

¡Hola Chicos!
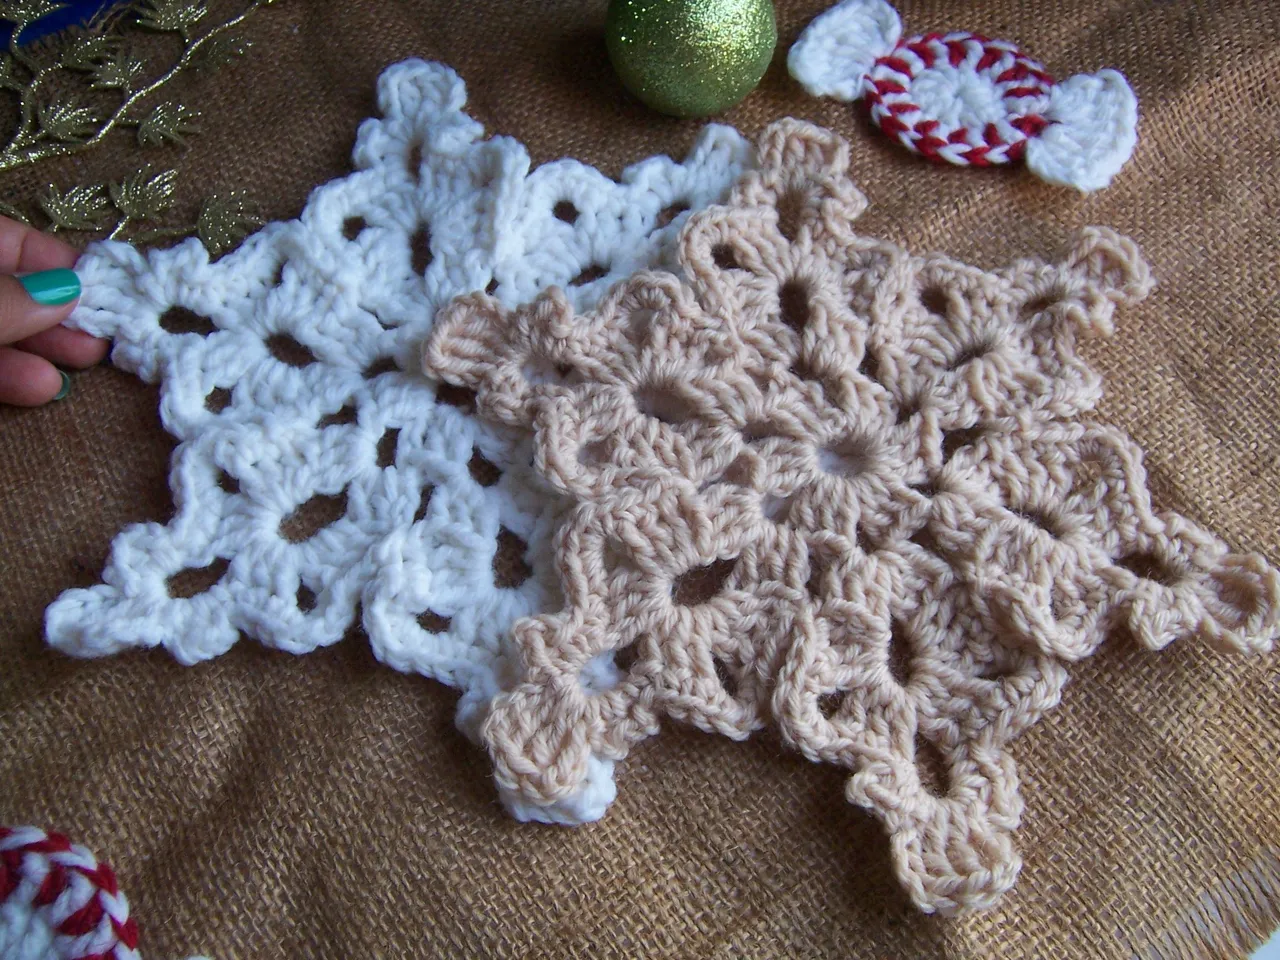
Continuando con los adornos navideños, damos inicio a esta semana con estos hermosos copos de nieve tejidos a crochet que me han encantado. ♥
Al inicio pensaba hacerlos parte de los adornos que colgaré en mi árbol de metal (pueden ver los que he tejido hasta ahora en mi perfil), pero al terminar de tejer el primero me di cuenta de que eran demasiado grandes y preferí darles otro uso como unos grandes colgantes para las puertas de mi casa.
El tamaño de los copos de nieve depende del grosor del hilo y la aguja que utilices, los míos quedaron de ese tamaño porque el hilo es de 4 hebras, unos 3 mm de grosor. Si tú decides hacerlos con un hilo más fino quedarán más pequeños.
Te cuento un poco como va el paso a paso para hacer este lindo tejido, y adicional te dejo acá el video del cual he sacado este modelo de copo de nieve -> video copo de nieve.
Ahora sí,
¡Comencemos a tejer!
Hello Guys!
Continuing with the Christmas decorations, we start this week with these beautiful crocheted snowflakes that I have loved. ♥
At the beginning I thought to make them part of the ornaments that I will hang on my metal tree (you can see the ones I have knitted so far in my profile), but when I finished knitting the first one I realized that they were too big and I preferred to give them another use as some big pendants for the doors of my house.
The size of the snowflakes depends on the thickness of the thread and the needle you use, mine were that size because the thread is 4 strands, about 3 mm thick. If you decide to make them with a finer thread, they will be smaller.
I will tell you a bit about the step by step to make this beautiful fabric, and additionally I leave you here the video from which I have taken this snowflake model -> snowflake video.
Now,
Let's start knitting!
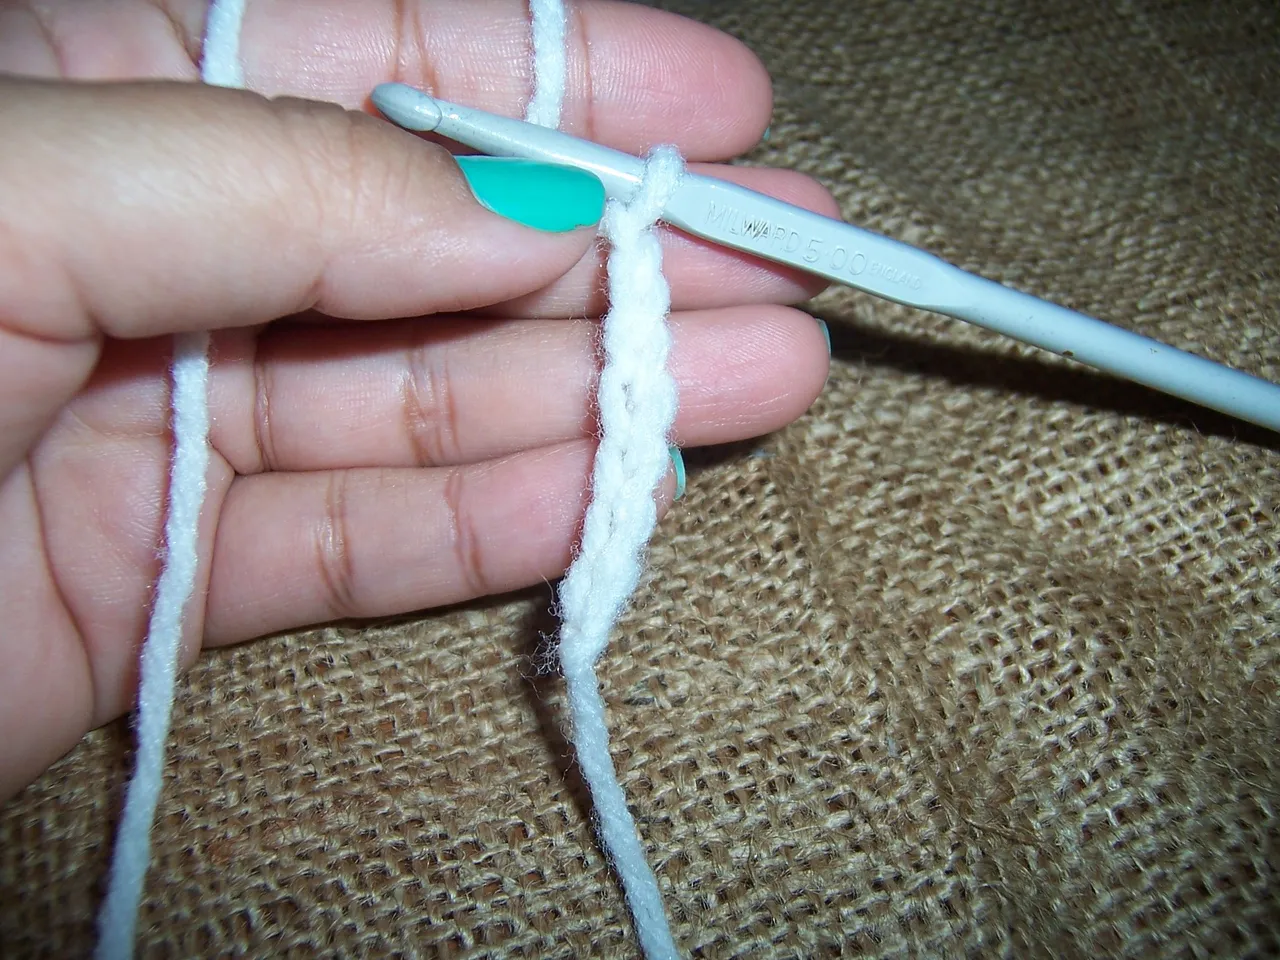
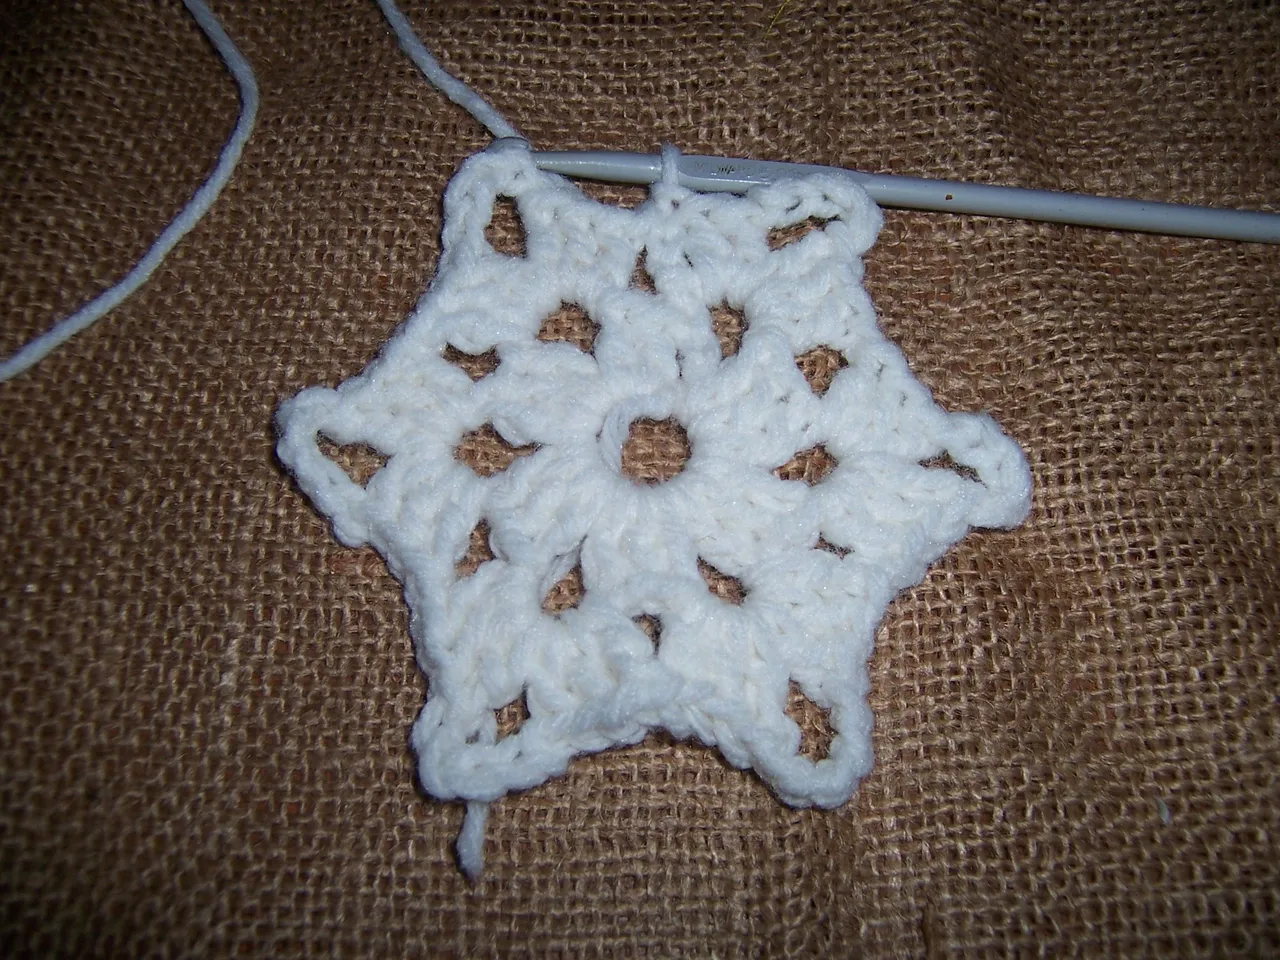
Iniciamos haciendo un nudo corredizo y luego 7 cadenetas. Cerramos el tejido para formar un círculo tejiendo la primera y última cadeneta.
Luego hacemos 3 cadenetas para elevar la vuelta. Esto contará como nuestro primer punto alto.
We start by making a slip knot and then 7 chains. We close the fabric to form a circle by knitting the first and last chain.
Then we chain 3 to raise the round. This will count as our first high point.
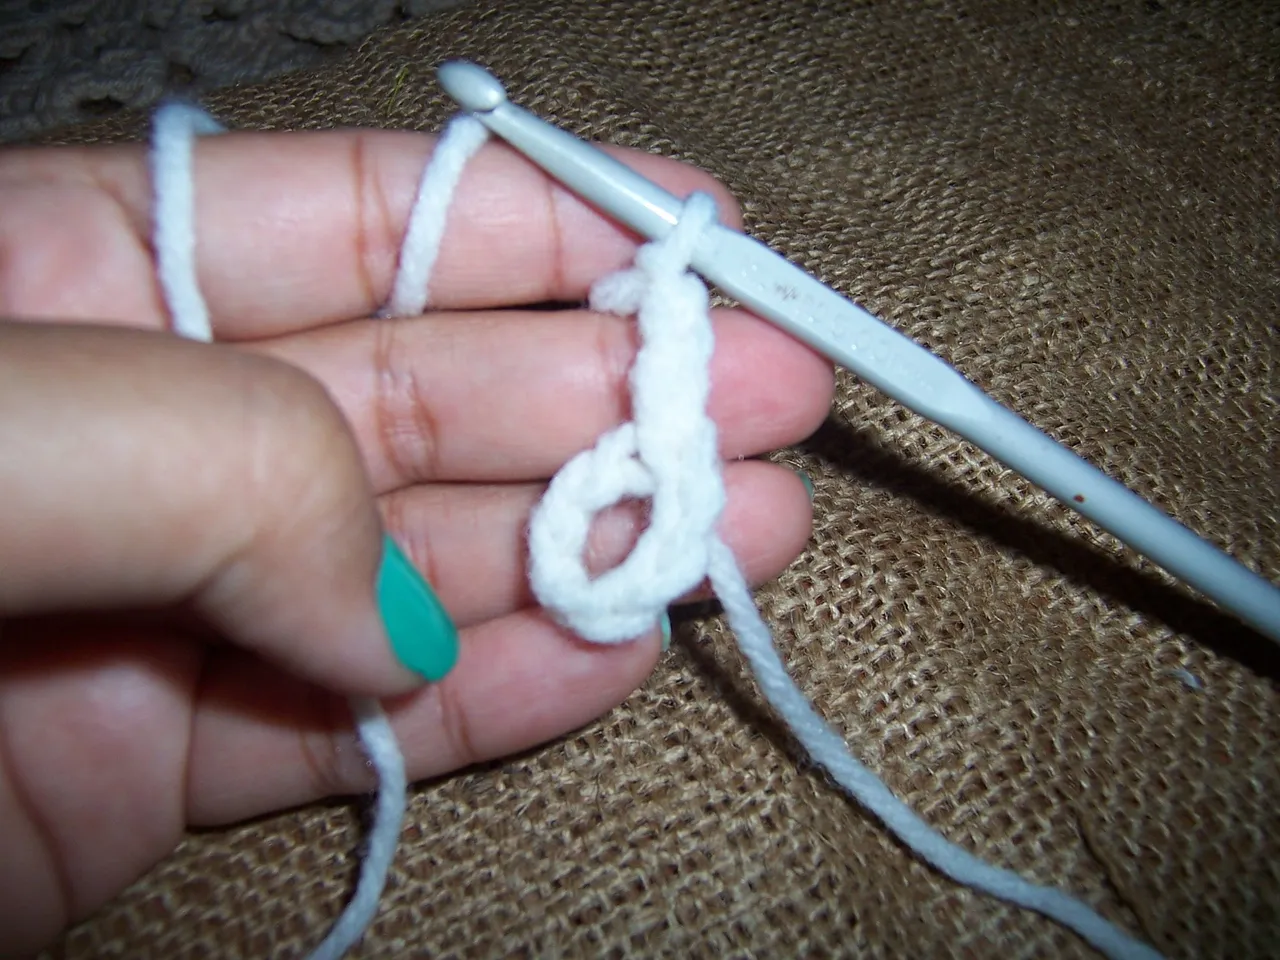
Seguido tejemos dos puntos altos sobre el círculo. Tejeremos entonces:
3 puntos altos + 3 cadenetas de separación + 3 puntos altos...
Así hasta obtener 6 grupos de 3 puntos altos separados por 3 cadenetas cada uno. Cerramos la vuelta haciendo un nudo deslizado en la 3 cadena de inicio.
Next we knit two double crochets on the circle. We will then weave:
3 treble crochets + 3 chains + 3 treble crochets ...
So until you get 6 groups of 3 treble crochets separated by 3 chains each. We close the round by making a slip knot in the 3 starting chain.
Para la segunda vuelta tejemos 4 cadenas para elevar la vuelta y en el espacio que tejimos de 3 cadenas vamos a tejer 2 grupos de 3 puntos altos separados por 5 cadenas. Al culminar hacemos una cadena y continuamos en el siguiente espacio de cadenas tejiendo nuevamente:
3 puntos altos + 5 cadenas + 3 puntos altos + 1 cadena de separación.
Así hacemos el mismo proceso hasta lograr los 6 grupos de puntos iguales.
For the second round we knit 4 chains to raise the row and in the space that we knit with 3 chains we are going to knit 2 groups of 3 treble crochets separated by 5 chains. At the end we make a chain and continue in the next space of chains knitting again:
3 treble crochets + 5 chains + 3 treble crochets + 1 split chain.
So we do the same process until we achieve the 6 groups of equal points.
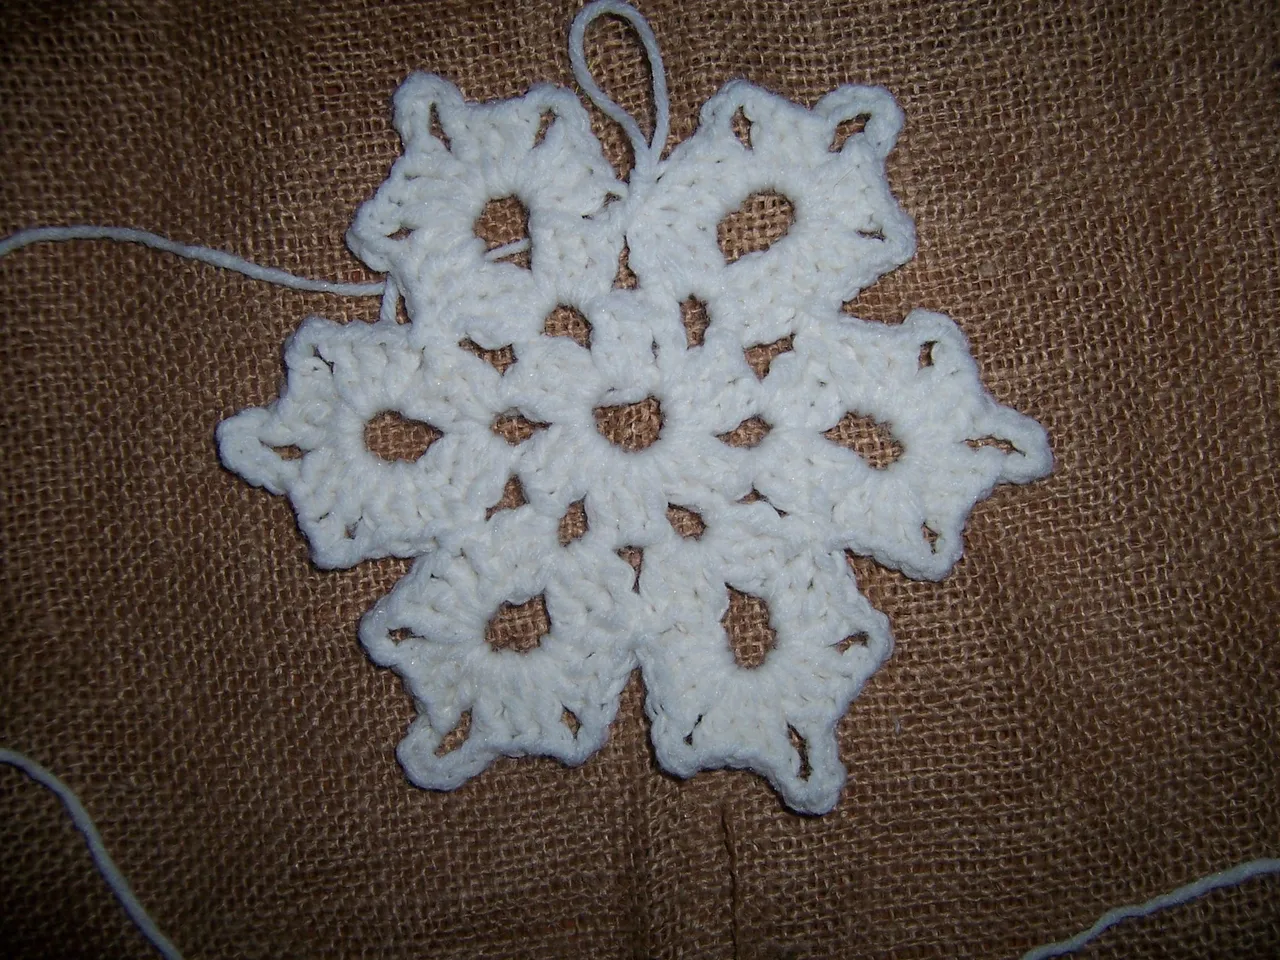
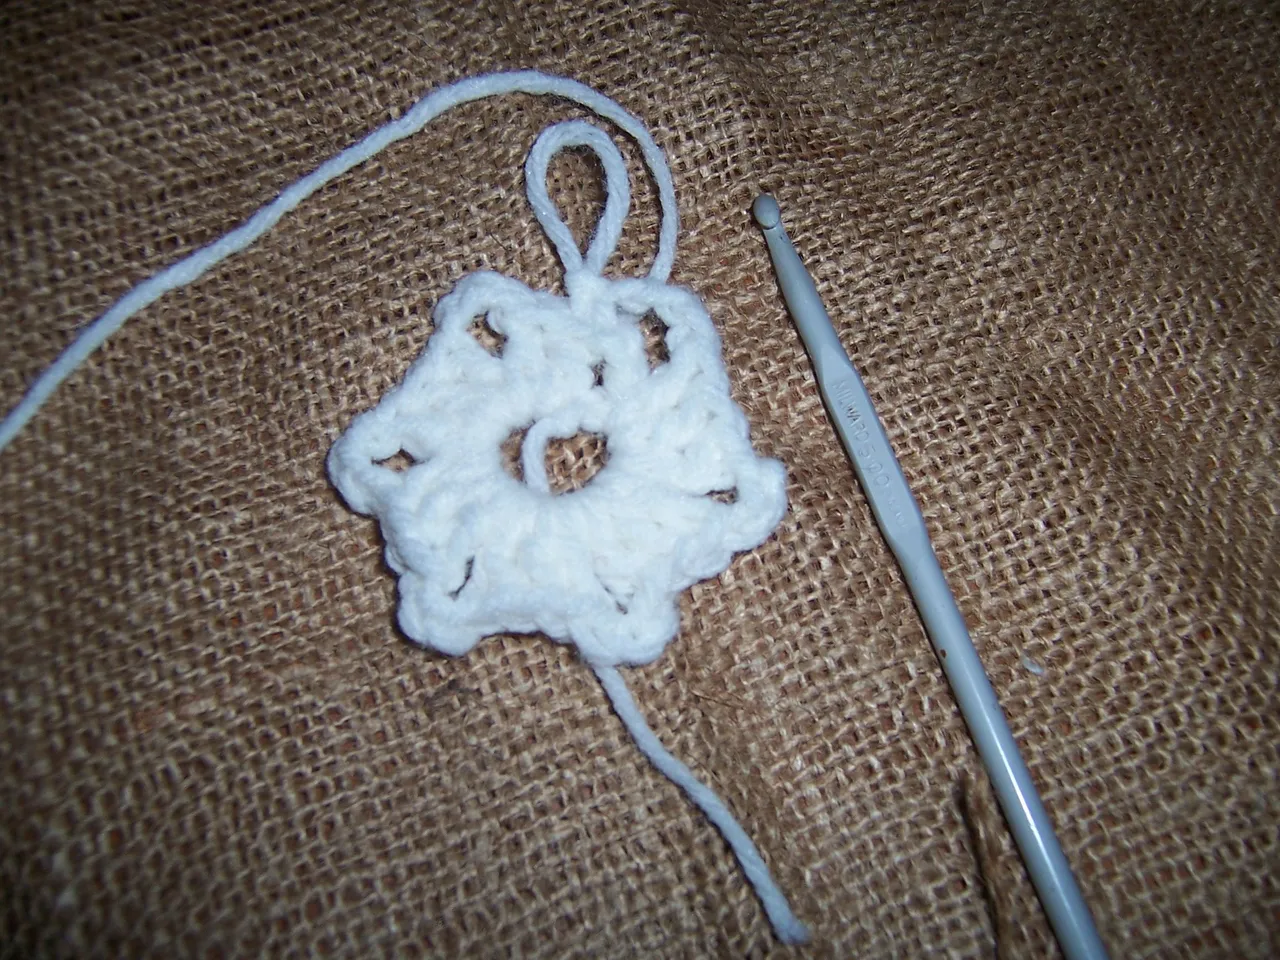
A medida que vamos avanzando va aumentando la cantidad de puntos y la complejidad, pero presta mucha atención y al cabo de 2 grupos de puntos ya te aprendes la secuencia.
Para la tercera vuelta vamos a tejer directamente sobre el espacio de 5 cadenas, sin hacer cadenas de inicio. Tejemos:
3 puntos altos + 3 cadenas + 3 puntos altos + 5 cadenas + 3 puntos altos + 3 cadenas + 3 puntos altos.
Finalizamos con un nudo deslizado en el espacio que queda entre cada grupo de puntos. Así hasta finalizar la vuelta con un nudo deslizado.
As we move forward, the number of points and the complexity increases, but pay close attention and after 2 groups of points you already learn the sequence.
For the third round we are going to knit directly over the space of 5 chains, without making starting chains. We weave:
3 double crochets + 3 chains + 3 double crochets + 5 chains + 3 double crochets + 3 chains + 3 double crochets.
We finish with a slip knot in the space that remains between each group of points. Like this until the end of the round with a slipped knot.

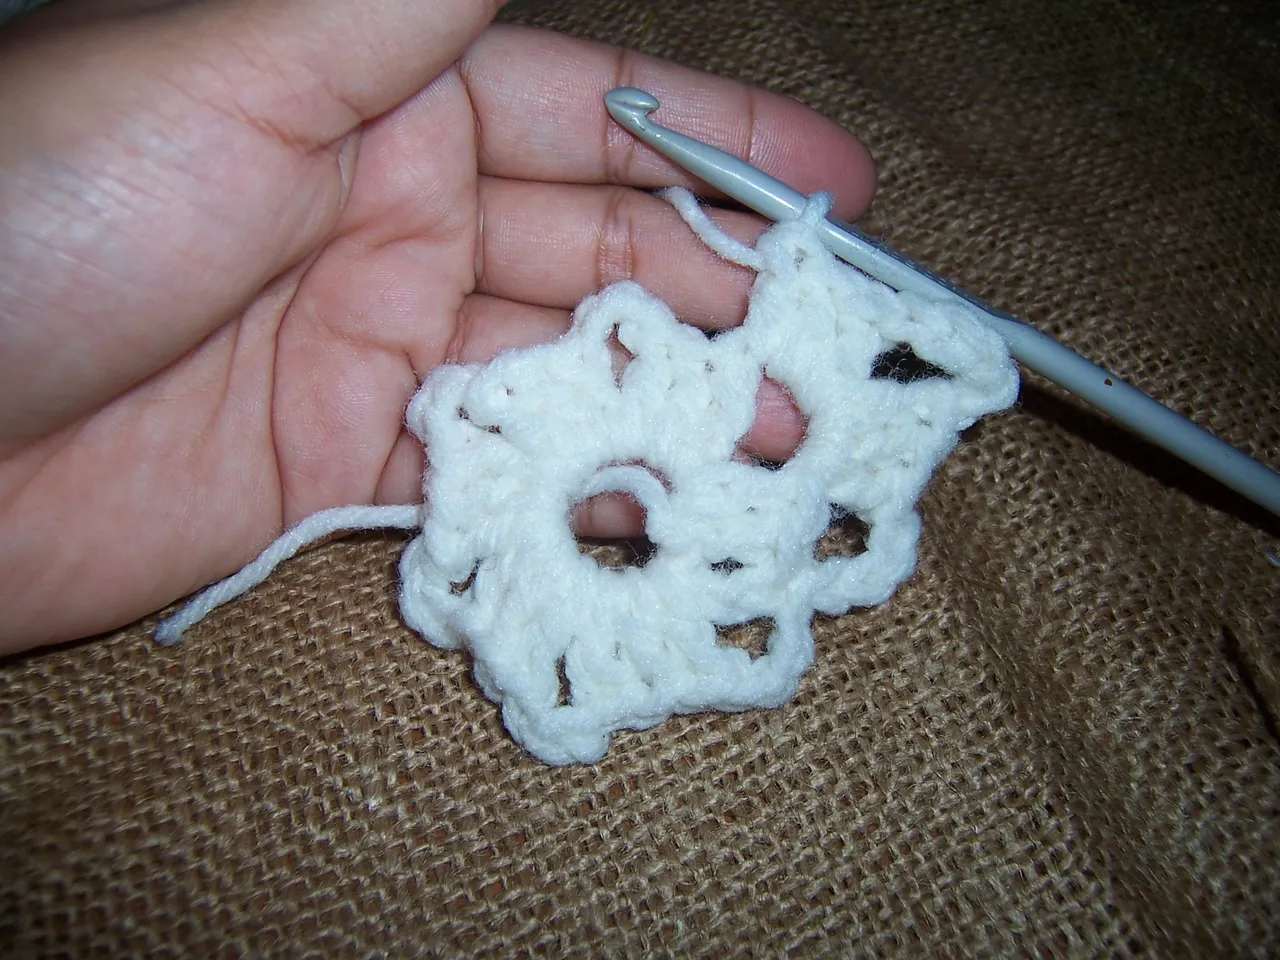
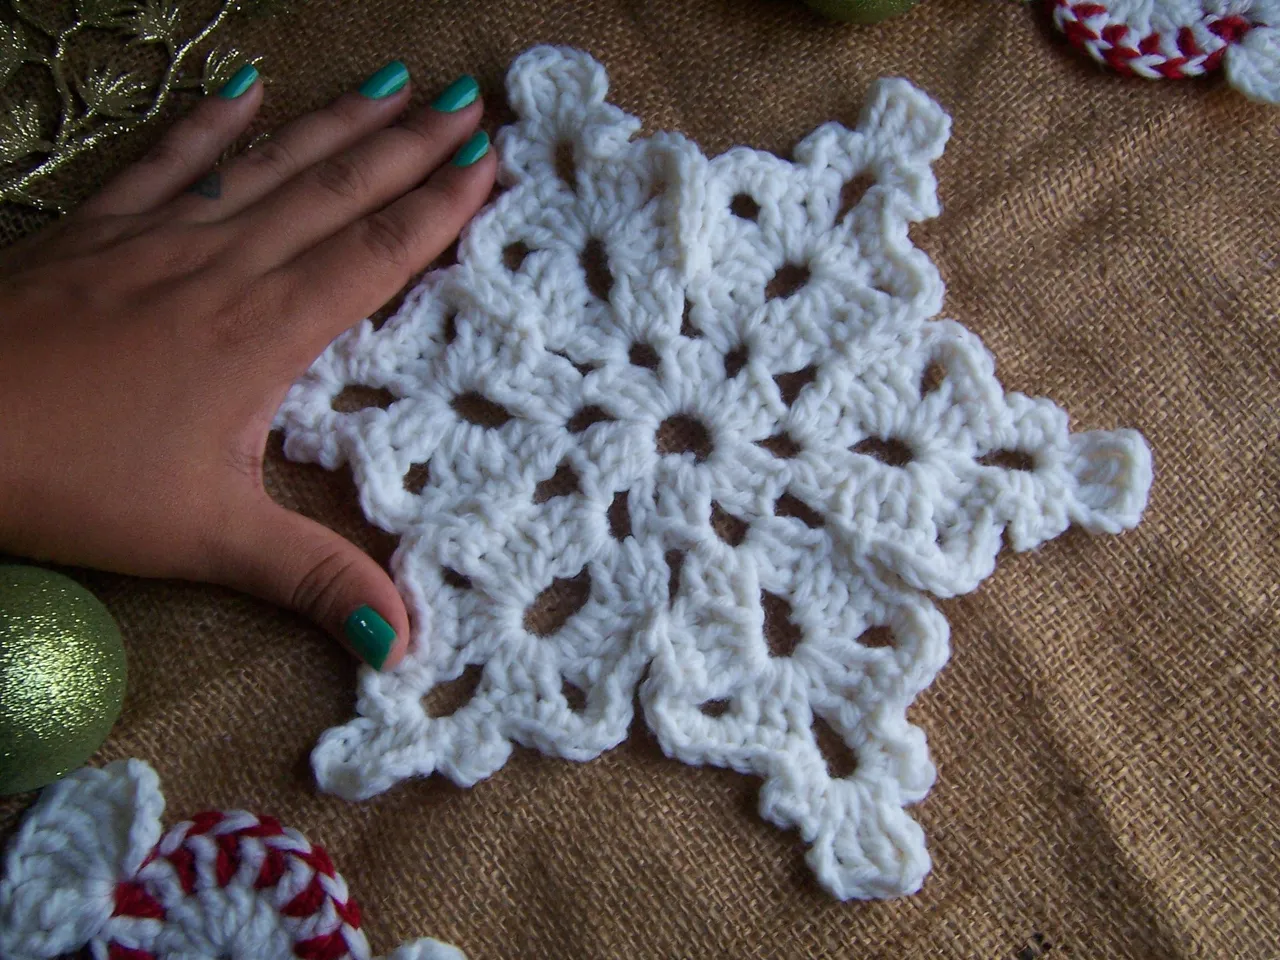
Para la última vuelta vamos a tejer dos puntos bajos en el primer grupo de 3 puntos, en el espacio de las 3 cadenas vamos a tejer 5 puntos bajos, luego continuamos con 2 puntos bajos sobre el segundo grupo de puntos y sobre las 5 cadenas tejemos lo siguiente:
1 punto bajo + 2 cadenas + medio punto alto + dos cadenas + 1 punto deslizado + 4 cadenas + 2 puntos altos dobles + 4 cadenas + 1 punto deslizado + 2 cadenas + medio punto alto + 2 cadenas + 1 punto alto.
Seguido tejemos nuevamente 2 puntos bajos sobre el tercer grupo de puntos, en el espacio de 3 cadenas tejemos 5 puntos bajos, luego 2 puntos bajos sobre el cuarto grupo de puntos y finalizamos con un punto deslizado la sección.
Repetiremos este proceso en los 5 grupos de puntos restantes y finalizamos el tejido con un nudo deslizado.
For the last round we are going to knit two single crochets in the first group of 3 stitches, in the space of the 3 chains we are going to knit 5 single crochets, then we continue with 2 single crochets on the second group of stitches and on the 5 chains we knit the next:
1 single crochet + 2 chains + half double crochet + two chains + 1 slip stitch + 4 chains + 2 double double crochet + 4 chains + 1 slip stitch + 2 chains + half double crochet + 2 chains + 1 double crochet.
Next we knit 2 single crochets again on the third group of stitches, in the space of 3 chains we knit 5 single crochets, then 2 single crochets on the fourth group of stitches and we end the section with a slip stitch.
We will repeat this process in the remaining 5 groups of stitches and finish the knitting with a slipped knot.
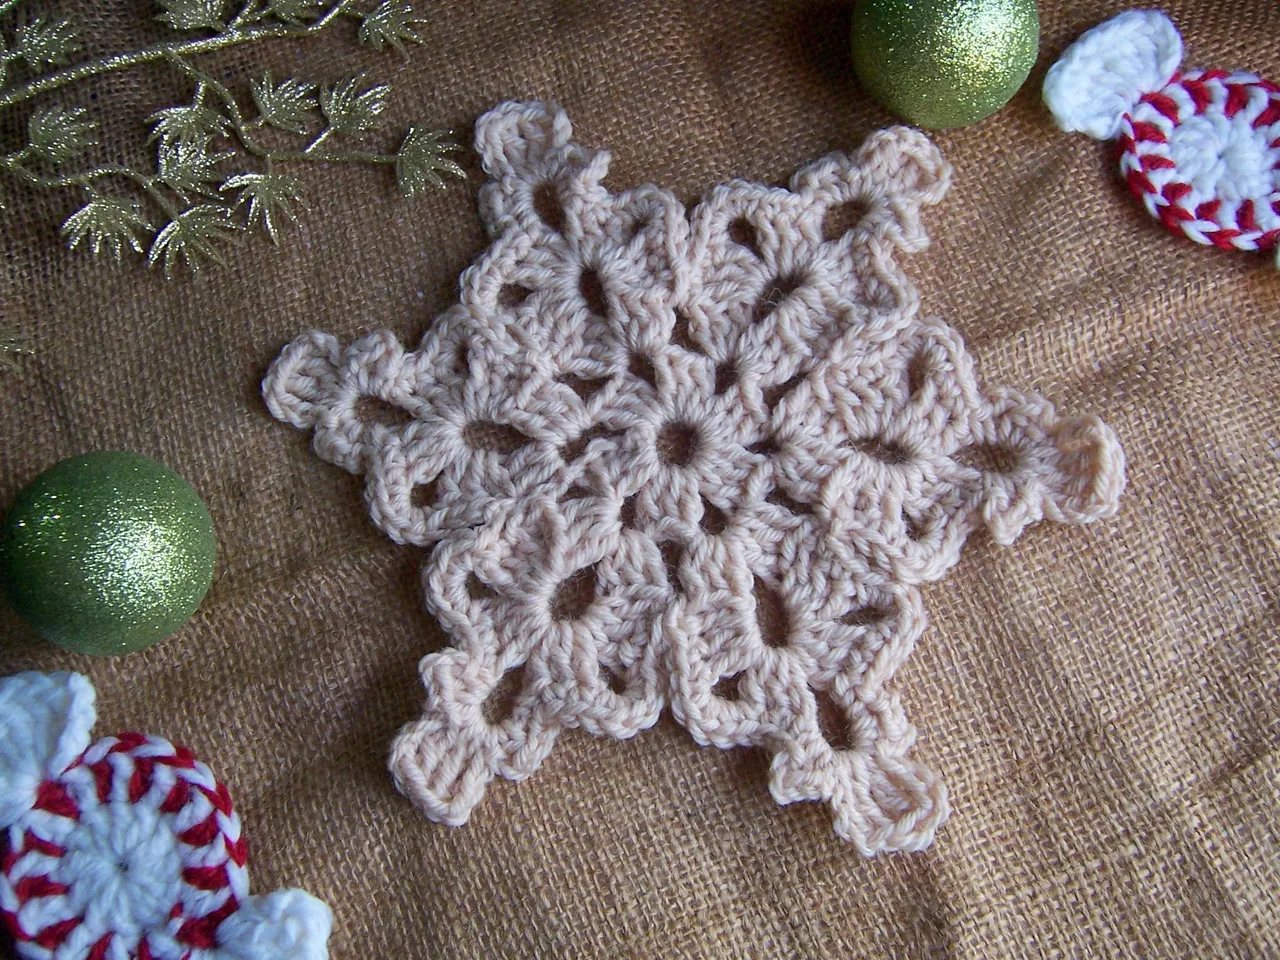
El tejido queda un poco flojo, así que en los próximos post les estaré enseñando como endurecerlo correctamente, estén atentos. Espero les haya gustado la propuesta. ♥
The fabric is a bit loose, so in the next post I will be teaching you how to harden it correctly, stay tuned. I hope you liked the proposal. ♥
Espero haya sido de tu agrado y provecho.
Un gran abrazo a todos, y nos leemos en un próximo post
• Lakrearte en Hive •
Att: Estefania Garcia ♥

Imágenes y separadores de mi autoría
Portada editada en Canva