Rising Star is a very simple game to play, but it has an interface with many elements inside, so it can be difficult to understand for those who have never played similar games in the past.
The token on which the game is based is STARBITS. There is also STARPRO which allows you to use the advanced functions of the game and for this reason it will NOT be explained in this guide.
First of all log in with Keychain (with HiveSigner it won't work, do it from computer).
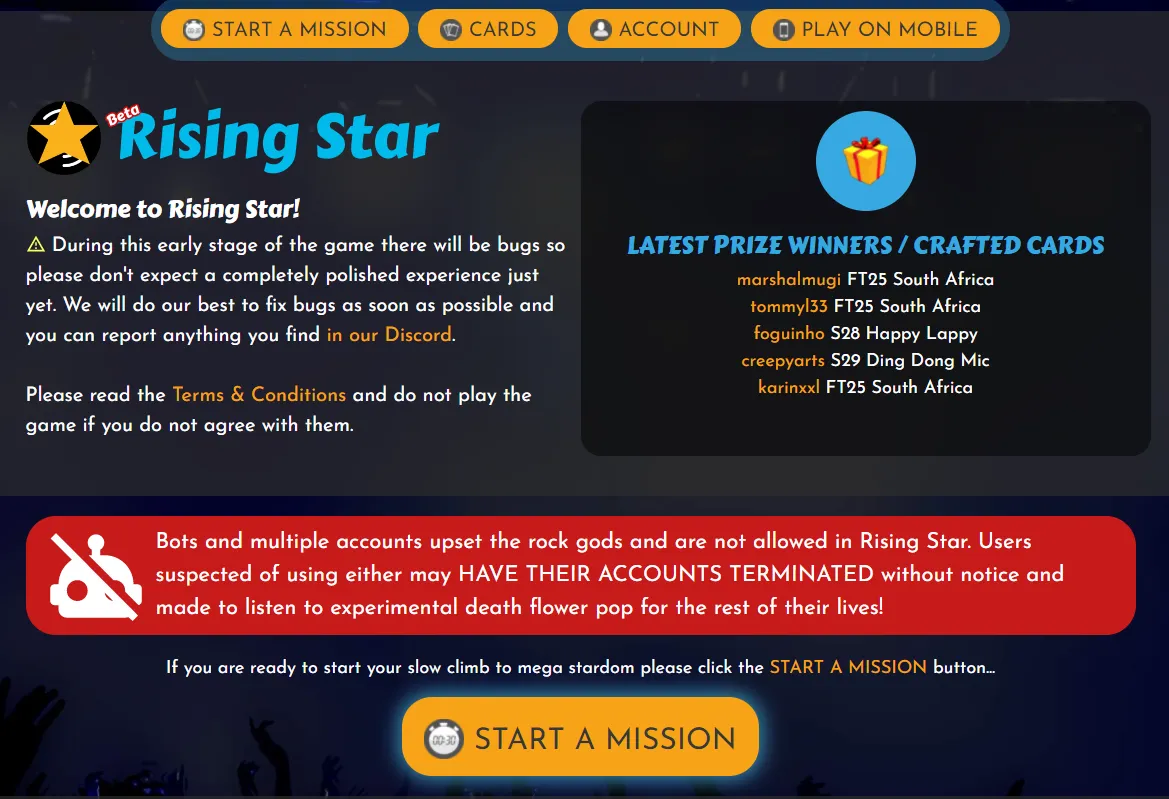
Immediately after logging in, select this page.
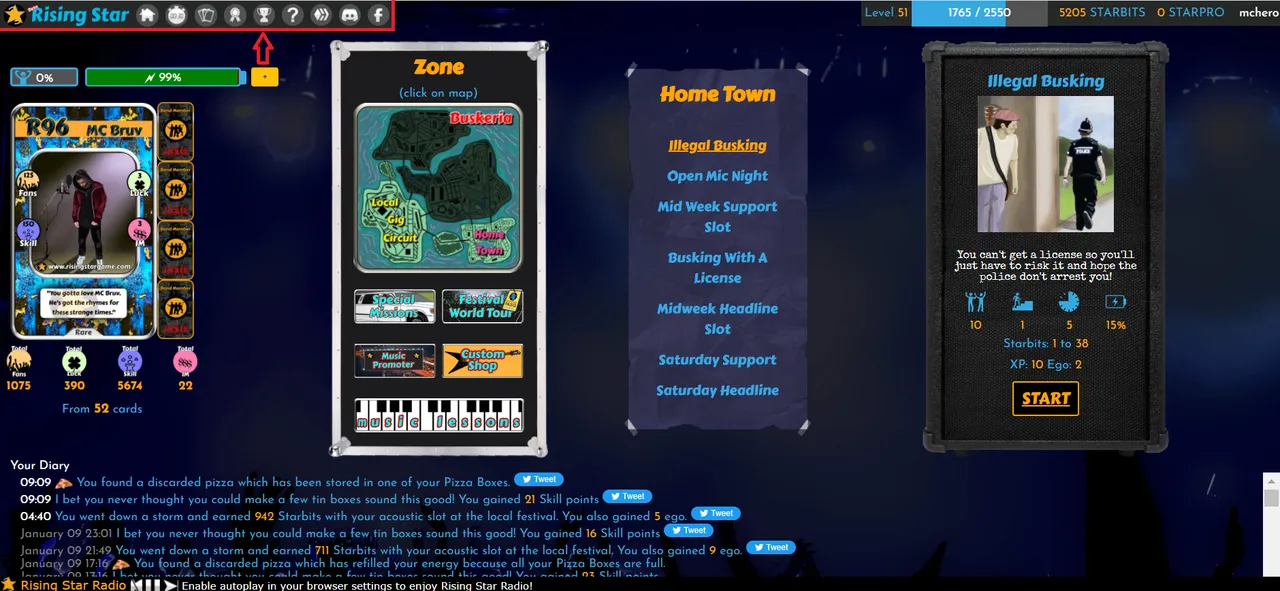
At the top there are 4 buttons. These are the most used in the game and have been included on the home page for this reason.
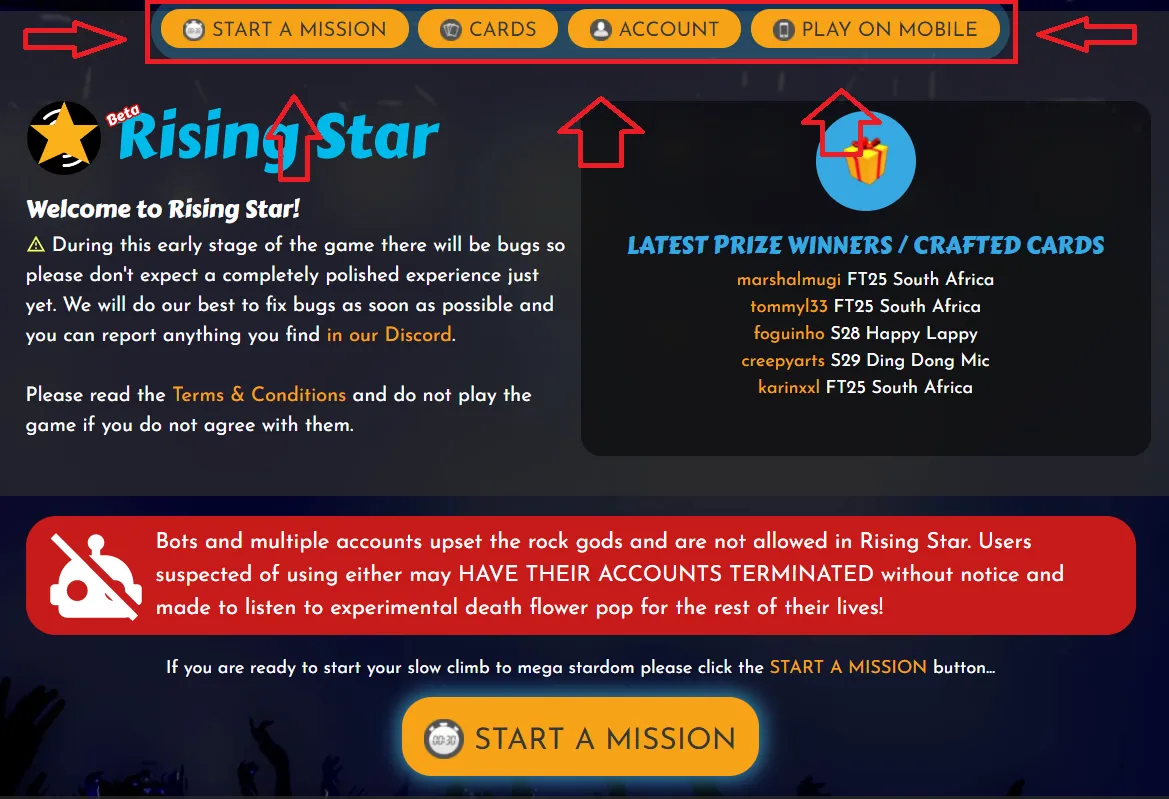
Each button displays a different web page:
In fact, the game does NOT start from mobile unless it uses the link generated by the browser.
ATTENTION: the mobile will log in automatically without Keychain, so do not give the link to ANYONE!
At the top right you will find the list of the latest users who have been given cards as a gift.
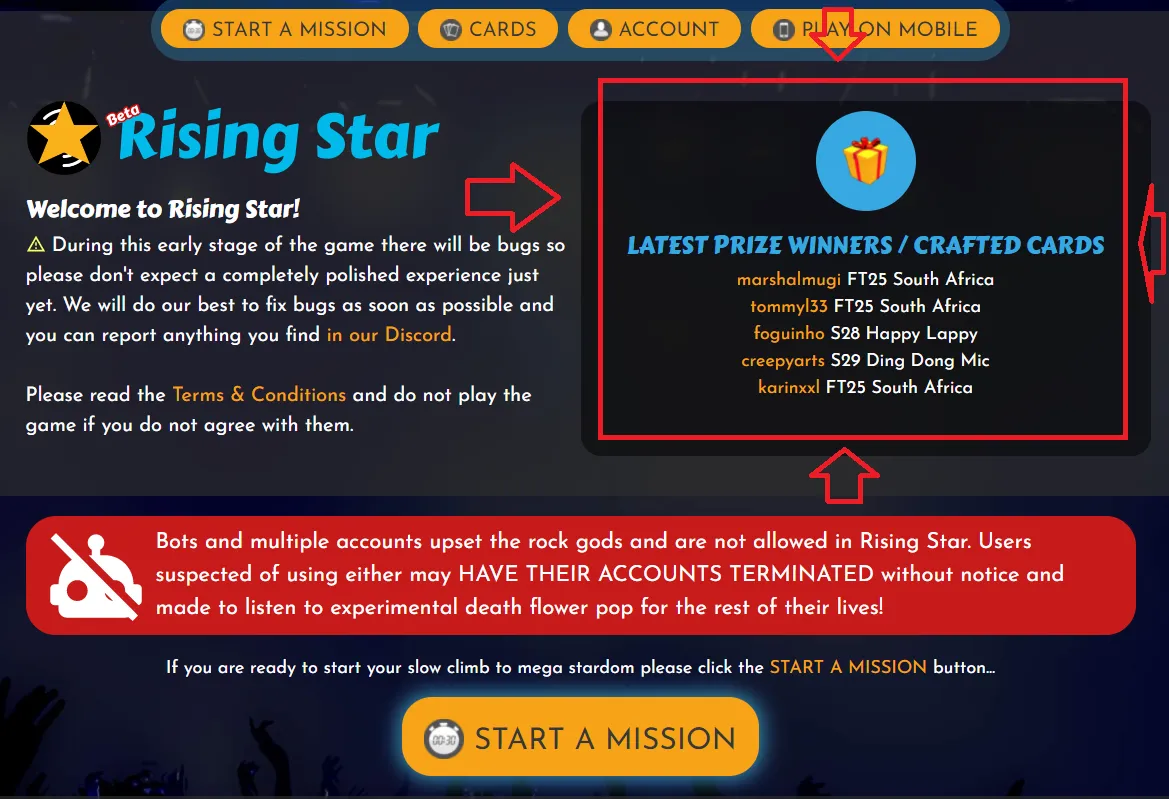
You read that right, the game gives away cards, but on one condition: having a very high luck score. Later you will see how to increase the scores.
Pressing the START A MISSION button opens the missions page.
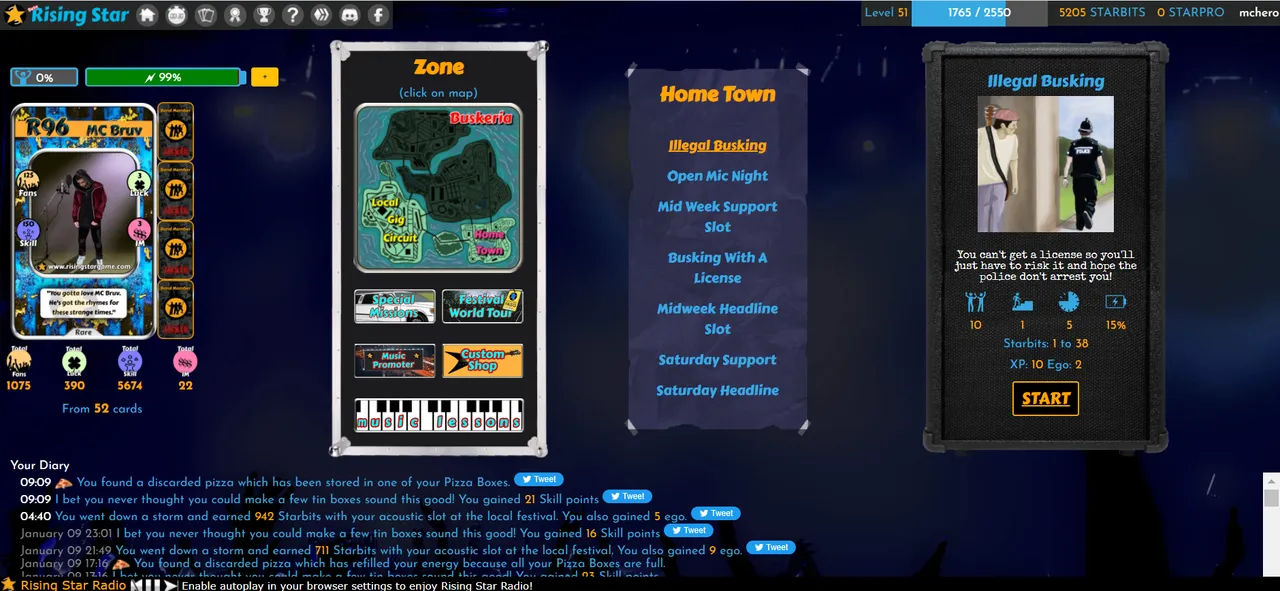
To start a mission, you need to perform two simple actions:
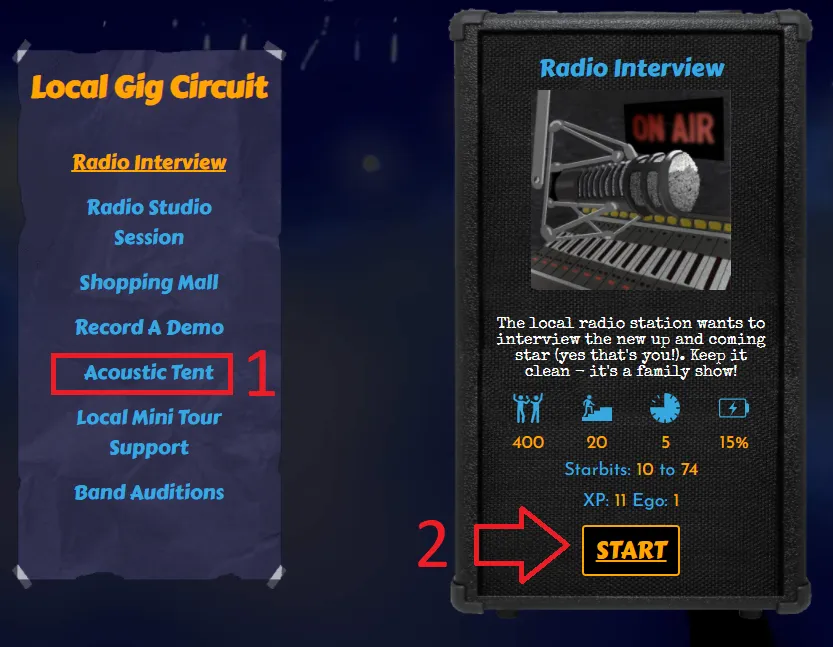
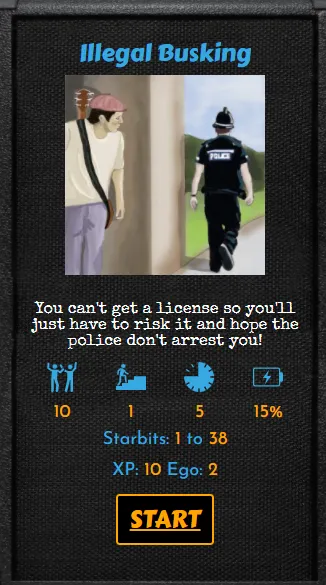
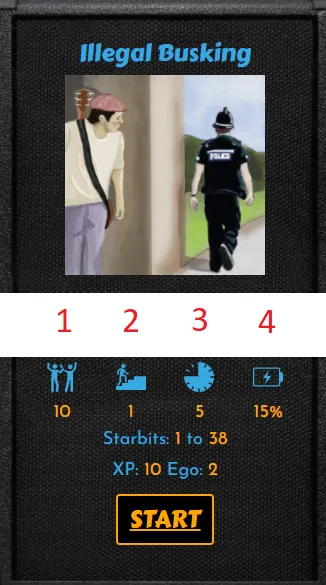
I chose "Acoustic tent" because I am advanced in the game, you are starting now and the only mission you can choose is "Illegal busking".
The countdown replaces the START button and this indicates that the mission has begun.
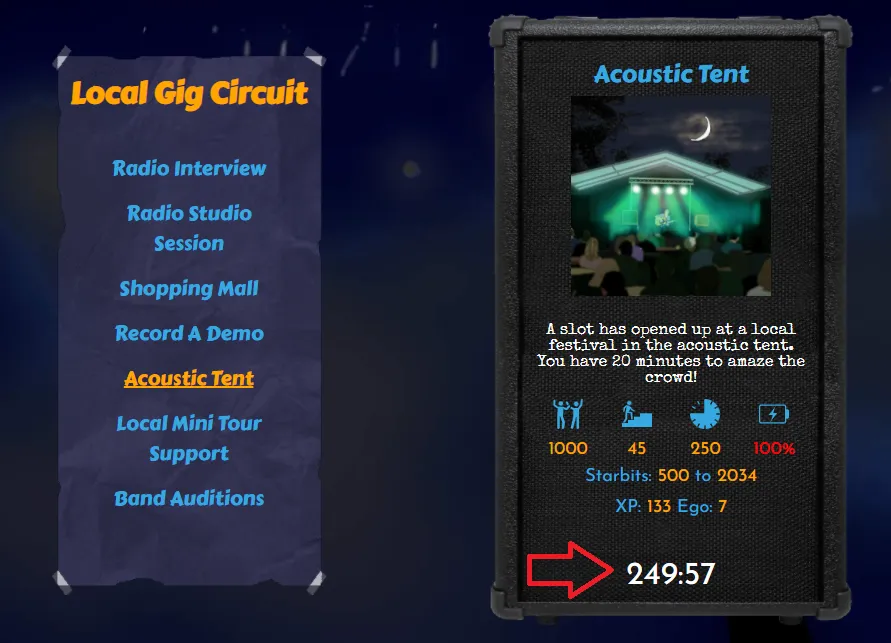
At this you can do other things such as cooking, working, shopping ... the timer will count down to zero even if you turn off your computer or mobile phone. When the time indicated by the timer has passed (5 minutes for the Illegal Busking mission), the mission will be completed and when you reopen the game you will notice that you have earned STARNITS. You can tell from the number at the top right.
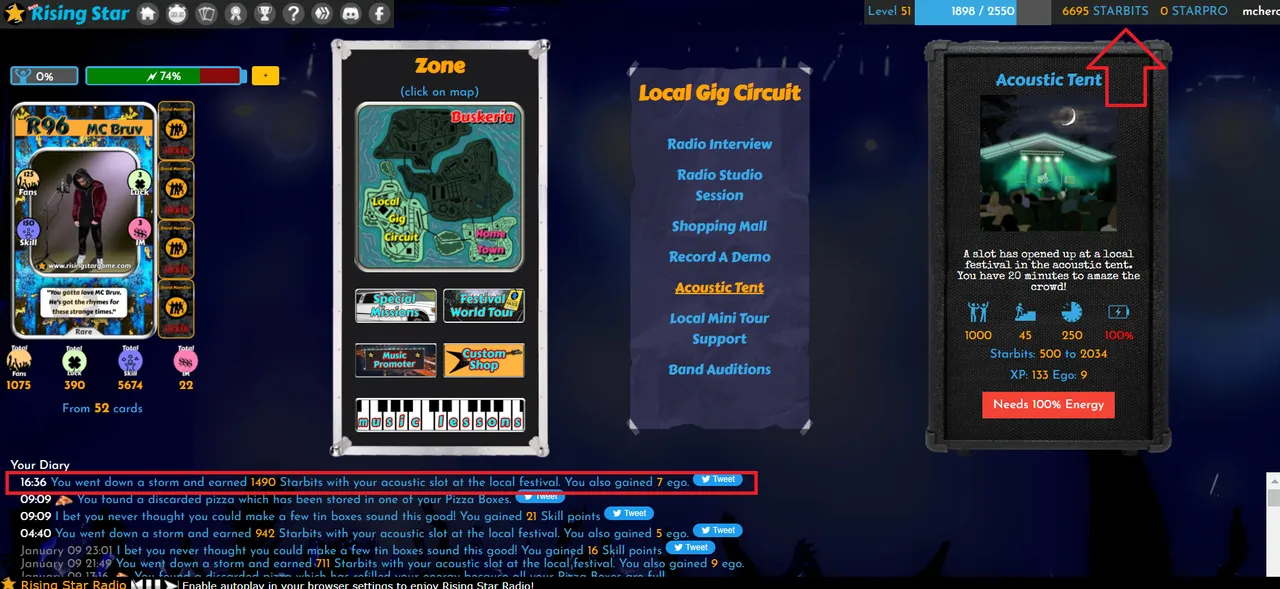
Also, on the bottom of the page you will find the logs of the completed mission. In this case, I earned 1490 STARBITS.
Now that you have completed your first mission, better understand the missions in detail and how you can do as many as possible to earn a lot of STARBITS.
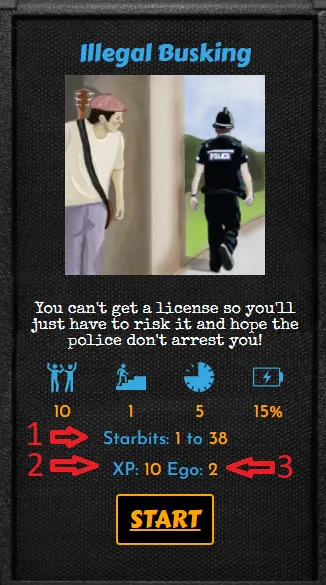
The place where you pressed the START button earlier is the Mission Panel.
For each mission you can perform, this panel has 4 symbols and numbers. The symbols are the requirements you need to be able to start the mission.
Where do you find this information? I point them out to you so you can see them easily.
Now let's move on to the numbers. The numbers indicate the rewards and penalties obtained by completing the mission.
In the Band section you will find the image of the singer and the 6 game scores. Check these scores to understand which missions you can start and the maximum earnings.
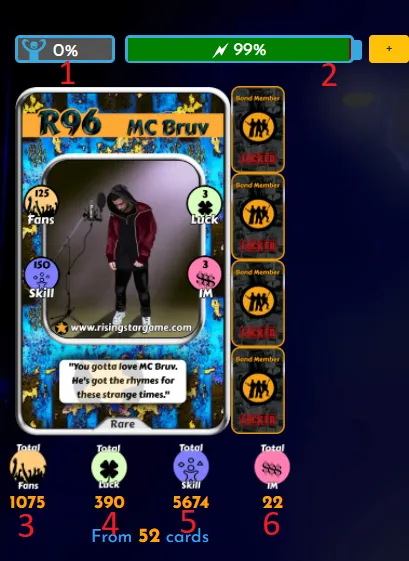
The total 4 scores can be increased by buying cards.
The Skill Score can also be increased by giving music lessons. You can find this type of mission in the Zone Panel.
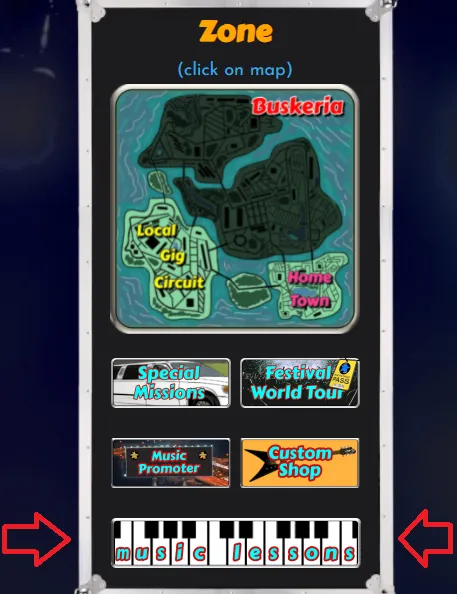
Click the button and the missions page will open with the Mission Panel changed. Now you find missions to earn Skills instead of missions to earn STARBITS.

The skill points earned by each mission vary according to the tools you own (tools are cards and you can buy them). I recommend that you always start the mission that earns you as many Skills as possible, so that you have to complete as few as possible to keep the Ego at 0%.
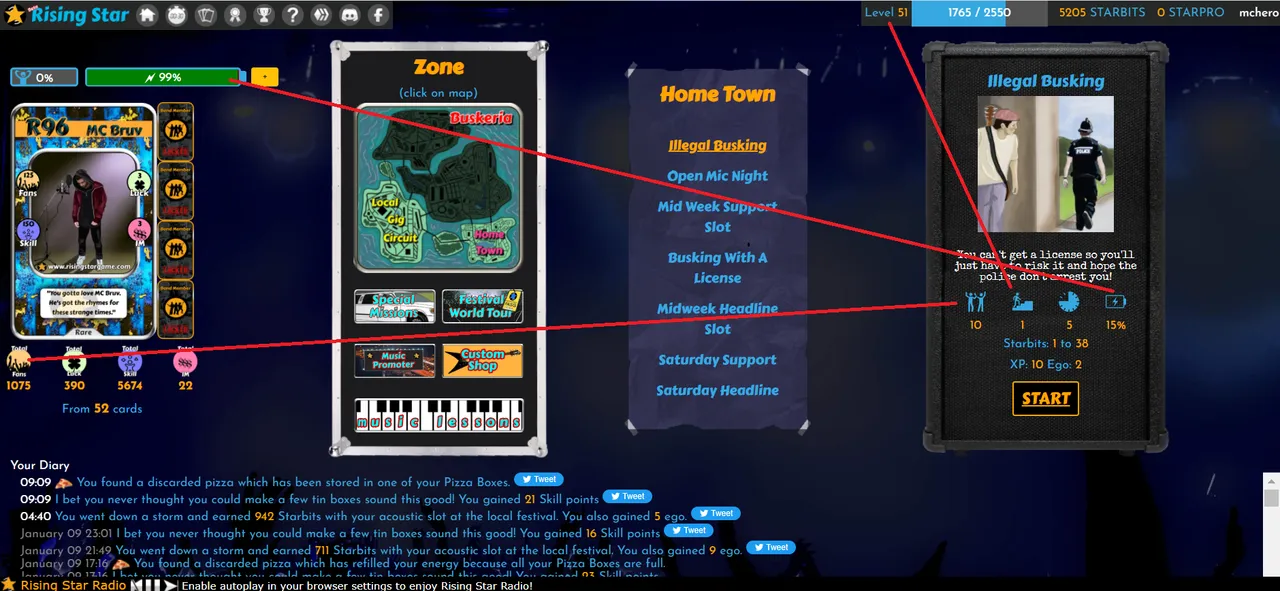
The ranking is the list of players in order of advancement in the game and the cards owned. The top ranked players get Hive credited to their account every day. To see the ranking click on the cup symbol in the navigation bar, located at the top.
Better to zoom in because it is really small.

Click the button with the cup image and the ranking page will open.
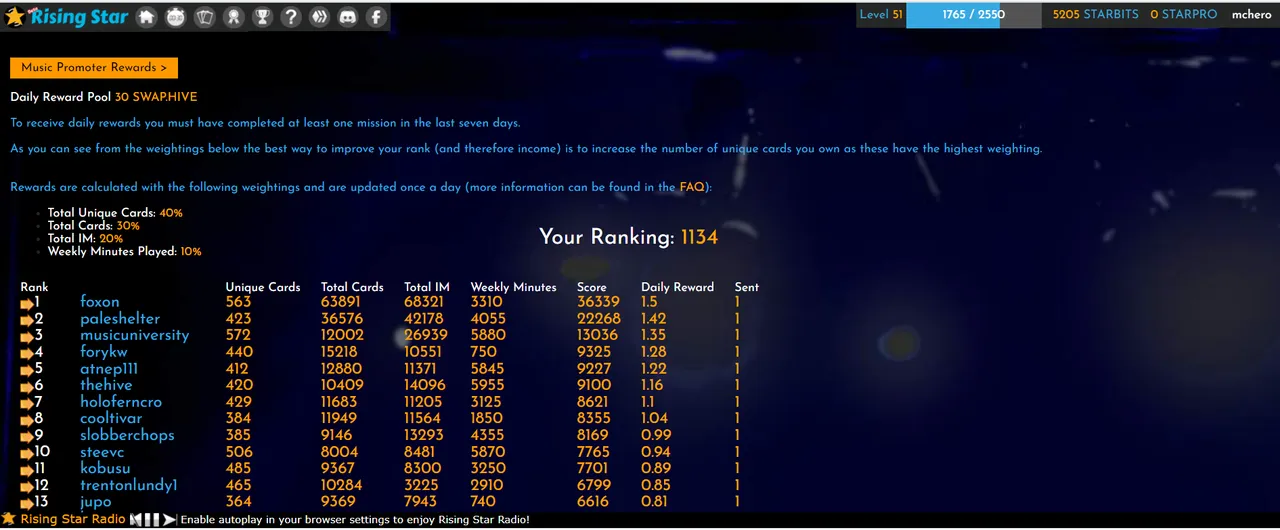
Here you can see your rank and if you are earning Hive every day.
You can buy cards for various reasons:
To buy the cards you first need to deposit the STARBITS in Hive-Engine. To deposit them, hover over the number of STARBITS held in the game, then click WithDraw / Deposit.
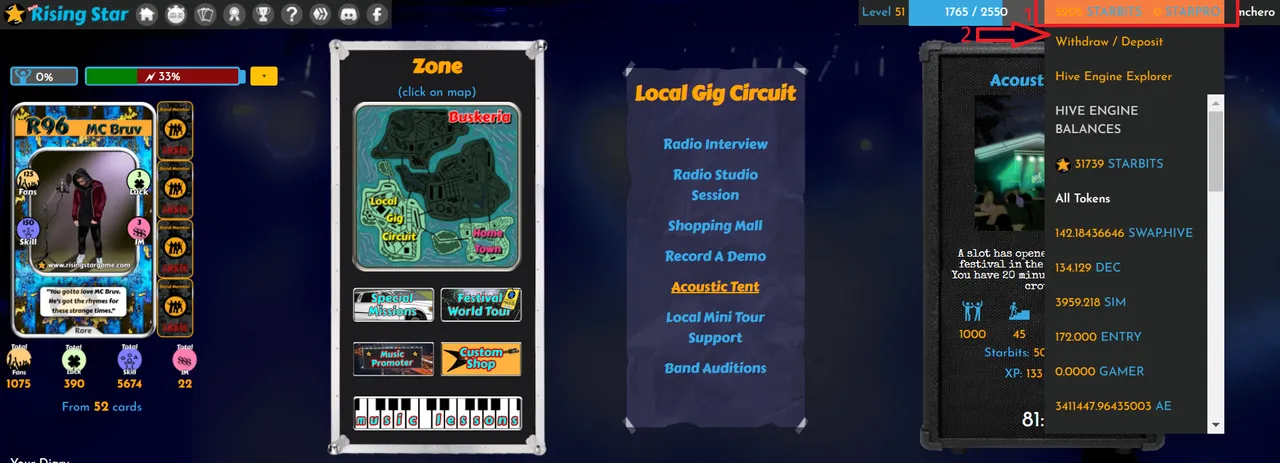
This will open the page where you can withdraw the STARBITS and deposit them in Hive-Engine. Withdrawal is done by simply clicking the Withdraw 1000 STARBITS, Withdraw 5000 STARBITS or Withdraw 10000 STARBITS buttons. From the image you can see that I cannot withdraw 10000 because I do not have them yet.
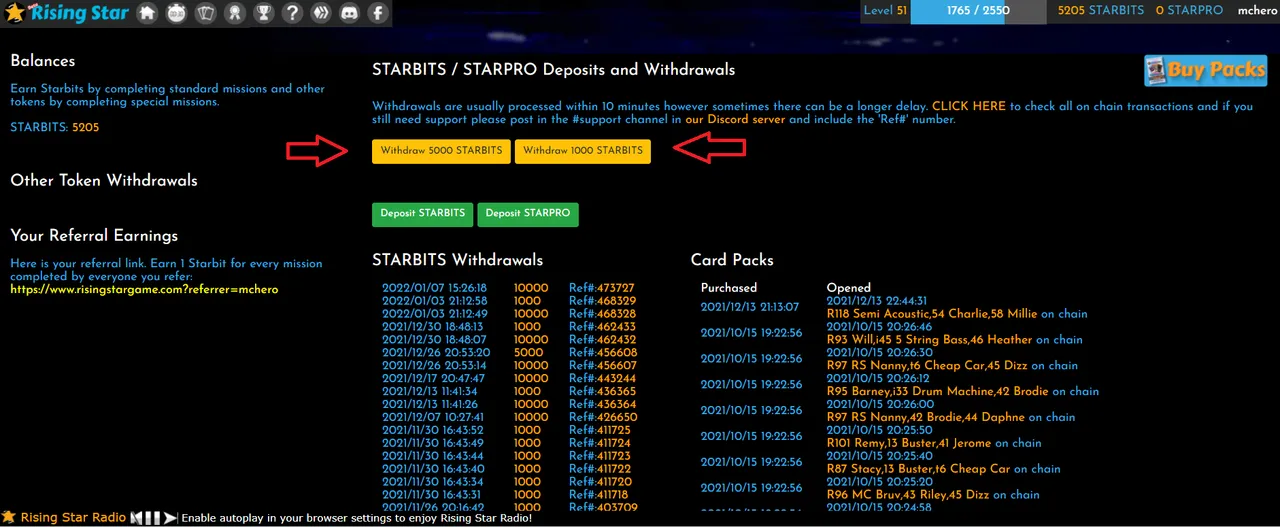
The transaction takes a few minutes to complete. Wait and you will see STARBITS on Hive-Engine.
Now you can buy the cards. Click on the Buy Packs button.

The card purchase page will open.
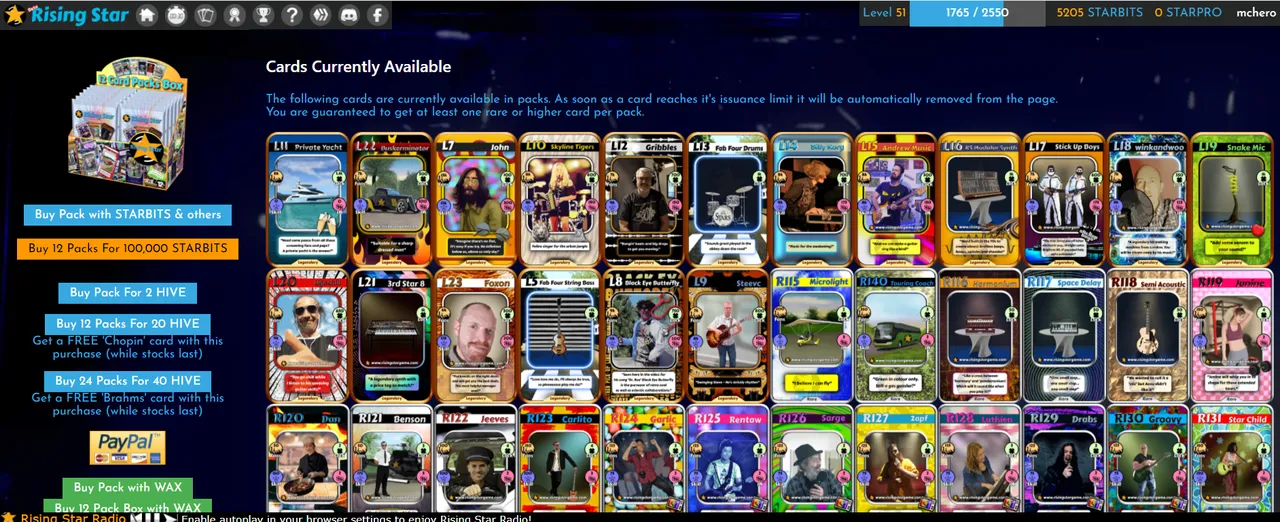
Here you will find the list of the cards still available in the packs and the coins that can be used with the relative prices. I recommend that you buy 12 packs because you will get them for the price of 10 packs.
Rising Star è un gioco molto semplice da giocare, ma presenta un'interfaccia con molti elementi al proprio interno, perciò può risultare difficile da capire per chi non ha mai giocato a giochi simili in passato.
Il token su cui si basa il gioco è STARBITS. Esiste anche STARPRO che permette di utilizzare le funzioni avanzate del gioco e per questo motivo NON sarà spiegato in questa guida.
Prima di tutto esegui il login con Keychain (con HiveSigner non funzionerà, fallo da computer).
Subito dopo il login, apparirà questa pagina.
Nella parte superiore si trovano 4 pulsanti. Questi rappresentano le azioni più utilizzate all'interno del gioco e sono state inserite nella pagina iniziale per questo motivo.
Ogni pulsante visualizza una pagina web diversa:
Infatti, il gioco NON si avvia da cellulare a meno che non utilizzi il link generato dal browser.
ATTENZIONE: il cellulare esegue il login automaticamente senza bisogno di Keychain, perciò non dare il link a NESSUNO!
In alto a destra trovi la lista degli ultimi utenti a cui sono state regalate delle carte.
Hai letto bene, il gioco regala delle carte, ma a una condizione: avere un punteggio di fortuna molto alto. Più avanti vedrai come aumentare i punteggi.
Premendo il pulsante START A MISSION si apre la pagina delle missioni.
Per iniziare una missione, devi eseguire due semplici azioni:
Io ho scelto "Acustic tent" perché sono avanti nel gioco, tu stai iniziando ora e l'unica missione che puoi scegliere è "Illegal busking".
Il conto alla rovescia sostituisce il pulsante START e ciò indica che la missione è iniziata.
A questo puoi fare altre cose come cucinare, lavorare, fare la spesa... il timer conterà fino a zero anche spegnendo il computer o il cellulare. Quando sarà passato il tempo indicato dal timer (5 minuti per la missione Illegal Busking), la missione sarà completata e quando riaprirai il gioco noterai di aver guadagnato degli STARNITS. Te ne accorgi dal numero in alto a destra.
Inoltre, sulla parte inferire della pagina trovi i log della missione completata.In questo caso ho guadagnato 1490 STARBITS.
Ora che hai completato la tua prima missione, meglio capire in dettaglio le missioni e come poterne fare il più possibile per guadagnare tanti STARBITS.
Il luogo dove prima hai premuto il pulsante START è il Pannello Missione.
Per ogni missione che puoi svolgere, questo pannello ha 4 simboli e dei numeri. I simboli sono i requisiti che ti occorrono per poter iniziare la missione.
Dove trovi queste informazioni? Te le indico così le puoi vedere facilmente.
Ora passiamo ai numeri. I numeri indicano le ricompense e i malus ottenuti completando la missione.
Nella Scheda della band trovi l'immagine del cantante e i 6 punteggi di gioco. Controlla questi punteggi per capire quali missioni puoi iniziare e i guadagni massimi.
I 4 punteggi totali possono essere aumentati comprando carte.
Il punteggio di Skill può essere aumentato anche dando lezioni di musica. Trovi questo tipo di missioni nel Pannello delle Zone.
Clicca il pulsante e si aprirà la pagina delle missioni con il Pannello Missione cambiato. Ora trovi le missioni per guadagnare Skill invece di quelle per guadagnare STARBITS.
I punti Skill guadagnati da ogni missione variano a seconda degli strumenti posseduti (gli strumenti sono carte e li puoi comprare). Ti consiglio di iniziare sempre la missione che ti fa guadagnare più Skill possibile, in modo da doverne completare il meno possibile per tenere l'Ego allo 0%.
La classifica è la lista dei giocatori in ordine di avanzamento nel gioco e delle carte possedute. I primi giocatori in classifica ottengono Hive ogni giorno accreditati nel loro account. Per vedere la classifica clicca sul simbolo della coppa nella barra di navigazione, posizionata in alto.
Meglio ingrandire perché è veramente piccola.
Clicca il pulsante con l'immagine della coppa e si aprirà la pagina della classifica.
Qui puoi vedere la tua posizione e se stai guadagnando Hive ogni giorno.
Puoi comprare delle carte per vari motivi:
Per comprare le carte hai bisogno prima di tutto di depositare gli STARBITS in Hive-Engine. Per depositarli passa con il mouse sopra il numero di STARBITS posseduti nel gioco, poi clicca WithDraw / Deposit.
Si aprirà la pagina dove potrai prelevare gli STARBITS e depositarli in Hive-Engine. Il preliavo avviene semplicemente cliccando i pulsanti Withdraw 1000 STARBITS, Withdraw 5000 STARBITS oppure Withdraw 10000 STARBITS. Dall'immagine puoi vedere che non posso prelevare 10000 perché ancora non li possiedo.
La transazione ha bisogno di qualche minuto per essere completata. Aspetta e vedrai gli STARBITS su Hive-Engine.
Ora puoi comprare le carte. Clicca sul pulsante Buy Packs.
Si aprirà la pagina per l'acquisto delle carte.
Qui trovi la lista delle carte ancora disponibili all'interno dei pacchi e le monete utilizzabili con i relativi prezzi. Ti consiglio di comprare 12 pacchi perché li avrai al prezzo di 10 pacchi.