Making wacky novelty or exquisite artwork with paper Quilling or Filigree is a fun pastime. You can spend hundreds of hours carefully manipulating paper pieces to create intricate paper sculptures or mosaics, or you can roll up paper strips rapidly. The basic idea behind the activity is always the same—rolled paper shapes—but how you utilize it and what you create depends entirely on you, how much time you want to spend, and maybe how much patience you have. For more details on my genre of work, keep reading.
To begin quilling, you will only need a few simple materials:
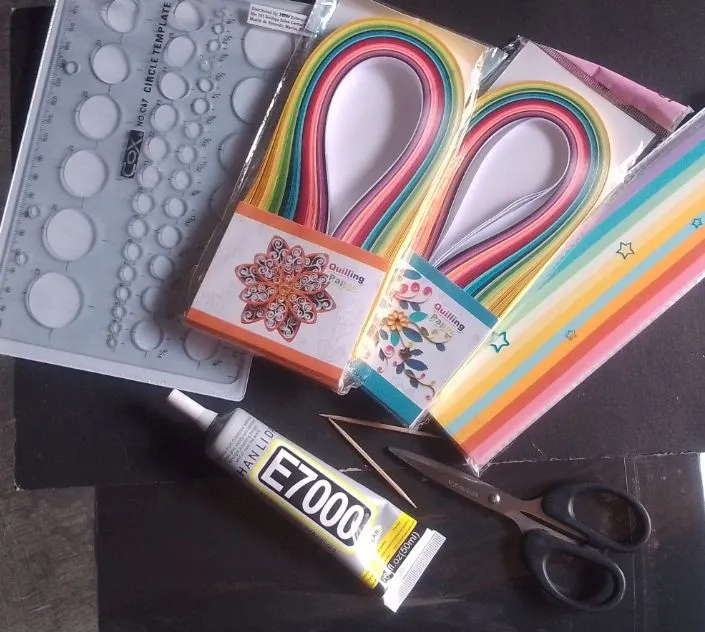
Slotted quilling tool or Toothpick
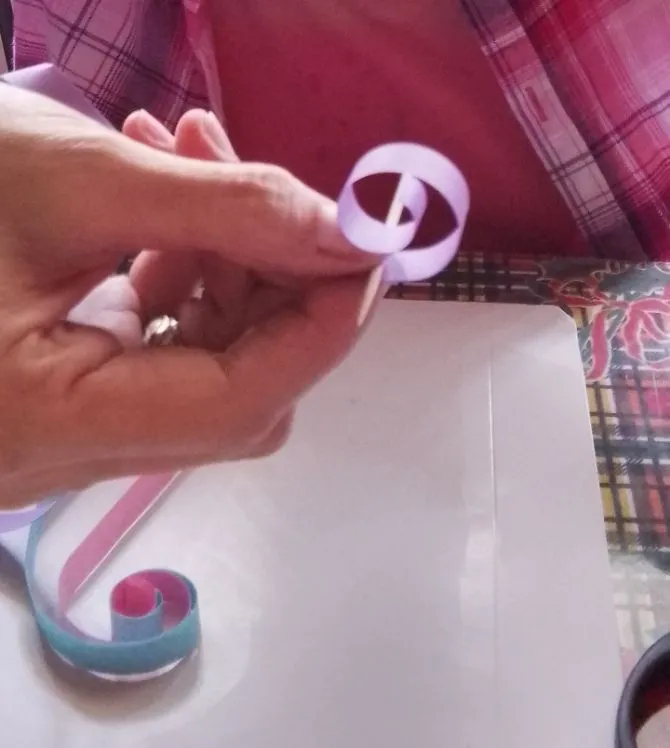
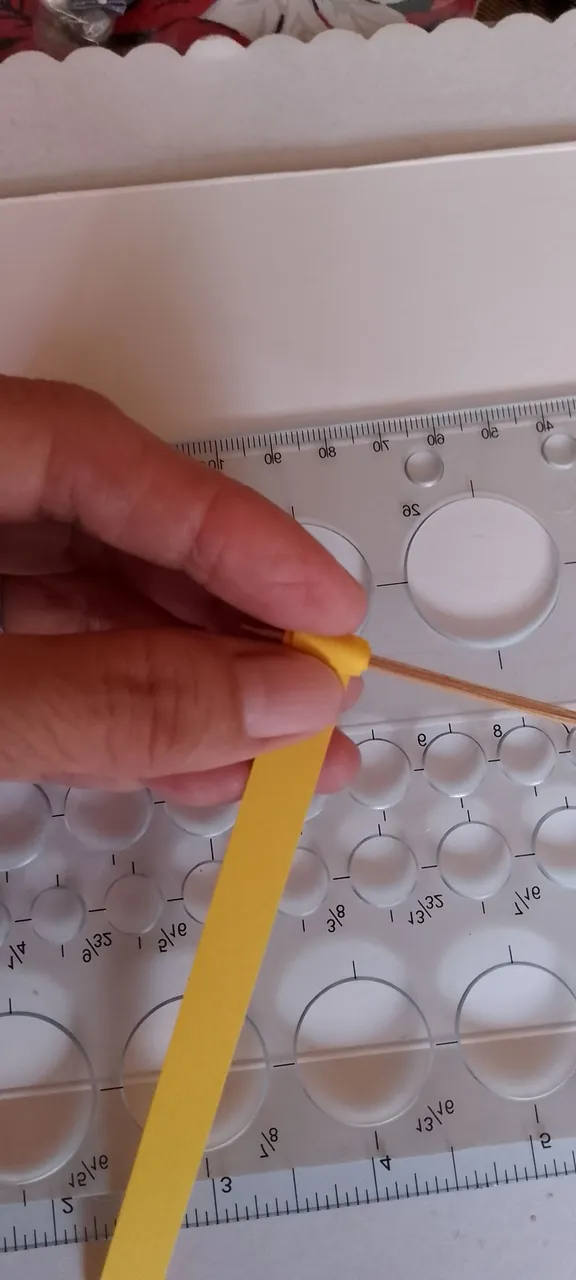
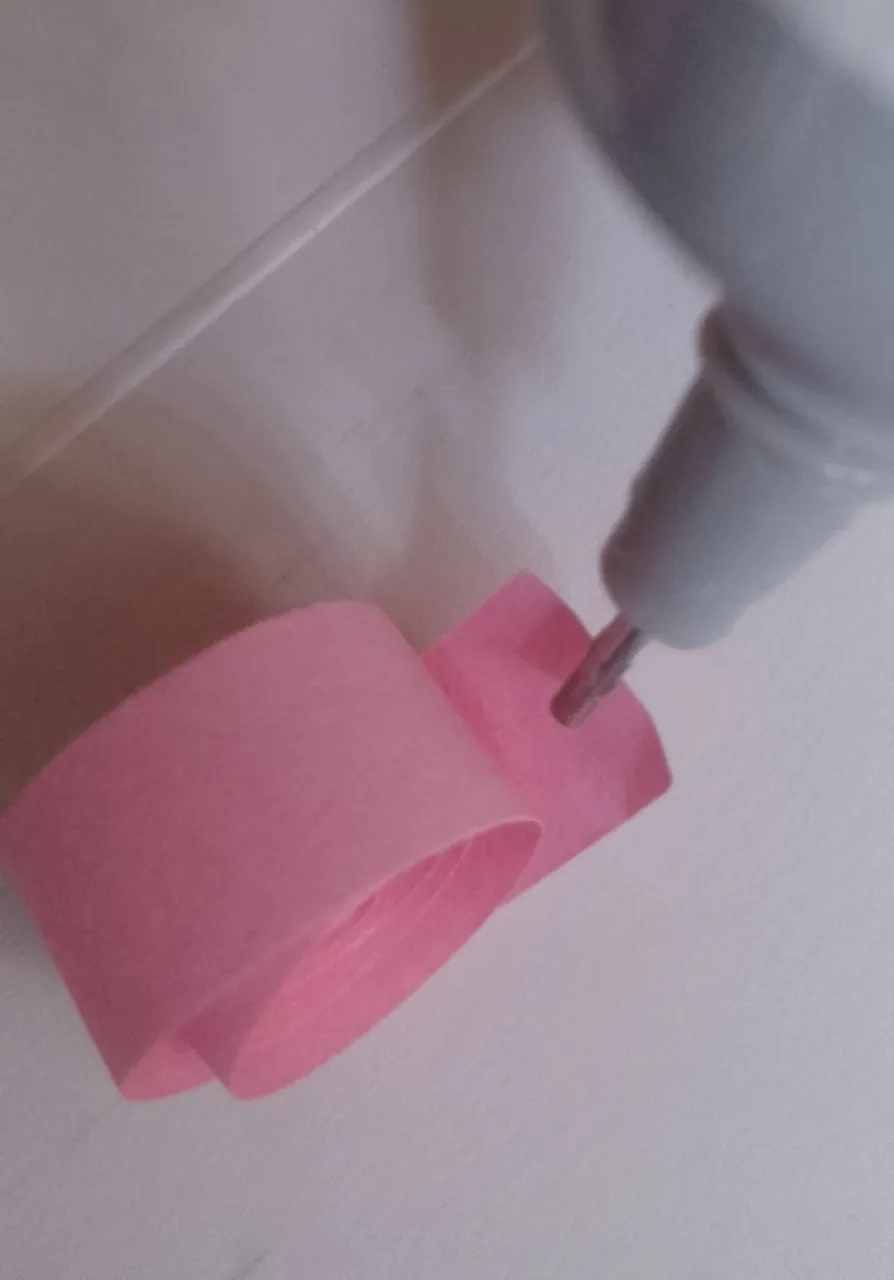
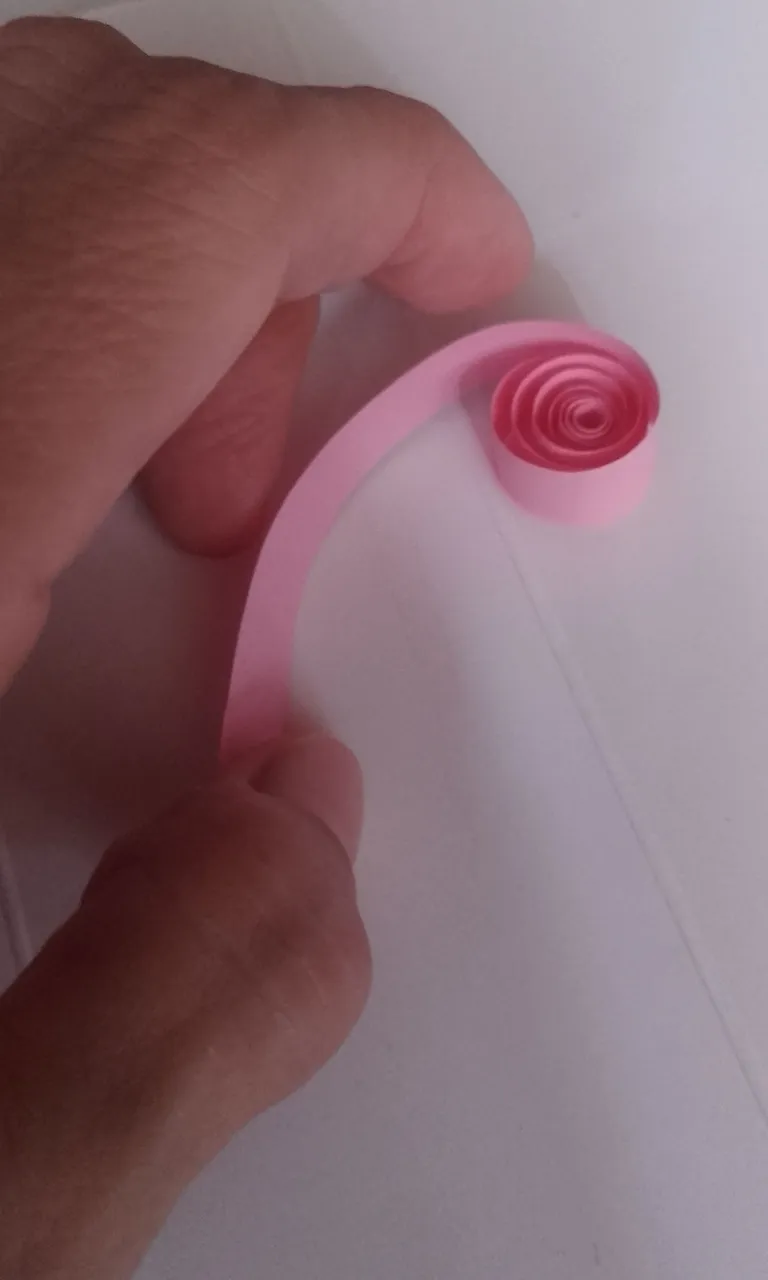
When producing quilling designs, the majority of individuals like to roll their paper strips with a slotted-end tool. When you turn the tool to form a coil, the slot allows you to insert one end of the paper into it. All slotted tools are compatible with normal-weight paper strips. However, if you want to deal with cardstock weight paper, you may have difficulty fitting it into the slots. Look for a slotted tool with a little bigger opening that will allow you to work with thicker papers. As for me, I use a toothpick. I find it easier to roll and modify the paper strips to form a coil.
Quilling glue in a needle-tip bottle or tube
When you've got a rolled coil the right size for your design, apply a dot of liquid glue to secure it in place. Look for glue with a pen-sized opening so that it may be applied directly to the paper strip. Alternatively, place a dot of liquid glue on a disposable plate or scrap of paper. Apply a dot of glue to the paper strip with a toothpick.
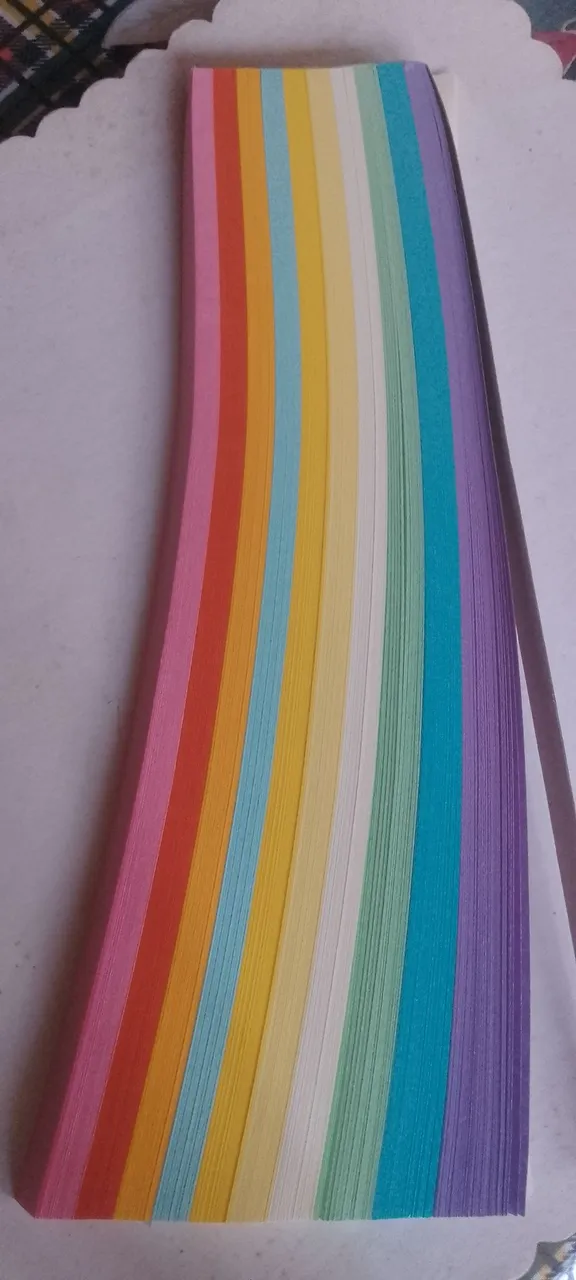
Package of quilling paper strips
Pre-cut paper quilling strips are available in vibrant bundles or cut lengths within transparent plastic tubes. These paper strips are precisely cut for quilling. They are lighter-weight paper that rolls up easily and may be attached to your designs with glue. The patterned paper makes for very easy cutting for your paper strips. Simply cut 1/8-inch width by 11 or 12-inch long pieces using your paper trimmer to create your strips.
Quilling Board
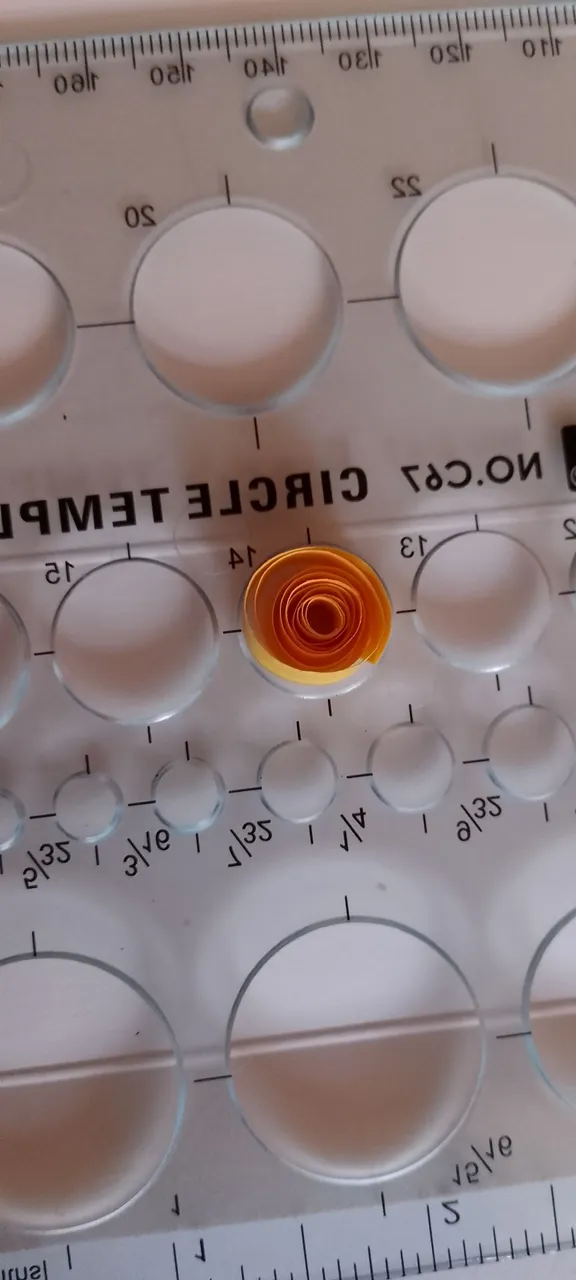
A quilling board makes sure that every spiral you roll out of paper is the same size because quilling is rolling paper strips into spirals. A tightly twisted coil can be released and allowed to expand to the diameter of any circle on the board. To secure pieces to the board, some Quillers use straight pins. You can play around with different layouts for the fundamental forms in the spacious area to the right. Making your quilling board might be sufficient if you are just starting and wish to create very basic designs.
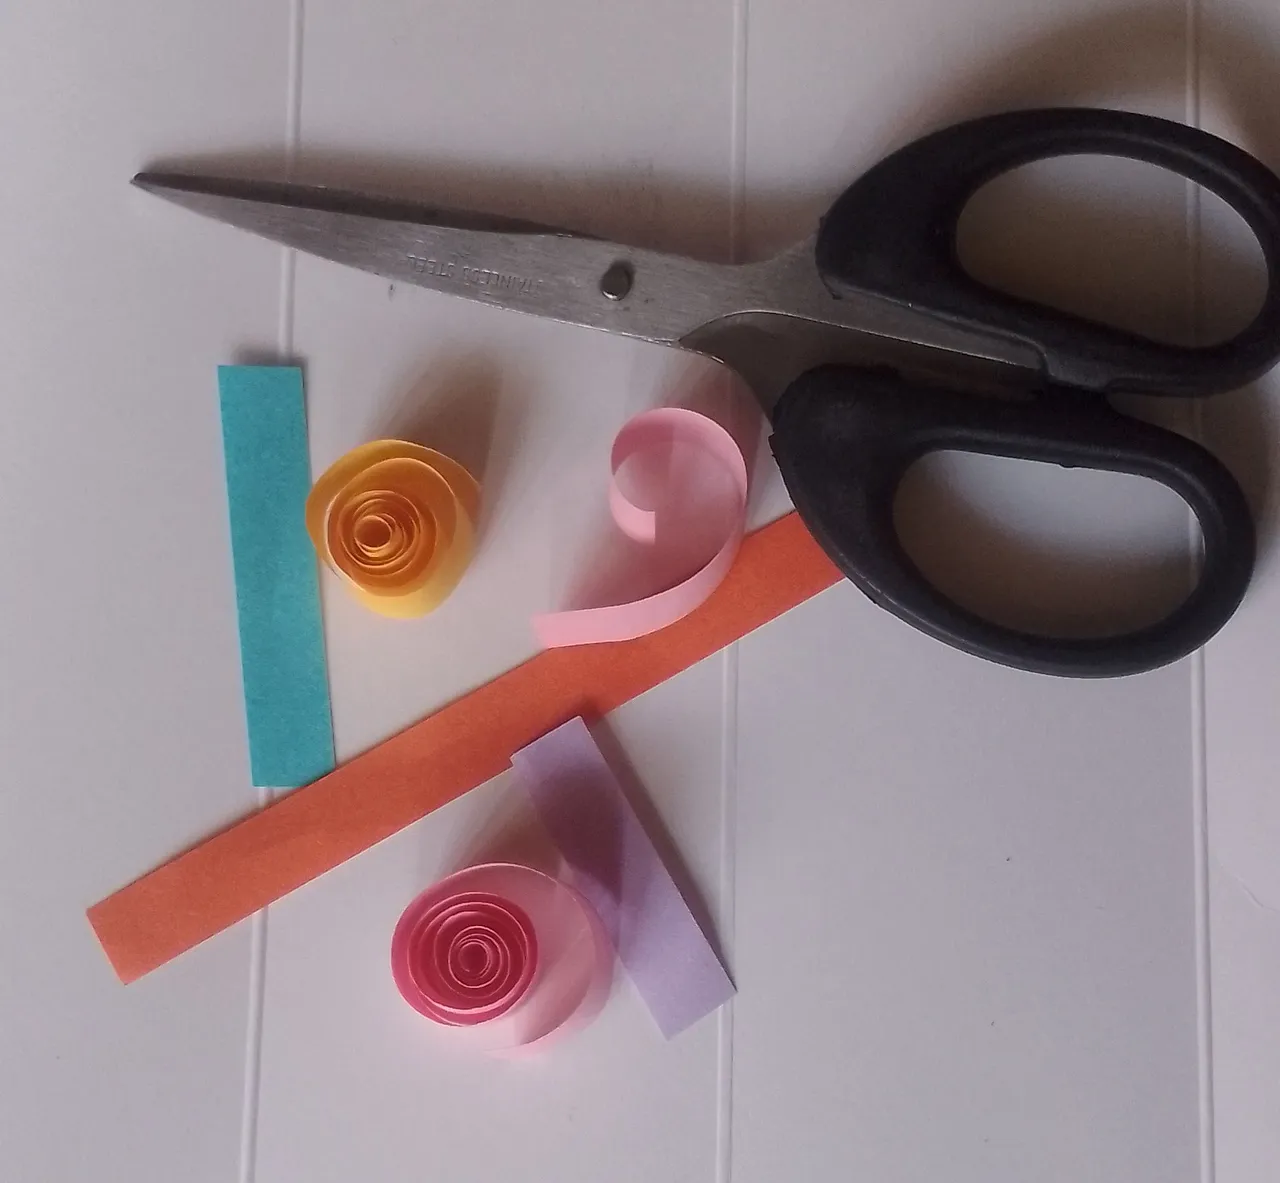
Scissors
A pair of scissors to cut an excess of paper craft strips.
Tweezers or Use your fingers😊
Tweezers are used to hold little rolled strips. Others have found tweezers to be simpler, but I prefer to hold them with my fingers. You can experiment with both methods to see which one produces the best results.
Now, let's start Quilling. I am not a pro nor an amateur Quiller, I just create whatever piques my interest.
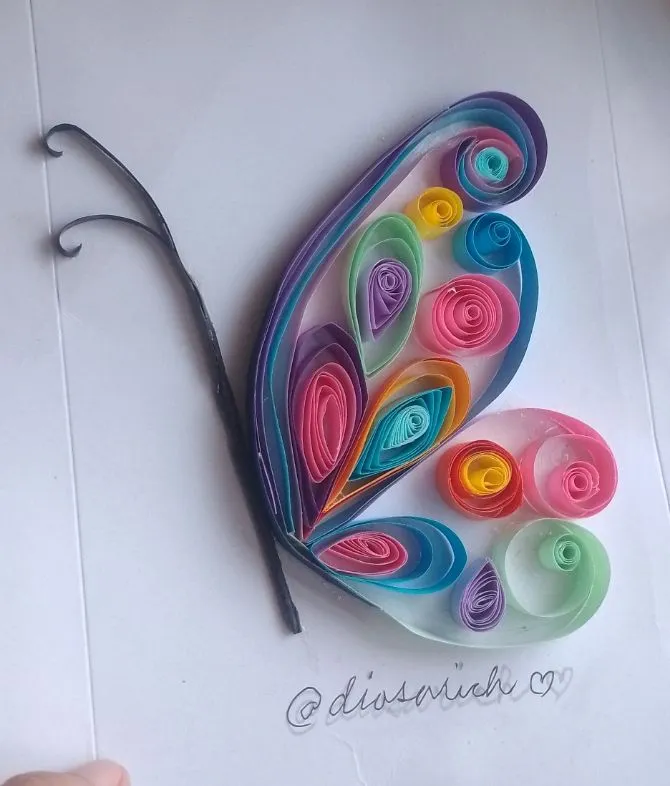
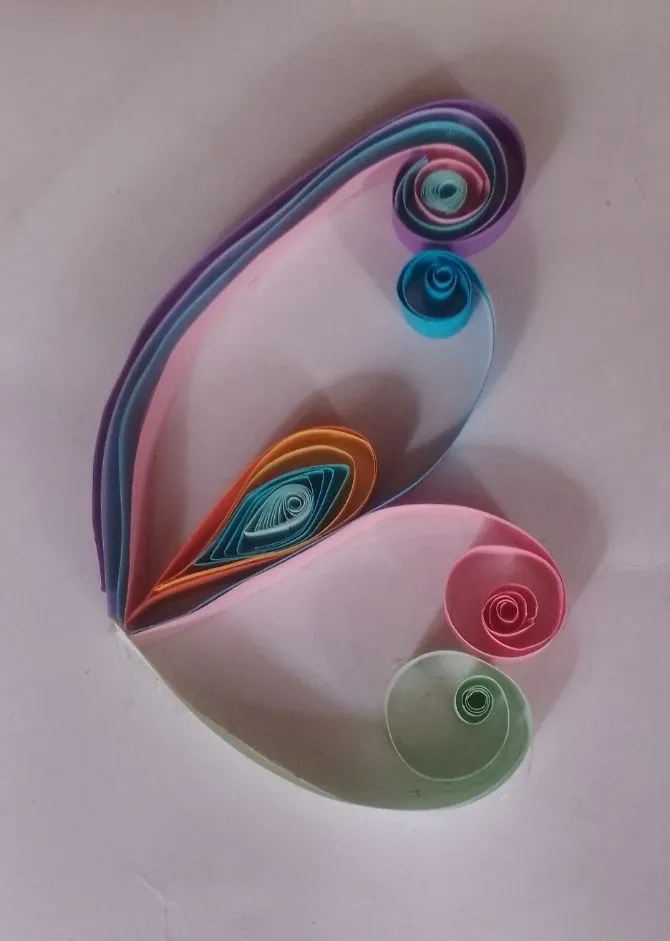
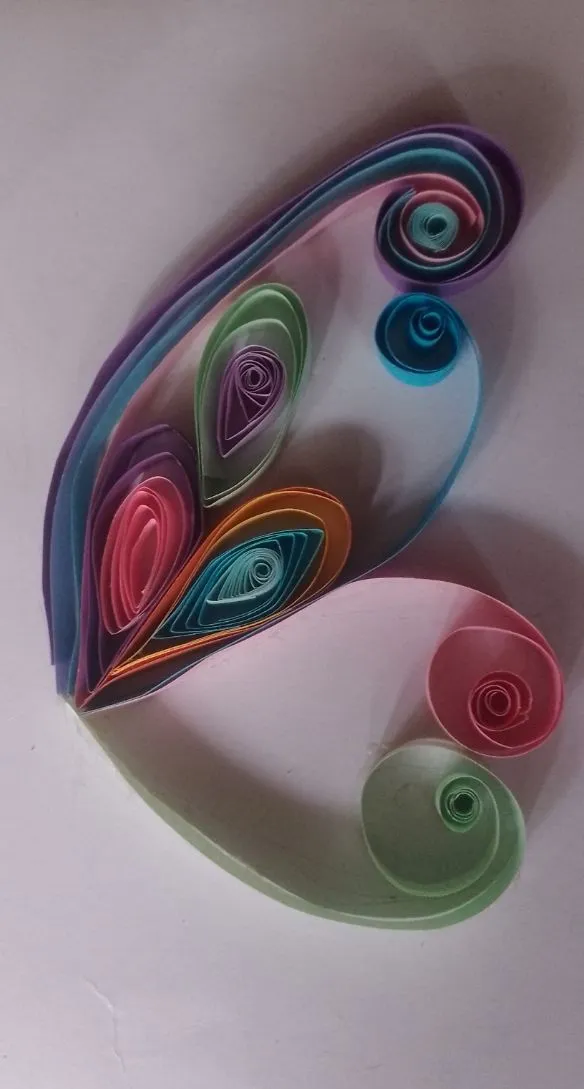
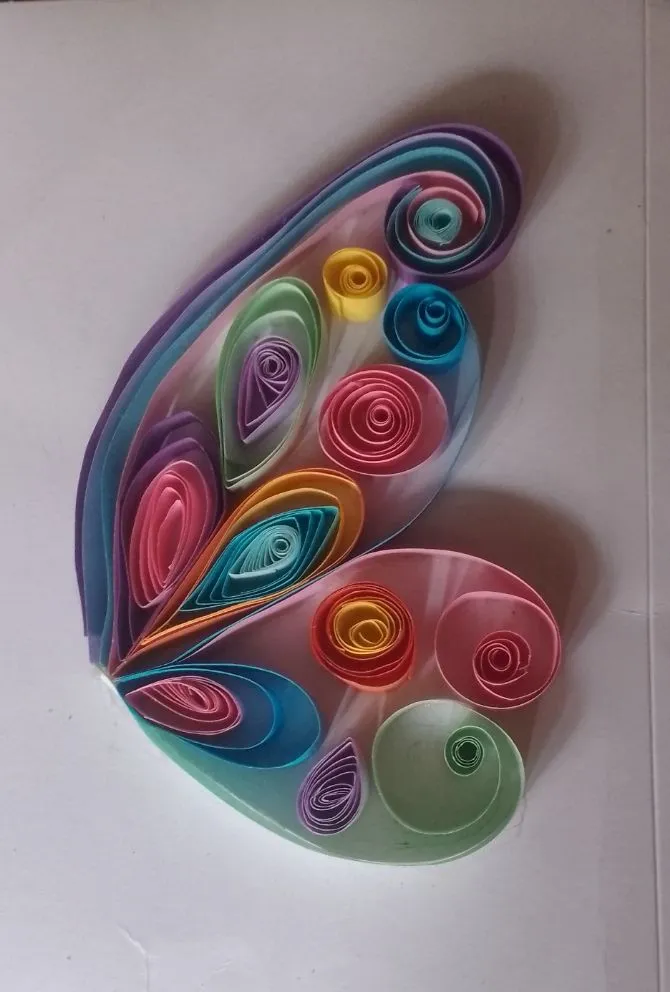
Choose the colors you prefer for your design from Quilling strips. I used pastels to create a rainbow butterfly. I rolled the Quilling strips with a toothpick, folded some, and pinched other coils to get different shapes.

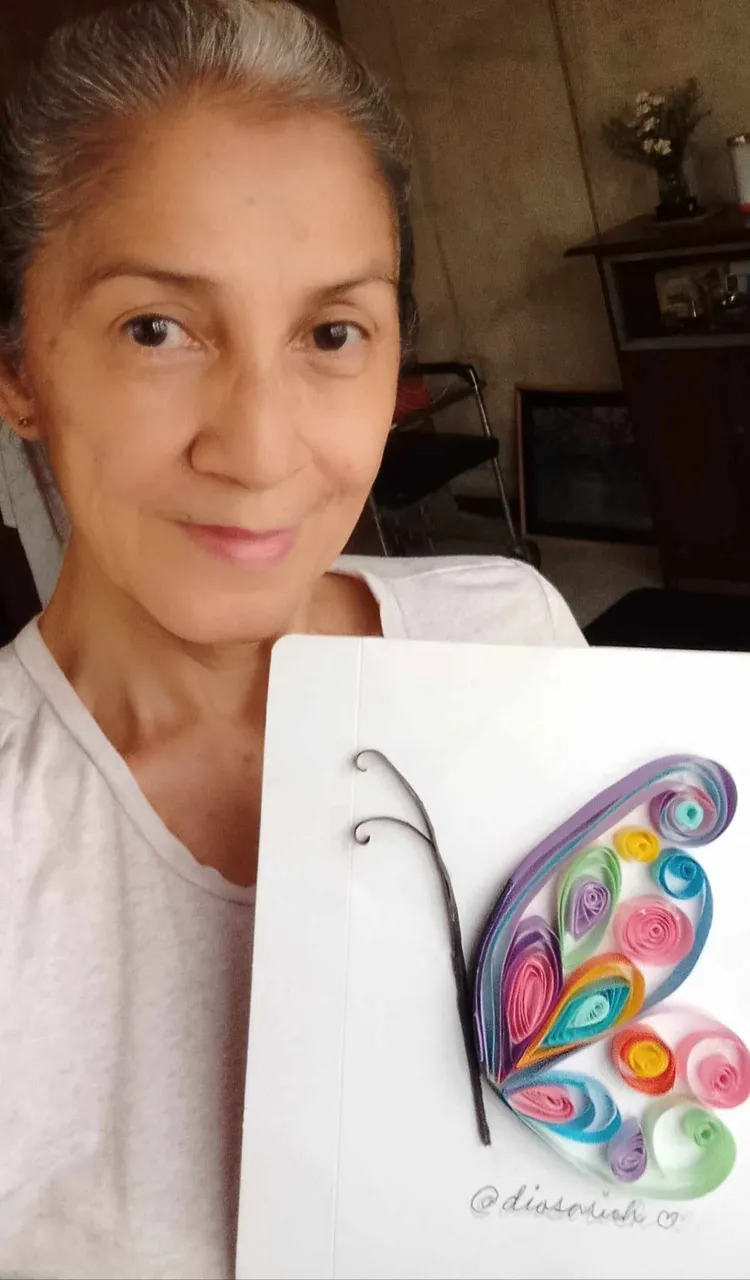
I begin with four hues. violet, lavender, blue, and pink. Rolled the tip of the Quilling strip, leaving the bottom unrolled. I glue each coil to guarantee that it does not come free. To create the butterfly's upper wing, I connect the four strips to a clean poster board. I kept adding strips to the lowest section of the upper wing until it formed. I kept on adding strips till I finished the upper wing and moved on to the lower half of it. When you're done with the wings, move on to the butterfly's body and antenna. Get a black paper strip, trim the upper section to create an antenna, and roll the rest in a toothpick, gluing it at the bottom when finished. The Quilling paper strip butterfly design was then completed by gluing it near the butterfly's wings on the poster board.
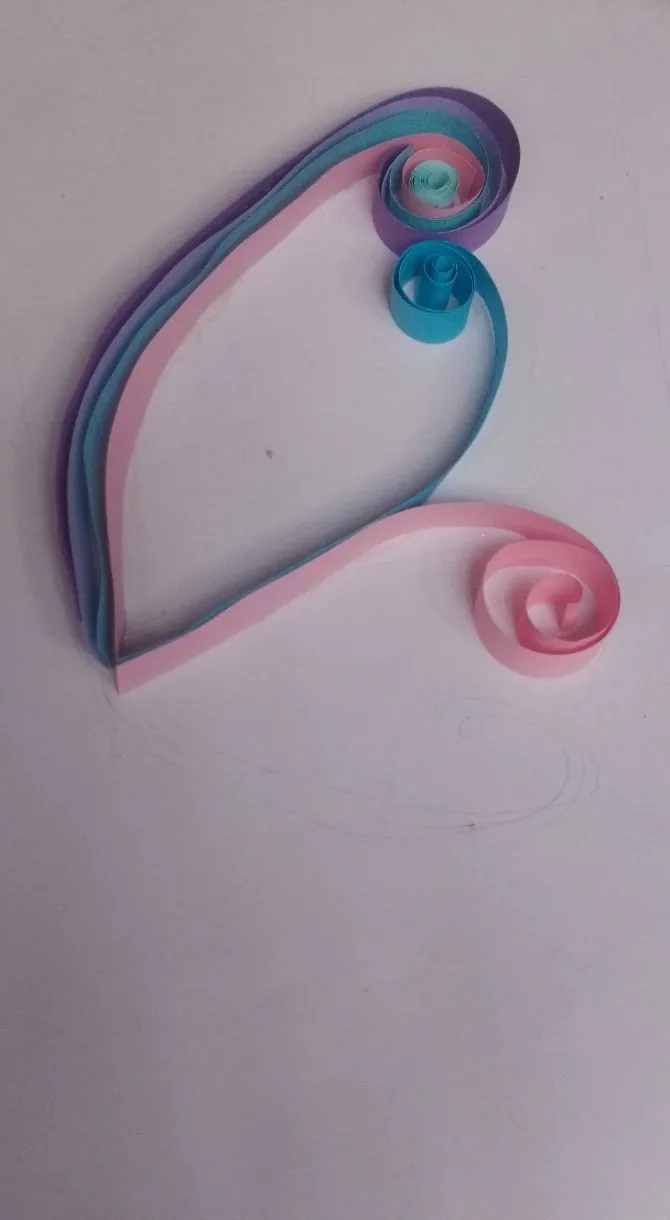
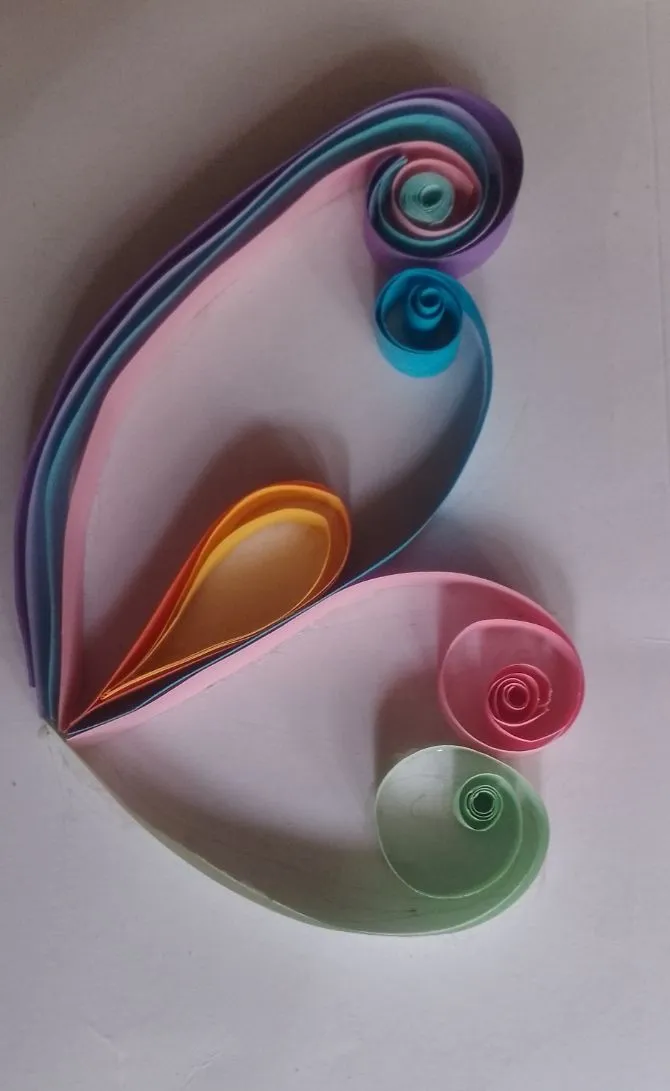
Everything was so simple for me that I just kept attaching the paper strip coils that I had already set up before I started designing the rainbow butterfly.

Patience and perseverance are essential while creating paper quilling. But when you finish your intended design, it feels great. Paper quilling is a viable source of income. You should become an expert at this, and you will always have extra revenue. I created a simple design out of folded paper strips that are easy to follow and create. Just today, I shared this with a buddy, and he has already placed an order.
How about making your butterfly and posting a picture? I would love to see it!
NOTE:
Use 1/4′′ wide quilling paper if you're a newbie. You can grasp and control it more easily due to its greater width. You can quill with smaller strips if you'd like when you've mastered the shapes.
With a bit of patience and a little practice, you will easily be able to take on any quilling project your creative heart desires to make. Happy rolling! 💕🌷🤩
I would like to thank @justinparke for creating the # ASEANHive #CommunityChallenge | ASEANHive Challenge Paper Crafts #109. This is my submission.
Thank you for swinging by and checking out the post. Catch you on my next blog.
Namaste,
@diosarich💖