
English
I hope you are having a happy week #Hive friends. I am excited to be posting in the #Hivegarden community again. A few days ago I had published my first post in this community related to growing tomatoes. Today I wanted to share with you the harvesting of white and pinto beans from the family garden.
At the end of April, in the family garden for about 10 years now, we have been growing beans of three varieties.
- Beans from the farm
- White round beans
- Pinto beans (local variety)

Once the beans sprout, a few days later we carry out the tasks aimed at giving them a support so that the plants can climb. To do this we place stakes using a shovel, then we put a wire of considerable thickness that goes from stake to stake from one end to another of the rows of beans and finally we place a net of string that is the place where the beans climb.


With the passing of the months and the necessary care in which we use sulfates to reduce the impact of the different fungi that can affect the plants, the best moment arrives, which is harvesting.

Since the development of the round white beans and pinto beans is shorter, we start harvesting in August.
Round white beans
This type of white bean is usually harvested both with the bean still green inside the pod and with the bean well ripe and dry.
Green round white bean
In the case of green bean harvesting, the process begins with the identification of the pods that are green, but whose bean is not going to develop further. In this type of bean this happens when the pod is both red and white in color. If the pods are both red and green, this indicates that it is not yet time to harvest them. Needless to say, in my family we do all this process by hand.

Once the green bean pods are harvested, we take them inside the house and patiently open the pods and select by hand which of the beans have an appropriate size and do not have any type of problem derived from plant diseases (stains) or are partially eaten by insects.

Once we have opened all the pods, we usually weigh the production and take them to one of our neighbors who have ordered this type of bean from us after receiving financial compensation.

Dry round white bean
In the case of harvesting dry round beans, the process is slightly different. First of all, we will collect only those pods that are dry and that can be differentiated by a brown and dry tone to the touch. In our house, we usually leave the pods in the sun for a couple of days so that they are drier.

After these two days of drying, we place them in a cloth bag and tie them. Later, with the help of a shovel, we beat the bag (meshing). With this, we get the beans out of the pod and separate the pods from the beans more quickly.

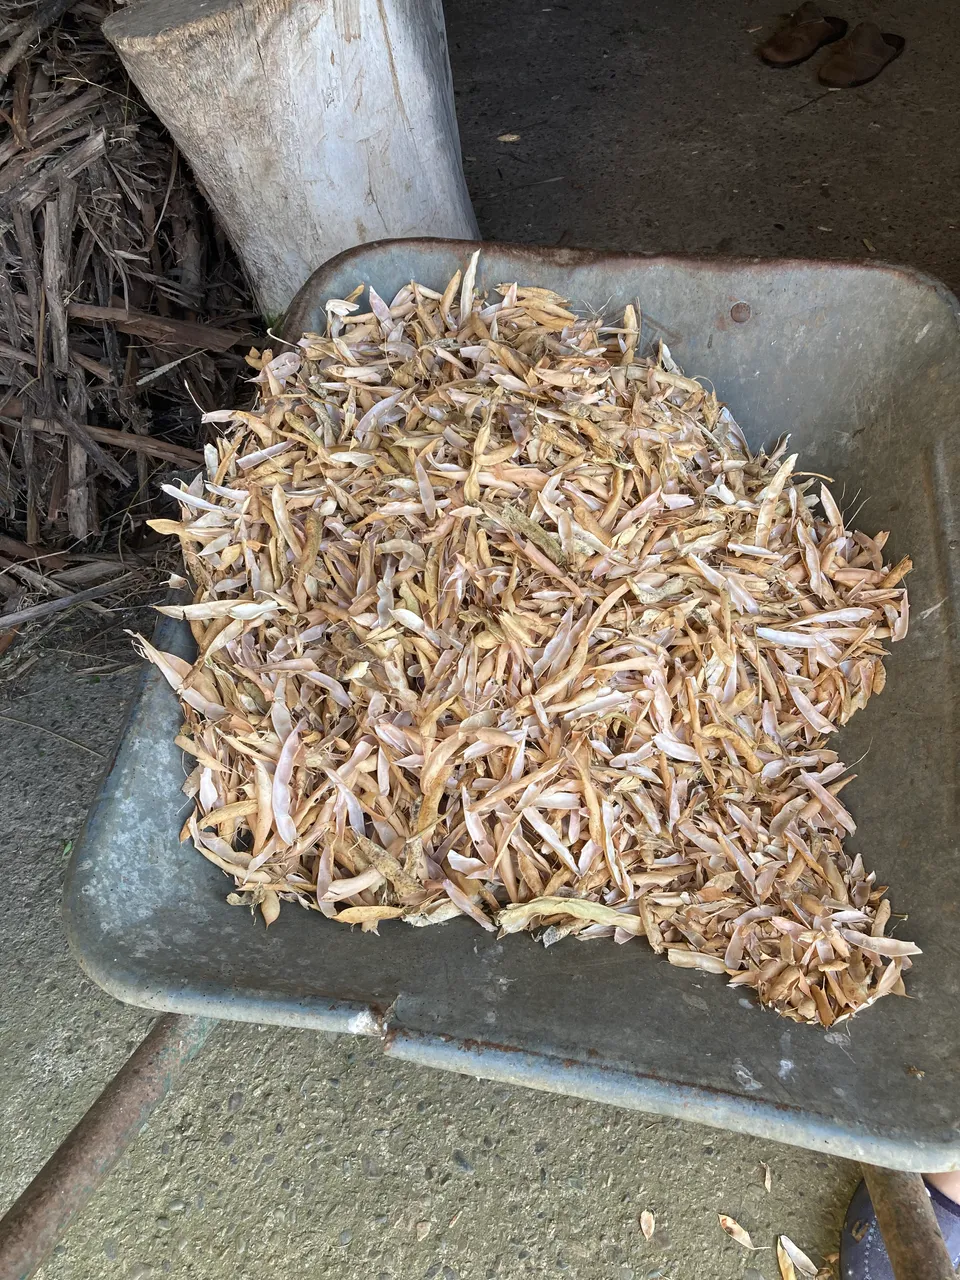

Next, we separate the pods from the beans by hand and finally, with the help of the wind, we separate the thinner parts of the pods from the beans that we want to harvest.

The final step, as in the case of the green beans, is the sorting process to remove the beans that are spotted, small, broken or nibbled by insects.

Dried pinto beans
In our house, pinto beans are usually harvested dry. The process is the same as for dry round beans. The only difference lies in the difficulty of choosing the beans, since due to their purple and reddish tones it is more difficult to eliminate beans that have yellow spots due to humidity or diseases.


I hope you have enjoyed this contribution to this community.
Best regards.
All photographs are my own and obtained with my iPhone SE.
Cover page created with Microsoft Powepoint.
Translated with www.DeepL.com/Translator (free version).
Español
Espero que estén pasando una feliz semana amigos de #Hive. Estoy ilusionado por volver a publicar en la comunidad #Hivegarden. Hace unos días había publicado mi primer post en esta comunidad relacionado con el cultivo de tomates. En el día de hoy quería compartir con ustedes la recolección de las alubias blancas y pintas de la huerta de la familia.
A finales del mes de abril, en la huerta familiar desde hace ya unos 10 años, realizamos el cultivo de alubias de tres variedades.
- Alubia de la granja
- Alubia blanca redonda
- Alubia pinta
Una vez que las alubias brotan, a los pocos días realizamos las tareas encaminadas a darles un soporte para que las platas puedan trepar. Para ello colocamos estacas empleando una paleadora, a continuación, ponemos un alambre de considerable grosor que va de estaca en estaca de un extremo a otro de las filas de alubias y finalmente colocamos red de cordel que es el lugar por donde trepan las alubias.
Con el paso de los meses y los necesarios cuidados en los que usamos sulfatos que permitan reducir el impacto de los distintos hongos que puedan afectar a las plantas, llega el mejor momento que es el de la recolección.
Debido a que el desarrollo de la planta de las alubias blancas redondas y de las alubias pintas es más corto, en el mes de agosto comenzamos su recolección.
Alubia blanca redonda
Este tipo de alubia blanca la solemos recolectar tanto con el grano aun verde dentro de la vaina como con el grano bien maduro y seco.
Alubia blanca redonda verde
En el caso de la recolección del grano verde, el proceso comienza con la identificación de las vainas que están verdes, pero cuyo grano no va a desarrollarse más. En este tipo de alubia esto sucede cuando la vaina tiene una tonalidad roja y a la vez blanca. En el caso de que la tonalidad sea roja y a la vez verde, esto nos indica que aún no es el momento de su recolección. No hace falta indicar, que todo este proceso en mi familia lo hacemos de forma manual.
Una vez recolectadas las vainas para alubia verde, las llevamos a dentro de la casa y con paciencia vamos abriendo las vainas y seleccionando a mano cuáles de los granos tienen un tamaño apropiado y que no tengan ningún tipo de problema derivado de enfermedades de la planta (manchas) o bien que esté parcialmente comido por insectos.
Una vez que hemos abierto todas las vainas, solemos pesar la producción y se las llevamos a alguno de los vecinos que nos ha encargado este tipo de alubia previa compensación económica.
Alubia blanca redonda seca
En el caso de la recolección de la alubia redonda seca, el proceso es ligeramente diferente. En primer lugar, recogeremos solo aquellas vainas que estén secas y que se diferencia por un tono marrón y seco al tacto. En nuestra casa, solemos dejarlas un par de días al sol, las vainas para que estas estén más secas.
Pasados esos dos días de secado, las colocamos en un saco de tela y las atamos. Posteriormente ayudado por una pala damos golpes al saco (mallado). Con ello, conseguimos que las alubias salgan de la vaina y conseguimos separar las vainas de las alubias de forma más rápido.
A continuación, separamos las vainas de las alubias de forma manual y finalmente, ayudados por el viento, conseguimos separar aquellas partes de la vaina más finas de las alubias que queremos recolectar.
El paso final, al igual que en el caso de las alubias verdes, es el proceso de selección para quitar las alubias manchadas, pequeñas, rotas o mordisqueadas por insectos.
Alubia pinta seca
En nuestra casa, las alubias pintas, las solemos recolectar secas. El proceso es el mismo que en las alubias redondas secas. La única diferencia radica en la dificultad de escoger los granos, ya que debido a sus tonalidades púrpuras y rojizos es más difícil eliminar las alubias que tienen manchas amarillas debido a la humedad o enfermedades.
Espero que les haya gustado esta aportación a esta comunidad.
Un cordial saludo.
Portada creada con Microsoft Powepoint.
Todas las fotografías son de mi propiedad y obtenidas con mi iPhone SE.