Bienvenidos - Welcome
Español
Hola! espero que estés excelente , en este momento te mostraré como hice una skin de robot para el juego Minecraft, con una resolución de 64x64 píxeles. Comencemos:
*Lo primero que hay que hacer es buscar un programa o página en la que podamos hacer la skin, en mi caso uso la página PMC Skin Editor
English
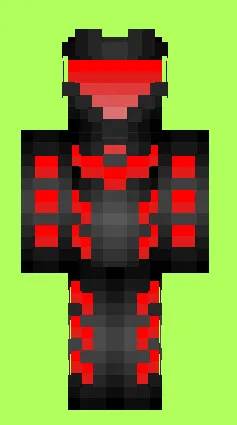
Hi! I hope you are doing great, right now I will show you how I made a robot skin for the game Minecraft, with a resolution of 64x64 pixels. Let's start:
*The first thing to do is to look for a program or page where we can make the skin, in my case I use the PMC Skin Editor page.

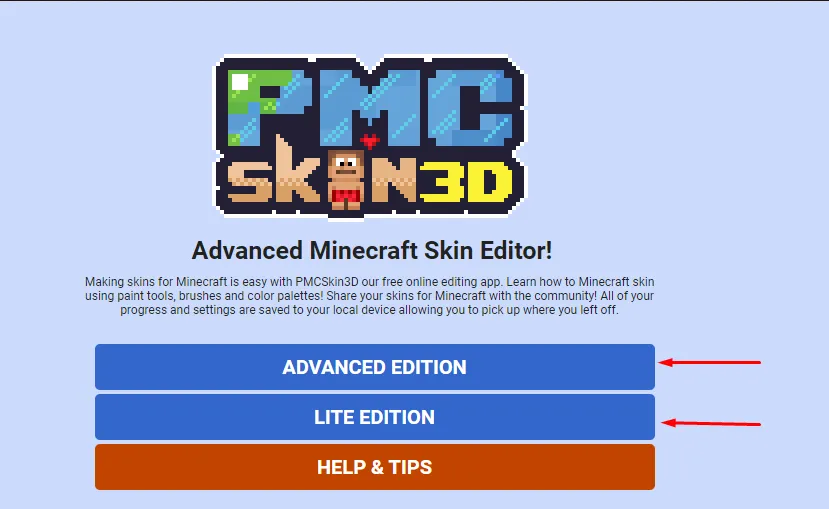
*Una vez en la página veremos 3 opciones que son "Advance edition" , "Lite adition" y "Help & Tips", nosotros le daremos en Advance edition.
*Once in the page we will see 3 options which are "Advance edition", "Lite addition" and "Help & Tips". Lite addition" and "Help & Tips", we will click on Advance edition.
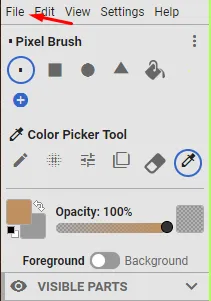
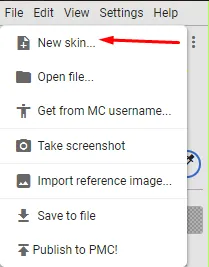
*Después vas a la parte superior izquierda y le damos en la opción "File", y luego en donde dice "New Skin", se abrirá una ventanita y le damos en "Create".
*Then go to the top left and click on the "File" option, and then click on "New Skin", a small window will open and click on "Create".
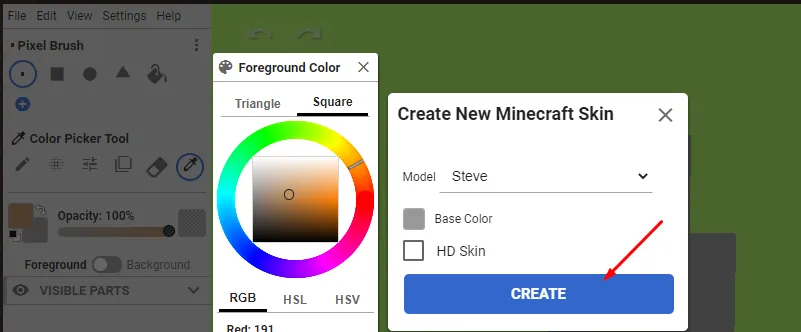
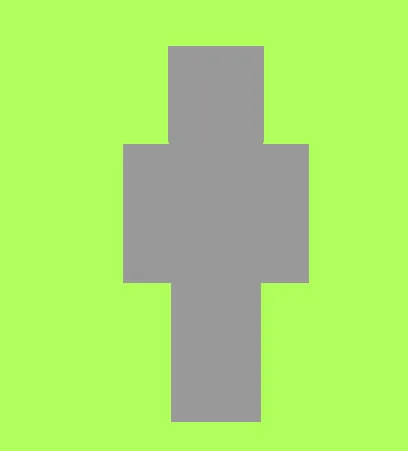
*Cuando le demos en "Create" nos saldrá el personaje en gris totalmente.
*When we click on "Create" the character will be grayed out completely.
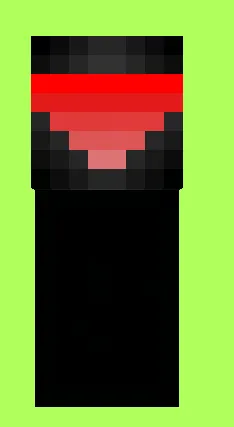
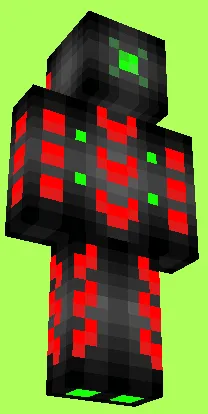
*Ya que tenemos nuestro personaje empezaremos a crear nuestra skin o en español piel, iniciamos con la cabeza, usaré el color rojo con degradado para hacer los ojos o el scanner y el color negro con degradados del mismo para asimilar a metal negro y en la parte de atrás de la cabeza le haré un chip.
*Now that we have our character we will begin to create our skin, we start with the head, I will use the red color with gradient to make the eyes or the scanner and the black color with gradients of the same one to assimilate to black metal and in the back of the head I will make a chip.

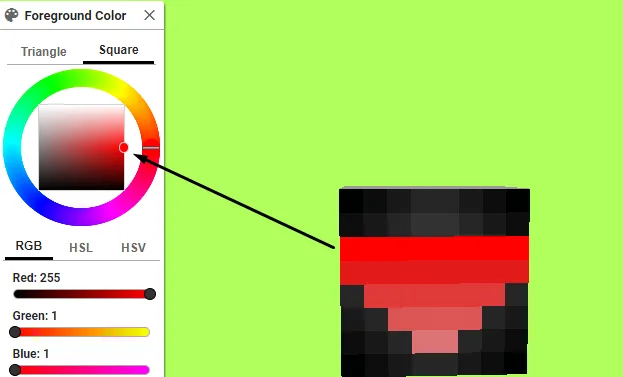
*Hay 2 maneras de hacer degradados, la primera es usando el despliegue de colores como se muestra es la foto de arriba y la otra forma es usando la paleta de colores e ir rodando el puntero poco a poco para formar un degradado.
*There are 2 ways to make gradients, the first one is to use the color drop down as shown in the picture above and the other way is to use the color palette and roll the pointer little by little to form a gradient.
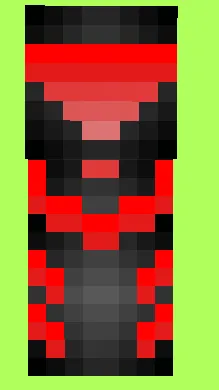
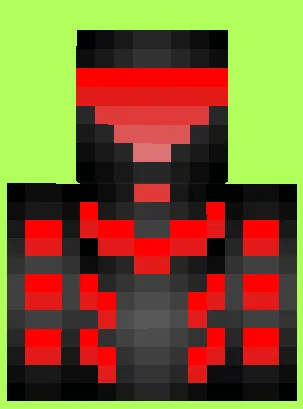
*Ahora como ya terminamos la cabeza, vamos a crear el cuerpo, para ello haré los mismo degradados con negro y detalles con el color rojo, los detalles de rojo serán como luces del robot , es lo que le dará ese aspecto electrónico.
*Now as we have finished the head, we are going to create the body, for this I will make the same gradients with black and details with the red color, the red details will be like lights of the robot, it is what will give it that electronic aspect.

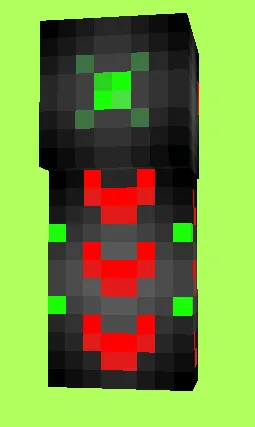
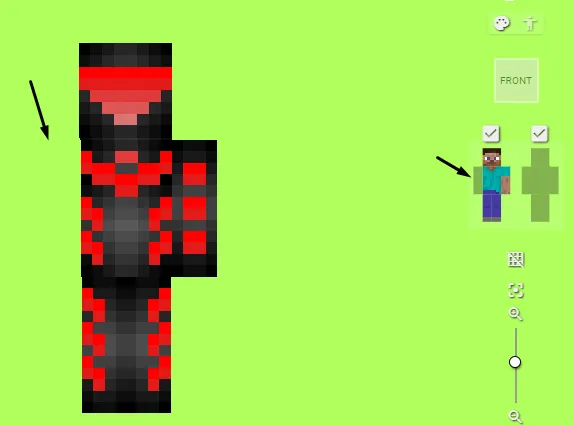
*Ya casi terminamos nuestra skin de robot, ahora haremos los brazos , para esto seguiremos con el degradado con el negro y los detalles con color rojo , teniendo en cuenta de no hacer las mismas cosas que en el cuerpo , en este caso haremos cuadros, si no sabes a lo que me refiero puedes guiarte de las siguientes imágenes.
*We have almost finished our robot skin, now we will make the arms, for this we will continue with the gradient with the black and the details with red color, taking into account not to do the same things that in the body, in this case we will make squares, if you don't know what I mean you can guide you of the following images.
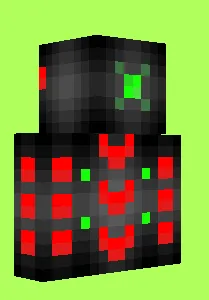

*En la parte de arriba de los brazos haremos un cuadro verde para asemejar chips.
*On the upper part of the arms we will make a green square to resemble chips.
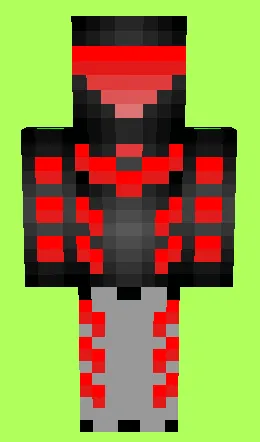
*Listo los brazos están creados! , ahora a comenzar con las piernas de nuestra skin , aquí no haremos cuadros si no que haremos algo parecido a lo que realizamos en el cuerpo y si! seguiremos con el degradado en negro , y en la parte de abajo de las piernas , precisamente en los pies haremos un cuadro verde para asimilar a chips en los pies.
*Ready the arms are created! now to begin with the legs of our skin, here we will not make squares but we will do something similar to what we did in the body and yes! we will continue with the gradient in black, and in the lower part of the legs, precisely in the feet we will make a green square to assimilate chips in the feet.
OJO
No olviden colorear todas las partes del cuerpo , desde las más visibles hasta las que casi no se ven , por ejemplo debajo de la cabeza , la parte de arriba de las piernas y la parte del cuerpo y brazos que se ven juntas, para facilitar su coloreado usen la herramienta que les enseñaré a continuación.
EYE
Do not forget to color all the parts of the body, from the most visible to those that are almost invisible, for example under the head, the top part of the legs and the part of the body and arms that are seen together, to make coloring easier use the tool that I will show you below.
Como vieron en la imagen , le di click al brazo izquierdo y se quitó el brazo izquierdo de nuestro personaje , así mismo pasa con cada parte del cuerpo que presionen , y solo vuelven a dar click a la parte que quitaron para volverla a poner.
As you saw in the image, I clicked on the left arm and the left arm of our character was removed, the same happens with every part of the body that you press, and just click again on the part that was removed to put it back.
Por último haremos detalles en la second layer, espera, ¿no sabes que es la second layer?, pues la second layer es una capa extra que se colocar a nuestra skin para dar detalles 3D esto hace que nuestra skin se vea más bonita, si no sabes como activar la second layer te lo mostraré a continuación.
Finally we will make details in the second layer, wait, don't you know what is the second layer?, well the second layer is an extra layer that is placed to our skin to give 3D details this makes our skin look more beautiful, if you don't know how to activate the second layer I will show you below.
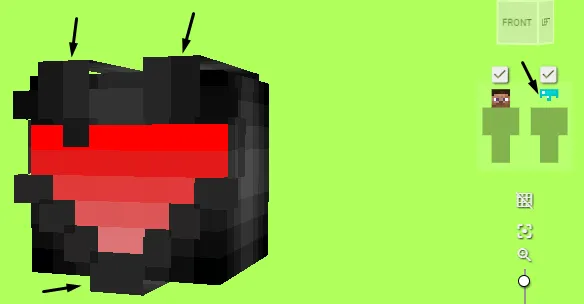
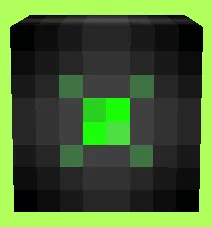
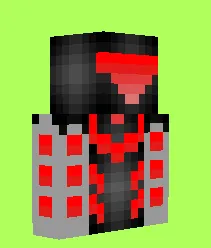
Como ven en la imagen para activar la second layer le dan click a segundo personaje que está en la parte derecha de la pantalla , un ejemplo es que yo active la second layer de la cabeza e hice detalles en ella como ya pudieron ver y se ve mucho mejor y así haremos con cada parte de la skin.
As you can see in the image to activate the second layer click on the second character that is on the right side of the screen, an example is that I activated the second layer of the head and made details on it as you can see and it looks much better and so we will do with each part of the skin.
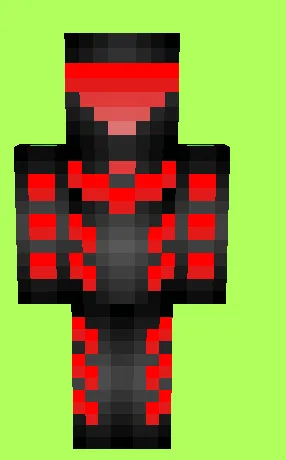
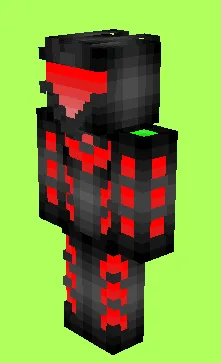
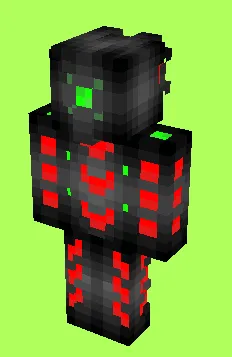
La skin terminada quedará así
The finished skin will look like this
Ahora para guardar la skin van a "File" y luego en "Save to file", le pones nombre y lo guardas en donde quieras y listo felicidades tienes tu skin de robot :D .
Now to save the skin go to "File" and then "Save to file", name it and save it wherever you want and congratulations you have your robot skin :D .
Herramientas usadas:
1.Laptop Canaima versión docente con windows 7.
2.Capturas tomadas con Lightshot.
3.Página de edición para skins, PMC Skin editor link : https://www.planetminecraft.com/pmcskin3d/
Used tools:
1.Laptop Canaima teacher version with windows 7.
2. Captures taken with Lightshot.
3.PMC Skin editor link page for skins: https://www.planetminecraft.com/pmcskin3d/
Espero que lo disfrutaran al máximo , si quieren que haga un tutorial explicando las herramientas que más uso de PMC Skin Editor me lo pueden dejar en los comentarios y si veo que hay muchas personas que quieren que lo haga pues con gusto lo realizo para ustedes , sin más que decir feliz día, tarde o noche hasta la próxima <3.
I hope you enjoyed it to the fullest, if you want me to make a tutorial explaining the tools that I use most of PMC Skin Editor you can leave it in the comments and if I see that there are many people who want me to do it then I will gladly do it for you, without more to say happy day, afternoon or evening until next <3.