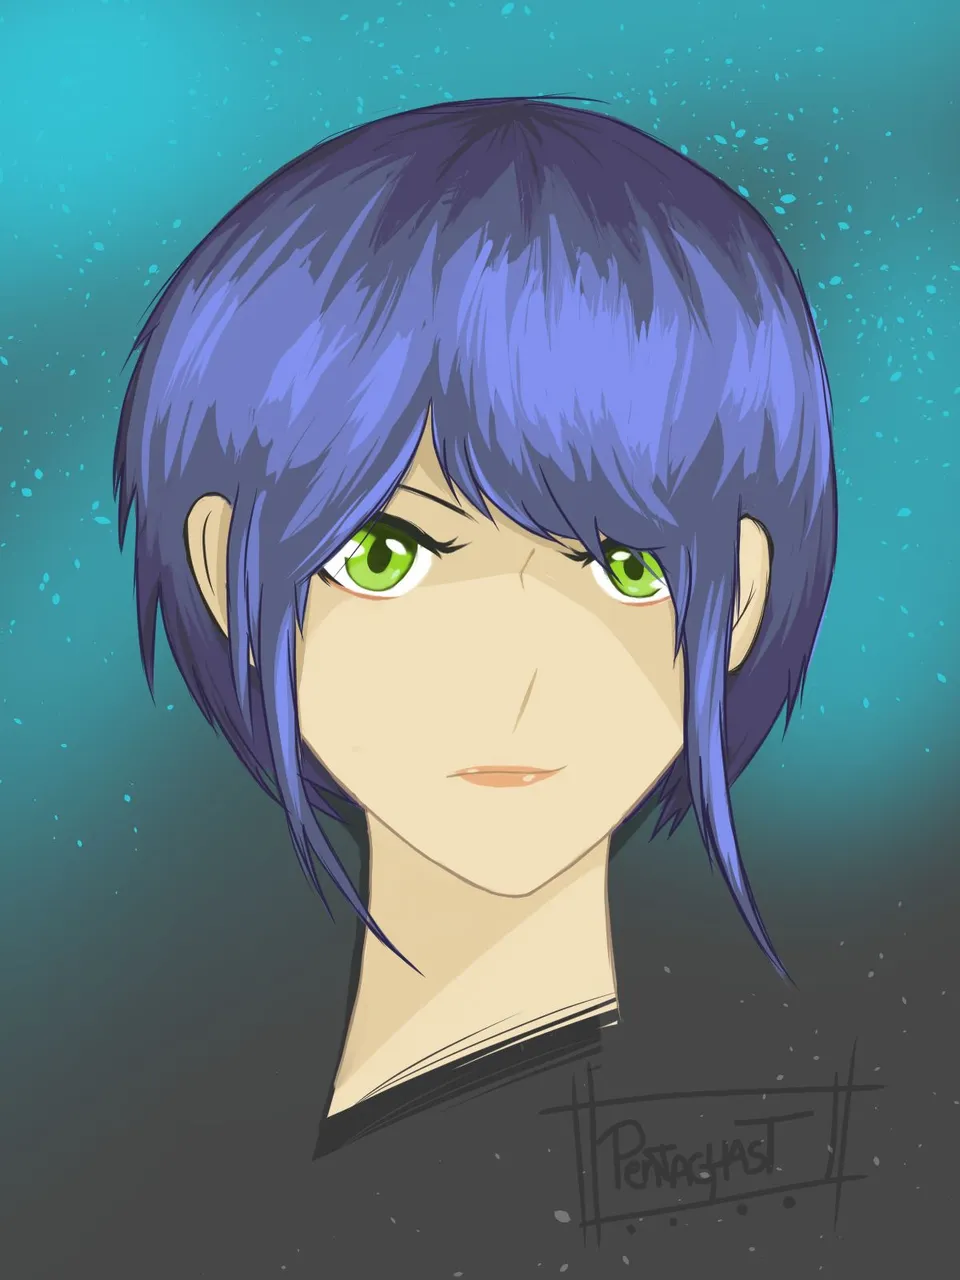
Hey amigos feliz domingo! Como he estado preparándome para hacer un reto de dibujo en febrero, he estado redibujando muchas de mis antiguas ilustraciones con mi estilo de dibujo actual y honestamente he visto bastante diferencia, me quedan unos cuantos, por rehacer, pero este es uno de los que quería hacer, pues ahora hago los rostros muy diferentes a como les mostrare a continuación, pero eso no quita que en su momento me gusto mucho la manera en cómo me resulto.

LINEART
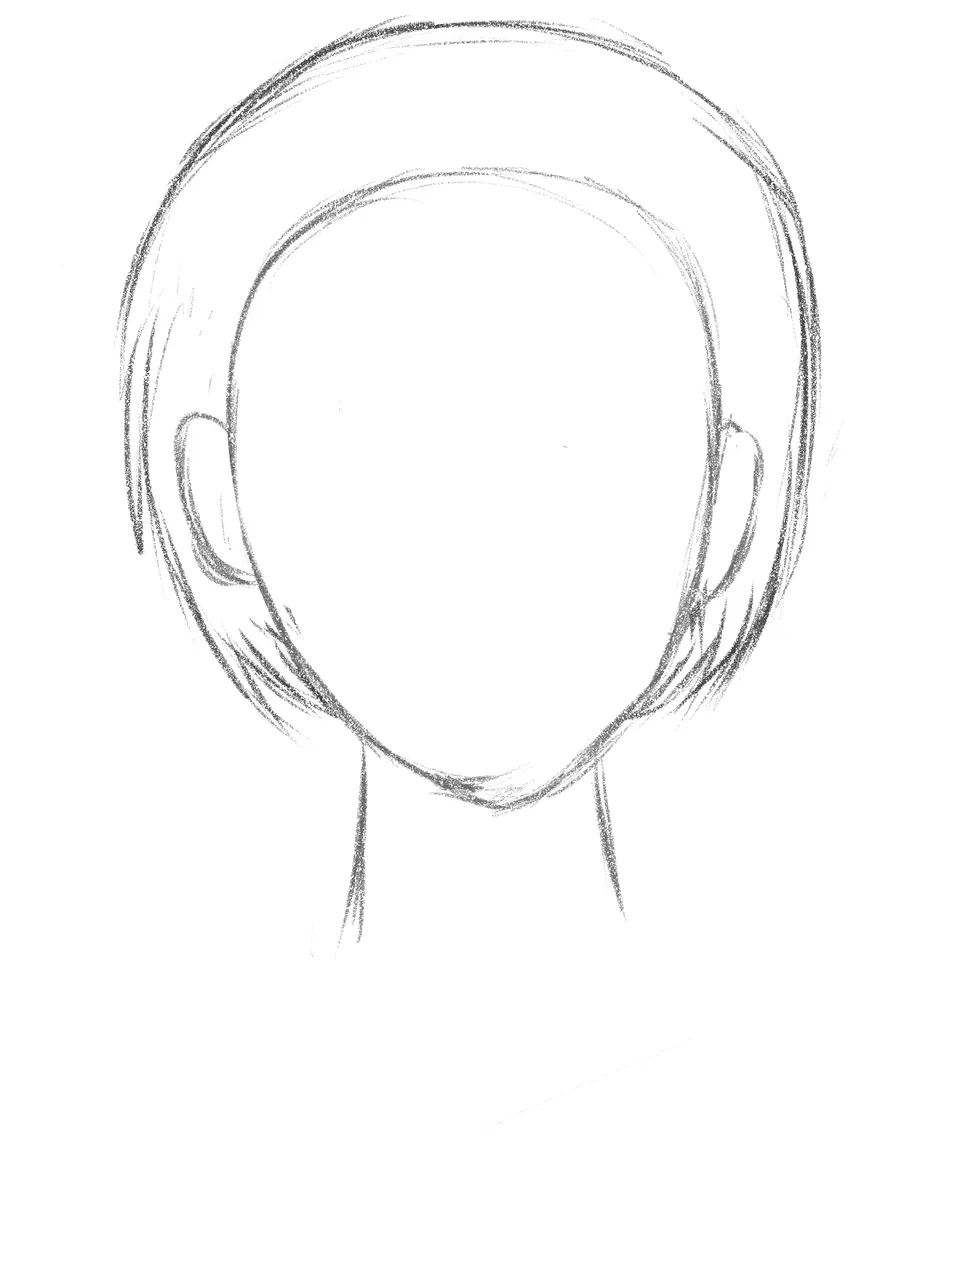
Realmente no recuerdo mucho como fue el proceso que realicé cuando hice este dibujo, lo que se lo he ido descifrando por las capas y el orden del archivo, algo que realmente ahora me molesta, pues antes no era ordenado con las capas y hacia todo en una sola (lo sé, es horrible) jajaja, pero comencé haciendo un pequeño boceto y separando el área del rostro, cuello y del cabello.
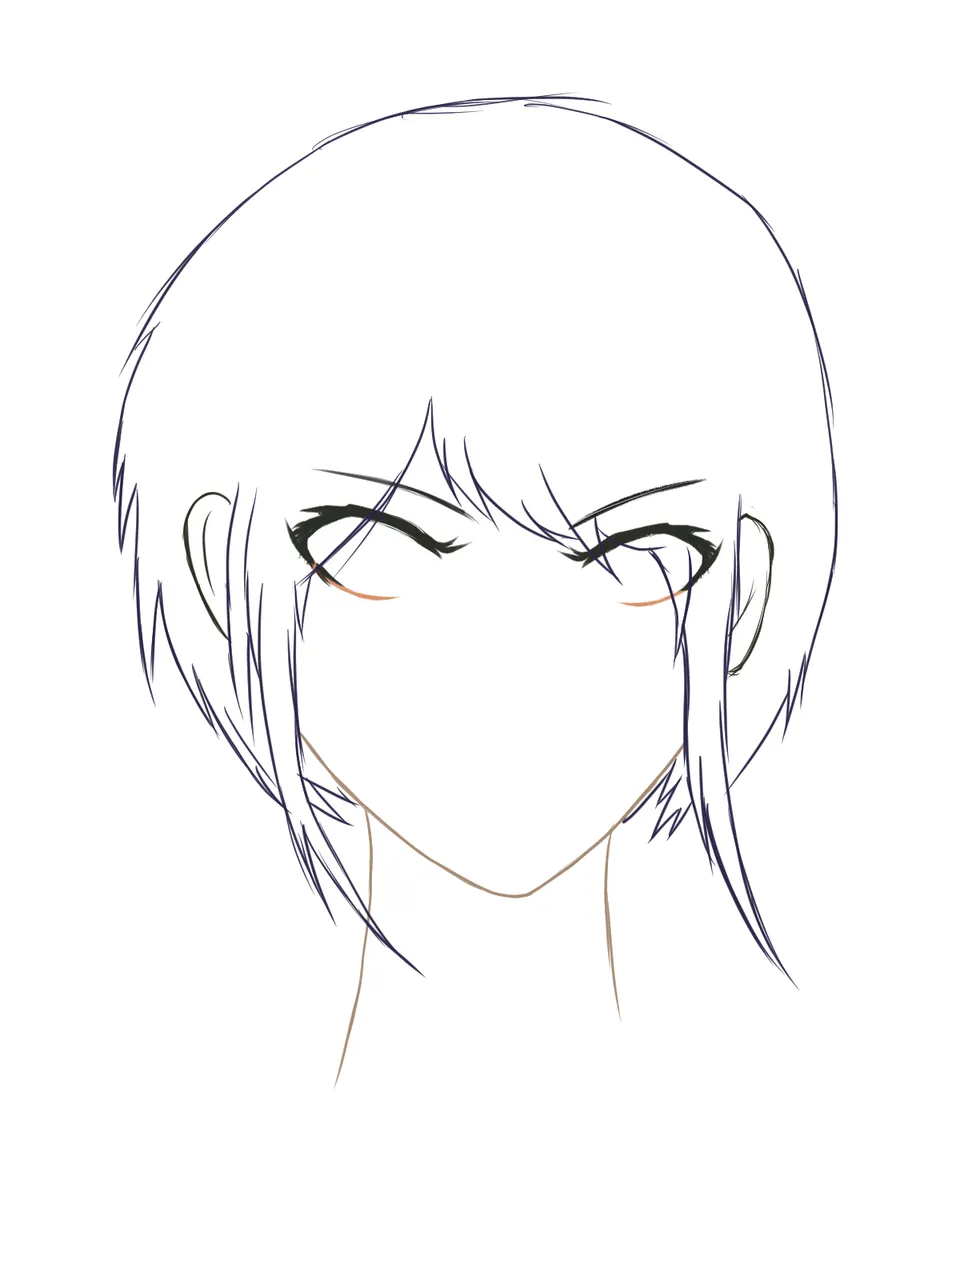
Al definir mejor el boceto, agregue las líneas de los ojos porque en ese momento, los ojos eran un medidor de equilibrio para mi en los rostros, así que desde el inicio los dibuje apenas tenía el Lineart un poco listo.
COLOR
Al terminar de hacer el Lineart, empecé a darle color a la piel y cabello, quise darle unos colores poco comunes, como una piel bastante pálida y un tono de cabello bastante brillantes, para enfocarme en practicar esos aspectos en aquel momento, el cabello en esa época me costaba muchísimo darle brillo y vida, también un poco de color en los ojos para ponerle mayor variedad a la paleta
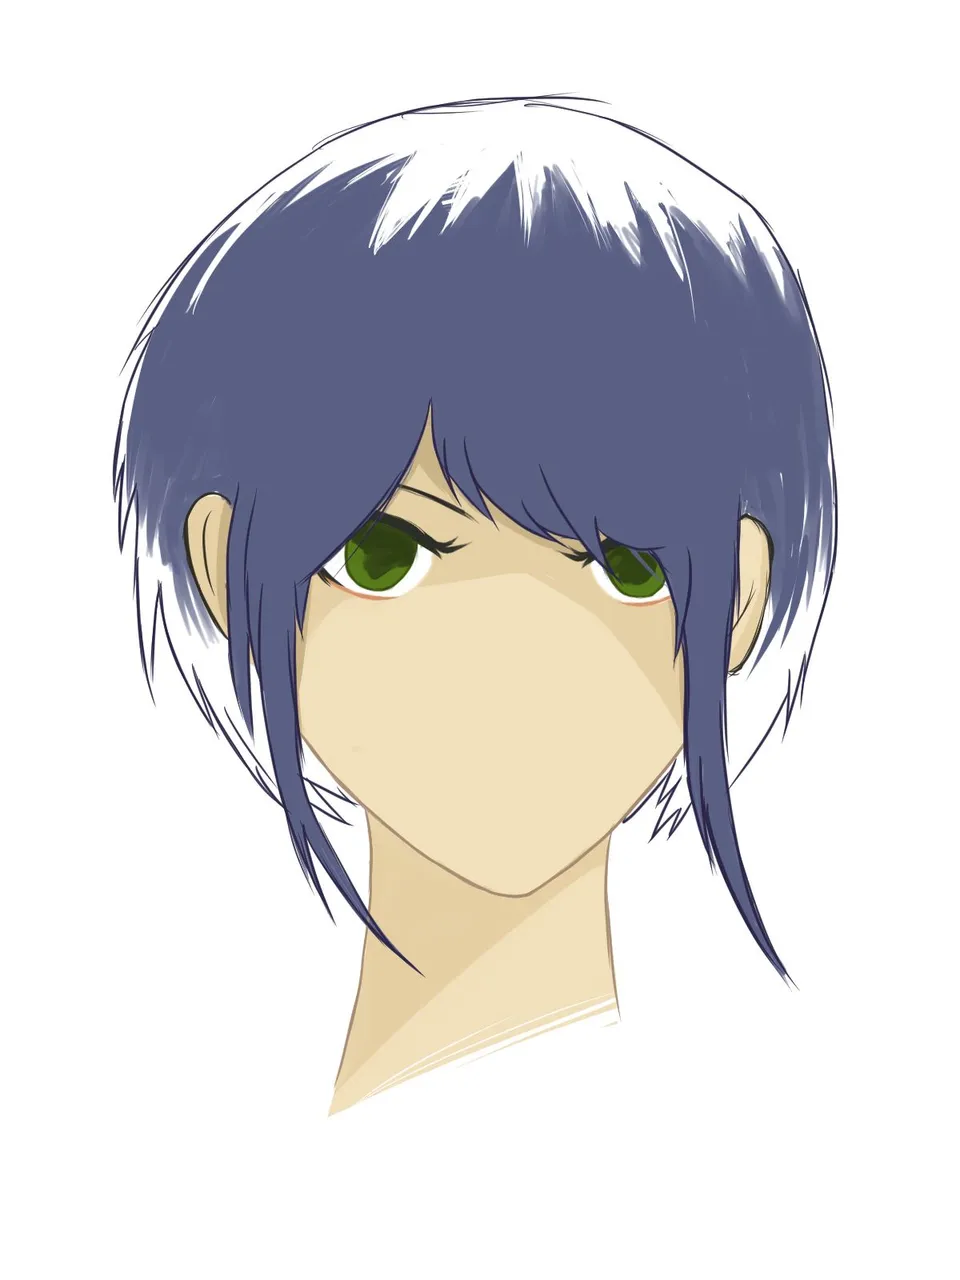
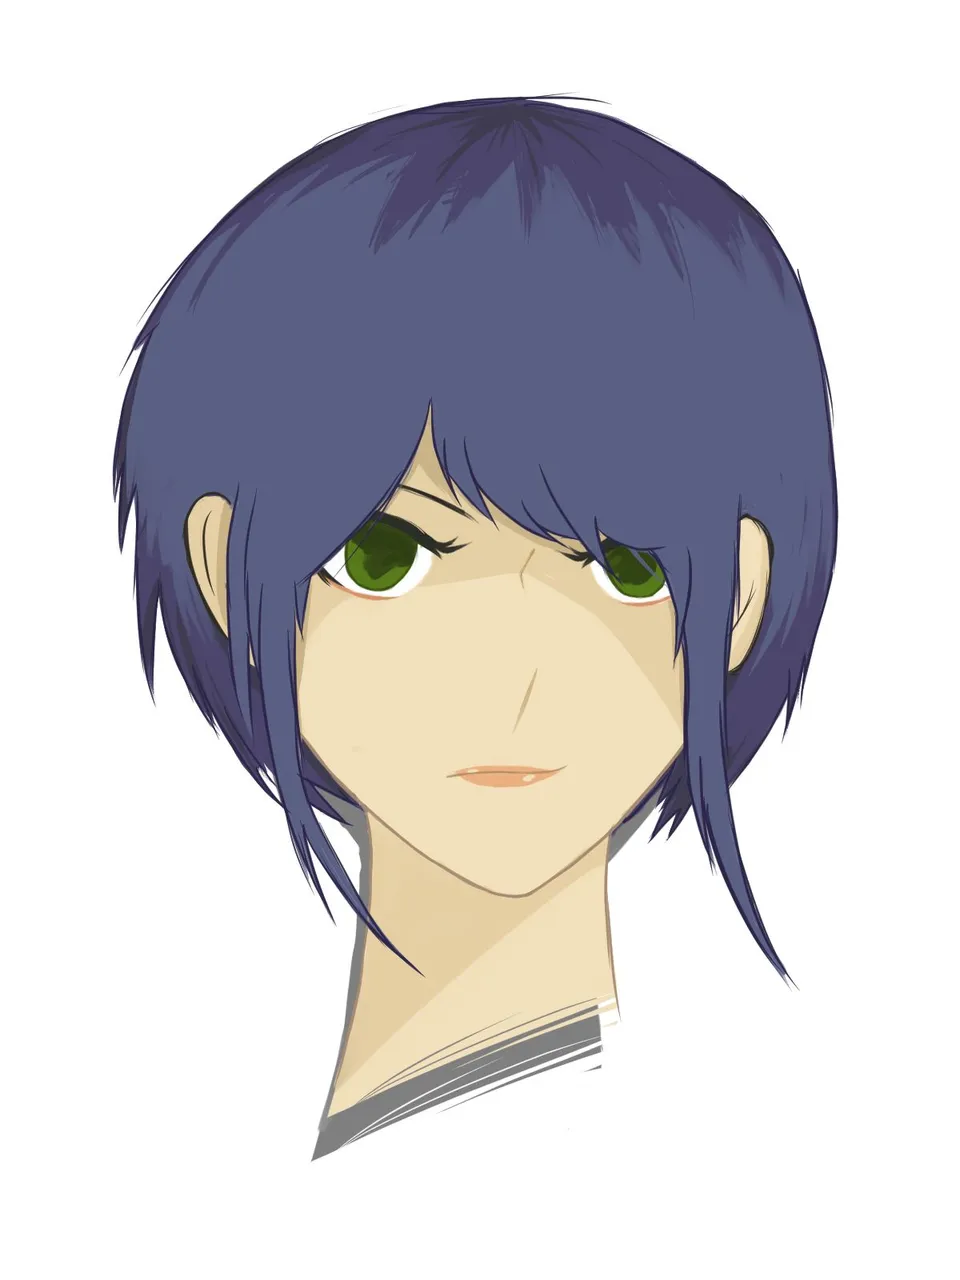
Apenas termine de rellenar el rostro, le agregue la boca y nariz, que, aunque un poco simples pues están en estilo anime, siempre son necesarias para completar el color y las facciones del rostro.
EFECTOS
Aquí fue donde todo cobro vida, le agregué luz y sombra al cabello y los ojos, con la sombra le di profundidad y grosor al cabello y con la luz en los ojos le da vida como tal al personaje, una de las cosas que en ese momento me costaba más, era aplicar la luz a las ilustraciones así que esta práctica me ayudo muchísimo.
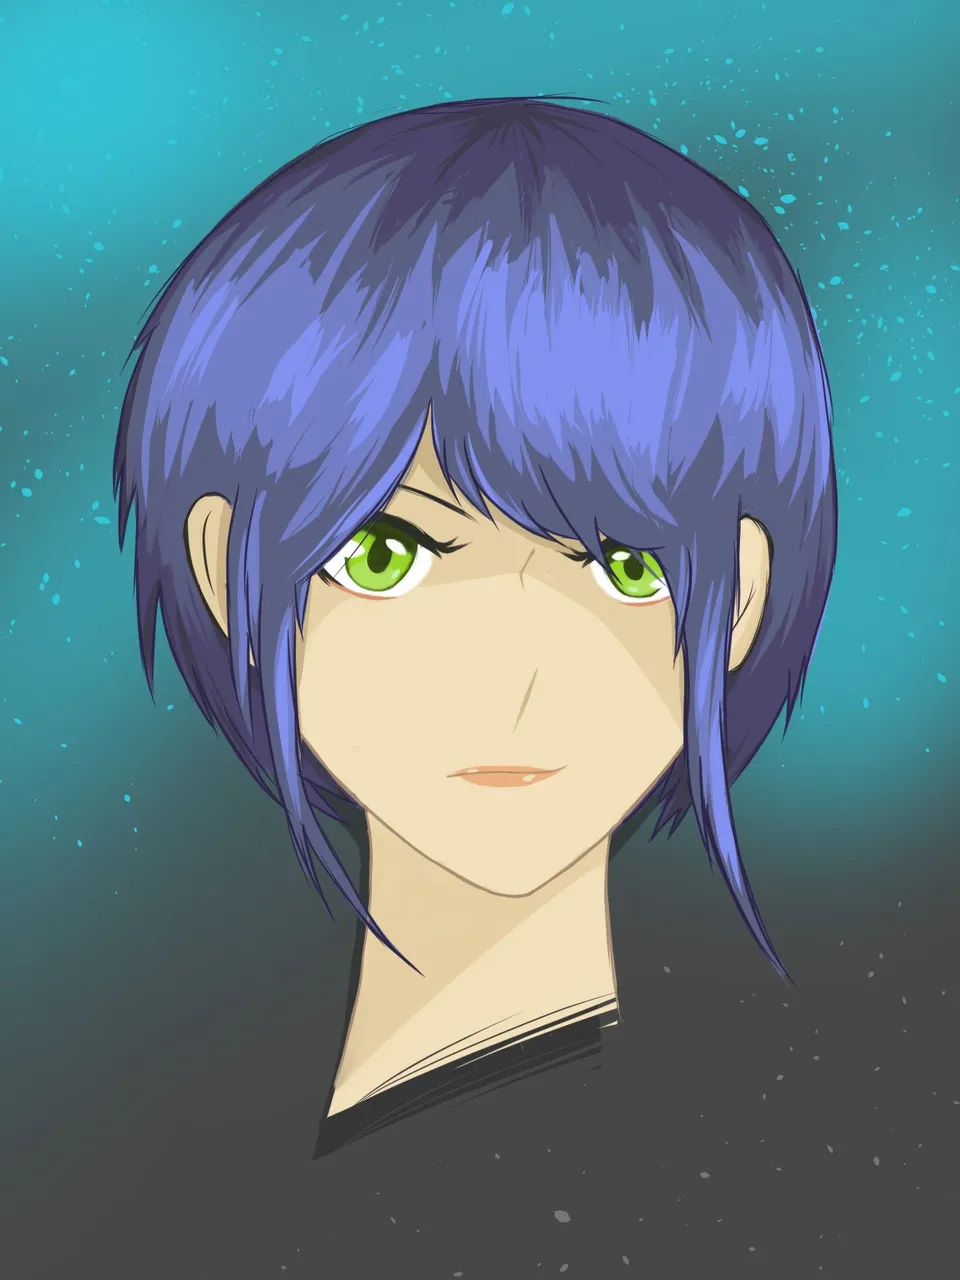
Al terminar le aplique un poquito de luz y detalles al fondo para que no se viera tan vacío, pero nada del otro mundo pues como les comente, era una práctica en aquel momento.
¡Quería compartirles este ejercicio que hice en aquel momento para mostrarles el cambio que ha habido con el tiempo, pues ahora mi ejercicio es rehacer este dibujo para ver que tal me queda en el 2024, sin nada mas que decirles nos vemos pronto! ¡Muchísimas gracias por leer!
Las herramientas que use en la creación de esta ilustración fueron:
- Clip Studio Paint (Software de Dibujo)
- HUION H420 (Tabla Grafica)
Hey friends happy Sunday! As I have been preparing to do a drawing challenge in February, I have been redrawing many of my old illustrations with my current drawing style and honestly I have seen quite a difference, I have a few left to redo, but this is one of the ones I wanted to do, because now I do the faces very different to how I will show you below, but that doesn't take away that at the time I really liked the way it turned out.
LINEART
I don't really remember much how was the process I did when I made this drawing, what I have been deciphering by the layers and the order of the file, something that really bothers me now, because before I was not tidy with the layers and did everything in one (I know, it's horrible) hahaha, but I started by making a small sketch and separating the area of the face, neck and hair.
When I defined the sketch better, I added the lines of the eyes because at that time, the eyes were a meter of balance for me in the faces, so from the beginning I drew them as soon as I had the Lineart a little bit ready.
COLOR
When I finished the Lineart, I started to give color to the skin and hair, I wanted to give some uncommon colors, like a quite pale skin and a quite bright hair tone, to focus on practicing those aspects at that time, the hair at that time was very difficult for me to give brightness and life, also a little color in the eyes to give more variety to the palette.
As soon as I finished filling the face, I added the mouth and nose, that, although a little simple because they are in anime style, they are always necessary to complete the color and the factions of the face.
EFFECTS
Here was where everything came to life, I added light and shadow to the hair and eyes, with the shadow I gave depth and thickness to the hair and with the light in the eyes it gives life to the character, one of the things that at that time I had more trouble, was to apply the light to the illustrations so this practice helped me a lot.
When I finished I applied a little bit of light and details to the background so that it didn't look so empty, but nothing too much, as I told you, it was a practice at that time.
I wanted to share with you this exercise I did at that time to show you the change that has occurred over time, because now my exercise is to redo this drawing to see how it looks in 2024, nothing more to tell you, see you soon! Thank you very much for reading!
The tools I used in the creation of this illustration were:
- Clip Studio Paint (Drawing Software)
- HUION H420 (Graphic Board)