 Logo Splinterlands and character image owned by @splinterlands. Edit by @stdd - Font used is Open Source

Hey There!
This post is written for SHARE YOUR BATTLE Weekly Challenge! DRAGONS!. The Challenge is held weekly, so if you'd like to participate, you can join at the link above. And to make sure you don't miss future Challenges, subscribe to Splinterlands community.
DRAGONS
Dragons are the most insidious splinter of the Splinterlands. And the most expensive. But it's worth it! When I first started playing, and I had dragons as opponents, I was perplexed at all: "How can you play against them? Now that there's a daily focus, it's easier to read my opponent. About 80% of opponents play one splinter. So those who have a thick deck of cards with different shards have found it easier to be unpredictable. As a result, you can earn more season rewards for less effort. An ideal option to expand your deck, are dragons. After all, with a few good cards in each splinter, all you need is a dragon summoner to be unpredictable in those battles when you need it.
My Team
| Splinter | Mana Cost | Position | Reason |
|---|---|---|---|
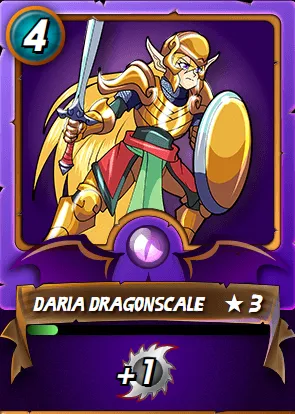 | 4 | Summoner | +1 to melee attack, and the ability to use another splinter's monsters. |
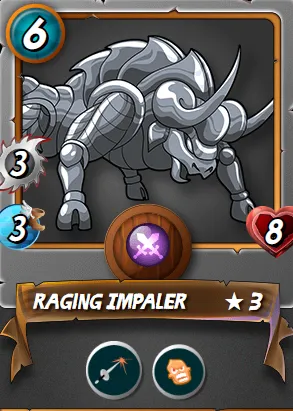 | 6 | 1st | ENRAGE and INSPIRE allow you to remove any tank 1 on 1. |
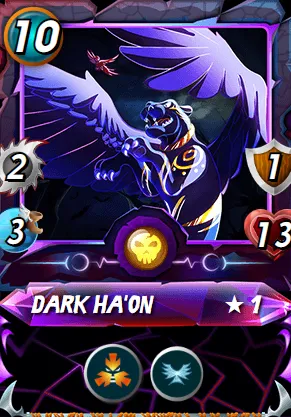 | 10 | 2nd | Draws all the fire on himself while our monsters take out the enemy's monsters. |
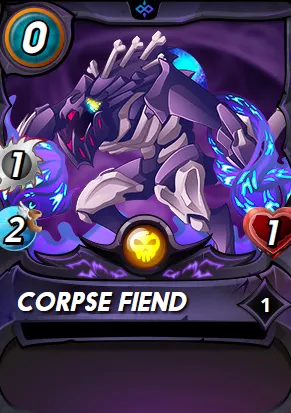 | 0 | 3rd | Protection against monsters with OPPORTUNITY for 0 mana. |
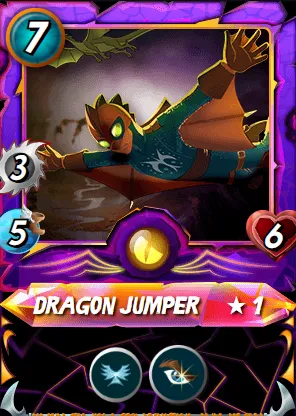 | 7 | 4th | Removes thin monsters, thanks to OPPORTUNITY. |
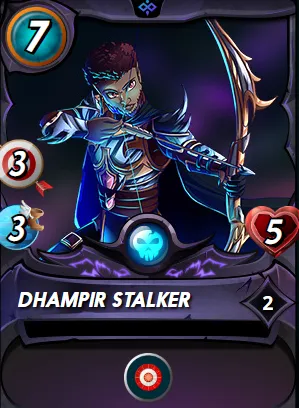 | 7 | 5th | 3 ranged attacks with a 100% hit on the first position. |
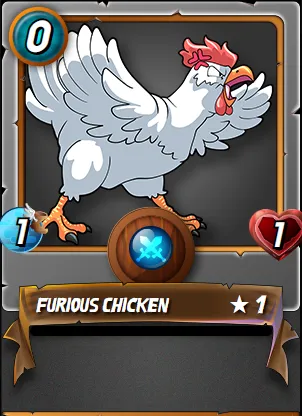 | 0 | 6th | Defending against enemy monsters with the SNEAK ability for 0 mana. |
| Total Mana: | 34 | I used up all my mana, filling all positions thanks to two monsters for 0 mana. |
RULESETS

HEALED OUT does not allow monsters to heal during battle. This means that you have to bet on a maximum and fast attack and, if possible, shield defense. I use a fat tank with the TAUNT ability to attack the enemy as long as possible without worrying about defense. LOST MAGIC does not allow the use of mages in this battle. This means that monsters with shield, high speed and FLYING, will look perfect in this battle. Also, the fact that you can use any shard in this battle, except Water, means that it's unlikely we'll see an opponent with a lot of shields.
Strategy for Battle
The strategy for the battle was as follows:
Raging Impaler on the first position and Dhampir Stalker on the 5th position are able to take out any tank in the first two rounds, but they need protection. Therefore, the first 2-3 rounds they are protected by Dark Ha'on on the second position, diverting all attacks to themselves.
In the third and sixth positions are monsters for 0 mana in case Dark Ha'on fails. Then, after Raging Impaler dies, I'll have an extra turn for my opponent. He'll have to spend it on a Corpse Fiend attack. Or if Raging Impaler is still alive, Corpse Fiend will protect my monsters from monsters with the OPPORTUNITY ability. For the same reason, Furious Chiсken is in last position, only it protects against monsters with SNEAK ability.
Dragon Jumper in seventh position takes out the monsters that survive Raging Impaler and Dhampir Stalker. He is in the seventh position to stay alive as long as possible and protects Dhampir Stalker in case they are left alone in this battle. His FLYING ability and speed 5 will allow him to get many misses if necessary.
BATTLE
A video of the battle that I uploaded to YouTube can be seen below 👇

View the fight in full on the site without registration Battle
Let's see how my round-by-round strategy worked out.
ROUND 1
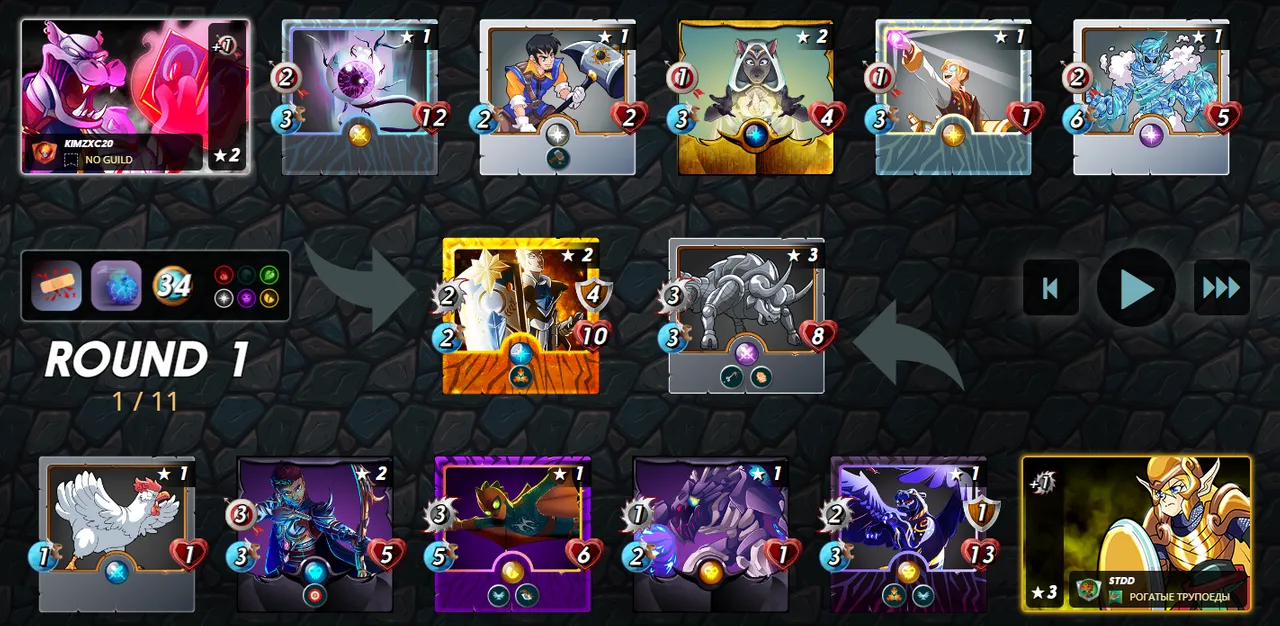
My opponent's bet was also on the monster Shieldbearer with the ability TAUNT, which will distract my monsters to themselves. And also Armorsmith, who would restore the shield every round. But my tank was fatter, and my monsters were faster and with more attack. So at the end of the first round my tank was with 8 health, my opponent had 3 health and 2 shields.
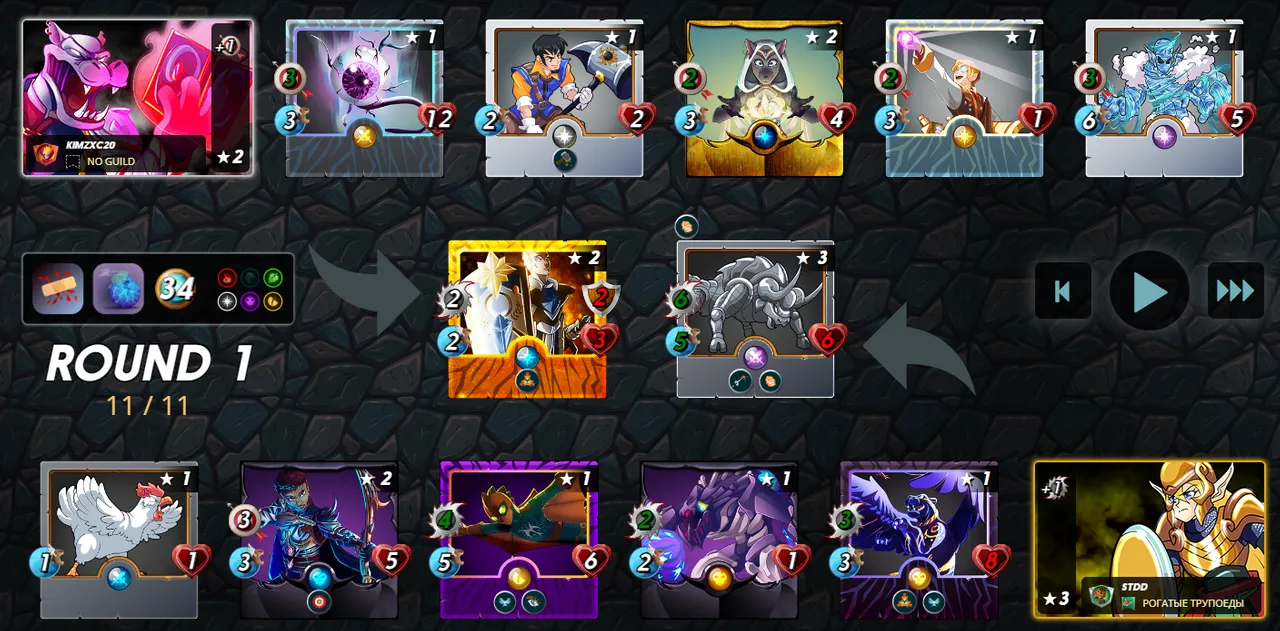
ROUND 2
I finish the second round without losses, but I take out the opponent's tank.
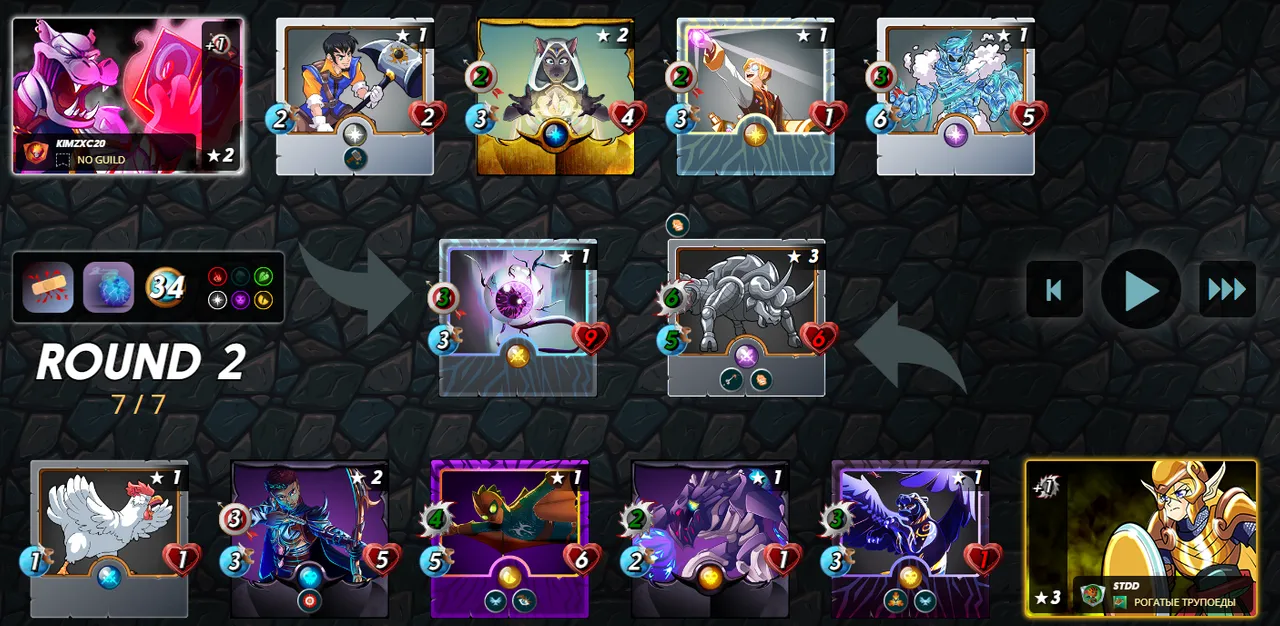
ROUND 3
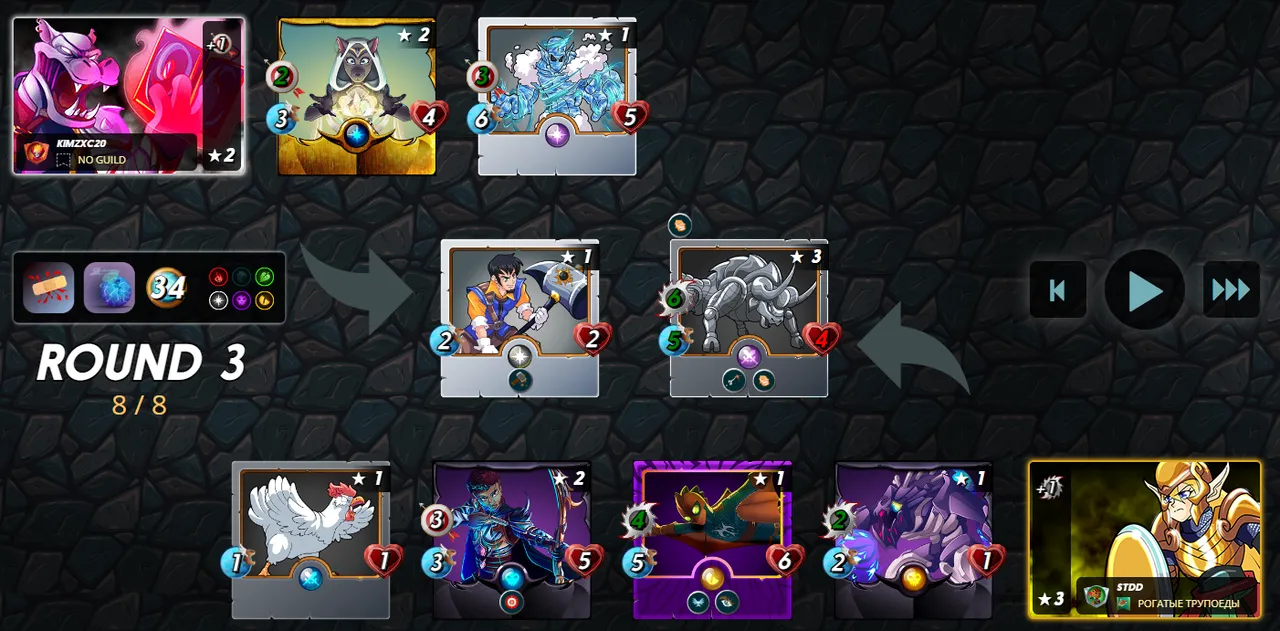
In the third round I lose a tank, I leave alive only three enemy monsters, two of them ranged. Victory remained a matter of time.
ROUND 4-5
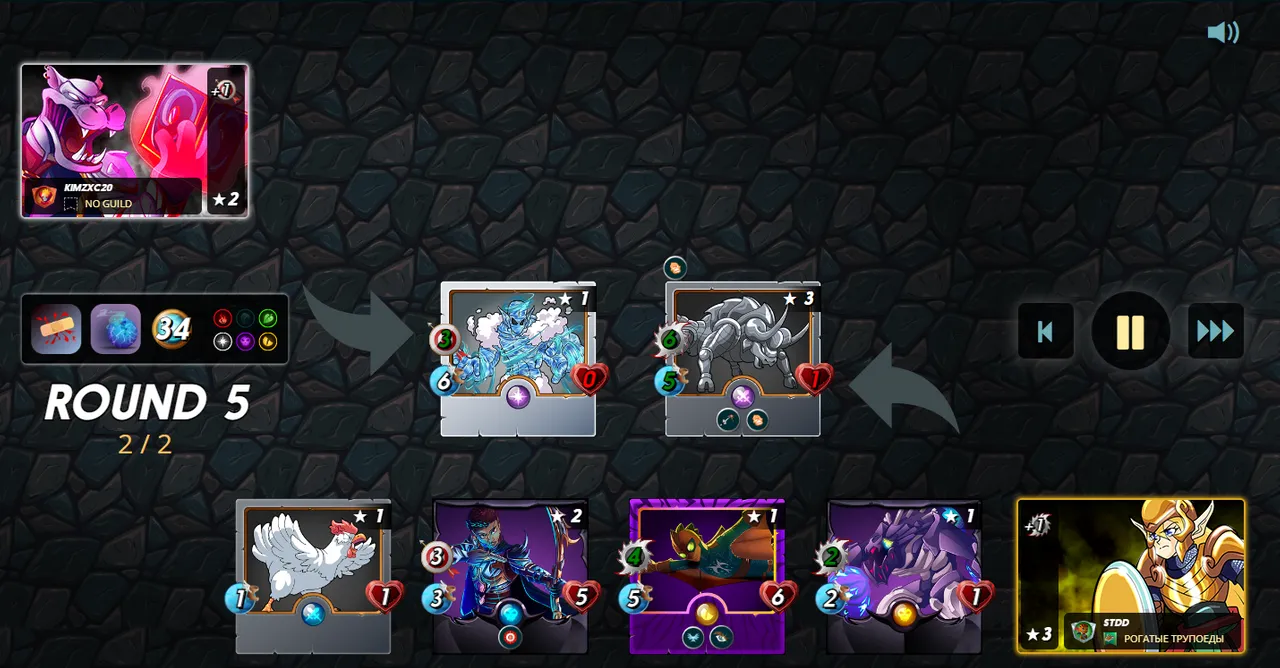
In the end, I didn't lose any more monsters except Dark Ha'on. And that's a win this time.
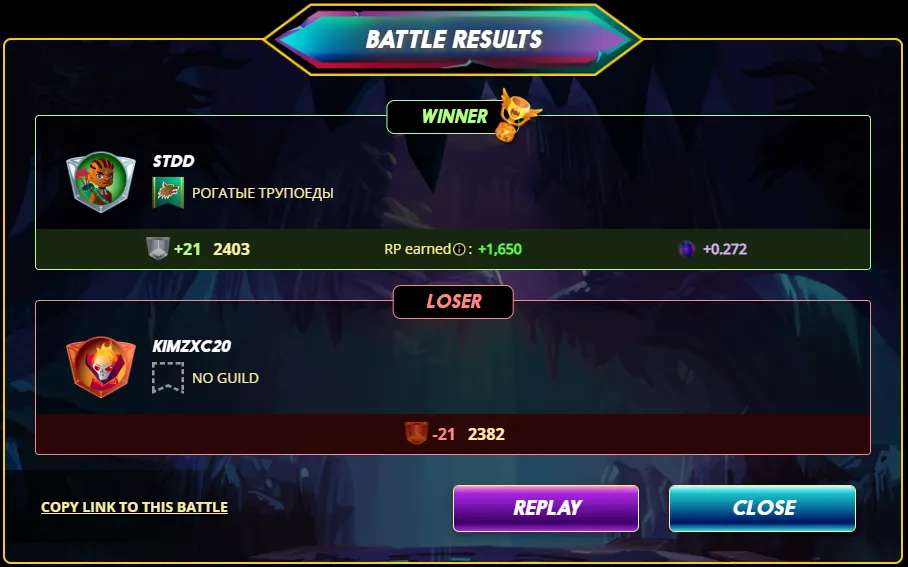
Conclusion
The team played exactly as I had hoped. Some of the monsters I put up for defense weren't even needed. The opponent didn't choose the best shard for this battle. I knew he would play it that way, because I had watched his previous 5 battles. So I roughly understood that my tank should last a little longer, and then I will draw his ranged monsters to the first position, from which they can not attack. That's basically how it worked out.
If I had to replay this game, I wouldn't change anything about it. The whole team is so well placed that it is impossible to change anything. But based on the opposing team, it would be better to put Furious Chiсken in fourth position, pushing Raging Impaler and Dhampir Stalker to the end.
That's all for now, hope this was as useful for you as it was for me!
Huge thanks to @kyo-gaming for the dividers! I also included you in the beneficiaries of this post!

Splinterlands On Top!

| SPLINTERLANDS.COM | SPLINTERLORE | BLOG | DISCORD | TELEGRAM |
