
Greetings to all Splinterlands players! It's time to make another blog, today I will make Battle Weekly Challenge this is a popular event held by Splinterlands. The theme is actually Dax Paragon, but I don't have good battles with that monster so I change it to Void Dragon, a monster of the Dragon element who has very high speed and the ability to dodge any type of attack, whether it be melee, magic, or ranged.
This post is about a battle in the Modern Format Diamond League played with a Scholar account from Balthazar. The deck used for this battle was made up of several Max Level Chaos Legion cards, some Neutral cards, and reward cards obtained from both buying them and receiving them from other Scholars. Although there are still numerous reward cards that have not been acquired, particularly Legendary ones.
This guide provides strategies for using more affordable monsters that can still help you move up the ranks. By using the example of cards, it is clear that it is possible to achieve Champion 3 with a budget deck.

Battle Link
If you want to watch the full battle link you can click Here.
For the video you can watch it here :

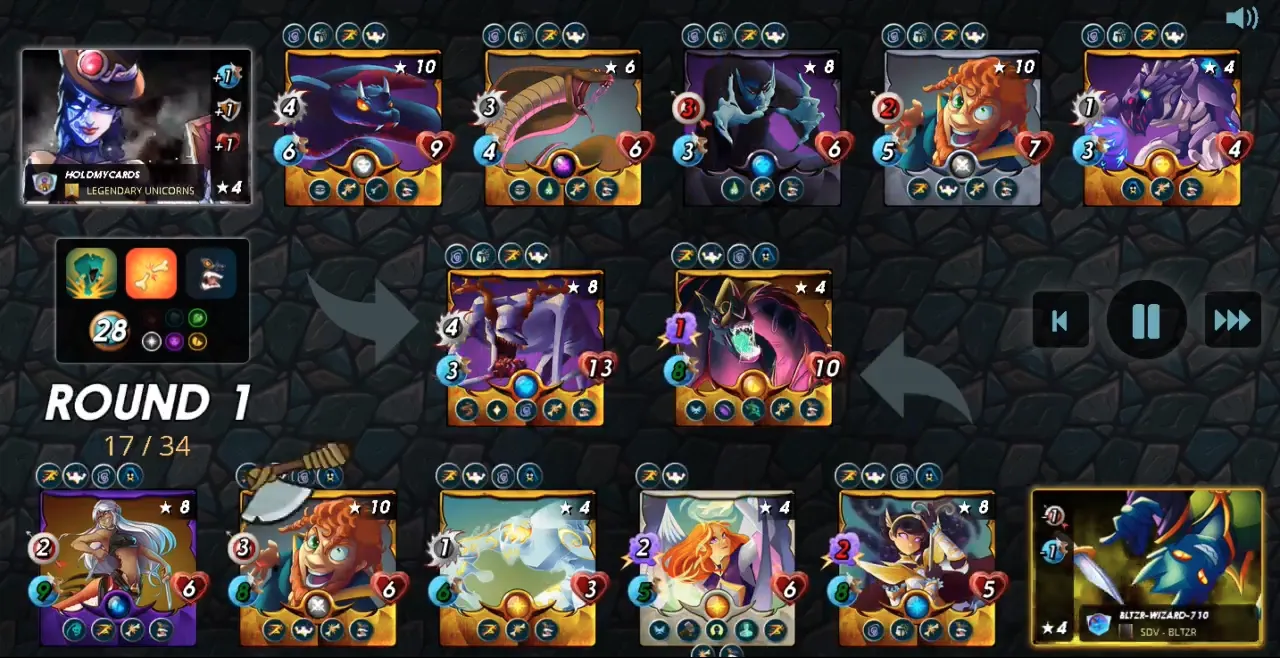
Ruleset

From left to right :
Stampede ruleset, the Trample ability can trigger multiple times per attack if the trampled Monster is killed.
- Trample ability, when a Monster with Trample hits and kills its target, it will perform another attack on the next Monster on the enemy Team.
Tis but Scratches ruleset, all monsters receive the Cripple ability.
- Cripple ability, each time an enemy is hit by a Monster with cripple it loses one max health.
Ferocity ruleset, all Monsters have the Fury ability.
- Fury ability, his monster does double damage to targets with the Taunt ability
Mana Cap 28.
Can use the element Earth, Life, Death, and Dragon.
My Lineup and strategy
According to the ruleset in this battle, there are some guides we can use :
- If possible use a monster with Trample ability.
- It's better not to bring monsters with Heal ability (Triage, Heal, Tank Heal) because the Cripple ability reduces the effect of Heal ability.
- Avoid bringing monsters with Taunt ability.
From the element we can choose, we know that there is a very strong magic monster on earth, a powerful range monster in Life and Death.
In that element, there were some monsters with good sneak and opportunity abilities too.
I suspect the enemy will most likely use magic or range type attacks. I decided to use the monster that has the fastest speed that I have in the four elements, the Void Dragon as a tanker, and whichever remains slot and mana available will use all the monsters that can increase the speed of our monster or reduce the enemy's speed. Thus we have a high probability of avoiding attacks both from the front (range and magic) and from behind by monsters who have sneak and opportunity abilities. This approach prioritizes attacks on the enemy monsters at the first position so that the enemy can be defeated quickly due to being attacked by multiple monsters.
The monster lineup that we will use is as follows:

My summoner Quix the Devious from Dragon element. I chose him because it can decrease the speed of enemy monsters. This summoner can decrease enemy range attack by 1 too.

As the main tanker, it has a high chance to evade the enemy attack.
Strengths :
- Have a high speed of 5 and flying ability, these abilities increase the chance to evade the enemy attack by 25%.
- Void makes enemy magic attack reduce by half.
- Phase ability with this ability void Dragon have chance to evade the enemy magic attack.
Weaknesses :
- The magic attack only 2 and doesn't have any armor.

For only 4 mana cost it has great magic damage.
My main reason to use this monster is because of the slow ability it has. This ability will decrease all enemy monster speeds by 1.
Its superior speed of five makes it a great choice to stand against both enemy melee and ranged monsters if the Void Dragon falls in battle. This will ensure that the team has a reliable tank to mitigate damage and protect other vulnerable monsters.

I brought this monster due to its Swiftness ability, which will increase the speed of all friendly monsters. It has other skill which is very useful too, especially the Resurrect ability. It's a slow monster with only one speed, but you'll see how much speed it will gain in this battle. Although it has Flying Ability (increase the chance to evade melee and ranged damage by 25%) due to its slow speed needs to be put in this position to ensure the safety of this monster.

This monster can't attack but can increase the speed of all friendly monsters, that was the reason I brought this monster and put it in this position to protect it from the enemy attack. It's a very vulnerable monster with only 2 HP and decent speed. 1 hit by an enemy monster usually can kill it.
Usually not common to protect monsters with zero mana cost, usually this monster use as a sacrifice to protect another monster from the enemy attack, but this time I want to maintain the highest speed as long as possible.

The Swiftness ability is the main reason I use this monster. Other than his Swiftness abilities this monster has good damage and great speed too. Strengthen ability will help our monsters survive longer by increasing the HP by 1.
I put this in the fifth position as the second tanker for our backline, incase the enemy brings many monsters with sneak ability

This is our tanker in the last position to deal with monster attacks that have sneak abilities. I choose him due to his high speed. Hope can evade the enemy attack several times before dying. It can increase the speed of our monster by 1.
Backfire is a great attacker ability, combined with Naga Assassin high speed will make a good combination that gives more damage to the enemy.
The Battle
Round 1:
As usual the battle starts with buffs and debuffs from both sides, here we can see all of our monsters' speed is equal or significantly faster than the enemy monsters.
The enemy uses Summoner Lux Vega which can add HP, Armor and Speed to all of his monsters. Luckily we brought a Time Mage so that the enemy's armor can be removed with the rust ability.
The enemy carries a Supply Runner which can increase speed and also Windeku monsters which can reduce the enemy's monsters Speed.
- The battle begins with our Naga Assassin attack which has the fastest speed towards enemy monster Windeku.
- We can avoid all enemy attacks on our monsters except for Uraeus's attack on the Naga Assassin which causes the Naga Assassin to be poisoned.
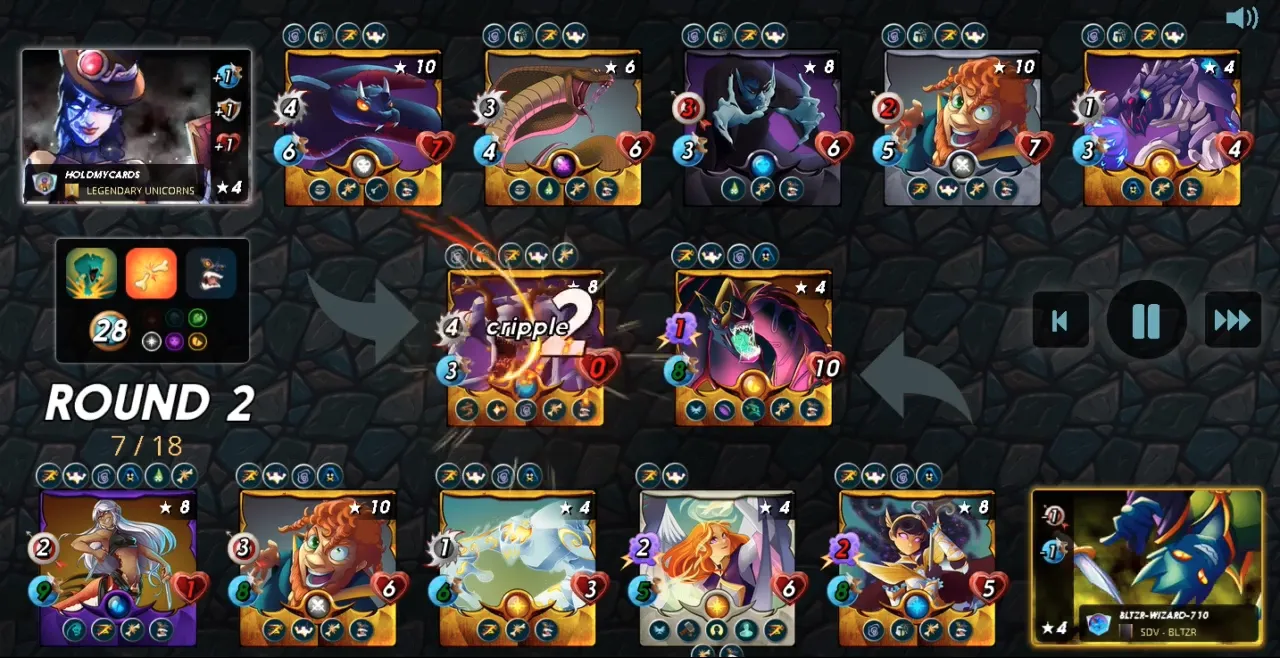
Round 2 :
The enemy monster Windeku dies in this round due to an attack from the Time Mage, with the death of my Windeku, the speed of all our monsters increases by 1.
This time the attack from enemy Uraeus on Naga Assassin could be avoided, and resulted in active backfire skill from Naga Assassin, and Uraeus was hit by 2 counterattack damage.
In this round, all enemy attacks were successfully avoided by our monsters.

Round 3 :
The round begins with the Naga Assassin, whose HP decreases by 2 due to the effects of poison dies, then is resurrected by Adelade Brightwing, and her poison status disappears, and left with 1 HP.
Without the chance to attack, enemy monsters Silent Sha-Vi and Uraeus perished in this round.
None of the enemy's attacks hit our monsters.
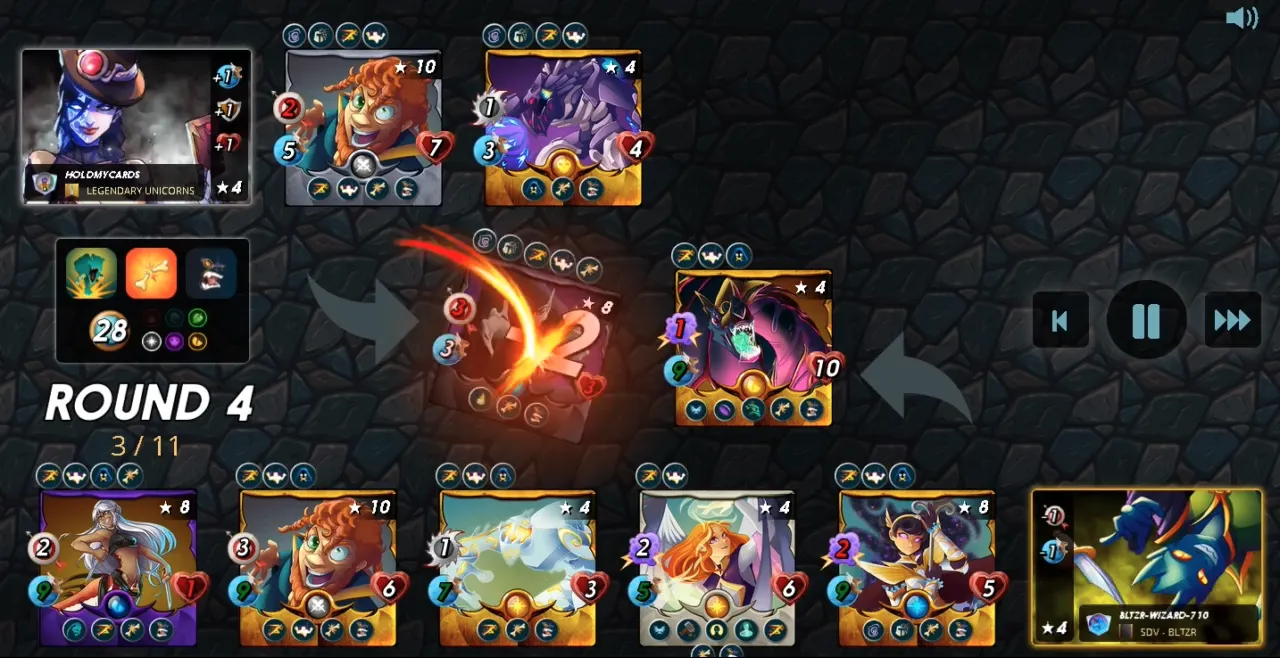
Round 4 :
In this round, the enemy can't do much because there is only 1 attacker left, the Supply Runner.
- The enemy soul strangler died in this round killed by the Naga Assassin
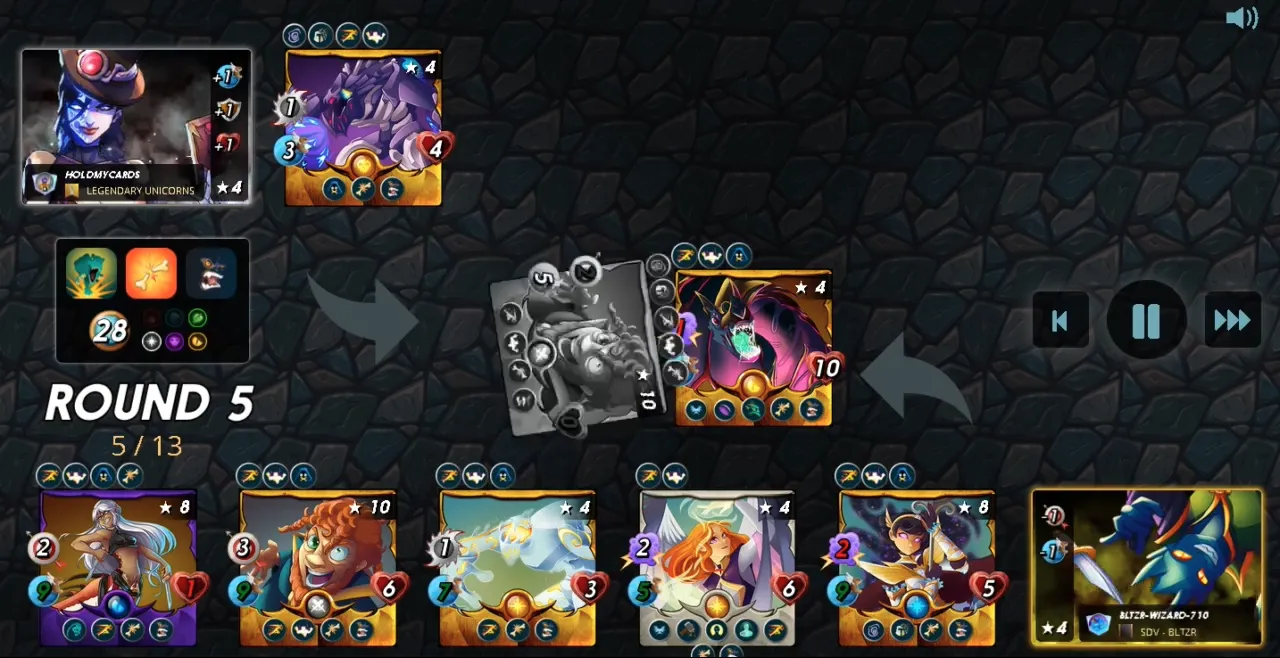
Round 5 :
The battle ends when our Supply Runner attacks the enemy Corpse Fiend and kills him, with the death of the last monster on the enemy's side, victory is on our side.
Did your strategy work?
Yes, this strategy is going very well. With considerable speed differences, the enemy has difficulty hitting our monsters. At the end of the round none of our monsters died, and almost all enemy attacks could be avoided by our monsters.
Void Dragon and Naga Assassin played an important role in this battle. These 2 tankers can protect other attacking monsters from enemy attacks.
The enemy breaks his attack into 2 teams, attacking our monsters in the first and last position. With the attacks not concentrated on one particular monster, the probability of the Void Dragon and Naga Assasin remaining unharmed increases.
I am grateful for you investing your time in reviewing my battle report. If you come across any errors, kindly let me know and leave a comment. Thank you, friends.
If you're new to the game, feel free to use my referral code https://splinterlands.com?ref=poplar-22 to join.
Credit
- Thumbnail using canva
- Divider taken from @kyo-gaming
- Card description, Image and graphic taken from https://Peakmonsters.com and https://Splintercards.com