It's time to post my very first piece of art here! While I am not a player of Splinterlands, it is a big part of the HIVE community and I can really appreciate the effort of the art and the lore behind the characters.
When I saw the Water Nymph, inspiration struck and I put my stylus on my screen and here is the process. (iPad Gen 8, Apple Pencil Gen 1 and Procreate if you were wondering 😉)

I found a wonderful reference photo on Unsplash by Engin Akyurt. He has a number of wonderful underwater shots. You can see the original photo here:
woman in black shirt and green shorts in water
I started by making a rough sketch using the reference photo.

Once I have a basic rough sketch, I started adding the details. In this case, changing the hair to be more appealing, and clothing the Water Nymph in her iconic uniform. Then I added the concept for the background. The next step is the basic line art. While I was doing the line art, I caught a few details that I had missed in the sketch phase, like the gauntlet. I added that in the first line art phase.
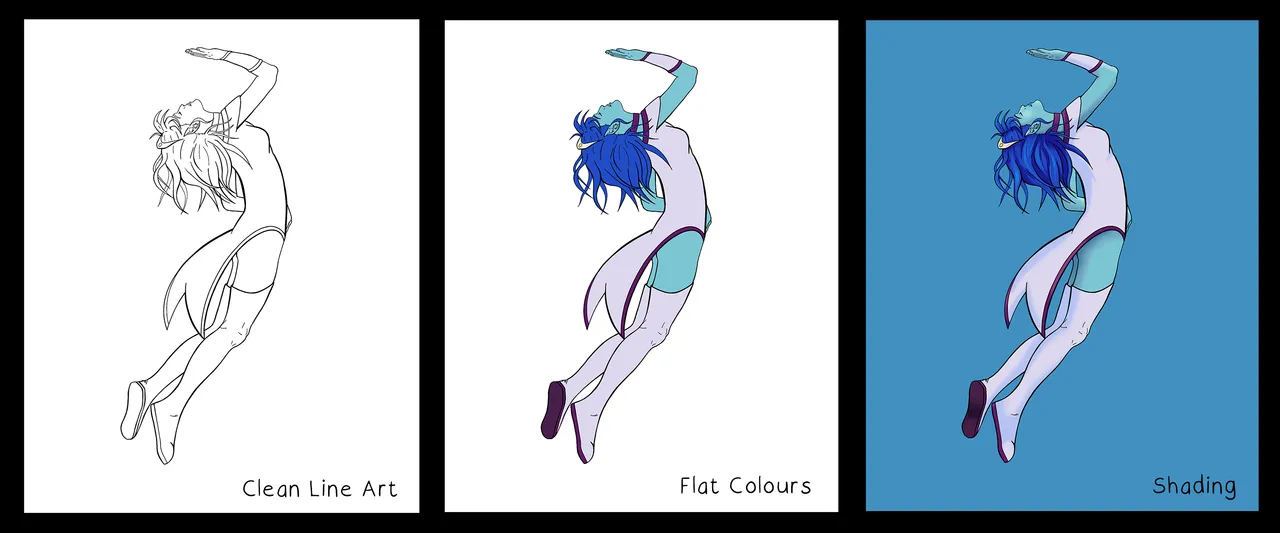
Once the basic line art is done, I started adding more life to the line art, by adding weight to certain lines. The next step is adding the flat colours. I used the original Splinterlands Water Nymph art to establish the basic colour pallet.
Then the real fun starts. This is the step that I probably enjoy the most. (Although it can also sometimes be the one that frustrates me the most!) Shading! When shading starts, it is when the piece starts to get some life.
Art Tip: Before you start shading, always keep in mind where your light source is, and how it will affect your subject matter.
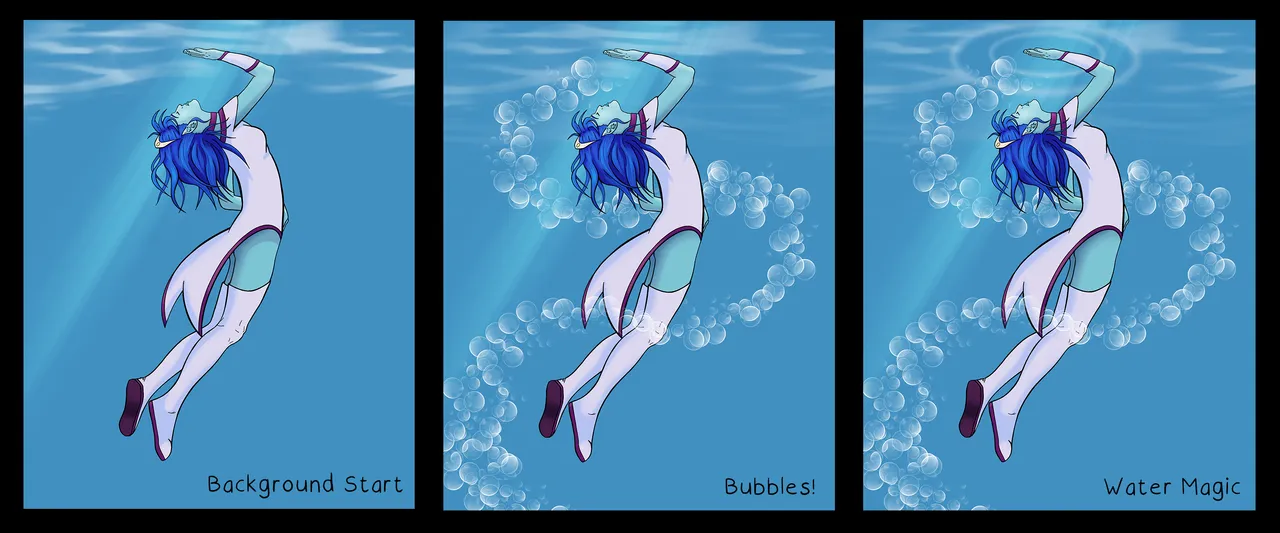
While I did have an initial concept in mind for the background, when I began playing around with different brushes in Procreate, the concept ended up changing. And that is okay! I didn't like the initial concept when I started painting it out, because it just felt like it detracted from the Water Nymph. So I dropped the underwater plants and rocks and focused more on the water itself.
The water surface brush is a standard brush that comes with Procreate. The light beam I created using a free brush by Attki. You can find it here:
Free Light Particles Brushpack! by Attki
And the bubbles come from a Photoshop brush on Brusheezy I modified.
Photoshop Brushes by Brusheezy!
Water Bubble Brushes
While brushes can help in creativity, in the end, it does come down to how you make use of them. Though they can really help if you don't want to spend hours and hours drawing every single bubble. I did consider doing so, but let's face it, this post would have only happened several weeks from now if I had. And the bubbles are only a supporting element, not the main focus.
So now it's looking pretty good, but it's still missing a few last touches. A bit of a gradient difference in the water, because if you have ever been underwater, it is something you will notice. I pictured this Water Nymph in beautiful coastal waters with light beach sand on the bottom.

After that, all that was left was to sign and add the date. So there you have it, my @splinterlands Water Nymph inspired Fan Art. I'll be entering this into the weekly art contest. Hold thumbs for me 😅
Splinterlands Art Contest Week 187!
And thank you so much for reading this post and viewing my art!