This week's battle challenge is all about the Crystal Jaguar. What's a Crystal Jaguar, you ask? Well, according to the lore, it's a big cat that slept through the apocalypse and then got even bigger. But I don't blame you for not knowing, because I myself have never more than glanced at this card before today. So let's start by taking a deeper look at it.
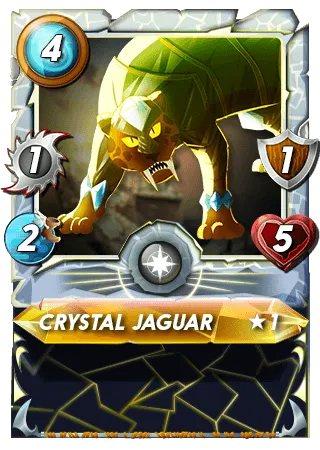
Crystal Jaguar is a 4 mana melee Life monster from the Untamed set, available to use as a starter card. At level 1 it's got 1 damage, 2 speed, 1 armor, 5 health, and no special abilities. Nothing terribly exciting there, but it's at least a usable 4 mana tank.
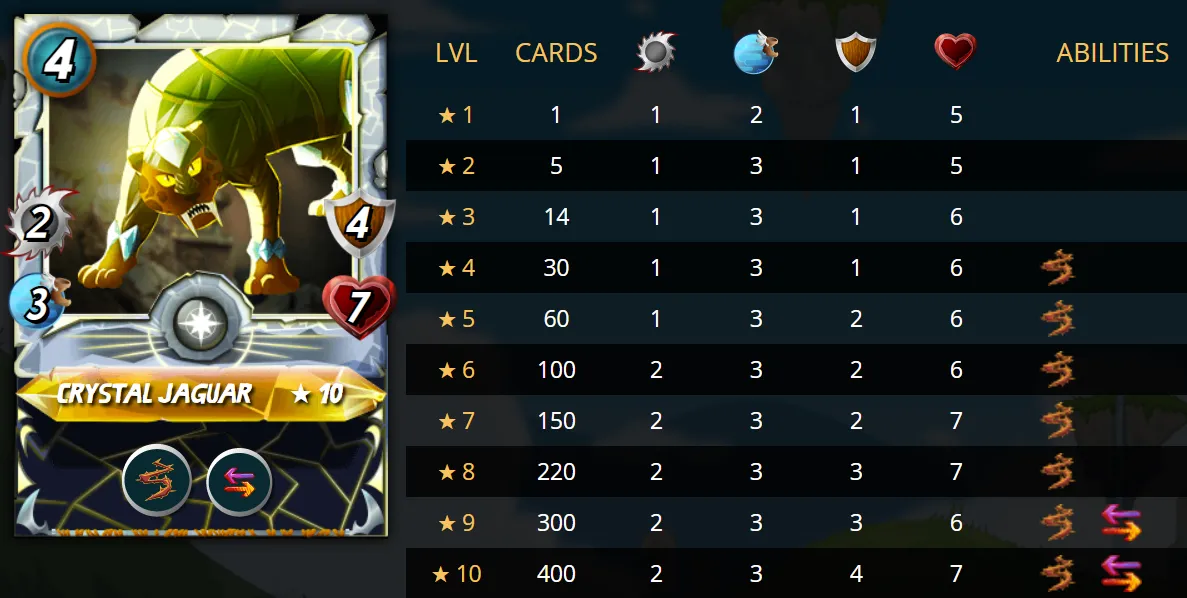
At level 4, Crystal Jaguar gains the Thorns ability to damage anyone who hits it with a melee attack, and at level 9 it gains Retaliate, so it has a chance of hitting back as well. By level 10 the Jaguar's armor has been boosted to 4 and its health to 7, while its damage and speed have only increased to 2 and 3, respectively. The main advantage in having a leveled Jaguar seems to be in those abilities, which will heavily punish melee enemies.
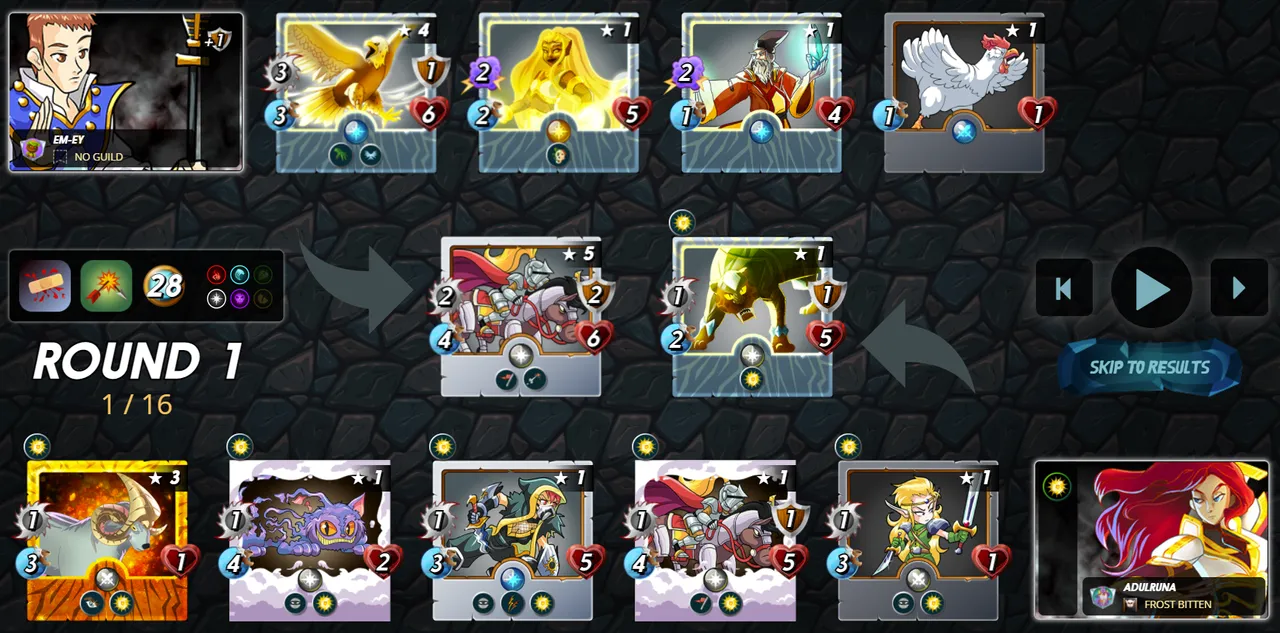
All that being said, I only have a level 1 starter Crystal Jaguar, so that's what I'll be using. My usual Life deck is based on buffing the damage of some good Sneak monsters and hiding them behind a tank, normally Silvershield Paladin or Shieldbearer. So the only way I can see Crystal Jaguar fitting into that deck is as a slightly cheaper replacement tank, or as an additional tank if I have the room. The Jaguar's 1 armor will only take a single hit, so I think I will use Lorna Shine as my summoner so that Divine Shield can help it hold out longer. Let's try it out!
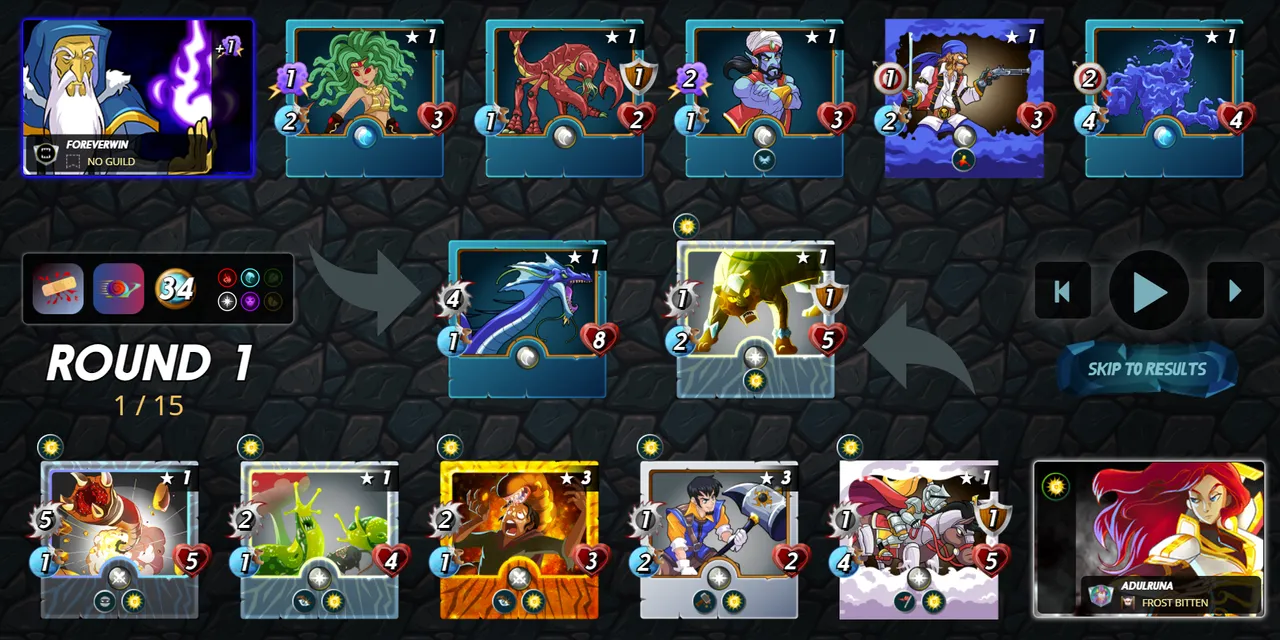
First we had a Reverse Speed battle against an Alric. Those magic attackers on the enemy team worried me since they would ignore the Jaguar's armor, potentially making my Armorsmith useless. I brought in a few 1 speed attackers to take advantage of the rule set, so hopefully they could chop through the enemy team quickly enough.
As it turned out, the Jaguar's armor was irrelevant, as it only absorbed a hit that would not have mattered anyway. However, Crystal Jaguar kept the enemies off my Silvershield Knight for a round, and that was enough for my heavy hitters to gain the advantage. In the end, Crystal Jaguar was our only casualty.
Our second battle was against another Life team, and once again there were some worrisome magic enemies present. I must have been concerned about losing my Knight because of the previous battle, so I put an extra body in front of him. Elven Cutthroat was not exactly a tank, but with Divine Shield it might hold the enemies back for a little while.
Our Jaguar was cut down quickly once again, but between it and the Cutthroat, our attackers were given enough time to take out all the back line enemies. The extra armor delayed us a bit, but our Divine Shield balanced things back out. Another win for the books.

For our final battle, we were up against the Scarred Llama Mage, but luckily no Kron. In fact, we had the Lost Magic rule set, so we didn't have to worry about any magic enemies ignoring our Jaguar's armor for a change. We did have to contend with a big healer on the enemy front line. Since most of our attacks would be directed at the back line, that Golem was going to wind up Standing Alone too. Therefore it was essential that we clear the back quickly enough to keep all of our damage available for the final boss.
And we did, just barely. This time our Jaguar was able to tank 7 hits before dying, thanks to the Armorsmith's help. The Knight got all the way down to 1 health and only survived thanks to a lucky miss by the Orc, but by then we were able to take out enough enemies to keep him safe. The Golem spent the rest of the battle repeatedly bashing at our Knight's replenished armor while we slowly whittled him down. The Golem's healing meant we only netted 2 damage per round, assuming all our attacks connected, but that was enough to eventually win.
Crystal Jaguar was not exactly the star of the show here, and I would certainly rather have brought stronger tanks along instead, but I can't deny that we still have 3 wins under our belt. I think the Jaguar earned a firm rating of "Good Enough For 4 Mana." I won't be turning to the Jaguar in the future if I have more mana available, but I also won't shy away from it if I'm in a crunch. I also look forward to trying out a higher level Jaguar one day to see how well those anti-melee abilities perform.

If you enjoyed this article, please consider giving an upvote, a follow, or even a reblog. Any show of support is appreciated.
Haven't even started playing Splinterlands yet? You must have been pretty bored to read this whole post about a game you've never played. Instead of just reading about Splinterlands, why don't you follow this link and try the game out for yourself?