Hola amigos de la comunidad Tattoo World hoy les quiero mostrar unos de mis trabajos más recientes que realice esta semana. Se trata de un arreglo y cobertura al mismo tiempo de este tatuaje antiguo.
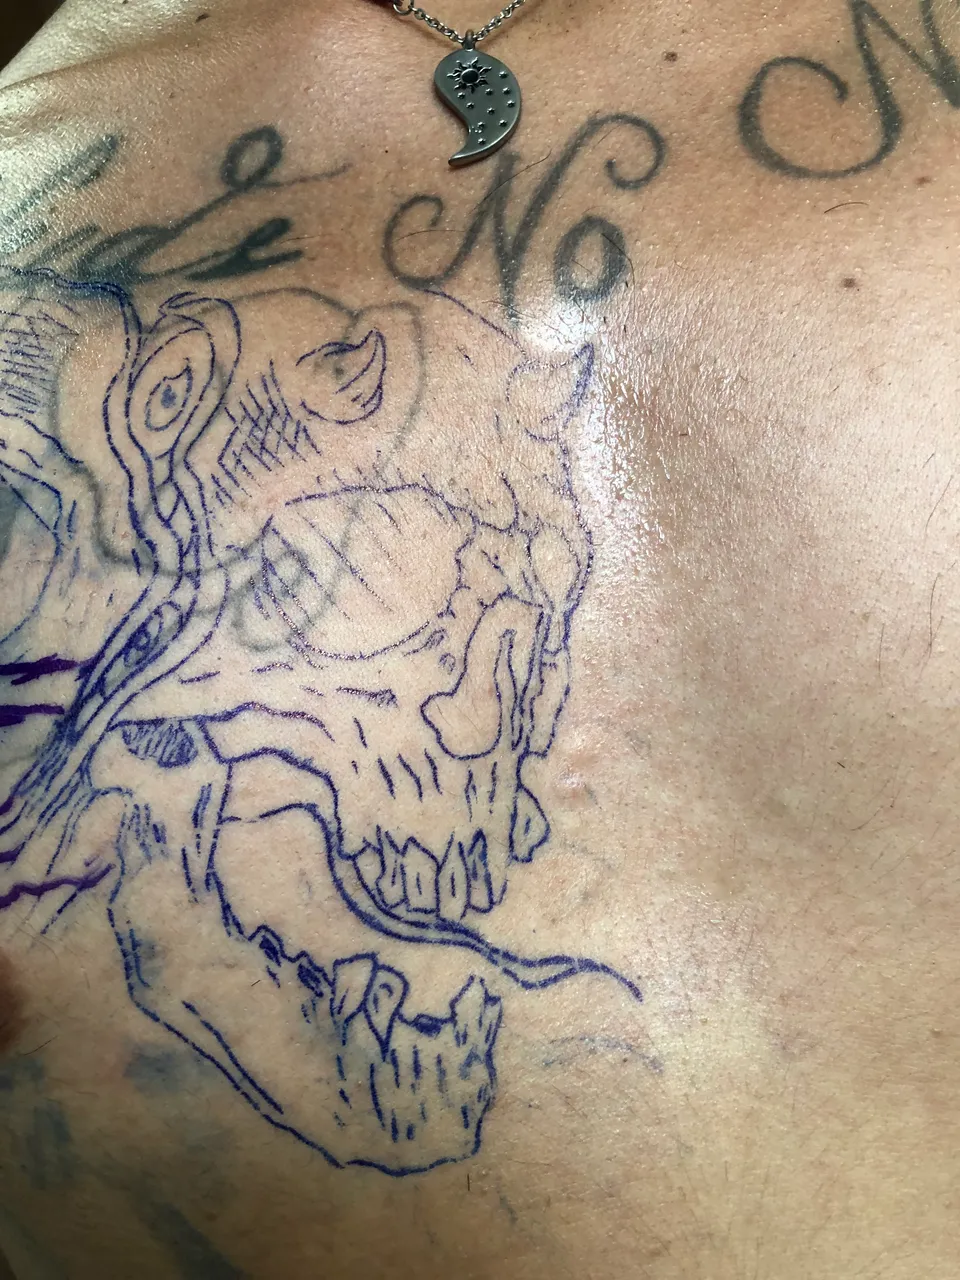
Es un proyecto que lo iremos trabajando por partes, comenzado por esta calavera que está bastante mal hecha, ya que tiene mucho queloide y cantidad de errores en el diseño. Los principales son los errores de proporción en las cuencas del cráneo y aún más los dientes, estos no tienes sentido alguno, y no menos importante el tatuaje está mal orientado, es decir, está al revés.
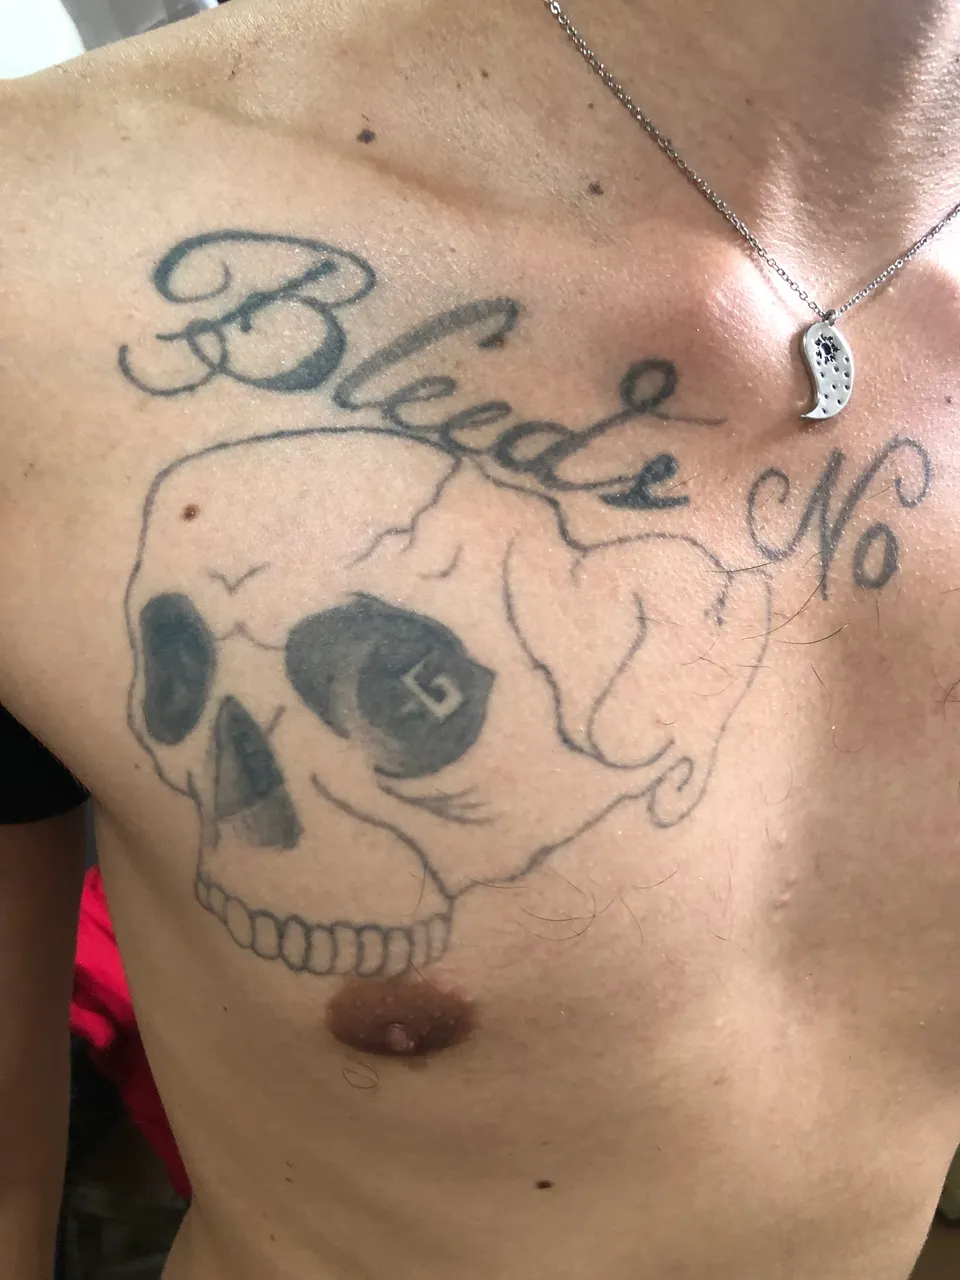
Lo principal a tener en cuenta para este tatuaje fue cambiar la orientación del tatuaje para que no se vea que está mirando hacia fuera, ya que esto es casi una regla universal que el diseño tiene que mirar hacia dentro del cuerpo y no hacia afuera.
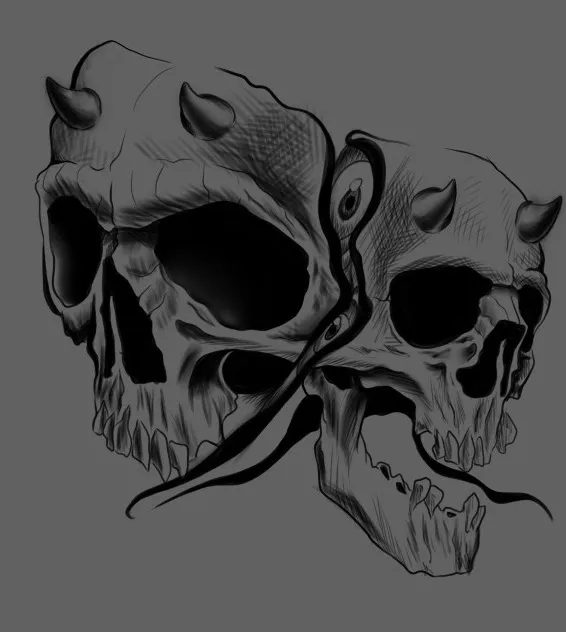
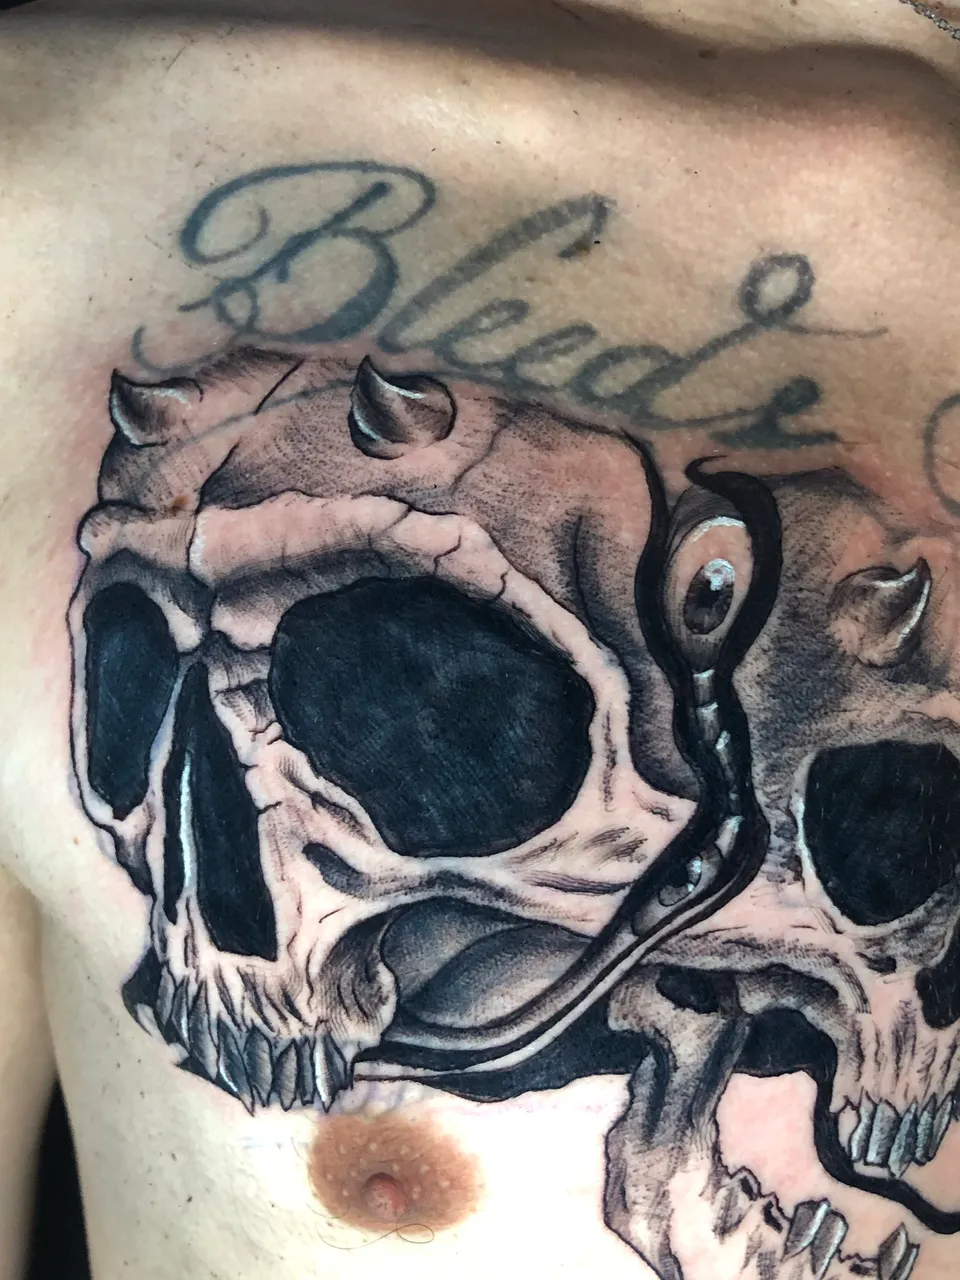
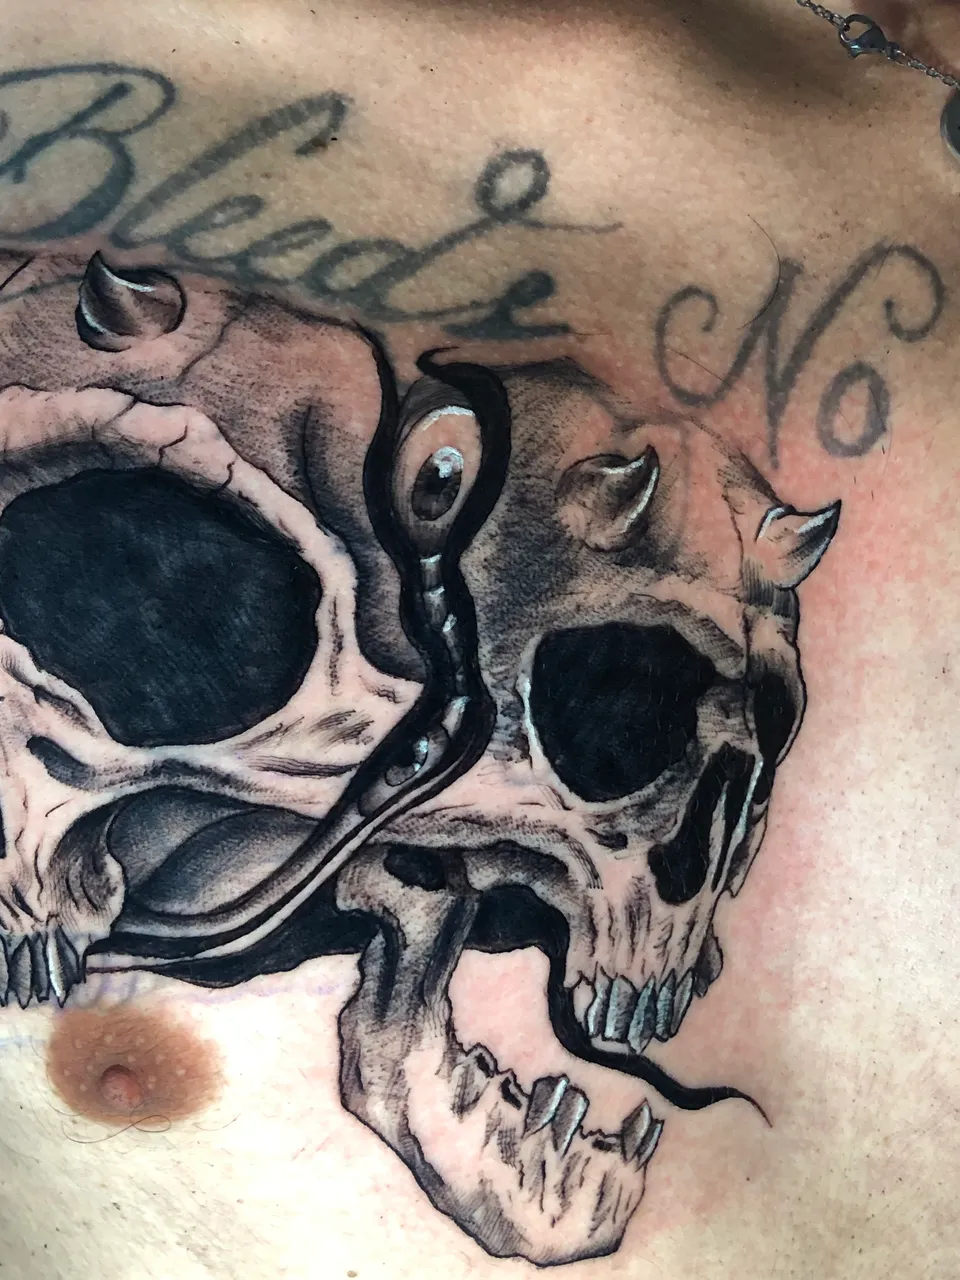
Entonces decidí hacer otra calavera y dividirlas en el centro con unas líneas y hacer unos detalle orgánicos como se muestra en la imagen.
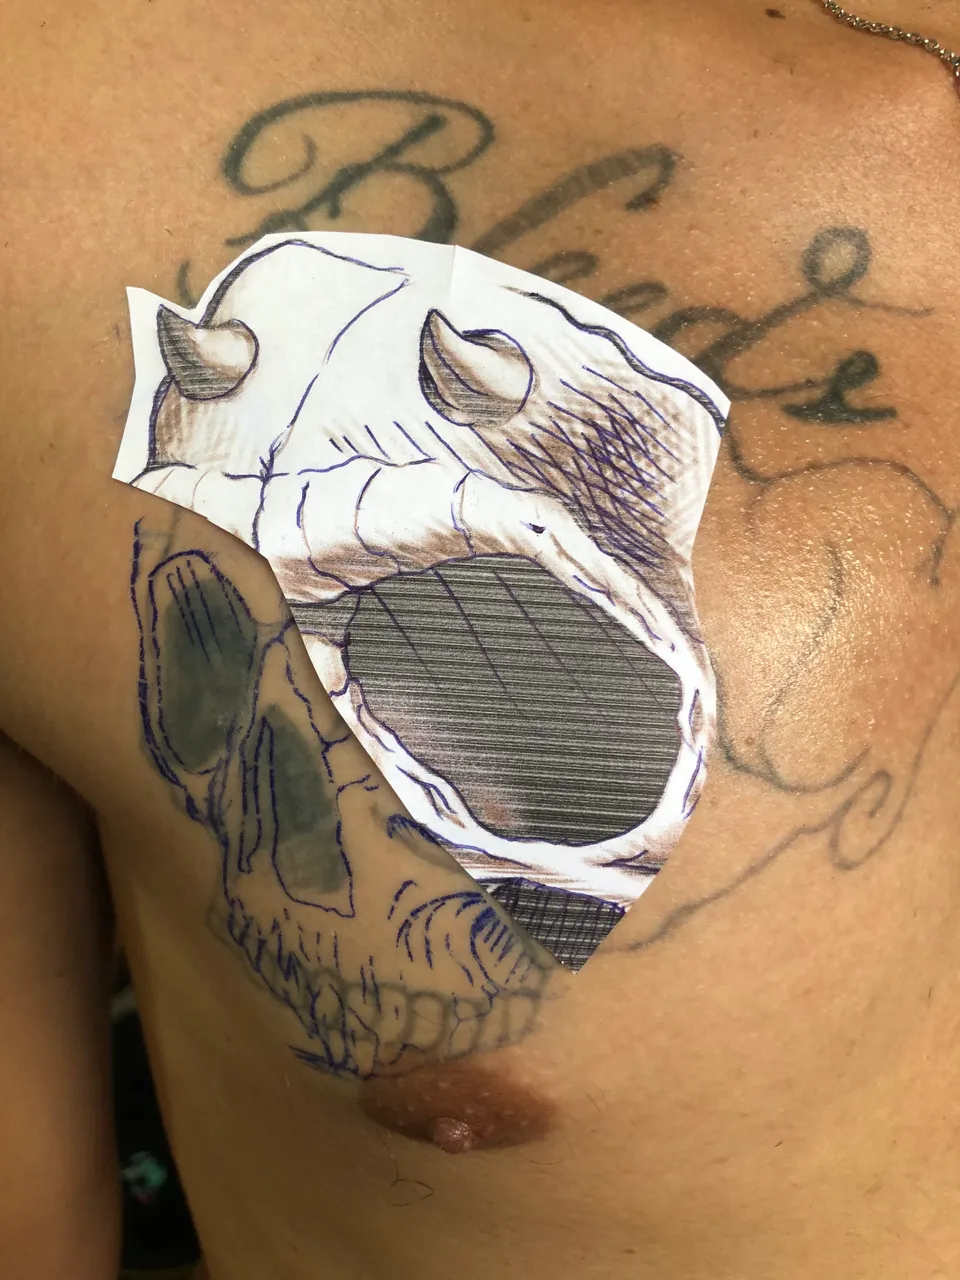
Luego de realizar la plantilla completa, para encajar mejor en la piel, hice recortes en le diseño con los puntos más importantes para colocarlos en el sitio que yo quería de manera más precisa.
Continúe colocando el resto de la platilla Y dibujando con el marcador hectográfico los detalles restantes.
El diseño lo estuve haciendo en Photoshop, el cliente me dio libertar creativa para este diseño y este fue el resultado.

Para este diseño y por lo grande que es lo estuve haciendo de manera bastante pausada y más por el dolor que conlleva el tatuar una piel maltratada. En la primera calavera la trabajé al estilo impresor haciendo todos los detalles de una vez para tratar completar dichos sectores.
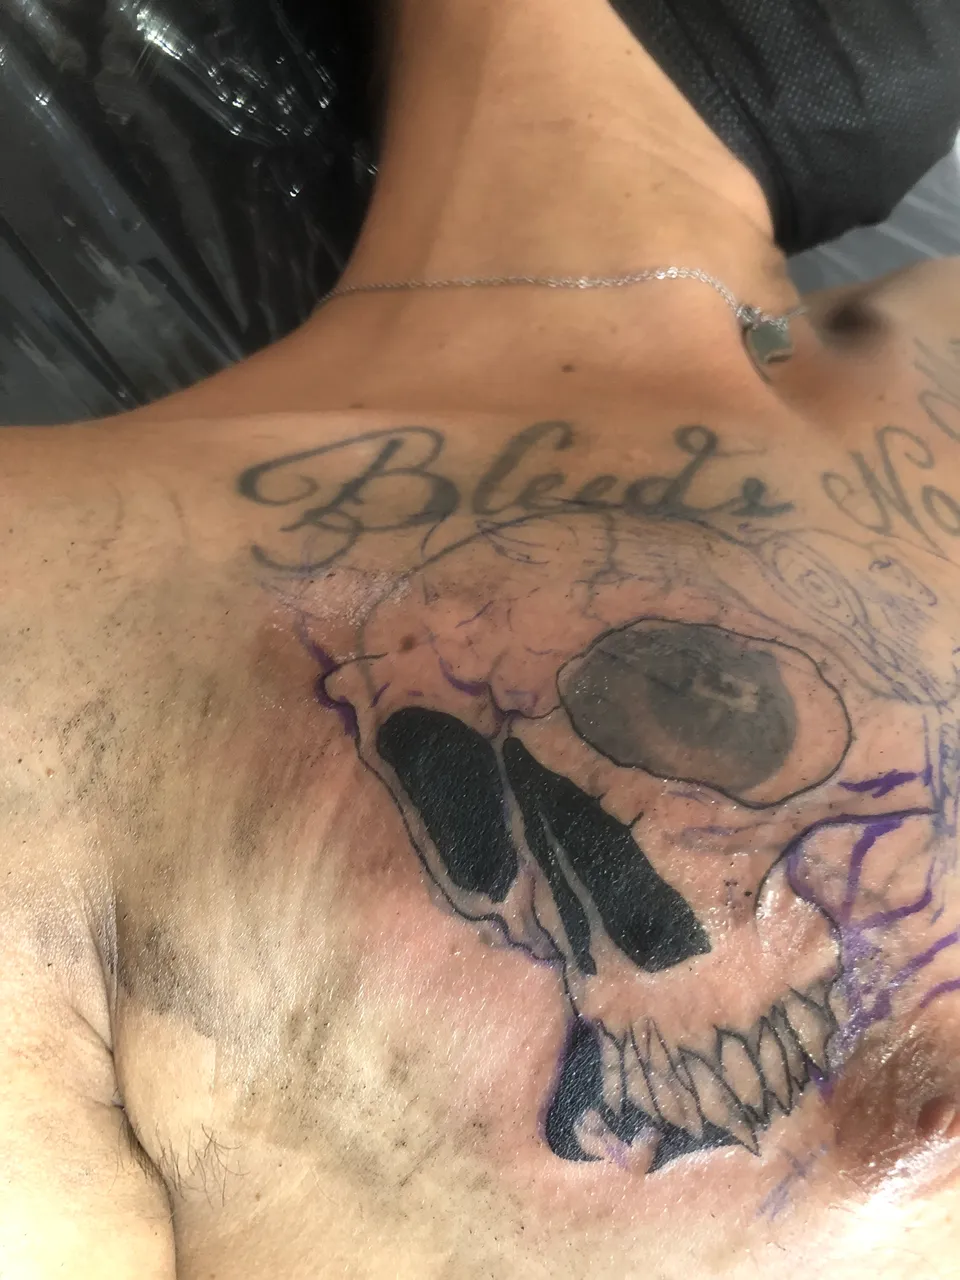
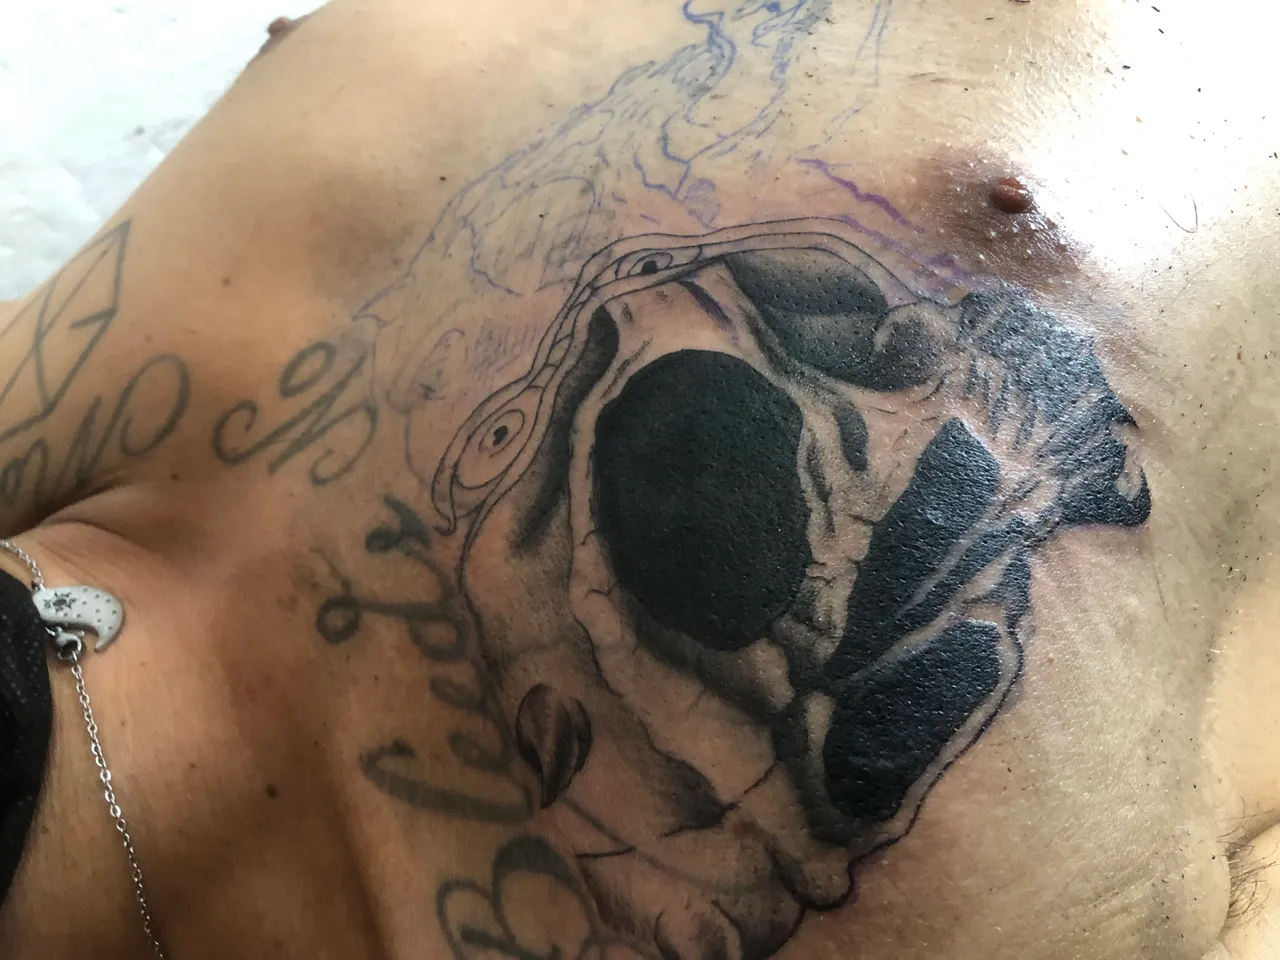
Con la segunda calavera si me tomé la libertad de realizar primero todo el delineado y luego los detalles, esto para poder ir limpiando bien toda la zona y dejar humectada las partes ya tatuada, esto ayuda a reducir un poco el enrojecimiento y alivia el dolor.
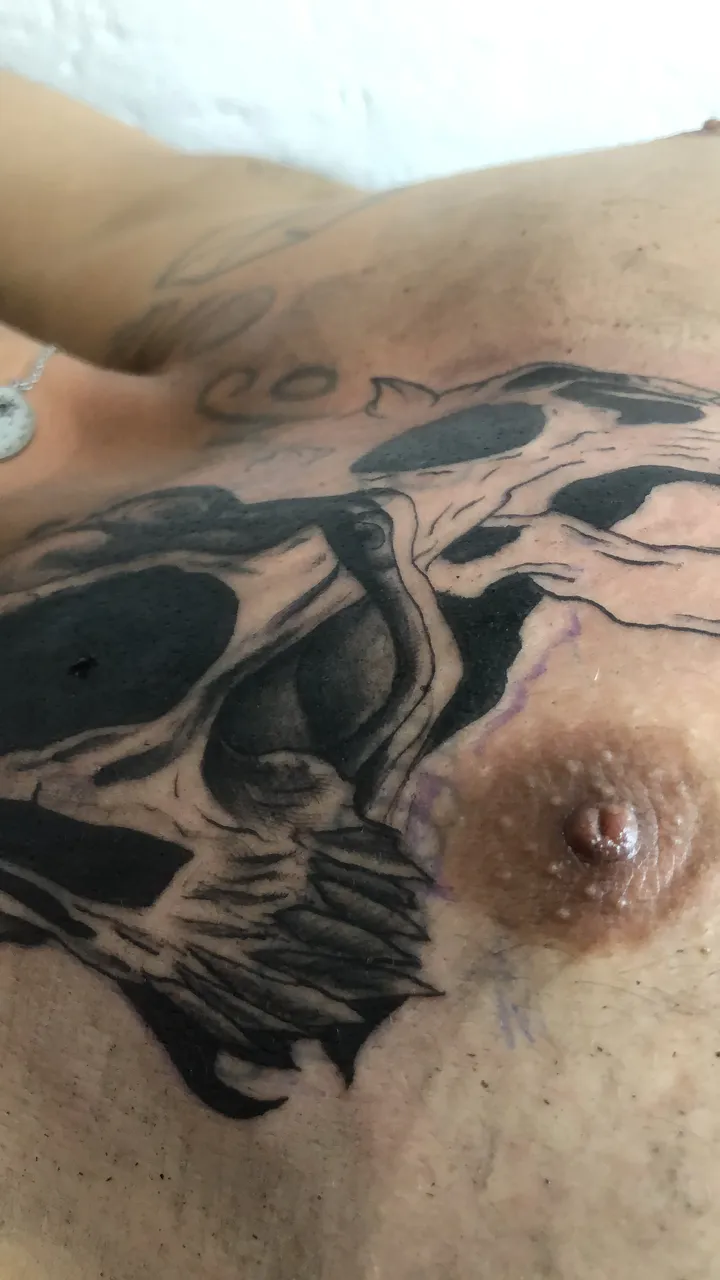
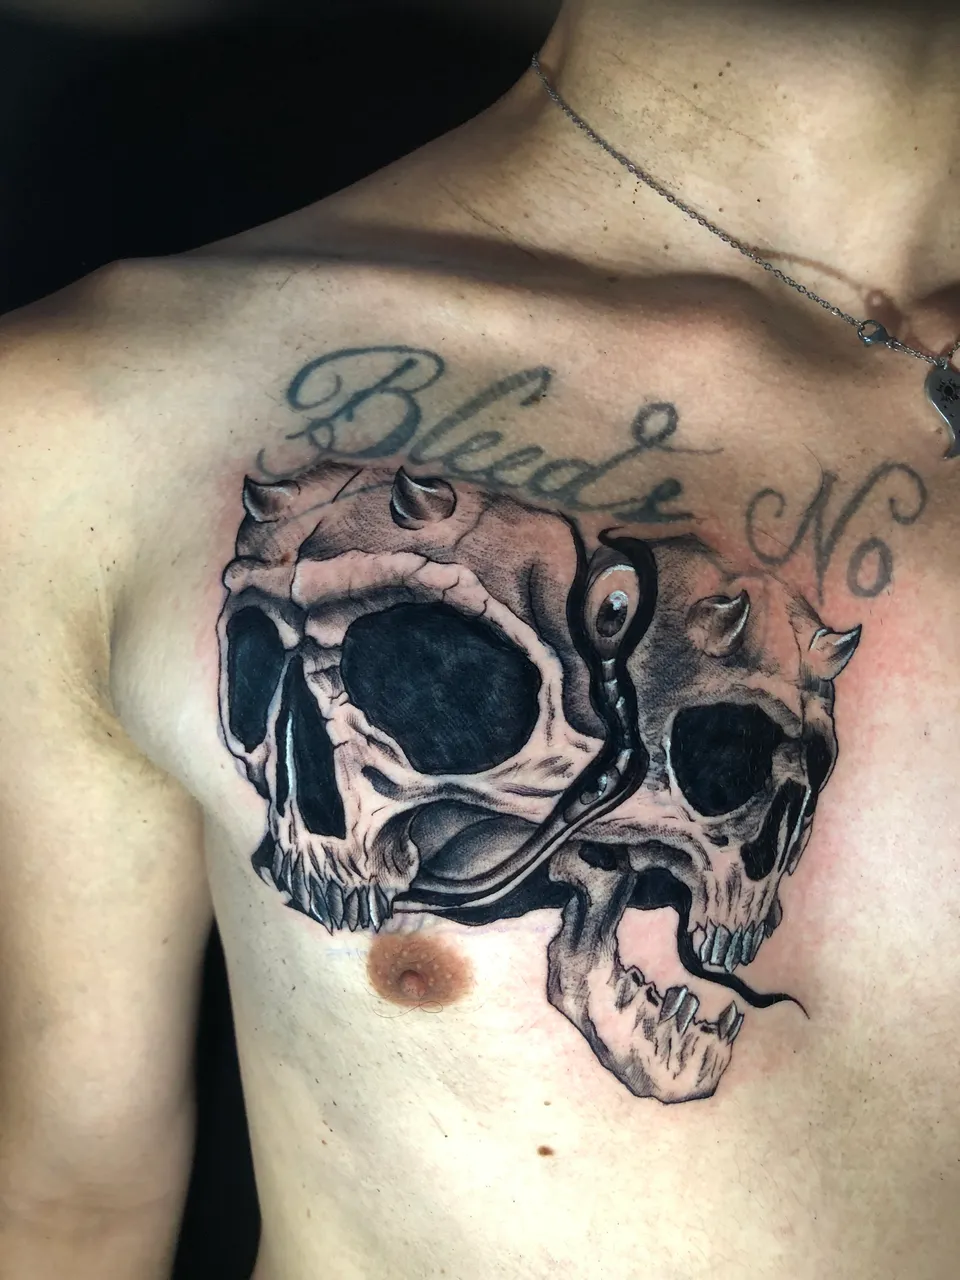
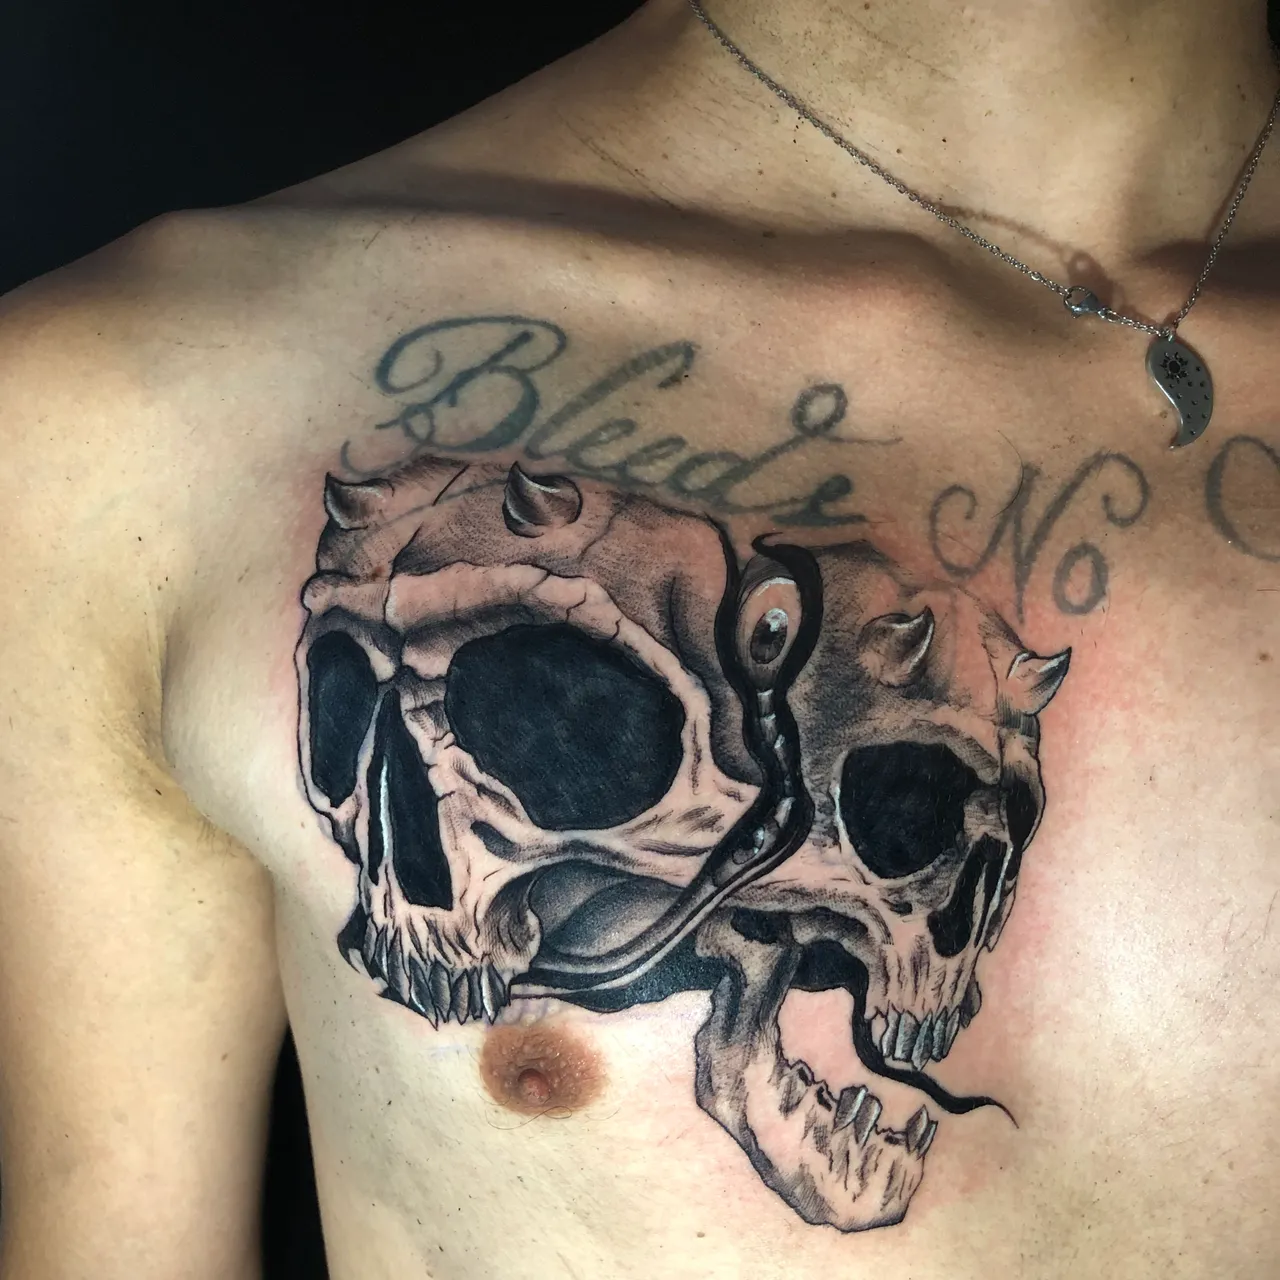
Este tatuaje me tomo alrededor de 4 horas de trabajo, fue bastante arduo, pero muy satisfactorio para mí y mi cliente quien quedo contento. Pronto estaré arreglando la parte de las letras de arriba de este proyecto.
Les dejo por acá el resultado final y unas fotos detalles del trabajo esperando que las disfruten.
Las fotos las tomé con mi IPhone X
¡Espero que les haya gustado. Te invito a leer mis próximas publicaciones y siempre estaré dispuesto a responder tus preguntas y comentarios!
Eng
Hello friends of the Tattoo World community, today I want to show you some of my most recent work I did this week. This is a fix and cover up of this old tattoo at the same time.
This is a project that we will be working on in parts, starting with this skull, which is quite badly done, as it has a lot of keloids and a lot of errors in the design. The main ones are the proportion errors in the skull sockets and even more the teeth, these make no sense at all, and not least the tattoo is badly oriented, that is to say, it is upside down.
The main thing to keep in mind for this tattoo was to change the orientation of the tattoo so that you don't see that it is facing outwards, as it is almost a universal rule that the design has to face inwards and not outwards.
So I decided to make another skull and divide it in the middle with some lines and make some organic details as shown in the picture.
After making the complete template, in order to fit better on the skin, I cut out the most important points of the design to place them in the place where I wanted them more precisely.
I continued placing the rest of the template AND drawing with the hectographic marker the remaining details.
The design was made in Photoshop, the client gave me creative freedom for this design and this was the result.
For this design and because it is so big, I was doing it in a quite slow way and more because of the pain that comes with tattooing a damaged skin. I worked on the first skull in the printer's style, doing all the details in one go to try to complete those sectors.
With the second skull I took the liberty of doing all the outlining first and then the details, this to be able to clean the whole area well and leave the parts already tattooed moisturised, this helps to reduce the redness a little and alleviates the pain.
This tattoo took me about 4 hours of work, it was quite arduous, but very satisfying for me and my client who was very happy. Soon I will be fixing the top letters part of this project.
I leave you here the final result and some detailed pictures of the work, I hope you enjoy them.
The pictures were taken with my IPhone X
**I hope you liked them. I invite you to read my next posts and I'm always happy to answer your questions and comments!