Hello Holozing Community!!
How r u today? the new #holozing contest that has been active for a few days. The purpose of the contest is awesome so after confirming that drawing instead of writing is okay, I set out to do what I had in mind. You can check out all the details of the Healer traits contest.
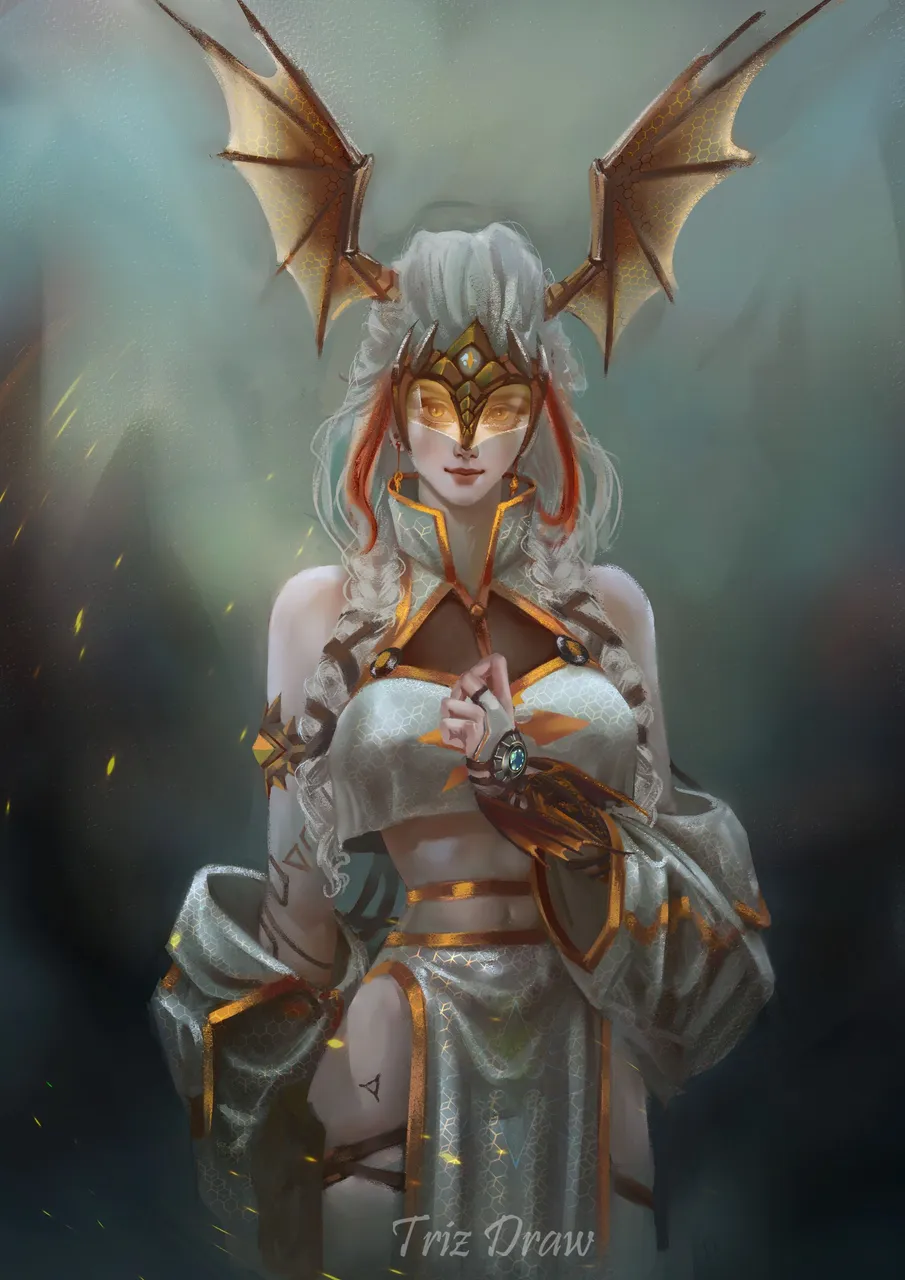
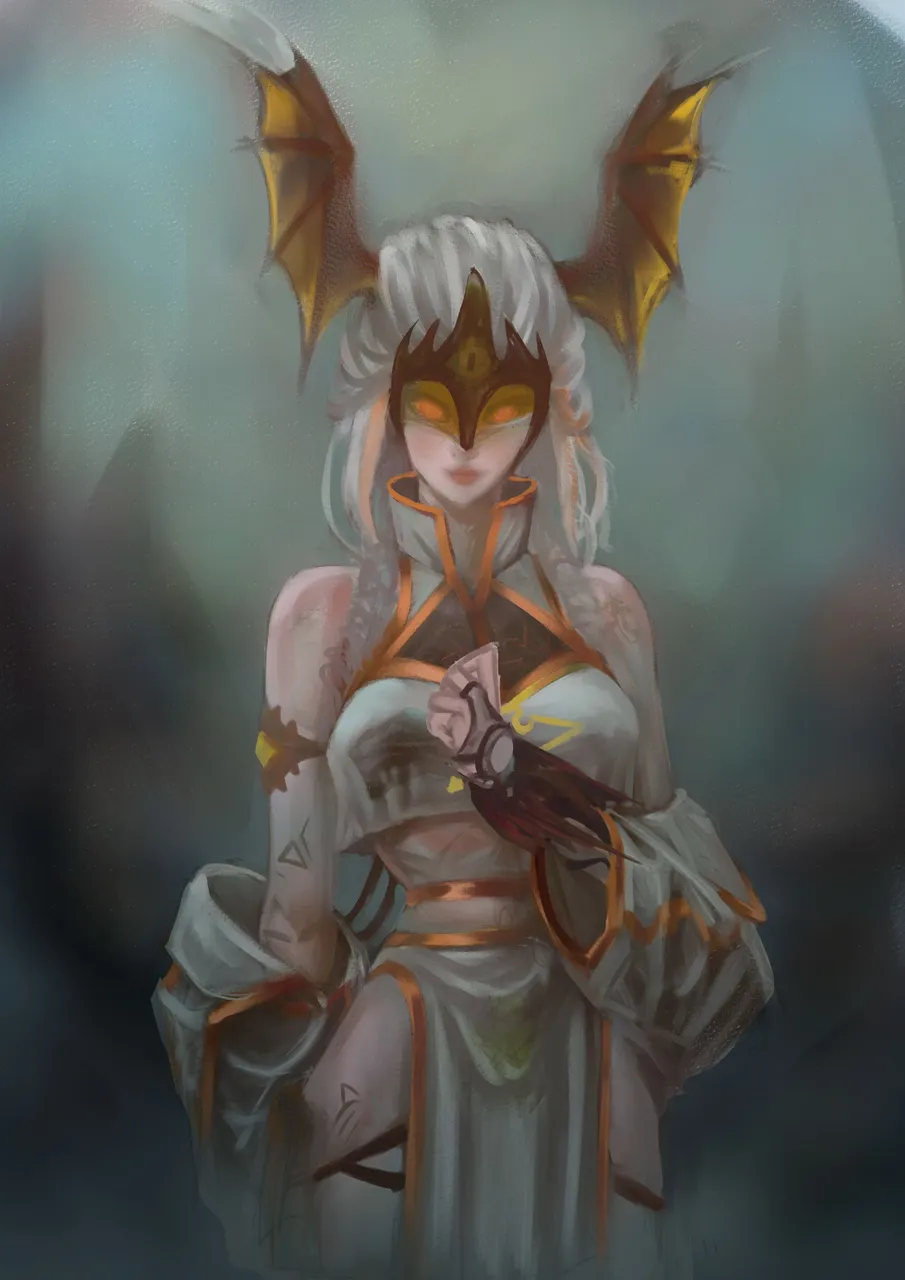
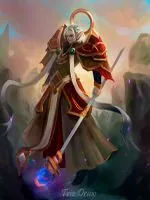
I've decided to go for the Female Light Healer.

For this version, I went with the dragon theme because, aside from really liking them, these creatures represent immense power. Also, I wanted to mix in a bit of a futuristic vibe, which was another allowed theme.
So, the big question was, where should I throw in those dragon elements?
Parts I'd include in this design:
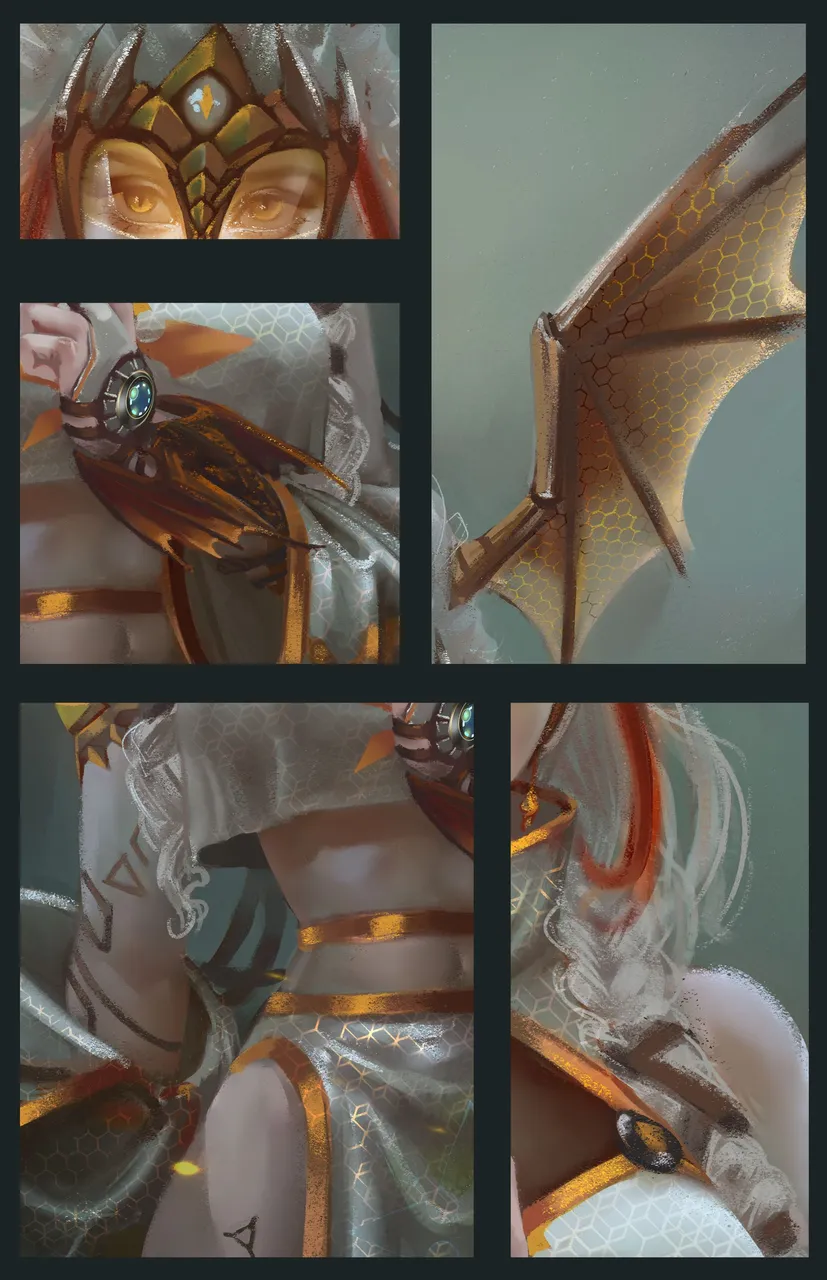
Head: Dragon wings coming out from her head, with some detail.
Forearm: The Gloves, a small dragon as a bracelet.
Eyes: A kind of Cyberpunk Glasses anddd Dragon eyes, ofc.
Arms: Some cool tattoos.
Hair: Going for a Viking-inspired look (I'm into that).
Clothing: The top design is almost the same, but it would be looser, the jacket wouldn't be complete, just on the arms and quite wide. The jacket itself wouldn't exist. Finally, I'd complete the outfit with a skirt.
After the whole idea behind this drawing, let's dive into some of the steps to make it happen. OMG, another video to add to the never ending list of videos to make. But I've put together a GIF nothing fancy and not the whole video just different parts nut hopefully it's viewable and not too fast well actually, it is 🤣.

 |  |
|---|
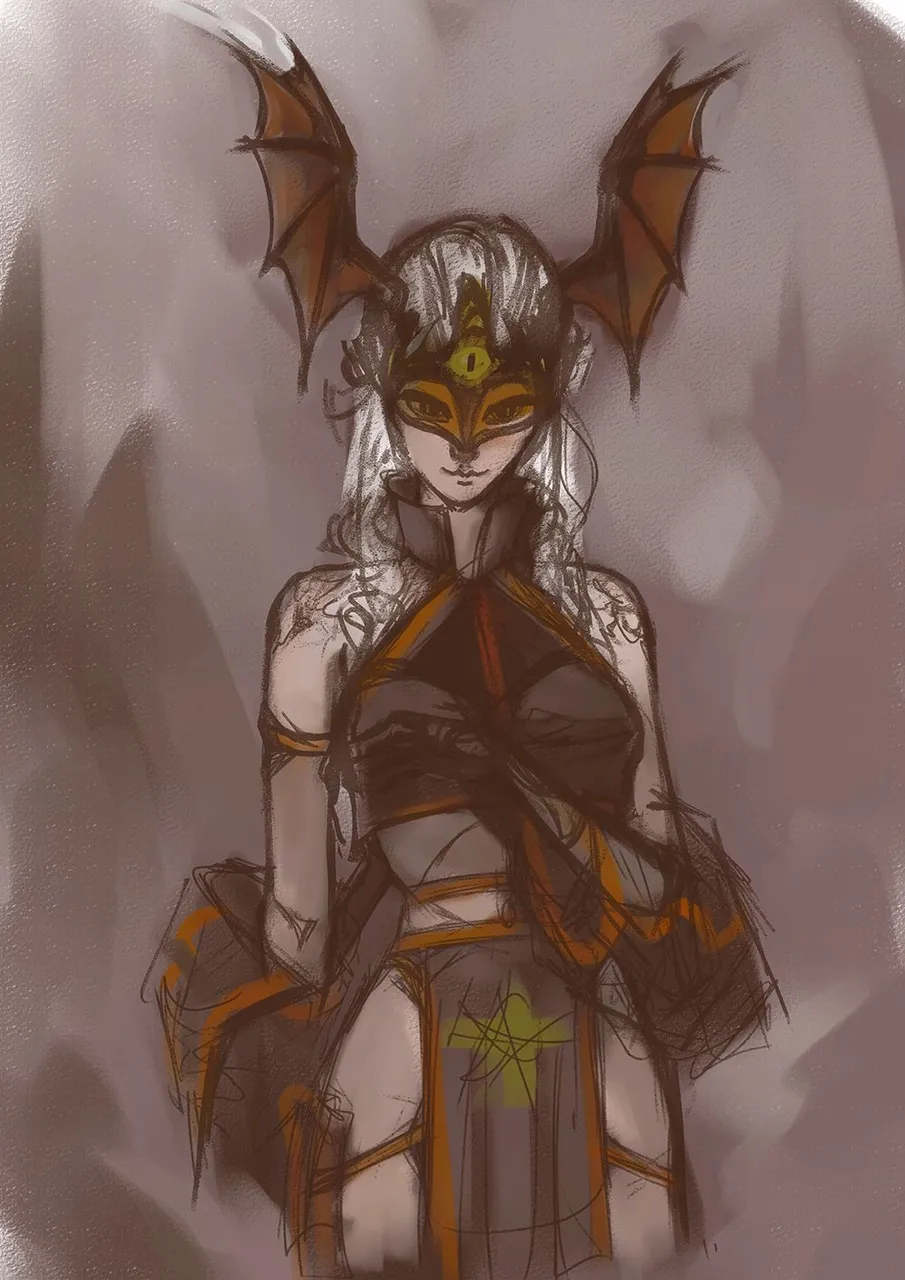
I started sketching with some not soooo pretty lines to figure out what I wanted to add to the design until I had a complete sketch. I didn't bother cleaning up the lines because I wouldn't need them later. On a layer under the lines, I laid down a base using the same color.
Even though it looked just a kinda dark in the previous step, it was cool. I was lightening it up by throwing in the basic colors here and there though there was still more to add. It was getting clearer what the character was, standing out from the background.
 |  |
|---|
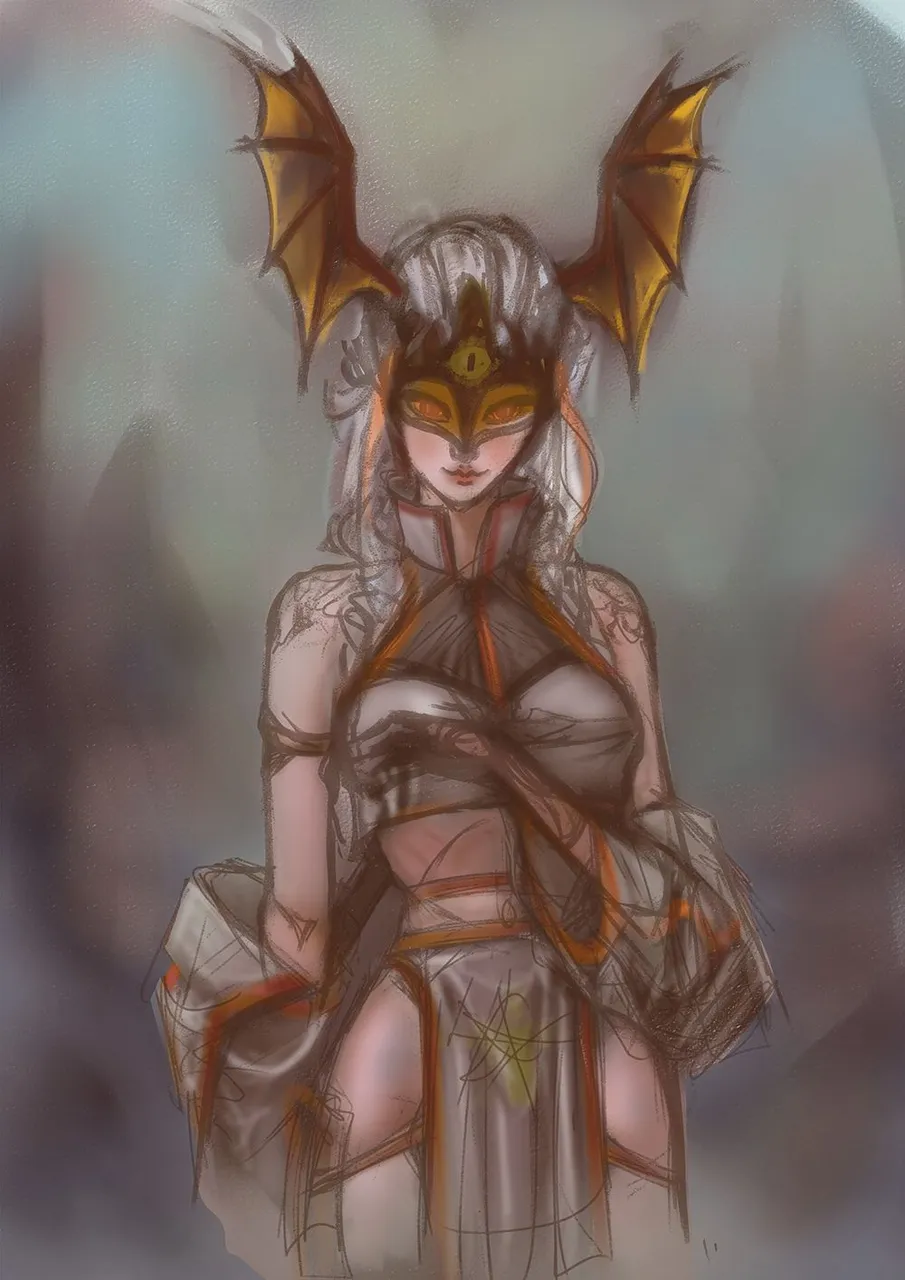
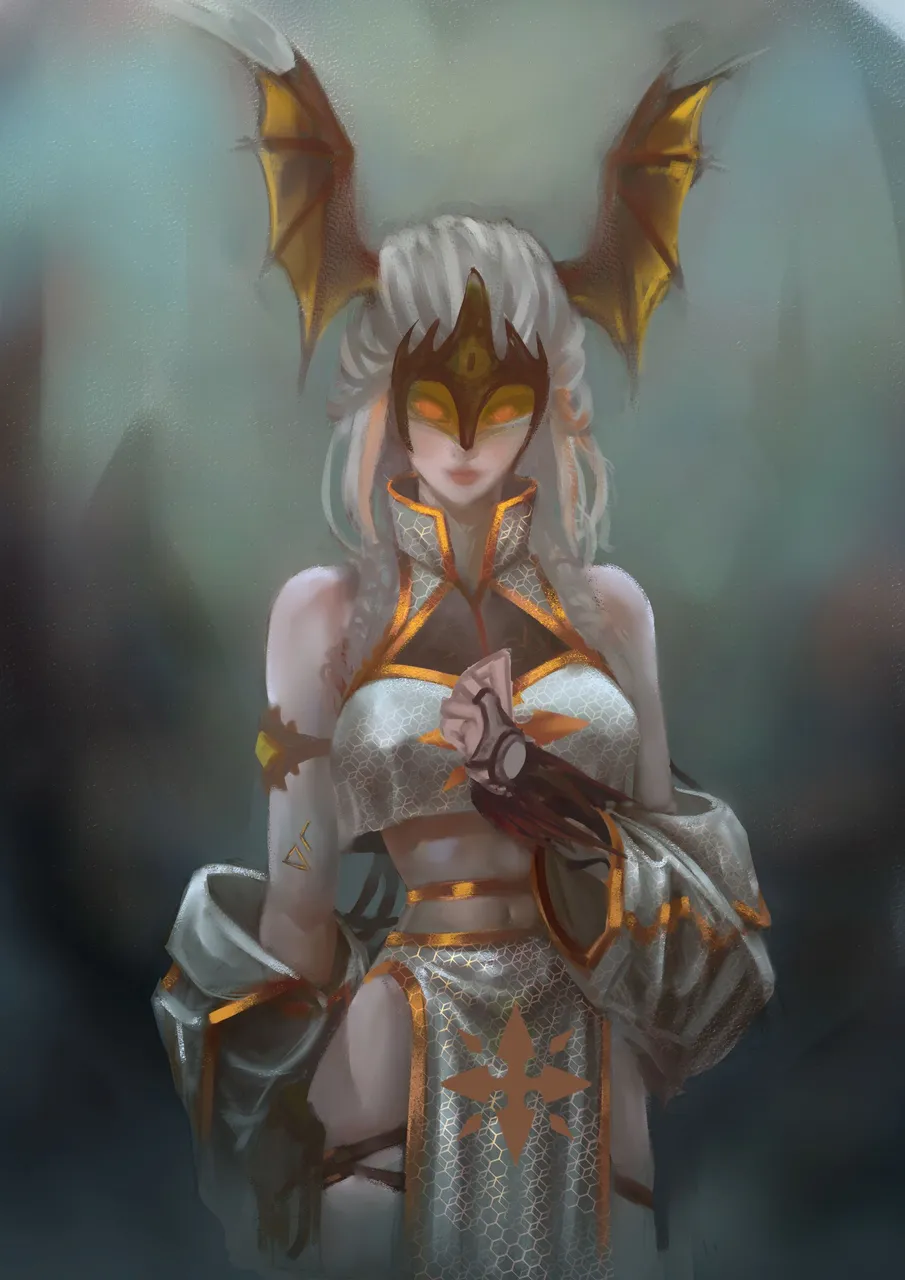
In most of the drawing, I worked on a single layer and I just lowered the opacity of the lines that were still there. The suit was supposed to be whiter but gradually it was getting to its color. The character originally had only one color, yellow, but in this case, I changed it a bit by adding some orange too.
There were hardly any lines left and things were a bit more detailed ☺. I went ahead to do the face, cleaned up things a bit more, added the tattoos, improved the design of the clothes and wings. At this point I had everything on a single layer, working with a few or just one layer is easier.
 |  |
|---|
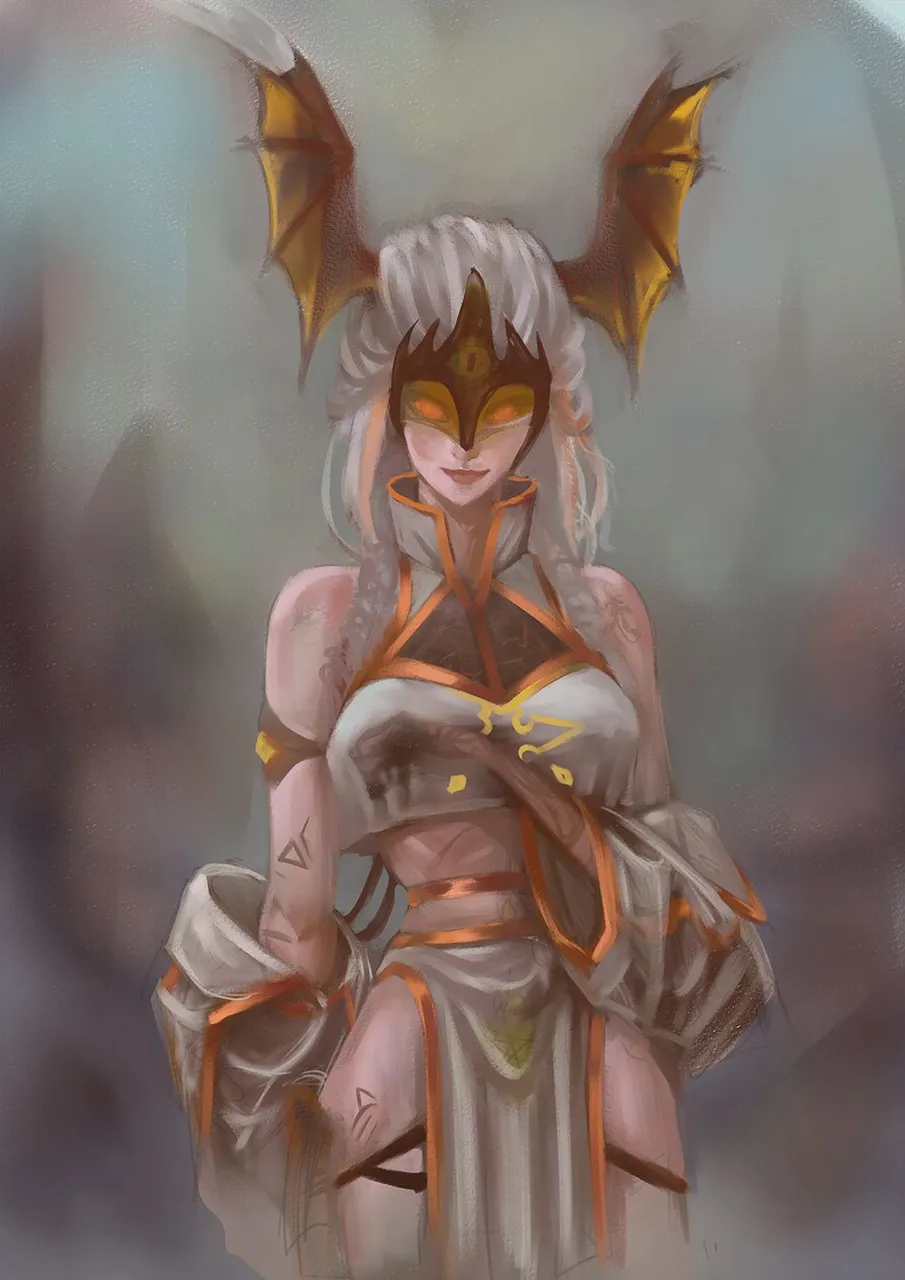
I was working in Corel all that time, the last thing I did there was the hand. From there, I moved to Photoshop to finish up the stuff. In Corel, I work with fewer layers because it's easier, but in Photoshop, among other things, I had to add the textures and left them on different layers to have control for editing if needed.
I have a thing with the beehive pattern, I've done several cyberpunk drawings and I like adding those hexagons. In this case, on the clothes, to make them, since I didn't have that shape handy, I created it . Can you create a hexagon with triangles? Yep! It just takes several triangles.

To finish, there were several things left like the hair, face, the hand, and a few other things that I needed to polish. Essentially, in this drawing inspired by the original artwork, I changed the position a bit, but I've captured in my drawing the idea I had for the Light female..
Thank you very much for taking the time to view my work.

👉🏼👈🏼


𝕺𝖍𝖍𝖍 BTW
👈🏼😶😶👉🏼
𝕱𝖔𝖑𝖑𝖔𝖜 𝖒𝖊𝖎𝖋 𝖚 𝖜𝖆𝖓𝖙
👇🏼