Greetings friends of #hive happy weekend today I brought you a different post, because for the first time I post in this community, at the invitation of a friend, who told me to participate in this wonderful initiative they have, and I said come on granny, you can prove that there is no age to be on the web 3 and publish content a day.
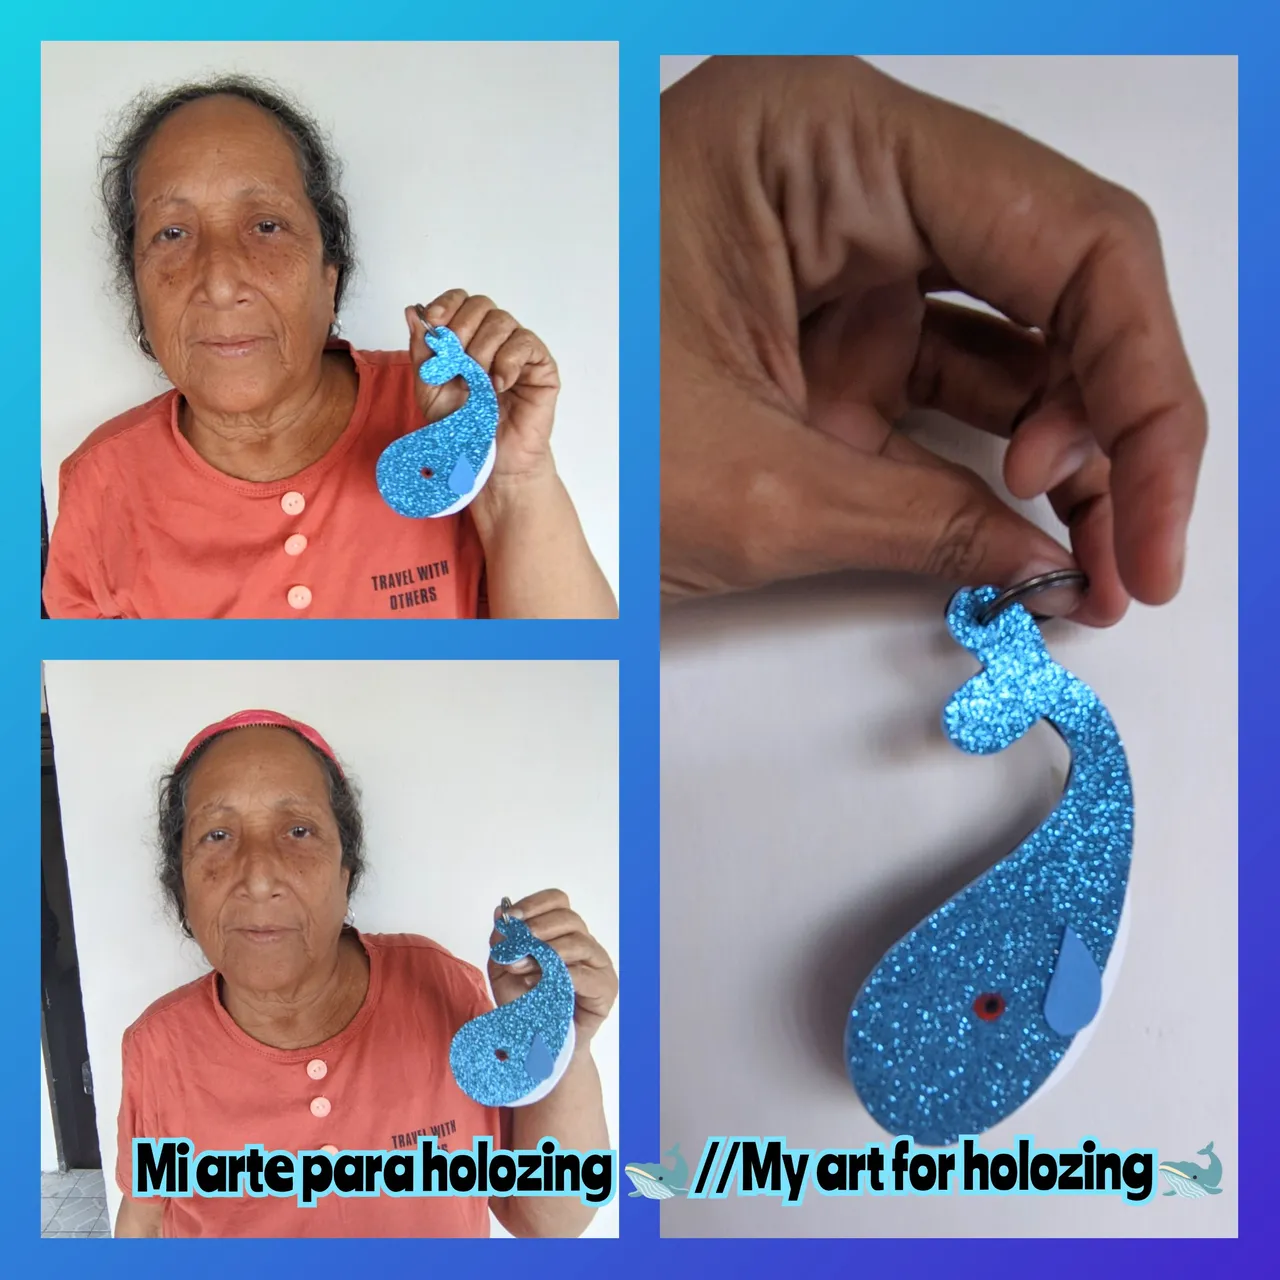
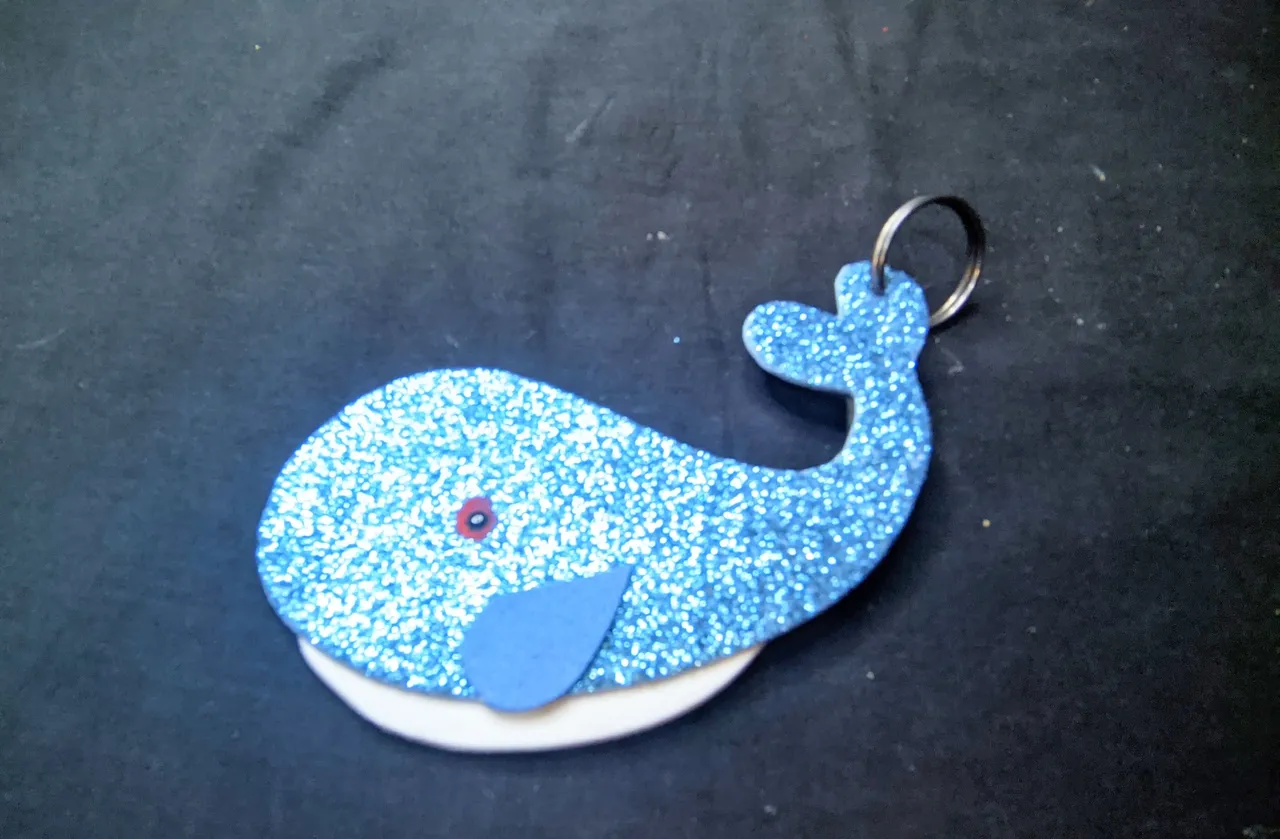
For those who do not know, I am faithful to the contents of manual arts, so it was great to join this #fanart and here I leave you the list of materials, the step by step and the final result of this character named walle, a little whale that today becomes the main character of this keychain that undoubtedly will serve to promote this game that undoubtedly promises to be the best.
MATERIALS
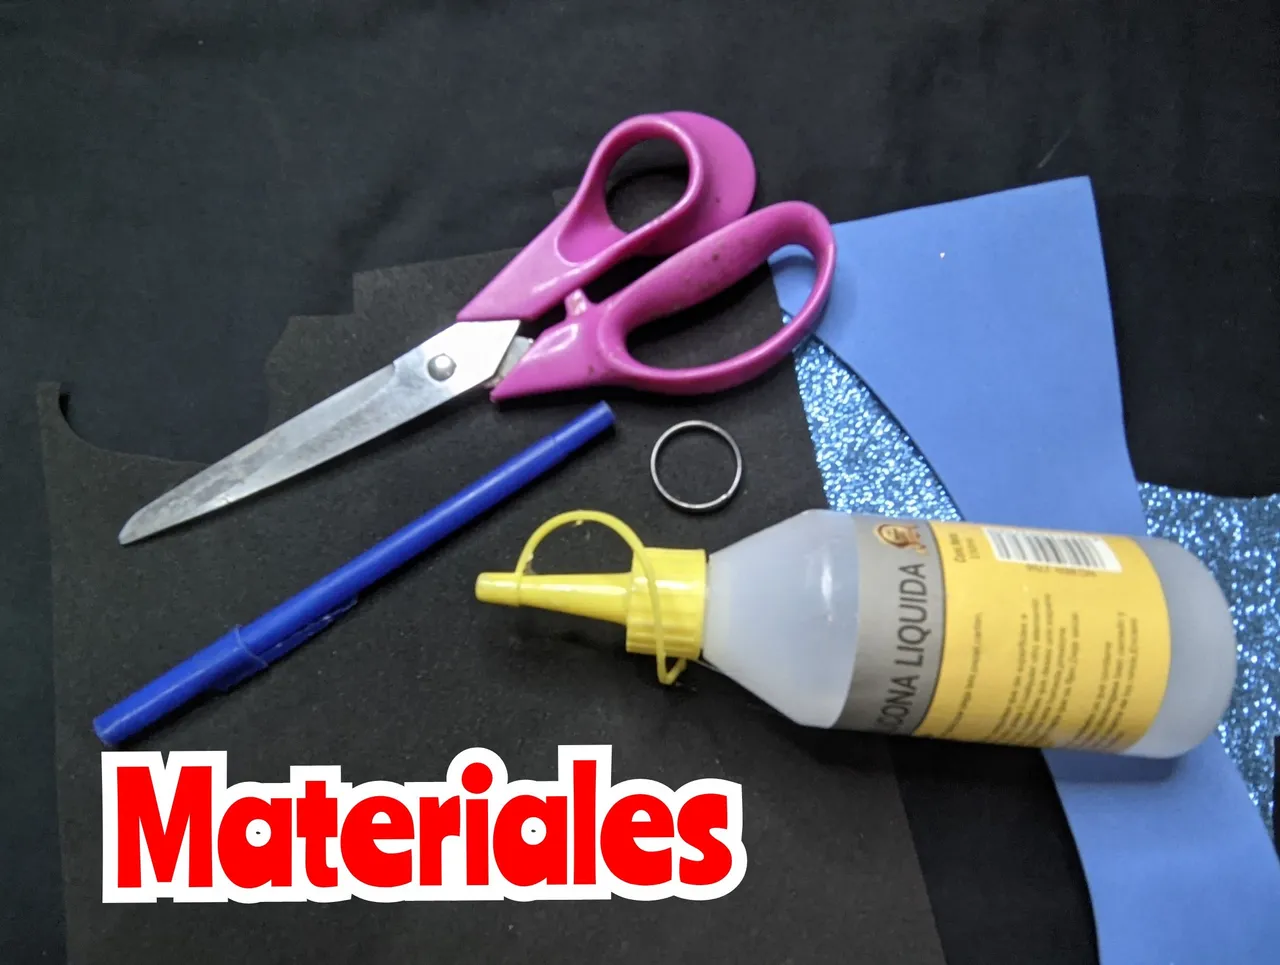
🐋 Blue frosted foami.
🐋 Blue foami.
🐋 White foami.
🐋 Black foami.
🐋 Liquid silicone.
🐋 Red paint.
🐋 Black paint.
🐋 Scissors.
🐋 Brush.
🐋 Pencil.
🐋 Paper.
🐋 STEP BY STEP 🐋
🐋 Step 1:
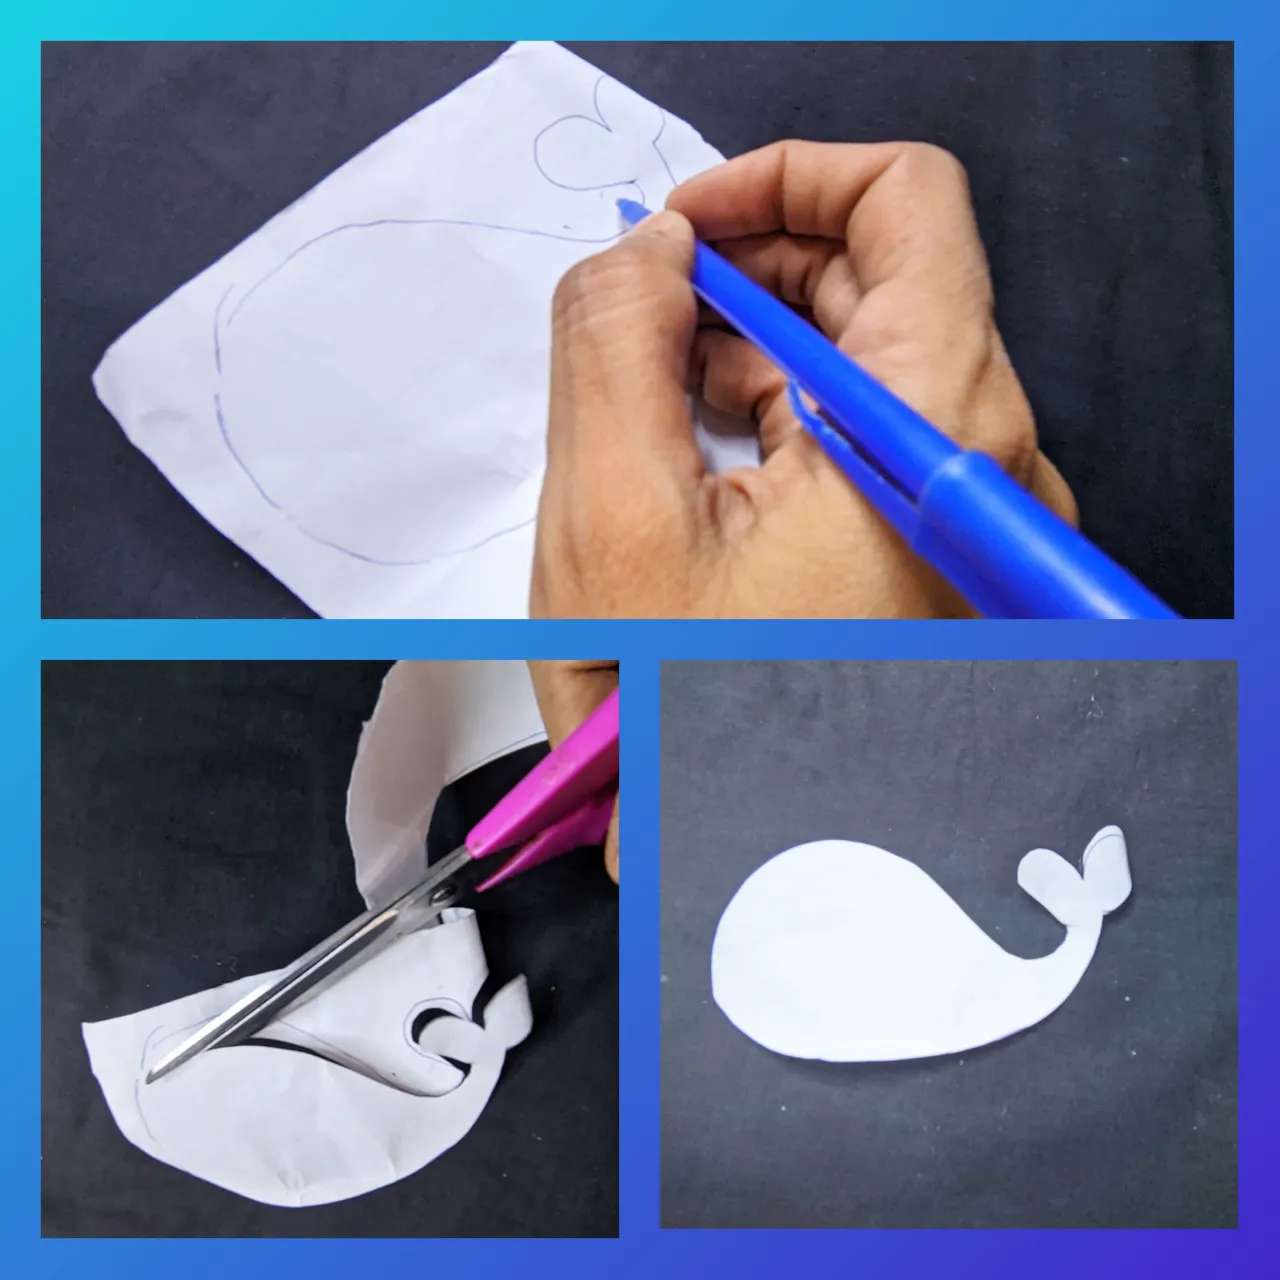
Take a small piece of white paper and with the help of the pencil draw the shape of the little whale, and when we draw it we cut it out and so we have the pattern with which we are going to work.
🐋 Step 2:
Take the blue frosted foami, and on the back side, place on top of it the pattern we drew and cut out the figure of the little whale.
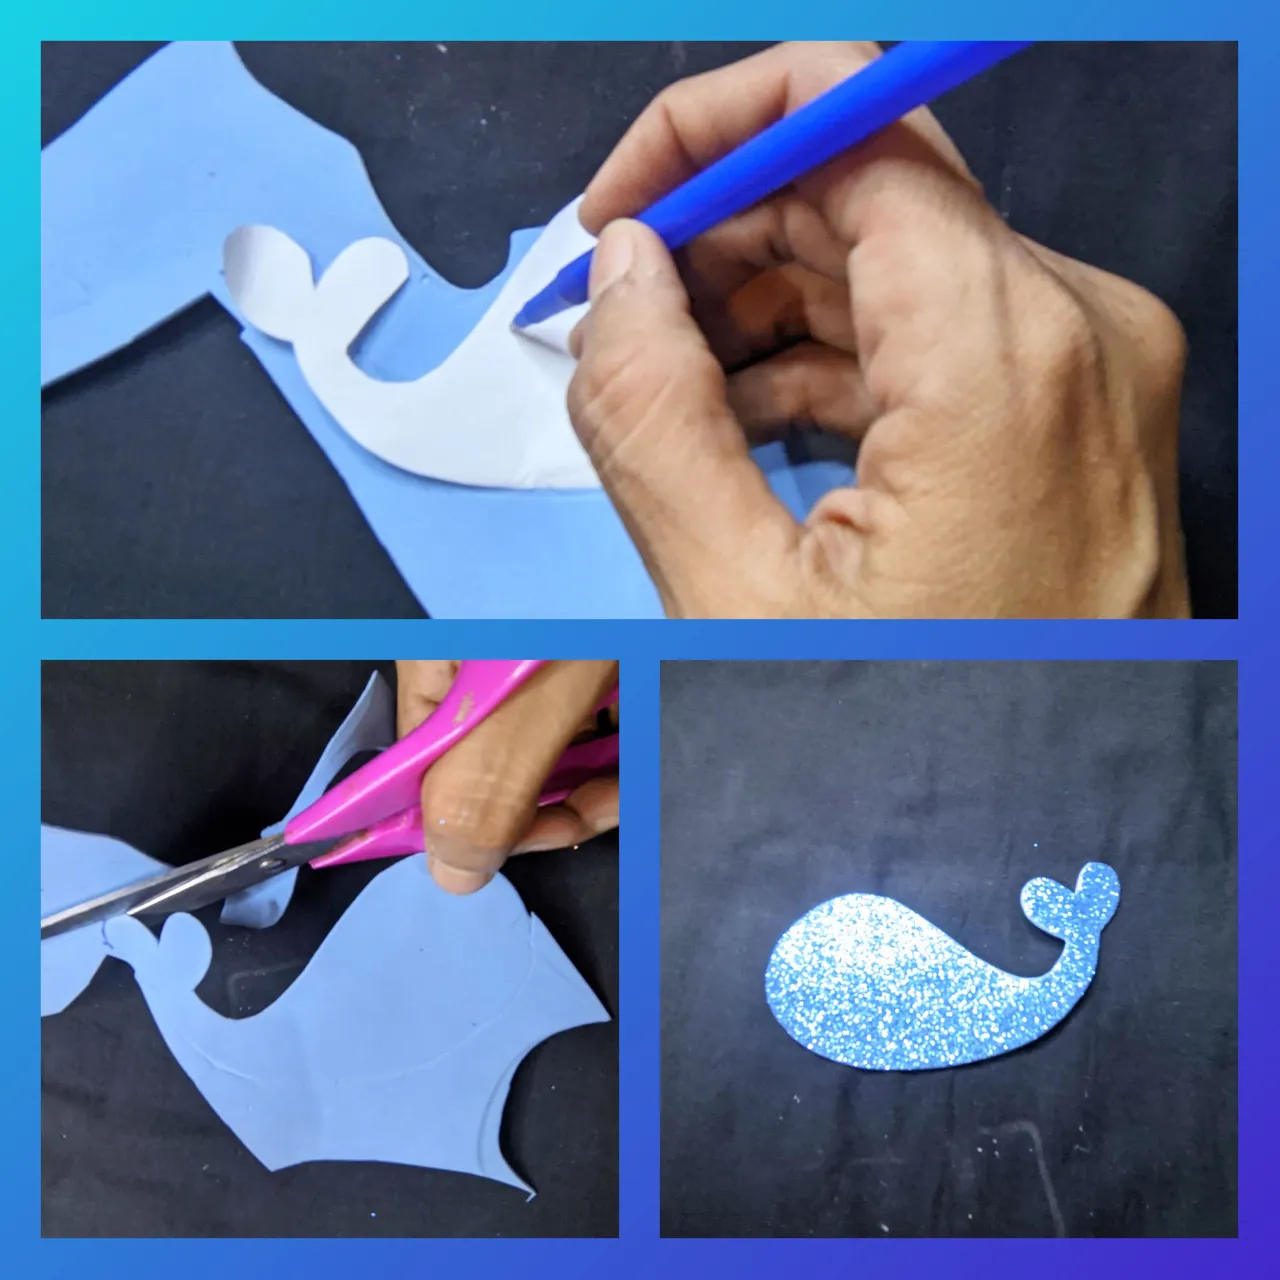
🐋 Step 3:
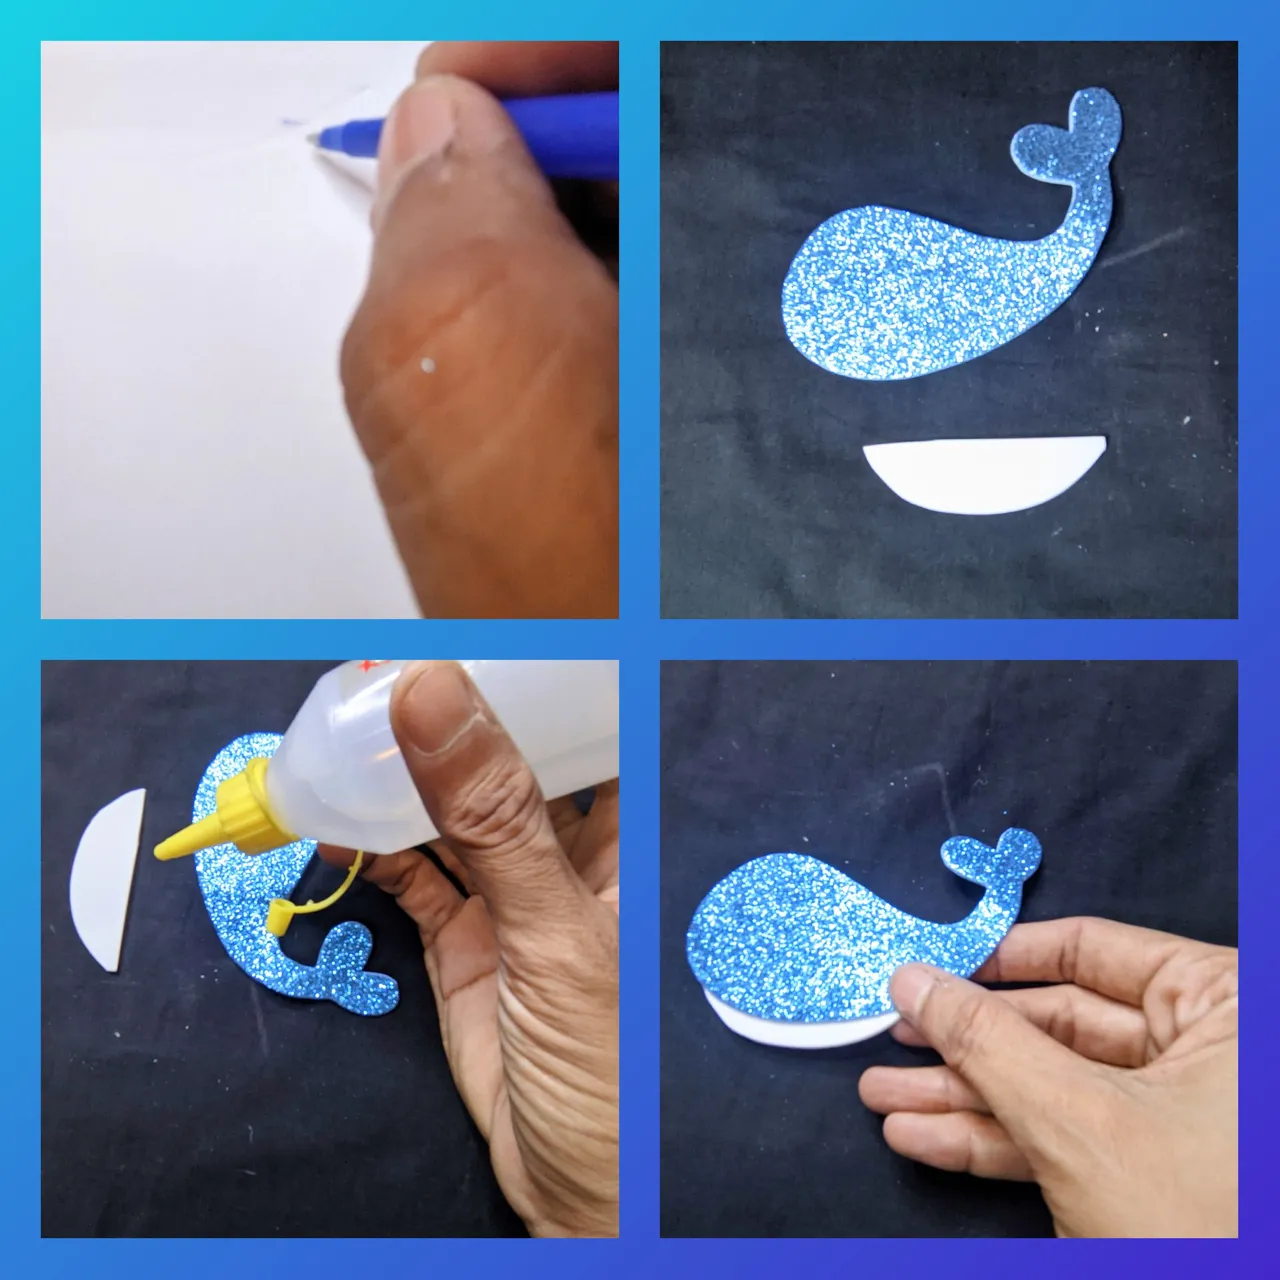
On the white Foami I drew and cut out a small piece to which I applied liquid silicone and glued on the whale piece.
🐋Step 4:
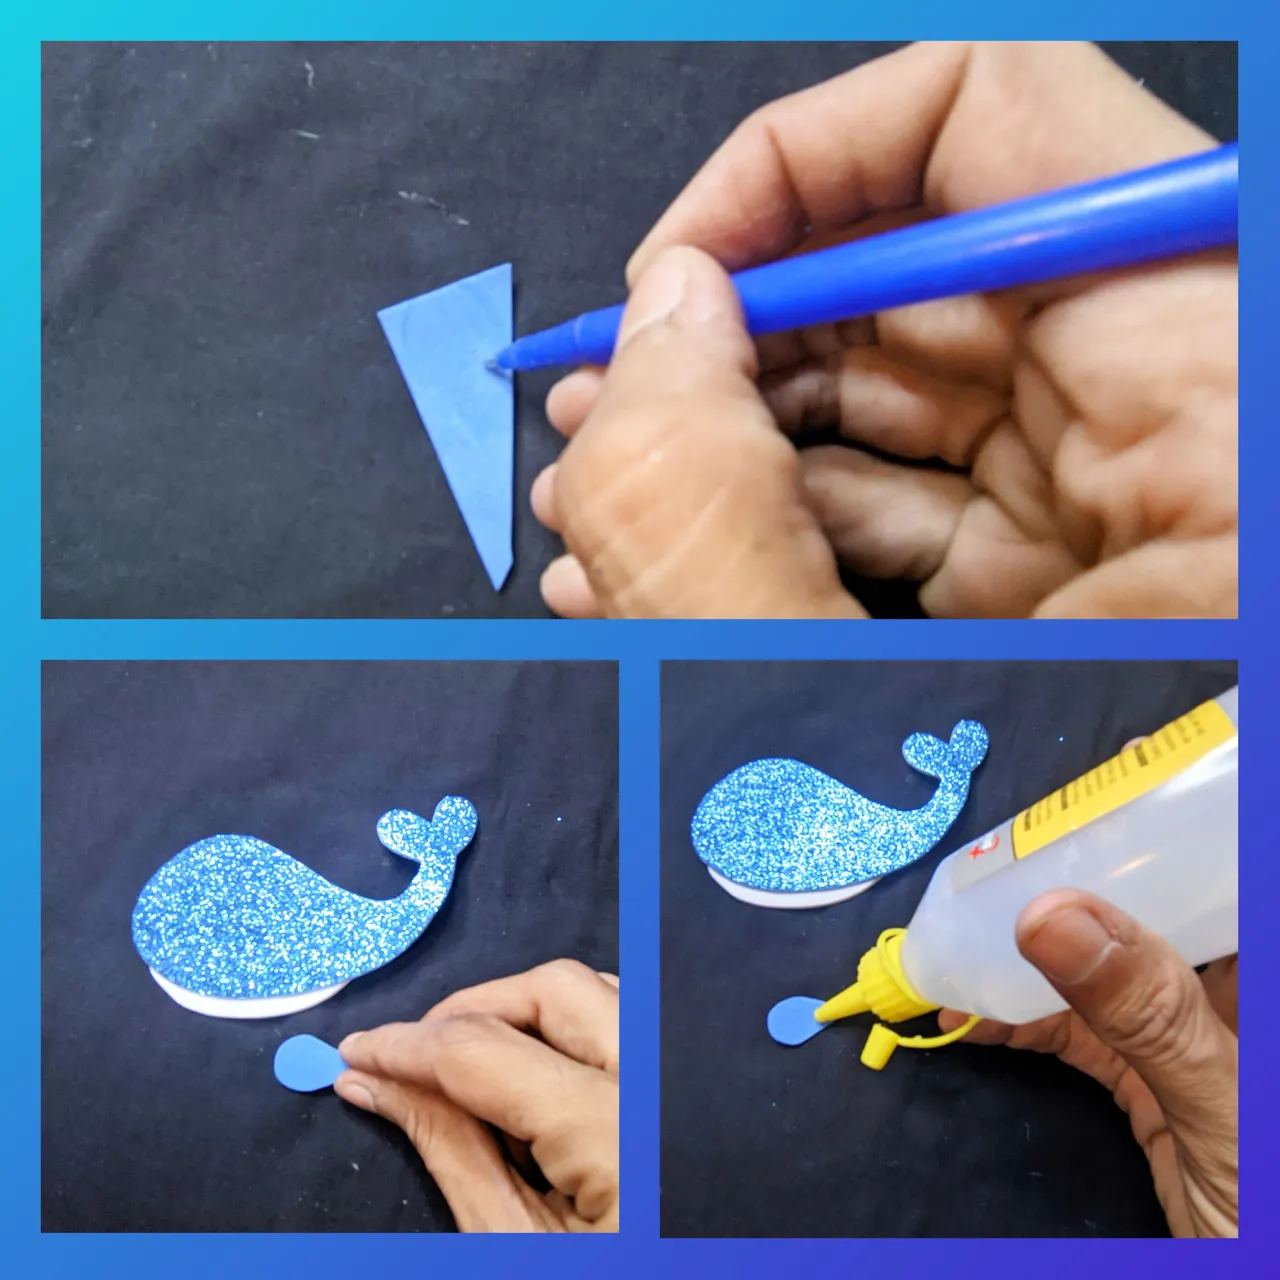
Take a small piece of the light blue foami and draw a fin, which I then cut out and with the liquid silicone glued on the body of the whale.
Then we glued it on top of the black foami and cut it out to cover the back.
🐋 Step 5:

Now with the black and blue paint I drew the eyes of my character.
🐋 Step 6:
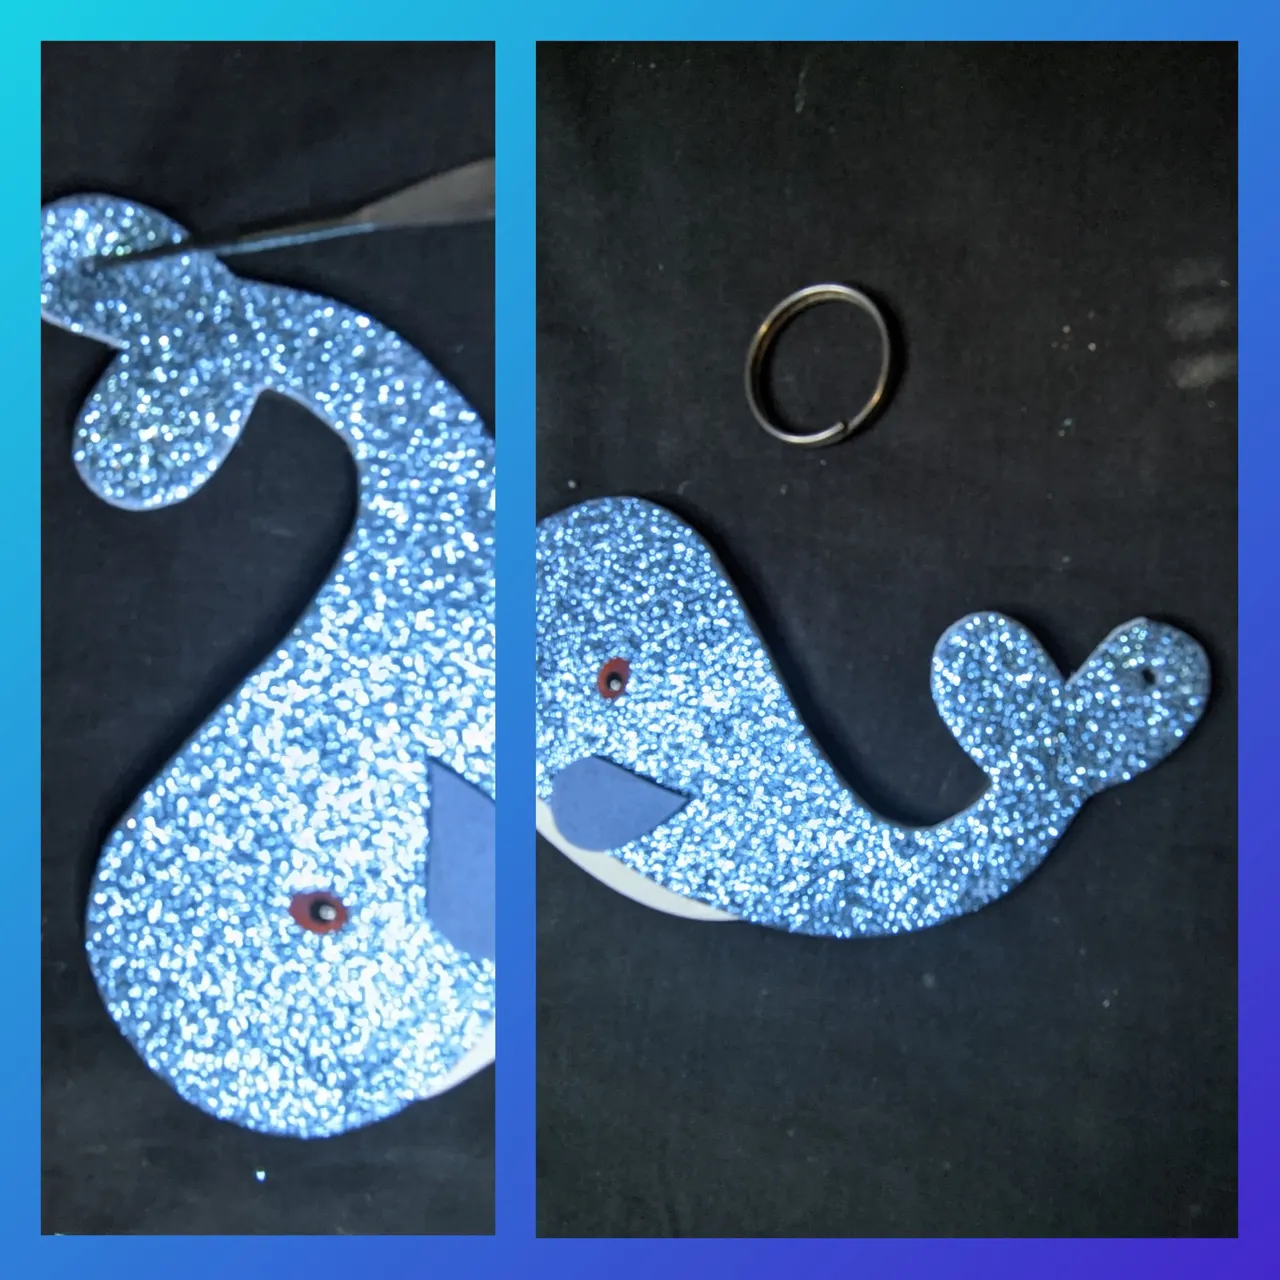
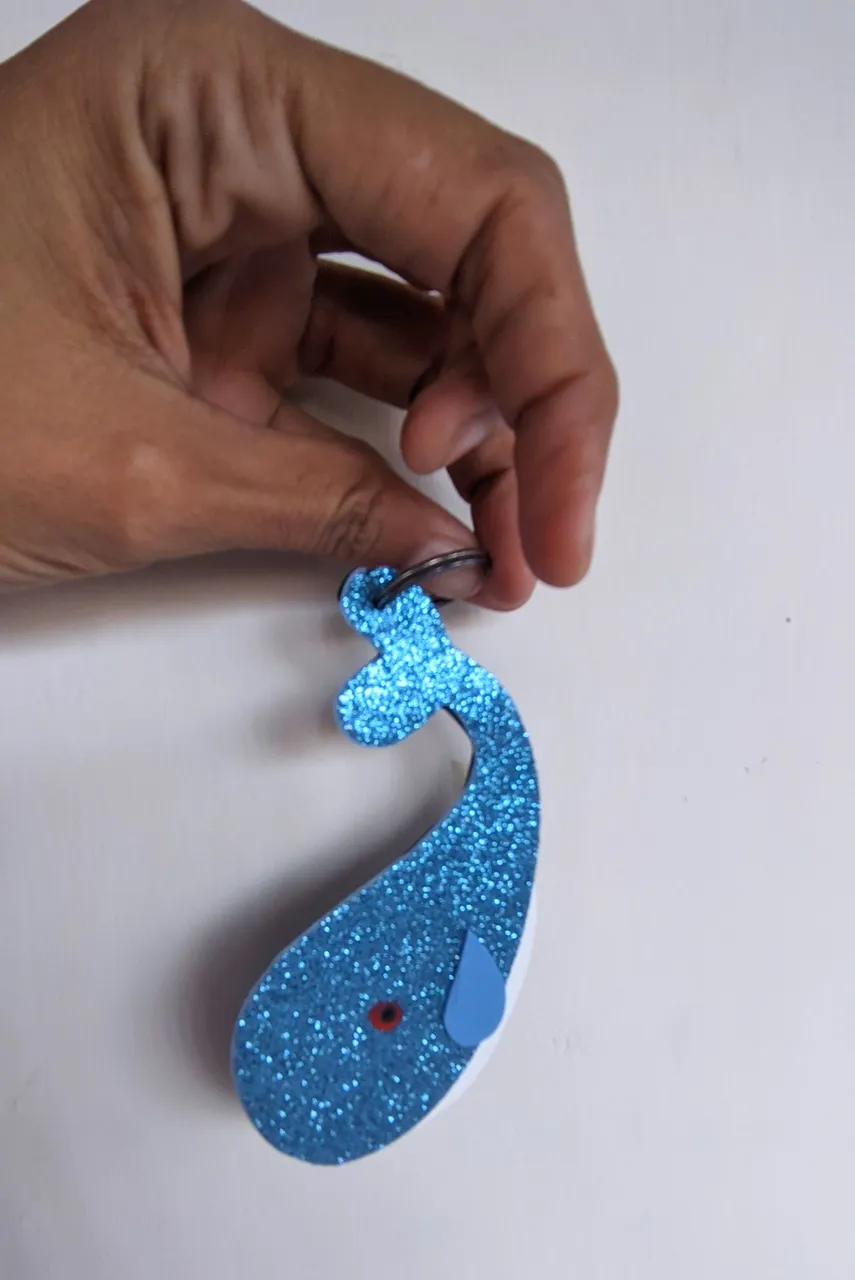
Now with the help of a knitting needle, pierce the tail of the whale, and there we insert the key ring and that's it
FINAL PHOTOS

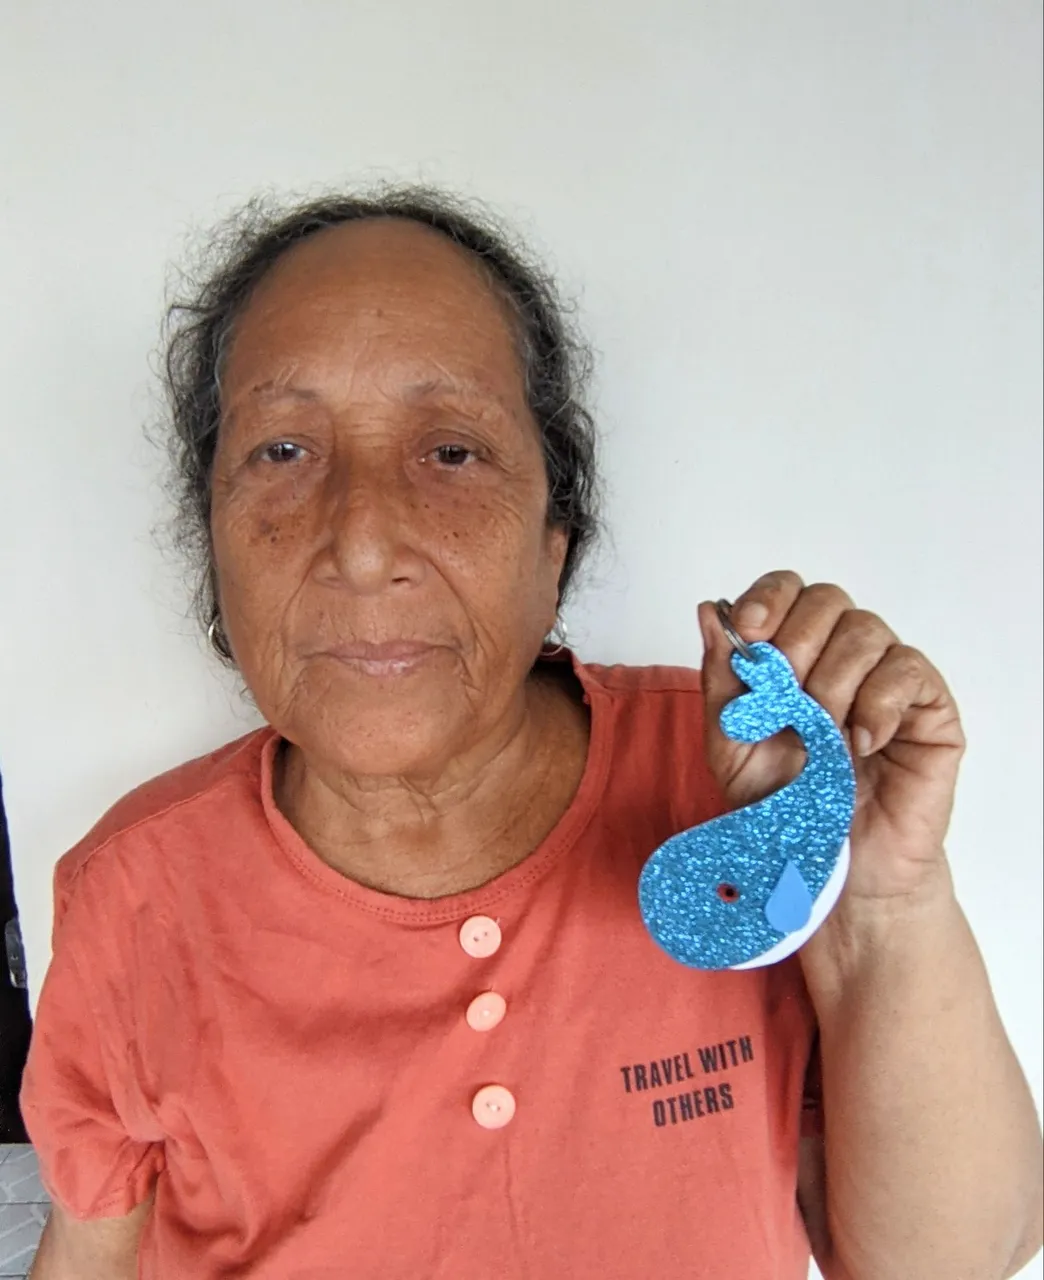
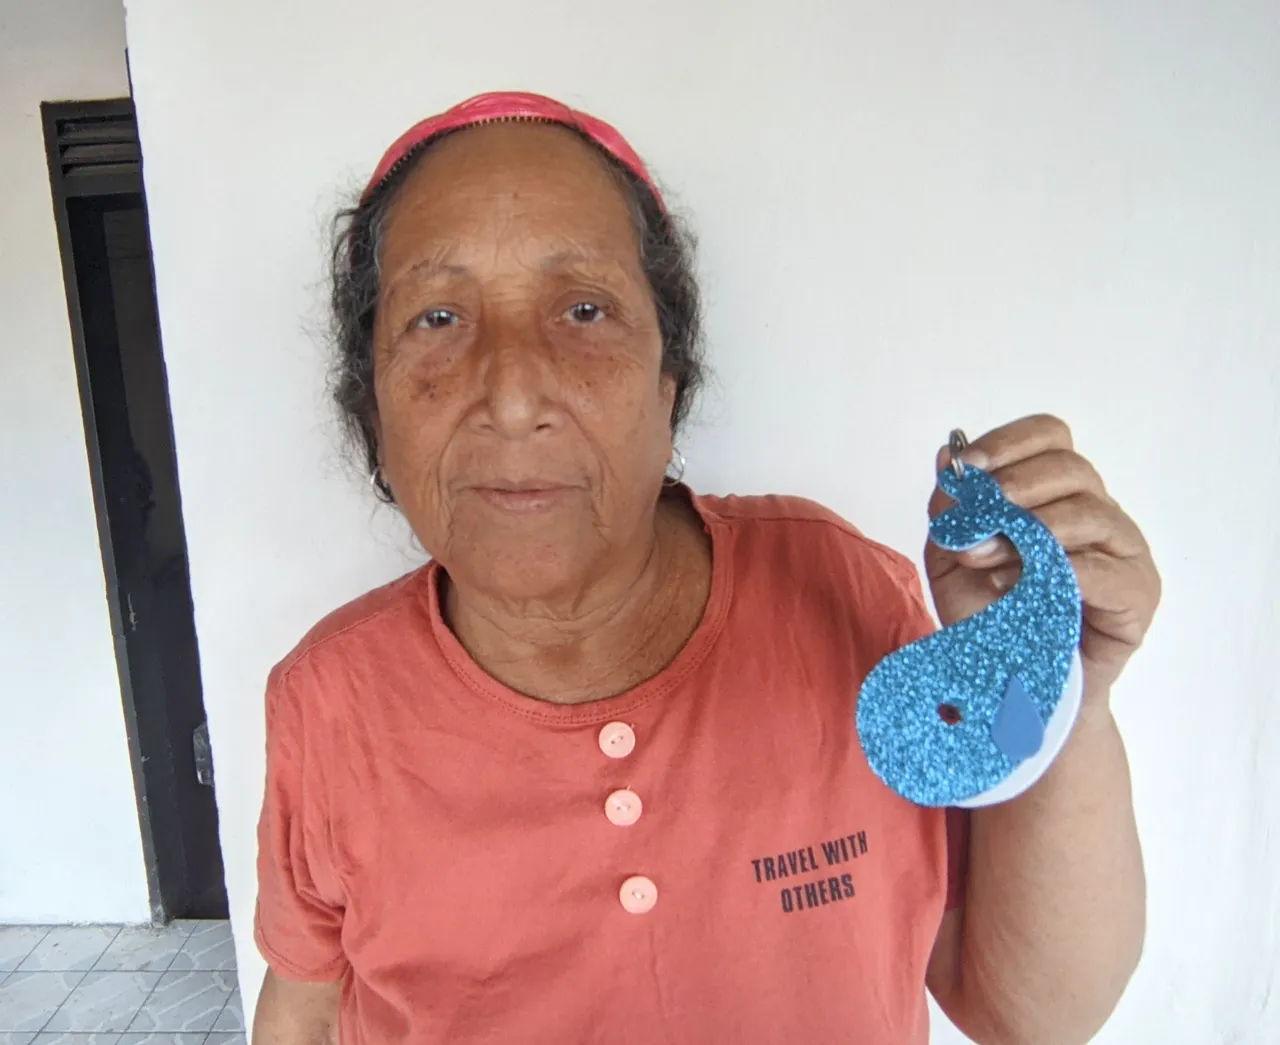
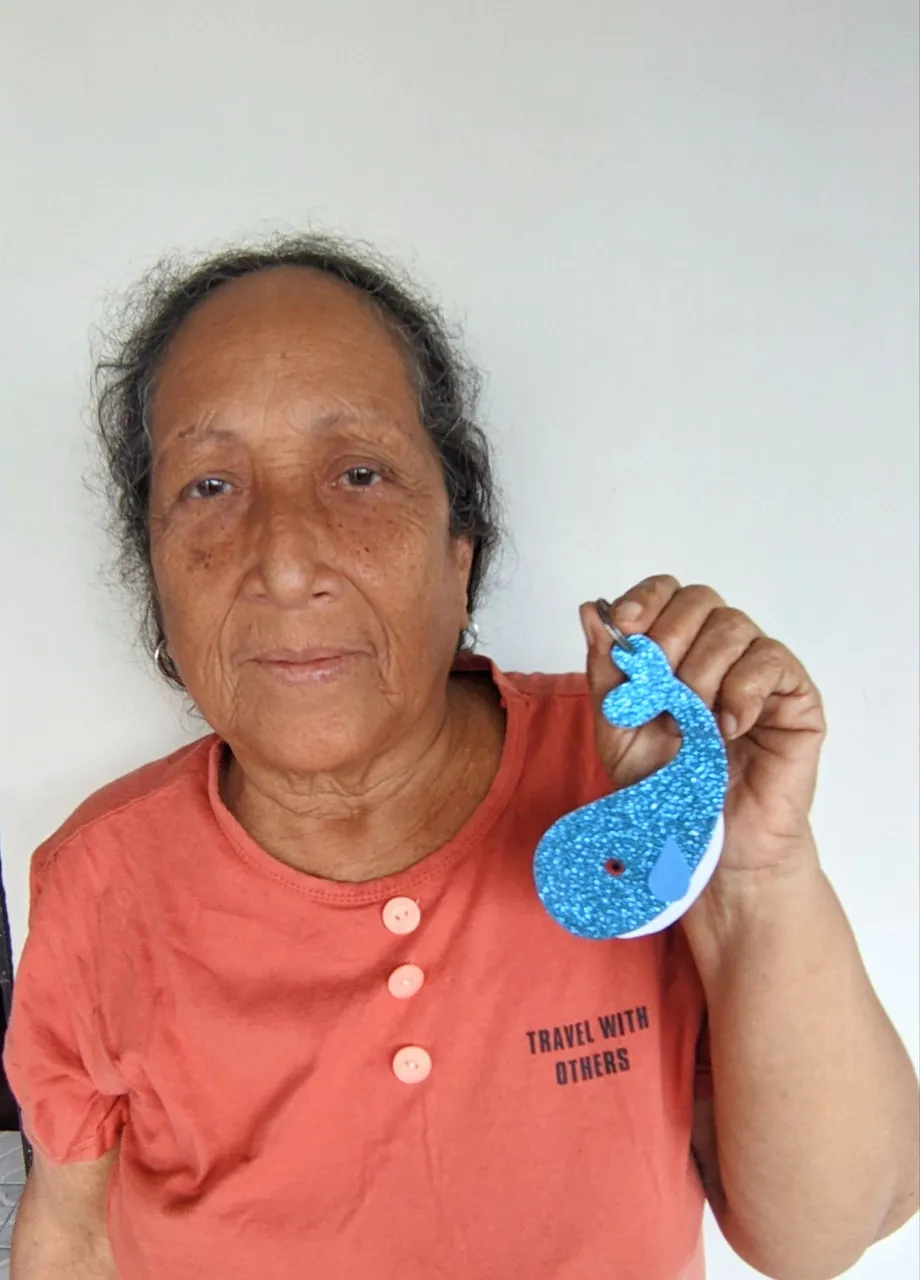
I hope you liked the work of this granny, soon I will bring you more art to this beautiful community, greetings to all and may God fill you with blessings to each and every one of its members.
for the realization of this post I helped me with the free version deepl translator, also the photos were taken with my Xiaomi redmi phone and belong to me, and I edited them with the polish program that brings my phone.
 SPANISH
Saludos amiguitos de #hive feliz fin de semana el día de hoy les traje un post diferente, ya que por primera vez posteo en esta comunidad, por invitación de una amiga, quien me habló de participar en esta iniciativa tan maravillosa que tienen, y me dije vamos abuelita, puedes demostrar que no hay edad para estar en la web 3 y publicar contenido al día.
Para los que no lo saben, soy fiel a los contenidos de artes manuales, así que entró genial poder unirme a este #fanart y aquí les dejo la lista de materiales, el paso a paso y el resultado final de este personaje llamado walle, una ballenita que se convierte hoy en el personaje principal de este llavero que sin lugar a dudas servirá para promocionar a este juego que sin duda alguna, promete ser el mejor.
MATERIALES
🐋 Foami escarchado azul.
🐋 Foami azul.
🐋 Foami blanco.
🐋 Foami negro.
🐋 Silicón líquido.
🐋 Pintura roja
🐋 Pintura negra.
🐋 Tijera.
🐋 Pincel.
🐋 Lápiz.
🐋 Papel.
🐋 PASO A PASO 🐋
🐋 Paso 1:
Tome un trocito de papel blanco y con ayuda del lápiz dibuje la forma de la ballenita, y cuando la dibujamos la recortamos y así tenemos el patrón con el que vamos a trabajar.
🐋 Paso 2:
Tome el foami escarchado azul, y por la parte trasera, coloque encima en patrón que sacamos, dibujamos y recortamos la figura de La ballenita.
🐋 Paso 3:
En el Foami blanco dibujé y recorté una pequeña pieza a la que le aplique silicón líquido y pegamos en la pieza de la ballena.
🐋Paso 4:
Tome un trocito del foami azul claro y dibuje una aleta, que luego recorté y con el silicón líquido pegamos en el cuerpo de la ballena.
Después la pegamos encima del foami negro y recortamos par tapar la parte de atrás.
🐋 Paso 5:
Ahora con la pintura negra y la azul dibujé los ojos de mi personaje.
🐋 Paso 6:
Ahora con ayuda de una aguja de tejer, perfore la colita de la ballena, y allí introducimos la argolla de llavero y listo hemos concluido.
FOTOS FINALES
Espero que les haya gustado el trabajo de esta abuelita, pronto les traeré más arte a esta bella comunidad, saludos a todos y que Dios los llene de bendiciones a todos y cada uno de sus miembros.
para la realización de este post me ayudé con el traductor deepl versión gratis, también las fotos fueron tomadas con mi teléfono Xiaomi redmi y me pertenecen a mi, y las edité con el programa polish que trae mi teléfono.