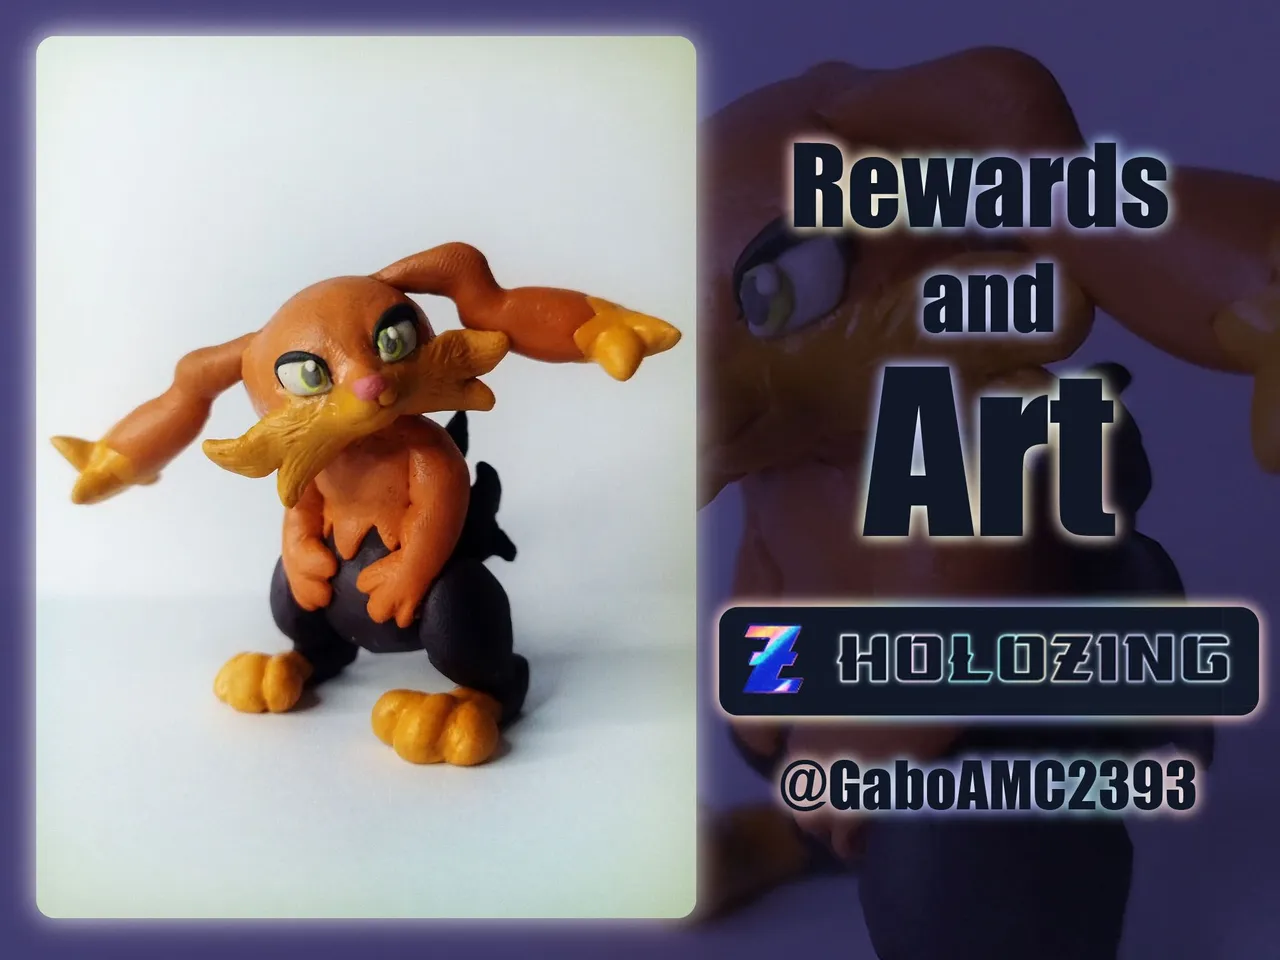
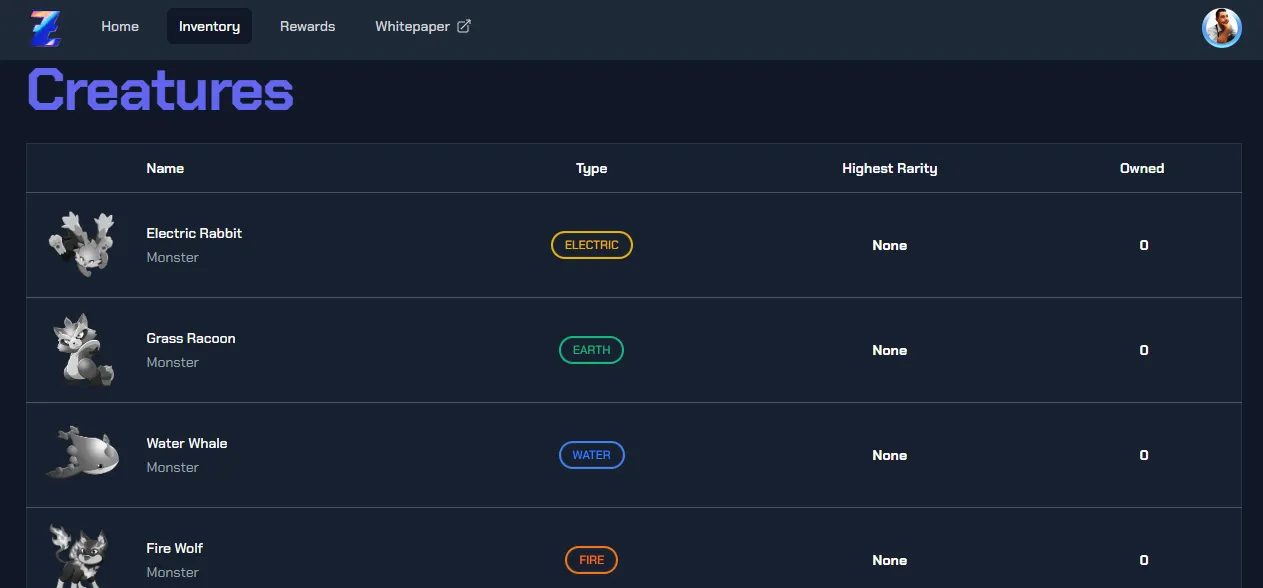
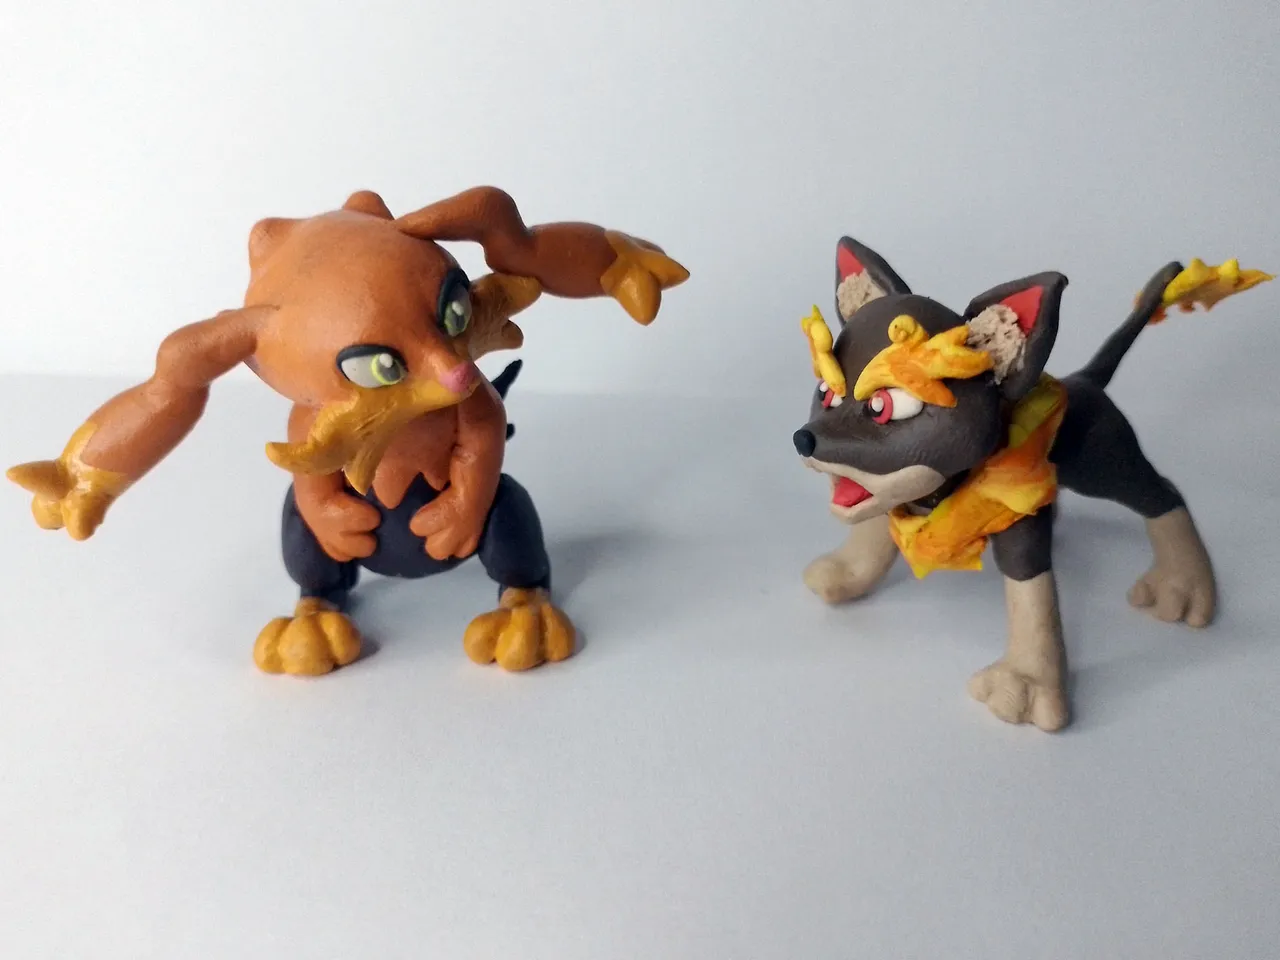
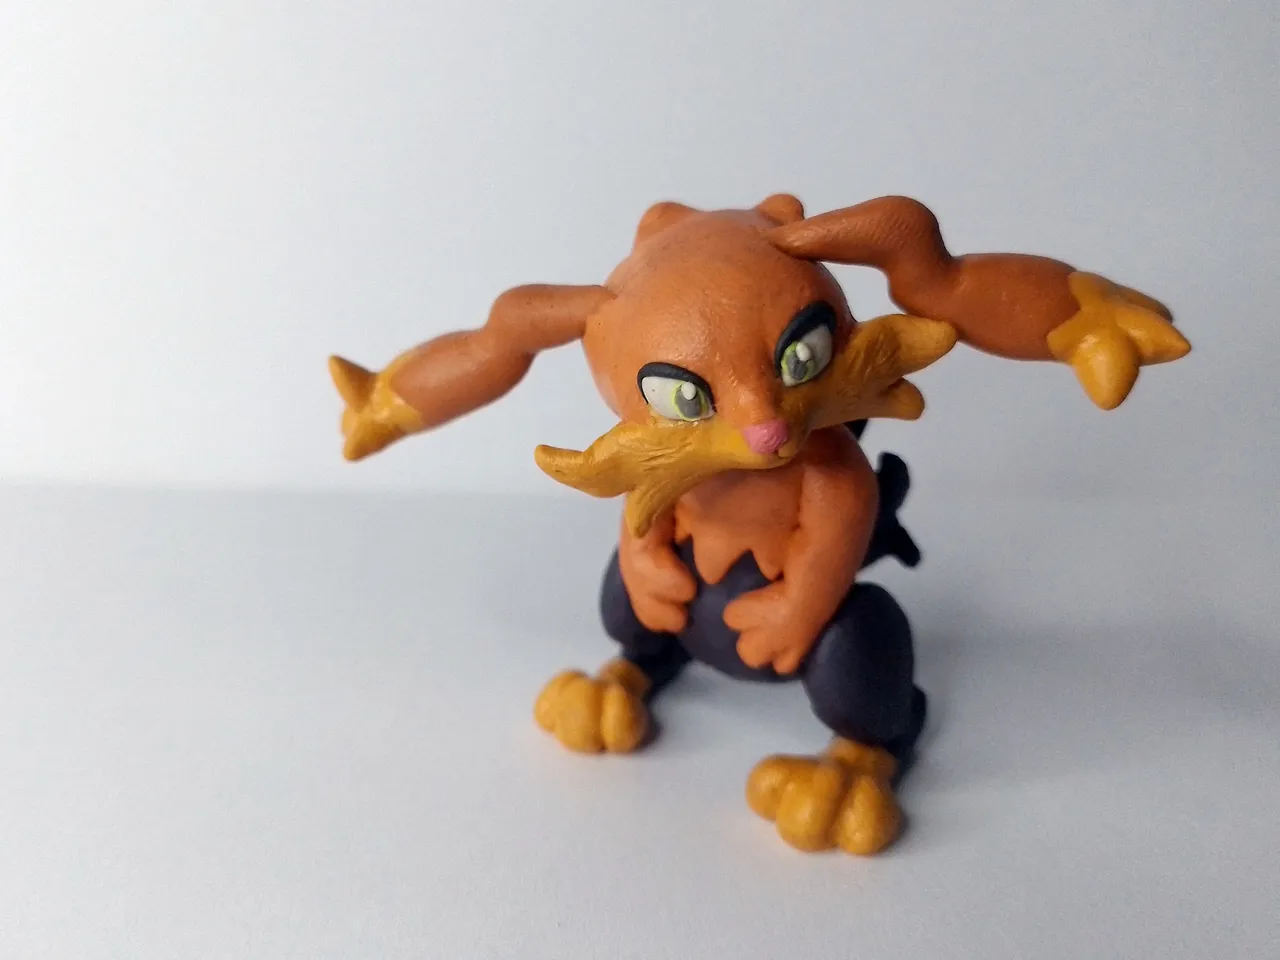
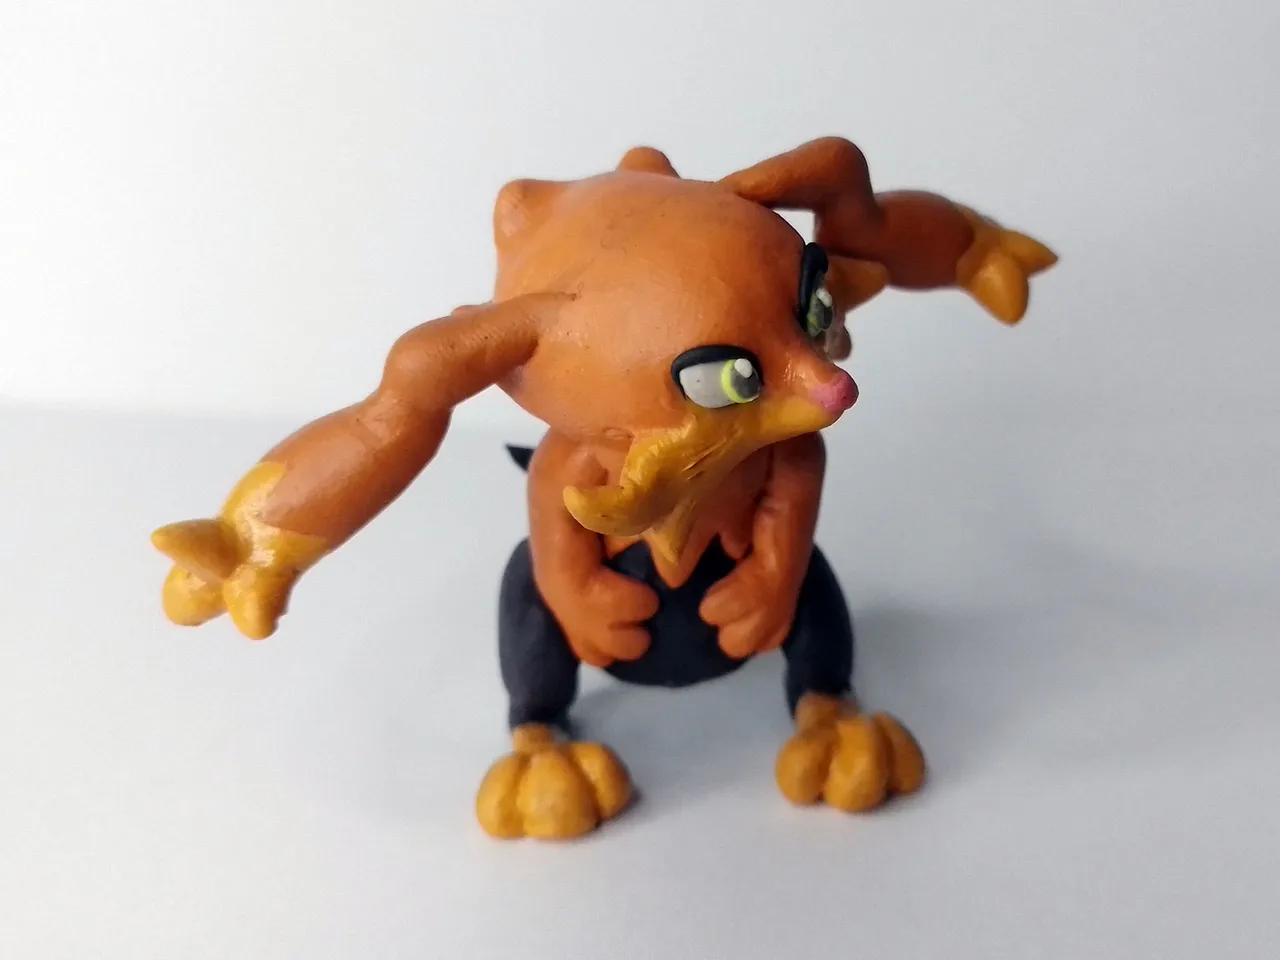
Since I started collecting my rewards on the official Holozing website, I have been looking closely at the designs they have in the Inventory tab. They are lovely creatures and the truth is now I have the desire to make sculptures of all of them, that's why on the cover of the publication you can see the little Electric Rabbit.
Español
Desde que empecé a cobrar mis recompensas en la página oficial de Holozing, he estado observando detenidamente los diseños que tienen en la pestaña de Inventario. Son criaturas encantadoras y la verdad ahora tengo el deseo de hacer esculturas de todas, por eso en la portada de la publicación pueden observar a al pequeño Conejo eléctrico.
On the other hand, I not only plan to make more sculptures, but to continue to progress in terms of the earnings that can be made through the different ways that the site offers.
The first one that we have all started with I believe is through delegations. Delegating to the zingtoken account allows you to generate rewards on zing, namely an APR of 29.20% at the time I am making this post.
Account to which you can delegate:
@zingtoken
Por otra parte, no solo planeo hacer más esculturas, sino seguir progresando en cuanto a las ganancias que se pueden obtener a través de las distintas maneras que ofrece el sitio.
La primera por la que todos hemos comenzado creo que es a través de las delegaciones. Delegar a la cuenta zingtoken te permite generar recompensas en zing, a saber un APR del 29,20% a la hora en que realizo esta publicación.
Cuenta a la que se puede delegar:
@zingtoken

This has allowed me to earn daily profits from the ZING token, which accumulates directly in stake and continues to add earnings every day.
In the chart below you can see an example of how I have claimed my rewards almost every day.
Esto me ha permitido obtener ganancias diarias del token ZING, que se acumula directamente en stake y sigue sumando ganancias todos los días.
En la gráfica a continuación pueden ver un ejemplo de cómo he reclamado mis recompensas casi todos los días.
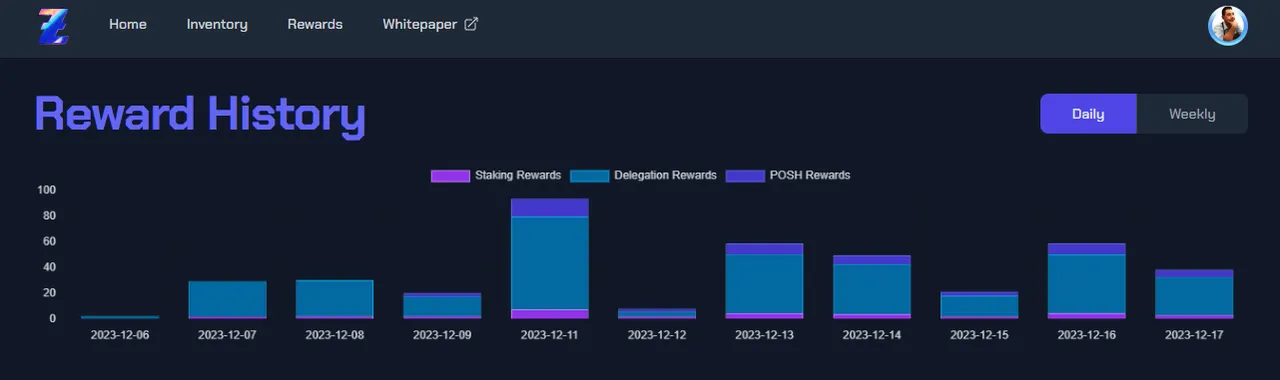
Obviously I didn't start since the first of December, but since I got up to speed I have tried to claim rewards and log in at least twice a day. Sometimes I claim more times, other days just once, it all depends.
Evidentemente no comencé desde el primero de diciembre, pero desde que me puse al corriente he tratado de reclamar las recompensas y entrar a la página al menos dos veces al día. A veces reclamo más veces, otros días una sola vez, todo depende.

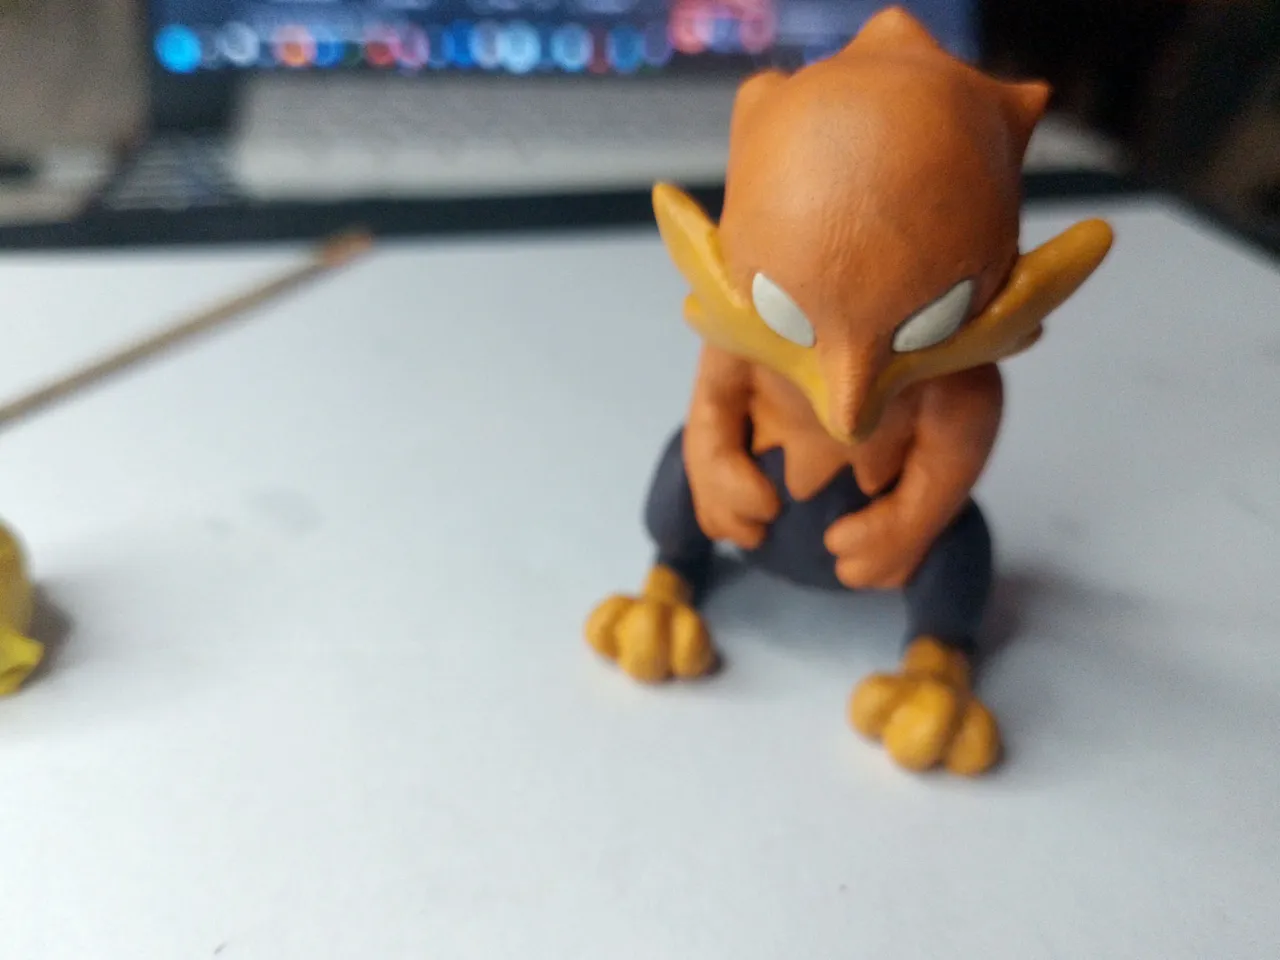
Electric Rabbit Sculpture
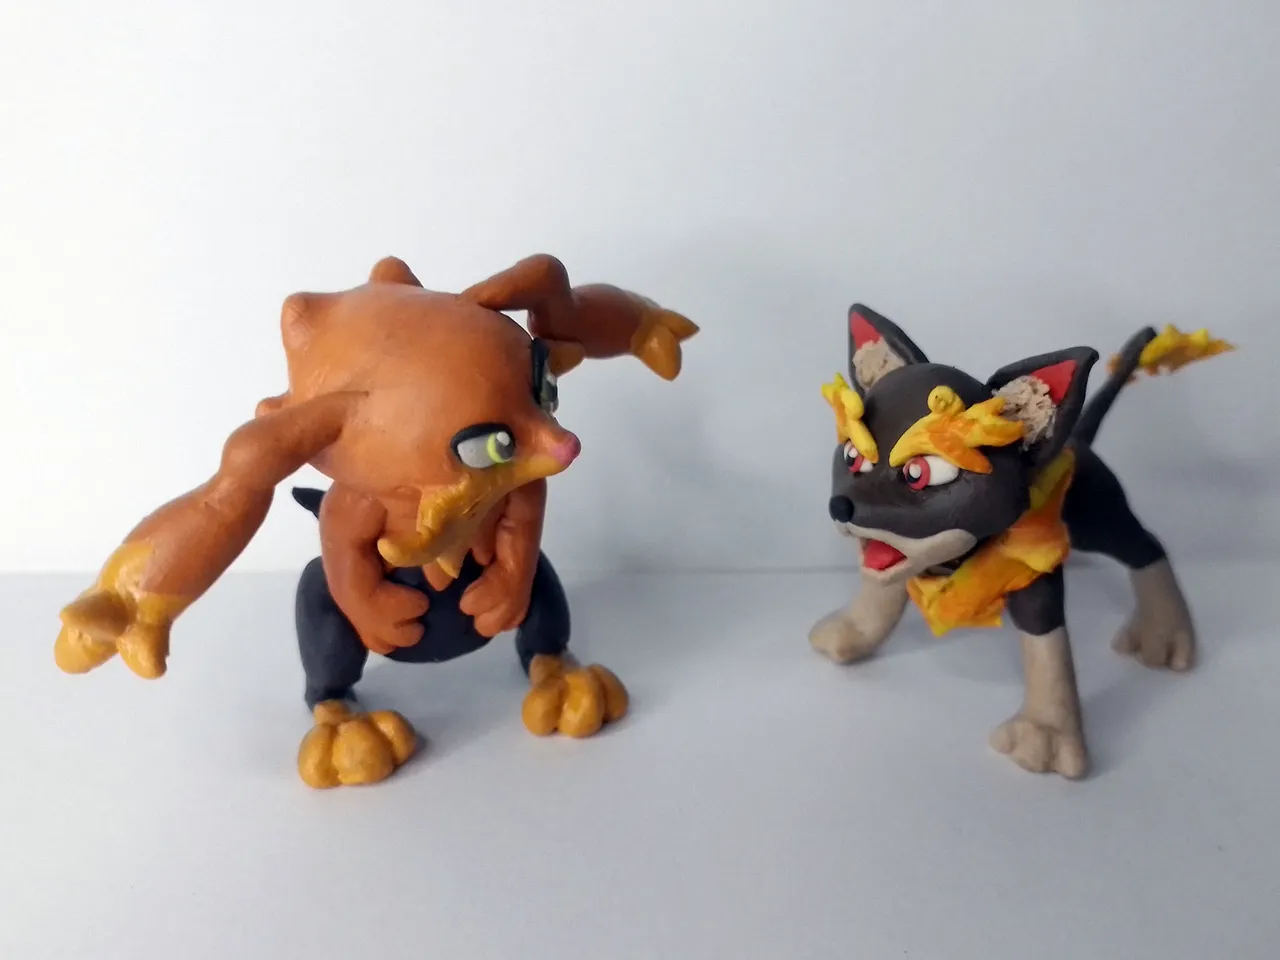
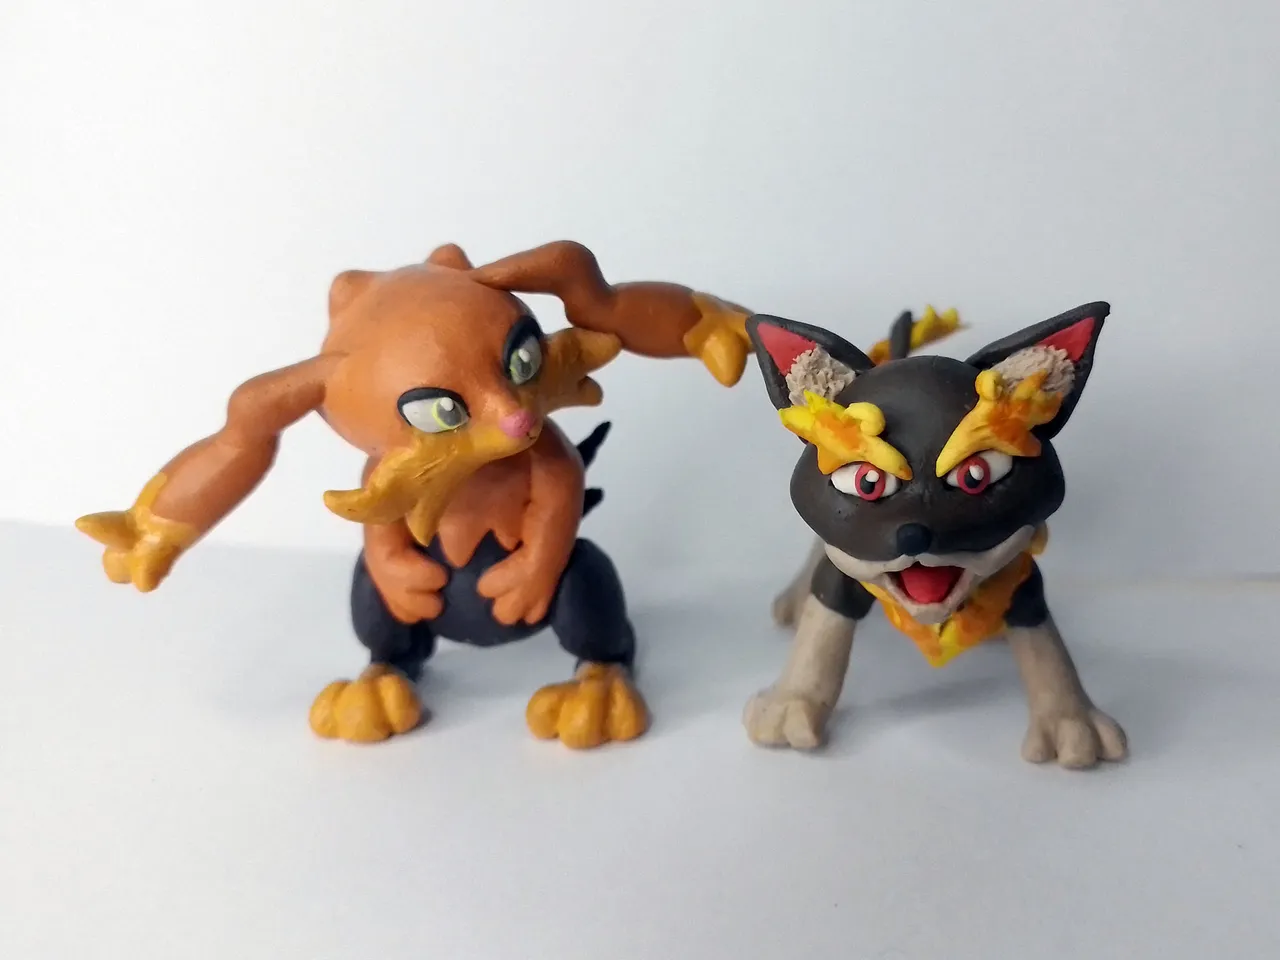
As I mentioned, I would love to make a sculpture of all these lovely creatures. I've already made one of Fire Wolf, but now it's Electric Rabbit's turn.
Escultura de Electric Rabbit
Como ya mencioné, me encantaría hacer una escultura de todas estas encantadoras criaturas. Ya hice una de Fire Wolf, pero ahora es el turno de Electric Rabbit.

This is a sculpture that I really enjoyed making and it put my creativity to the test, as there are parts of the character that you can't see, as he is in a way that you can't see his abdomen, so I had to imagine what he looks like.
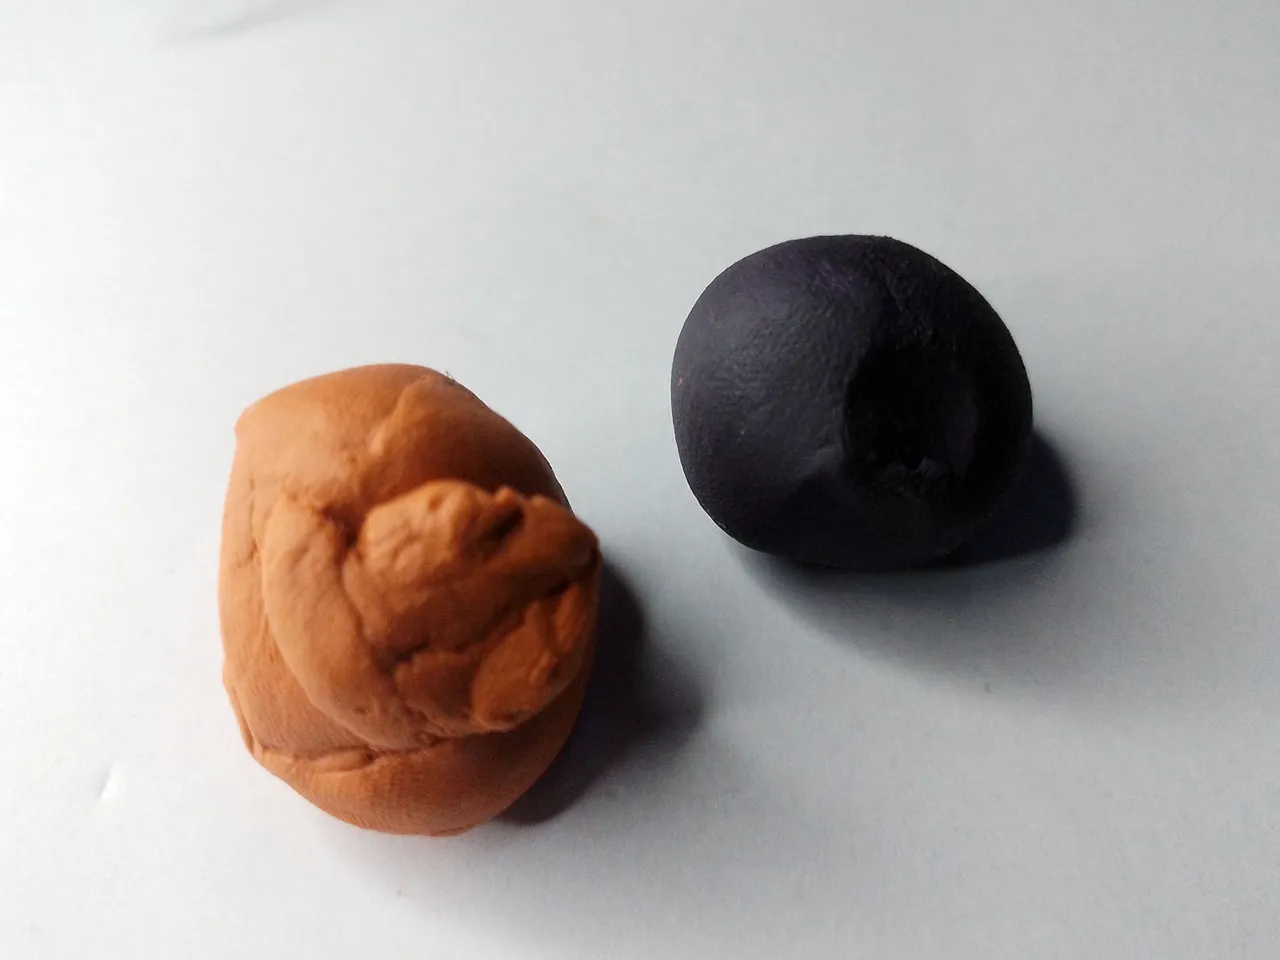
Step by step
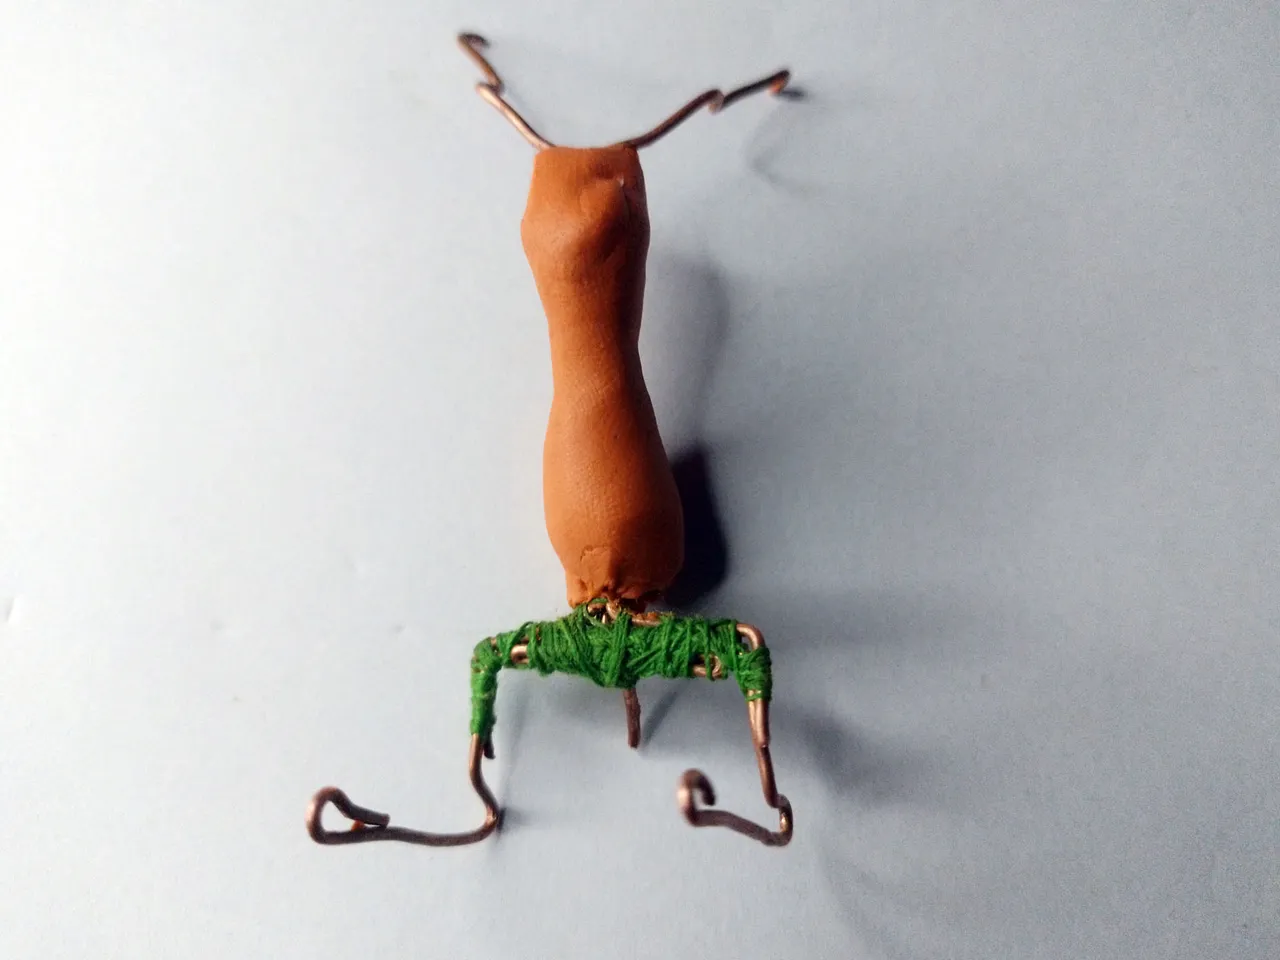
As always with my sculptures, I started by making the skeleton that the character would have to keep the right shape. It's a character with long shapes and pieces so I had to give support to these pieces, otherwise it would fall down.
Esta es una escultura que disfruté mucho haciendo y puso a prueba mi creatividad, pues hay partes del personaje que no se ven, pues está de una manera en la que no se ve su abdomen, así que tuve que imaginarme cómo es.
Paso a paso
Como siempre con mis esculturas, empecé haciedo el esqueleto que tendría el personaje para mantener la forma correcta. Es un personaje con formas y piezas largas así que debía darle soporte a estas piezas, sino se caería.

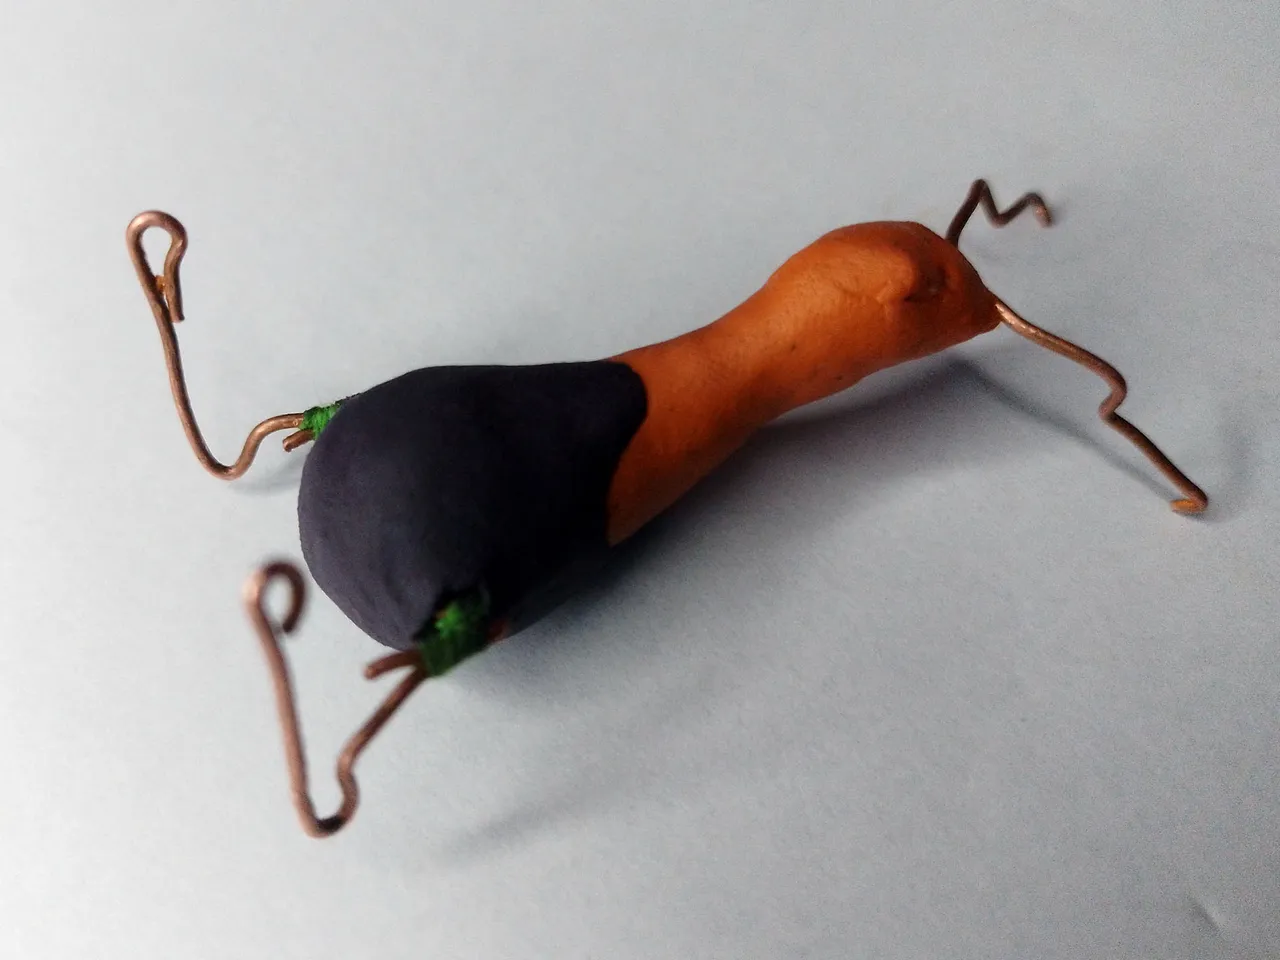
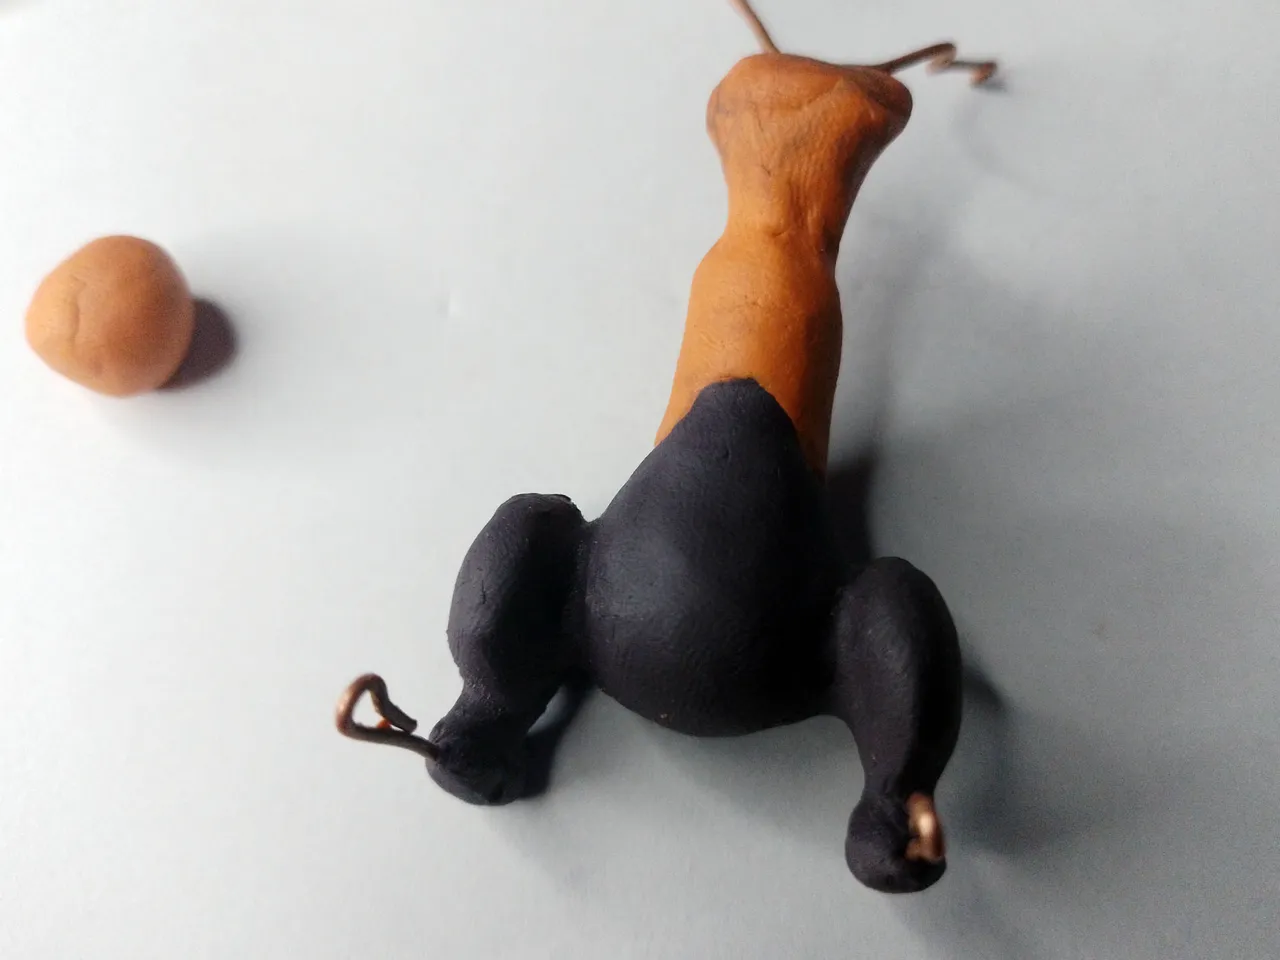
With this support I started molding. I used the orange color and a dark purple to cover the skeleton and mold the character. First I started with the orange color, molding the upper part of the character.
Con este soporte comencé a moldear. Usé el color naranja y un morado oscuro para cubrir el esqueleto y moldear el personaje. Primero comencé con el color naranja, moldeando la parte superior del personaje.
 |  |
|---|
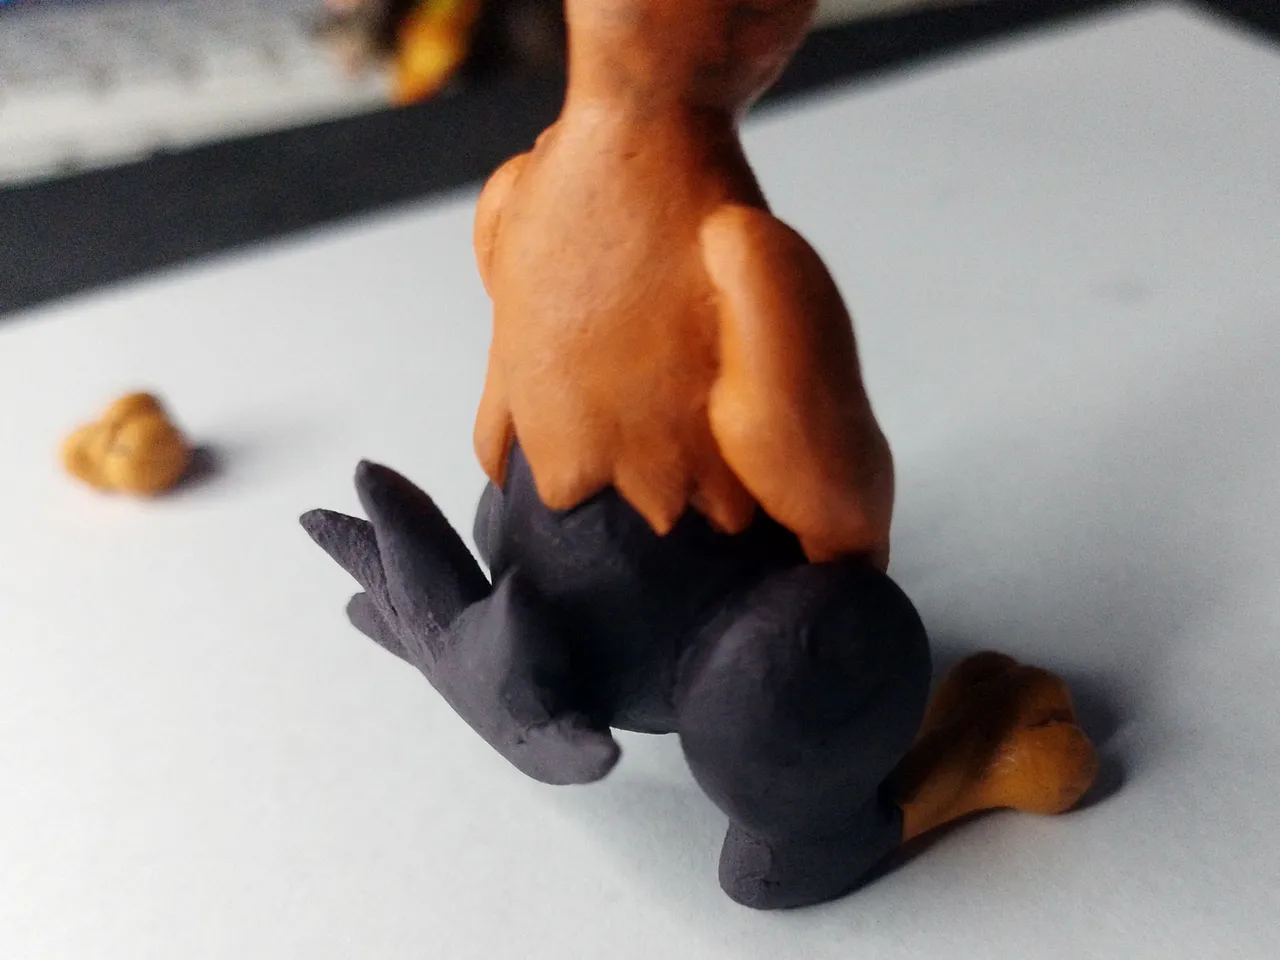
I covered the lower part with dark purple plasticine, trying to make it as wide as possible in the lower area of the figure, as if it were a bowling pin. On the legs I also placed some plasticine protuberances, for the thighs of this little rabbit.
La parte inferior la cubrí con la plastilina de color morado oscuro, tratando de hacerlo lo más ancho posible en el área inferior de la figura, como si fuese un pino de bowling. En las piernas también le coloqué unas protuberancias de plastilina, para los muslos de este pequeño conejo.
 |  |
|---|
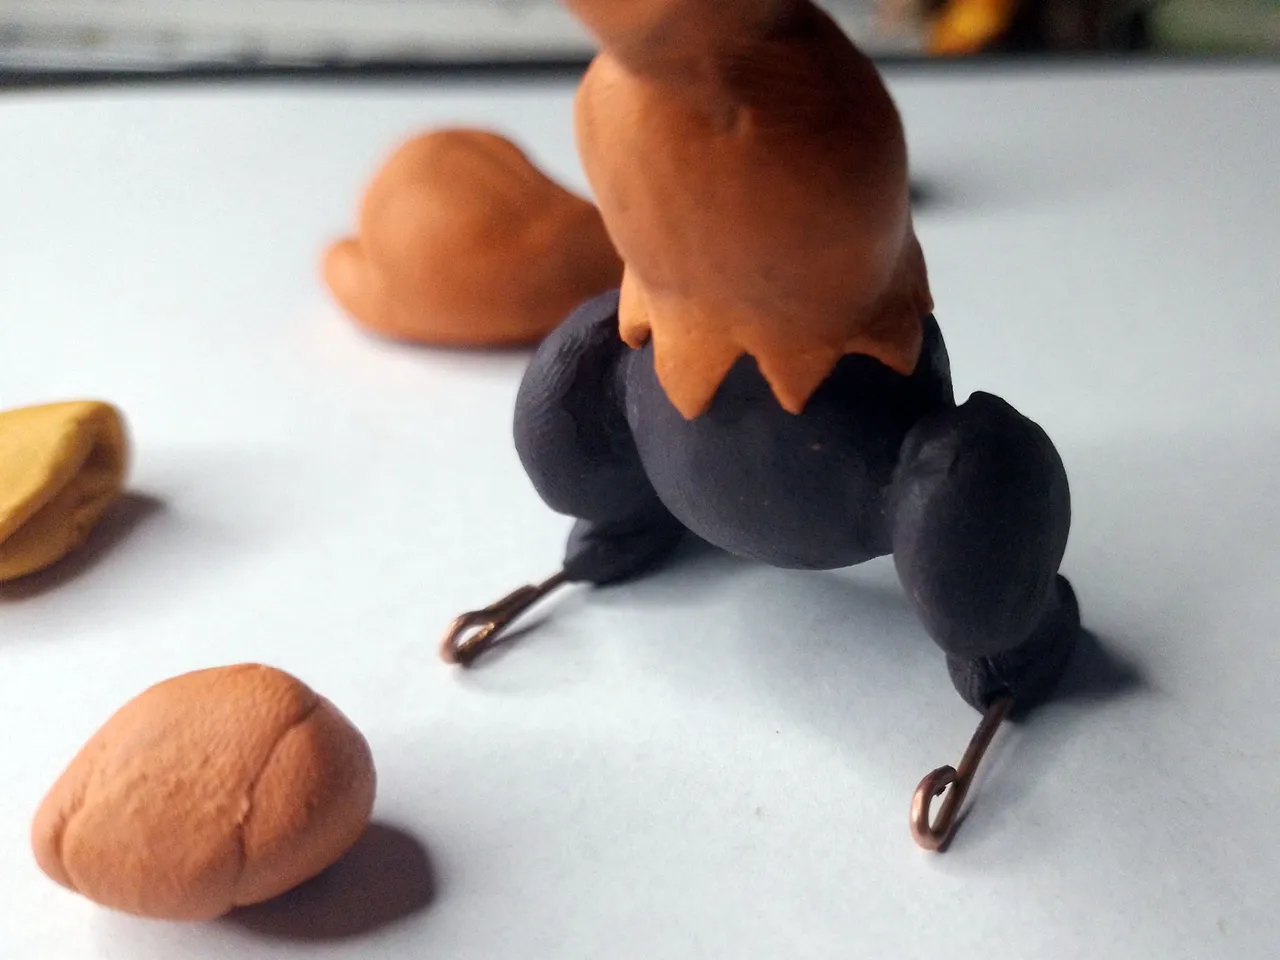
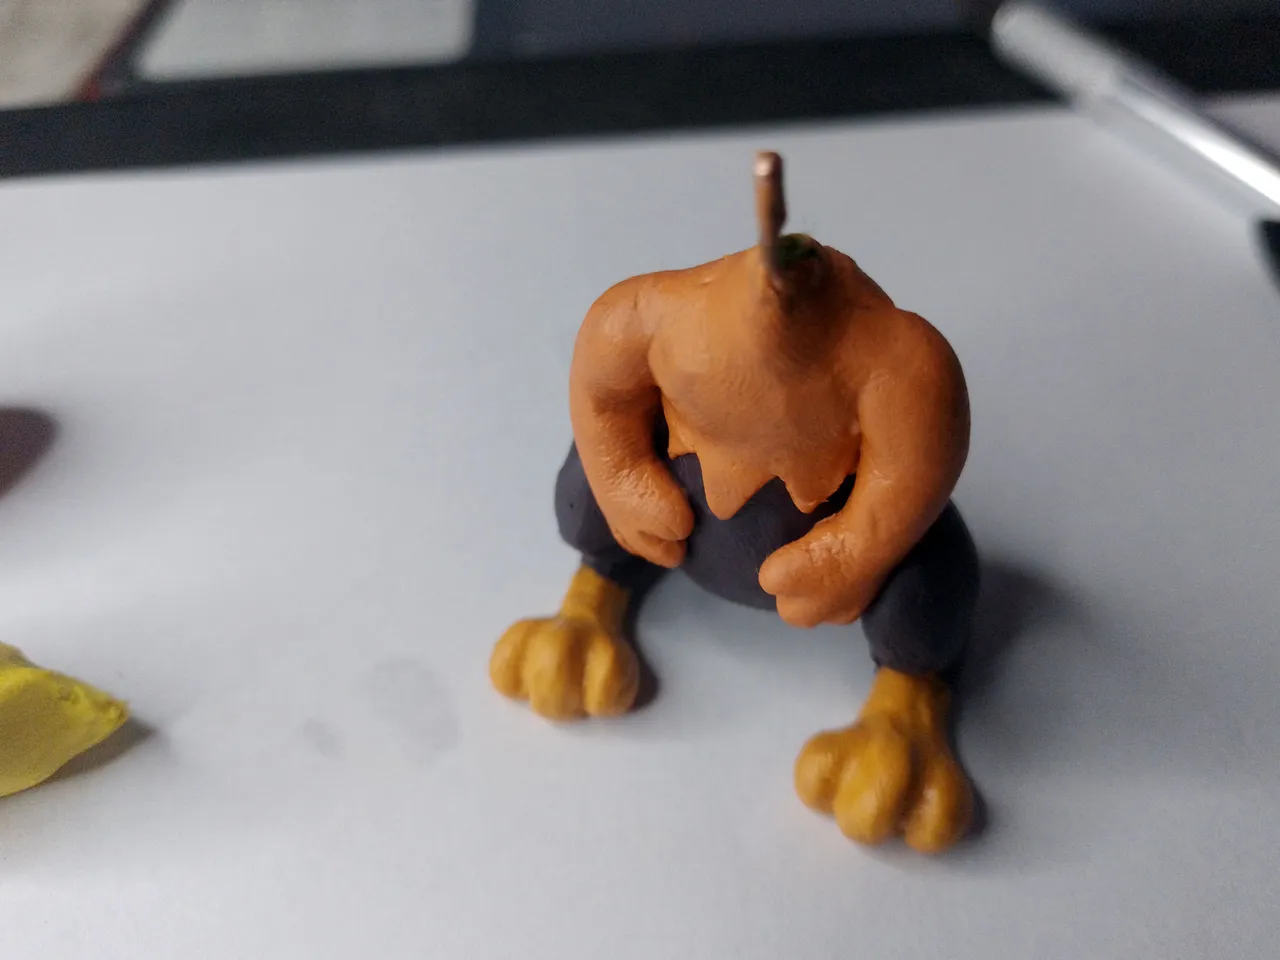
I continued with the part where I had to put a little imagination, because it is the area that is not drawn of the character, or at least I have not seen it.
I made this area similar to the character's ears, with colored spikes. After this I also made the upper legs.
Continué con la parte donde tuve que poner un poco de imaginación, pues es el área que no está dibujada del personaje, o al menos yo no lo he visto.
Esta área la hice de forma similar a las orejas del personaje, con picos de colores. Luego de esto también le hice las patitas superiores.
 |  |
|---|
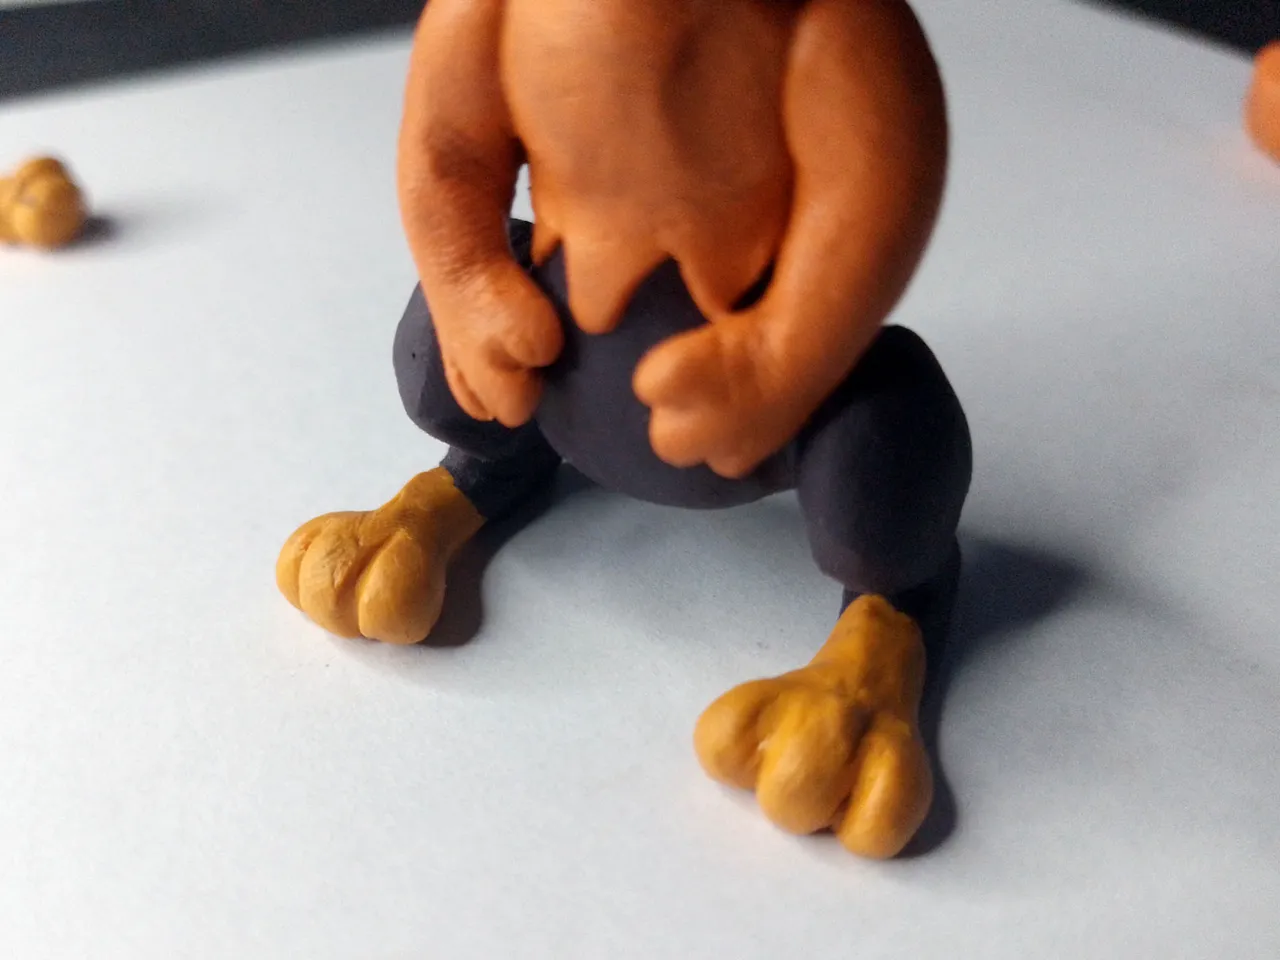
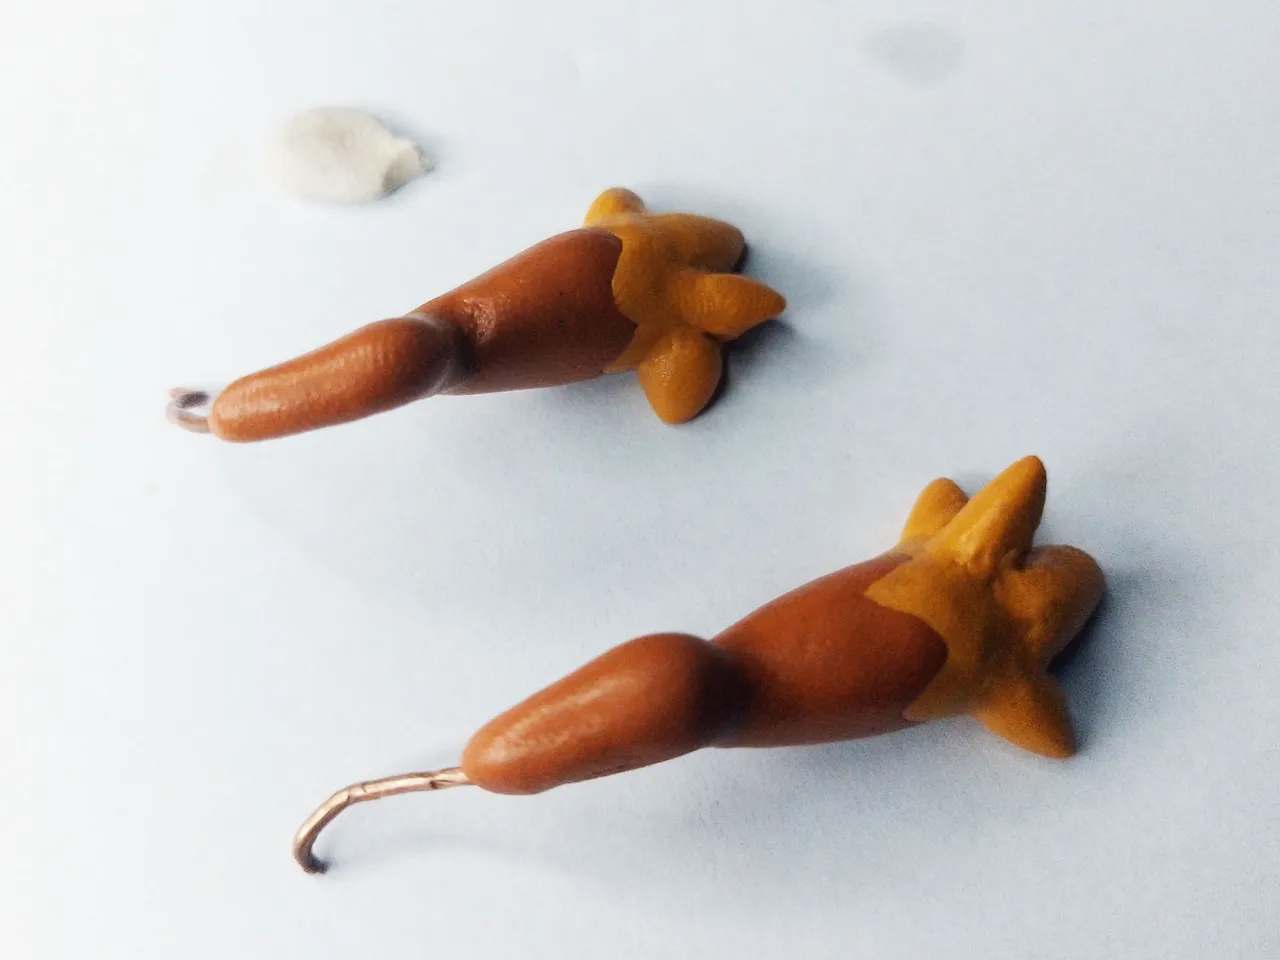
Then I made the hind legs, which are longer for being a rabbit, and the tail with a bristly shape. I made the paws a more yellowish color, different from the body color.
Seguidamente le hice las patas traseras que son más largas por ser de conejo y la colita con forma erizada. Las patitas las hice de un color más amarillento, distinto al color del cuerpo.
 |  |
|---|
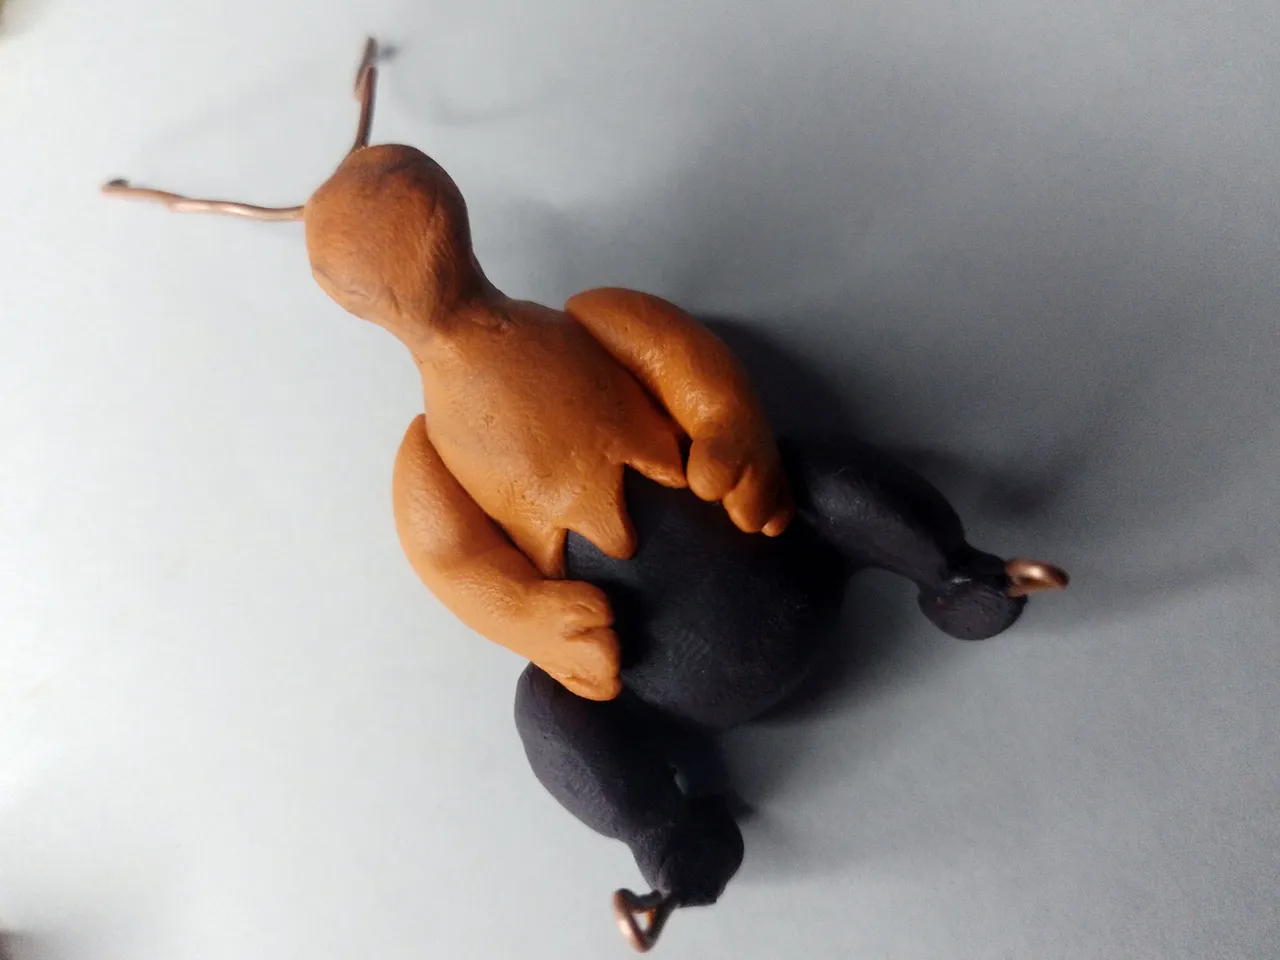
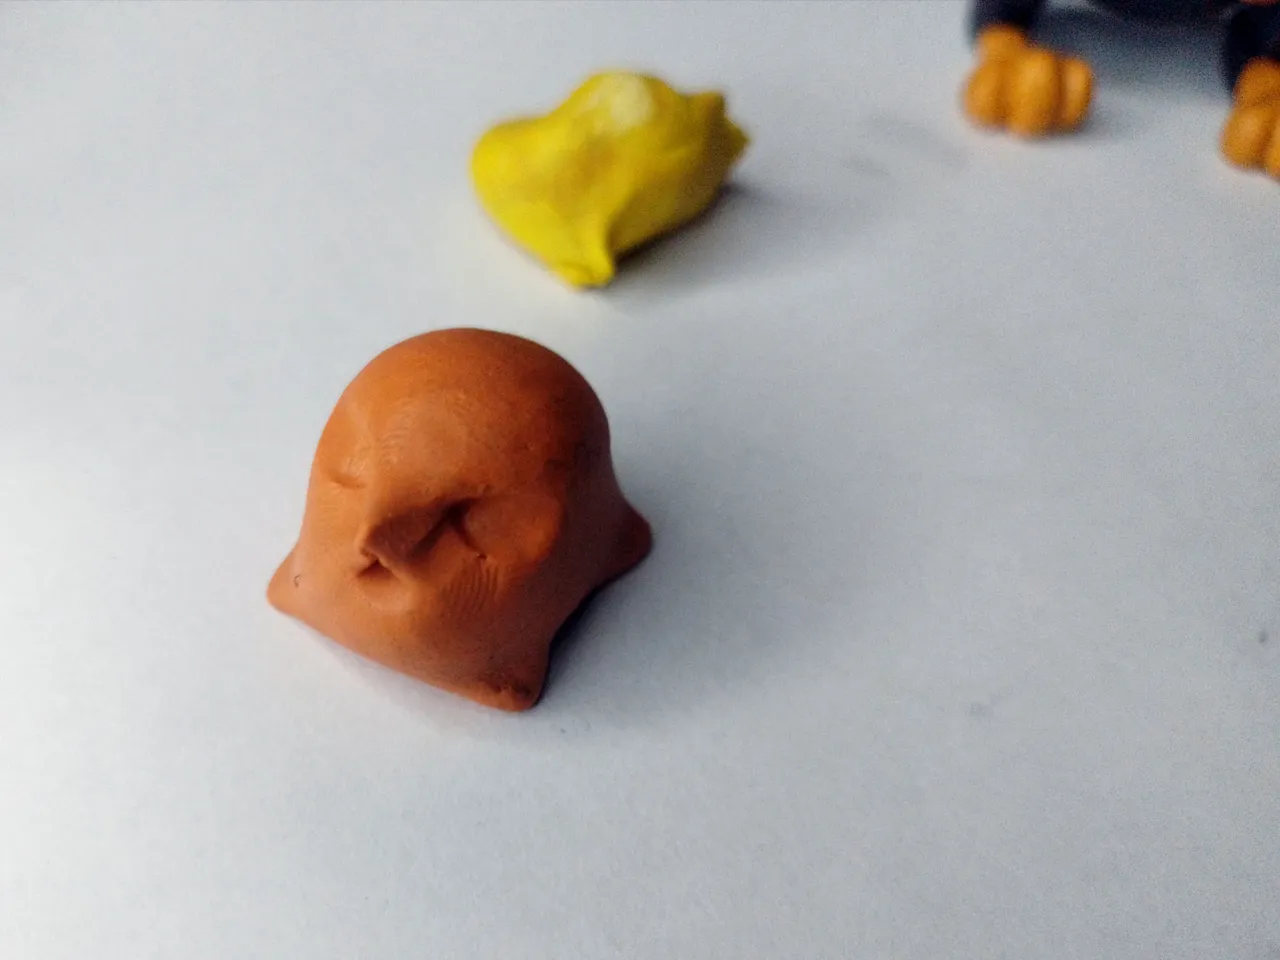
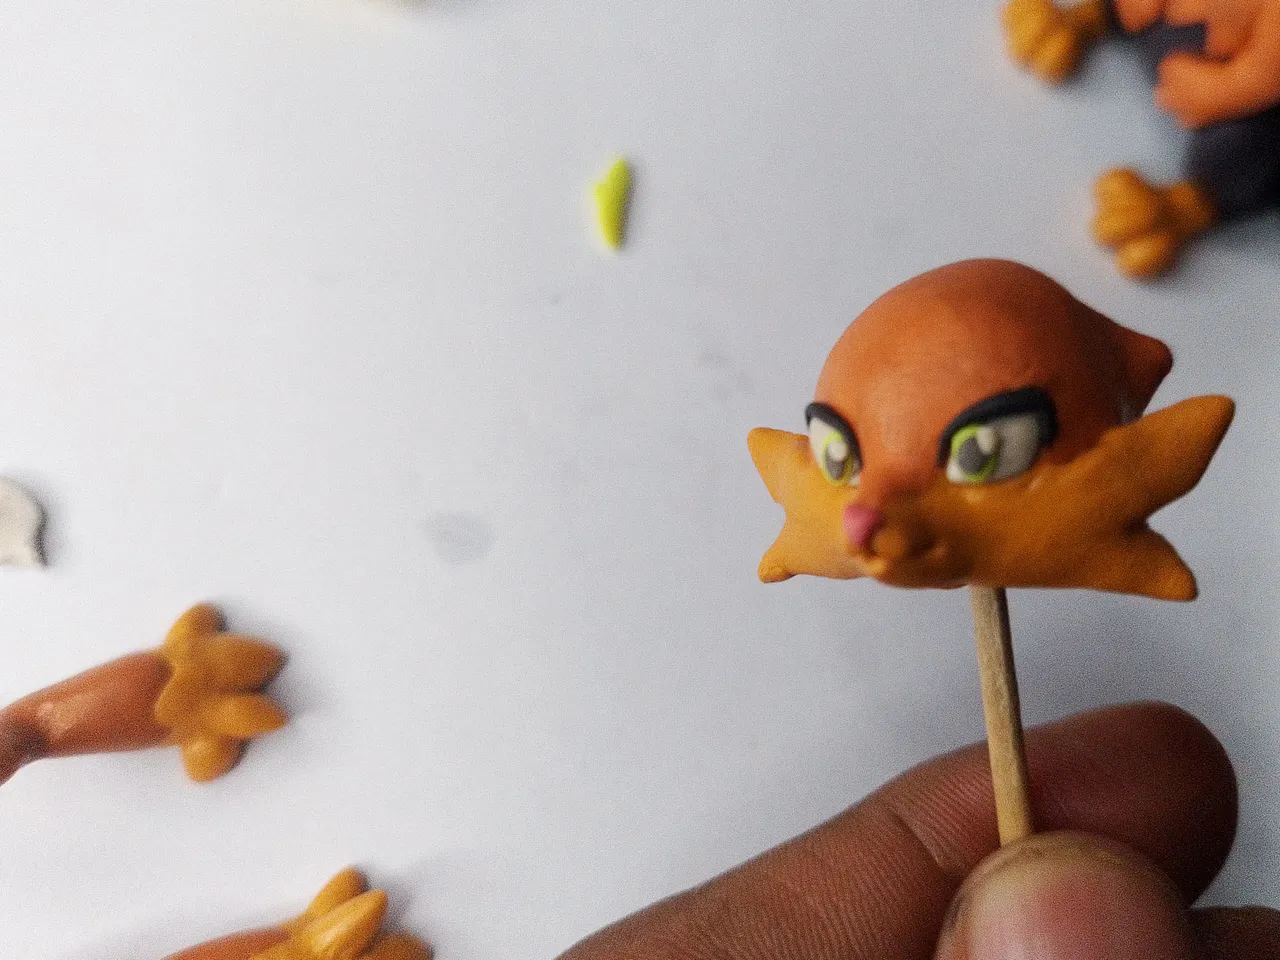
To make the head I removed the entire upper shell and began to mold the head individually. I then placed it in the neck area where it belongs.
I then placed the two eyes in the sockets I made for them.
Para hacer la cabeza retiré todo el armazón superior y comencé a moldear la cabeza de manera individual. Luego la coloqué en el área del cuello, donde corresponde.
Luego le coloqué los dos ojos en las cuencas que les hice.
 |  |
|---|
 |  |
|---|
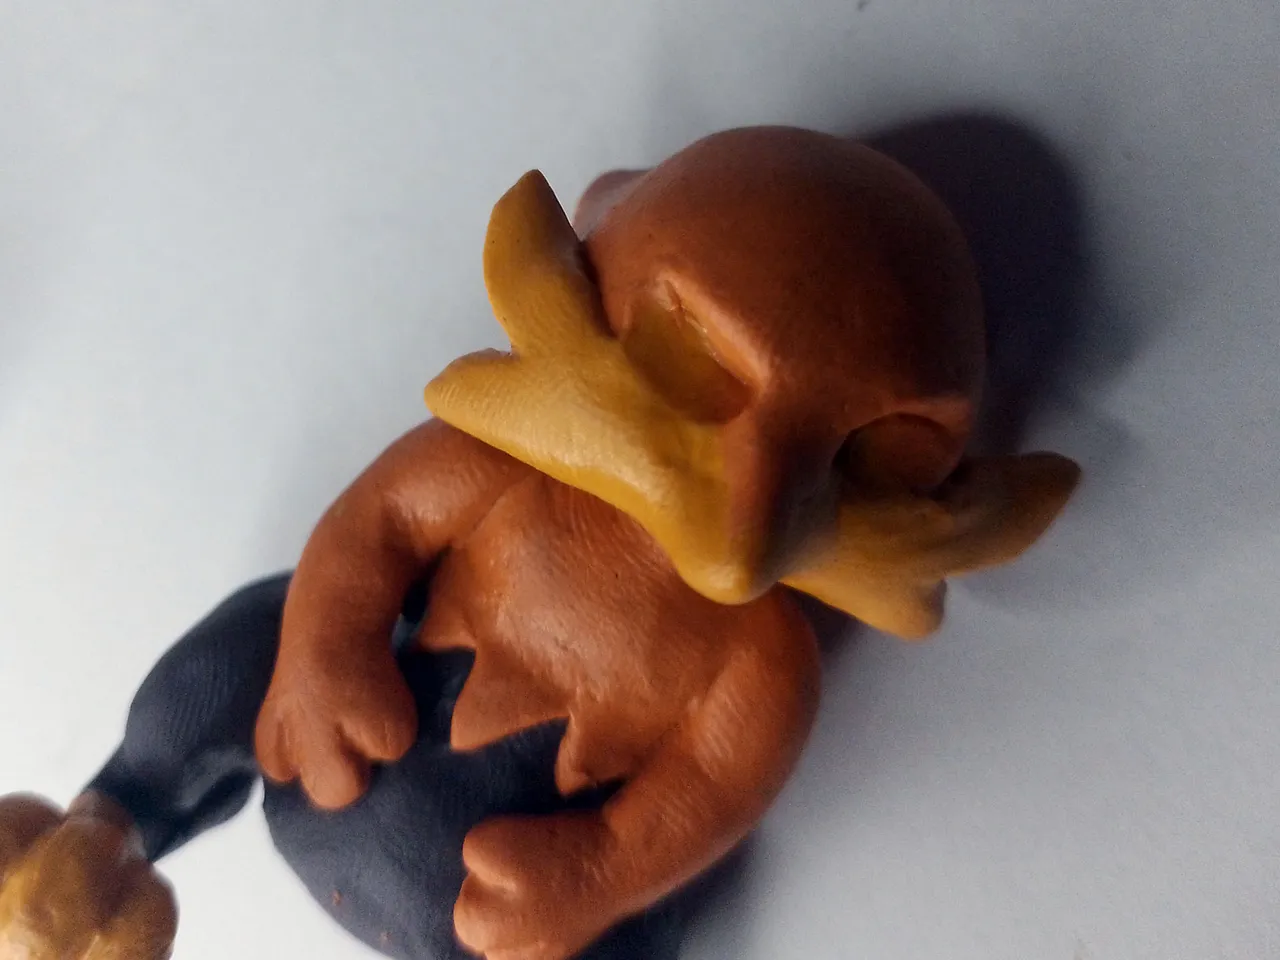
Finally, I made the ears, which are huge. I attached the wire support, finished the eyes and put everything in place.
Ya para finalizar le hice las orejas, que son enormes. Les coloqué el soporte de alambre, le terminé los ojos al personaje y coloqué todo en su lugar.
 |  |
|---|
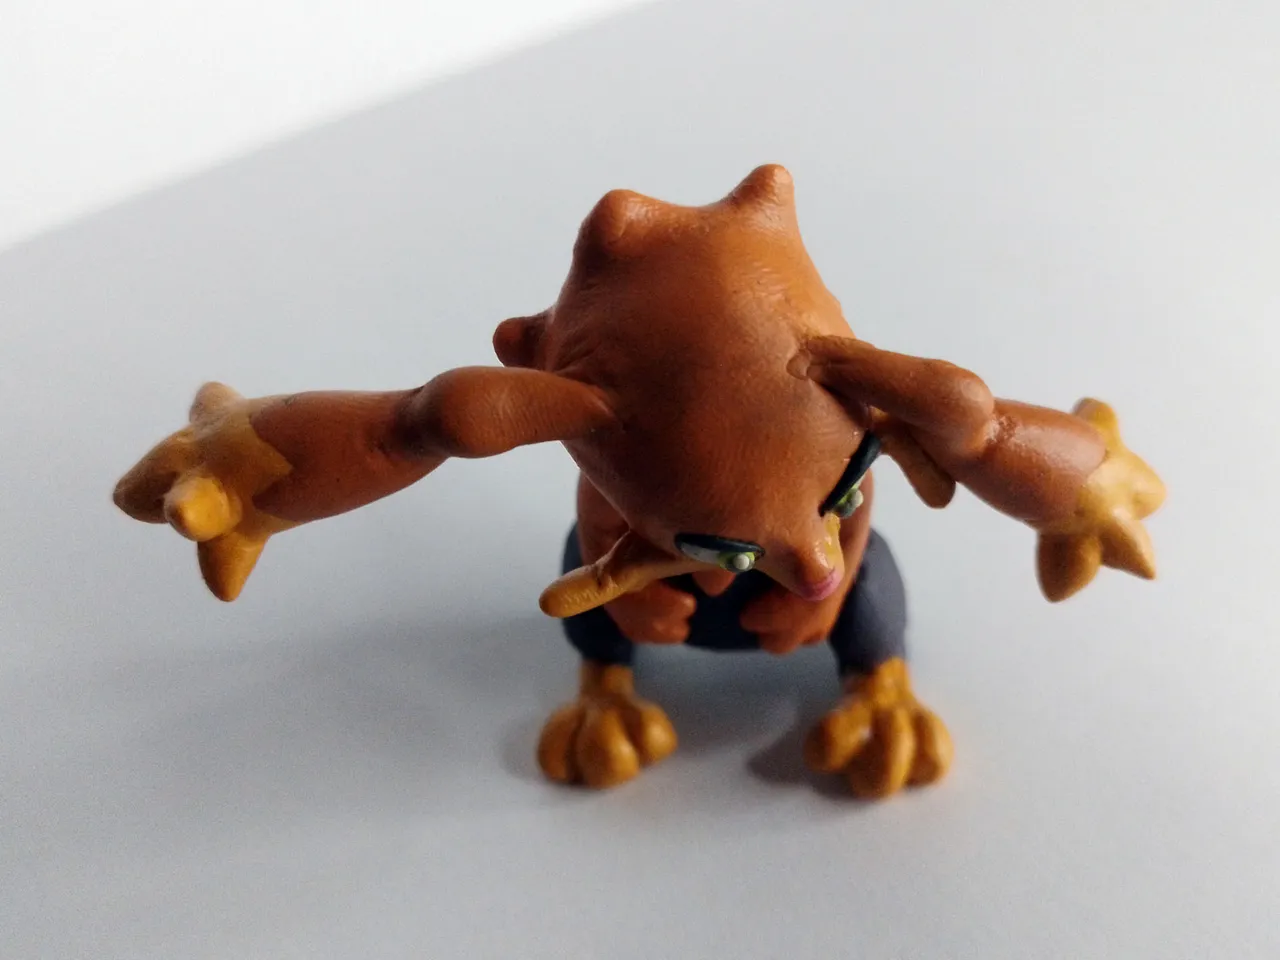
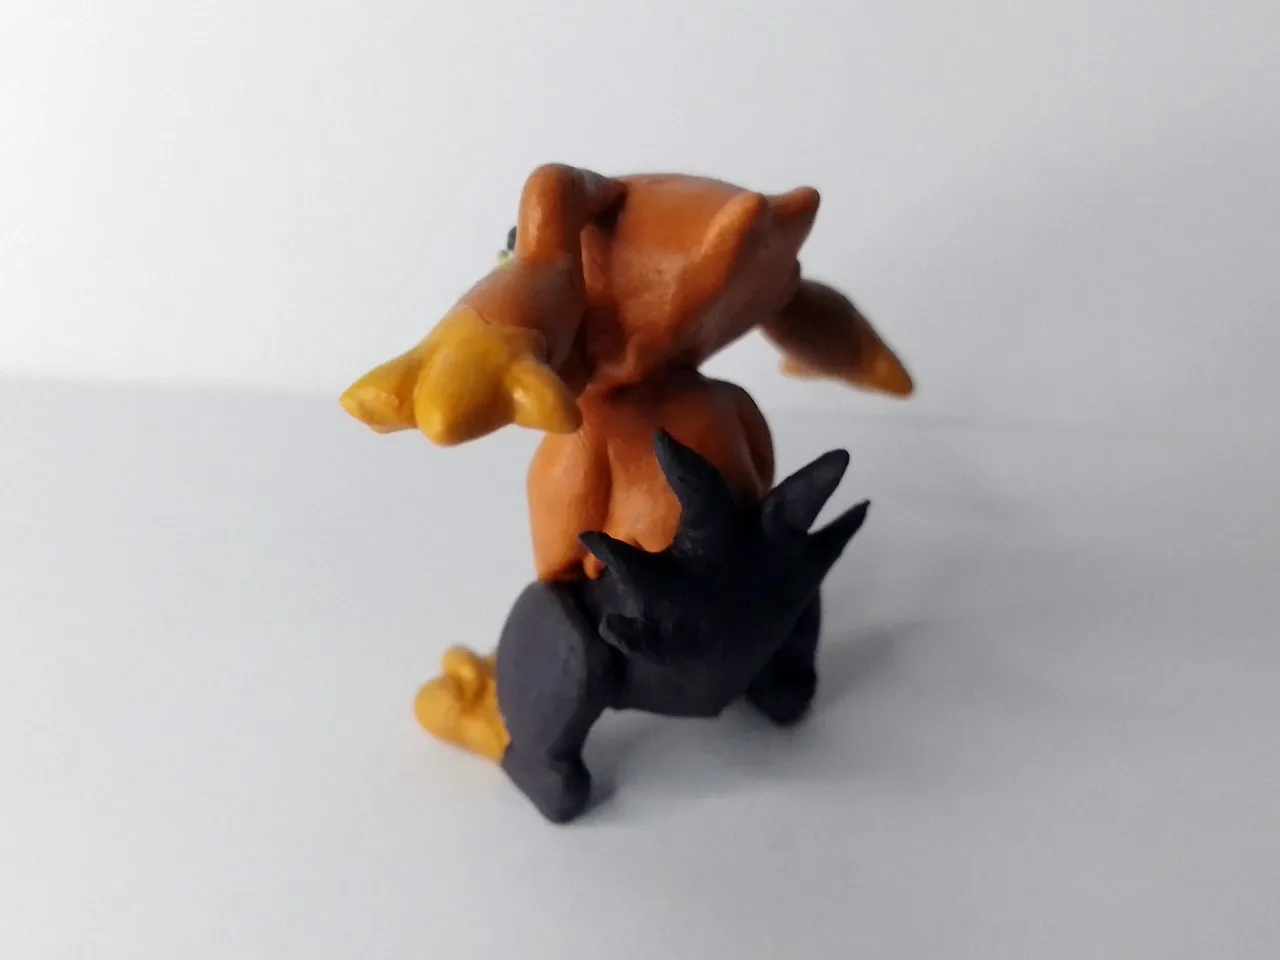
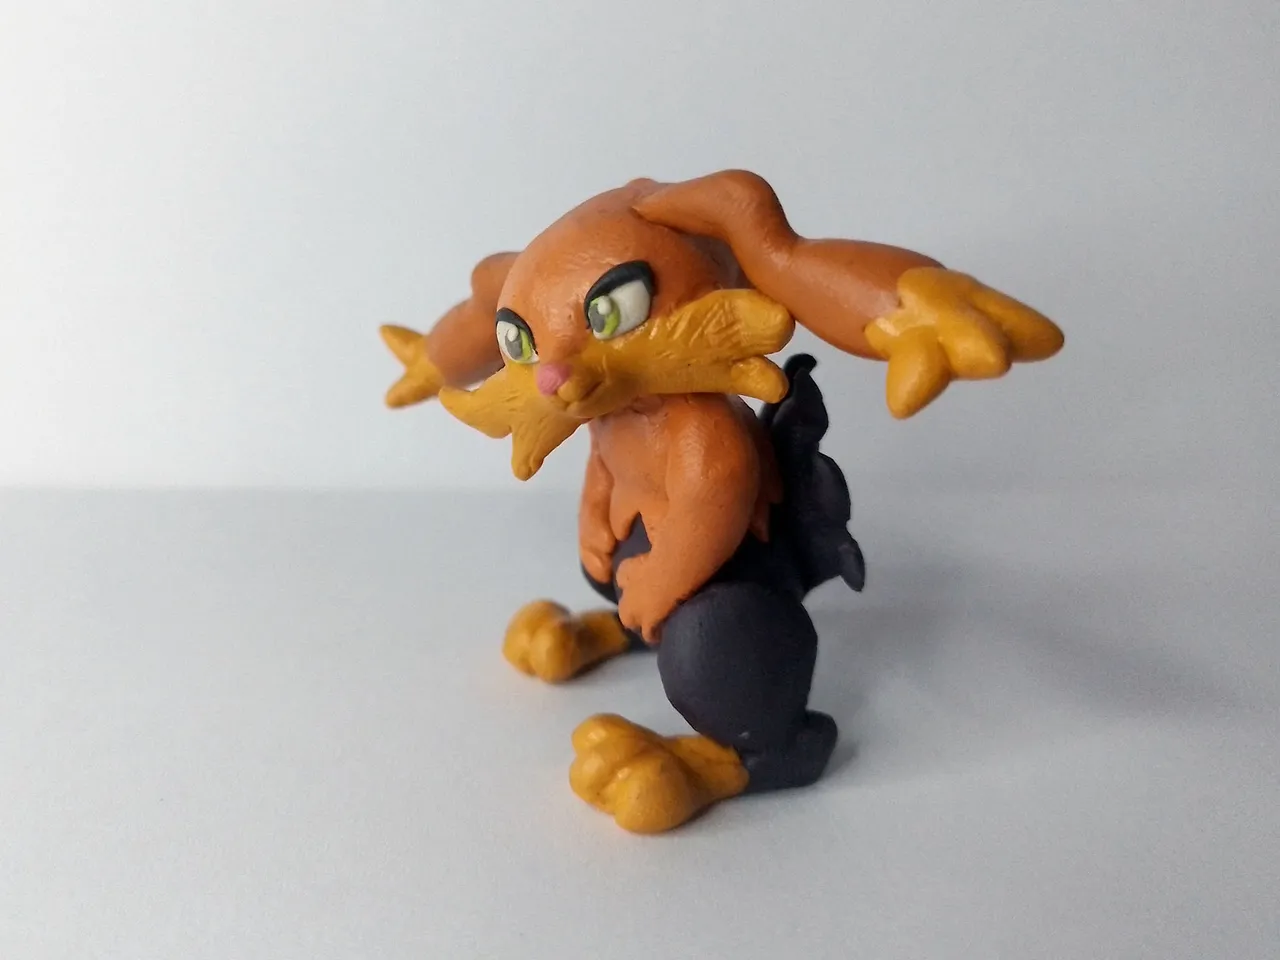
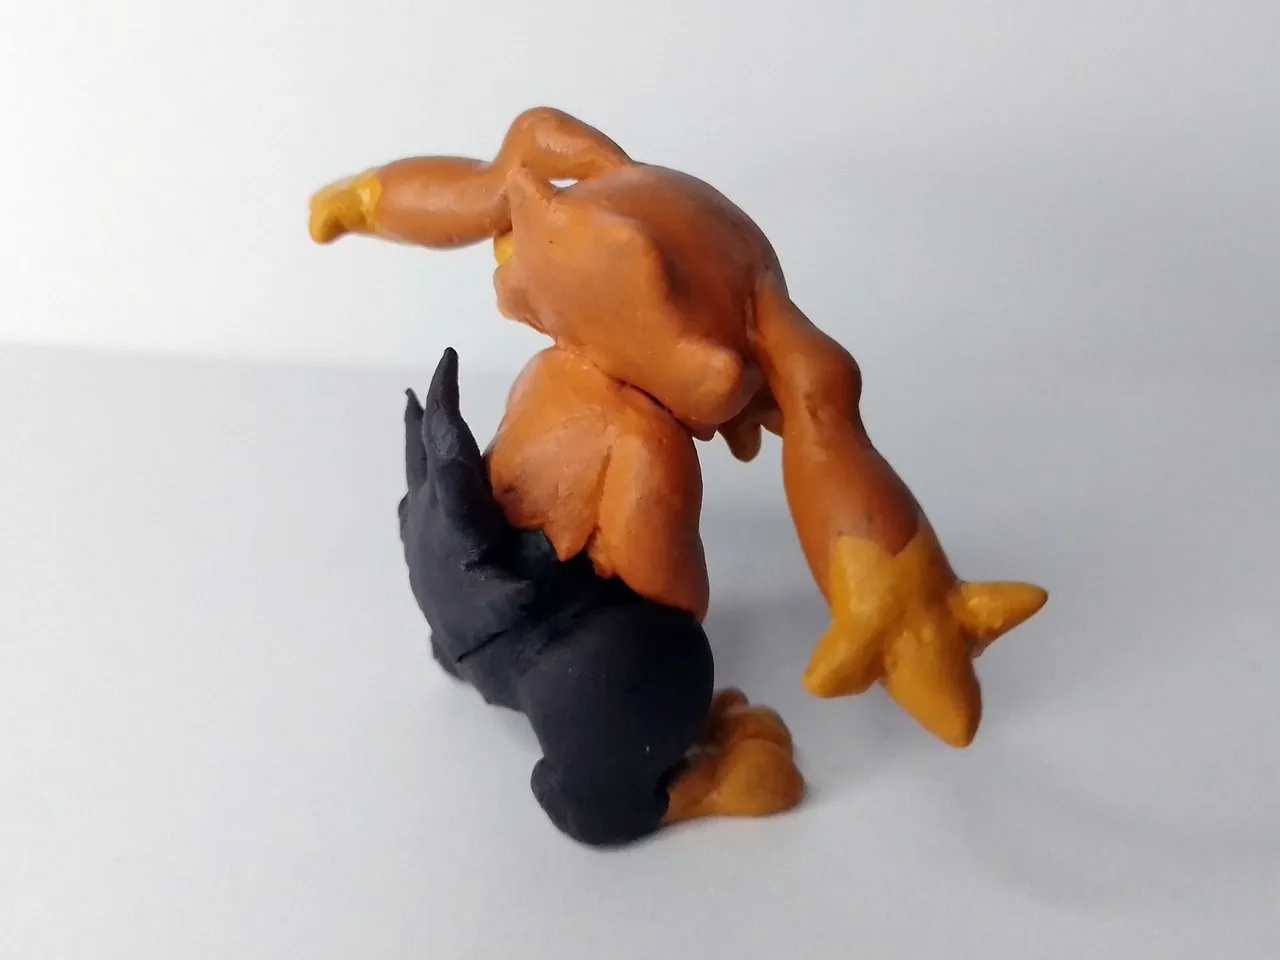
This is how the figure was finished. Below is a series of photographs of the final result:
De esta manera quedó terminada la figura. A continuación una serie de fotografías del resultado final:
And well, this has been all for now regarding my Holozing rewards and this cool sculpture I made. I invite you to give your opinions about it below in the comments, as always I will be happy to read them.
I appreciate you taking the time to read my post. With nothing more to add, I'll say goodbye then...
See you next time!
Y bien, esto ha sido todo por ahora en cuanto a mis recompensas en Holozing y esta genial escultura que hice. Los invito a dar sus opiniones al respecto abajo en los comentarios, como siempre estaré encantado de leerlos.
Agradezco que se tomaran el tiempo de leer mi publicación. Sin más que agregar, me despido entonces...
¡Hasta la próxima!