Hola a todos los amigos y amigas de Holozing. Estoy contenta de realizar hoy mi primera publicación en esta comunidad, la verdad estoy aún aprendiendo sobre el proyecto activo, pero espero prontamente ponerme al día con muchas cosas que aún no soy tan capaz de descifrar. Sin embargo, a términos generales el juego me recuerda mucho a uno que solían jugar mis hijos cuando eran niños, por la naturaleza de los personajes. Además de que estoy segura de que será algo bastante fantástico y deseando ser parte aunque de manera bastante minúscula, hoy he elaborado una franela inspirada en Holozing!
Hello to all the friends of Holozing. I am happy to make my first publication in this community today, the truth is I am still learning about the active project, but I hope to soon catch up with many things that I am not yet able to decipher. However, in general terms the game reminds me a lot of one that my children used to play when they were children, due to the nature of the characters. In addition to the fact that I am sure that it will be something quite fantastic and wanting to be part of it although in a very small way, today I made a flannel inspired by Holozing!
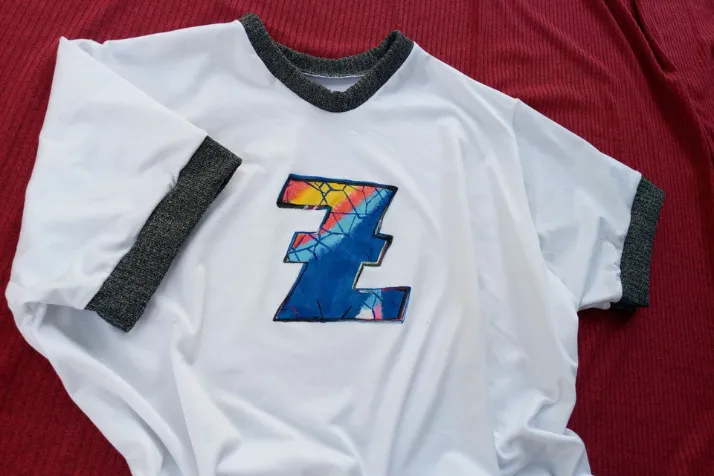
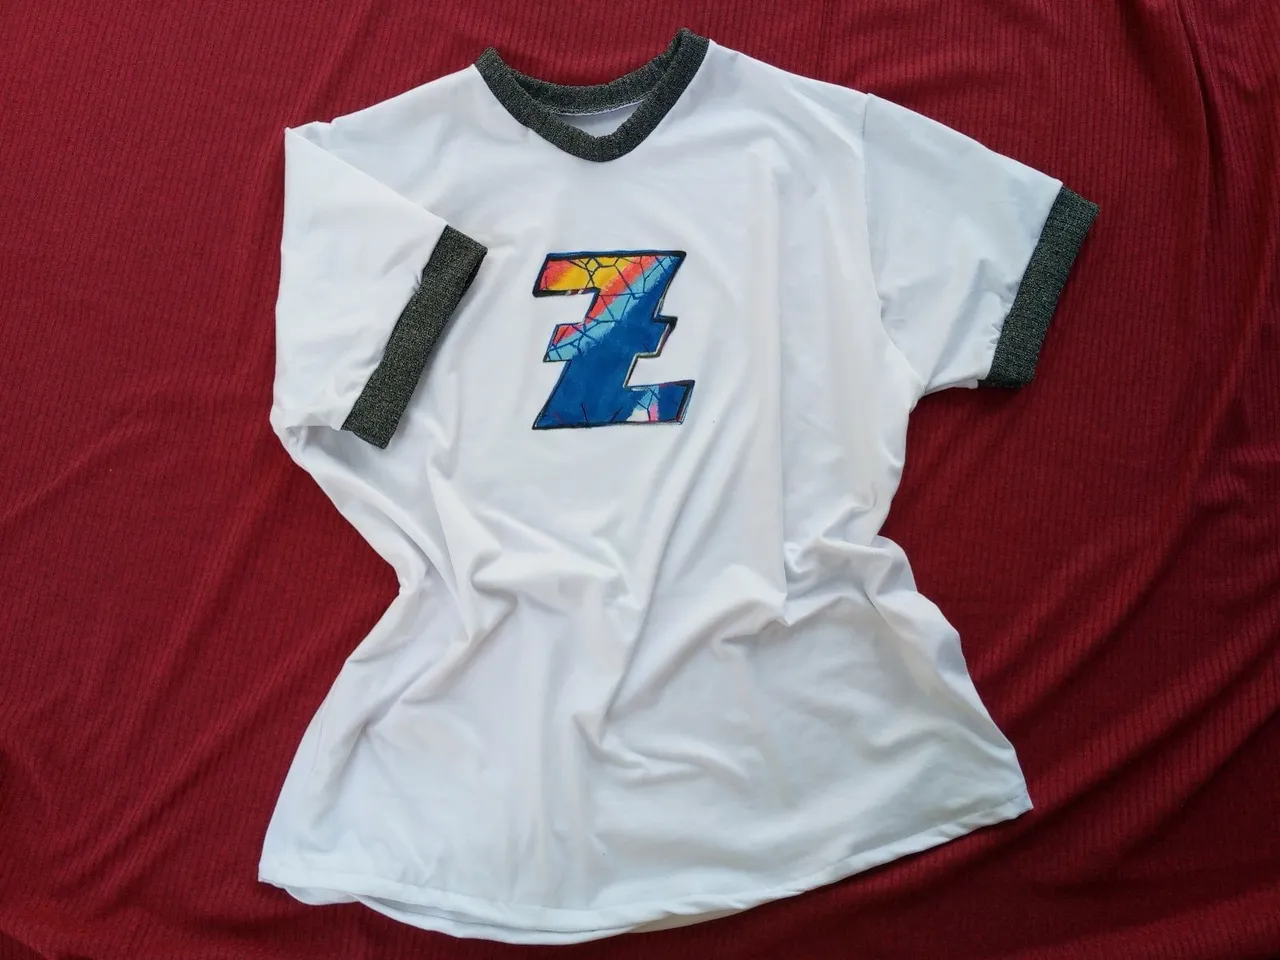
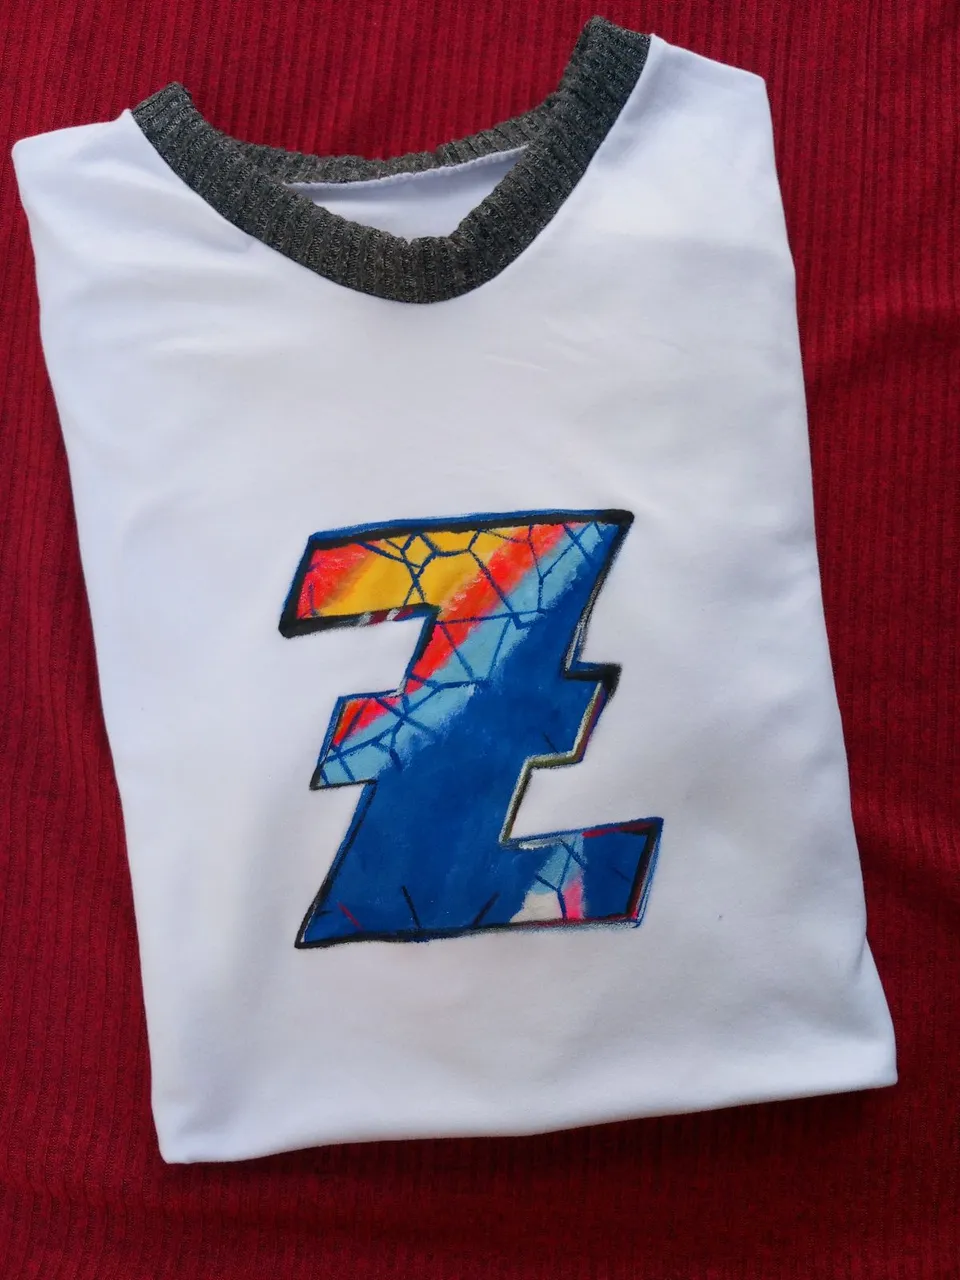
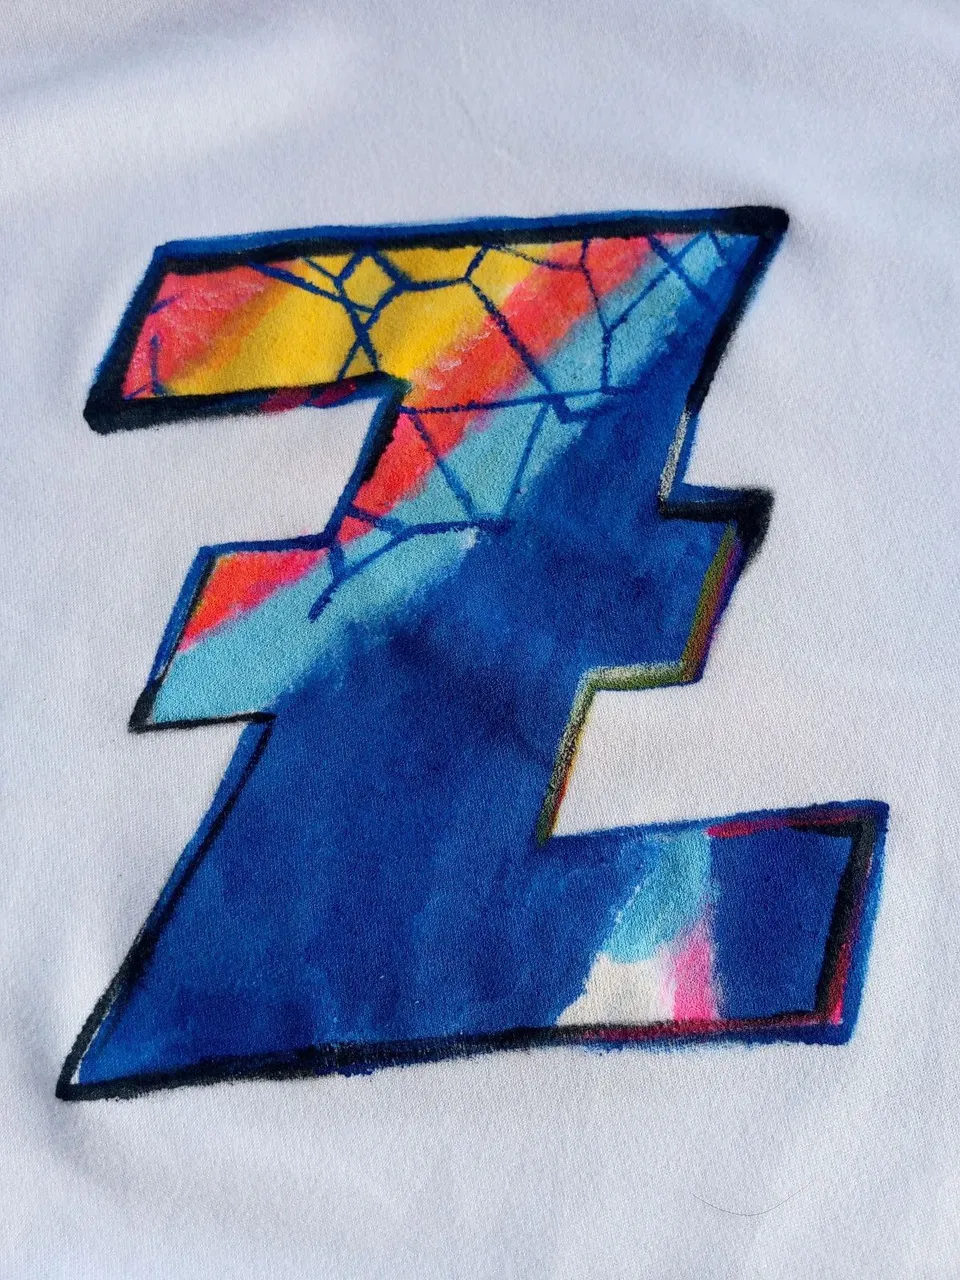
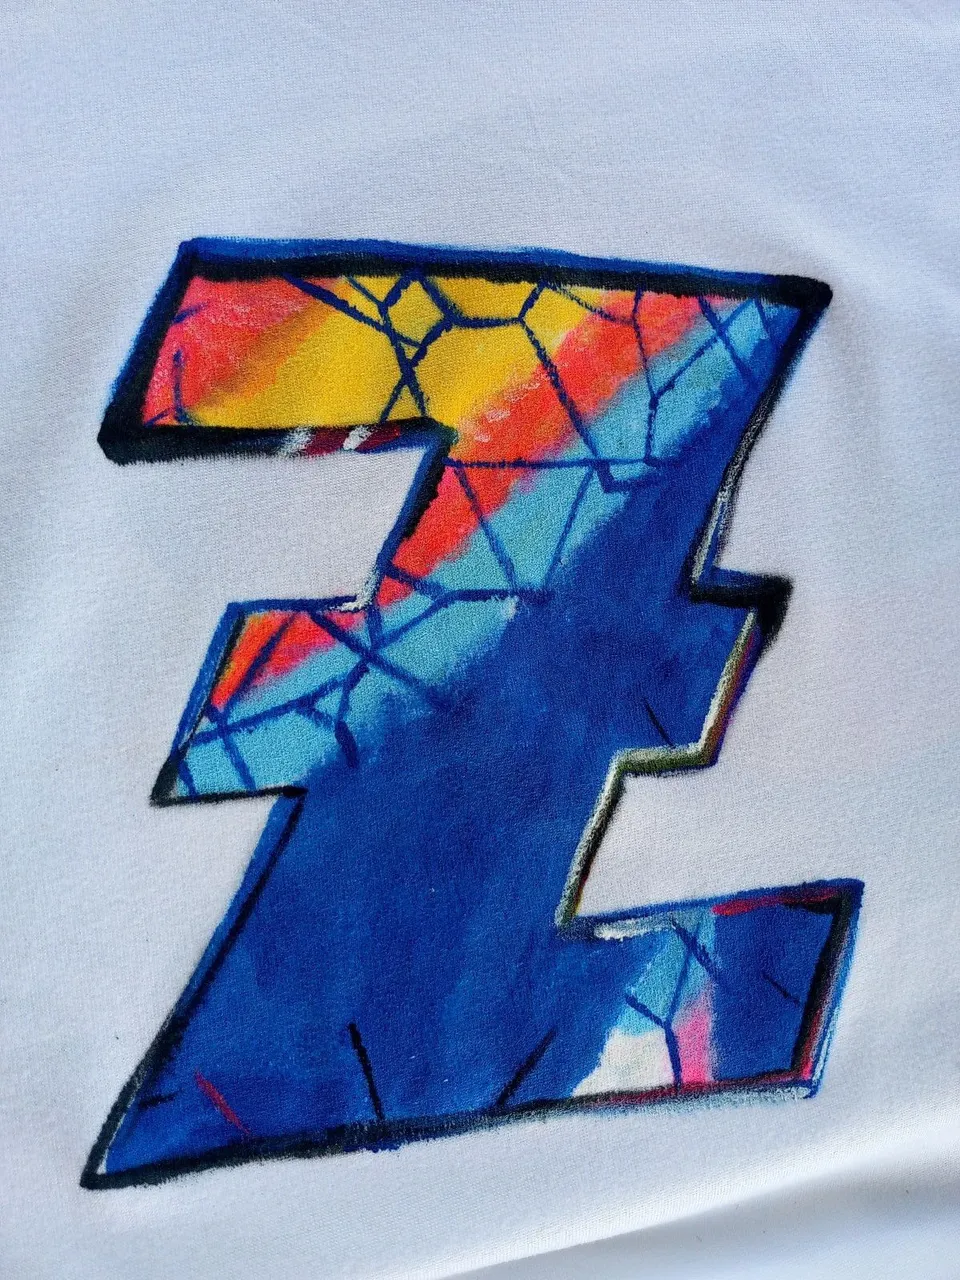
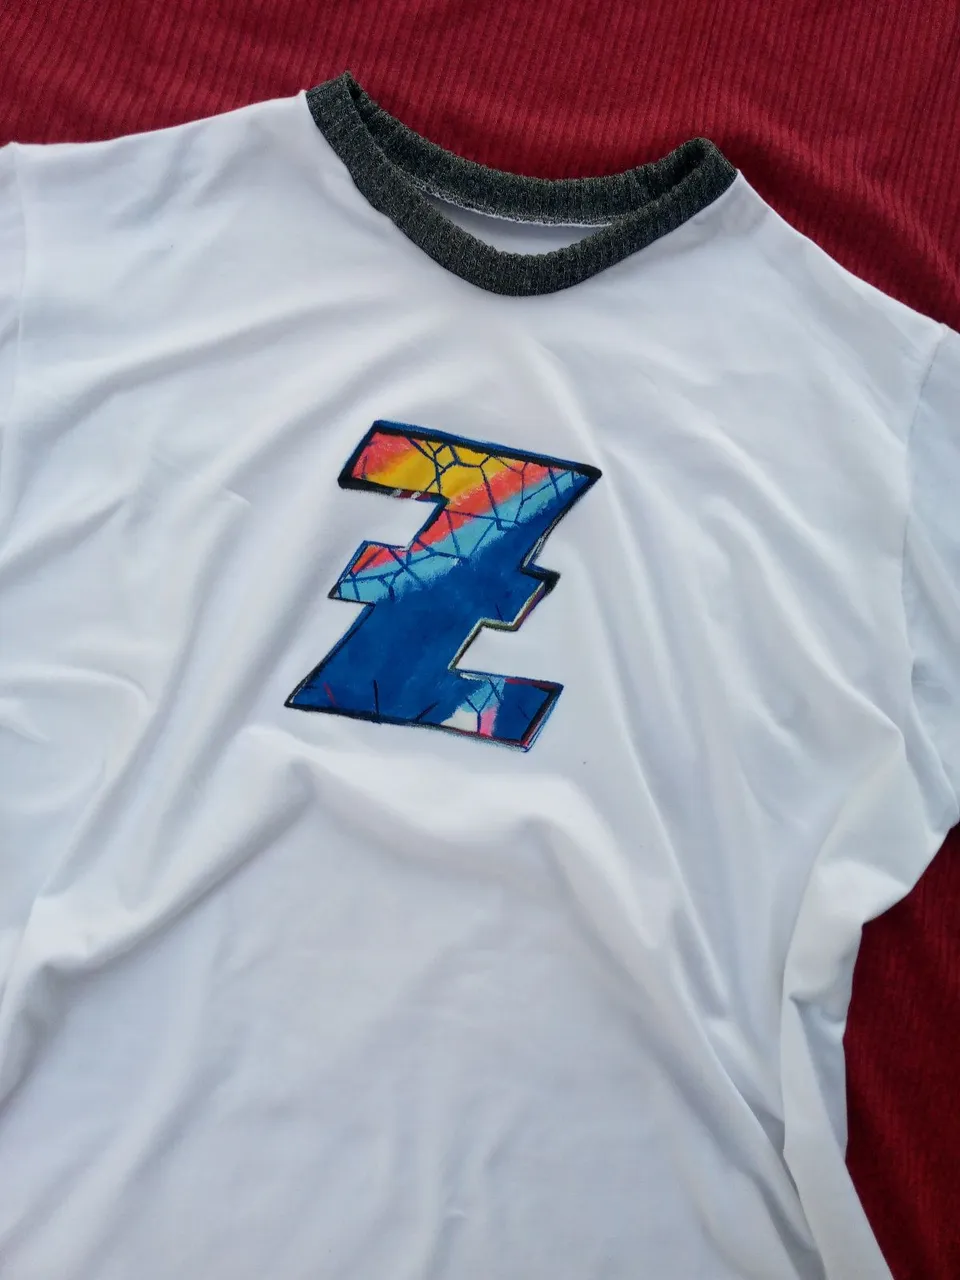
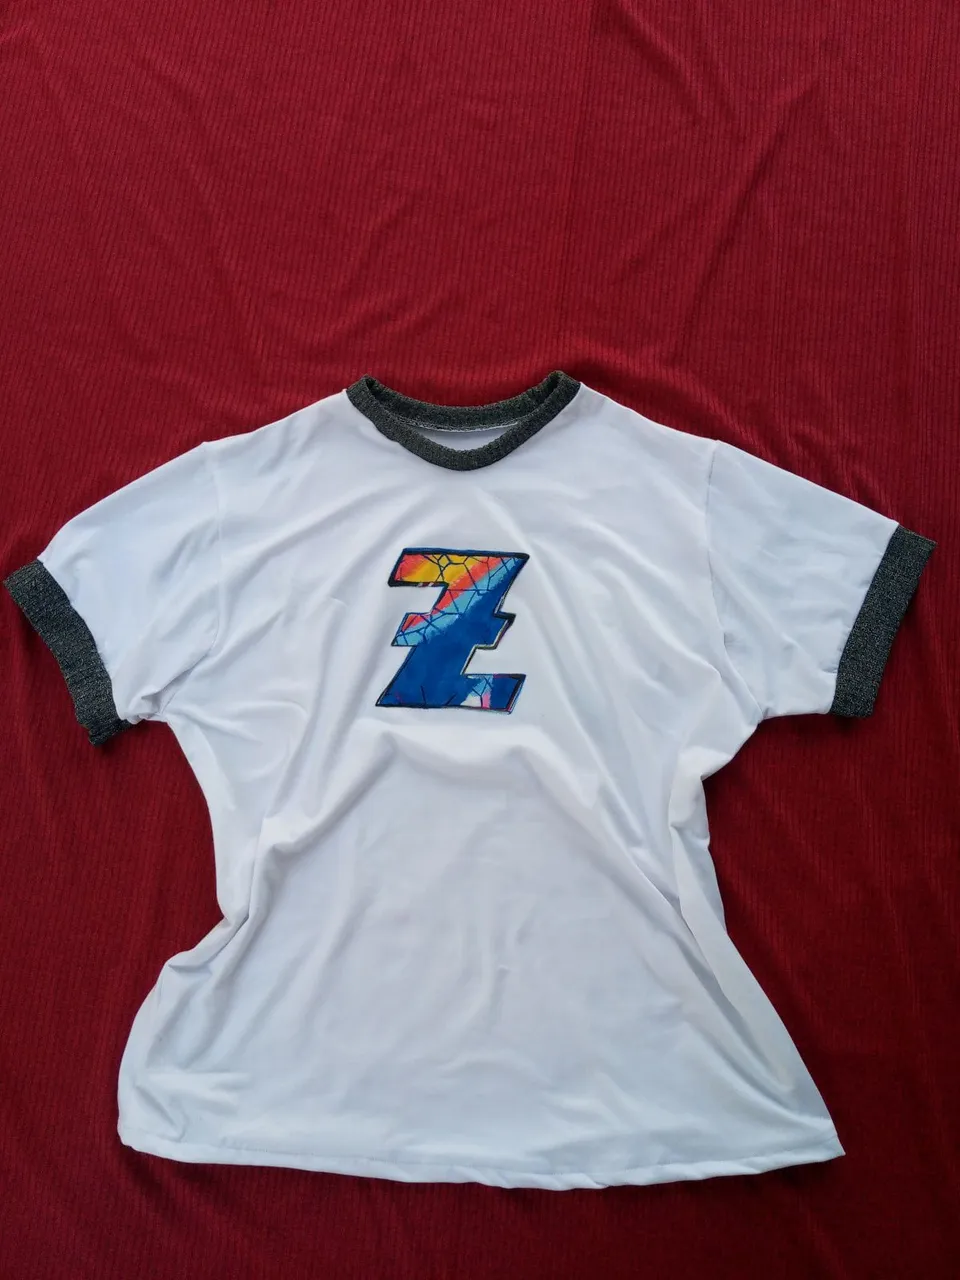
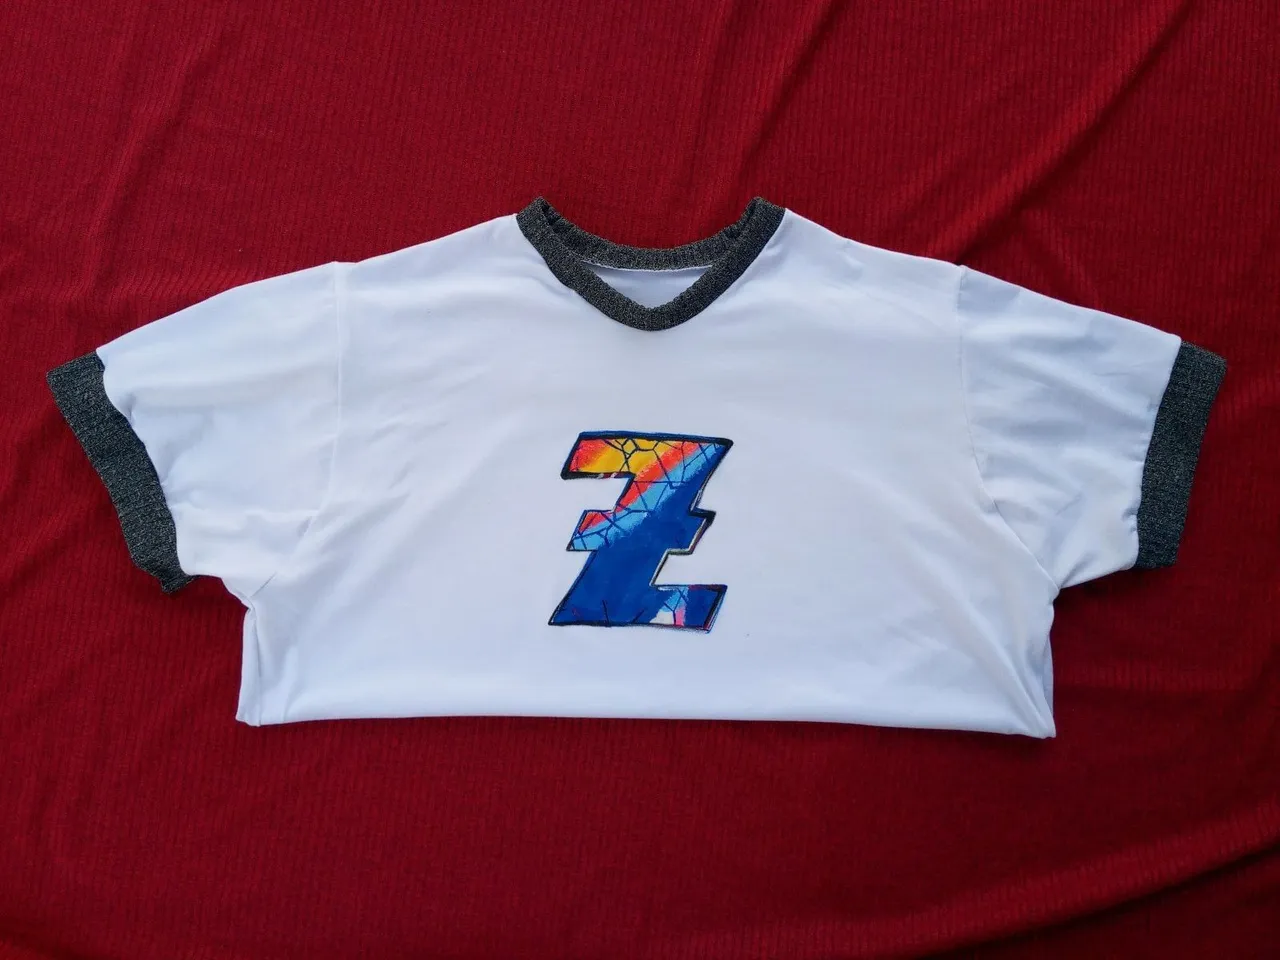
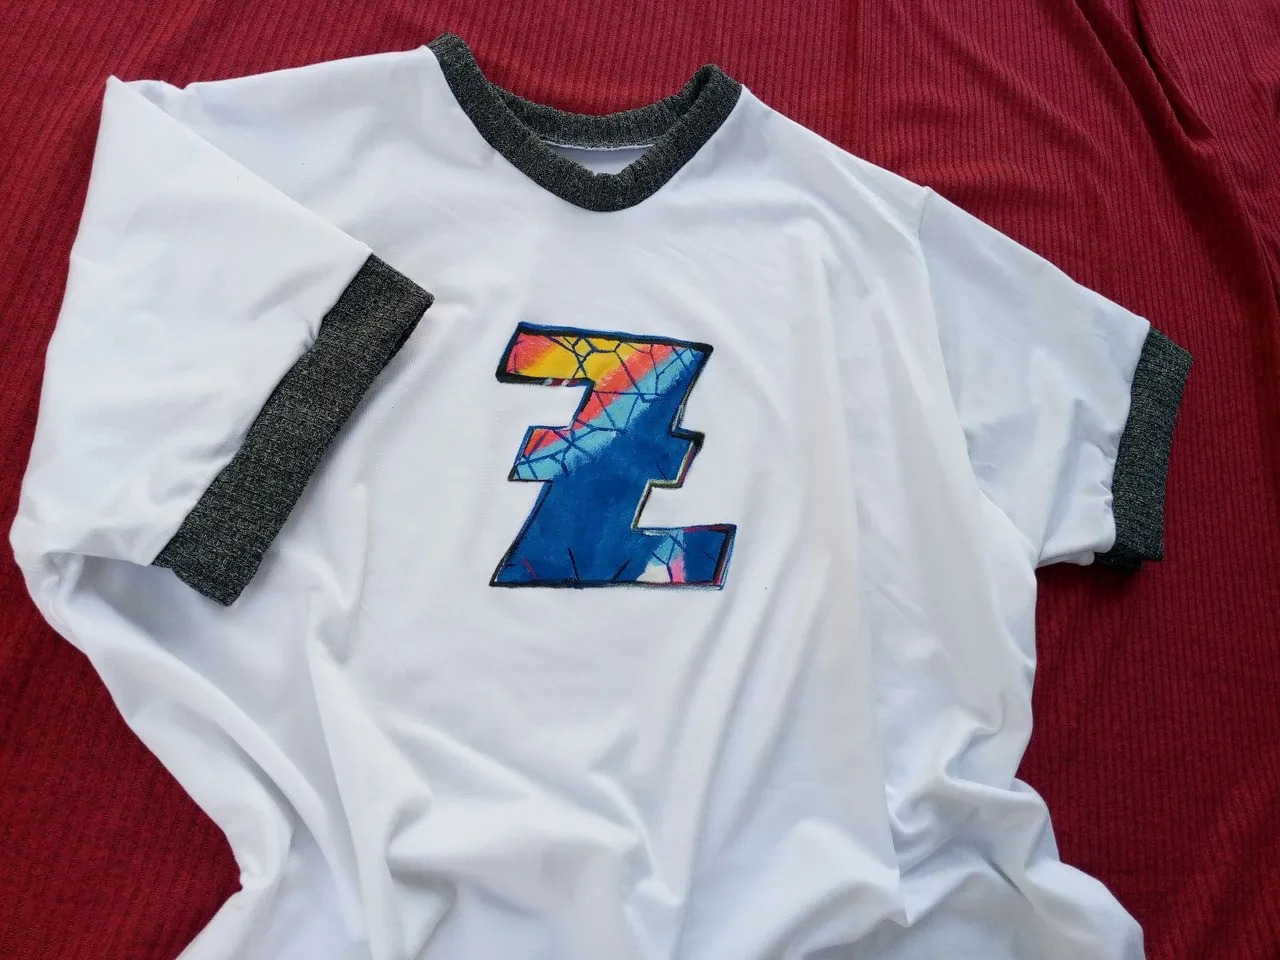
La franela tiene un diseño básico y cómodo, simplemente podrías usarle para cualquier ocasión que requiera comodidad. La tela que he usado es Microdurazno, una total suavidad, mi nieta la tocaba por todos lados y decía: muy suave. Los bordes de las mangas y el cuello en tela de Rib con un tono gris plomo, para realzar detalles. Me ha parecido que es bastante bonita la combinación, el logo del proyecto Holozing resplandece de manera central. El logo fue recreado de manera manual a base de pinturas, hubiera deseado imitar a plenitud la simulación de textura del mismo, pero no pude a pesar de mi mejor esfuerzo. Para recrear el logo, he usado la imagen que se muestra en el sitio web: https://holozing.com/
The flannel has a basic and comfortable design, you could simply use it for any occasion that requires comfort. The fabric I used is Micropeach, totally soft, my granddaughter touched it everywhere and said: very soft. The edges of the sleeves and collar in Rib fabric with a gunmetal tone, to highlight details. I thought the combination was quite nice, the Holozing project logo shines centrally. The logo was recreated manually using paints. I would have liked to fully imitate its texture simulation, but I couldn't despite my best efforts. To recreate the logo, I have used the image shown on the website: https://holozing.com/
Esta linda versión de franela inspirada en Holozing la he elaborado bajo el pensamiento de obsequiarla en navidad a mi nieto mayor. Él es un adolescente y vive en otra ciudad con su madre, y estoy segura que nos veremos prontamente en navidad para la reunión familiar. Me lo he imaginado muy contento por el regalo, siempre suele usar franelas para ir a sus pendientes educativos o reuniones de amigos. Para mis otros nietos también debo ir pensando en algunos presentes, prontamente me ocuparé de ellos.
I made this cute flannel version inspired by Holozing with the thought of giving it as a Christmas gift to my oldest grandson. He is a teenager and lives in another city with his mother, and I am sure we will see each other soon at Christmas for the family reunion. I have imagined him very happy for the gift, he always usually wears t-shirts to go to educational activities or meetings with his friends. For my other grandchildren I must also be thinking about some presents, I will soon take care of them.
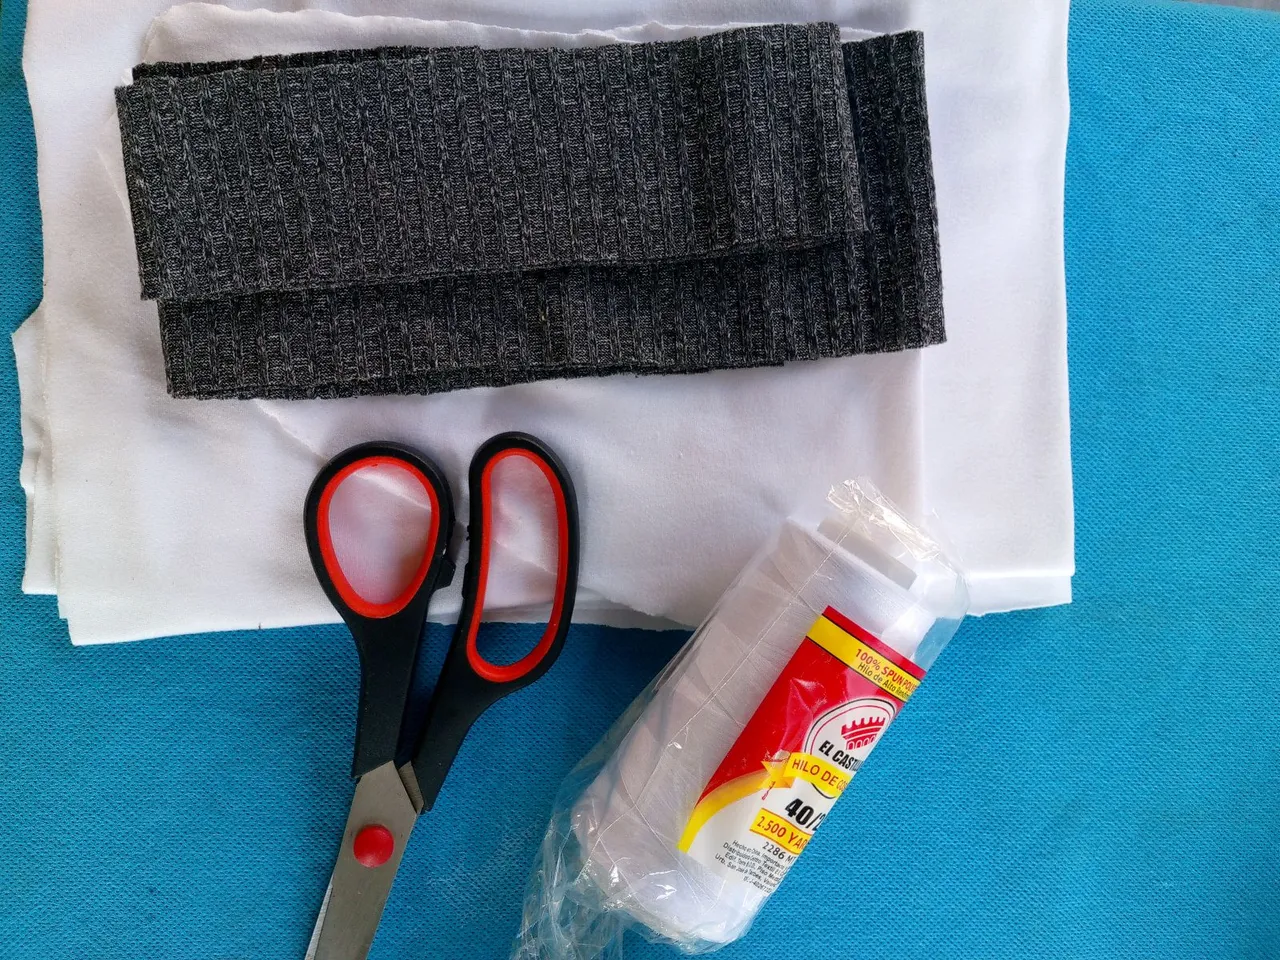
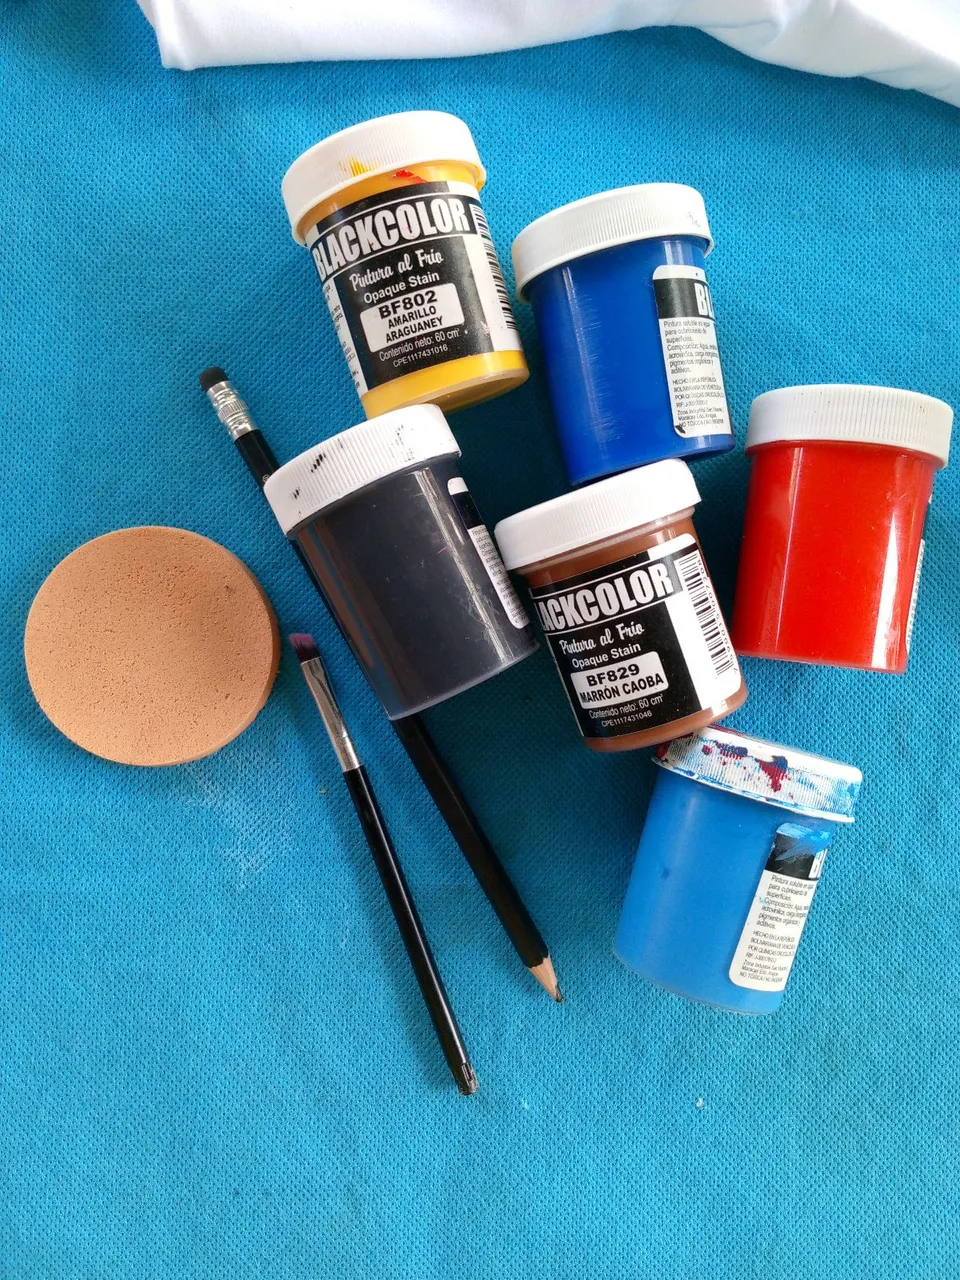
Materiales:
- 1 metro de tela Microdurazno en color blanco
- 20 centímetros de tela Rib en color gris plomo
- Pinturas de colores: Blanco, amarillo, rojo, rosa, azul, negro.
- Pincel - Esponja - Lápiz
- Hilo - Máquina de coser - Tijera - Cinta métrica
Materials:
- 1 meter of Micropeach fabric in white
- 20 centimeters of Rib fabric in lead gray color
- Color paints: White, yellow, red, pink, blue, black.
- Brush - Sponge - Pencil
- Thread - Sewing machine - Scissors - Tape measure
Proceso de Creación / Creation Process
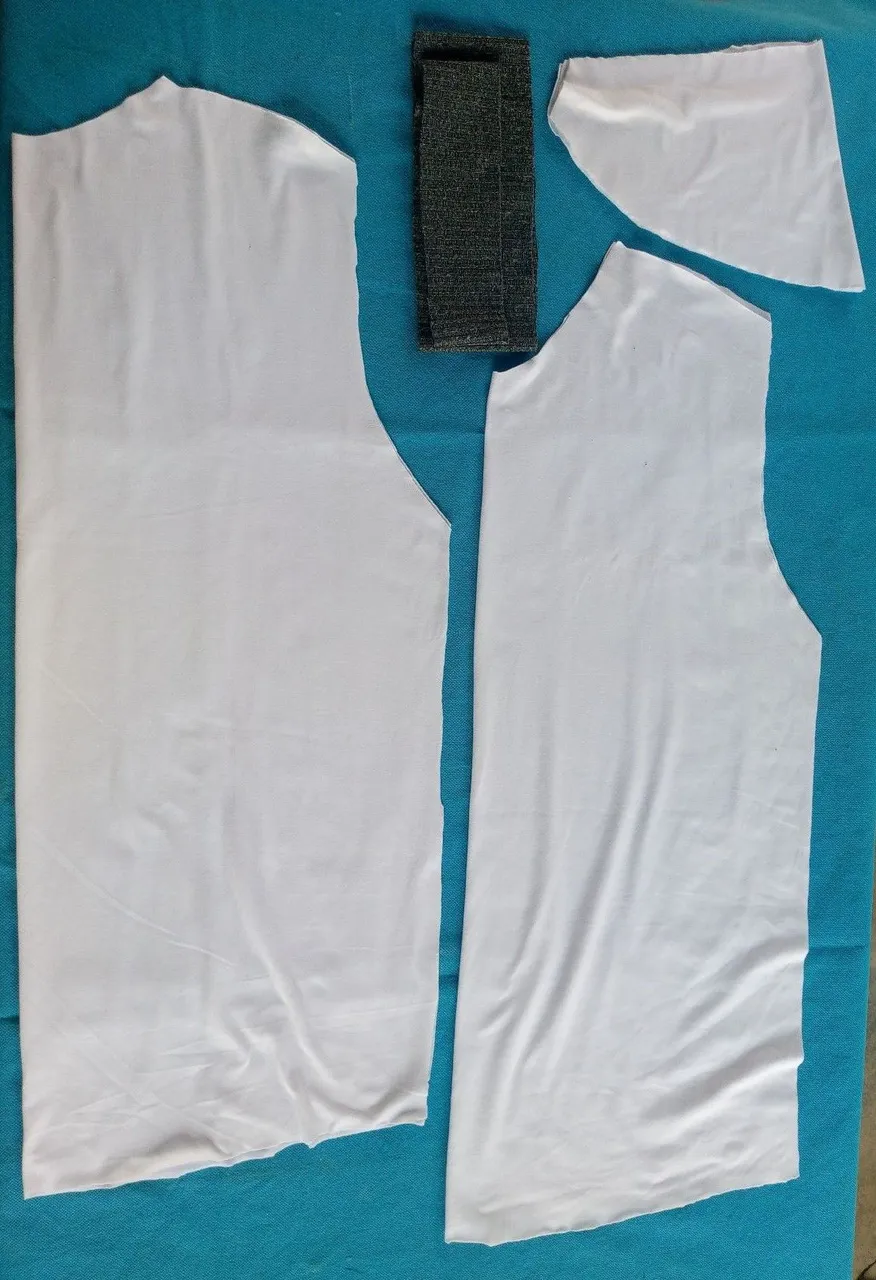
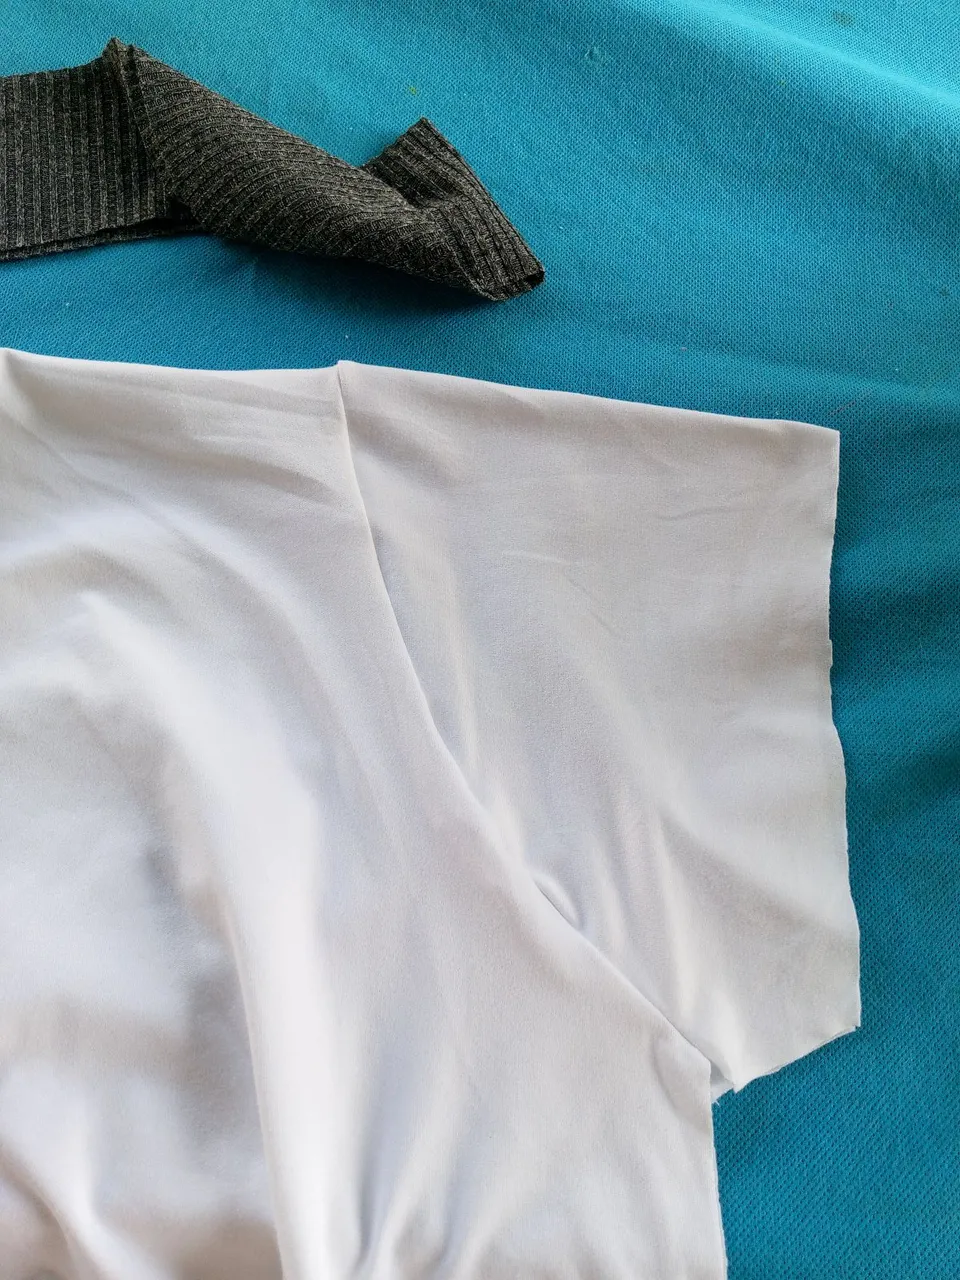
Iniciamos la labor cortando las piezas, del cuerpo de la franela son dos piezas que se distinguen una de la otra por el cuello. Sería un delantero y un trasero. Cortamos también dos listones, que sería uno para el cuello que tiene 4 centímetros de ancho y para las mangas he optado por colocarle más ancho el detalle, por ello he cortado 8 centímetros de ancho.
We start the work by cutting the pieces, from the body of the flannel there are two pieces that are distinguished from each other by the neck. It would be a front and a rear. We also cut two ribbons, which would be one for the neck that is 4 centimeters wide and for the sleeves I have chosen to place the detail wider, which is why I have cut 8 centimeters wide.
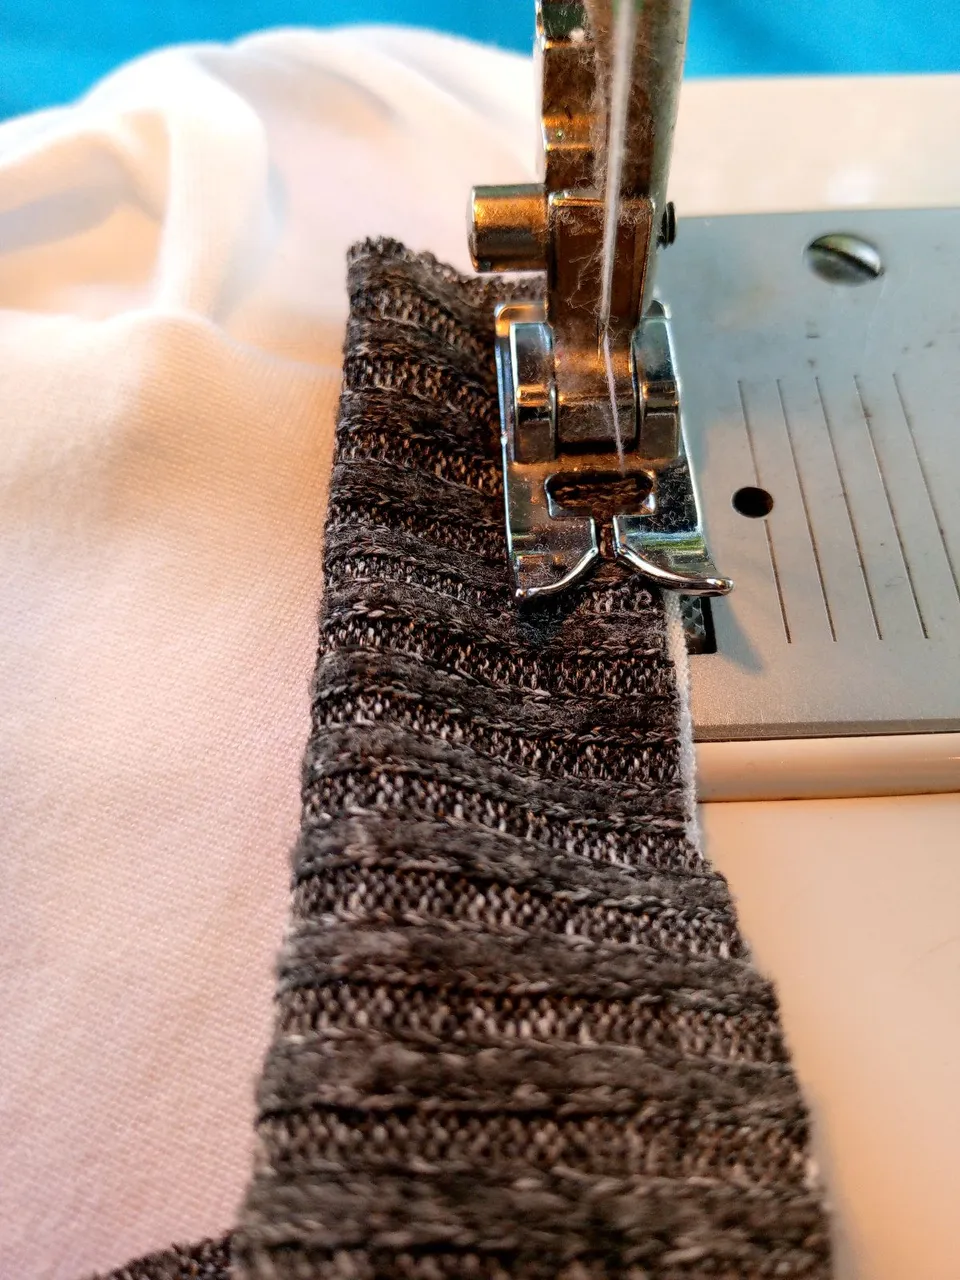
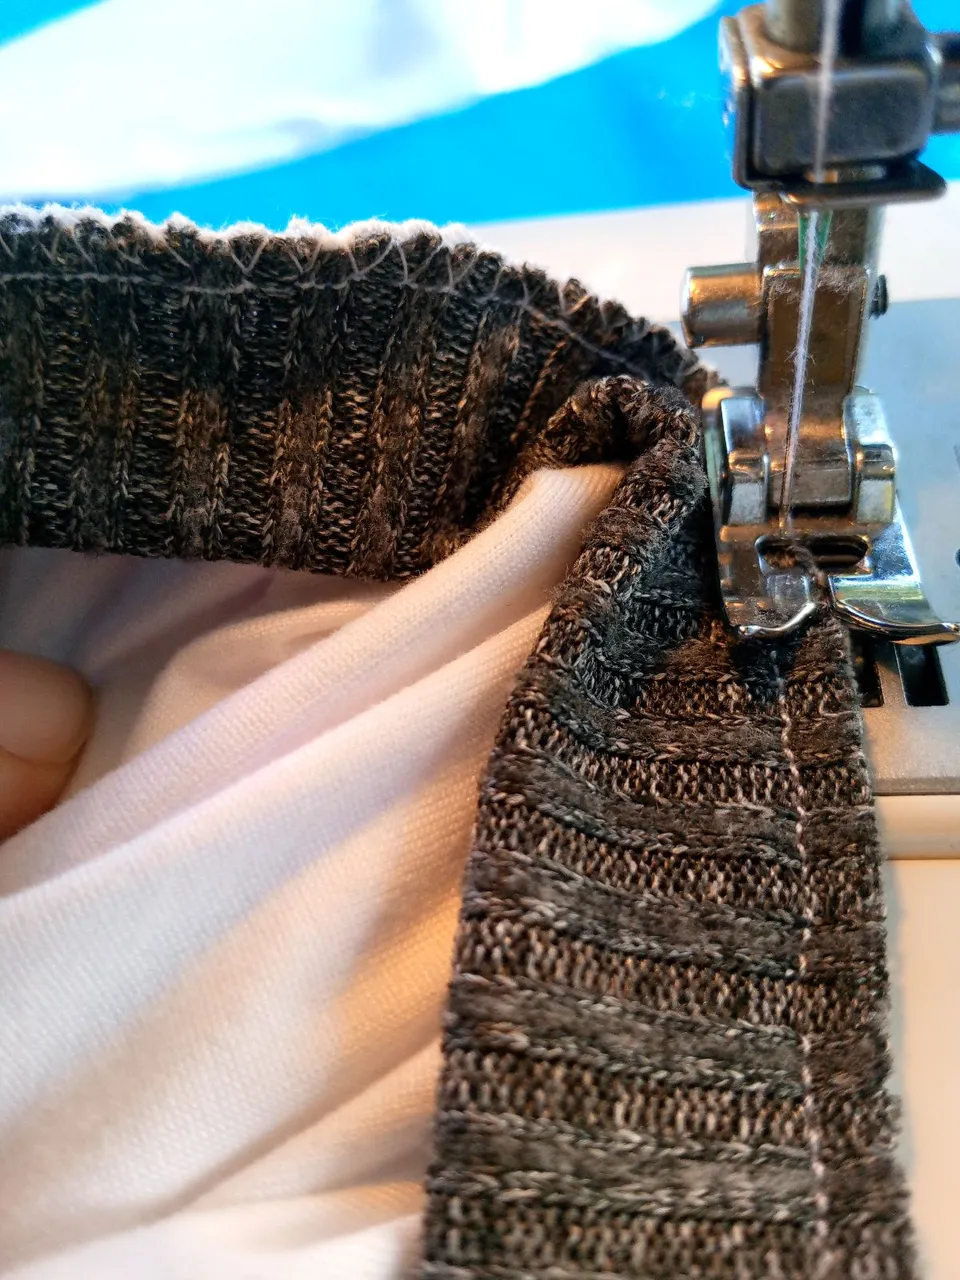
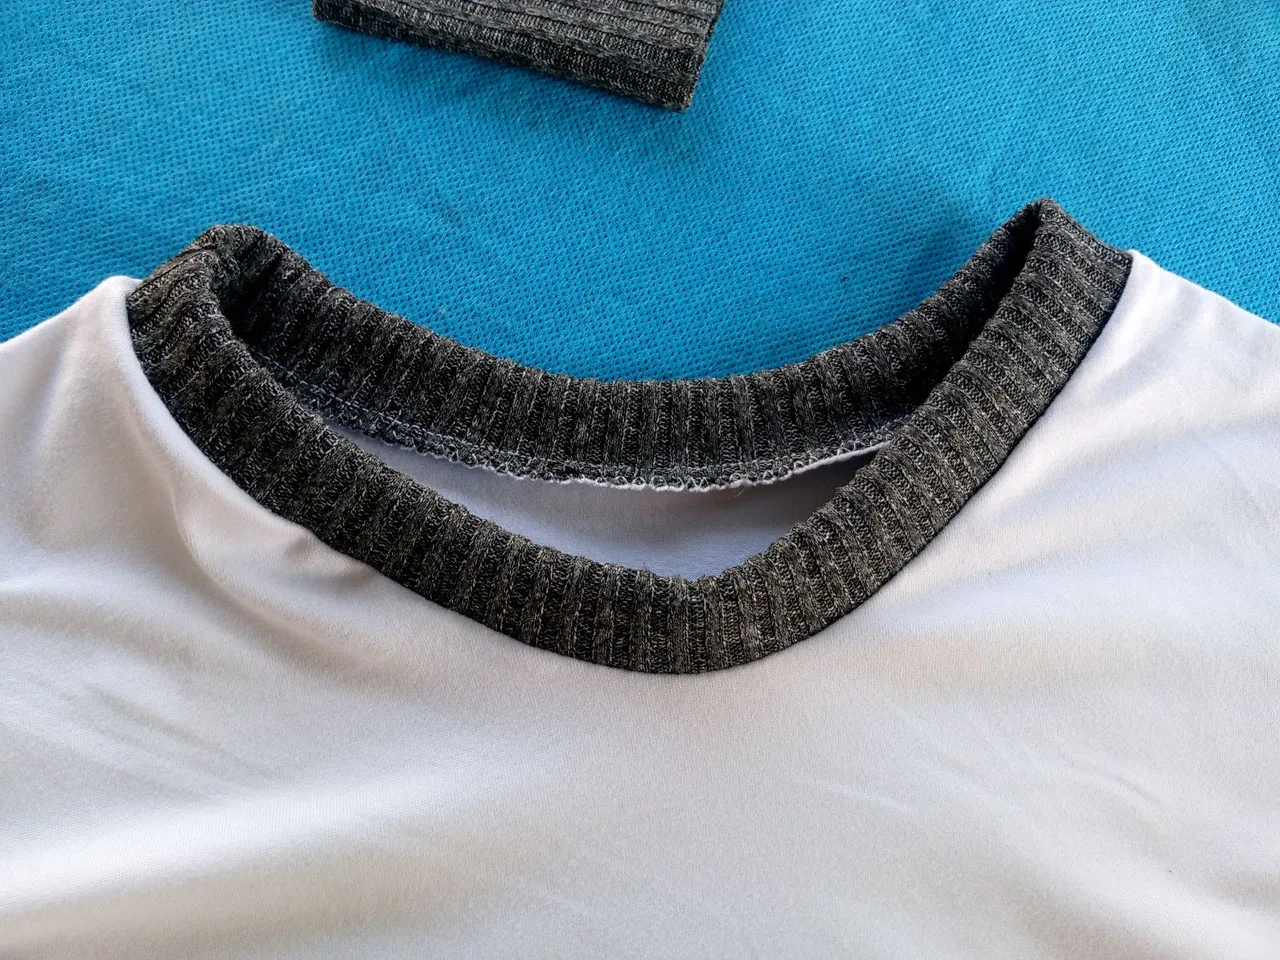
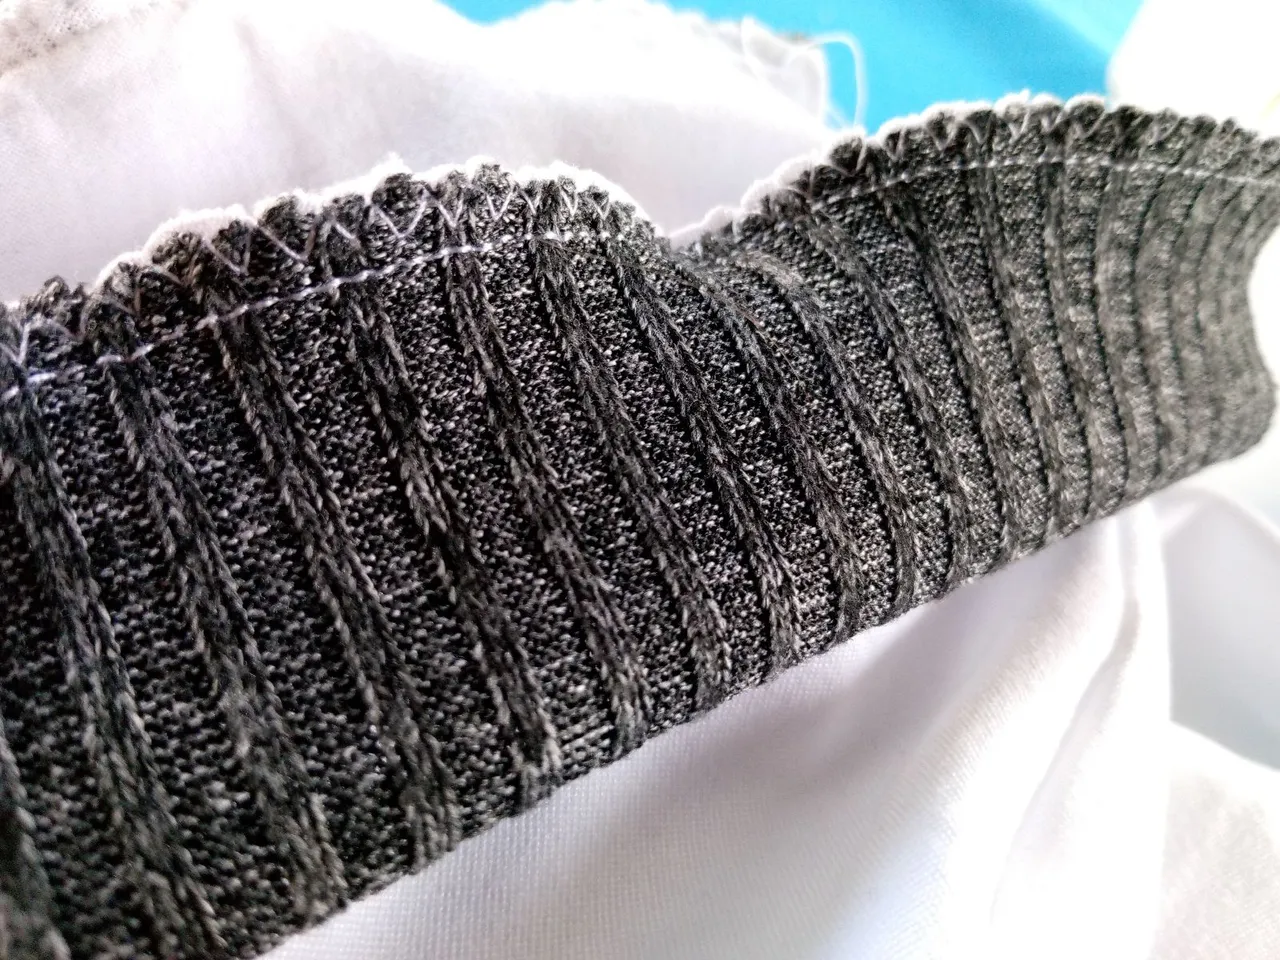
Para el armado de la franela, iniciamos enfrentando los derechos de las piezas del cuerpo y cosiendo los hombros desde su lado superior. Después de unidos los hombros, he procedido a trabajar el cuello, doblando el rib a mitad y enfrentando desde el lado derecho, cosemos inicialmente con costura recta y después con zigzag para da un mejor acabado.
To assemble the flannel, we start by facing the right sides of the body pieces and sewing the shoulders from the top side. After joining the shoulders, I proceeded to work on the neck, folding the rib in half and facing from the right side, initially sewing with a straight seam and then with a zigzag to give a better finish.
 |  |
 |  |
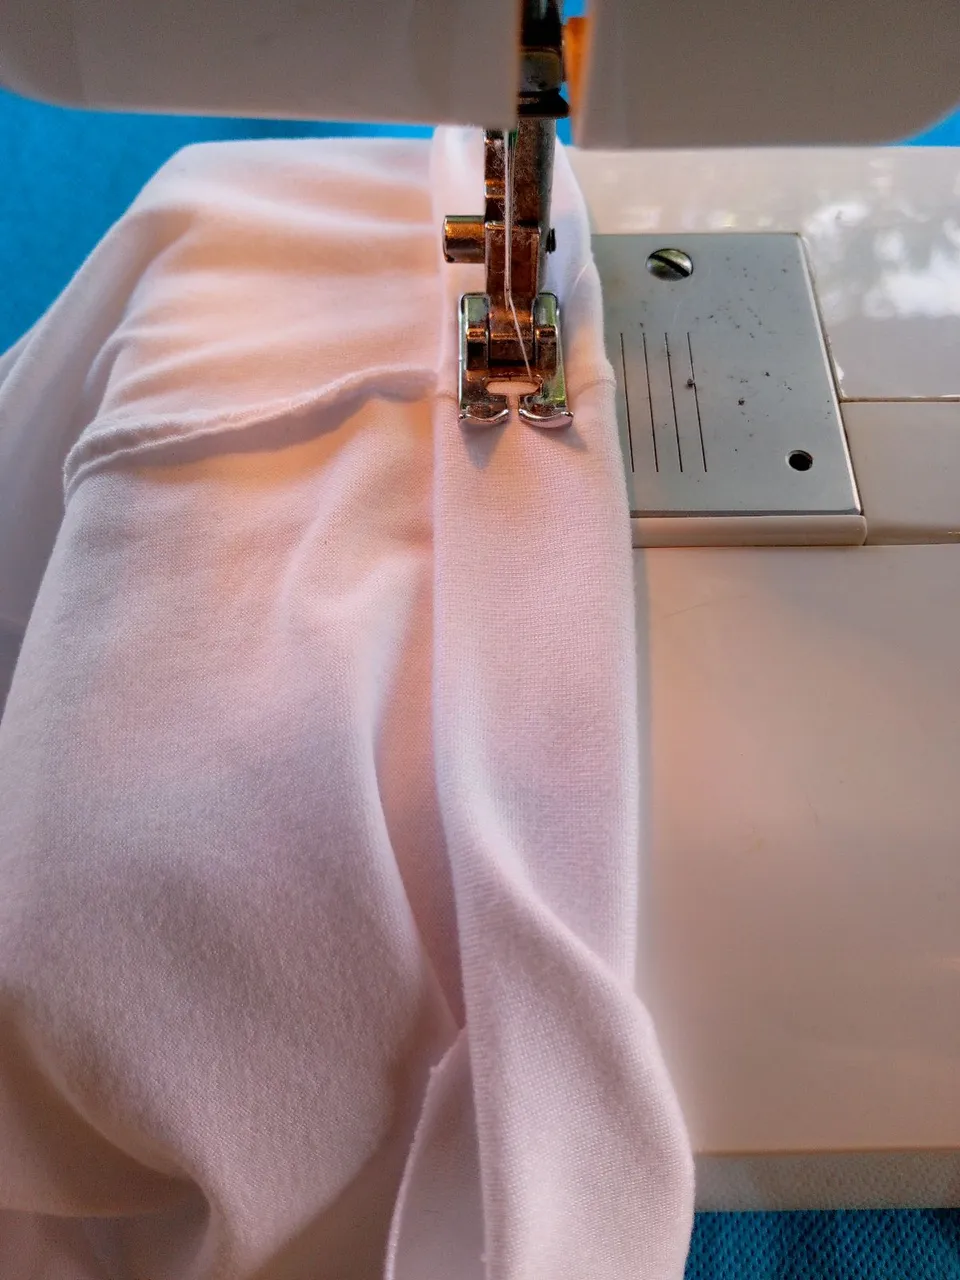
Procederemos a coser las mangas. Enfrentamos derechos desde la parte superior de ambas piezas, es decir la franela y las mangas. Desde la parte superior media y cuadrando bien las piezas cosemos por el contorno de la sisa. El proceso se repite en ambos brazos. Continuamos con el detalle del final de las mangas, donde repetimos el proceso realizado en el cuello. Cosemos los costados, que van desde el terminal de la manga hasta el inferior final de la franela.
We will proceed to sew the sleeves. We face right sides from the top of both pieces, that is, the flannel and the sleeves. From the upper middle part and squaring the pieces well, we sew along the contour of the armhole. The process is repeated on both arms. We continue with the detail of the end of the sleeves, where we repeat the process carried out on the neck. We sew the sides, which go from the end of the sleeve to the bottom end of the flannel.
 |  |

En cuanto a confección solo nos resta emparejar el final de la franela y realizar el dobladillo.
In terms of tailoring, we only have to match the end of the flannel and hem it.
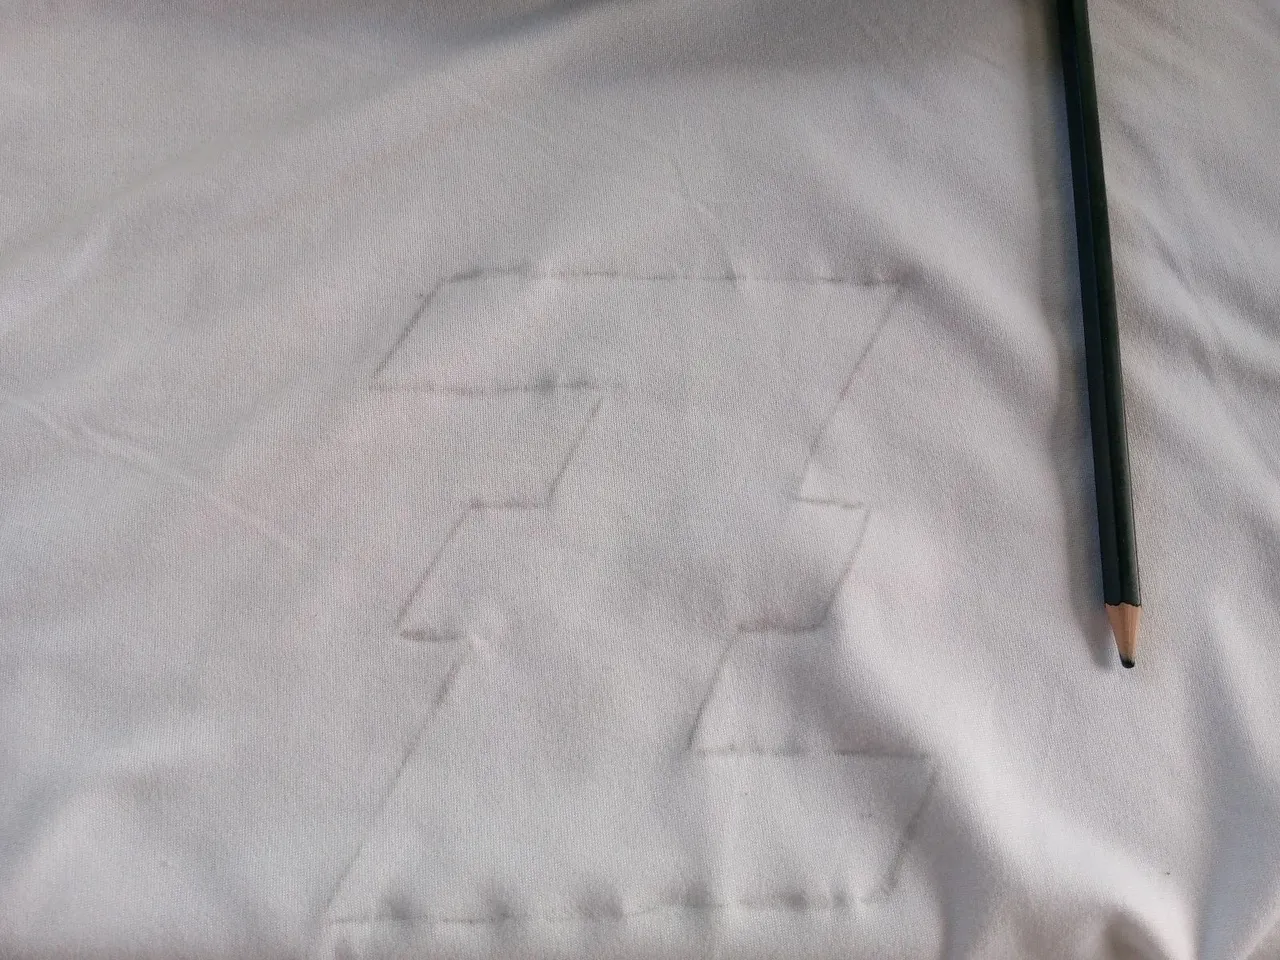
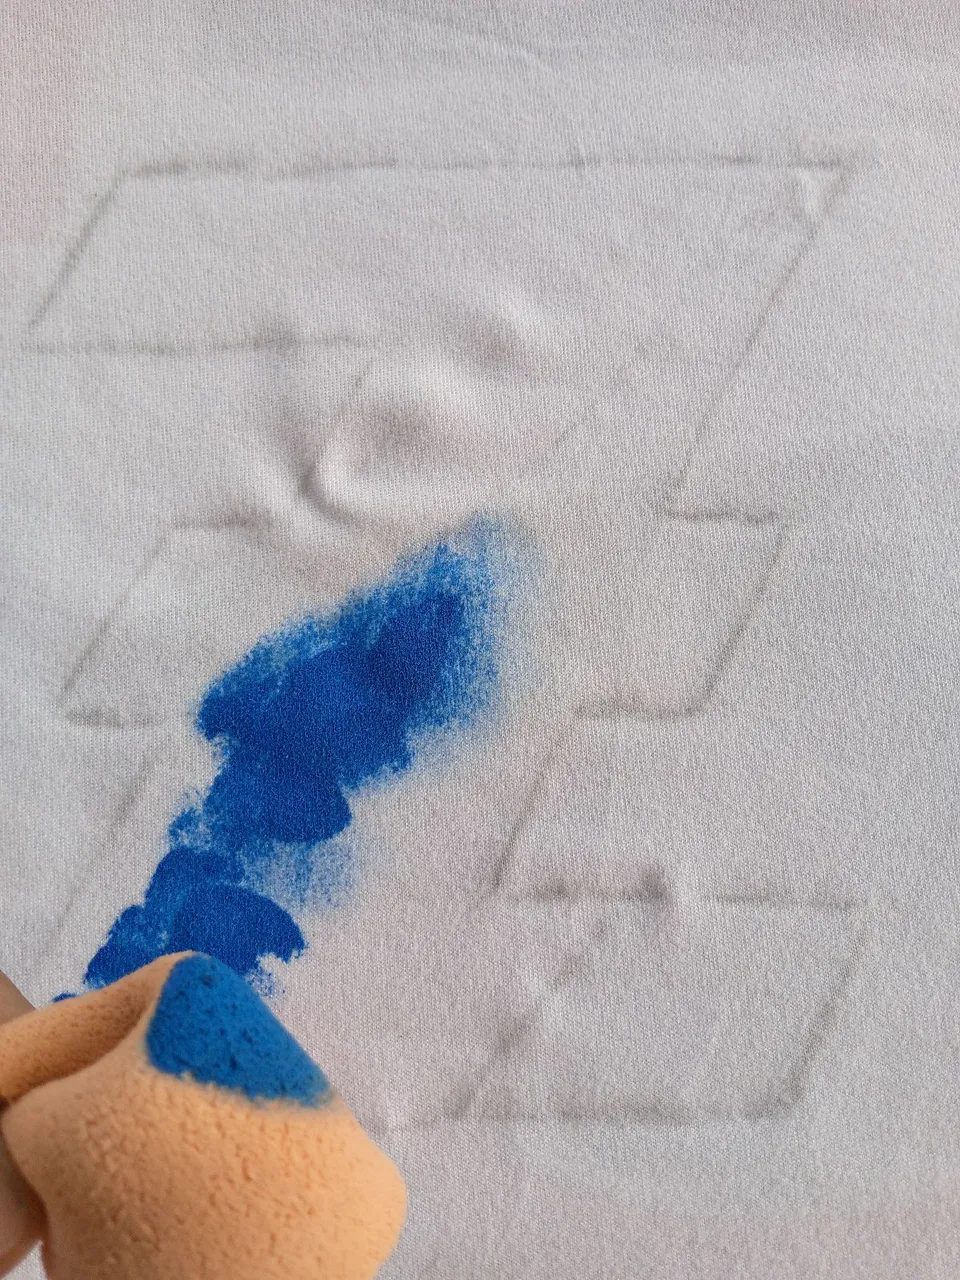
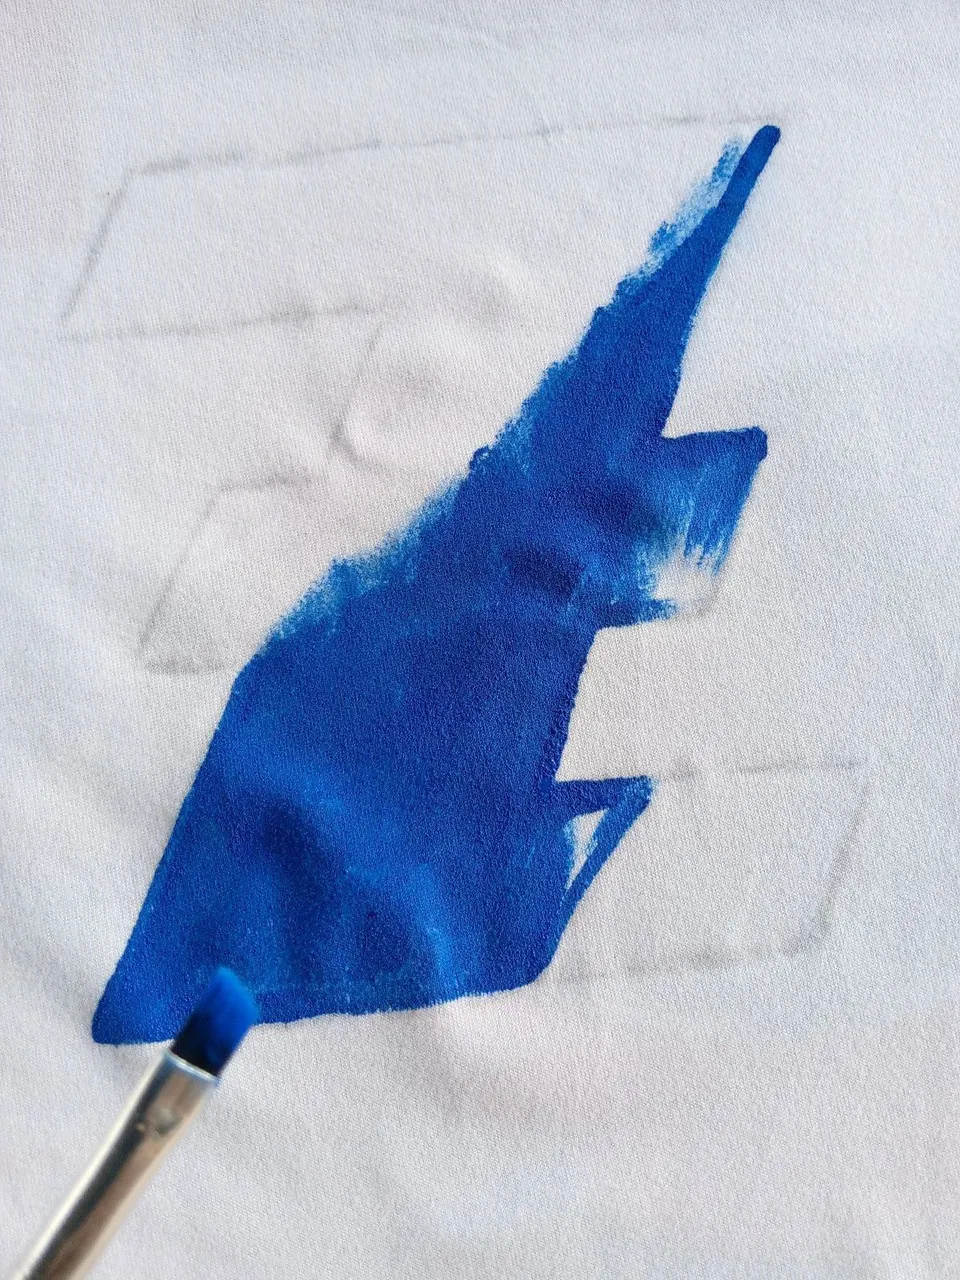
Proceso de Estampado / Stamping Process
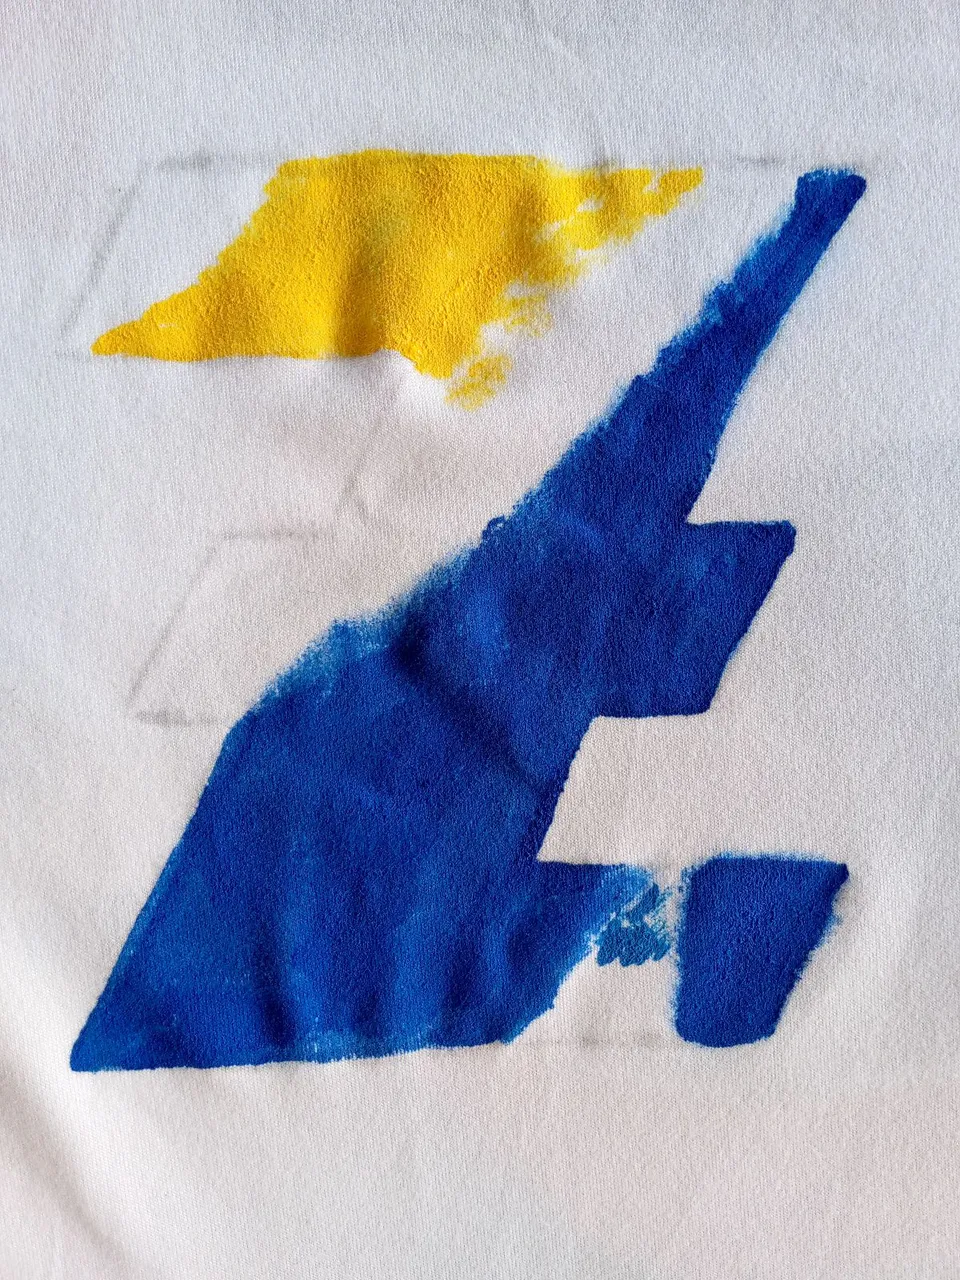
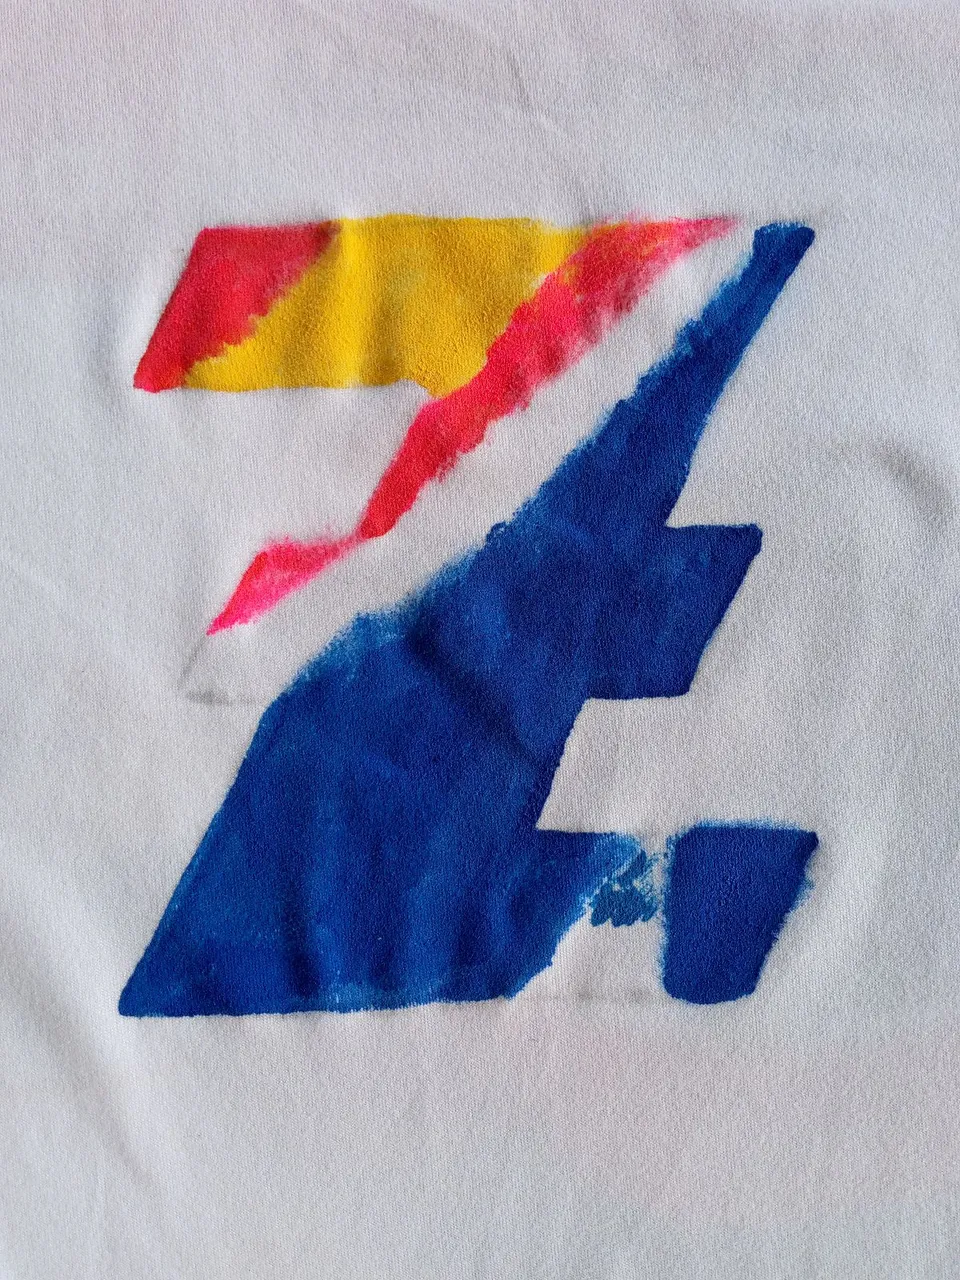
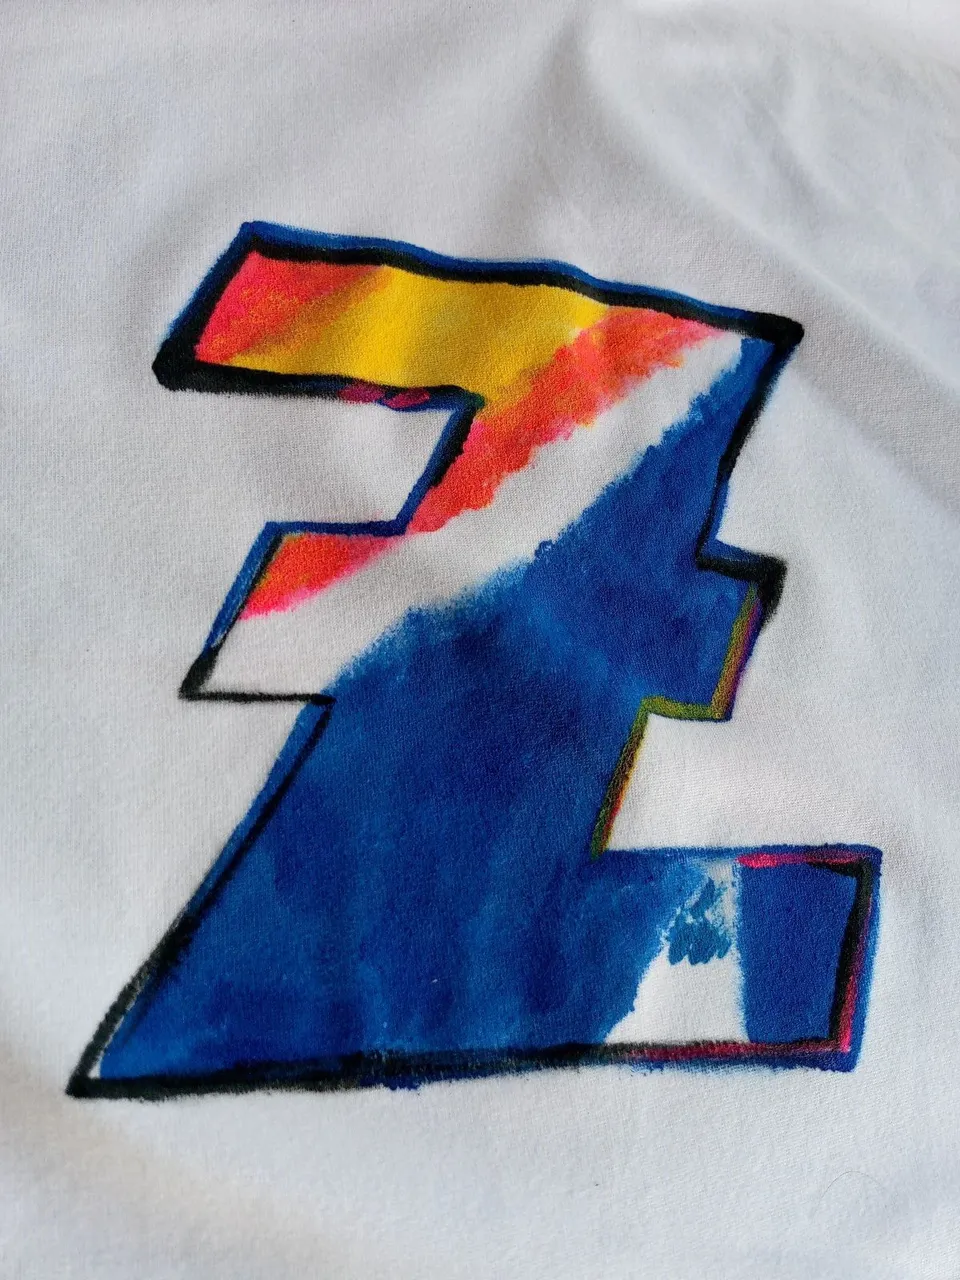
Inicialmente dibujé el logo, usando lápiz. Después procedí a pintar, alternando el uso de esponja y pincel. Este proceso fue bastante retro, recordé cuando antes los estampados de las franelas se realizaban de manera manual y solo había pintura al frío para el procedimiento. Actualmente hay una gran variedad de materiales y máquinas para estampar, pero yo solo contaba con lo más básico.
 |  |
 |  |
 |  |
 |  |
Resultado / Result
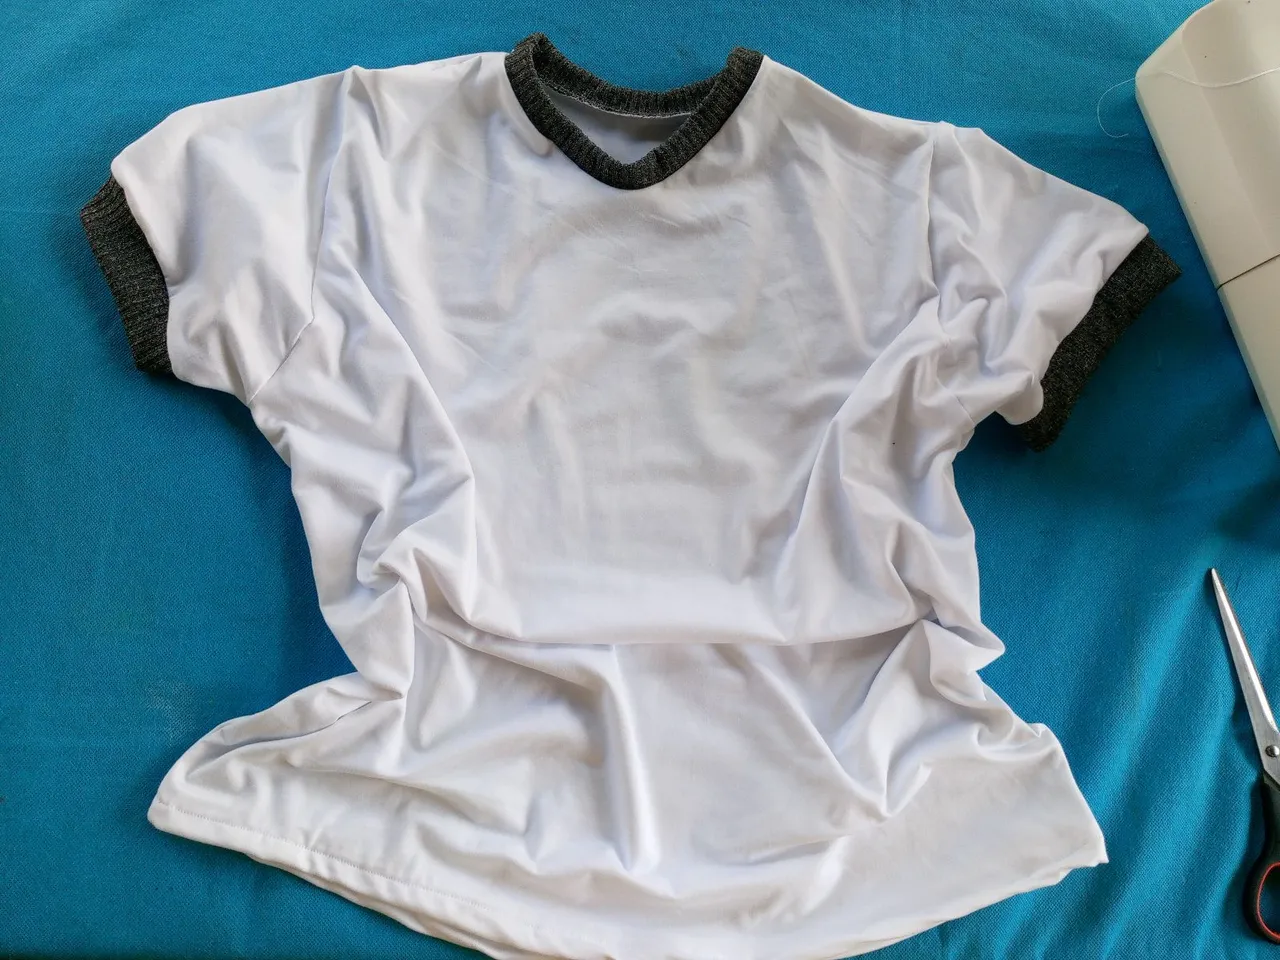
Estoy muy satisfecha con el resultado obtenido, este modelo era la primera vez que lo confeccionaba y más aún me gustó tanto estamparle el logo. Mi nieta por su lado solo observaba detenidamente y me dijo: ¿Cuándo me toca pintar?. Yo la entretuve pintando otras cosas, porque luego se pone bastante creativa y solo Dios sabe como habría terminado la franela.
¡Y hasta aquí el proyecto del día! Espero les haya gustado tanto como a mí.
Si tienes alguna duda o sugerencia, no dudes en dejar un comentario. Las fotos que he colocado a lo largo del texto, las he tomado desde mi móvil Infinix.
¡Hasta la próxima!, tengan todos una bendecida noche.
I am very satisfied with the result obtained, this model was the first time I made it and even more I liked stamping the logo on it. My granddaughter on her side just watched carefully and she told me: When do I have to paint? I entertained her by painting other things, because then she gets quite creative and only God knows how she would have finished the flannel.
And that's it for the project of the day! I hope you liked it as much as I did.
If you have any questions or suggestions, don't hesitate to leave a comment. The photos that I have placed throughout the text were taken from my Infinix mobile.
Until next time! Have a blessed night everyone.