
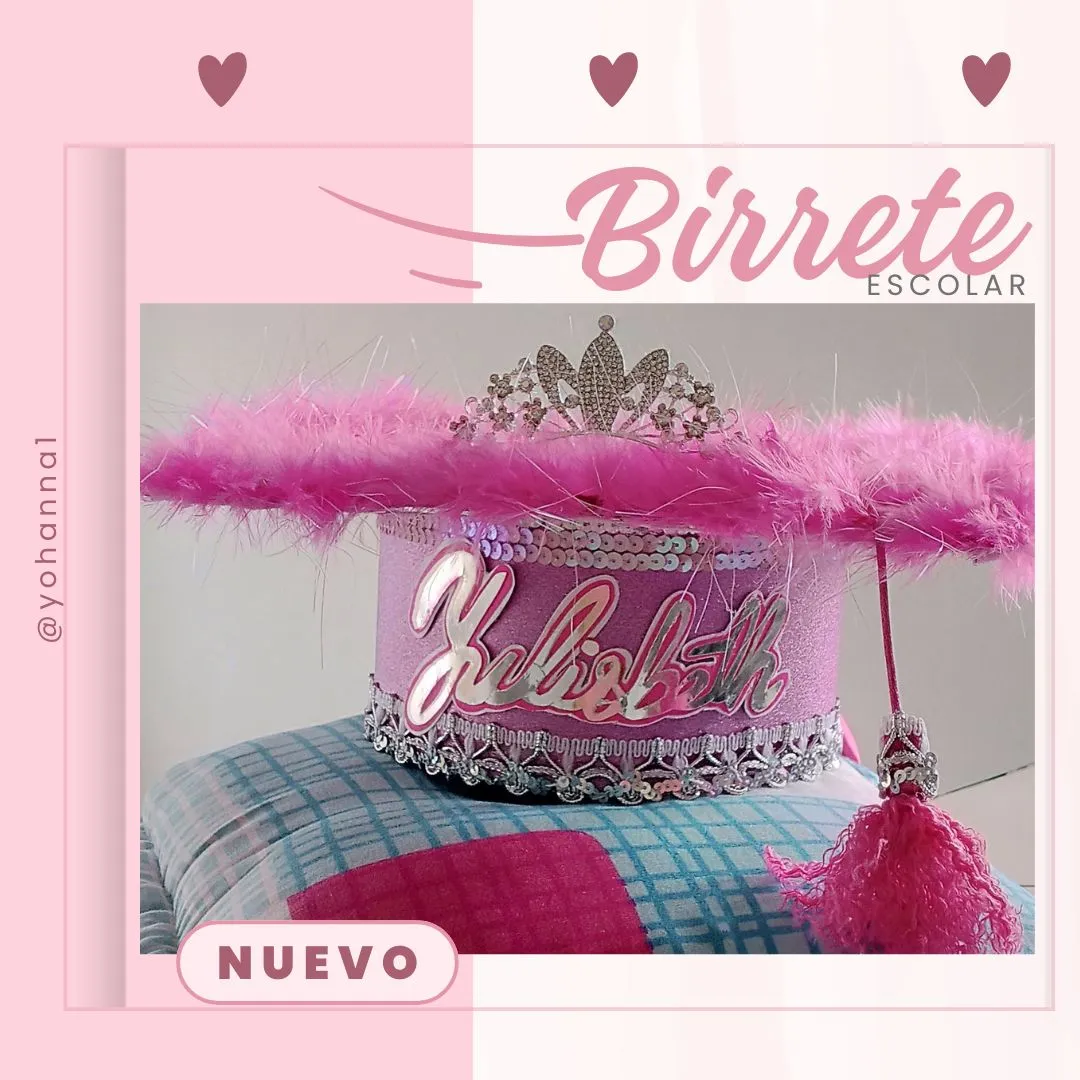
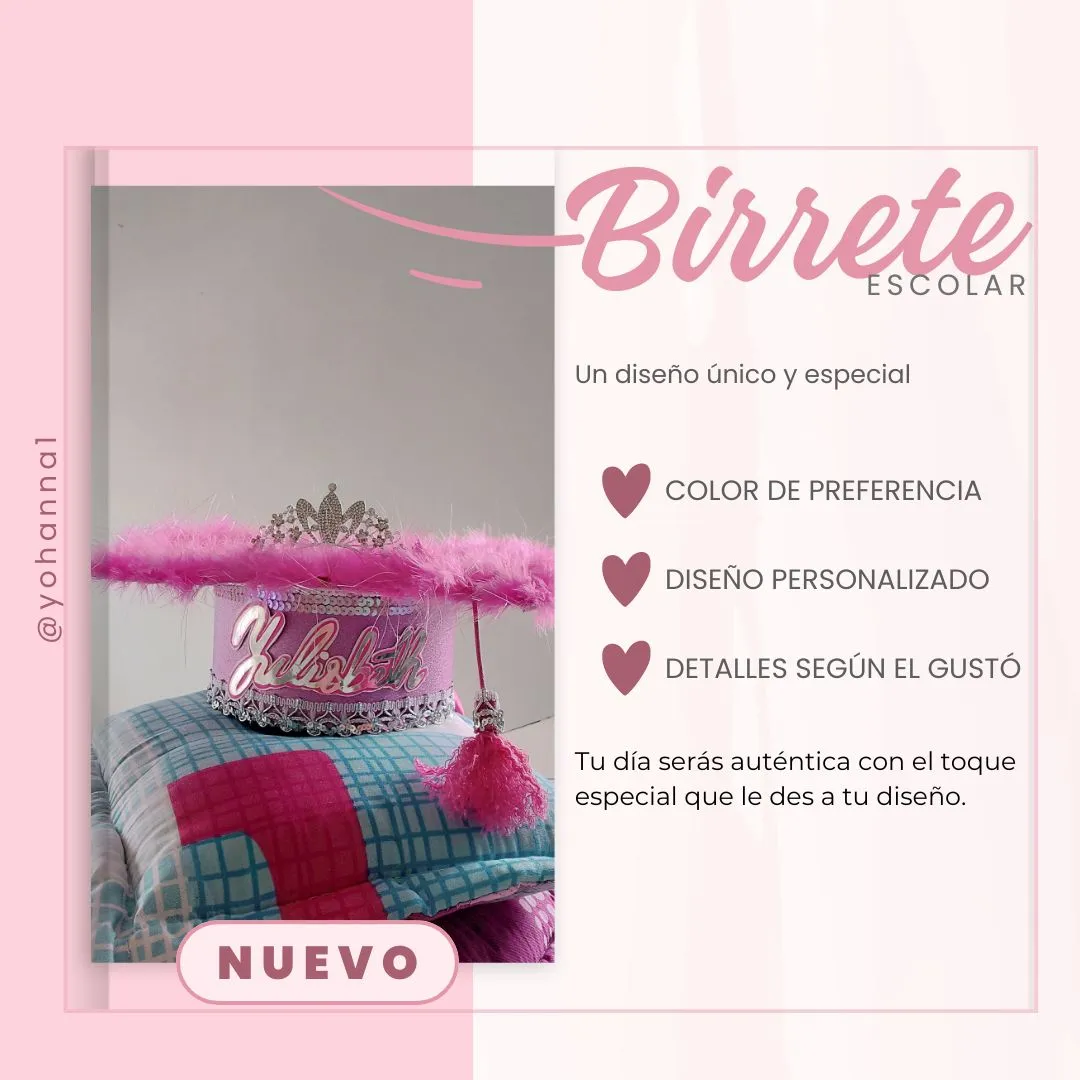
Llego mes de julio, mes de culminación de las clases escolares y el comienzo de los preparativos para la graduación de los niños y jóvenes que son promovidos a la básica, secundaria y los que culmina el bachillerato. Entre los preparativos se encuentra el buscar la documentación, la ropa, cancelar paquetes de grados e infinidades de cosas que se debe tener listo para ese día tan importante. Entre esas cosas es lucir un elegante y hermoso birrete, hoy les traigo el paso a paso para la realización de uno, el cual puede adaptar a tu gusto, así que manos al papel.
The month of July has arrived, the month of the culmination of school classes and the beginning of preparations for the graduation of children and young people who are promoted to basic, secondary and those who complete high school. Among the preparations is finding documentation, clothing, canceling degree packages and countless things that must be ready for that important day. Among those things is showing off an elegant and beautiful cap, today I bring you the step by step for making one, which you can adapt to your taste, so let's get down to paper.
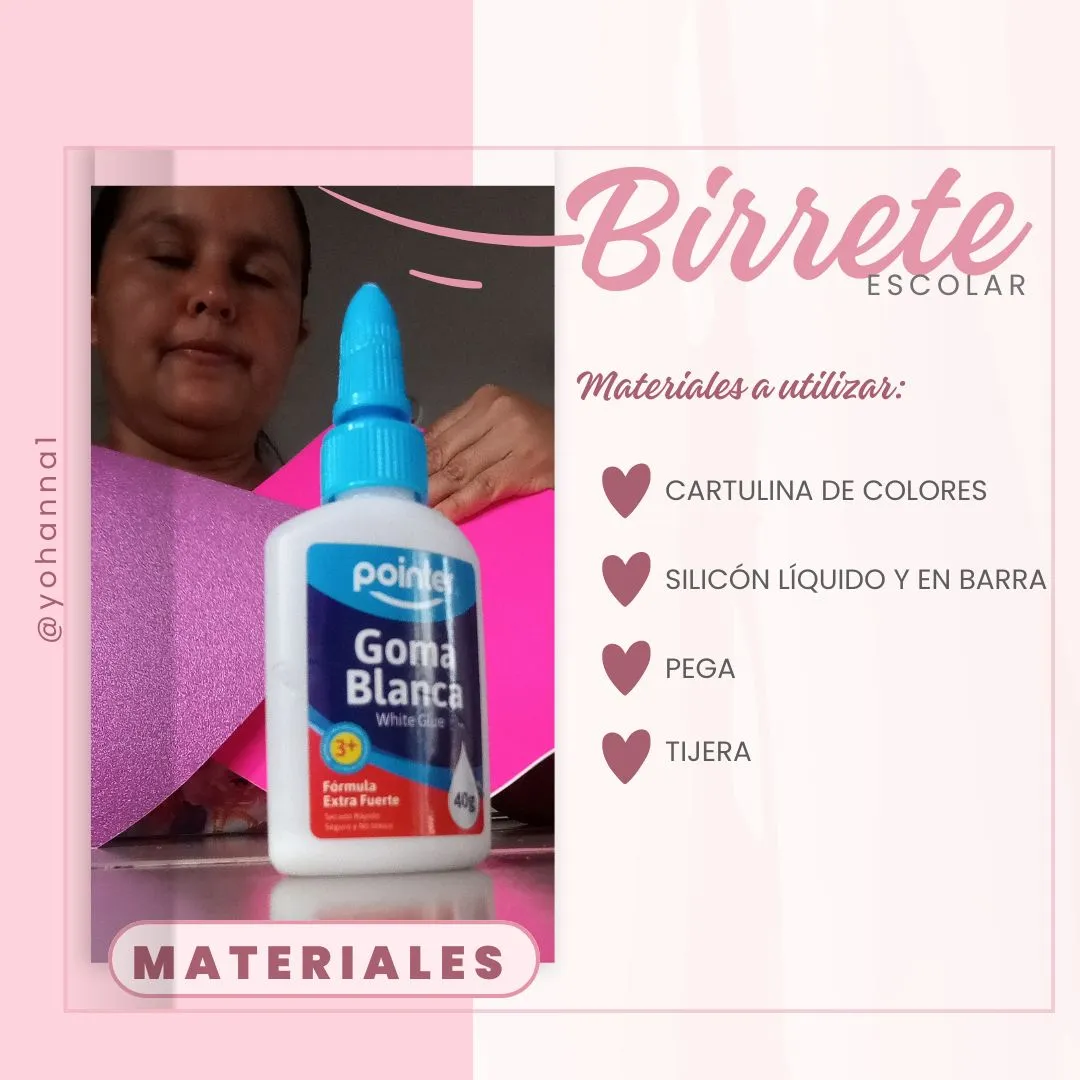
Materials

• Cardboard in the color of your choice
• Liquid and stick silicone
• Job
• Scissors
• Silicone gun
• Detail to taste (crown, decorative ribbon, letter, name, butterfly)
Procedure
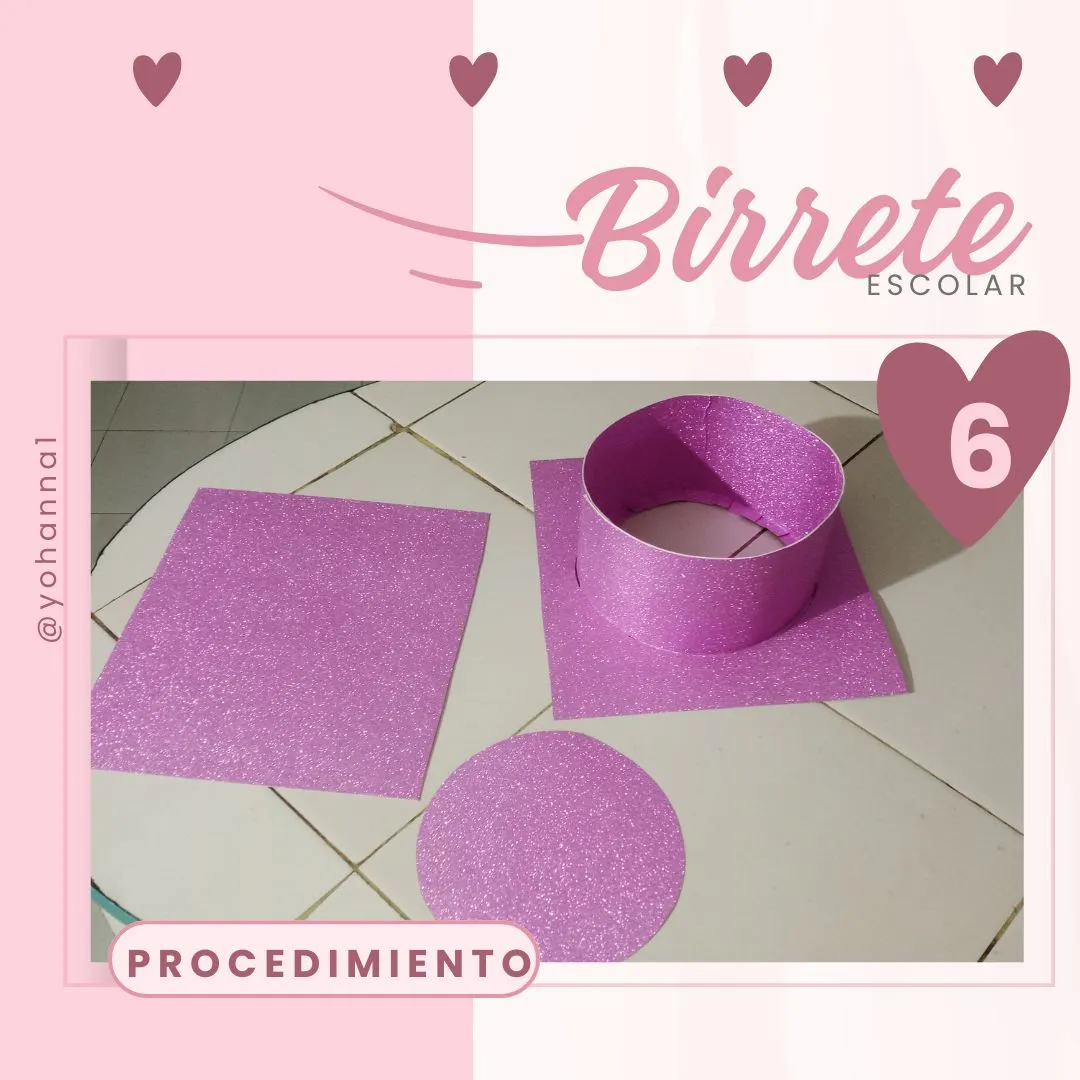
• Select the cardboard to use in this case, the color used is frosty lilac.
• To reinforce, a fuchsia double fax cardboard is used as a base.
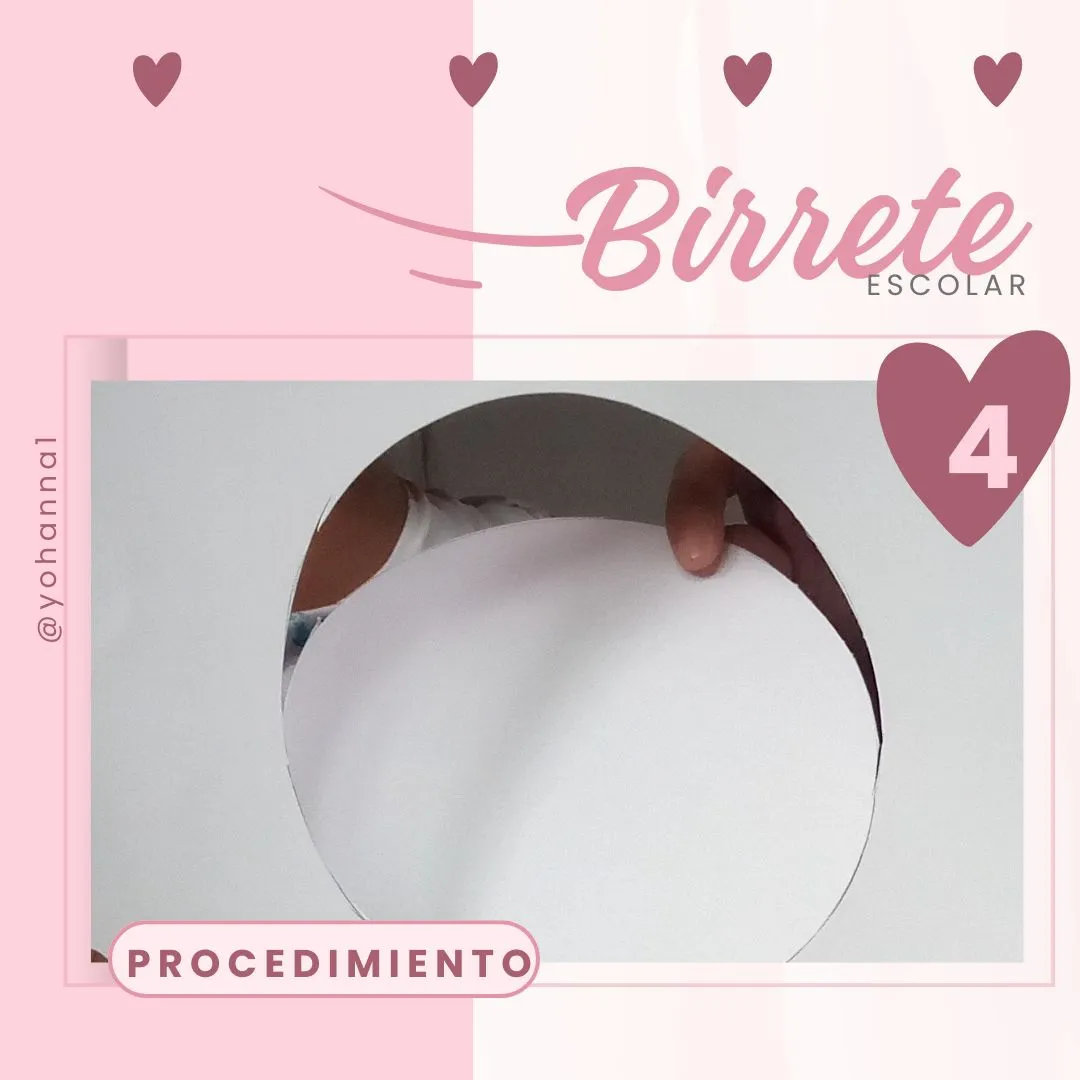
• We measure two strips measuring 11.5 cm by 58.5 cm long, two rectangles measuring 24 by 27 cm, and we mark a circle in the center of one of the rectangles. The measurements will also depend on the size of the person
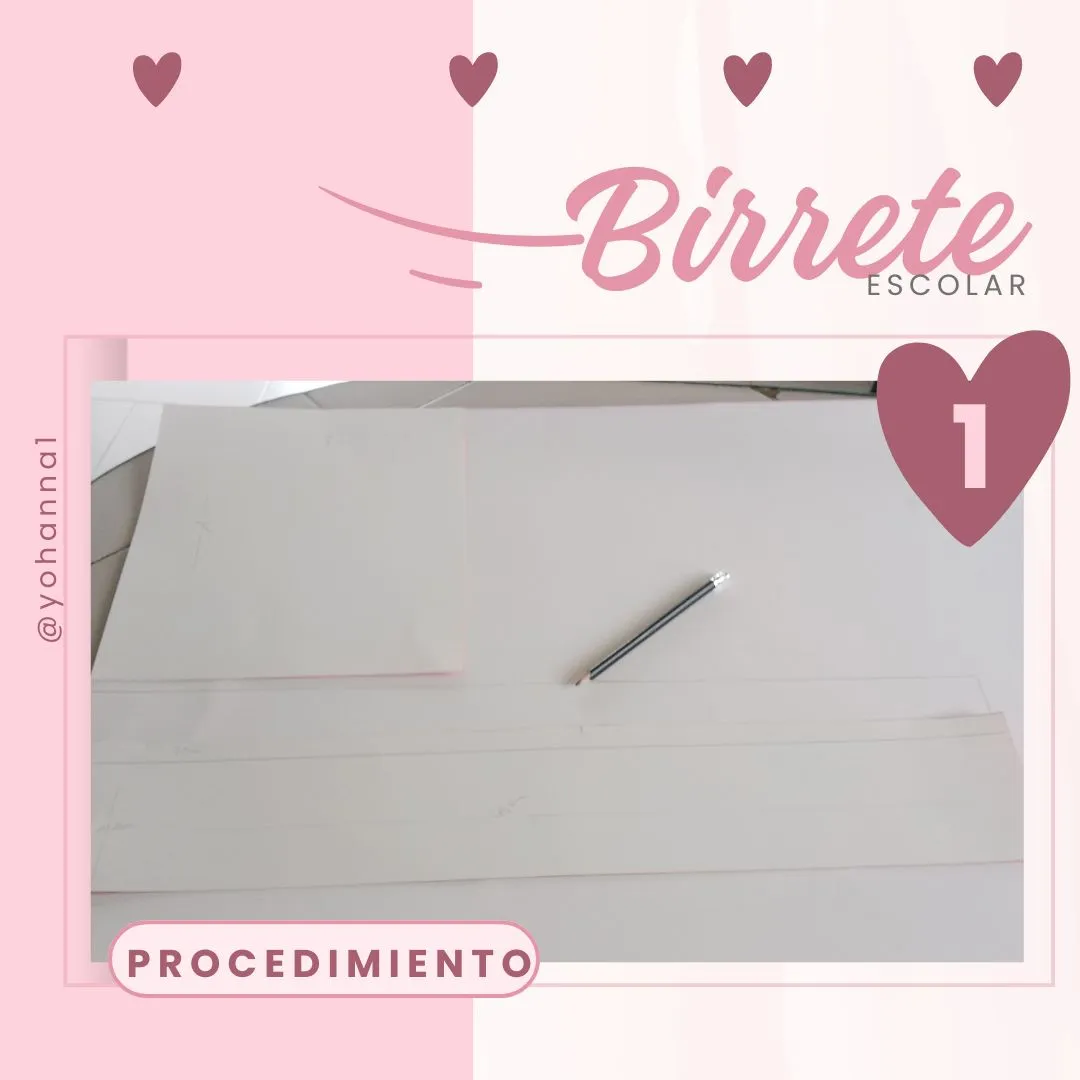
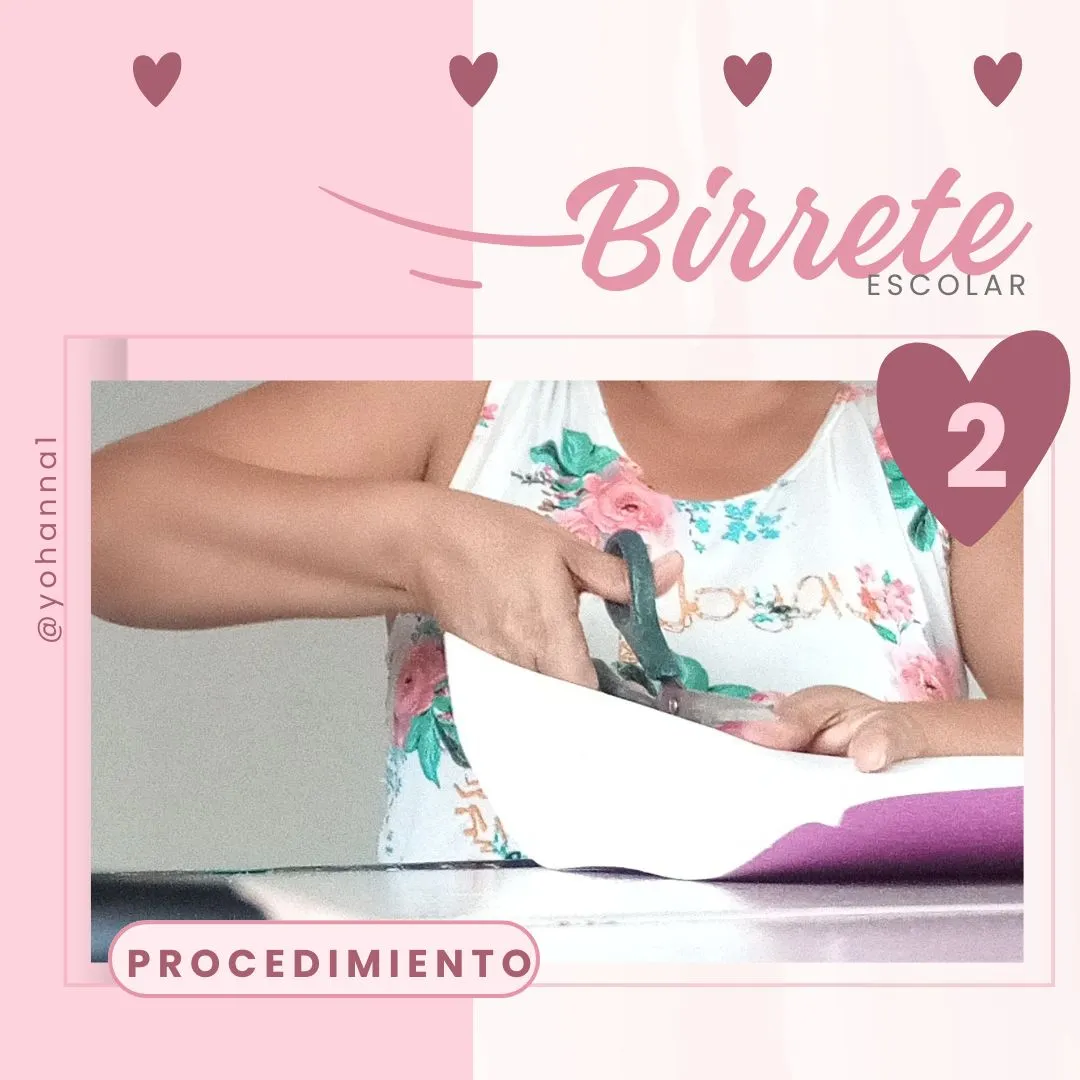
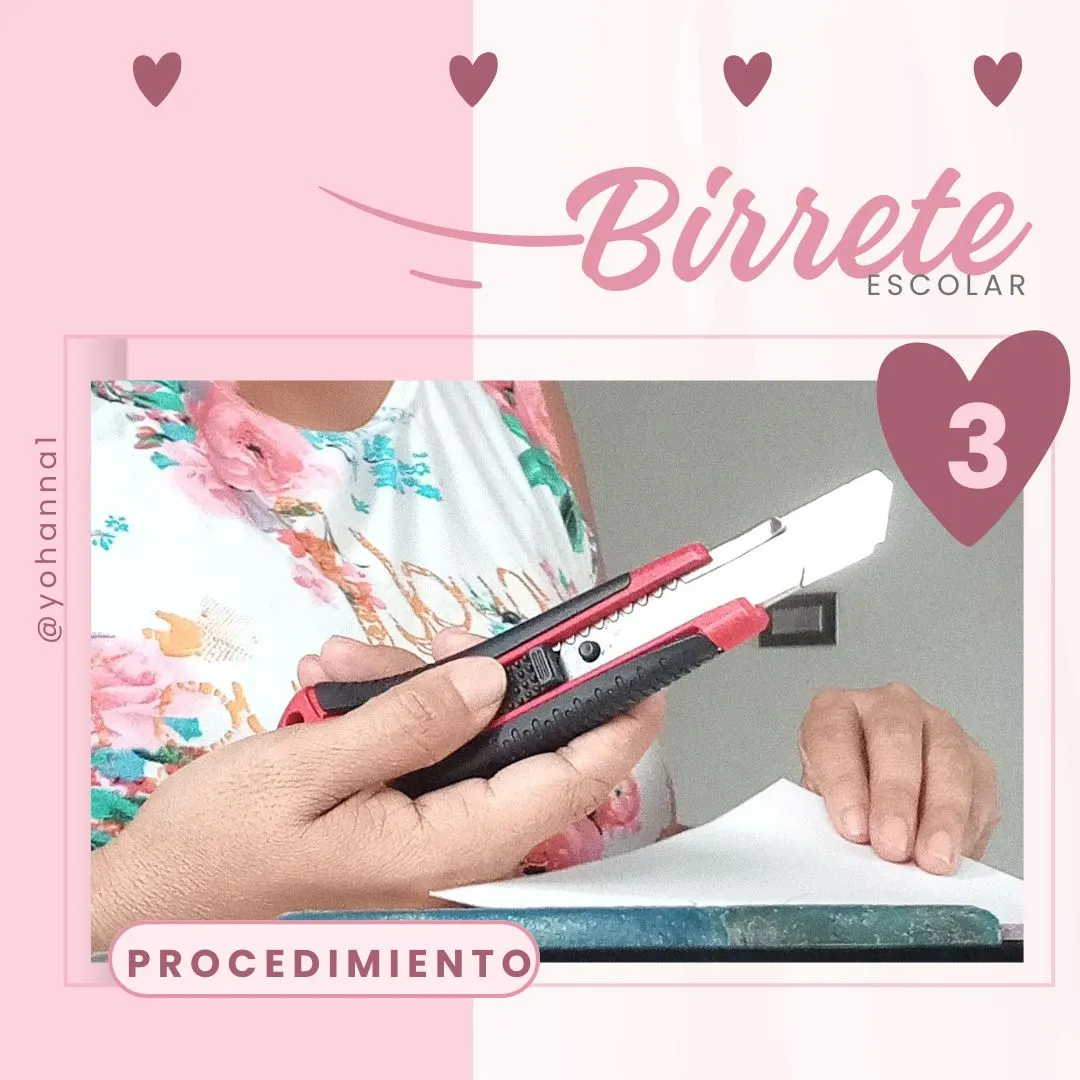
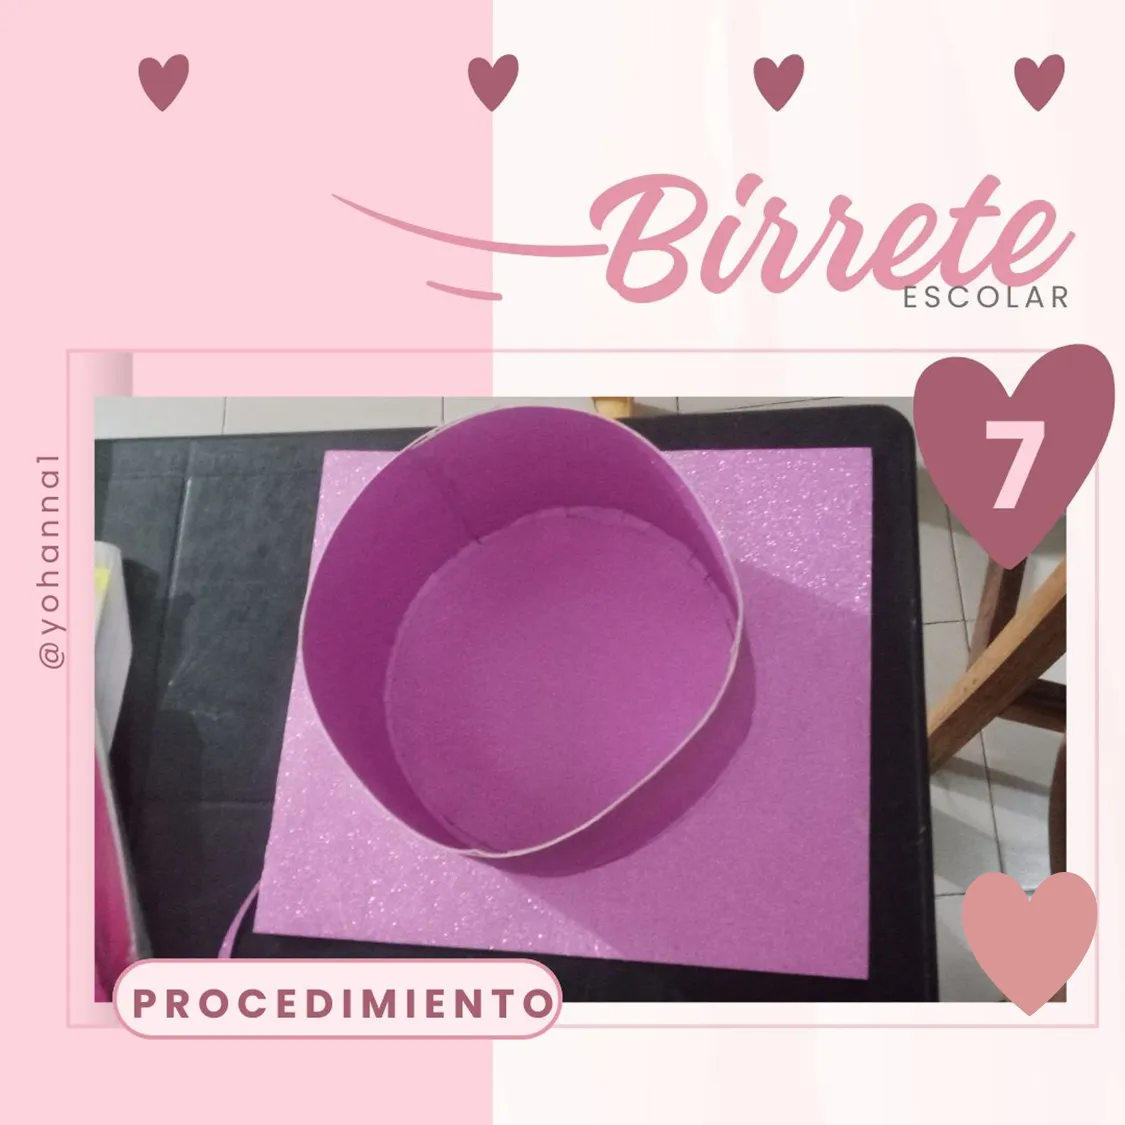
• We begin to cut each marked piece with the help of scissors and, if necessary, use a cardboard cutter to remove the circle.
We measure each piece, to begin gluing, using white glue to join each piece that will serve as a base, the other frosted piece is recommended to use liquid silicone for reinforcement.

As you will see, the cap is already taking shape, it is time to let it rest so that the glue can take its time to dry and we can continue with placing the details.
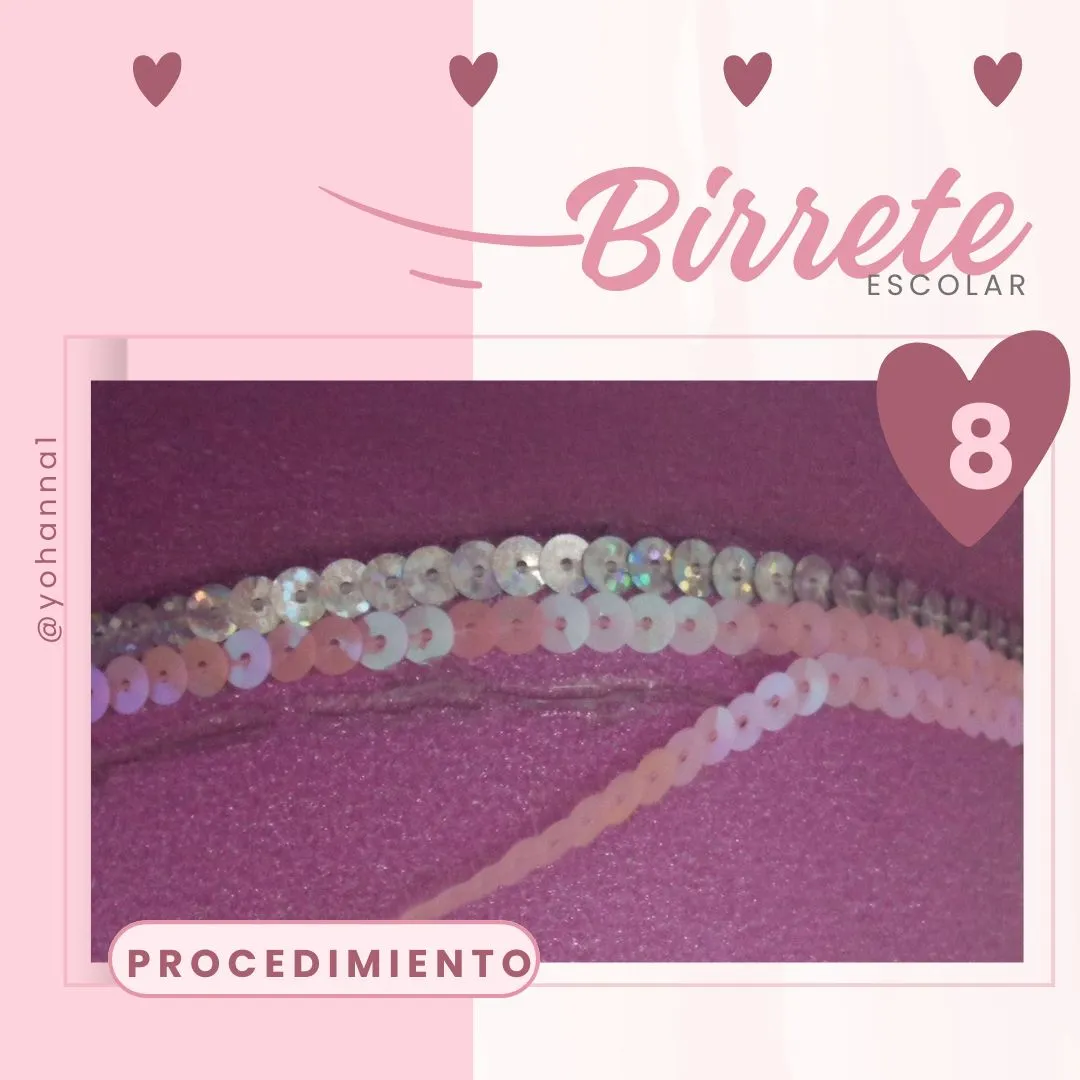
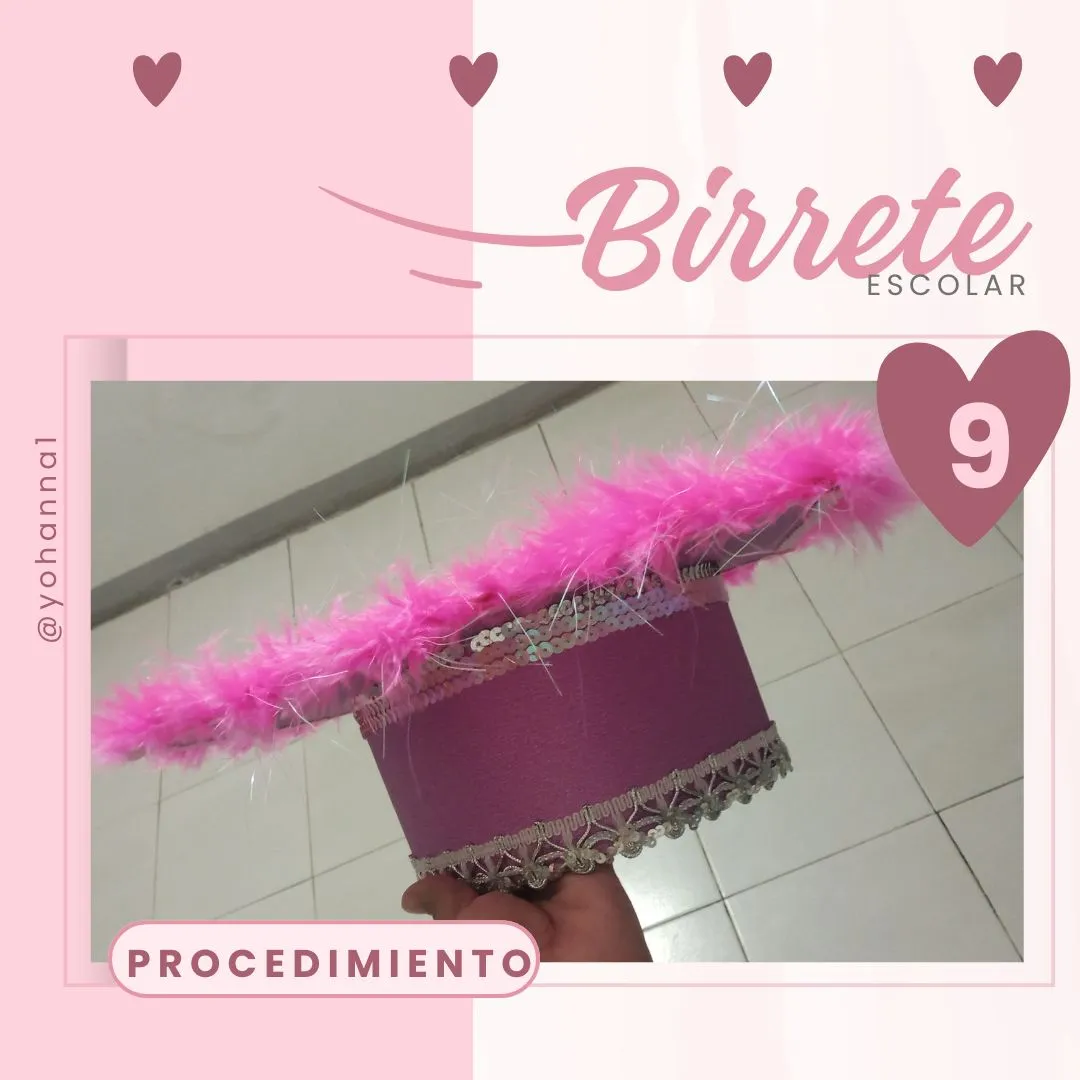
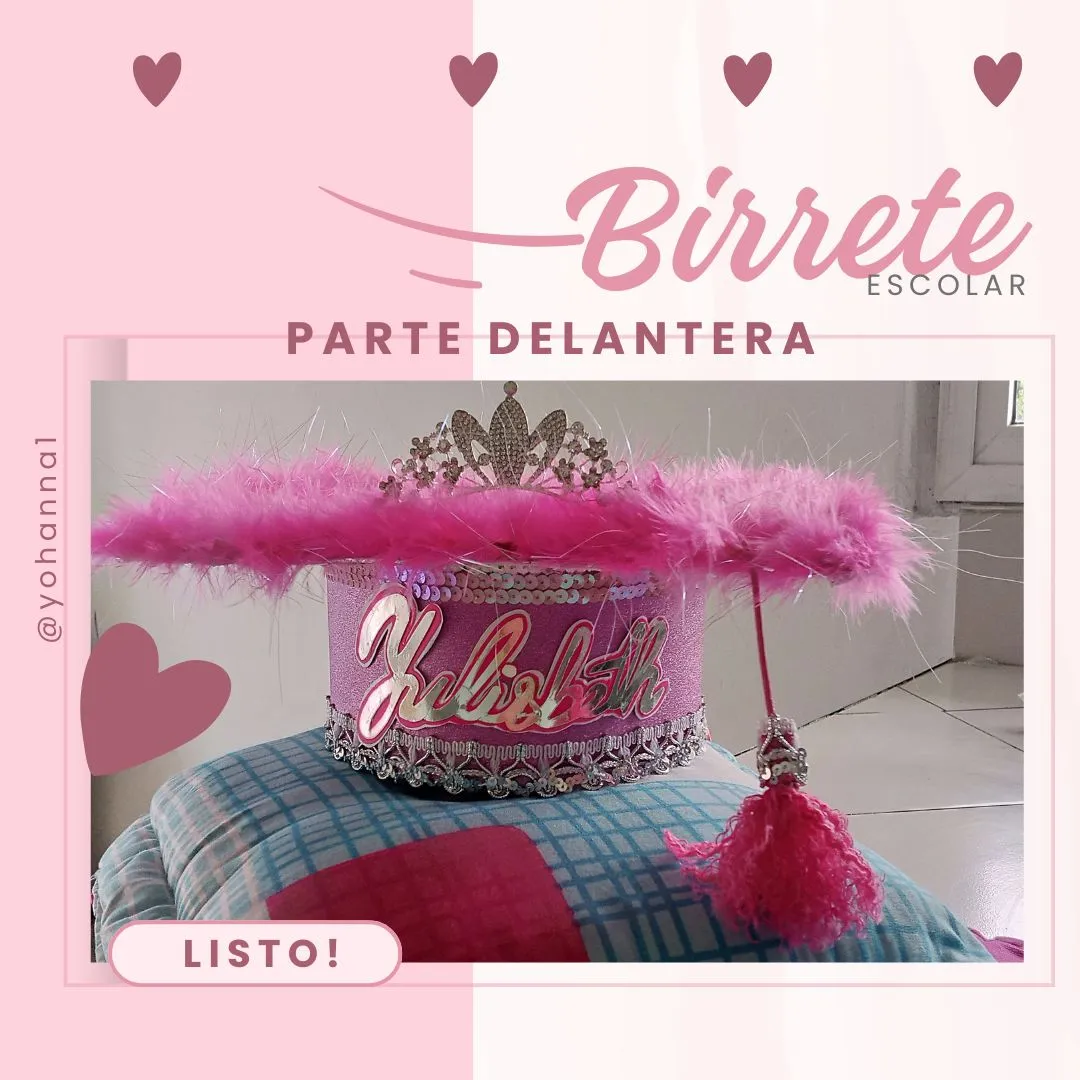
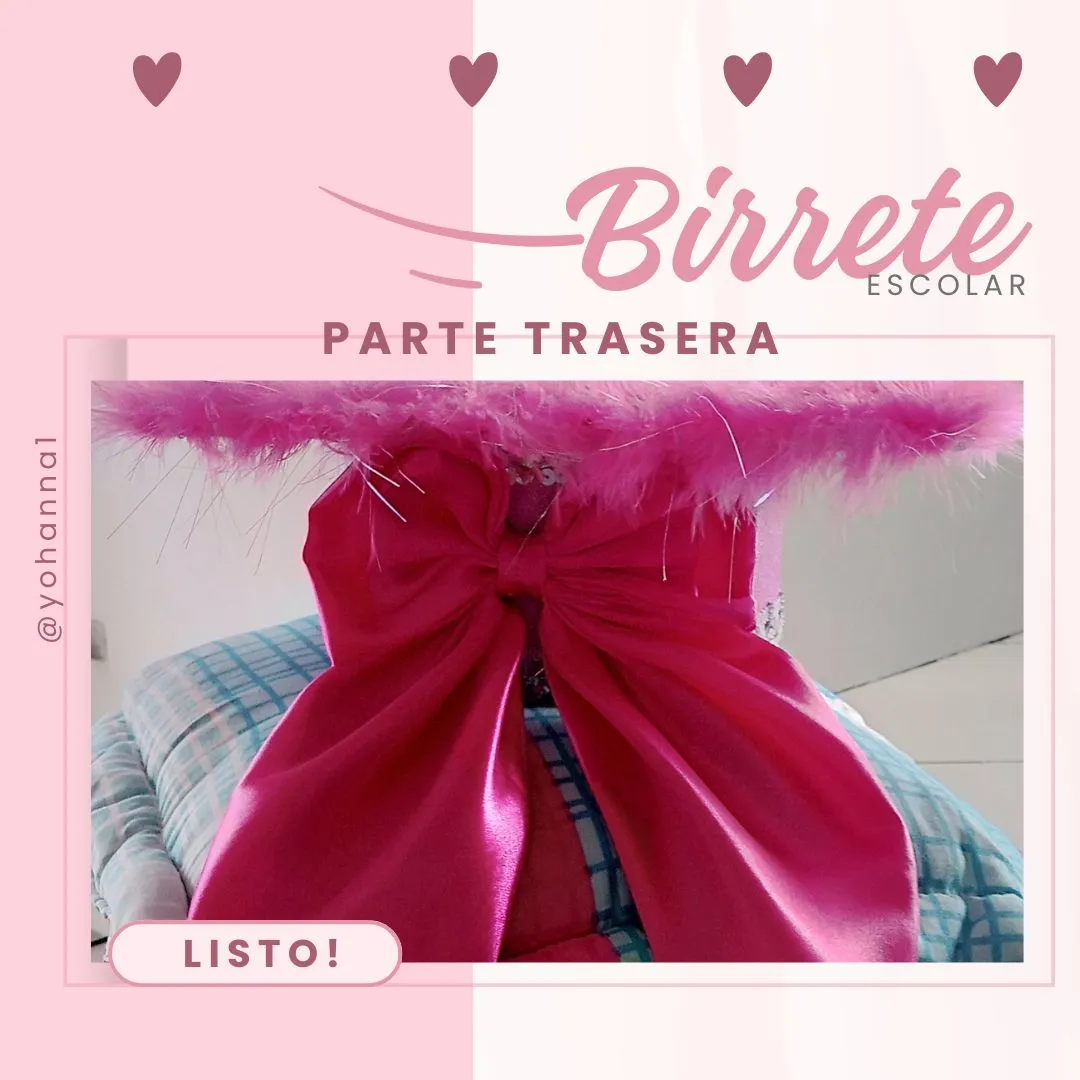
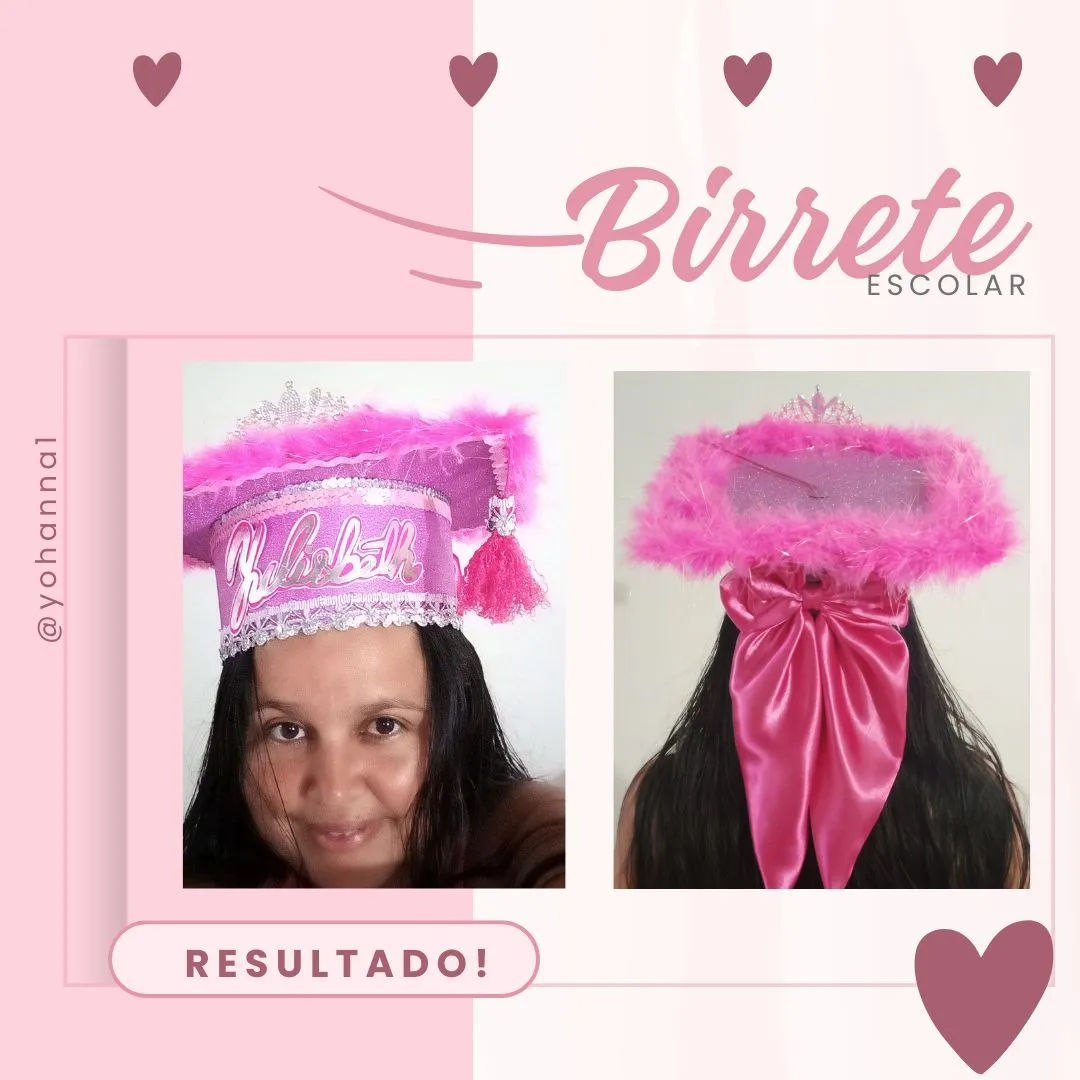
- Once the cap is well glued, begin to glue the details, the ribbons, the silver and iridescent pink sequins with the help of the silicone stick and the hot gun, the frosted cardboard is very delicate and you have to be very attentive to the time to do the gluing. Once the lower part is finished, we continue with the upper part, there we place a bright pink boa to make a contract since it is for a very flirtatious teenager, it will have her name and a princess crown.
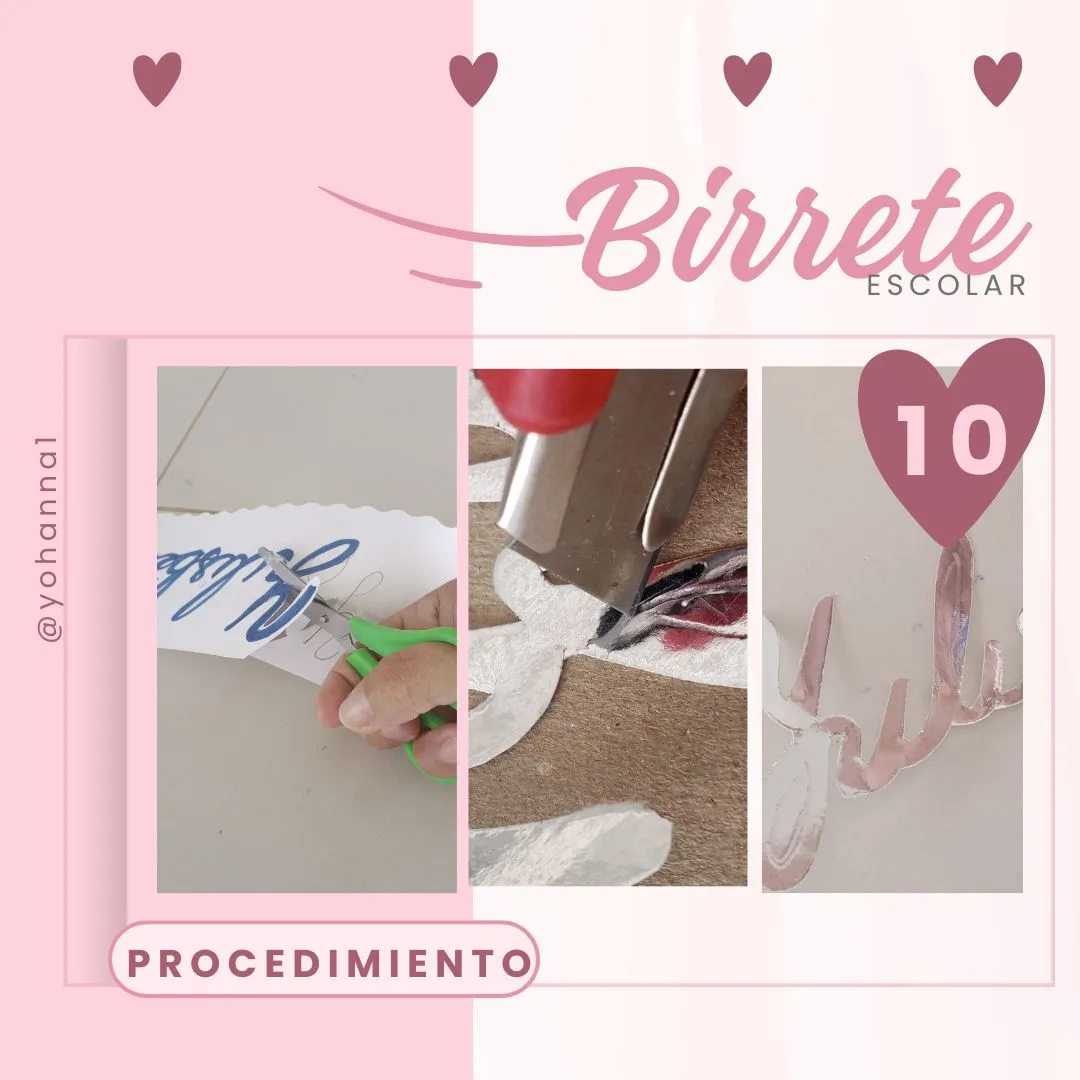
The name was made by hand, the first thing to write is the name on a sheet to remove the mold, later it was placed on top of the silver cardboard to emboss and be able to cut with the help of the cardboard cutter, to make contrast it was glued on top of a fuchsia cardboard and one white.
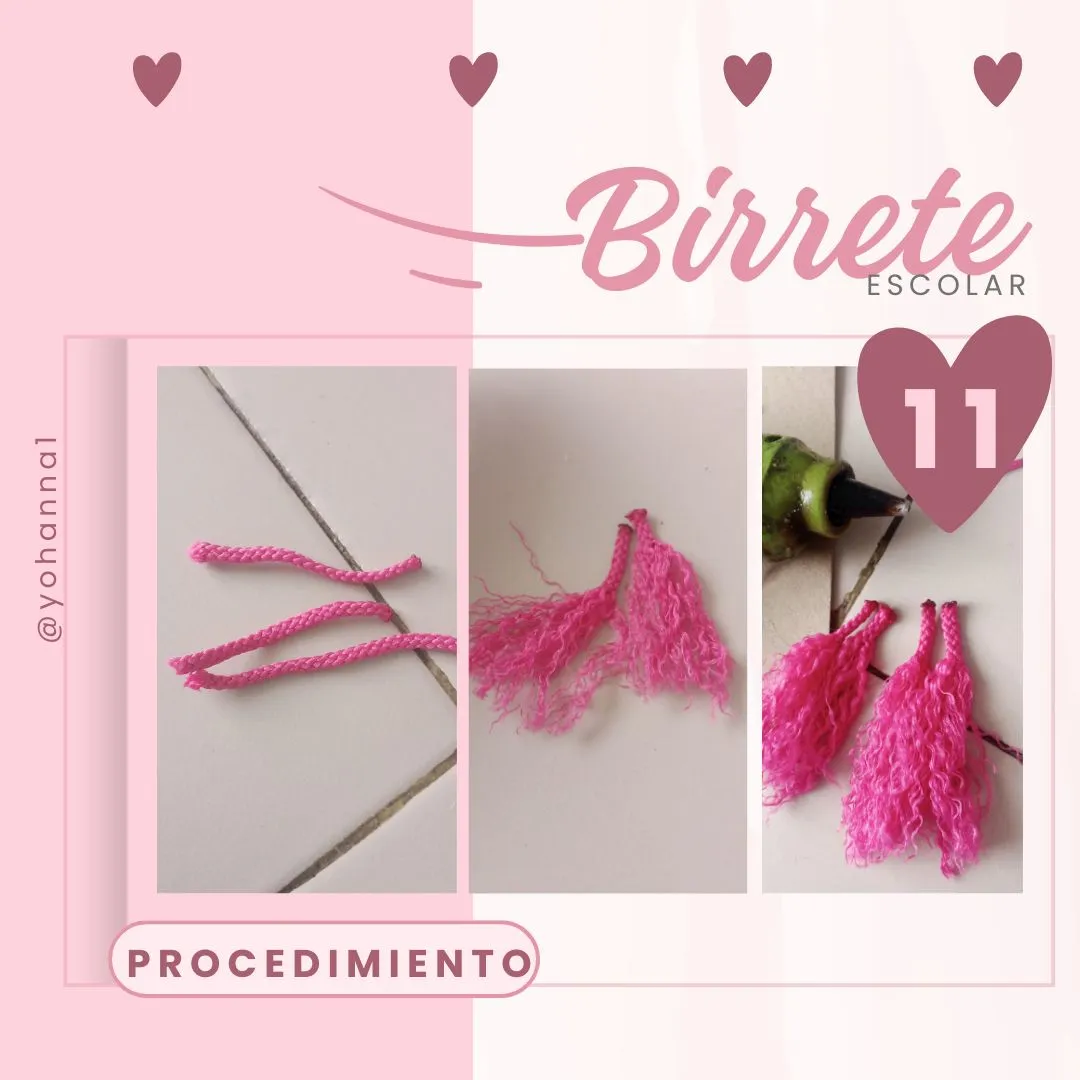
For the beret, less than half a meter of mouse tail was used, 4 small pieces of 4 cm were cut out, to comb them and then join them with silicone and a silver ribbon to make a contrast with the cap, once ready it was glued to the cap.
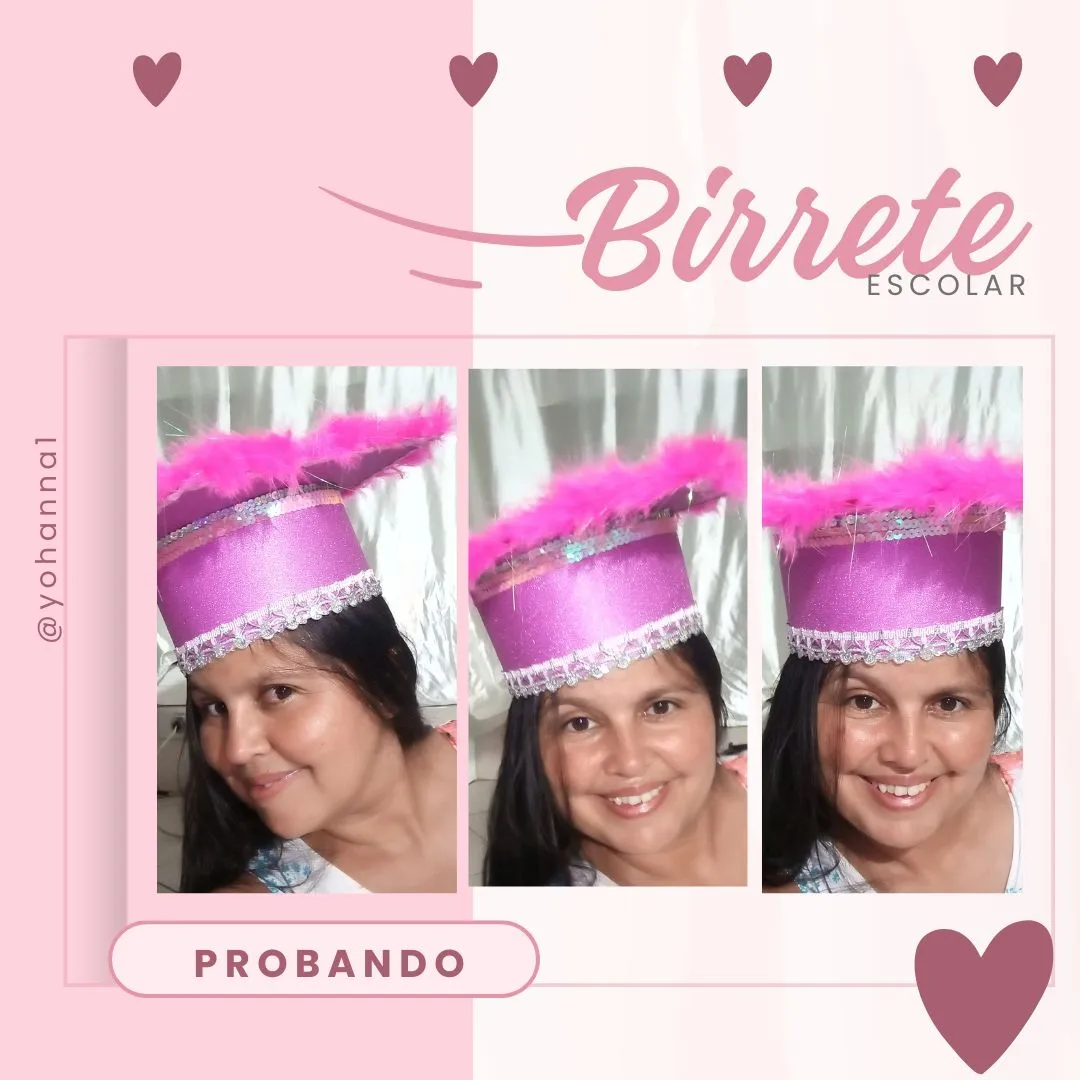
- After gluing the name, the beret, and the crown, a classic fuchsia bow was glued to finish giving it the coke princess touch. I put it on to test its resistance, it was comfortable and light.

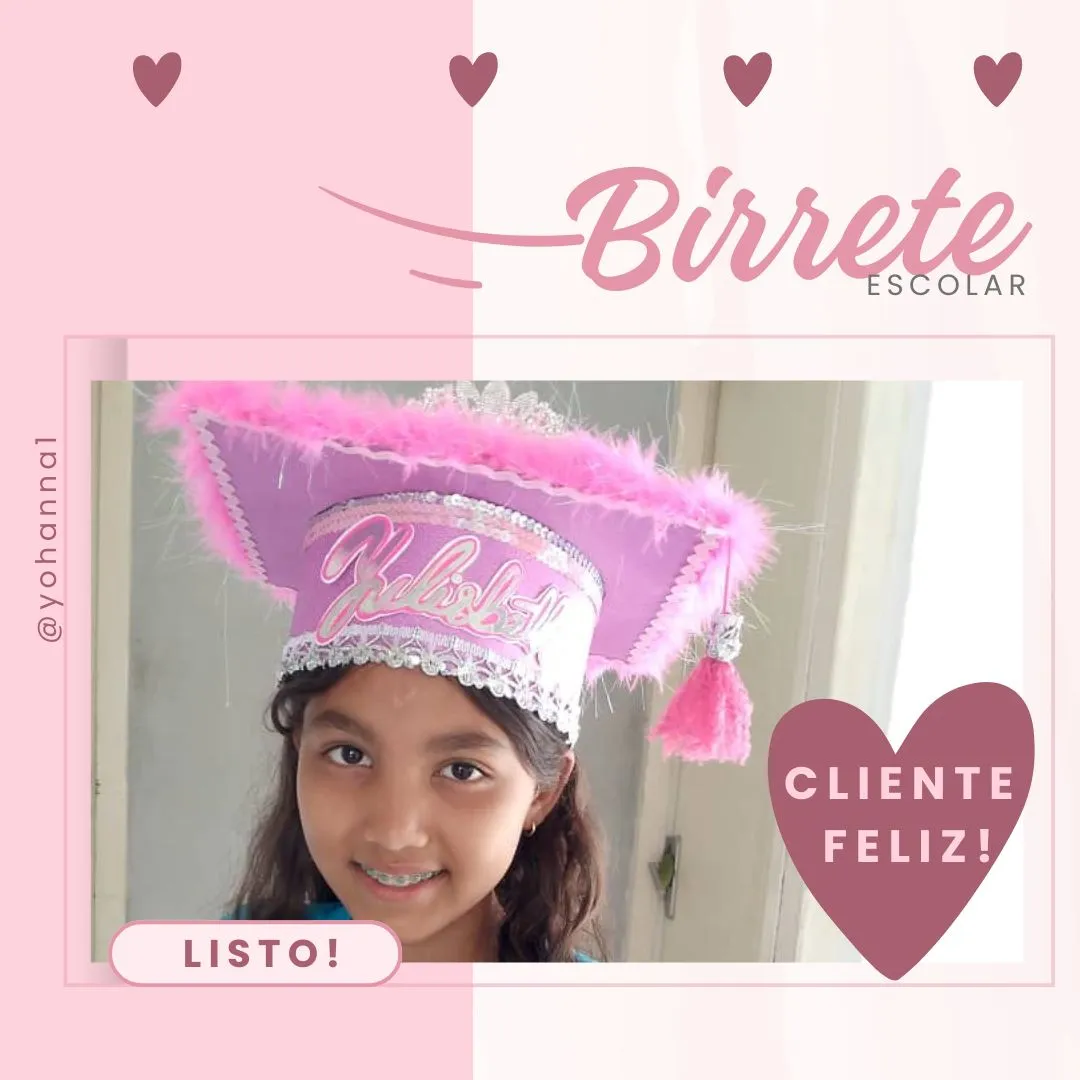
Una vez terminado fue entregado a nuestras cliente, la cual quedo feliz con el resultado.
Once finished, it was delivered to our client, who was happy with the result.
I hope you enjoy it! Grateful for every support. God bless you!
Contenido: Original del Autor.
Imágenes: Originales tomadas con mi teléfono
Recursos: Computador y teléfono infinix hp 10
Programa: Canva y Polish
Traducido con traductor google
Todos los Derechos Reservados: @yohanna1
Content: Original by the Author.
Images: Originals taken with my phone
Resources: Computer and phone infinix hp 10
Program: Canva and Polish
Translated with google translator
All Rights Reserved: @yohanna1