Greetings dear community
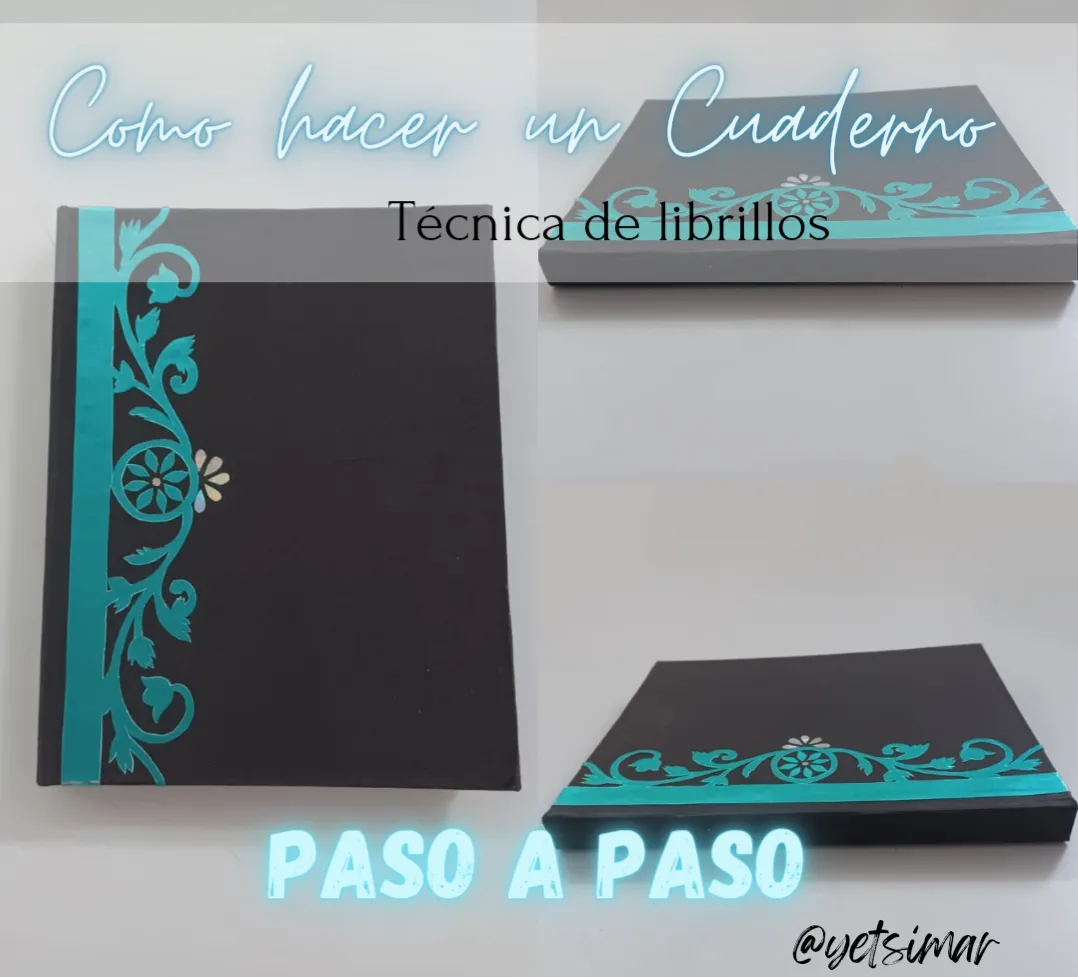
Hoy les quiero mostrar como hago mis libretas de dibujos, desde hace tiempo complete mi última memoria de dibujos y andaba haciendo mis dibujos en hojas sueltas y que termino perdiendo o arrugando o caen al suelo... en fin es un desastre hace un par de días me decidí y aquí les muestro mi procedimiento, me da algo de nostalgia uno de los primeros post que hice cuando comencé en steemit fue como hacer este tipo de encuadernación, intente fotografías cada parte del proceso espero que sea un post útil.
Today I want to show you how I make my sketchbooks, some time ago I completed my last drawing memory and I was doing my drawings on loose sheets and I end up losing or wrinkling or fall to the ground ... in short is a disaster a couple of days ago I decided and here I show you my procedure, it gives me some nostalgia one of the first post I did when I started in steemit was how to do this type of binding, try photographs every part of the process I hope it is a useful post.
Materials:
- 40 sheets of legal paper
- Scissors
- Needles
- Ruler
- Cardboard
- Cardboard
- Silicone
- White glue.
- Piece of cloth
Materiales:
- 40 hoja oficio
- Tijeras
- Agujas
- Regla
- Cartón
- Cartulinas
- Silicon
- Pega blanca.
- Trozo de tela
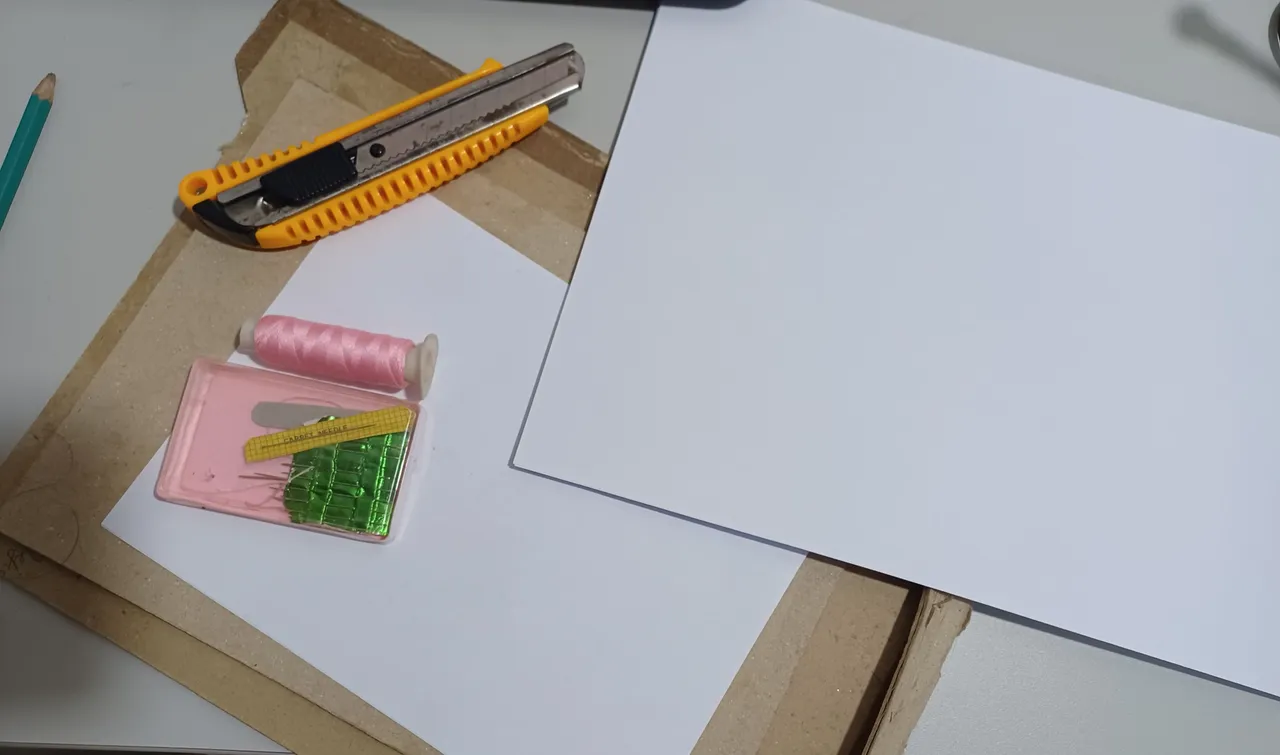
Lo primero que se debe hacer es disponer de las páginas de papel blanco o del color de tu preferencia, yo quería un cuaderno de muchas hojas y amplio así que he usado 40 páginas tamaño oficio.
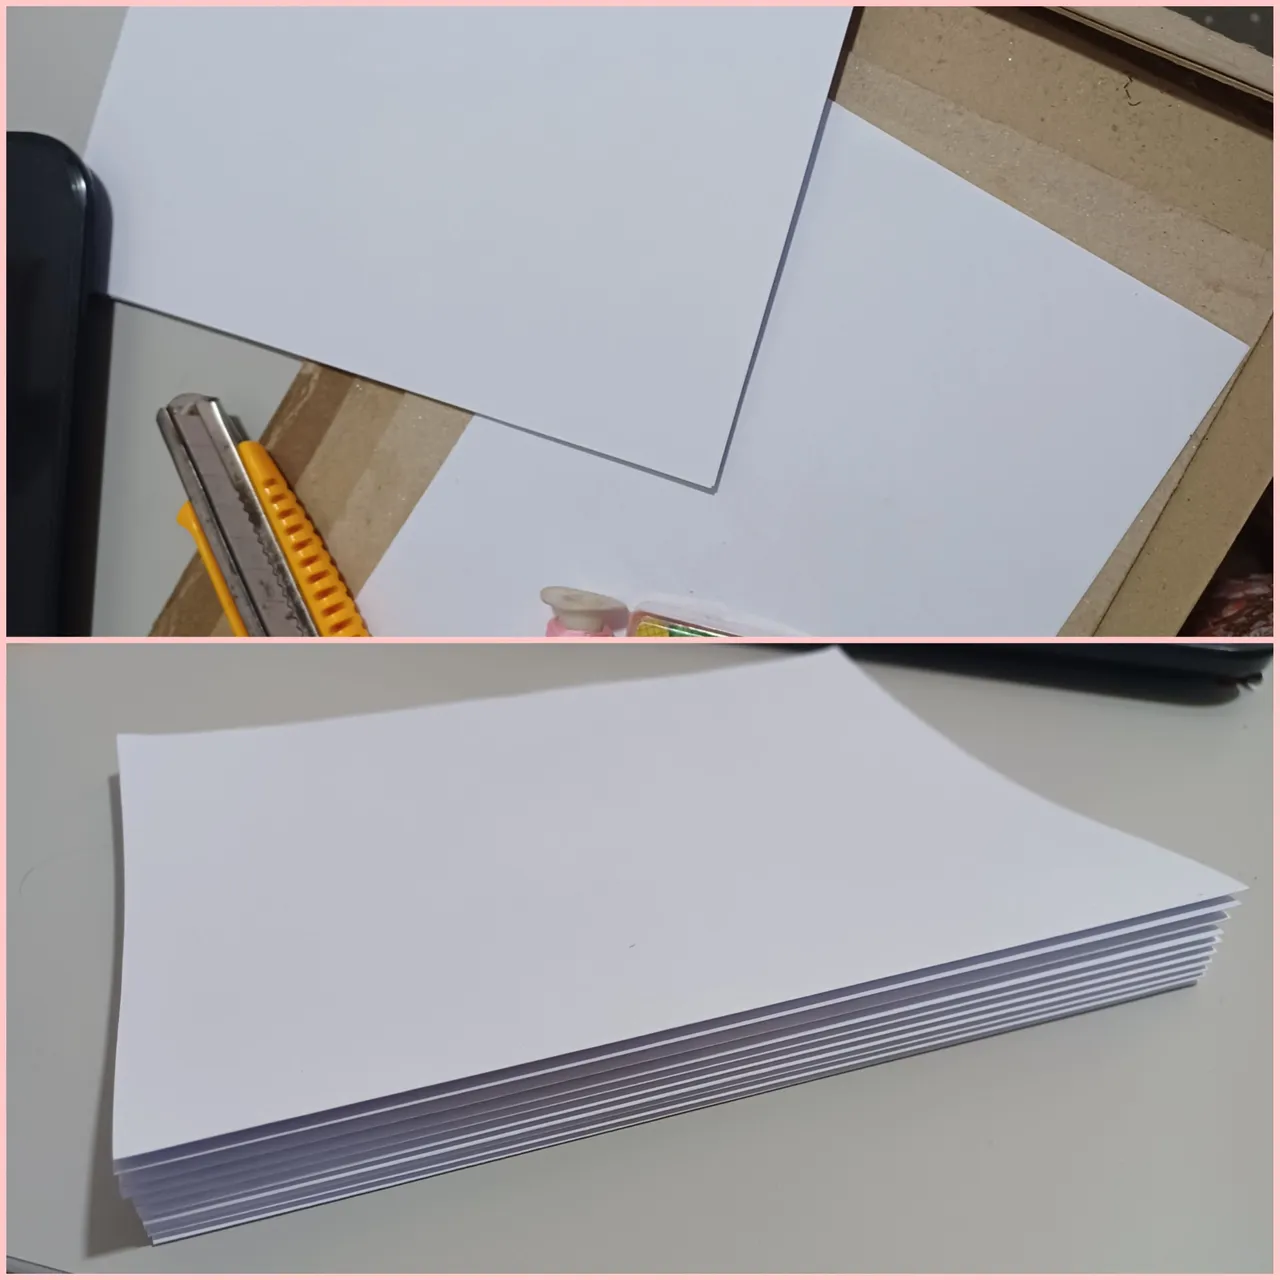
Luego las he doblado todas por la mitad, y las he agrupado en cuadernillos de cuatro páginas cada una para un total de 10 cuadernillos.
The first thing to do is to have the pages of white paper or the color of your choice, I wanted a notebook of many sheets and wide so I used 40 pages of legal size.
Then I folded them all in half, and grouped them into booklets of four pages each for a total of 10 booklets.
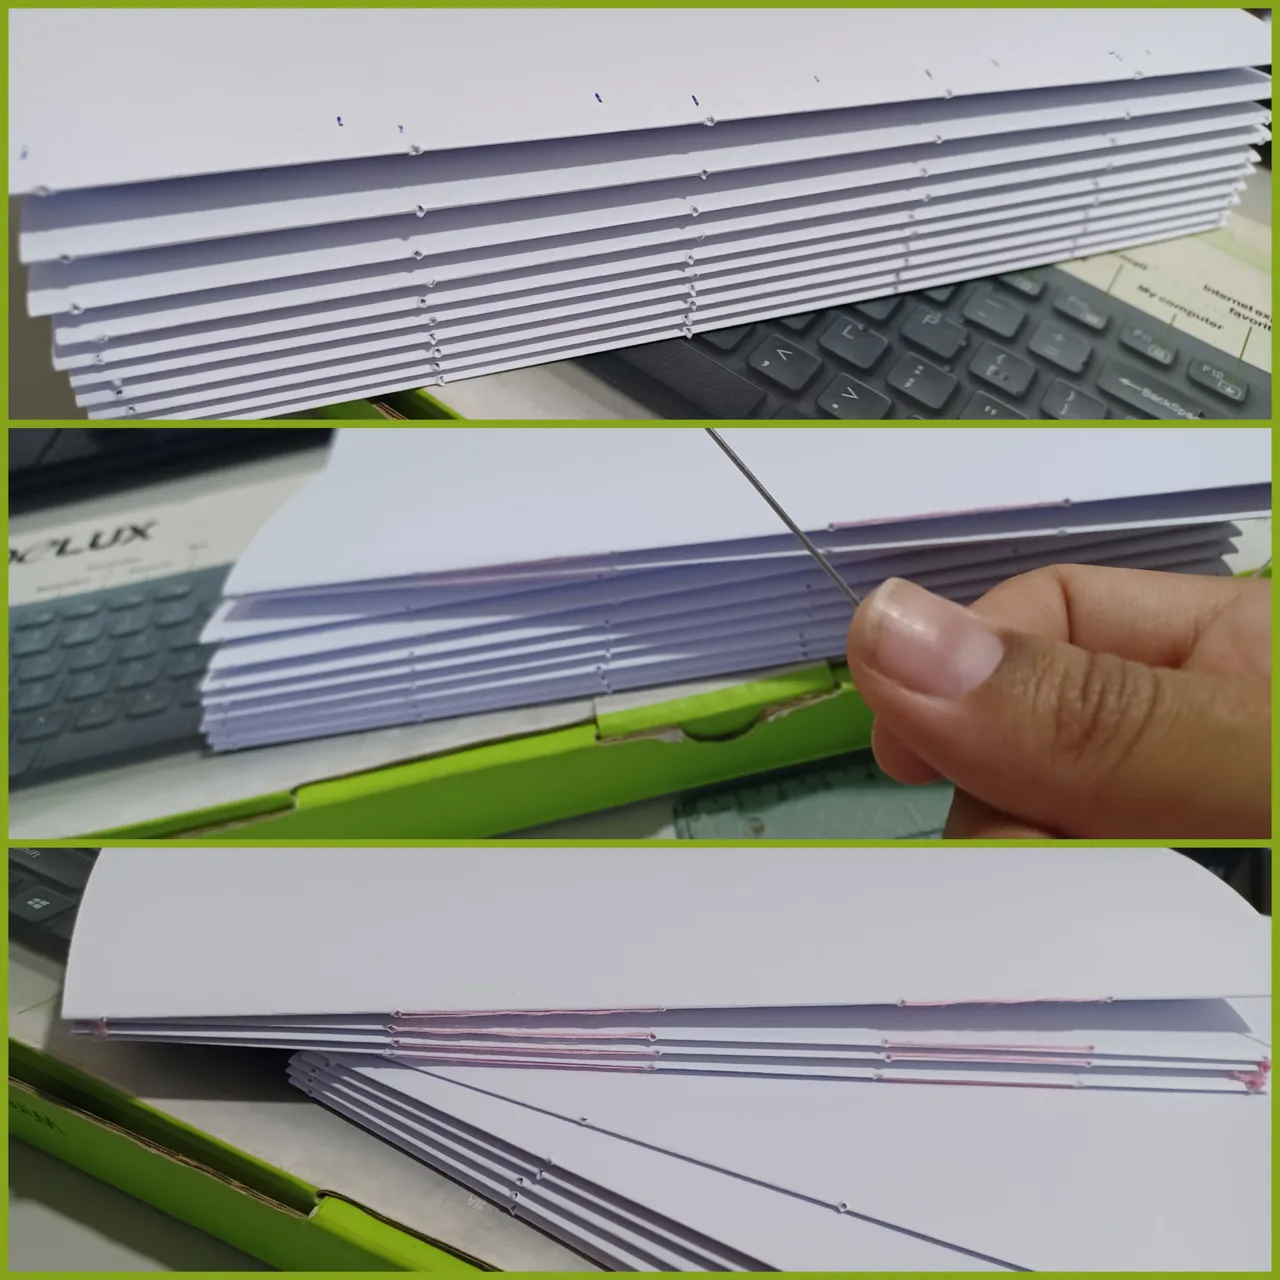
Lo siguiente es abrir los orificios para coser cada uno de los cuadernillos, los cuales se realizan sobre la línea del doblez, se deben realizar una cantidad par de agujeros y comenzar a realizar pasar el hilo desde el lado exterior para que al pasarlo a través de los agujeros el hilo termine igualmente al otro extremo del papel por el lado de afuera.
Sin cortar el hilo se comienza nuevamente a pasar el hilo a través del siguiente cuadernillo, hasta comerlos todos juntos.
The next step is to open the holes to sew each of the booklets, which are made on the fold line, you must make an even number of holes and start passing the thread from the outside so that when passing it through the holes the thread also ends up at the other end of the paper on the outside.
Without cutting the thread, start again to pass the thread through the next booklet, until you eat them all together.
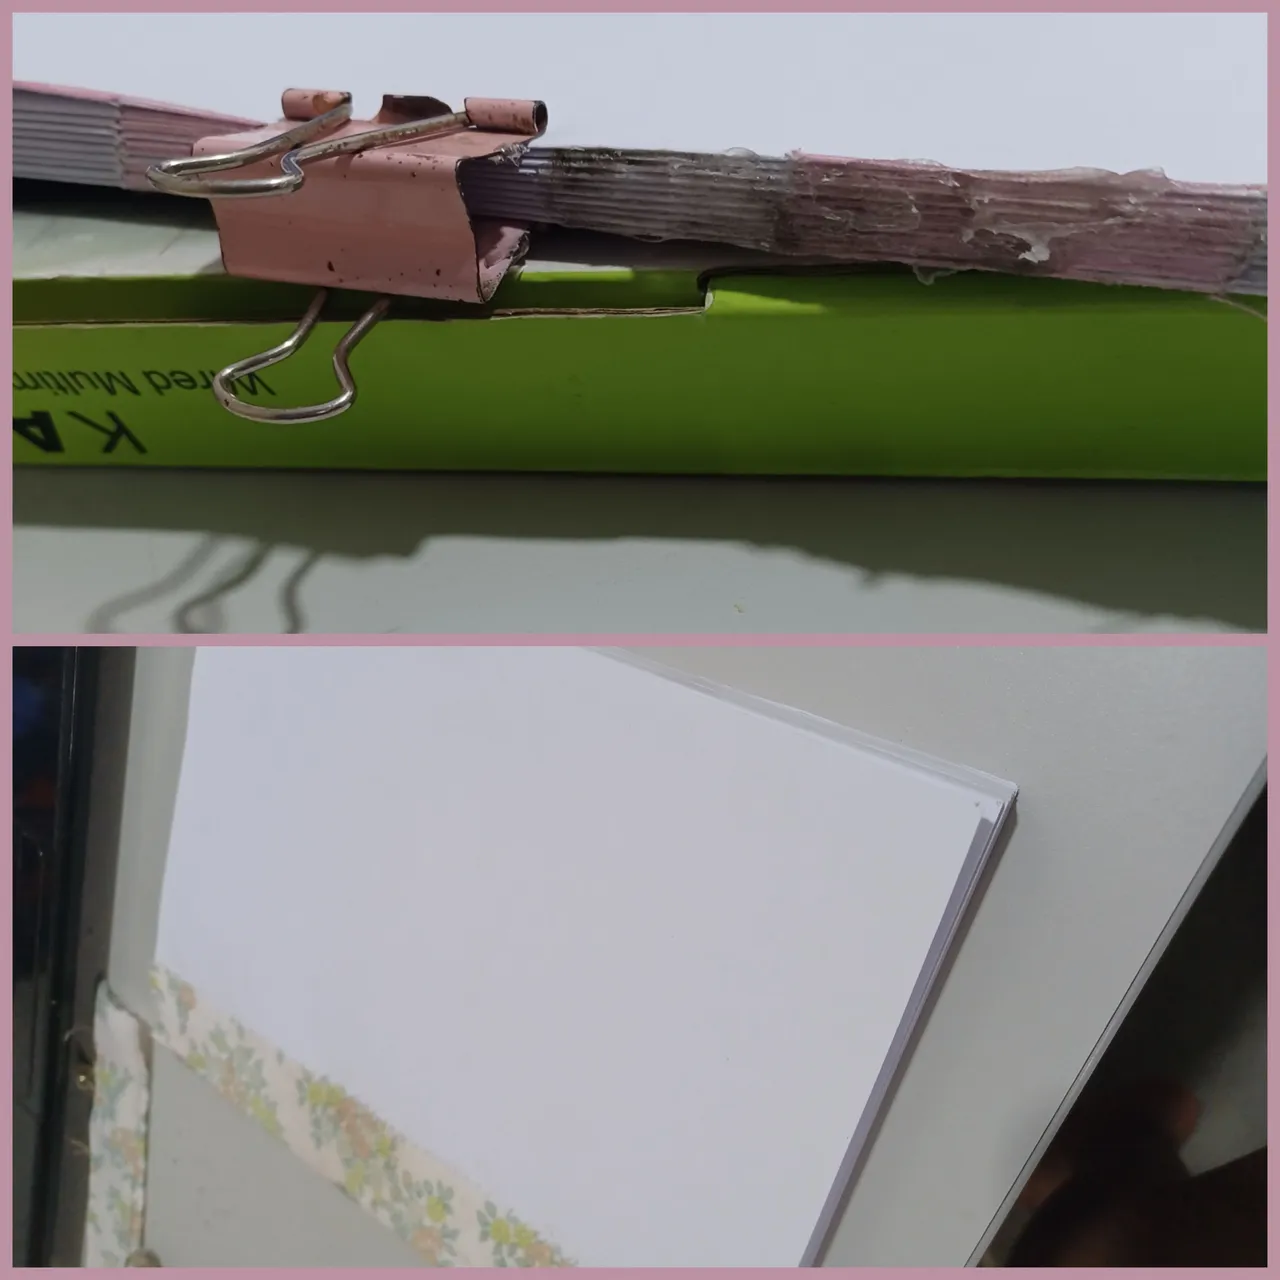
Para asegurar muy bien los cuadernillos, se pegan con pega blanca y se coloca un trozo de tela que mantendrá todo en su lugar, pero esta vez conseguí entre mis cosas una barra de silicon y aunque no tenía una pistola para calentarlo, use un encendedor, coloque antes una pinza de presión para mantenerlos muy juntos y calentando de a poco el silicon coloque una capa sobre todo el lomo y aunque no quedó muy prolijo no es tanto problema esta parte estará totalmente cubierta, luego tomé pega blanca y pegue un trocito de tela sobre la parte posterior de los librillos.
To secure the booklets very well, they are glued with white glue and a piece of cloth is placed to keep everything in place, but this time I got among my things a silicon stick and although I didn't have a gun to heat it, I used a lighter, first I put a pressure clamp to keep them together and heating the silicone little by little I put a layer over the whole spine and although it was not very neat it is not so much of a problem this part will be completely covered, then I took white glue and glued a small piece of cloth on the back of the booklets.
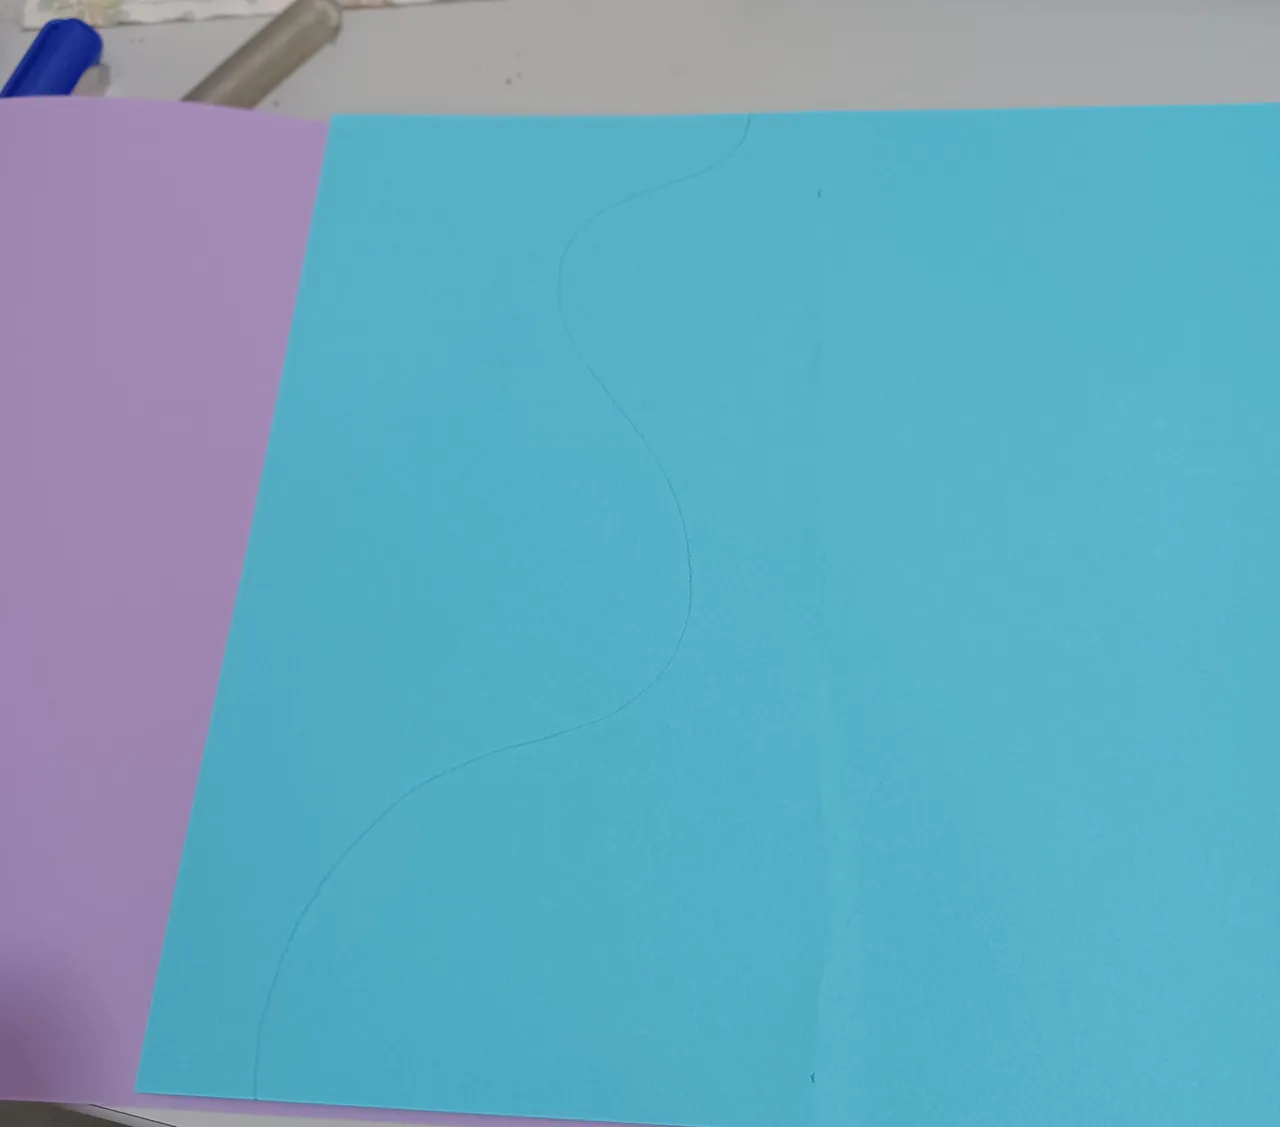
Luego debía pegar las contratapa, para ello necesitaba un papel o cartulina de las mismas dimensiones usada en los librillos y lo resolví usando páginas de colores que pegue juntas pero antes dibuje y corte unas líneas curvas y pegué juntos los papeles y los doble a la mitad y pegue en la primera y última página de mi cuaderno.
Then I had to glue the back cover, for this I needed a paper or cardboard of the same dimensions used in the booklets and I solved it by using colored pages that I glued together but first I drew and cut some curved lines and glued the papers together and folded them in half and glued them on the first and last page of my notebook.
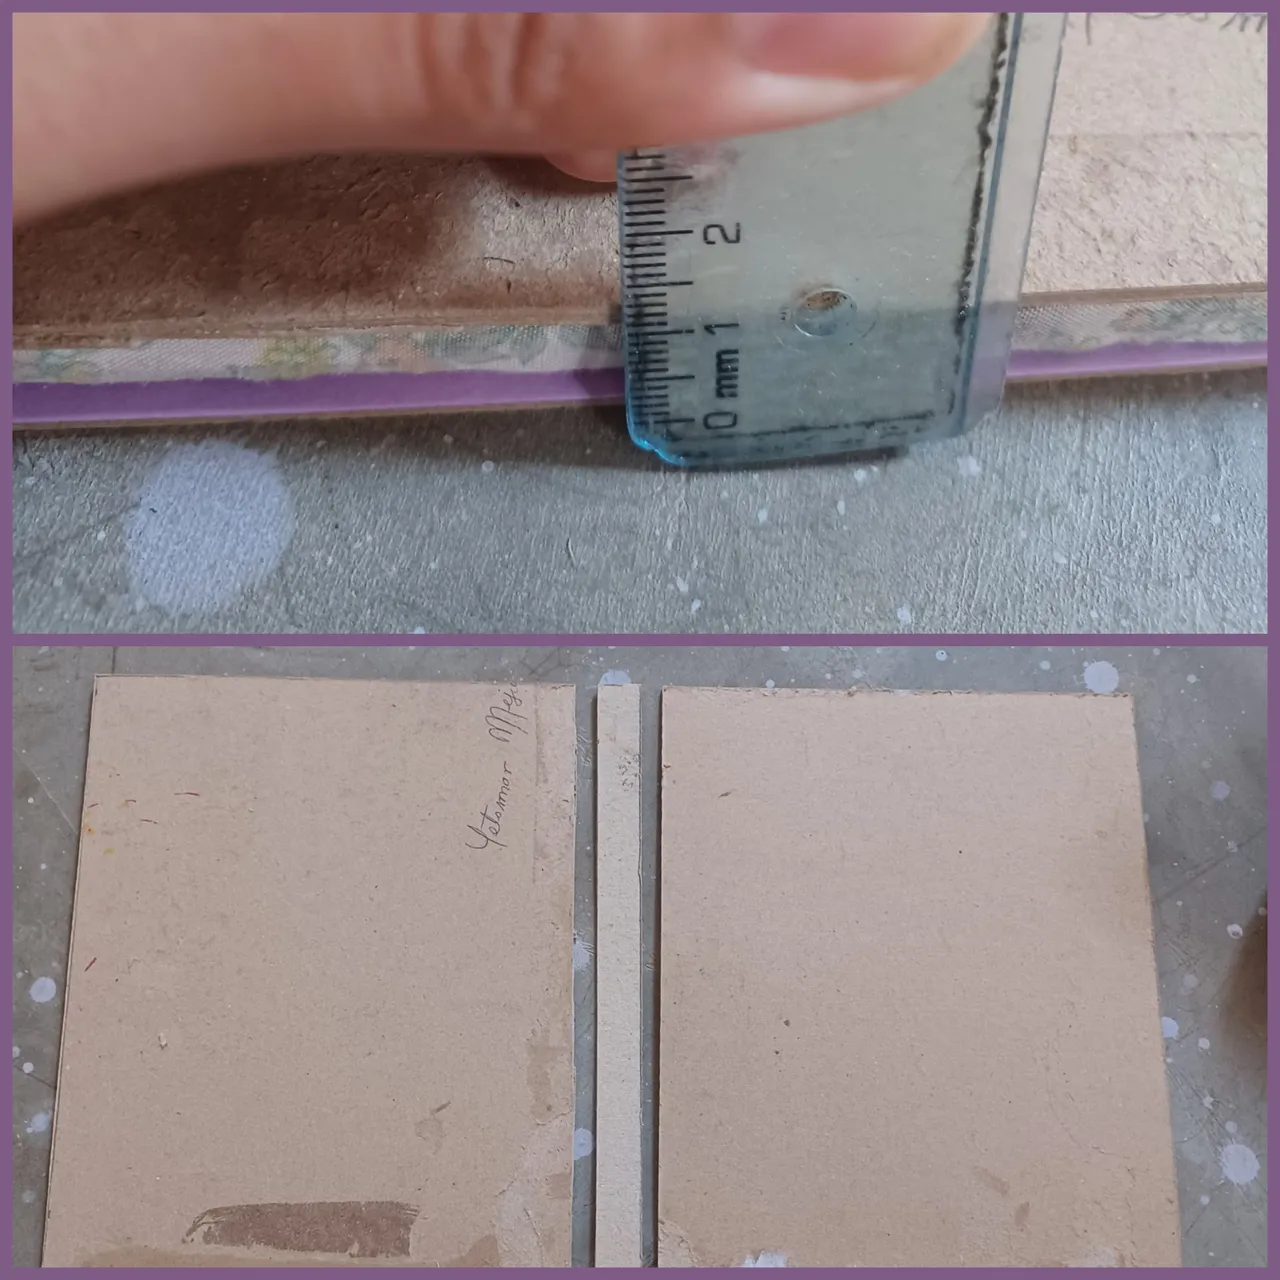
Lo siguiente era hacer las tapas, para eso tomé un cartón muy grueso, cartón 1 en kilo afortunadamente tenia entre mis cosas dos trozos que se ajustan al tamaño que necesitaba, la libreta mide 21.5x16.5cm del lado largo agregue un centímetro para que sobresaliera medio centímetro de cada lado y del lado corto solo medio centímetro más, las medidas del cartón fueron 22.5x17cm corte dos de esta medida.
The next thing was to make the covers, for that I took a very thick cardboard, cardboard 1 in kilo fortunately I had among my things two pieces that fit the size I needed, the notebook measures 21.5x16.5cm long side added a centimeter to protrude half a centimeter on each side and the short side only half a centimeter more, the measures of the cardboard were 22.5x17cm cut two of this measure.
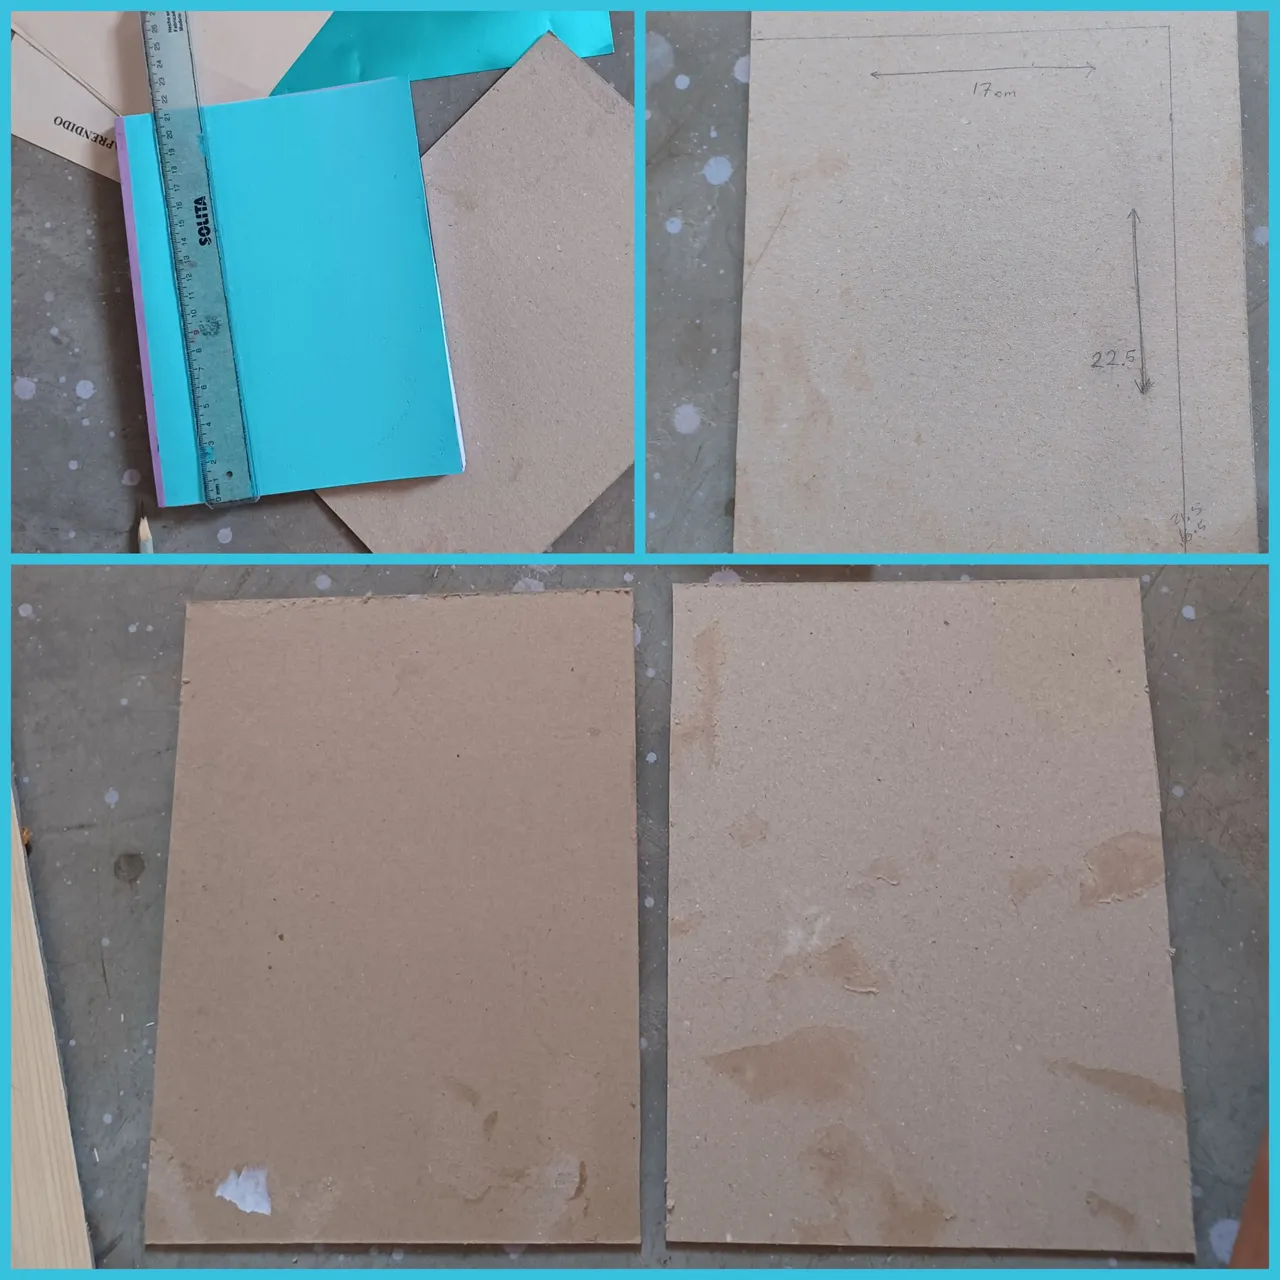
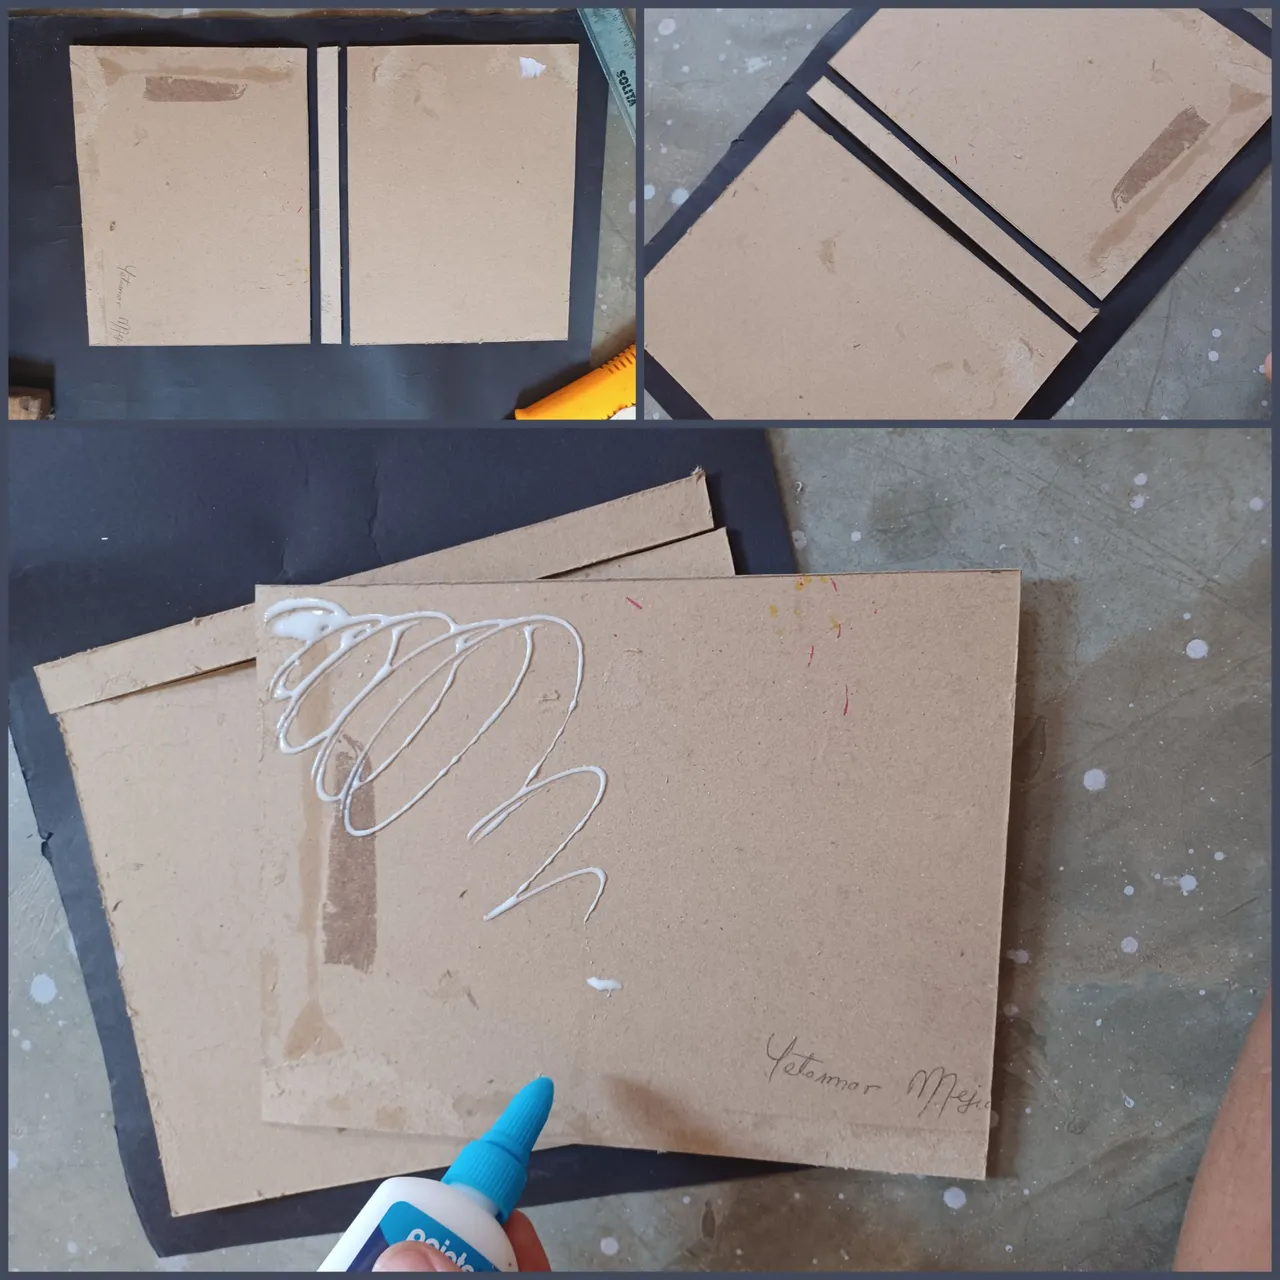
Luego pase a cortar el lomo, para ello dispuse las dos tapas juntas con el cuaderno, resultando una medida de 1.5cm así que corte en el mismo cartón un rectángulo de 22.5×1.5 para el lomo, luego dispuse como se observa en la 2da imagen, con una separación de 0.5cm entre cada uno.
Then I cut the spine, for this I arranged the two covers together with the notebook, resulting in a measure of 1.5cm so I cut in the same cardboard a rectangle of 22.5×1.5 for the spine, then I arranged as shown in the 2nd image, with a separation of 0.5cm between each one.
Para forrar mi libreta quise usar una cartulina negra que tenia guardada entre mis cosas marque sobre la cartulina los cartones con su respectiva separación y deje un margen de aproximadamente dos centímetros para doblar hacia adentro luego.
Luego cubrí los cartones de una capa de pega blanca e hice presión sobre la cartulina negra y asegurándome que no dejar grumos en medio.
To cover my notebook I wanted to use a black cardboard that I had saved among my things. I marked on the cardboard the cardboards with their respective separation and left a margin of approximately two centimeters to fold inward later.
Then I covered the cardboard with a layer of white glue and put pressure on the black cardboard, making sure not to leave lumps in the middle.
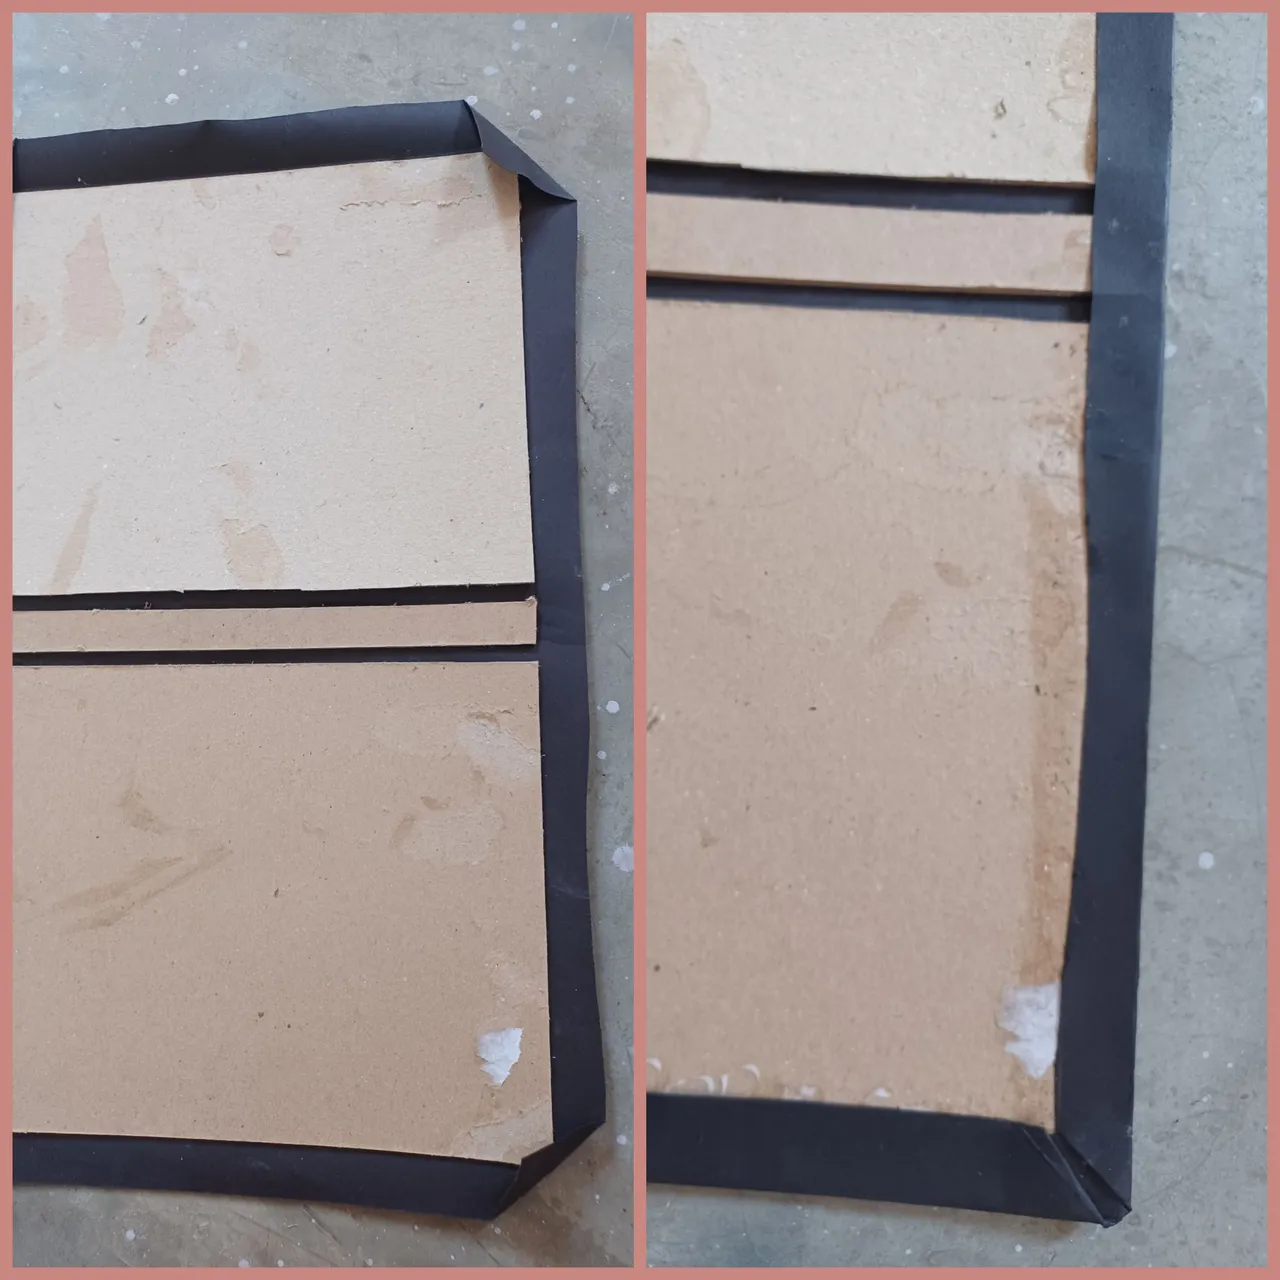
Una vez pegue las dos tapas y el lomo, procedí a doblar los sobrante, hice un primer doblez en toda la esquina y la pegue sobre el cartón y luego se repliegan los lados y queda muy bonito y cubierto.
Once I glued the two covers and the spine, I proceeded to fold the excess, I made a first fold in the whole corner and glued it on the cardboard and then the sides are folded and it is very nice and covered.
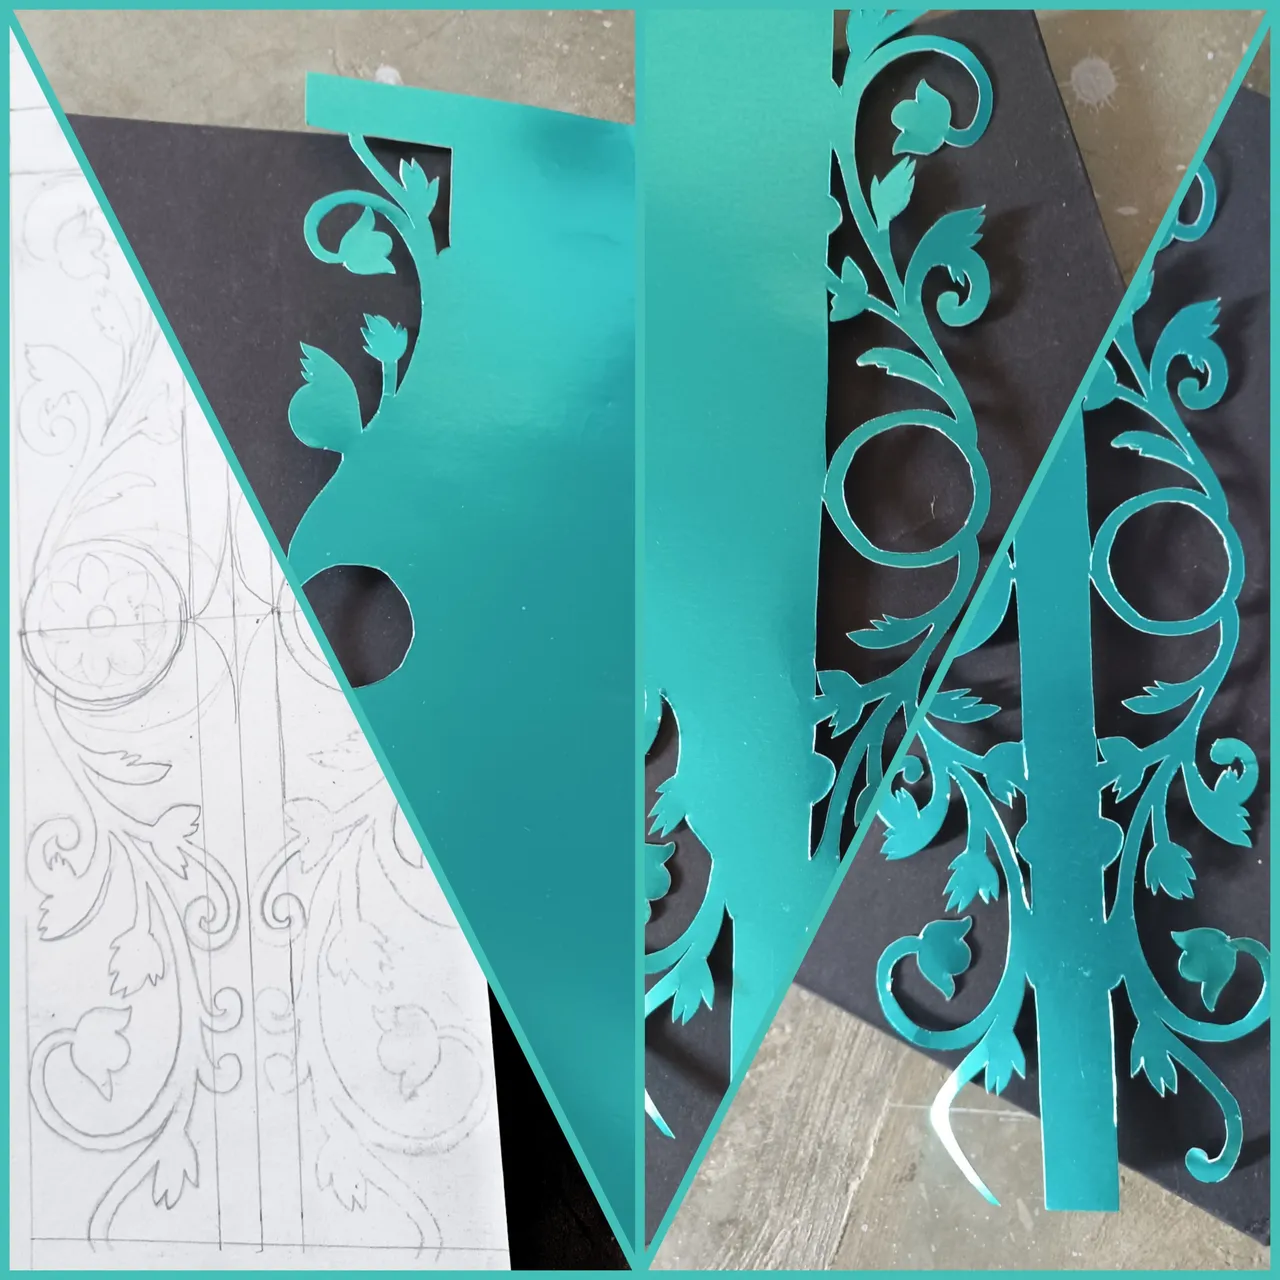
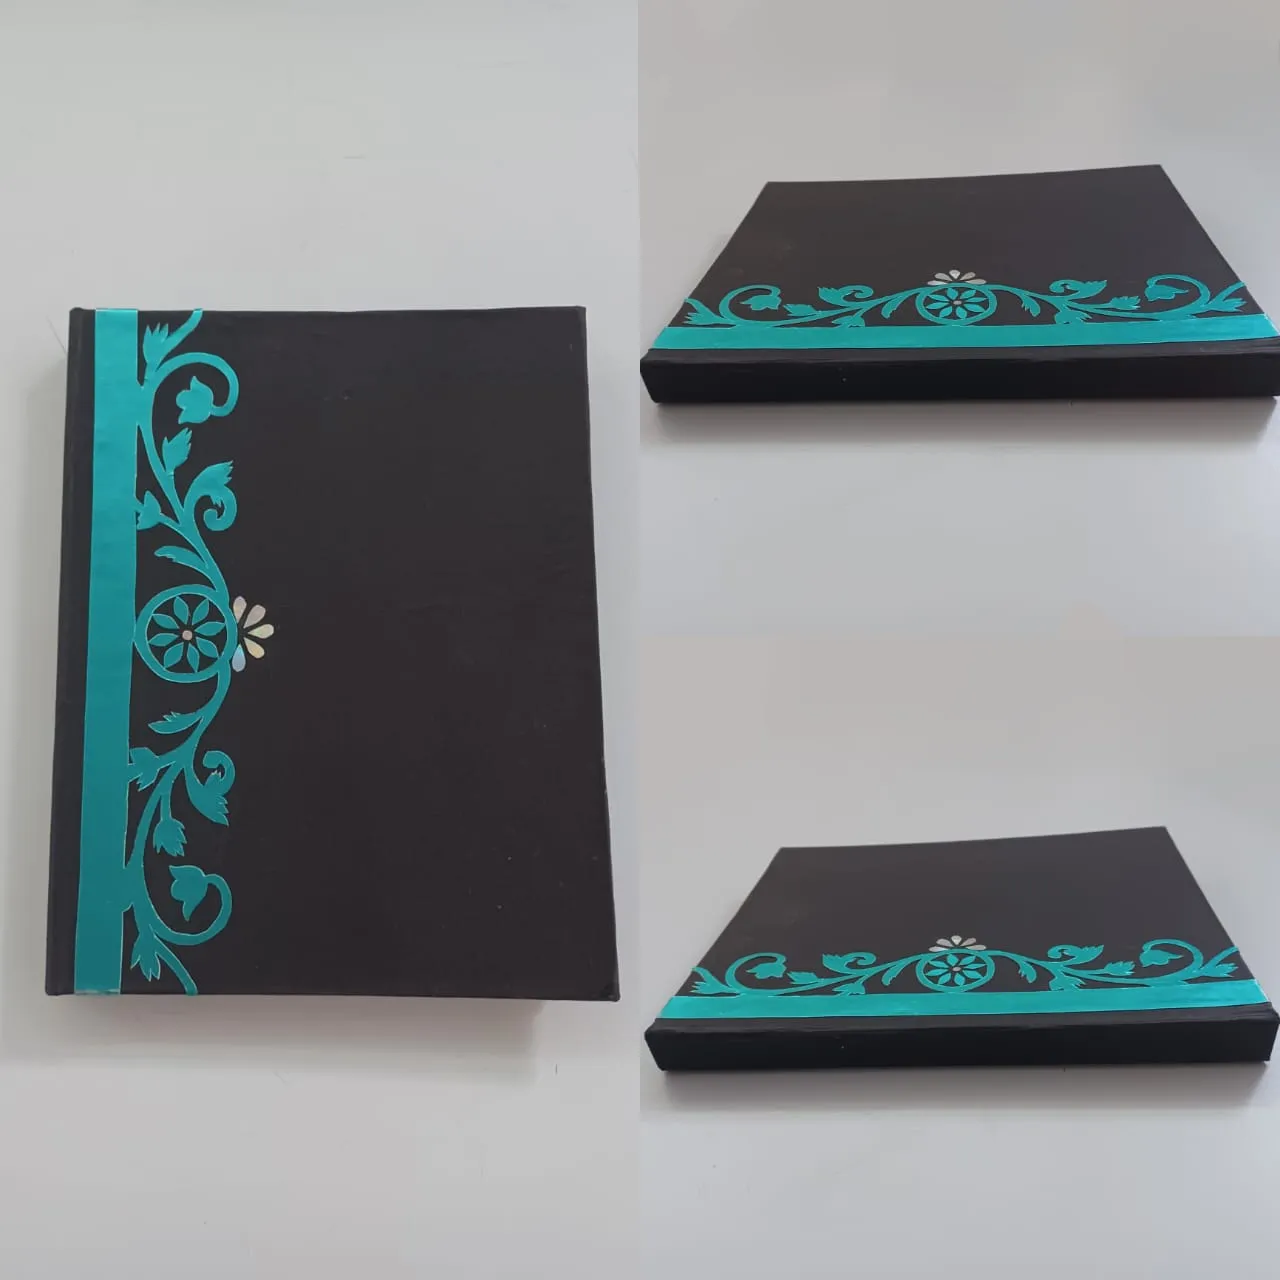
Para decorar el lomo he decidido cortar algunas formas arabescas en una cartulina metalizada azul que tenia guardada, normalmente suelo hacer esto con tela porque es más resistente, pero como esta vez no tenía tela lo hice todo de cartón, así que seré muy cuidadosa al manipularlo.
To decorate the spine I decided to cut some arabesque shapes in a blue metallic cardboard that I had saved, normally I usually do this with fabric because it is more resistant, but this time I didn't have fabric, so I will be very careful when handling it.
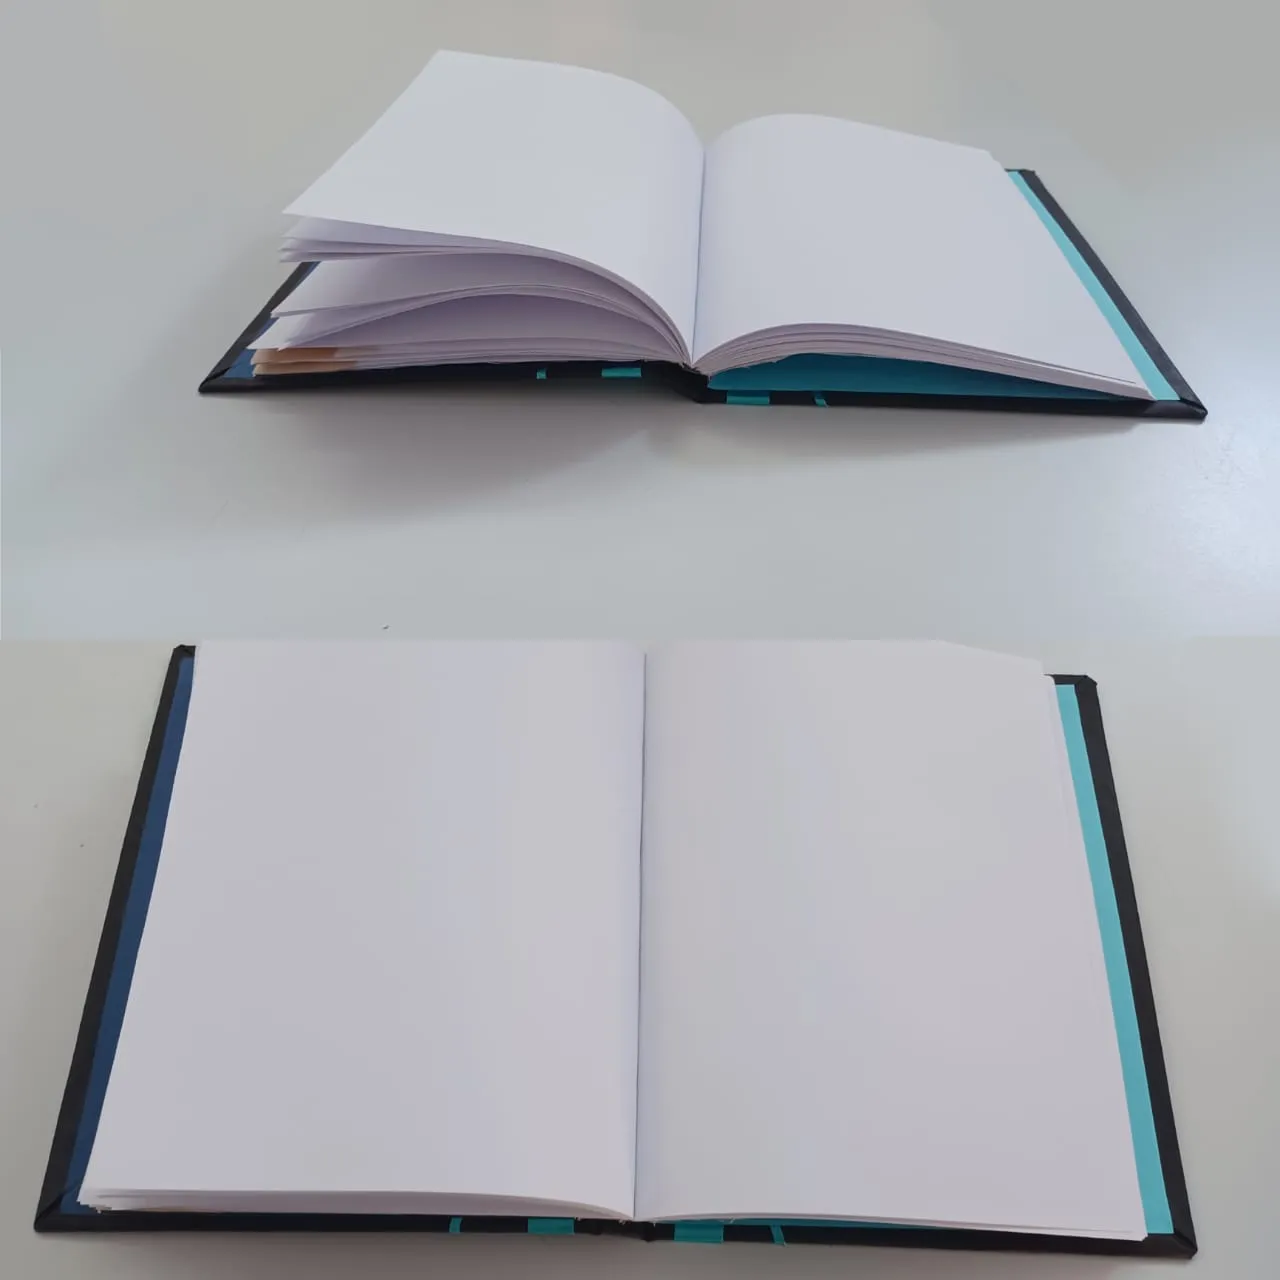
Para finalizar pegue las contratapa a las tapas del cuaderno, usando pega blanca disponiendo uniformemente una capa de pega sobre todo el papel y con la libreta sobre la tapa lo cerré e hice presión y me aseguré de no dejar ningún grumo.
A continuación las fotos del resultado final de este proyecto, me gustó mucho e incluso antes de finalizar ya estaba realizando mi primer dibujo sobre ella, espero seguí haciendo los dibujos de brujitas en mi nuevo cuaderno.
To finish I glued the back cover to the cover of the notebook, using white glue evenly arranging a layer of glue over the entire paper and with the notebook on the cover I closed it and made pressure and made sure not to leave any lumps.
Here are the photos of the final result of this project, I liked it very much and even before finishing I was already making my first drawing on it, I hope I continued making the drawings of witches in my new notebook.
Espero que el proceso haya quedado muy bien explicado, si no es así estaré dispuesta a responder cualquier duda, espero que haya sido útil y de su agrado hasta la próxima
¡feliz día!
I hope the process has been very well explained, if not I will be willing to answer any questions, I hope it has been useful and to your liking until next time.
Happy day!

Traducción en Deepl.com | Portada Canva | Collages Picsart
I hope the process has been very well explained, if not I will be willing to answer any questions, I hope it has been useful and to your liking until next time.
Happy day!
Traducción en Deepl.com | Portada Canva | Collages Picsart