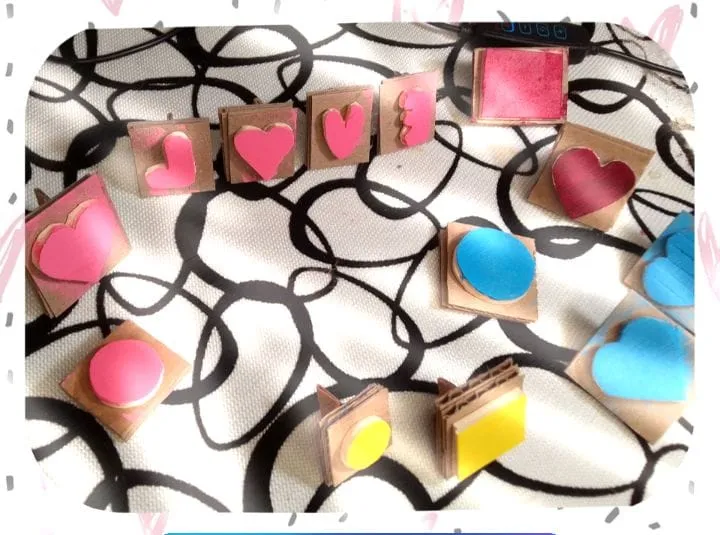
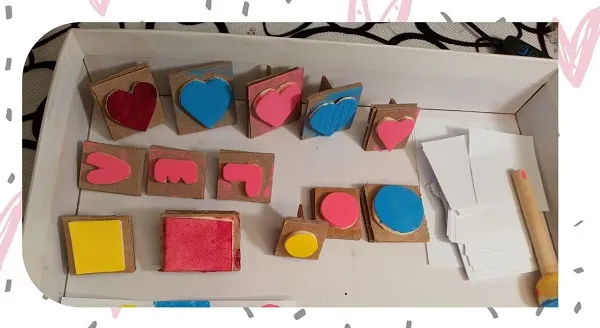
Los Sellos de Foami me encantan, tienen tantas posibilidades de uso, y puedes coleccionarlos. De hecho, es inevitable no guardarlos. Hoy hice mis primeros Sellos y ya tengo una caja dispuesta para empezar a guardarlos.
Hola a toda la Comunidad HIVE BLOG, en el DIY de hoy les enseño a elaborar tus propios Sellos de Foami o Goma Eva. Estos los hice hace muchos años para hacer un trabajo escolar de mis hijos y no les presté atención mas alla de eso. Sin embargo, ahora pienso que tiene tantas posibilidades, ya que los puedo usar para hacer tarjetas, estampar ropa usando pintura textil, hacer decoraciones en paredes, cuadernos, realizar cuadros, como plus en nuestros dibujos como fondo o base, etc.
Materiales:
Cartón reciclado
Foami o Goma Eva grueso
Silicón Caliente
Pintura al Frío
Cartulinas u Hojas
Tijera
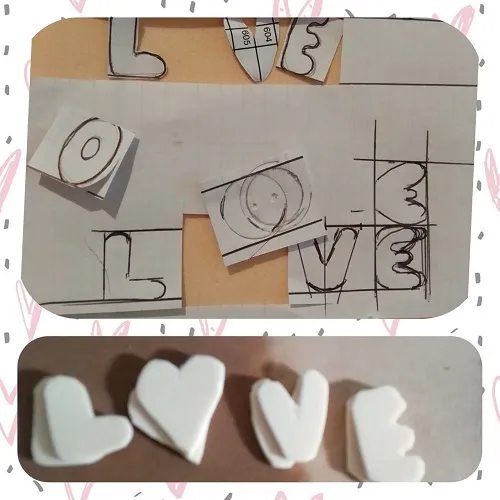
Una vez tenemos armado nuestros sello así de sencillo, hacemos pruebas. Un dato importante es que cuando se trate de letras debemos pegarlas alrevés, como tipo espejo, ya que al realizar la impresión debe leerse al derecho.
En esta caja comenzaré a guardar lo que será mi colección de Sellos de Foami, ya que en futuros proyectos será de mucho valor ya tenerlos listos e ir incrementando su número con cada nuevo diseño que cree.
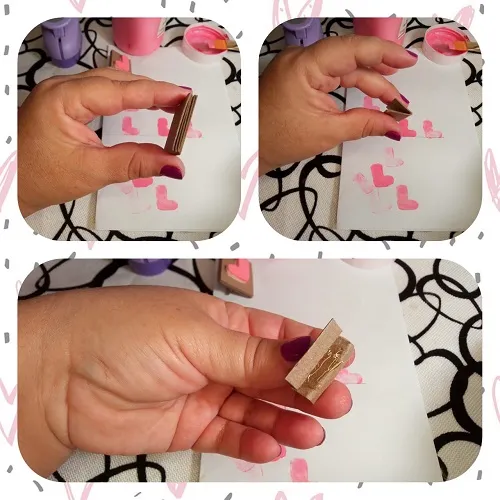
Ya que estoy estampando con pintura al frio, debemos hacer un sello para cada color que se use. Otra forma de estampar es con tintas que se compren o que igualmente hacemos.
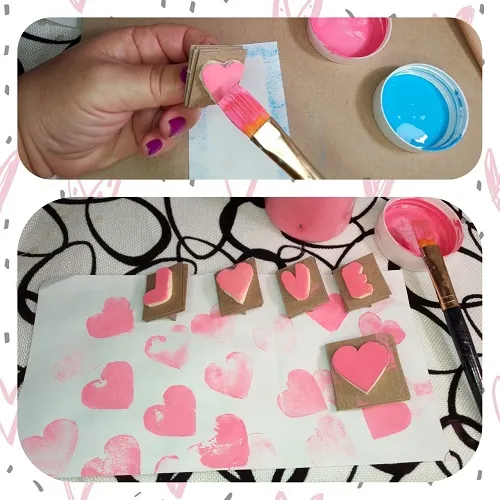
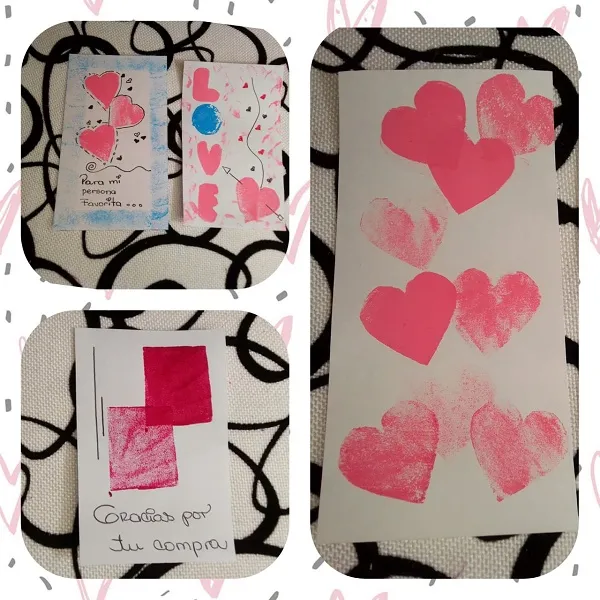
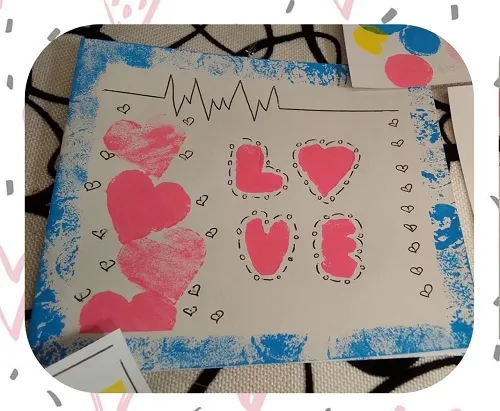
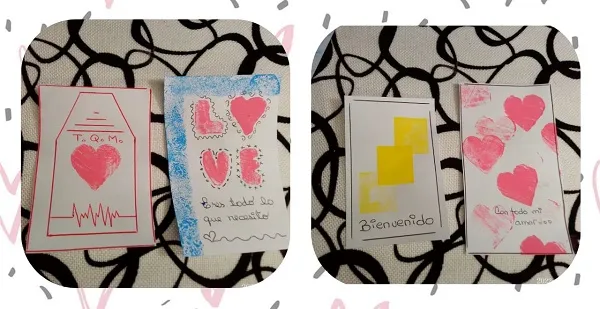
Para estos primeros sellos realicé o hice pruebas para tarjetas diferentes. El diseño es personal y es bueno practicar para ir mejorando día a día. Igualmente, si vamos a estampar en ropa como franelas, camisas, faldas, pantalones, carteras, bolsas de tela, etc es bueno que hayamos practicado bastante para llegar a tener pericia, ya que los textiles se pintan con pintura especializada, y una vez pintados ya no podemos revertirlo, y el costo sería mas alto que practicar con una simple hoja de cartulina o papel.
Aquí puedes ver mis diseños de practica del día de hoy:
Siempre es un placer cada proyecto, y genera algo lindo dentro de nosotras el hecho de hacer algo con nuestras propias manos, deseo que les haya gustado tanto como a mí.
Las fotos las tomé con mi teléfono Smooth 6.5
Los Collage con Photo Collage Maker
Usé el traductor Google
I love Foami Stamps, they have so many possibilities of use, and you can collect them. In fact, it is inevitable not to keep them. Today I made my first Stamps and I already have a box ready to start storing them.
Hello to the entire HIVE BLOG Community, in today's DIY I teach you how to make your own Foami or Eva Rubber Stamps. I made these many years ago to do my children's school work and I didn't pay attention to them beyond that. However, now I think that it has so many possibilities, since I can use it to make cards, print clothes using textile paint, make wall decorations, notebooks, make paintings, as a plus in our drawings as a background or base, etc.
Materials:
Recycled carton
Foami or thick Eva rubber
Hot Silicone
Cold paint
Cardboard or Sheets
Scissor
Once we have assembled our seal as simple as that, we do tests. An important fact is that when it comes to letters we must stick them upside down, like a mirror type, since when printing they must be read right side up.
In this box I will begin to store what will be my collection of Foami Stamps, since in future projects it will be of great value and to have them ready and increase their number with each new design that I create.
Since I am stamping with cold paint, we must make a stamp for each color that is used. Another way of stamping is with inks that are bought or that we also make.
For these first stamps I made or made tests for different cards. The design is personal and it is good to practice to improve day by day. Likewise, if we are going to print on clothing such as flannels, shirts, skirts, pants, handbags, cloth bags, etc., it is good that we have practiced enough to become proficient, since textiles are painted with specialized paint, and once painted we can no longer reverse it, and the cost would be higher than practicing with a simple sheet of cardboard or paper.
Here you can see my practice designs for today:
Each project is always a pleasure, and the fact of doing something with our own hands generates something beautiful within us, I hope you liked it as much as I did.
The photos were taken with my Smooth 6.5 phone
Collages with Photo Collage Maker
I used google translate