---- 📱📲📱📲 ----
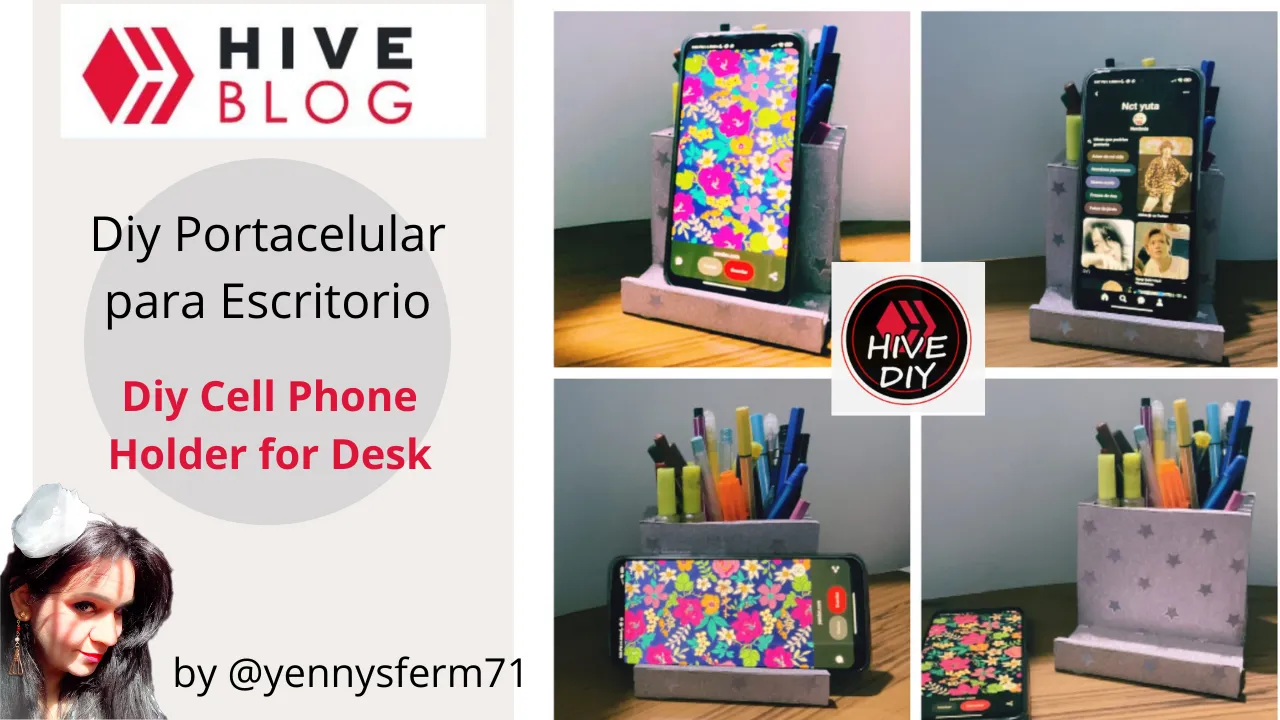
Saludos a todos y todas en esta hermosa Comunidad Hive Diy . Soy Yennys Fernández, y hoy les presento mi nueva Publicación Diy Portacelular para Escritorio, que adicionalmente es un Portalápices, de manera que es una pieza muy funcional y está realizada en Cartulina Microescarchada que le aporta un diseño muy hermoso.
Greetings to everyone in this beautiful Community Hive Diy . I'm Yennys Fernández, and today I present to you my new Post Diy Cell Phone Holder for Desktop, which is also a Pencil Holder, so it's a very functional piece and it is made of Microfrosted Cardboard that gives it a very beautiful design.
---- 📱📲📱📲 ----
Actualmente vivimos en lo que muchos llaman La Era de las Formas y es que todo está en el Diseño, el cual adaptamos a nuestras necesidades y gustos. Todo, absolutamente todo puede ser mejorado y adaptado. Los diseños funcionales para accesorios tecnológicos siguen esa evolución, ya que para todos es muy importante la forma como interactuamos con la tecnología y nuestro estilo de vida.
Este Portacelular se lo hice a otra de mis hijas que quería uno diferente al que le hice a su hermana anteriormente. Ella deseaba que principalmente se sintiera muy estable, que se pudiera usar con el teléfono tanto vertical como horizontal, que fuese fashion y que tuviera otra función como un almacenamiento, ya que ella dispone de muchas cosas en su escritorio.
Los invito a ver este Tutorial y deseo que les guste mucho...
We currently live in what many call The Age of Forms and everything is in the Design, which we adapt to our needs and tastes. Everything, absolutely everything can be improved and adapted. Functional designs for technological accessories follow this evolution, since the way we interact with technology and our lifestyle is very important to all of us.
I made this ** Cell Phone Holder ** for another of my daughters who wanted a different one than the one I made for her sister before. She wished that she mainly felt very stable, that she could be used with the phone both vertically and horizontally, that it be fashionable and that it have another function such as a storage, since she has a lot of things on the desk of she.
I invite you to see this Tutorial and I hope you like it a lot...
---- 📱📲📱📲 ----
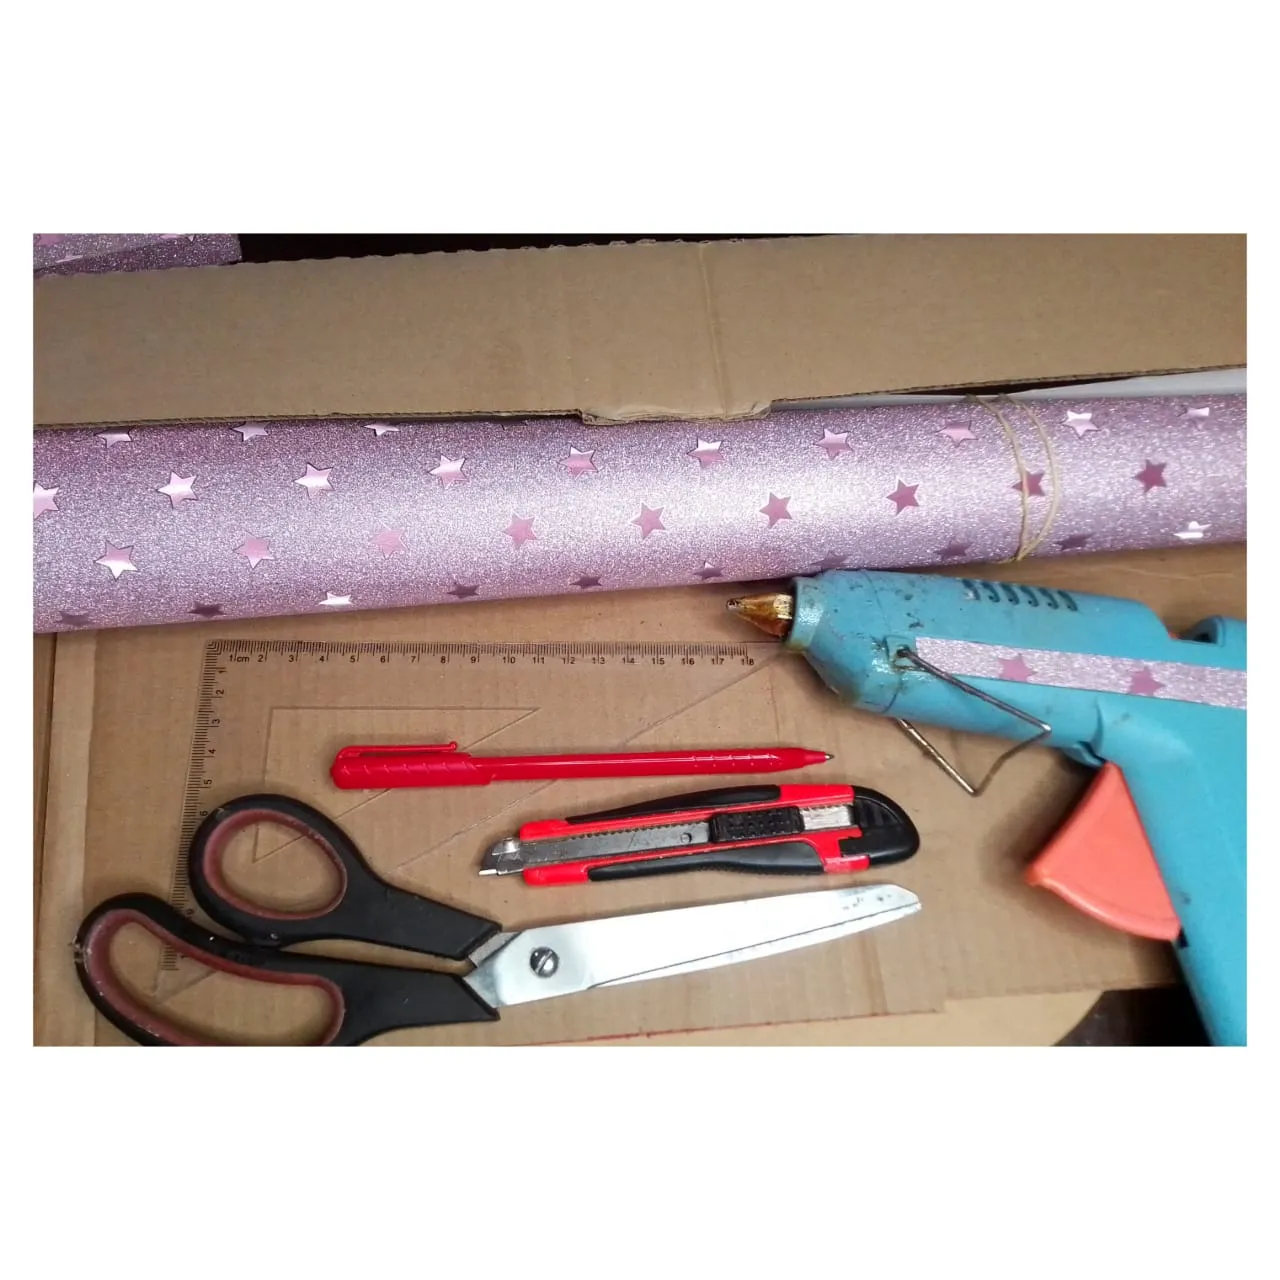
** Los Materiales / The Materials**
📱 Cartón reciclado
📱 Cartulina Microescarchada
📱 Silicón Caliente
📱 Tijera y/o Cuter
📱 Regla y lápiz
📱 Recycled cardboard
📱 Micro Frosted Cardstock
📱 Hot Silicone
📱 Scissors and/or Cutter
📱 Ruler and pencil
---- 📱📲📱📲 ----
El Tutorial / The Tutorial
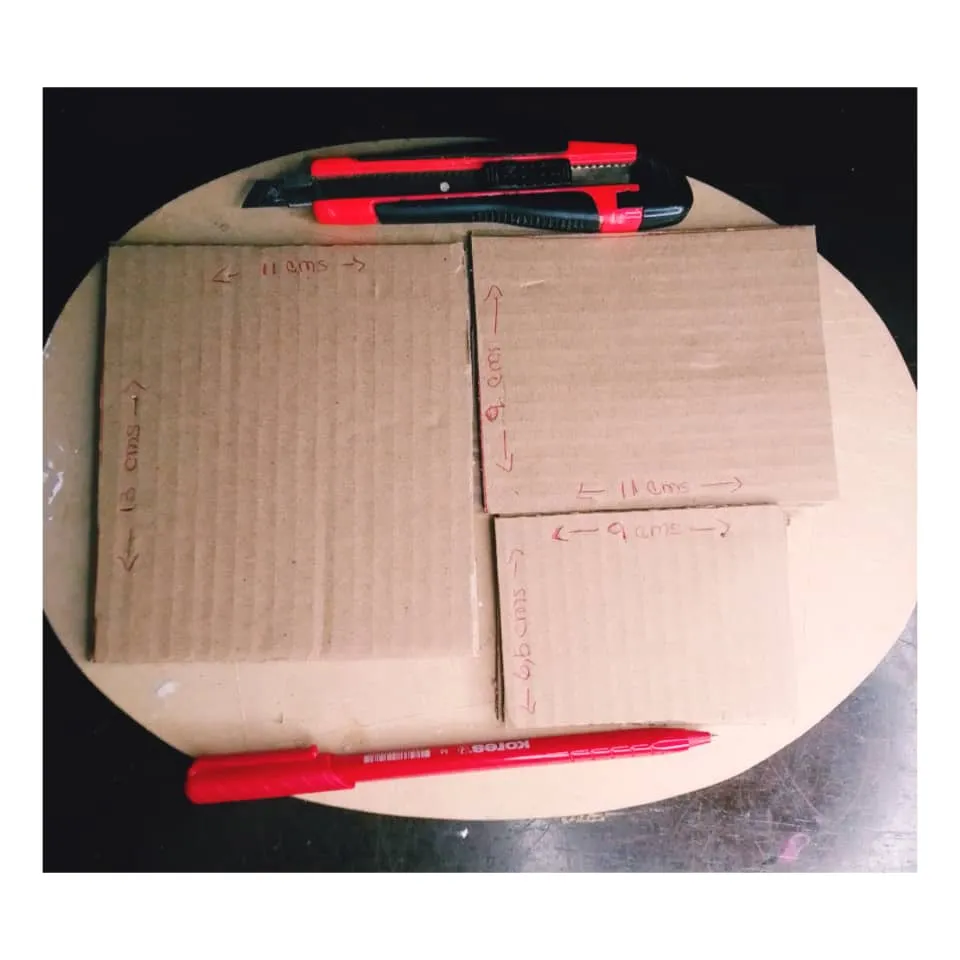
Paso 1: Lo primero que hice fue cortar las piezas en el cartón reciclado, con el exacto o Cuter. Las piezas y su número son las siguientes:
Base: 11cms x 13cms x 2 piezas
Portalápiz:
Parte Frontal y posterior: 9cms x 11 x 4 piezas
Partes Laterales: 9cms x 6,5cms x 4 piezas
Importante: Utilicé una tabla para realizar los cortes con el cuter, para no dañar la superficie de la mesa.
Step 1: The first thing I did was cut the pieces out of the recycled cardboard, with the exact or Cuter. The parts and their number are as follows:
Base: 11cm x 13cm x 2 pieces
Pencil holder:
Front and back: 9cms x 11 x 4 pieces
Side Parts: 9cms x 6.5cms x 4 piecesImportant: I used a table to make the cuts with the cutter, so as not to damage the surface of the table.
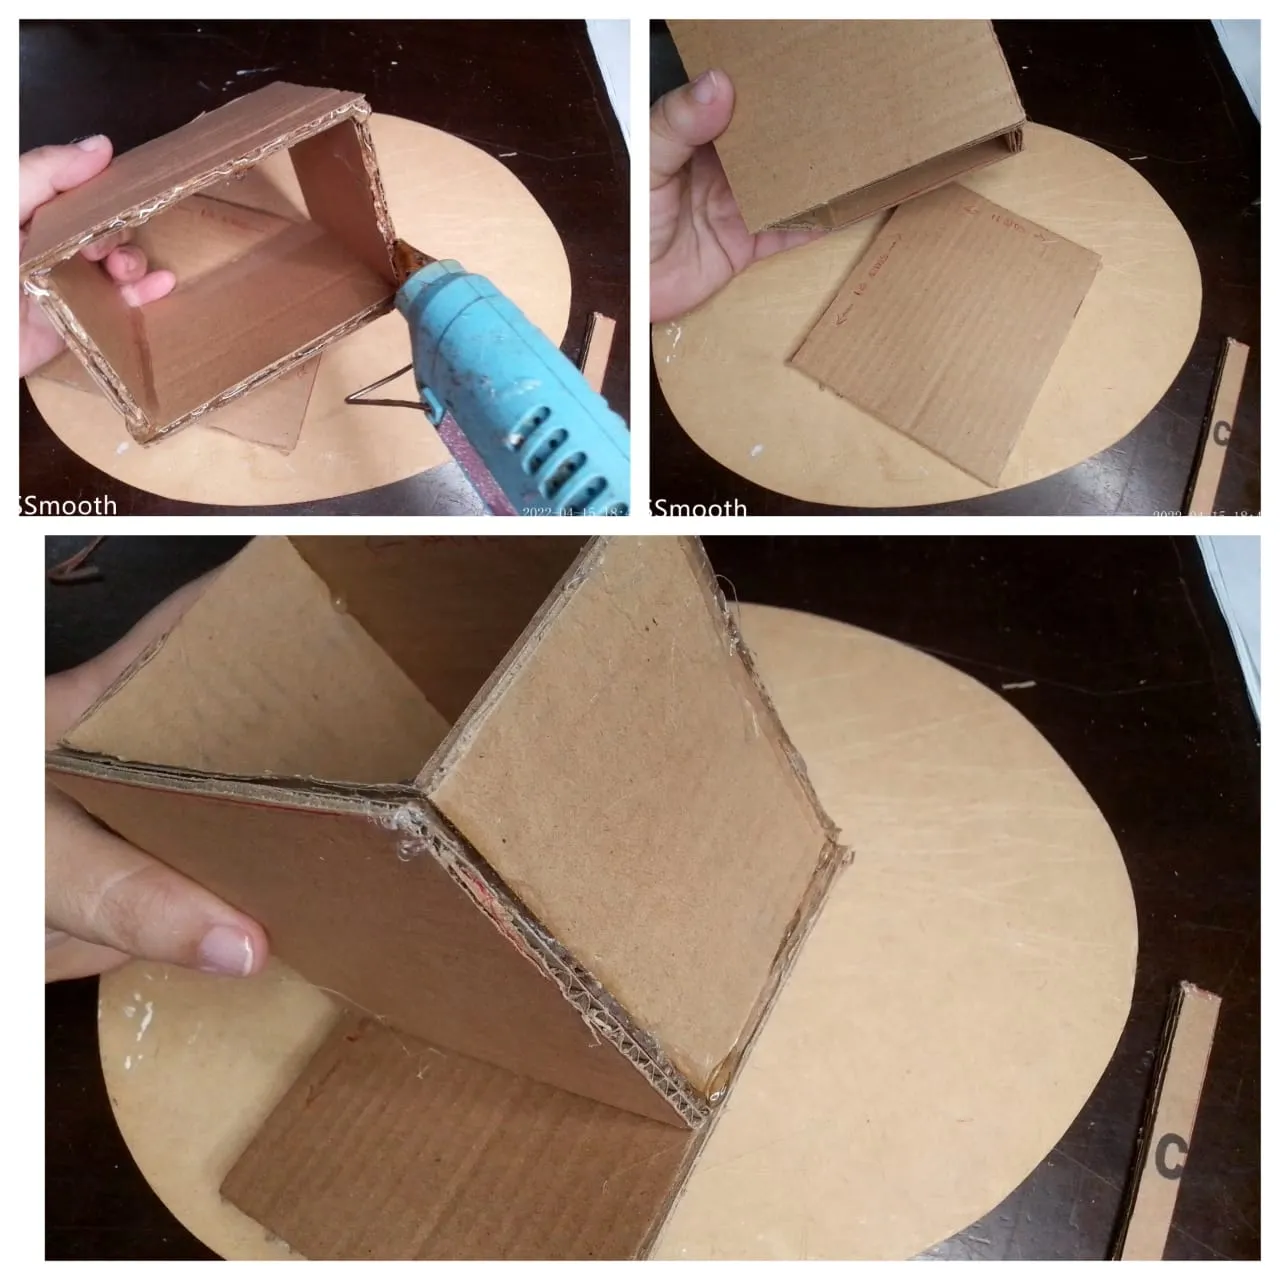
Paso 2: Las piezas están contadas en pares, para que la estructura del Portacelular tenga más firmeza. De manera que, pegué las dos piezas de la base, y los frontales, posterior y laterales igualmente con sus pares.
Step 2: The pieces are counted in pairs, so that the structure of the Phone holder has more firmness. So, I glued the two base pieces, and the front, back and sides equally with their pairs.

Paso 3: Una vez que todos están fuertemente pegado con sus pares, procedo a armar la caja del Portalápices, como se muestra en la siguiente imagen:
Step 3: Once everyone is firmly attached to their pairs, I proceed to assemble the Pencil Holder box, as shown in the following image:
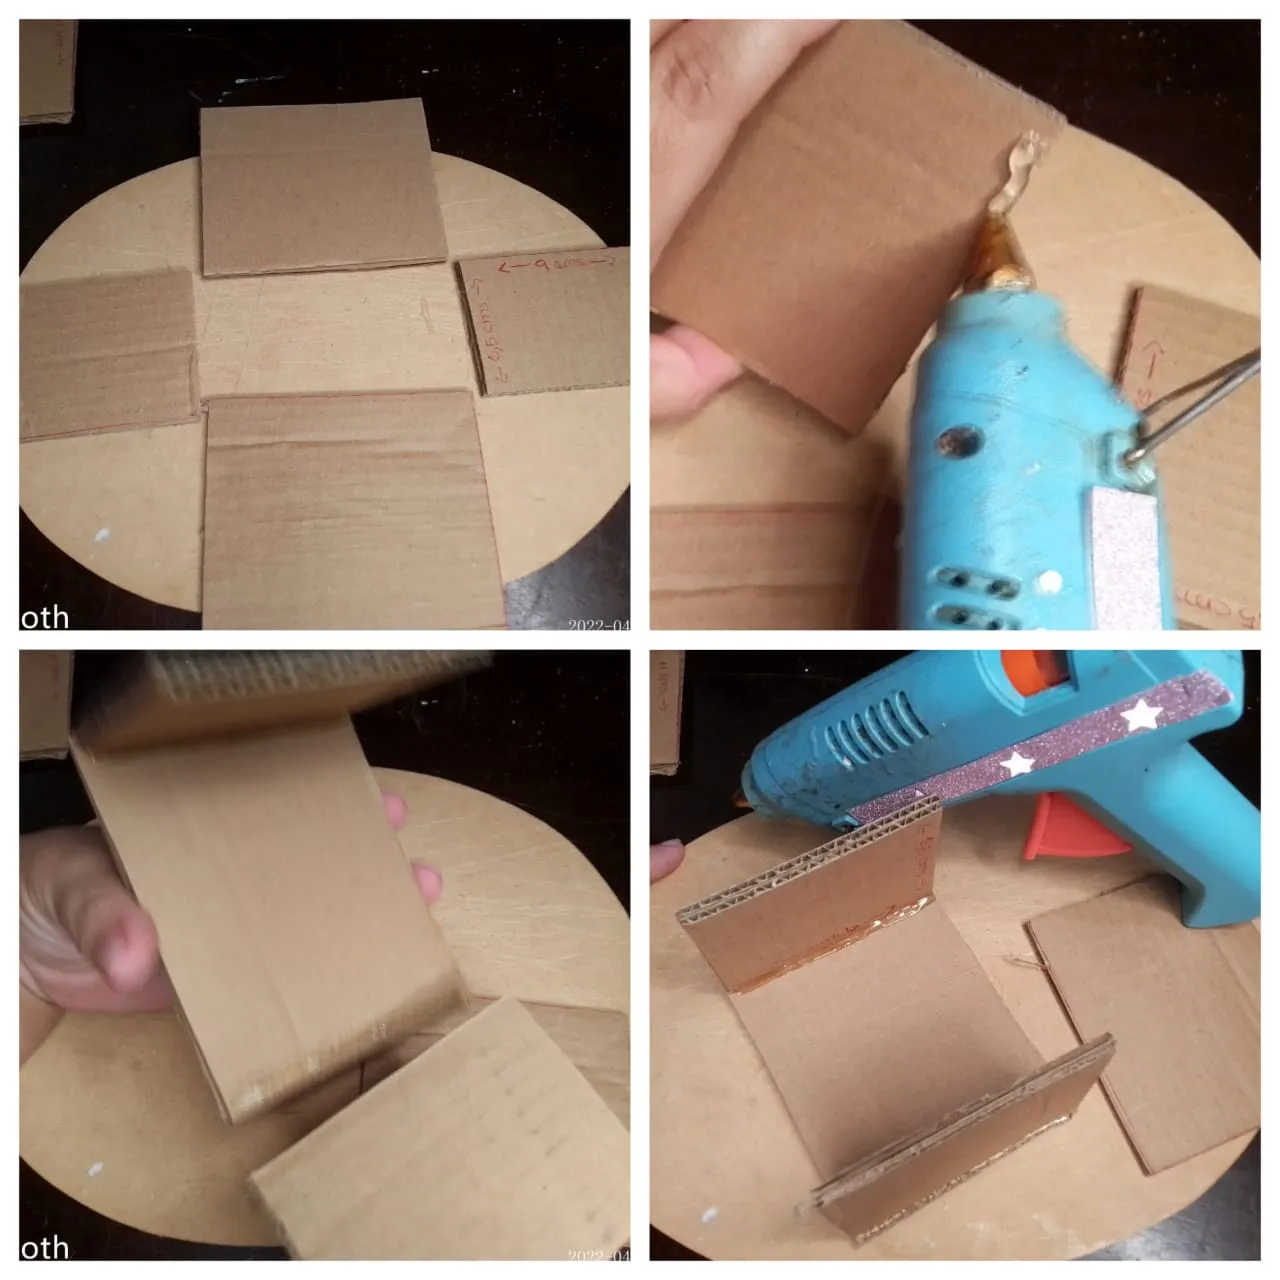
Paso 4: Luego, pegué el cuadrado del Portalápices al extremo de la base, con todo el silicón caliente que sea necesario para que quede bien fijo y estable.
Step 4: Next, I glued the square of the Pencil Holder to the end of the base, using as much hot glue as needed to make it secure and stable.
Paso 5: Comienzo a cortar la Cartulina Microescarchada para ir pegando todas las piezas.
Step 5: I begin to cut the Microfrosted Cardboard to stick all the pieces together.
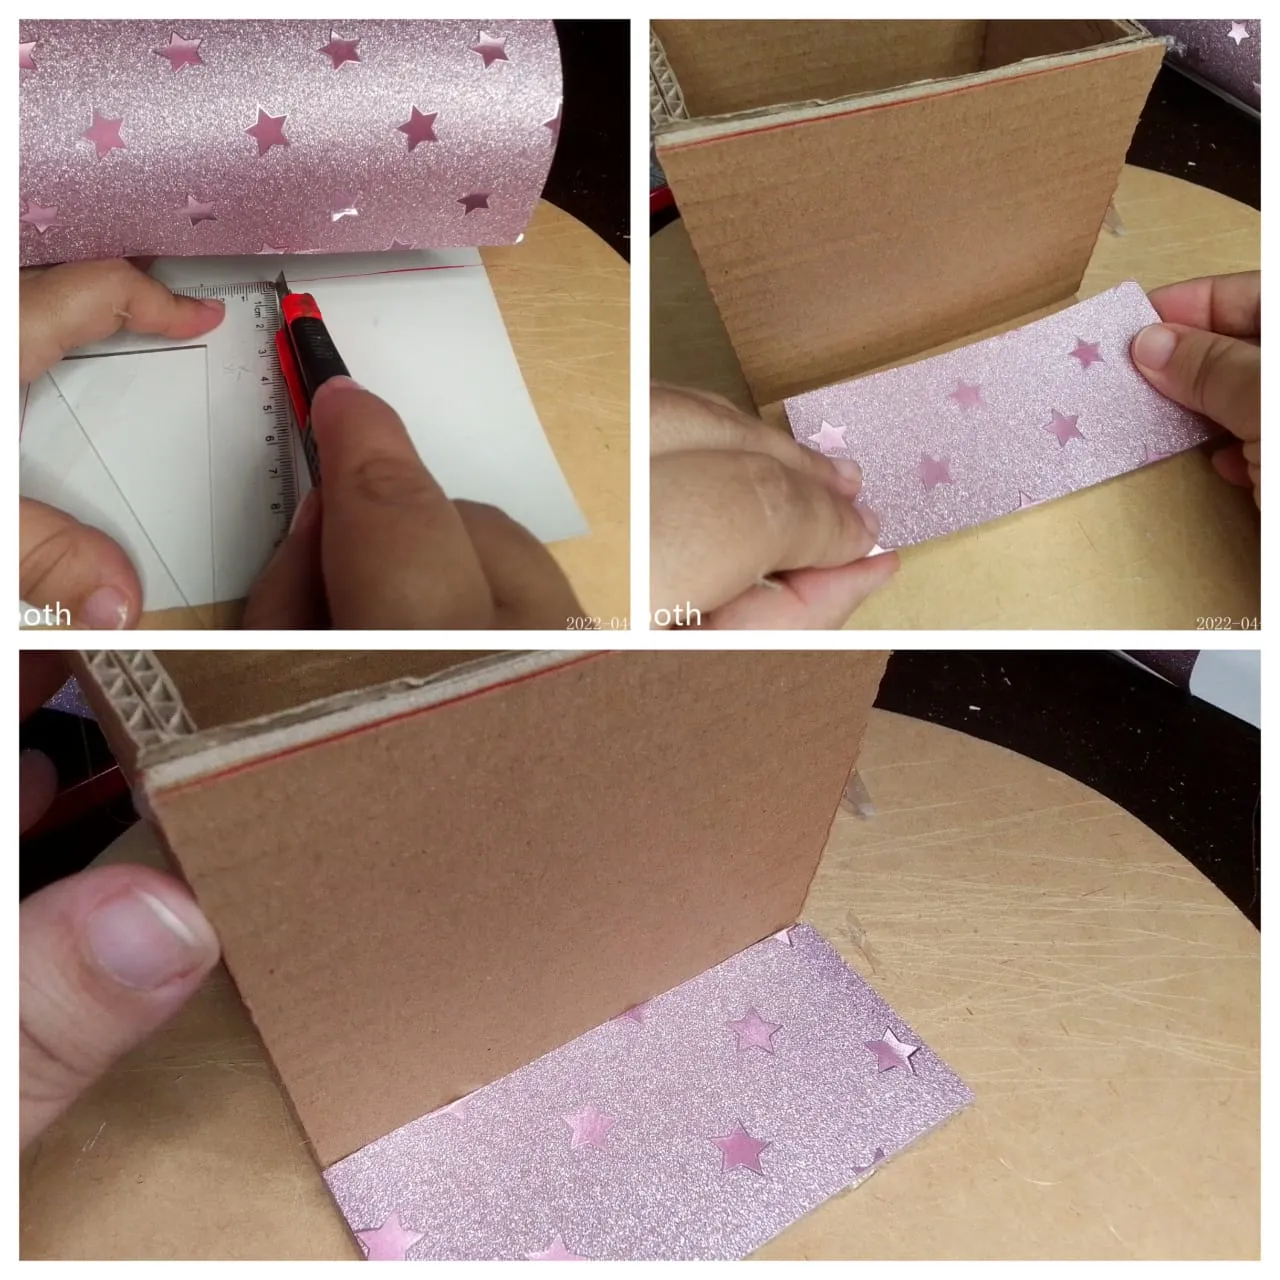
Paso 6: Luego que pegué las piezas principales, comienzo a ajustar la Cartulina, con el Cuter hago cortes para que quede al borde exacto.
Step 6: After I glued the main pieces, I begin to adjust the Cardboard, with the Cuter I make cuts so that it is at the exact edge.
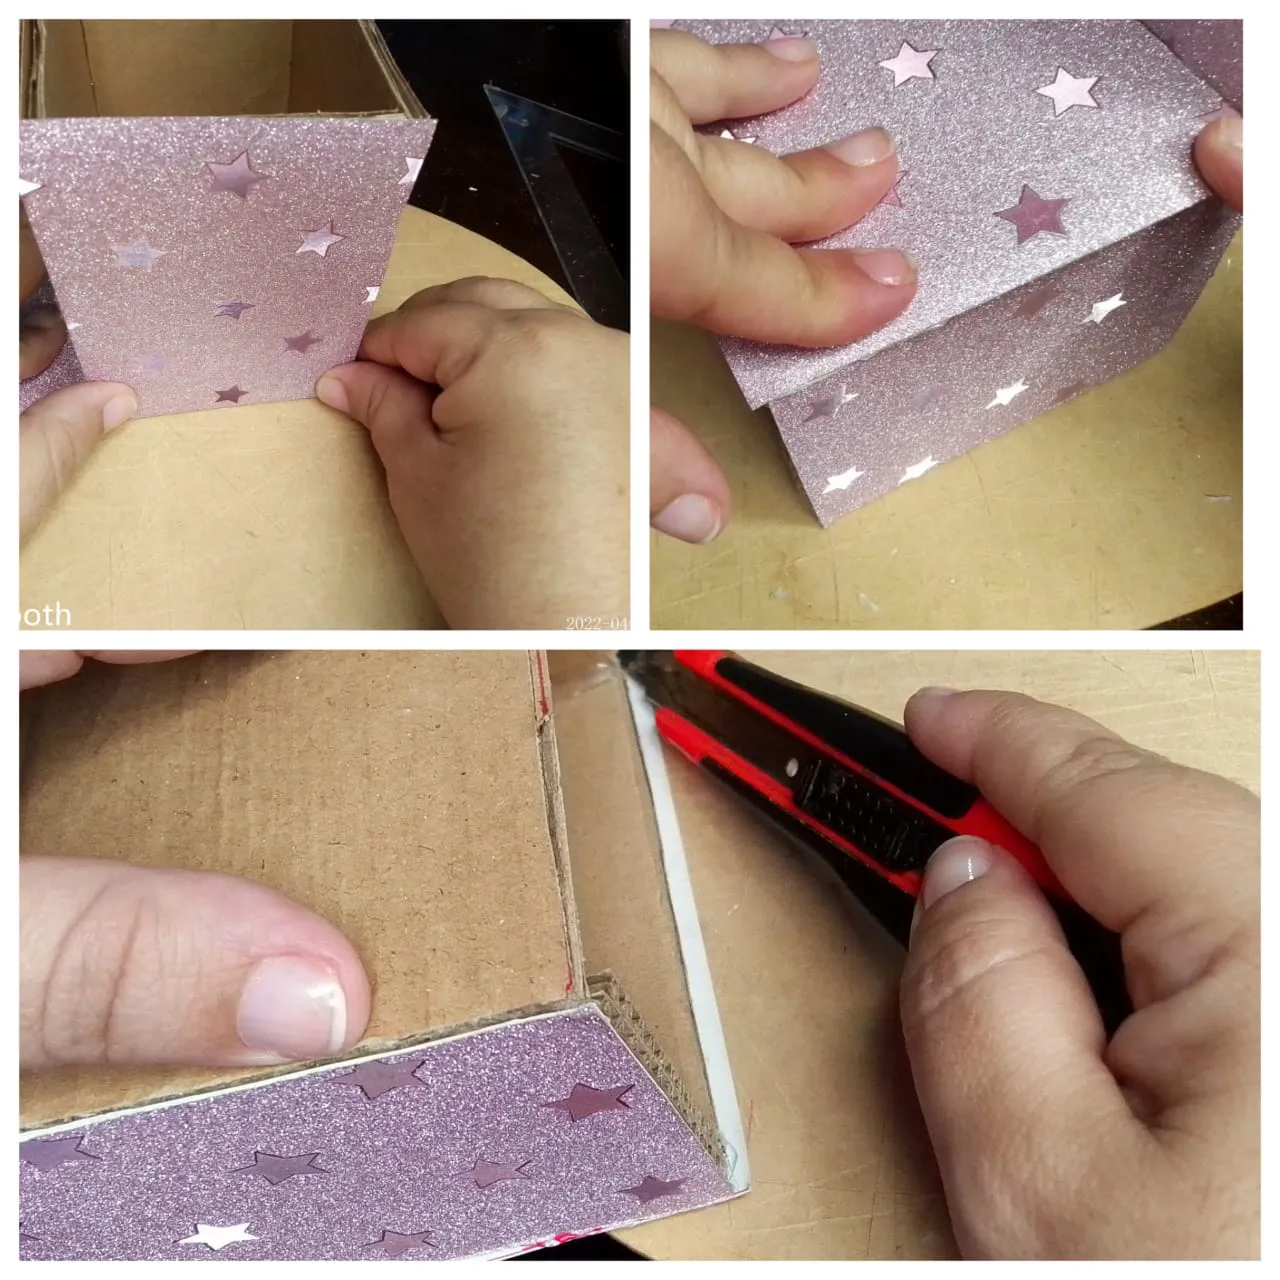
Paso 7: Ahora corté tiras en la cartulina microescarchada de 1cms aproximadamente, para pegarlas en los bordes expuestos. Esto hace toda la diferencia, es en este momento que se eleva la calidad de los trabajos... en los detalles.
Step 7: Now I cut strips in the microfrosted cardboard of approximately 1cms, to glue them on the exposed edges. This makes all the difference, it is at this moment that the quality of the work rises... in the details.
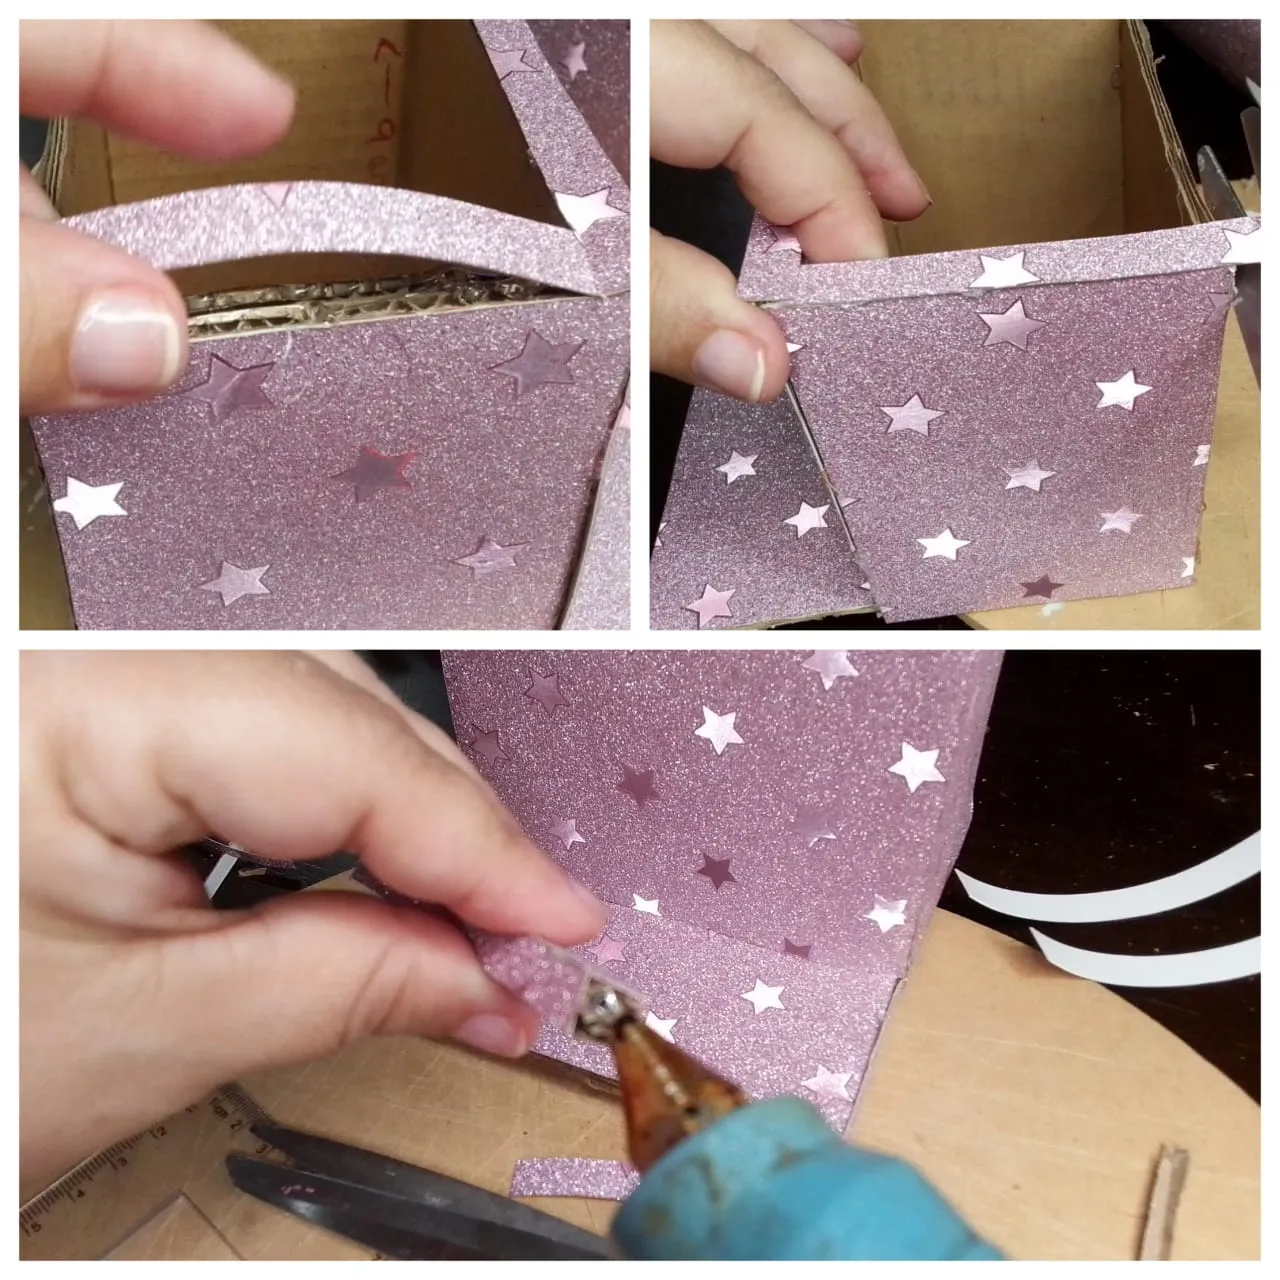
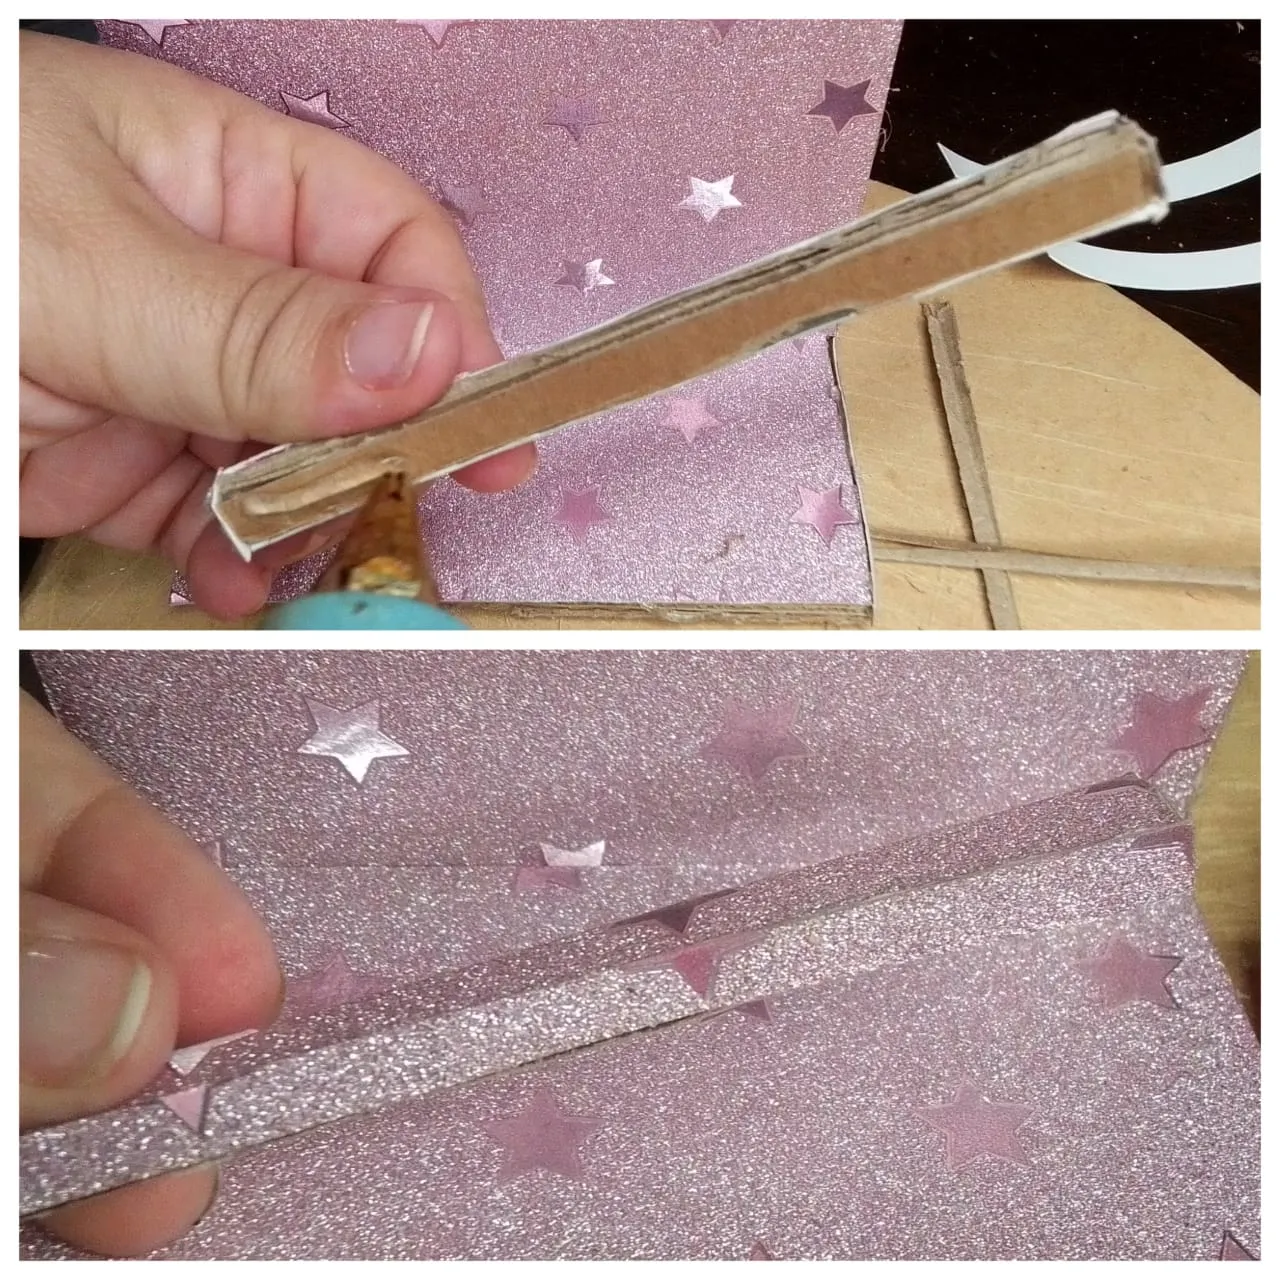
Paso 8: Ahora corté una tira de cartón y que también forré con la cartulina. Esta es una pieza que mide el ancho 11cms por 1cm y ella va a ser el tope para que el celular no se deslice y quedé bien estable, tanto vertical como horizontalmente. Y lo pegué en el borde frontal.
Step 8: Now I cut a strip of cardboard and that I also covered with the cardboard. This is a piece that measures 11cms wide by 1cm and it is going to be the stop so that the cell phone does not slide and it is very stable, both vertically and horizontally. And I glued it on the front edge.
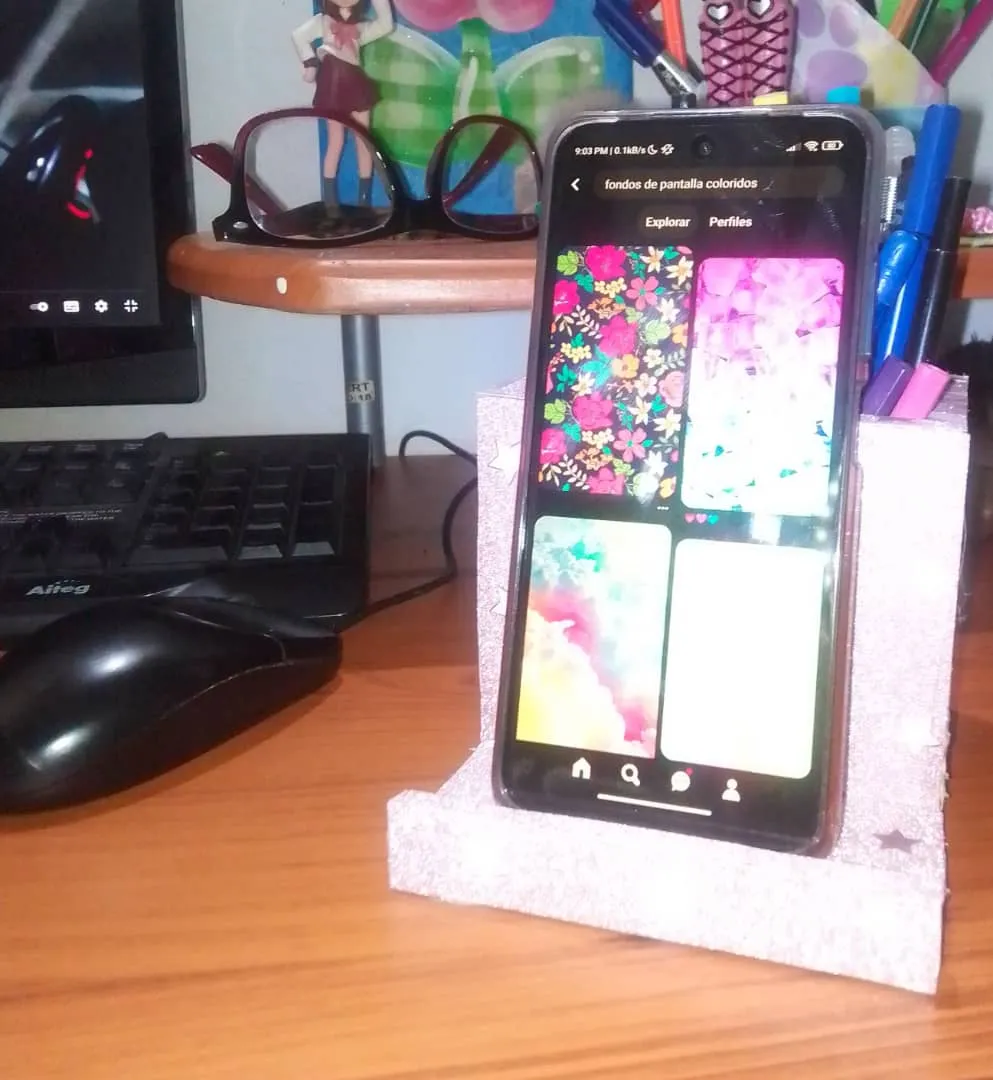
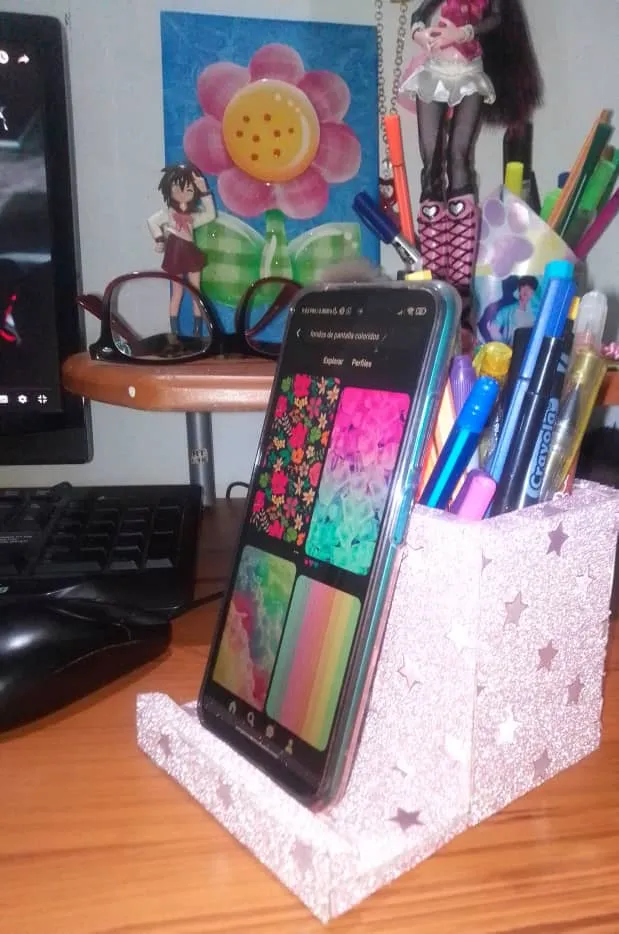
Y ya está listo mi Portacelular para Escritorio con Portalápices Muy simple, fashion y estable como lo quería mi hija. Me encanta como se ve, y lo práctico y funcional que es. Lo puedes tomar muy fácilmente para moverlo de un lado a otro, y ya mismo mi hija comenzó a disfrutarlo... Le encantó ♥️♥️♥️
And now my Desk Cell Phone Holder with Pen Holder is ready. Very simple, fashionable and stable as my daughter wanted it. I love how it looks, and how practical and functional it is. You can take it very easily to move it from one place to another, and right now my daughter began to enjoy it ... she loved it ♥ ️ ♥ ️ ♥ ️
Deseo que en verdad les haya gustado este proyecto, y los invito cordialmente a mi próxima Publicación...
I hope that you really liked this project, and I cordially invite you to my next publication...
Las fotos las tomé con mi teléfono SSmoth 6.5 y las edité en la App InShot y son de mi propiedad @yennysferm71. Por favor no las utilices sin mi Autorización.
También edité con https://www.canva.com/
Utilicé el Traductor Google
Mi redes sociales:
Discord: YennysYaneth#0189
Twitter: @yennysferm
Instagram: @yennysyaneth
I took the photos with my SSmoth 6.5 phone and edited them in the InShot App and they are my property @yennysferm71. Please do not use them without my Authorization.
I also edited with https://www.canva.com/
I used Google Translate
My social networks:
Discord: YennysYaneth#0189
Twitter: @yennysferm
Instagram: @yennysyaneth