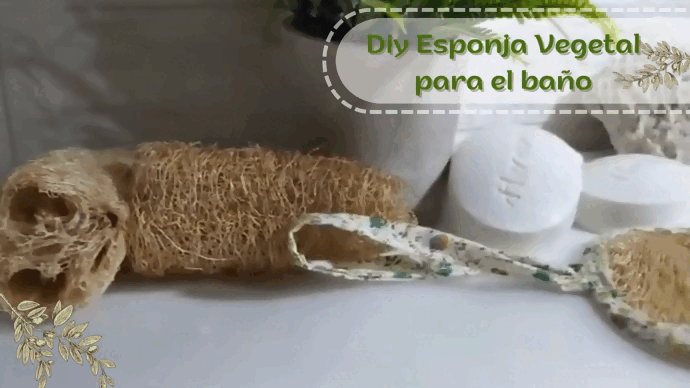
Estoy casi segura que todos conocemos las Esponjas Vegetales que tienen por nombre Luffa, tal vez no sabíamos que se llamaban así, pero si las hemos visto sobre todo en nuestro país Venezuela. Muchas veces se usan así como la obtenemos de la naturaleza. Sin embargo, ayer fui a una farmacia de una red muy conocida, y tenían varios productos elaborados con la Luffa, y con la imagen comercial de un Spa al ser naturales y por los beneficios que aporta su uso.
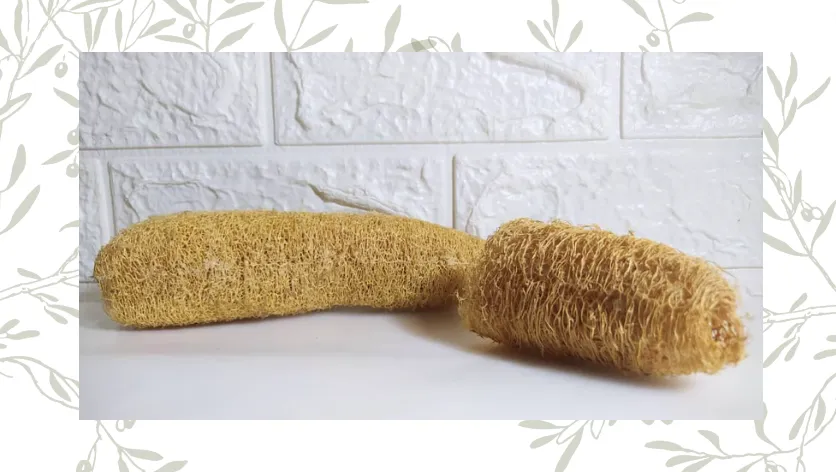
Hoy voy a realizar mi propia Esponja de Baño, con Luffa. Éstas se las pedí a mi mamá que tiene acceso a pequeños productores agropecuarios y siempre le regalan de estas.
I am almost sure that we all know the Vegetable Sponges called Luffa, maybe we didn't know that they were called that, but we have seen them especially in our country Venezuela. Many times they are used just as we obtain them from nature. However, yesterday I went to a pharmacy of a well-known chain, and they had several products made with Luffa, and with the commercial image of a Spa because they are natural and because of the benefits that their use brings.
Today I am going to make my own Bath Sponge, with Luffa. I asked my mother for these, who has access to small agricultural producers and they always give her these as gifts.
Las Luffas las podemos aprovechar para elaborar nuestras esponjas de baño, largas para la espalda, en diferentes modelos y tamaños, incluso la usan para hacer más atractivos los jabones artesanales, etc.
Hoy voy a elaborar una Esponja de baño, del tamaño de mi mano, y le voy a elevar su apariencia con una tela en el reverso y una tira para colgar en la ducha. Así que los invito a ver el siguiente Tutorial o Diy, y transformar tu rutina de baño en una experiencia de Spa.
We can use loofahs to make our own long bath sponges for our backs, in different models and sizes, they are even used to make handmade soaps more attractive, etc.
Today I am going to make a bath sponge, the size of my hand, and I am going to enhance its appearance with a cloth on the back and a strip to hang in the shower. So I invite you to watch the following Tutorial or DIY, and transform your bath routine into a Spa experience.

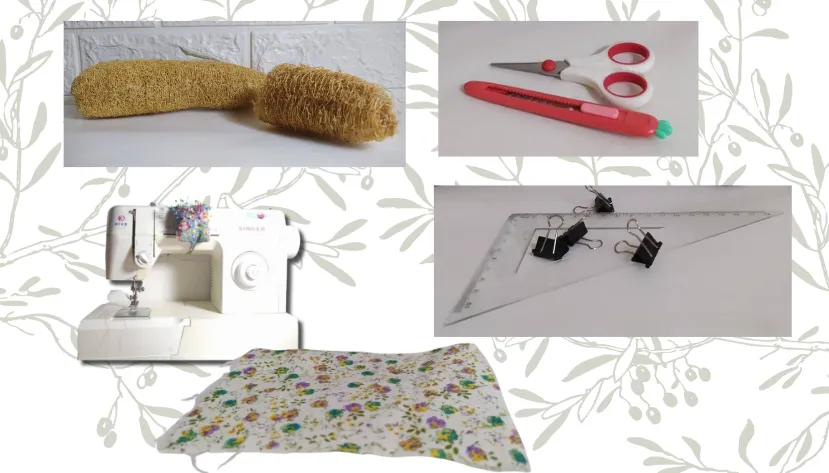
Como pueden ver, se necesitan muy pocos materiales, incluso de la tela es muy poca tela, yo utilicé un retazo que me quedaba. Si prefieres puedes utilizar tela de toalla para tener otra opción de esponja en el reverso de la esponja, pero yo utilicé solo tela porque mi interés es solo la parte de la esponja vegetal y para mi es suficiente, esta parte hace bastante espuma y no necesito más nada.
As you can see, very few materials are needed, even the fabric is very little, I used a scrap that I had left. If you prefer you can use towel fabric to have another sponge option on the back of the sponge, but I used only fabric because I am interested only in the loofah part and for me it is enough, this part creates enough foam and I do not need anything else.

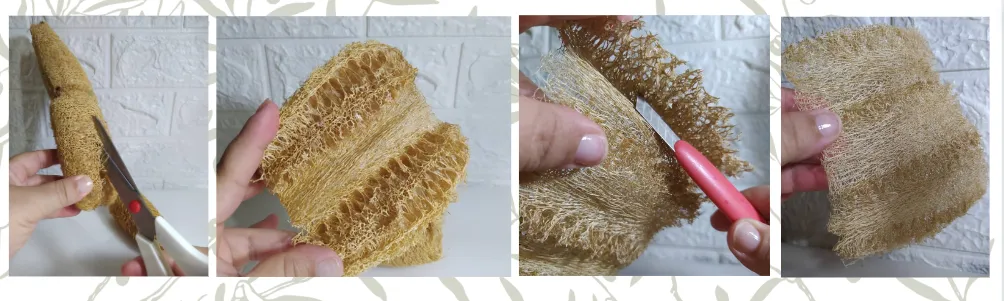
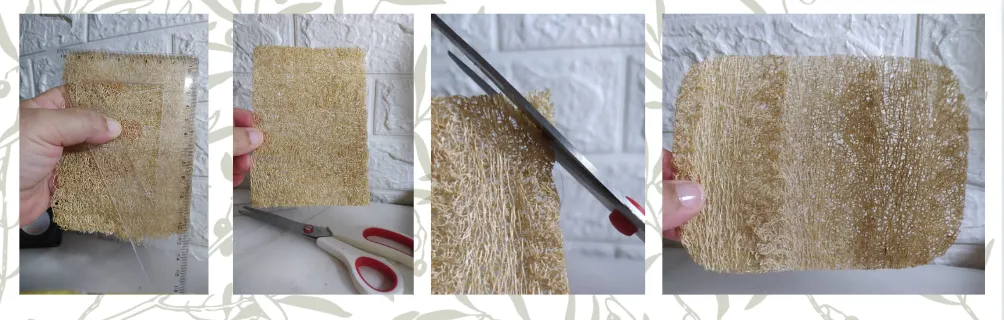
Mostraré el titular en secuencias de fotos. Primero corto la Luffa con una tijera o directamente con un cúter ya que es más fácil de cortar.
Abro por la mitad, y retiro también todo el relleno del mismo material, para obtener una pieza bastante plana. El tamaño de las luffas varían mucho, así que trabajaré con esta que me regaló mi mamá que no muy grande.
I will show the headline in sequences of photos. First I cut the Luffa with scissors or directly with a cutter since it is easier to cut.
I open it in half, and also remove all the filling of the same material, to obtain a fairly flat piece. The size of the luffas varies a lot, so I will work with this one that my mother gave me, which is not very big.
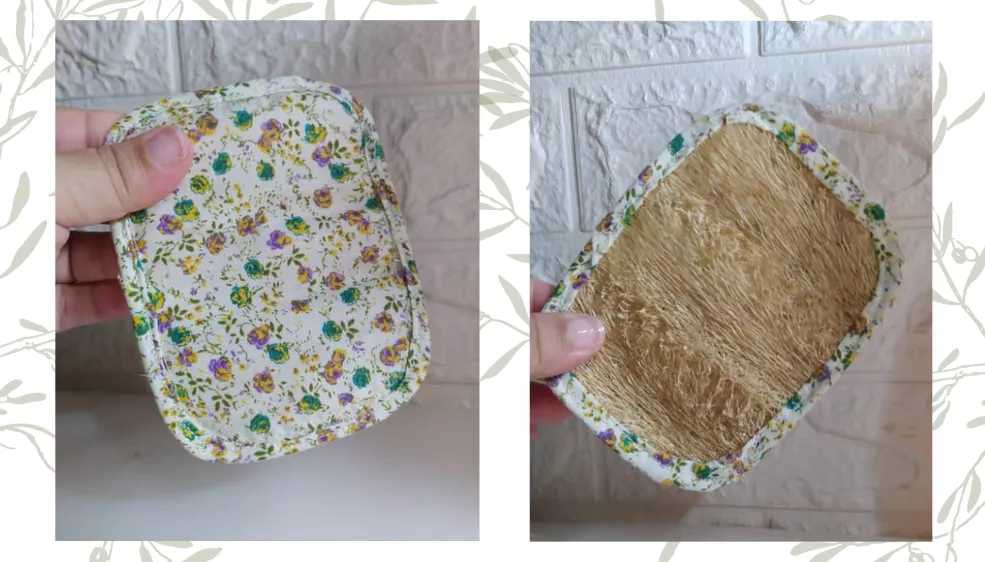
Para obtener una forma más simétrica me ayudé de una regla tipo escuadra, aunque no es realmente necesario. Solamente empareja los lados para tener una forma más armoniosa, incluso pudiera ser redonda u ovalada.
Yo trabajé con una forma rectangular y al redondear las esquinas quedó de la siguiente forma:
To get a more symmetrical shape I used a square ruler, although it's not really necessary. It just matches the sides to get a more harmonious shape, it could even be round or oval.
I worked with a rectangular shape and when I rounded the corners it looked like this:
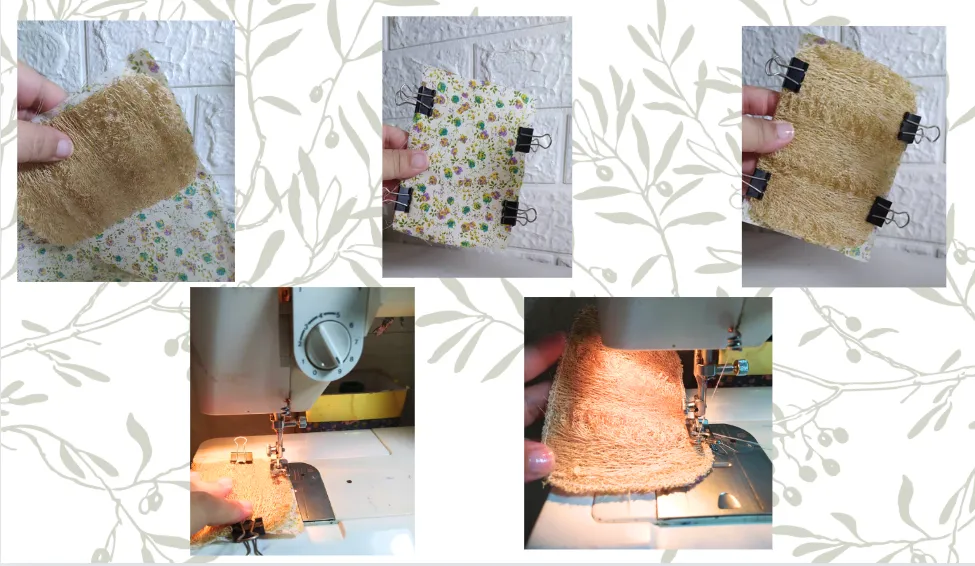
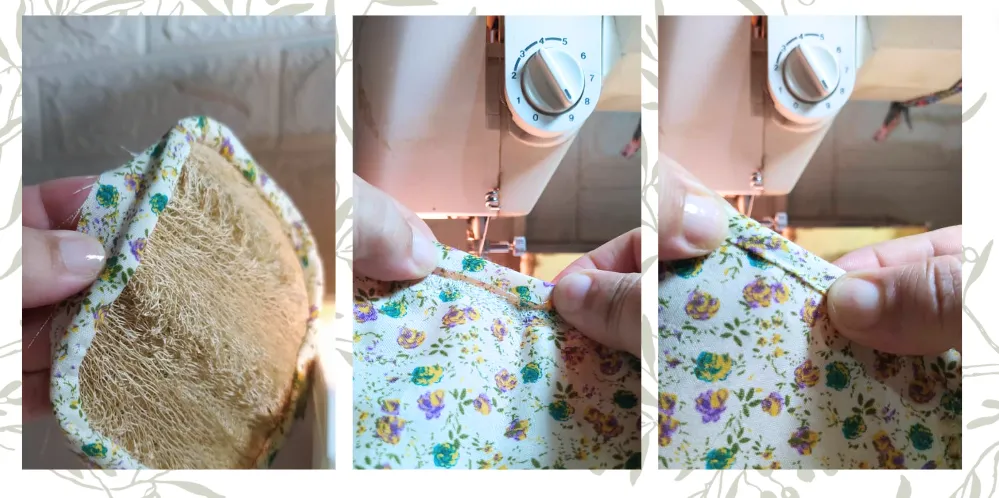
En la tela que elegí para este proyecto, que fue muy poca tela y me gustó mucho porque tenía tonos marrones claros en su diseño, lo que me pareció muy lindo para el diseño. Bueno, recorté una pieza del mismo tamaño y fijé con clips de presión, y coso con costura recta primero y luego un zig zag para asegurar la integridad del producto.
In the fabric I chose for this project, which was very little fabric and I really liked it because it had light brown tones in its design, which I thought was very nice for the design. Well, I cut out a piece of the same size and fixed it with pressure clips, and I sew with a straight seam first and then a zig zag to ensure the integrity of the product.

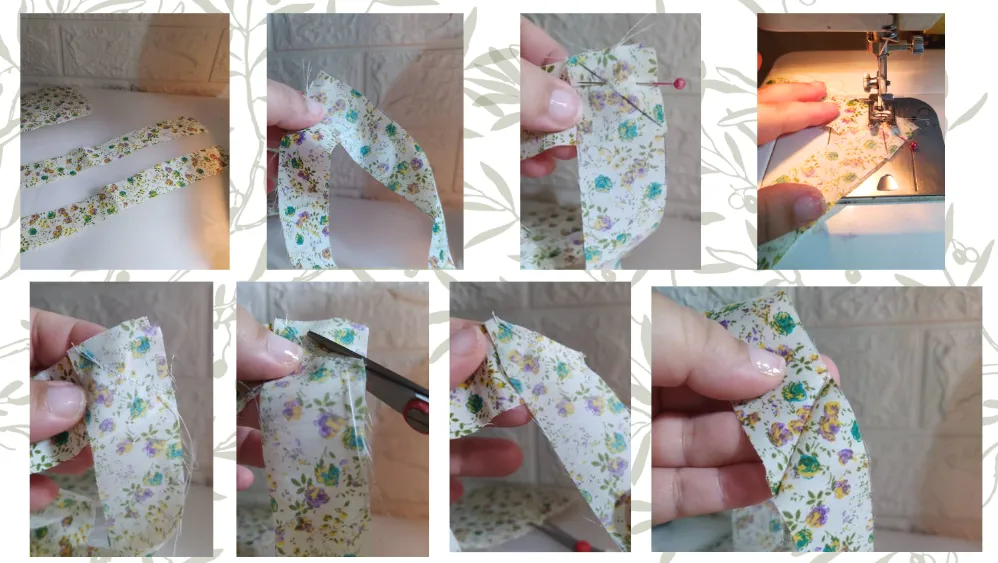
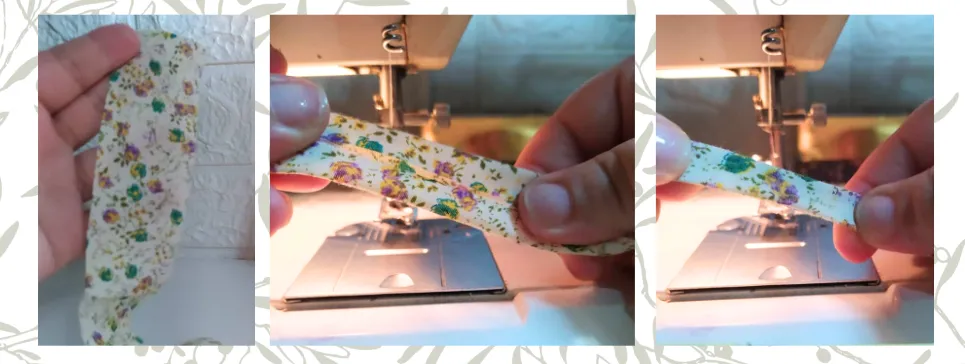
Me gusta mucho aprovechar esta oportunidad para contarles cómo hago mis tiras continuas, les recomiendo este método porque coserlas derechas las hace lucir feas y también es algo fácil de que se separen eventualmente.
Coloca las dos tiras en "L", luego puedes hacer una marca con lápiz de un borde a otro como se ve en la imagen, si ves los bordes claramente no es necesario hacer la línea, solo es importante que los veas. Luego coses con costura recta, cortas el excedente, y abres las dos tiras, verás que hermosas quedan las tiras, con una costura diagonal que va a garantizar que no se abran. Puedes hacer esto las veces que necesites hasta tener la tira del largo que desees.
I really like to take this opportunity to tell you how I make my continuous strips, I recommend this method because sewing them straight makes them look ugly and it is also easy for them to separate eventually.
Place the two strips in an "L" shape, then you can make a pencil mark from one edge to the other as seen in the image, if you see the edges clearly it is not necessary to make the line, it is only important that you see them. Then you sew with a straight seam, cut the excess, and open the two strips, you will see how beautiful the strips look, with a diagonal seam that will guarantee that they do not open. You can do this as many times as you need until you have the strip of the length you want.
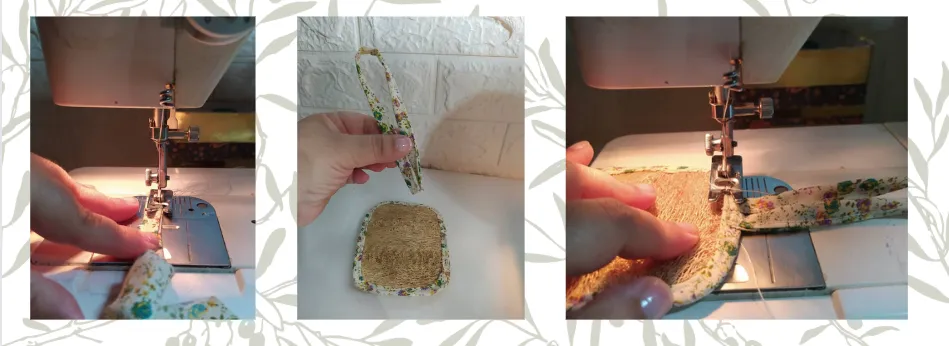
Ahora coso la tira en el borde de la pieza de mi esponja. Fíjate que antes de terminar, doblo el extremo de la tira que está debajo para dar un acabado más lindo.
El extremo que va arriba lo coso pasando por encima unos centímetros más, y corto. Fíjate que al abrir la tira se ve hermoso el doblez que hice en el extremo de abajo, queda en diagonal... bello.
Now I sew the strip to the edge of my sponge piece. Note that before finishing, I fold the end of the strip that is underneath to give it a nicer finish.
I sew the end that goes on top, passing over it a few more centimeters, and cut. Note that when I open the strip, the fold I made at the bottom end looks beautiful, it is diagonal... beautiful.
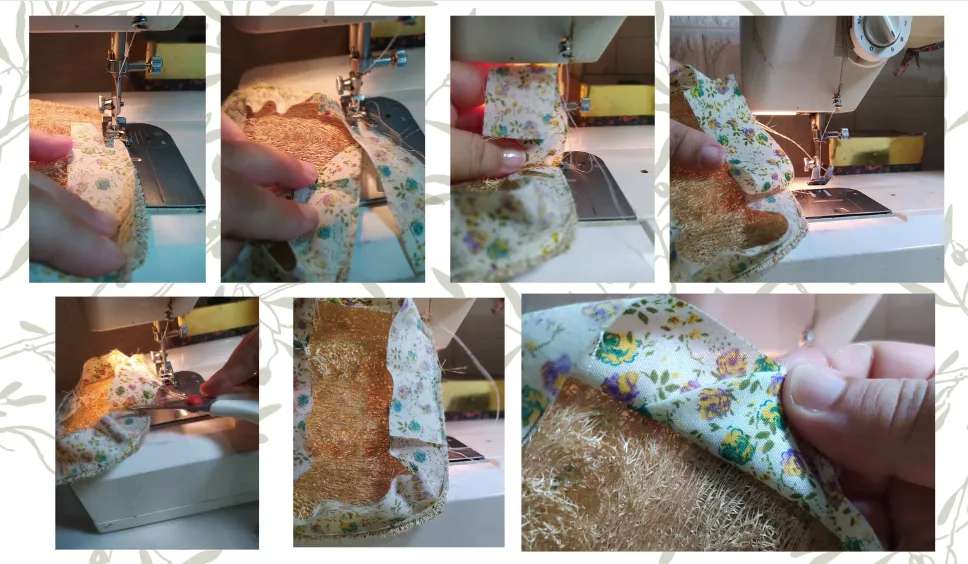
Abro bien la tira hacia el otro borde donde voy a doblar una vez y luego nuevamente, para que quede prolijo. Paso costura recta.
I open the strip well towards the other edge where I will fold once and then again, so that it is neat. I sew straight stitch
Hasta aquí podría dejar la esponja de baño, pero ahora le voy a colocar una tira para que se pueda colgar en la ducha y así se puede secar mejor.
I could leave the bath sponge here, but now I'm going to put a strip on it so that it can be hung in the shower and thus dry better.
Corto una tira de 3 cms de grueso por 22 cms de largo. Doblo los bordes hasta "el beso", así se dice en costura. Luego doblo nuevamente y coso con costura recta.
I cut a strip 3 cm thick by 22 cm long. I fold the edges up to the "kiss", as they say in sewing. Then I fold again and sew with a straight seam.
La tira que preparé la coso en un extremo de la esponja, y ya con eso termino este proyecto de hoy.
I sew the strip I prepared to one end of the sponge, and that's it for today's project.
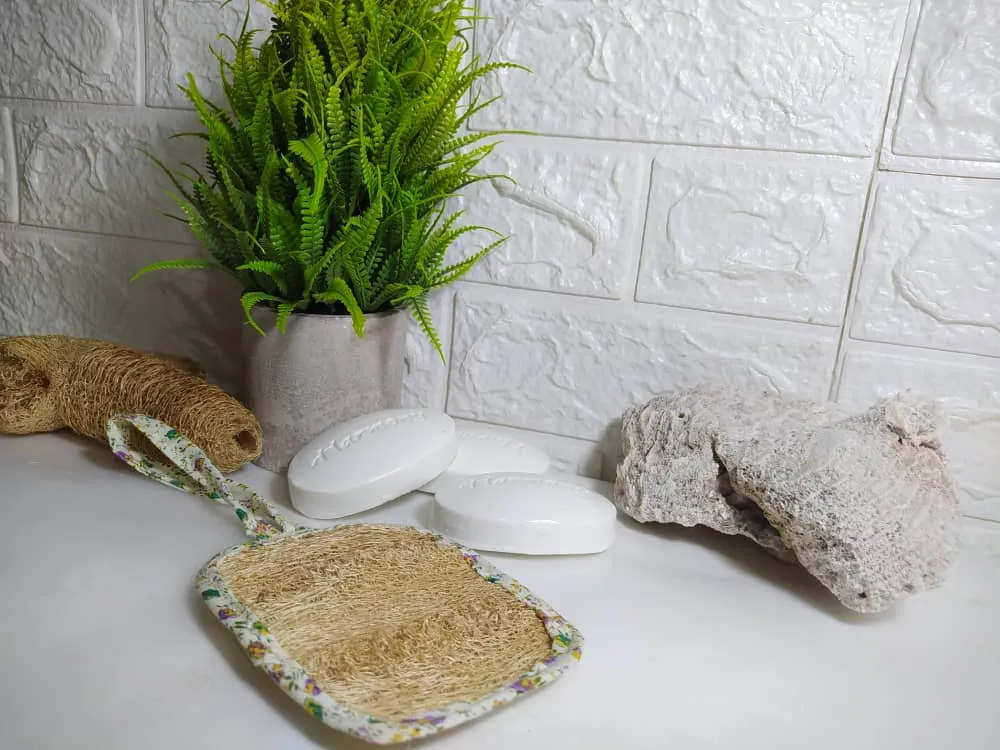
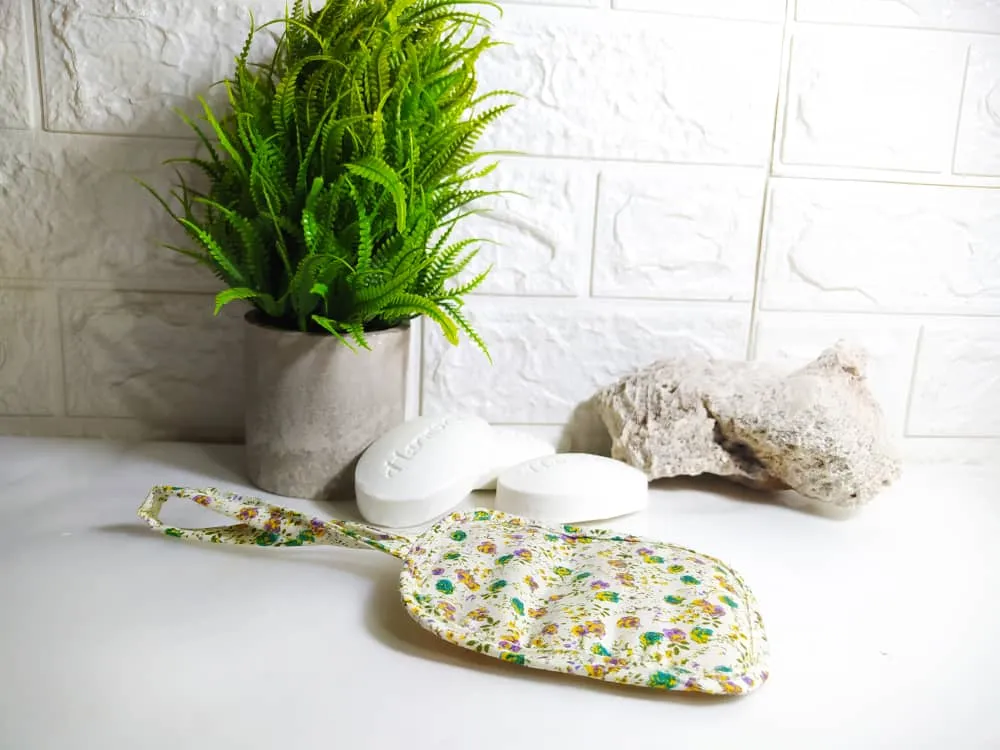
Me gusta mucho como pude arreglar este Set de fotografía para este Post, ya que pude darle un aire de Spa con unas Lufas, jabones, una plantita y un coral que mi hijo tiene en su cuarto.
Cuando hacemos las cosas con amor, tiene un efecto multiplicador en todo lo demás, nuestro hogar debe decirlo, cada detalle debe reflejar el amor hacia nosotros y hacia nuestra familia.
I really like how I was able to arrange this photography set for this post, since I was able to give it a spa-like feel with some loofahs, soaps, a little plant and a coral that my son has in his room.
When we do things with love, it has a multiplying effect on everything else, our home should say it, every detail should reflect the love for us and our family.
Antes de terminar quiero mencionarte algunos beneficios de tener nuestra Esponjas Vegetales:
Before finishing, I want to mention some benefits of having our Vegetable Sponges:
- We can perform a gentle exfoliation with it, helping to remove dead cells.
- We can use it with circular movements and thus stimulate circulation and give ourselves a light massage.
- We can apply some product in the shower more easily and effectively.
- They are durable and biodegradable, which is great for the environment and thus we take advantage of natural resources, as is the case with loofahs.
- The sensation of using something natural is superior to using synthetic sponges, and you can only understand this when you use it, so I invite you to have this spa experience, of renewal and of love for yourself and your family.
Deseo que les haya gustado este proyecto Diy de hoy, y los invito a realizar sus propias Esponjas Naturales.
I hope you enjoyed today's DIY project, and I invite you to make your own Natural Sponges.
I took the photos with my phone Redmi Note 8
Apps I used:
Canva Pro for Cover, Collage and Banners
I used Deepl Translator
My social networks:
Discord: YennysYaneth#0189
Twitter: @yennysferm
Instagram: @yennysyaneth
Las fotos las tomé con mi teléfono Redmi Note 8
Apps que utilicé:
Canva Pro para la Portada, Collage y Banners
Utilicé el Traductor Deepl
Mi redes sociales:
Discord: YennysYaneth#0189
Twitter: @yennysferm
Instagram: @yennysyaneth