¡Bienvenidos, amigos creativos!🎨
Les deseo un grandioso fin de semana lleno de cosas bonitas✨
Una de las cosas que me encanta de las manualidades es trabajar en foami y para esta oportunidad decidí realizar un porta yesquero o encendedor de una forma tan linda que sirve para decorar la cocina también 🤗. Tomé la decisión de hacer esto por el hecho de que al yesquero le salen piecitos y siempre se mueve de sitio 😅, cada vez que voy a cocinar no lo consigo ¿a ustedes les pasa? Sin más los materiales a utilizar son:
Welcome, creative friends!🎨 I wish you a great weekend full of beautiful things✨
One of the things I love about crafts is working in foami and for this opportunity I decided to make a tinder holder or lighter in such a cute way that serves to decorate the kitchen too 🤗. I decided to make this because the tinder holder has little legs and it always moves 😅, every time I go to cook I don't get it, does it happen to you? Without further ado the materials to use are:
 |
|---|

🐮 Paso 1:
En una hoja blanca realice el diseño que quería para decorar, el cual fue una vaca como en un cuadro, seguidamente recorte (Como se puede apreciar en la imagen 1 y 2.
🐮 Step 1:
On a white sheet I made the design I wanted to decorate, which was a cow as in a picture, then cut it out (As you can see in image 1 and 2).
🐮 Paso 2:
Luego recorte la parte de la vaca ya que sería lo primero en trabajar en el foami, reservando lo que sería el cuadro dibujado.
🐮 Step 2:
Then cut out the cow part since it would be the first thing to work on the foami, reserving what would be the drawn picture.

🐮 Paso 3:
Recorte cada parte de la vaca y los transferí en el foami en cada color correspondiente, en este caso cada pieza la colocaba en el foami de forma contraria y marcaba con el lápiz, al voltear de esta forma no quedaría marcado el lápiz.
🐮 Step 3:
Cut out each part of the cow and transferred them on the foami in each corresponding color, in this case each piece was placed on the foami in the opposite way and marked with the pencil, to flip this way the pencil would not be marked.

🐮 Paso 4:
De está forma cada pieza de la vaca la transferí en el foami del color correspondiente como lo explique en el paso anterior.
🐮 Step 4:
In this way, each piece of the cow was transferred onto the foami of the corresponding color as I explained in the previous step.

🐮 Paso 5:
Con pintura color negro y un pincel finito remarque parte de la boca, orejas y ojos hasta dejar secar muy bien para luego pegar cada pieza.
🐮 Step 5:
With black paint and a fine brush, highlight part of the mouth, ears and eyes until they dry very well and then glue each piece.

🐮 Paso 6:
Ya armada la vaca con todas sus piezas pegadas, seguidamente recorte tiras pequeñas de limpiapipas Y pegue en el centro de la cara de la vaca.
🐮 Step 6:
Once the cow is assembled with all its pieces glued together, cut out small strips of pipe cleaners and glue them in the center of the cow's face.

🐮 Paso 7:
Luego con un marcador color marrón delinee la parte donde está la boca e hice los orificios de la nariz.
🐮 Step 7:
Then with a brown marker I outlined the part where the mouth is and made the nose holes.

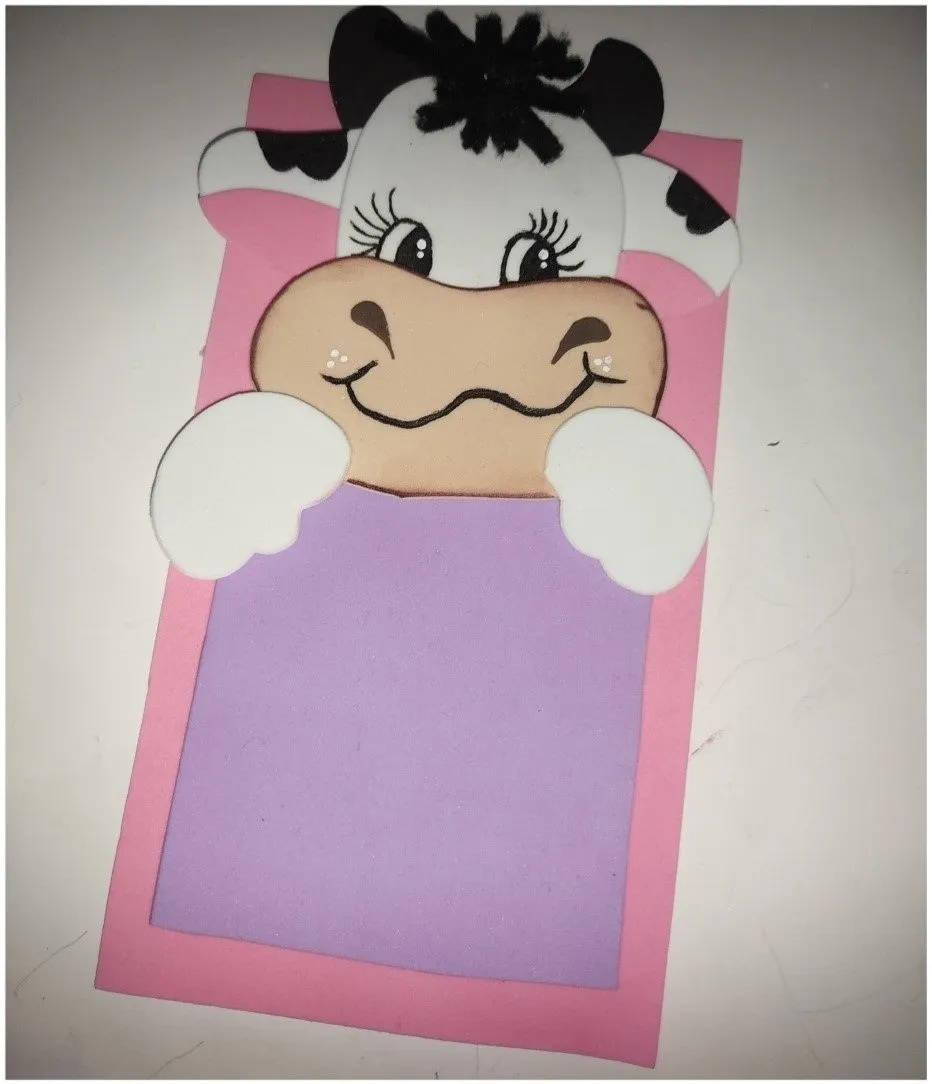
🐮 Paso 8:
En foami rosado recorte un rectángulo de 11,5cm × 20cm, y un cuadrado de 9cm × 10,5cm. Seguidamente pegue uno sobre otro de la forma que se puede apreciar en la siguiente imagen.
🐮 Step 8:
In pink foami cut out a rectangle of 11.5cm × 20cm, and a square of 9cm × 10.5cm. Then glue one on top of the other as shown in the following image.

🐮 Paso 9:
La vaca en foami que había realizado la pegue por el borde del cuadrado morado.
🐮 Step 9:
I glued the foami cow I had made along the edge of the purple square.
🐮 Paso 10:
En foami rosado realice la forma de un bolsillo y con un marcador negro realice pequeñas líneas en todo el borde.
🐮 Step 10:
In pink foami make the shape of a pocket and with a black marker make small lines all around the edge.

🐮 Paso 11:
Ese bolsillo lo pegue en el cuadro morado dejando un pequeño espacio.
🐮 Step 11:
That pocket I glued on the purple square leaving a small space.

🐮 Paso 12:
Con un trozo de mecatillo o cuerda pegue en la parte de atrás y pegue un trozo pequeño de foami como soporte para poder colgar.
🐮 Step 12:
With a piece of string glue on the back and glue a small piece of foami as a support for hanging.
🐮 Paso 13:
Finalmente con un puntero y pintura blanca realice detalles en el cuadro morado, y deje secar muy bien.
🐮 Step 13:
Finally, with a pointer and white paint, make details on the purple square, and let it dry very well.


Mil gracias por leerme una vez
Nos vemos en una próxima publicación.
Muchas bendiciones y abrazos digitales🤗
Thank you very much for reading me once
See you in an upcoming post.
Many blessings and digital hugs🤗