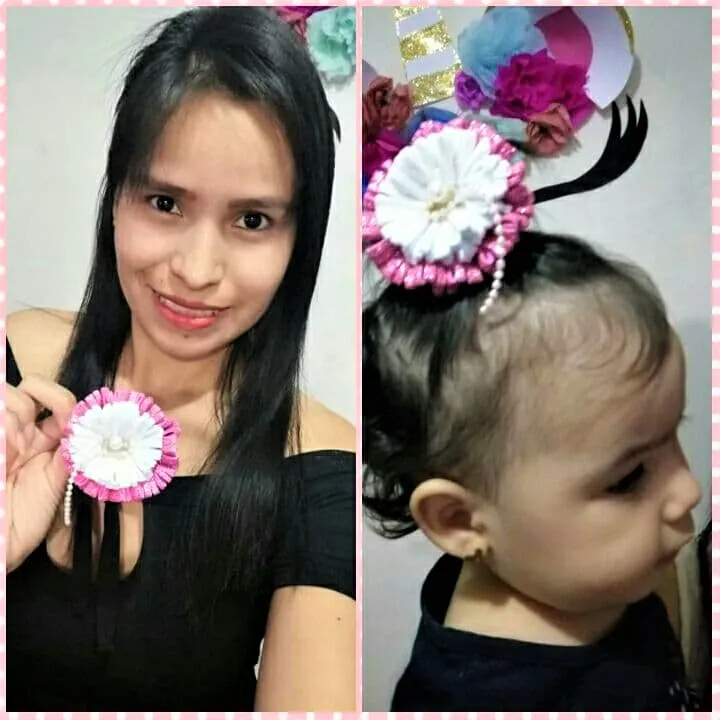

!Hola! Como están queridos amigos? Es un gusto poder saludarles una vez más. En este post les voy a compartir como hacer una linda flor de foami, la cual le pueden dar el uso que ustedes deseen, en mi caso elegí hacerlo como accesorio para el cabello de mi hija menor Fabiana.
Acá la mostraré con foami escarchado pero se pueden hacer en foami normal e incluso en otro material como tela o vinil.
No esperemos más y manos a la obra 😊
Hello! How are you, dear friends? It is a pleasure to greet you once again. In this post I am going to share with you how to make a cute foami flower, which you can use as you wish, in my case I chose to make it as an accessory for my youngest daughter Fabiana's hair.
Here I will show them with frosted foam but they can be made in normal foam and even in another material such as fabric or vinyl.
Let's not wait any longer and get to work 😊
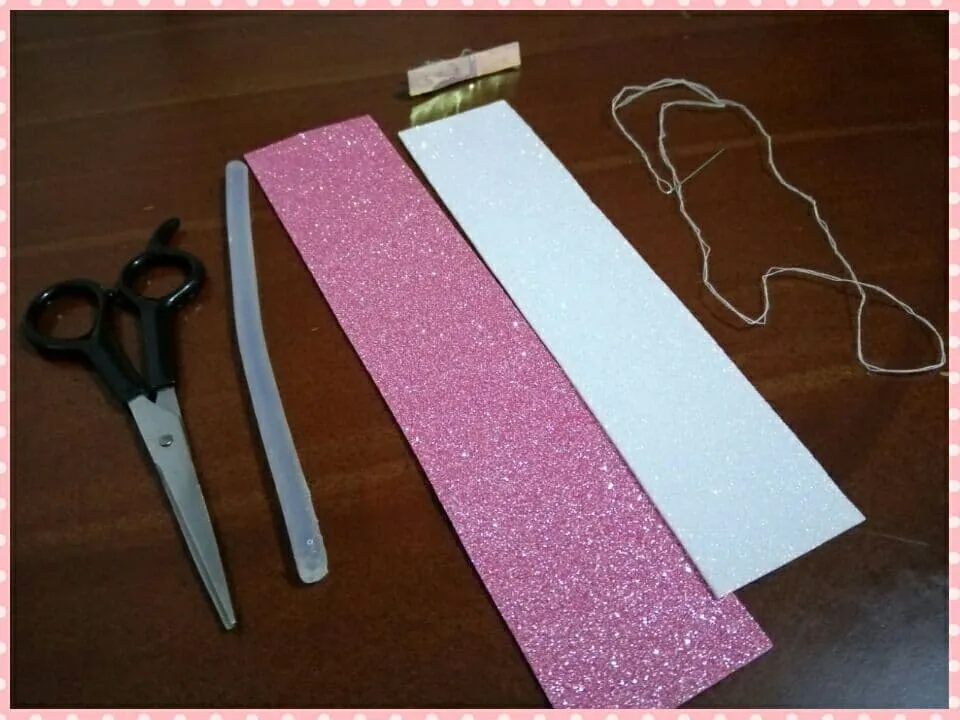
Materiales:
- Foami escarchado.(Rosado 24x5cm y blanco 20x4.5cm)
- Tijera.
- Silicona.
- Aguja e hilo.
- Pinza para el cabello.
Materials:
- Frosted Foami.(Pink 24x5cm and white 20x4.5cm)
- Scissors.
- Silicone.
- Needle and thread.
- Hair clip.
Comenzaremos con el foami grande que mide 24cm de largo y 5cm de ancho, lo doblamos a la mitad, dejando el lado con escarcha por fuera, tomamos una de las puntas y comenzamos a coser, dejando al principio un poco de hilo sobrante.
We will start with the large foami measuring 24cm long and 5cm wide, fold it in half, leaving the frosted side on the outside, take one of the ends and start sewing, leaving a little bit of excess thread at the beginning.
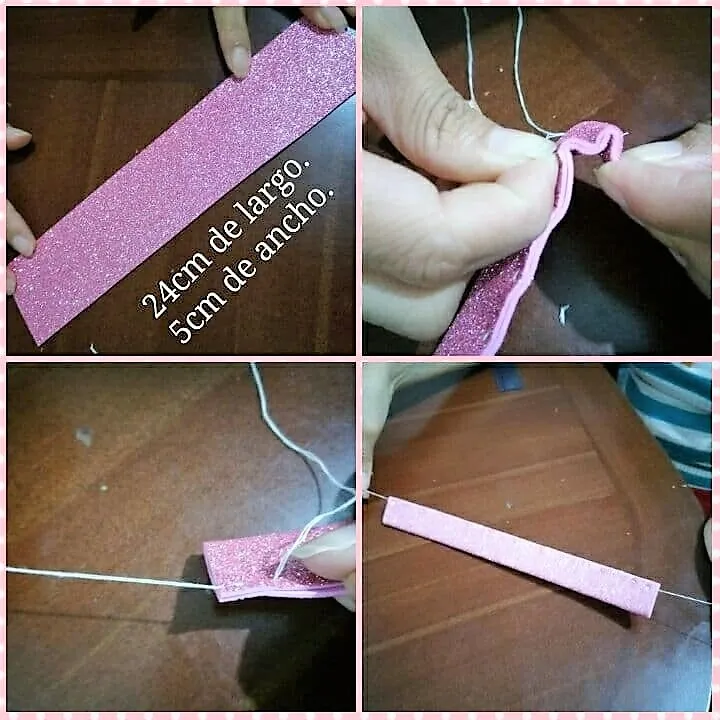
Se cose hasta el otro extremo, seguido de esto con la tijera comenzaremos a cortar sin llegar a la costura, creándose celdas con cada recorte, esto se hace desde principio a fin. Tal cual como lo vemos en la imagen.
It is sewn to the other end, followed by this with the scissors begin to cut without reaching the seam, creating cells with each cut, this is done from beginning to end. As shown in the picture.
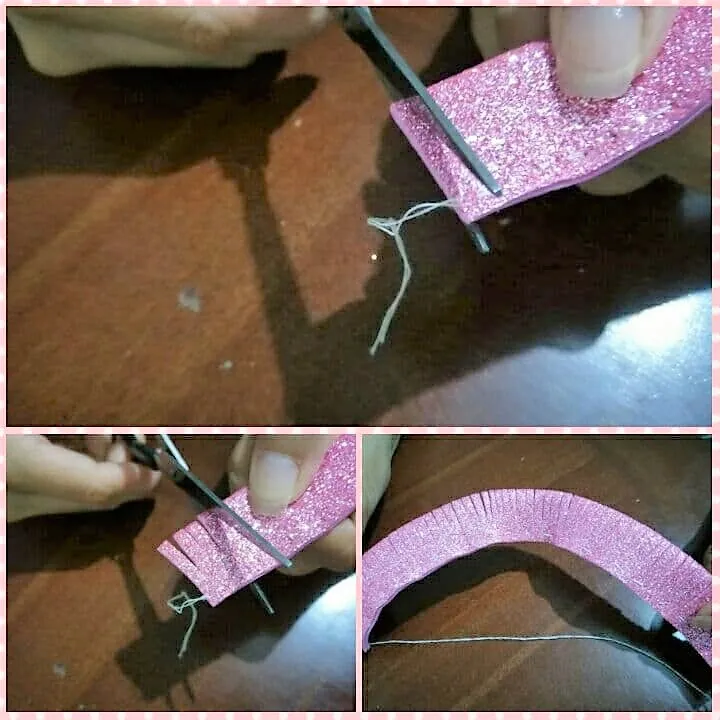
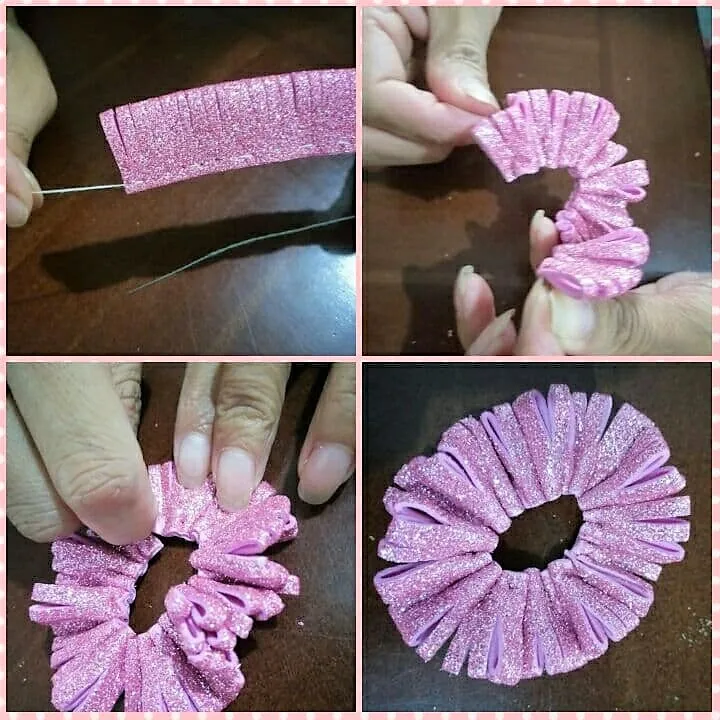
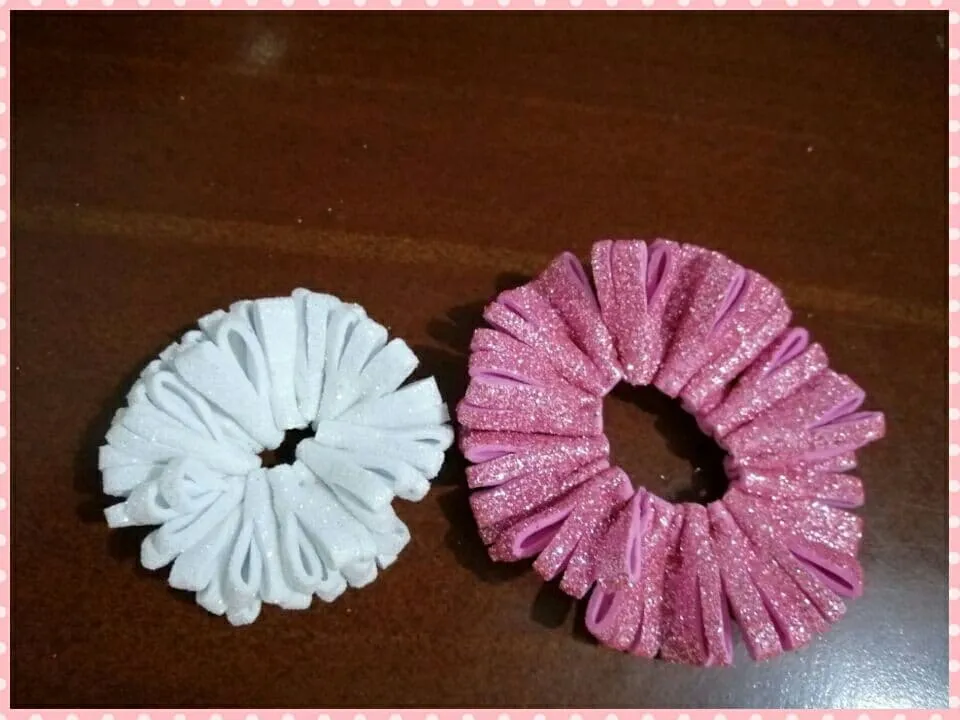
Por los hilos restantes de los extremos halamos poco a poco hasta que se nos cree un círculo al unir cada punta con dos nudos.
Ahora vamos con el segundo foami escarchado color blanco que mide 20cm de largo y 4.5 de ancho, doblando a la mitad y cosemos de punta a punta.
Now we go with the second white frosted foami measuring 20cm long and 4.5cm wide, folding it in half and sew from end to end.
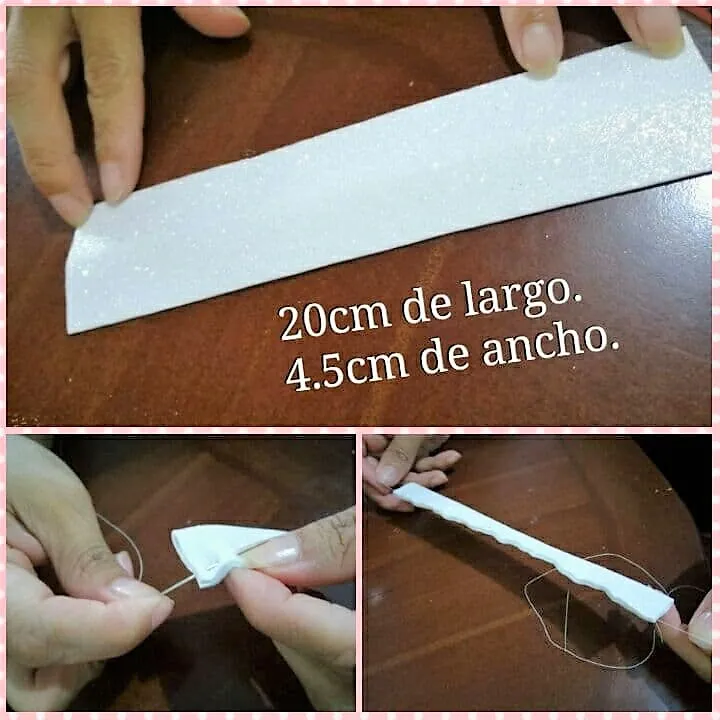
Repetimos los cortes sin tocar la costura.
We repeat the cuts without touching the seam.

Halamos por el hilo, y sellamos con dos nudos.
We pull through the thread, and seal with two knots.
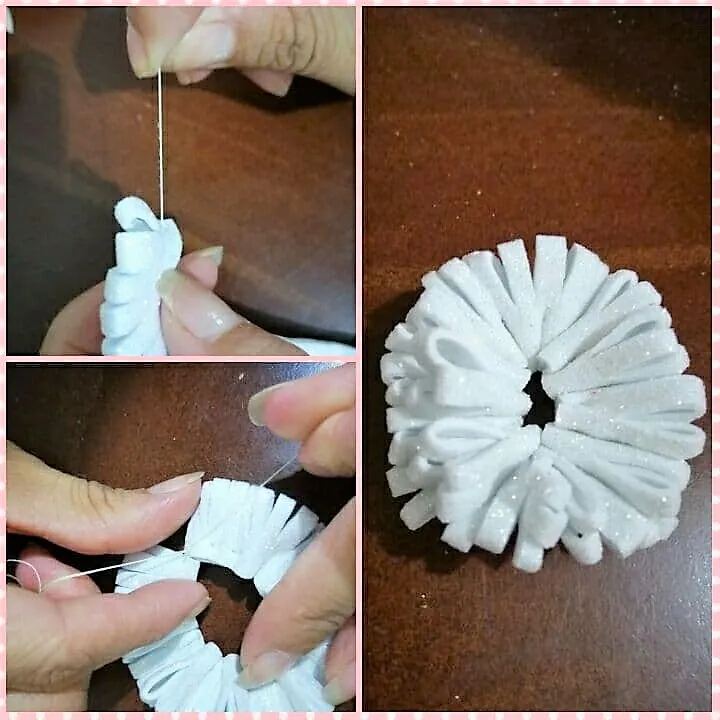
Y tendremos dos círculos.
And we will have two circles.
Con silicona caliente unimos los círculos, quedando el más grande en la parte de abajo.
With hot silicone we join the circles, leaving the larger one at the bottom.

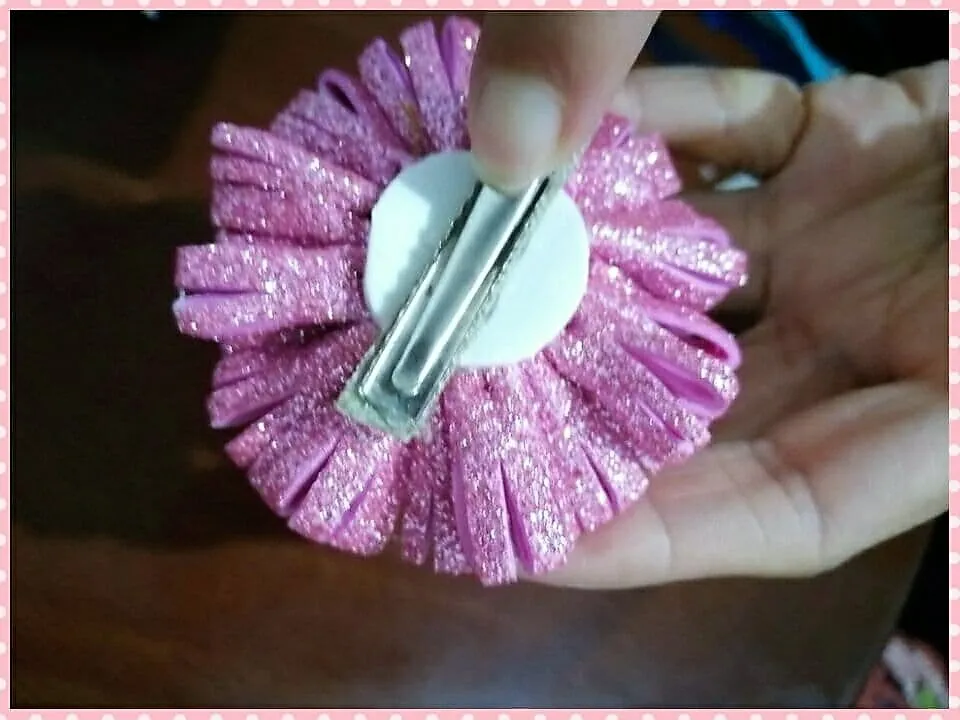
Hacemos un círculo con foami para colocarlo en la base donde irá la pinza.
We make a circle with foami to place it on the base where the clip will go.
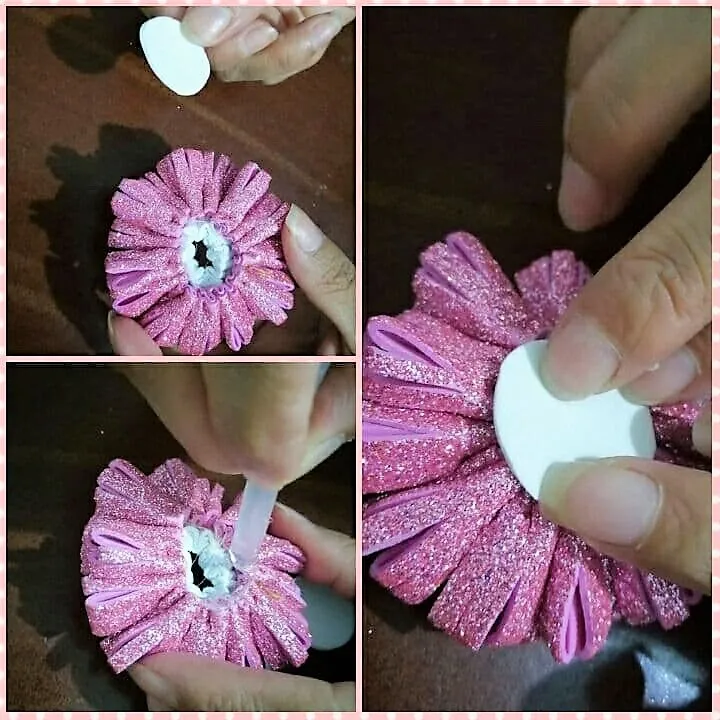
La cual adherimos con la ayuda de silicona.
Which we adhere with the help of silicone.
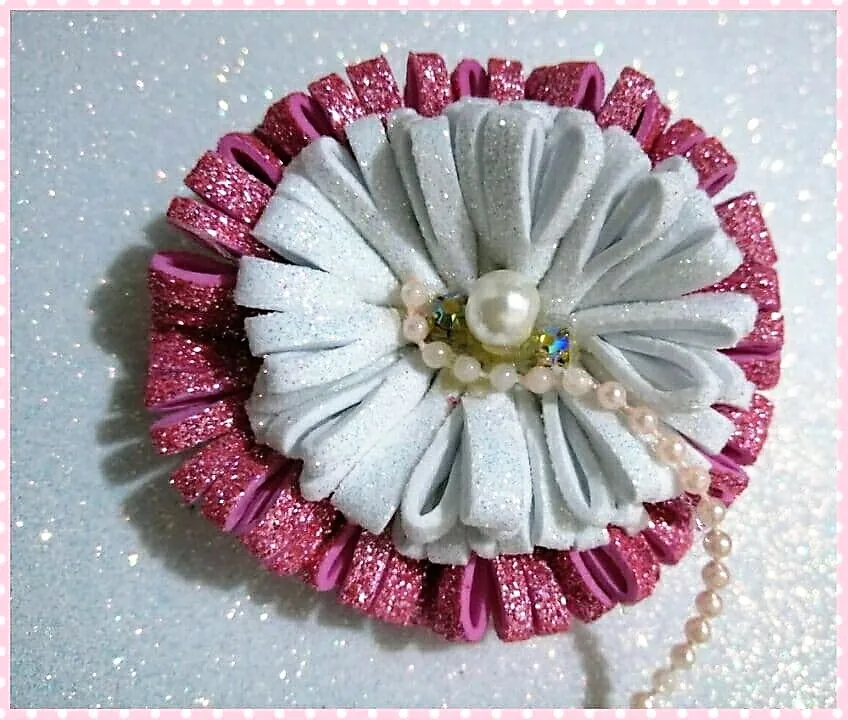
Ya esta sería la última parte donde decoramos nuestra bella flor, acá debemos jugar con nuestra creatividad, colando algo sutil para que no se vea exagerado y no pierda lo delicado que lo caracteriza. En mi caso elegí unas pedrerías brillantes y otras color mate, son parte de otros accesorios que ya no uso.
This would be the last part where we decorate our beautiful flower, here we must play with our creativity, adding something subtle so that it does not look exaggerated and does not lose the delicacy that characterizes it. In my case I chose some shiny rhinestones and other matte colored ones, they are part of other accessories that I don't use anymore.
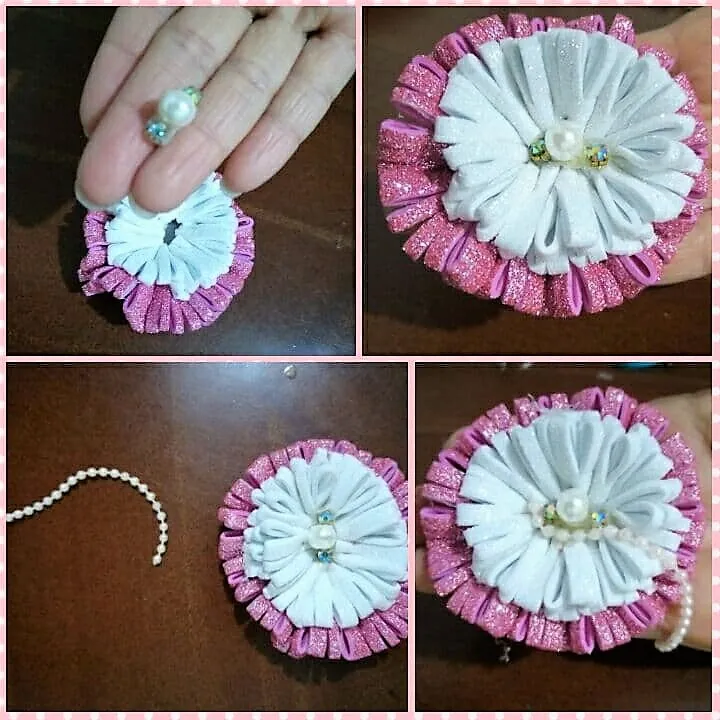
Y este es el resultado final 😍 Realmente hermoso y muy delicado.
And this is the final result 😍 Really beautiful and very delicate.
Muchas gracias por visitar mi blog, espero sea de utilidad y se animen a realizar esta hermosa flor🌸. Hasta una nueva oportunidad mis queridos amigos, lluvia de bendiciones. 🙏
Todas las fotos son personales.
Editadas en: PhotoScape.
Separador de: www.pngwing.com/
Disculpen si poseo errores de traducción, mi unico lenguaje es el castellano.
Thank you very much for visiting my blog, I hope it will be useful and encourage you to make this beautiful flower🌸. Until a new opportunity my dear friends, shower of blessings. 🙏
All photos are personal.
Edited in: PhotoScape.
Separator from: www.pngwing.com/
Sorry if I have translation errors, my only language is Spanish.