English

Video Source - Fuente del video
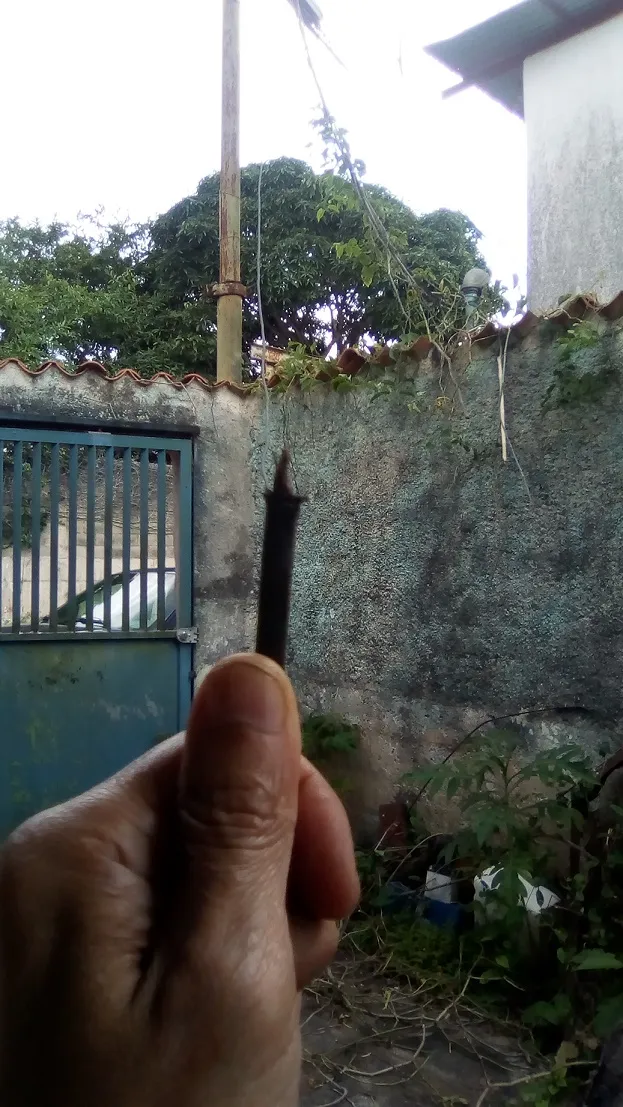
With my best wishes, I greet you this excellent start to the week, I haven't posted in this community for a long time. The electric service company still to date does not repair the cable fallen from the pole to the electricity meter, in the house. So I had to connect the electricity to my aunt's house, while the matter is resolved.
So I didn't want to hook up most of the shop equipment, much less the welding machine.
Even so, I can share with you one of the simplest and oldest tools that I use for my repairs, in fact it is one of the most important when I do a service or a quote.
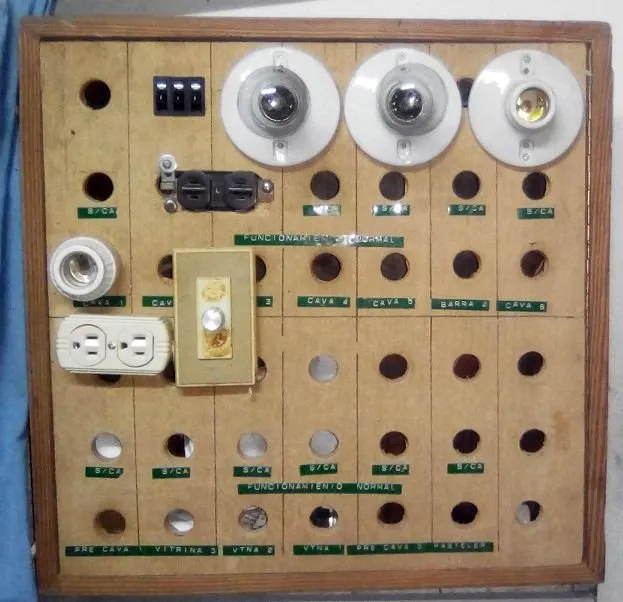
The test bench or also called "The serial lamp", this test bench uses conventional filament light bulbs as limiters of the current that passes through them, in principle it is a tool used to service conventional televisions, or CRT tube.
I used a discarded board from a machine room, and I have been adding recycled parts to it, to the extent that I have needed them, it has a dimmer that I use in other jobs. So it's still under construction.
Image's Source - Image Source
I usually use it in electronic cards, or in any device that works or connects to the wall outlet with 110 Volts.
The grace or utility consists in taking advantage of the fact that, in conventional filament lamps, the resistance increases when the current that passes through them increases.
If there is a total crossover in the power lines, or a component is damaged, what we commonly call a short circuit, the lamp will turn on, preventing the device in question from suffering additional damage.

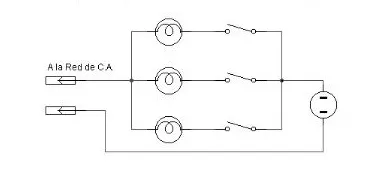
I put mine together, with a three-lamp circuit, this way I can increase the amount of power, depending on the equipment I'm testing.
For jobs that do not require much, or a portable board, to carry in the briefcase or toolbox, a single lamp circuit may be more than enough.
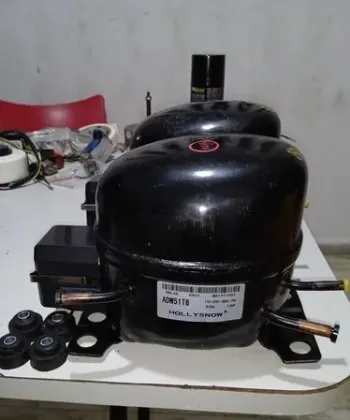
But, if you work with equipment with a slightly higher consumption, such as microwaves, sound amplifiers, or equipment with a more demanding power, it is better to assemble the one with three lamps. I used it a lot to test motors on home refrigerators and 110 Volt air conditioners.
Image's Source - Fuente de la Imagen
When I was studying at the beginning of my path, in the world of repairs, and I did not have this test bench, it could happen that I changed a fuse and the components that I determined were damaged, and I came to see how the fuse was blown, or damaged. The components you just installed.
What did not make my first jobs very profitable, fortunately I was investigating, and I was able to put together my first board, this is already the fourth version,
I hope to add more parts to it, but for now, it serves me pretty well.
I hope you find it useful, if I can, I would highly recommend you to get your own breadboard, it's really very useful, when starting out.
An alternative method to using the board is to work the electronic components, with much lower voltage levels. But we are already talking about handling, with a little more knowledge, the issue of repairs.
Thank you very much for reading me, you can get a lot of use out of it in a home or commercial workshop. It is quite an old tool, but useful, filament bulbs are hardly used, but at least they are still available in my country.
I have used the Google translator for the English language, the images, unless indicated at the bottom of them, are mine, I took them in my workshop.
I hope you have a very good week, and that whatever comes your way during these days, you can get through it.
Español

Video Source - Fuente del video
Con mis mejores deseos, les saludo este excelente inicio de semana, hace mucho que no publico en esta comunidad. La compañía de servicio eléctrico aun a la fecha no repara el cable caído del poste al medidor de electricidad, en la casa. Así que tuve que conectar la electricidad a la casa de mi tía, mientras se resuelve el asunto.
Por lo que no he querido conectar la mayoría del equipo del taller, mucho menos la máquina de soldar.
Aun así puedo compartirles una de las herramientas más simples y antiguas con la que me valgo para mis reparaciones, de hecho es una de la más importante cuando hago un servicio o un presupuesto.
El banco de pruebas o llamado también "La lámpara serié", este banco de pruebas, utiliza los bombillos convencionales de filamento, como limitadores de la corriente que pasa a través de ellos, en principio es una herramienta usada para hacer servicio a los televisores convencionales, o de tubo CRT.
Use un tablero desechado de un cuarto de máquinas, y le he ido agregando partes recicladas, en la medida que las he necesitado, tiene un Dimmer que uso en otros trabajos. Así que aún está en construcción.
Image's Source - Fuente de la Imagen
Yo suelo usarlo en las tarjetas electrónicas, o en todo aparato que funcione o se conecte a la toma de pared con 110 Volts.
La gracia o utilidad consiste en aprovechar que, en las lámparas convencionales de filamento, aumenta la resistencia al aumentar la corriente que las atraviesa.
Si hay un cruce total en las líneas de alimentación, o algún componente está dañado, lo que comúnmente llamamos un corto circuito, la lámpara se encenderá evitando que el aparato en cuestión sufra un desperfecto adicional.
Arme el mío, con un circuito de tres lámparas, de esta forma puedo aumentar la cantidad de potencia, dependiendo del equipo que esté probando.
Para trabajos que no exijan mucho, o un tablero portátil, para llevar en el maletín o caja de herramientas, un circuito de una sola lámpara les puede resultar más que suficiente.

Image's Source - Fuente de la Imagen
Pero, si trabajaras con equipos de un consumo un poco mayor, como microondas, amplificadores de sonido, o equipos de una potencia más exigente, es mejor armar el de tres lámparas. Lo usé mucho para probar motores de neveras domésticas y acondicionadores de aire de 110 Volts.
Image's Source - Fuente de la Imagen
Cuando estudiaba al inicio de mi camino, en el mundo de las reparaciones, y no contaba con este banco de pruebas, podía pasar que cambiaba un fusible y los componentes que determinaba dañados, y llegaba a ver como se fundía el fusible, o se dañaba los componentes que recién había instalado.
Lo que no hacía muy rentable mis primeros trabajos, por fortuna fui investigando y pude armar mi primer tablero, este ya es la cuarta versión. Espero agregarle más partes, pero de momento, me sirve bastante bien.
Espero les sea de utilidad, si puedo les recomendaría encarecidamente que se hicieran con su propio tablero de pruebas, es realmente muy útil, cuando se comienza.
Un método alternativo al uso del tablero es trabajar los componentes electrónicos, con niveles de voltajes mucho más reducidos. Pero ya estamos hablando de manejar, con un poco más de conocimiento, el tema de las reparaciones.
Muchas gracias por leerme, pueden sacarle mucho provecho en un taller casero o comercial. Es una herramienta bastante vieja, pero útil, los bombillos de filamento casi no están en uso, pero por lo menos aún en mi país se pueden conseguir.
He usado el traductor de Google para el idioma inglés, las imágenes a menos que se indiquen al pie de las mismas, son mías, las tome en mi taller.
Espero que tengan una muy buena semana, y que sea lo que se les presente durante estos días, puedan superarlo.