English

Greetings to the community, I hope you are in the best possible situation and in excellent spirits to overcome the challenges that the week brings you.
These days I have been doing remote control recycling work, and it seemed like a good idea to share with you part of my work in the workshop.

He had already disassembled and washed the plastic covers of a batch he had for recycling with dishwashing detergent and warm water, and had washed the electronic cards with alcohol. But since I decided to post the topic, I set aside a couple of controls to show the disassembly process. These are the usage controls for the DirecTV decoder, but what is shown can be applied to any remote control. It's just that these DirecTV remotes have extra screws that aren't usually present on other remotes.
I usually use to disassemble, a broken dentist tool that they brought me from a street market, a thin flat screwdriver, an old credit card, or a phone disassembly tool will also work.

We carefully lift the cover that it brings to the front, without making much effort, to separate the pressure tabs that fix the cover. You have to be patient and careful not to break it and not leave marks on the control covers. I have to warn you that there is a cheap imitation model where this little cover does not come off and is integrated into the plastic of the front cover, it is very low quality and too cheap even to recycle.

Well we find the first four Philips or knurled screws that hold the top and rear covers together, we carefully remove.

In the lower back we only have two screws that we must remove.

When disassembling, I usually leave the screws on a magnet so they don't get lost.

We can separate the covers, and check the internal conditions, there are a minimum of components, so there is not much that can be damaged really, I don't understand why people throw them away so soon.


In my case I try with a 3 volt regulated source, when powering up the indicator leds on the upper front side should blink for a moment, so I try all the cards that I have removed, and I put aside those that do not light up. They work on those who respond first and are left last to review the cards that do not light up. It is the way in which it is done so that the service is profitable.


I hold the membrane against the card and check that they activate the buttons, and then check the signal emitting leds. The light from these LEDs can only be captured with the phone's camera, they cannot be seen with the naked eye.


I find in many recycled controls that the membrane that has the keys is covered on the inside by grease or dirt, and that alone is the cause of not working well. Just by washing them with dishwashing detergent and warm water I manage to leave them in good condition. These work well and I had already washed them and let them dry, they are ready to ride.

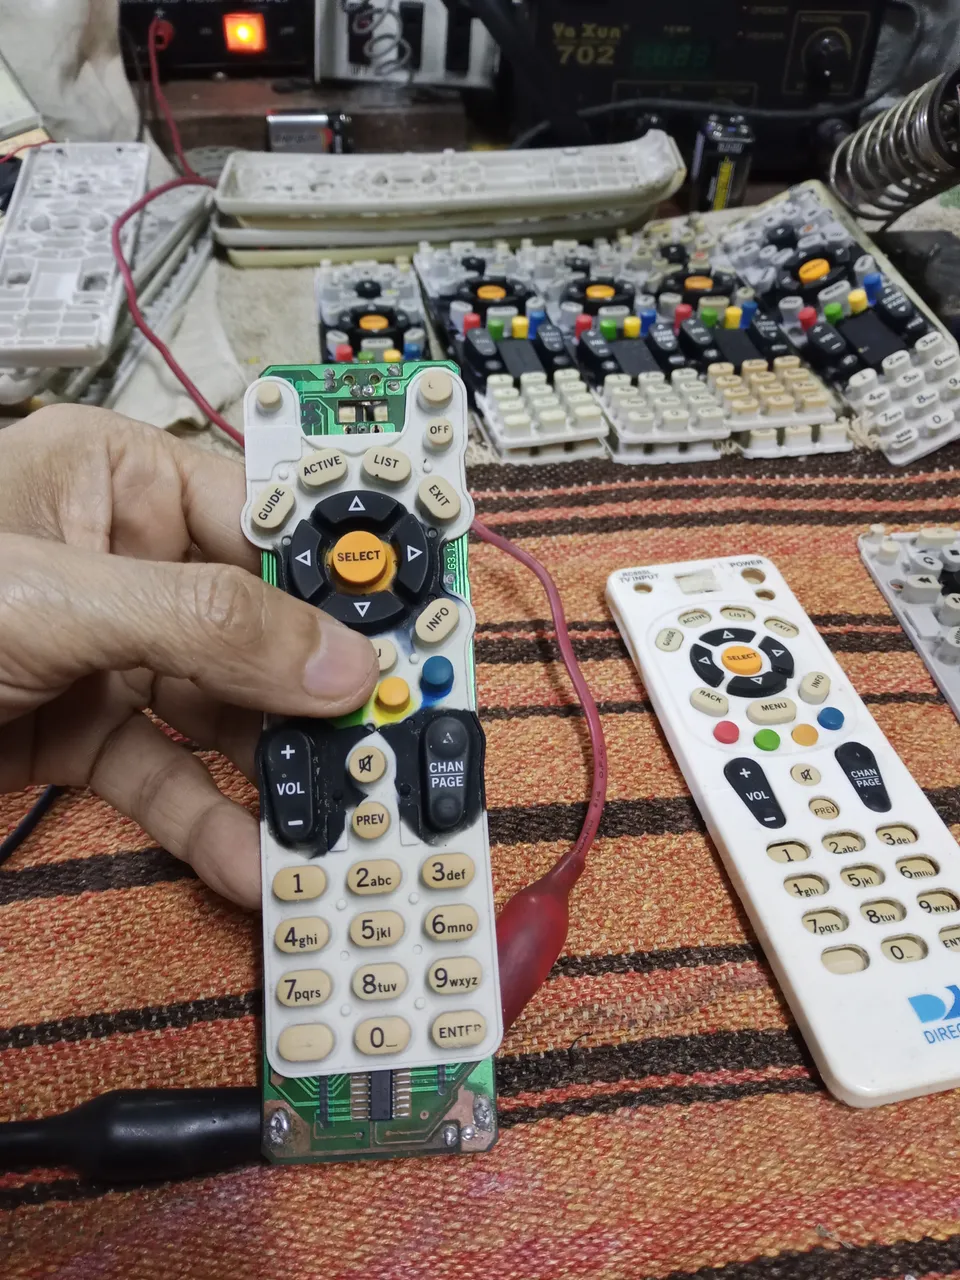
I arm and verify with the phone's camera, since I have found controls that turned on the indicator leds when pressing the buttons, but did not activate the leds that emit the control signal, as these signal emitters cannot be seen with the naked eye. user was not aware of the failure.

Finally, I had to show you this other control model in which the signal from several buttons was not activated, I already had another of the same damaged model in stock, so I disassembled it and tested that the membrane keys were fine.

I just put the keys on another position and the signal was activated without problems, then I knew that it was a fault in the card. There are very few components to see, check the tracks and get to the control micro.

The first and third tracks on the left side did not have continuity with the micro pin. Despite looking good, the track was actually interrupted.

I corrected the welds, and it's fixed.


Thank you very much for stopping by and reading me, the failures in these devices are usually very simple. You just have to be careful and be patient. I see the failure of interrupted welds in many electronic equipment, from computers to saving light bulbs. It can be resolved by following a step-by-step service plan.

I have used Google translate for the English language.
The images are captures of my work in the workshop.
Have an excellent week.
Peace.
Español
Saludos para la comunidad, espero que estén en la mejor situación posible y con un excelente ánimo para superar los desafíos que les traiga al frente la semana.
Estos días he estado haciendo labores de reciclaje de control remoto, y me pareció una buena idea compartir con ustedes parte de mi trabajo en el taller.
Ya había desmontado y lavado con detergente lavaplatos y agua tibia las cubiertas plásticas de un lote que tenía para reciclar, y había lavado las tarjetas electrónicas con alcohol. Pero como decidí hacer la publicación del tema, aparte un par de controles para mostrar el proceso de desmontaje. Son los controles de uso para el decodificador de DirecTV, pero lo mostrado se puede aplicar para cualquier mando a distancia. Solo que estos controles de DirecTV, tienen tornillos adicionales que por lo general no están presentes en otros controles a distancia.
Suelo emplear para desmontar, una herramienta de dentista rota que me trajeron de un mercado callejero, sirve también un destornillador plano delgado, una tarjeta de crédito vieja, o una herramienta para desarmar teléfonos.
Con cuidado levantamos la cubierta que trae al frente, sin hacer mucho esfuerzo, para separar las pestañas de presión que fijan la cubierta. Tiene que ser paciente y cuidadoso para no romperla y no dejar marcas en las cubiertas del control. Tengo que advertir que hay un modelo de imitación barato en que esta pequeña cubierta no se desprende y está integrada al plástico de la cubierta frontal, es de muy baja calidad y es demasiado barato aún para reciclar.
Bien nos hallamos con los cuatro primeros tornillos Philips o de estrías que sujetan las cubiertas superior y posterior entre sí, retiramos con cuidado.
En la parte baja posterior tenemos solo dos tornillos que debemos retirar.
Acostumbro al desarmar ir dejando los tornillos sobre un imán para que no se extravíen.
Podemos separar las cubiertas, y revisar las condiciones internas, hay un mínimo de componentes, por lo que no hay mucho que pueda dañarse en verdad, no comprendo por qué las personas los desechan tan pronto.
En mi caso pruebo con una fuente regulada en 3 volts, al energizar los leds indicadores del lado frontal superior deben parpadear por un momento, así pruebo todas las tarjetas que he desmontado, y aparto las que no encienden. Se trabaja en las que respondan primero y de último se dejan para revisar las tarjetas que no enciendan. Es la forma en que se hace para que el servicio sea rentable.
Sostengo la membrana contra la tarjeta y verifico que activen los botones, y luego verifico los leds emisores de señal. La luz de estos leds solo puede captarse con la cámara del teléfono, no pueden verse a simple vista.
Encuentro en muchos controles reciclados que la membrana que tiene las teclas, está cubierta en el lado interno por una grasa o suciedad, y tan solo eso es la causa de que no funcionen bien. Solo con lavarlas con detergente de lavaplatos y agua tibia logro dejarlas en buen estado. Estas funcionan bien y ya las había lavado y dejado secar, están listas para montar.
Armo y verifico con la cámara del teléfono, ya que me he encontrado controles que encendían los leds indicadores al presionar los botones, pero no activaban los leds que emiten la señal de control, como estos emisores de señal no pueden ser vistos a simple vista el usuario no se daba cuenta de la falla.
Por último, tenía que mostrarles este otro modelo de control en que no se activaba la señal de varios botones, ya tenía otro del mismo modelo dañado en depósito, así que desarme y probé que las teclas de la membrana estuviesen bien.
Simplemente, coloque las teclas sobre otra posición y se activó la señal sin problemas, entonces supe que era una falla en la tarjeta. Son muy pocos componentes para ver, revise las pistas y llegue al micro del control.
La primera y tercera pista del lado izquierdo, no tenían continuidad con el pin del micro. A pesar de verse bien, en realidad la pista estaba interrumpida.
Corregí las soldaduras, y quedo solucionado.
Muchas gracias por pasar y leerme, las fallas en estos artefactos suelen ser muy simples. Solo hay que tener cuidado y ser pacientes. El fallo de las soldaduras interrumpidas, lo veo en muchos equipos electrónicos, desde computadores a bombillos ahorradores. Puede resolverse si se sigue un plan de servicio paso a paso.
He usado el traductor de Google para el idioma inglés.
Las imágenes son capturas de mi trabajo en el taller.
Que tengan una excelente semana.
Paz.