English
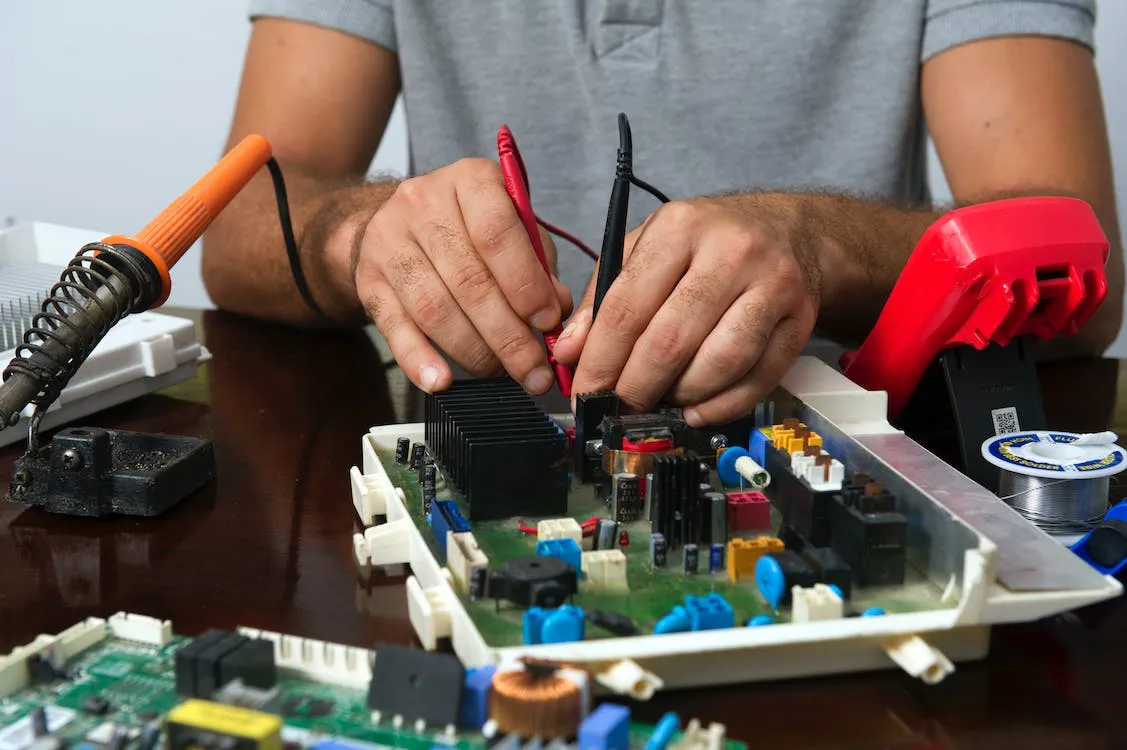
Image's Source - Fuente de la Imagen
Greetings, I hope that life is treating you in the best possible way, but if not and life is in difficult mode, then I wish you the best of spirits to move forward. That sometimes we go through situations that we have not sought and do not deserve, it may seem difficult, but we can get ahead.
“Practice makes perfect” is a phrase that has a certain degree of certainty, little by little I have been perfecting the repair of LED light bulbs.
On this occasion I have dared to do a slightly more advanced or complex repair on an LED bulb. This was more of a practice in the workshop, to perfect the repair method and check the tools that we have built to do the work in the workshop.
I have to clarify that there are two types of LED bulbs: Those with a capacitor source, which are the cheapest and tend to be damaged much more easily. They are also the simplest to operate, their circuit is so simple that they are easy to repair and modify.

Switched source LED bulbs, which are a little more expensive and have a slightly better lifespan than capacitor source LED bulbs. They are a little more complex to alter when we want to modify their operating conditions, to improve their lifespan.
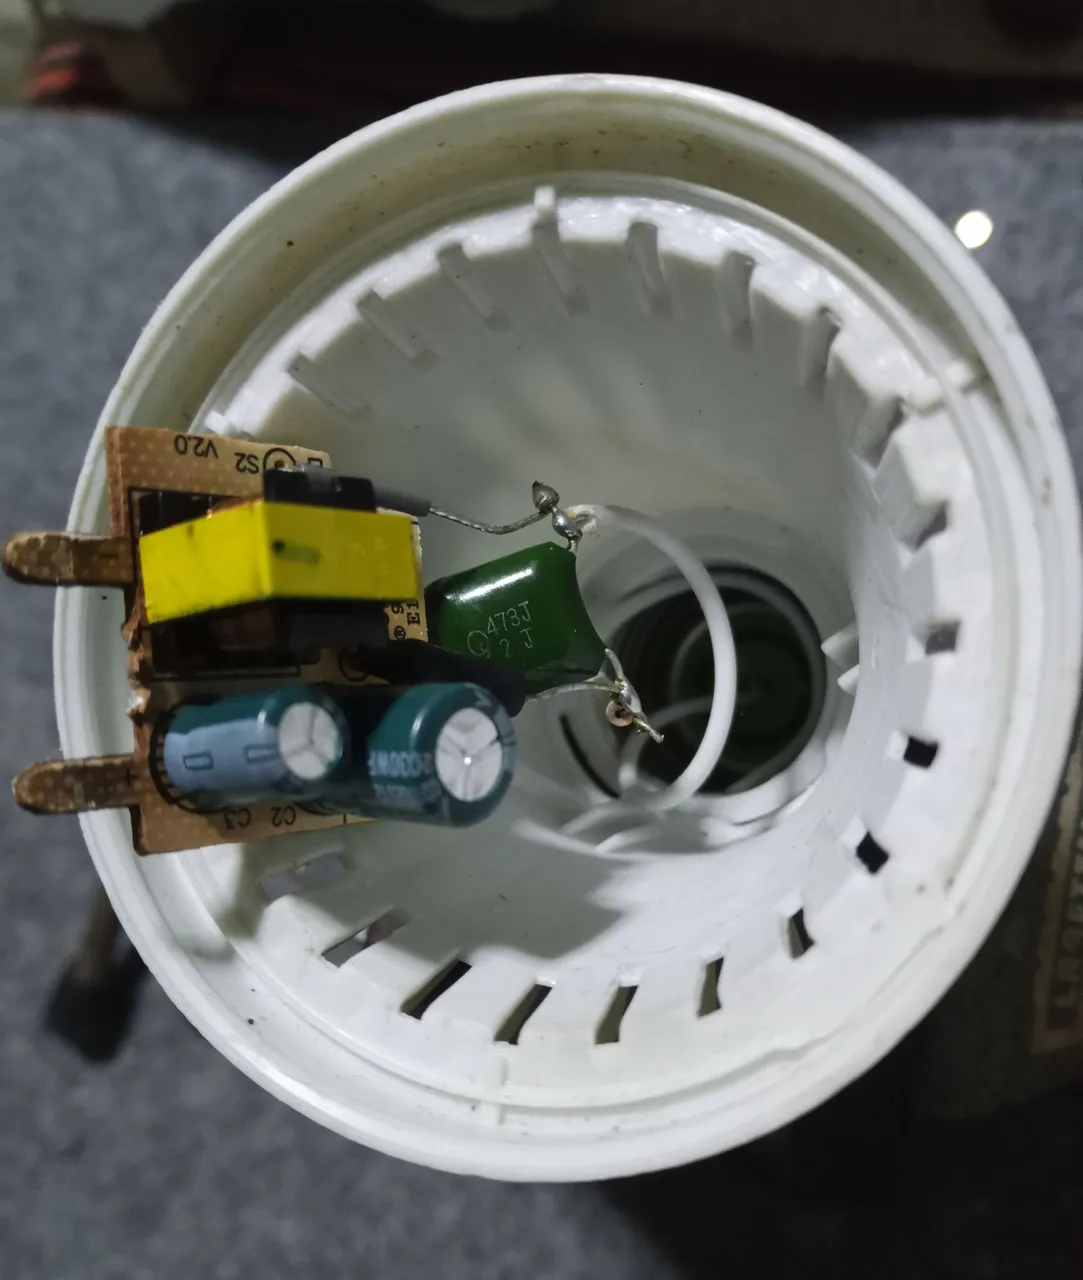
This repair is made on a switched source bulb, it does not apply to capacitor source LED bulbs.
I took advantage of a 20 watt light bulb to do the practices, in principle I was only going to remove the damaged LED, and I was thinking of simply making a solder bridge between the LED terminals, which is one of the simplest solutions that works in light bulbs, switched source.

Or use an NPN transistor with a Zenner diode to replace the damaged LED, which is the way in which the failure in LED televisions is repaired.

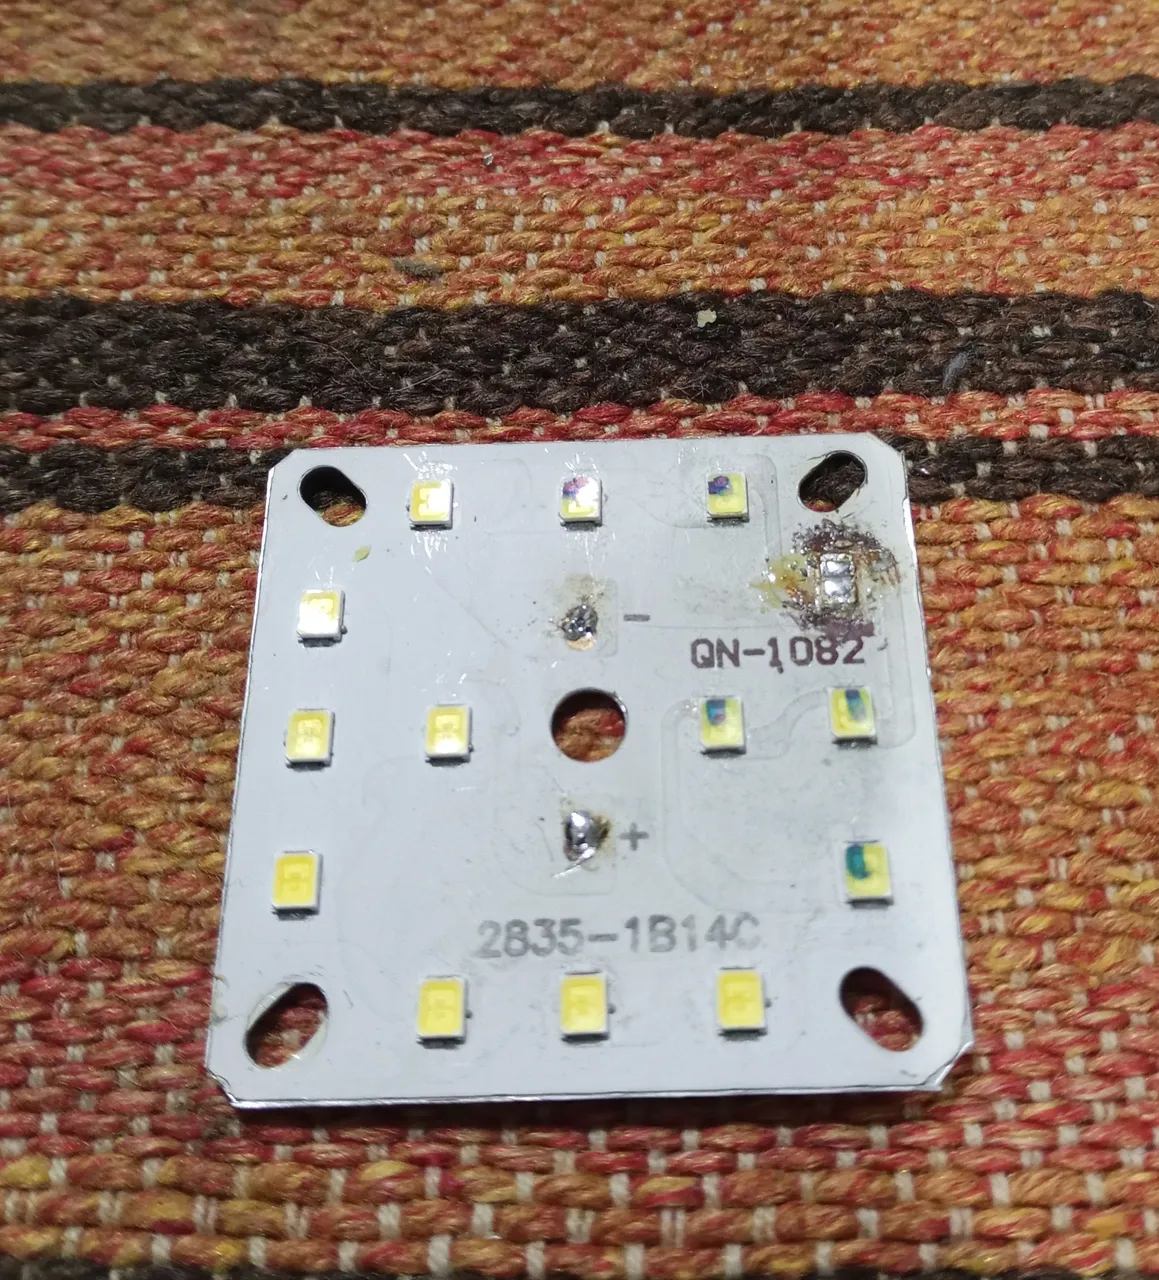
But the board had a total of four damaged LEDs. In principle, when a board has more than two damaged LEDs, the rule in these cases is not to repair the board and take the bulb as a spare for other repairs. In this type of work, it must be taken into account to get the work done as quickly and efficiently as possible.
So since it was already very damaged, it wouldn't hurt to use this bulb to practice more advanced repair techniques.
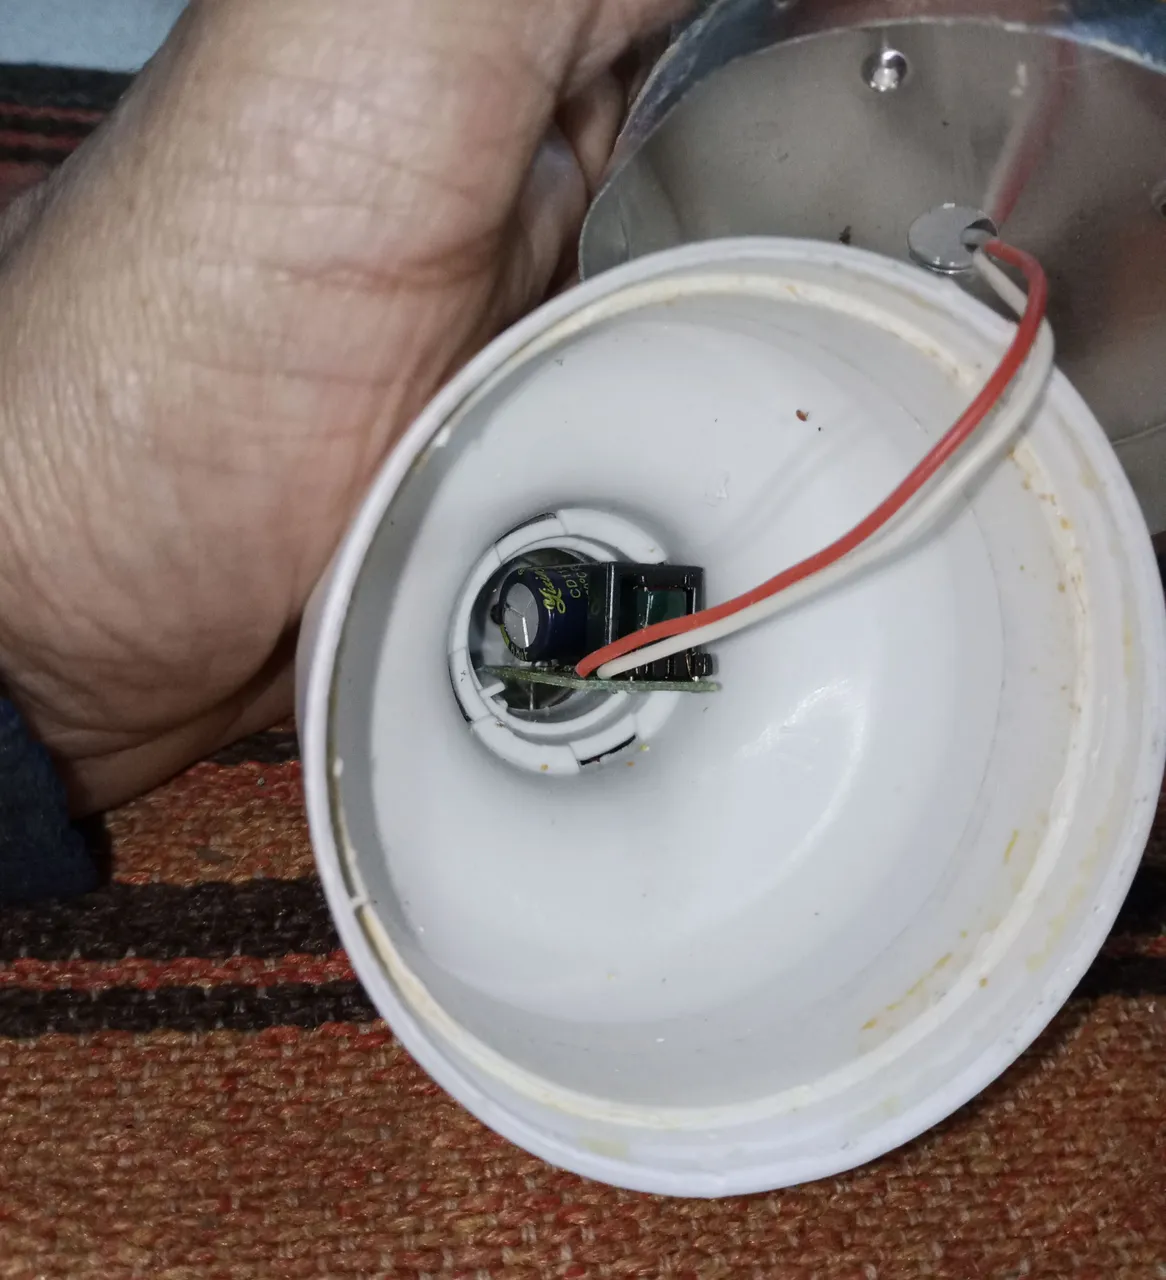
The disassembly of these bulbs, I admit, is very simple, the parts are placed under pressure, with some glue or screws.

Take advantage of the soldering plate that we made using a damaged iron that we modified and recycled. I was removing LEDs in good condition from several boards that I had for spare parts.

Using the soldering plate made the job much easier to remove the LEDs. The times I tried to do the same service with the hot air station or the soldering iron, I couldn't do the job as well and cleanly.

Mark the positive polarity on the LEDs in good condition that were removed, to know how to place them later on the board.

“With the appropriate tools, all work is much easier,” is a saying that has a lot of truth. Using this damaged LED bulb plate helped me a lot to fine-tune the tools that I have been making for the workshop.
I used the LED strip tester that we put together in previous posts, and all the solders were fine, the board worked without any major problems.

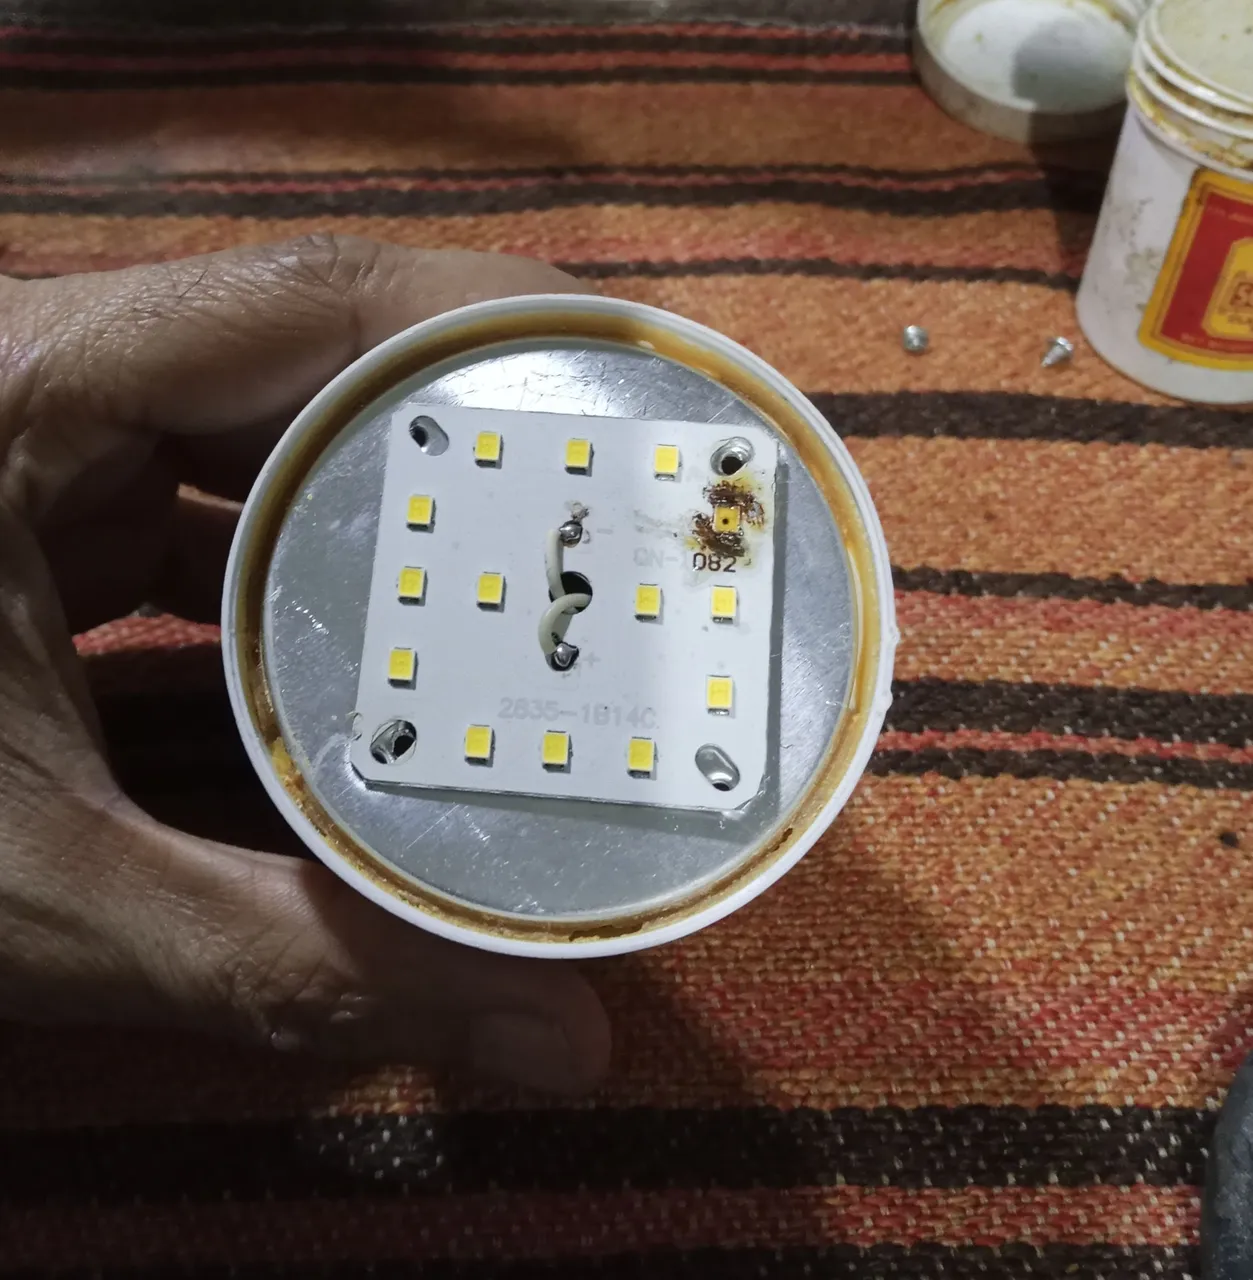
When assembling these plates, you must remember to place thermal grease on the back of the plate, before fixing it with screws to the metal support that holds it inside the bulb. This support or chassis also works as a heat sink for the LEDs.
The correct thing is that at the factory, thermal grease would have been applied, but it would increase the manufacturing cost and the life of these bulbs is only the end user's concern.

Since I am working with used spare parts, I must take into account the wear and tear they have suffered from use, so now I have to reduce the current at which the LEDs are working. The factory setting of the circuit is adjusted to work at the maximum operating current, thus the LEDs shine brighter, but their life time is also greatly reduced.
If it were a capacitor source, which is a very simple circuit, you could easily reduce the load on the LEDs, placing a resistor and little else, but in a switched source circuit you have to vary the value of the reference voltage of the integrated circuit , it is something that takes a little more work, and will be left for the next publication.
To leave a bulb plate with a used LED working a little longer, it is necessary to adjust the working current to a lower value, since the LEDs have a very short lifespan. If I leave them working with the original circuit, the LEDs that I have placed may end up burning. In the case of used LEDs, if they are placed with the source not adjusted, they end up burning.
Thank you very much for stopping by and reading me.
Have an excellent week.
Peace.
I have used Google translator for the English language.
Images unless noted are screenshots of work from my workshop.
Español
Image's Source - Fuente de la Imagen
Saludos, espero que la vida les esté tratando de la mejor manera posible, pero si no es así y la vida está en modo difícil, entonces les deseo el mejor de los ánimos, para salir adelante. Que algunas veces pasamos por situaciones que no hemos buscado y no nos merecemos, puede parecer difícil, pero podemos salir adelante.
“La práctica hace al maestro”, es una frase que tiene cierto grado de certeza, poco a poco he ido perfeccionando la reparación de los bombillos de led.
En esta ocasión me he atrevido a hacer una reparación un poco más avanzada o compleja de una bombilla de led. Esto fue más a modo de práctica en el taller, para ir perfeccionando el método de reparación y comprobar las herramientas que hemos ido construidos para hacer los trabajos del taller.
Tengo que aclarar que hay dos tipos de bombillos led: Los de fuente de capacitores, que son los más baratos y suelen dañarse con mucha más facilidad. También son los más simples de intervenir, su circuito es tan sencillo que son fáciles de reparar y de modificar.
Los bombillos led de fuente conmutada, que son un poco más costosos y tienen un tiempo de vida un poco mejor que los de fuente de capacitores. Son un poco más complejos de alterar cuando queremos modificar sus condiciones de funcionamiento, para mejorar su tiempo de vida.
Esta reparación está hecha en un bombillo de fuente conmutada, no aplica para bombillos led de fuente de capacitores.
Aproveche un bombillo de 20 watt para hacer las prácticas, en principio solo iba a retirar el led dañado y estaba pensando en simplemente hacer un puente de soldadura entre los terminales del led, que es una de las soluciones más simples que funciona en los bombillos de fuente conmutada.
O usar un transistor NPN con un diodo zenner, para sustituir el led dañado, que es la forma en que se repara la falla en los televisores led.
Pero la placa tenía en total unos cuatro leds dañados, en principio cuando una placa tiene más de dos leds dañados, la norma en estos casos es no reparar la placa y tomar el bombillo como repuesto para otras reparaciones. En este tipo de trabajos se debe tener en cuenta sacar los trabajos lo más rápido y eficientemente posible.
Así que como ya estaba muy dañada, no se perdía nada si uso este bombillo para practicar técnicas más avanzadas de reparación.
El desmontaje en estos bombillos, reconozco que es muy sencillo, las partes están colocadas a presión, con algo de pegamento o tornillos.
Aproveche la placa de soldar que hicimos usando una plancha dañada que modificamos y reciclamos. Fui retirando led en buen estado de varias placas que tenía para repuesto.
Usando la placa para soldadura el trabajo se hizo mucho más sencillo remover los leds, las veces que trate de hacer el mismo servicio con la estación de aire caliente o con el cautín no pude hacer trabajo tan bien y limpio.
Marque la polaridad positiva en los leds en buen estado que desmontaba, para saber como colocarlos luego en la placa.
“Con las herramientas apropiadas todo trabajo resulta mucho más sencillo”, es un refrán que tiene mucha verdad. Usar esta placa de bombillo led dañado me sirvió de mucho para poner a punto las herramientas que he ido fabricando para el taller.
Use el probador de tiras led que armamos en las publicaciones pasadas, y todas las soldaduras quedaron bien, la placa funciono sin mayores problemas.
Cuando se arman estas placas hay que recordar el colocar grasa térmica en la parte trasera de la placa, antes de fijarla con tornillos al soporte metálico que la sostiene dentro del bombillo, este soporte o chasis también funciona como disipador de calor para los leds.
Lo correcto es que de fábrica, la grasa térmica hubiese sido aplicada, pero sería un aumento del costo de fabricación y la duración de estos bombillos es solo preocupación del usuario final.
Como estoy trabajando con repuestos usados debo tomar en cuenta el desgaste que han sufrido por el uso, así que ahora tengo que reducir la corriente en que están trabajando los leds. El ajuste de fábrica del circuito está ajustado para trabajar a la corriente máxima de funcionamiento, así los leds brillan más, pero también su tiempo de vida se reduce en mucho.
Si fuese una fuente de capacitores, que es un circuito muy simple, podría reducir la carga de los leds fácilmente, colocando una resistencia y poco más, pero en un circuito de fuente conmutada hay que variar el valor del voltaje de referencia del circuito integrado, es algo que lleva un poco más de trabajo, y quedara para la siguiente publicación.
Para dejar funcionando un poco más una placa de bombillo con led usado, es necesario ajustar la corriente de trabajo a un valor menor, ya que los leds tiene un tiempo de vida muy reducido. Si los dejo trabajando con el circuito original, se pueden terminar de quemar los leds que he colocado, los led usado si se colocan con la fuente sin ajustar, terminan quemándose.
Muchas gracias por pasar y leerme.
Que tengan una excelente semana.
Paz.
He usado el traductor de Google para el idioma inglés.
Las imágenes a menos que se indique son capturas del trabajo de mi taller.