💙🌼🦋Español🦋🌼💙
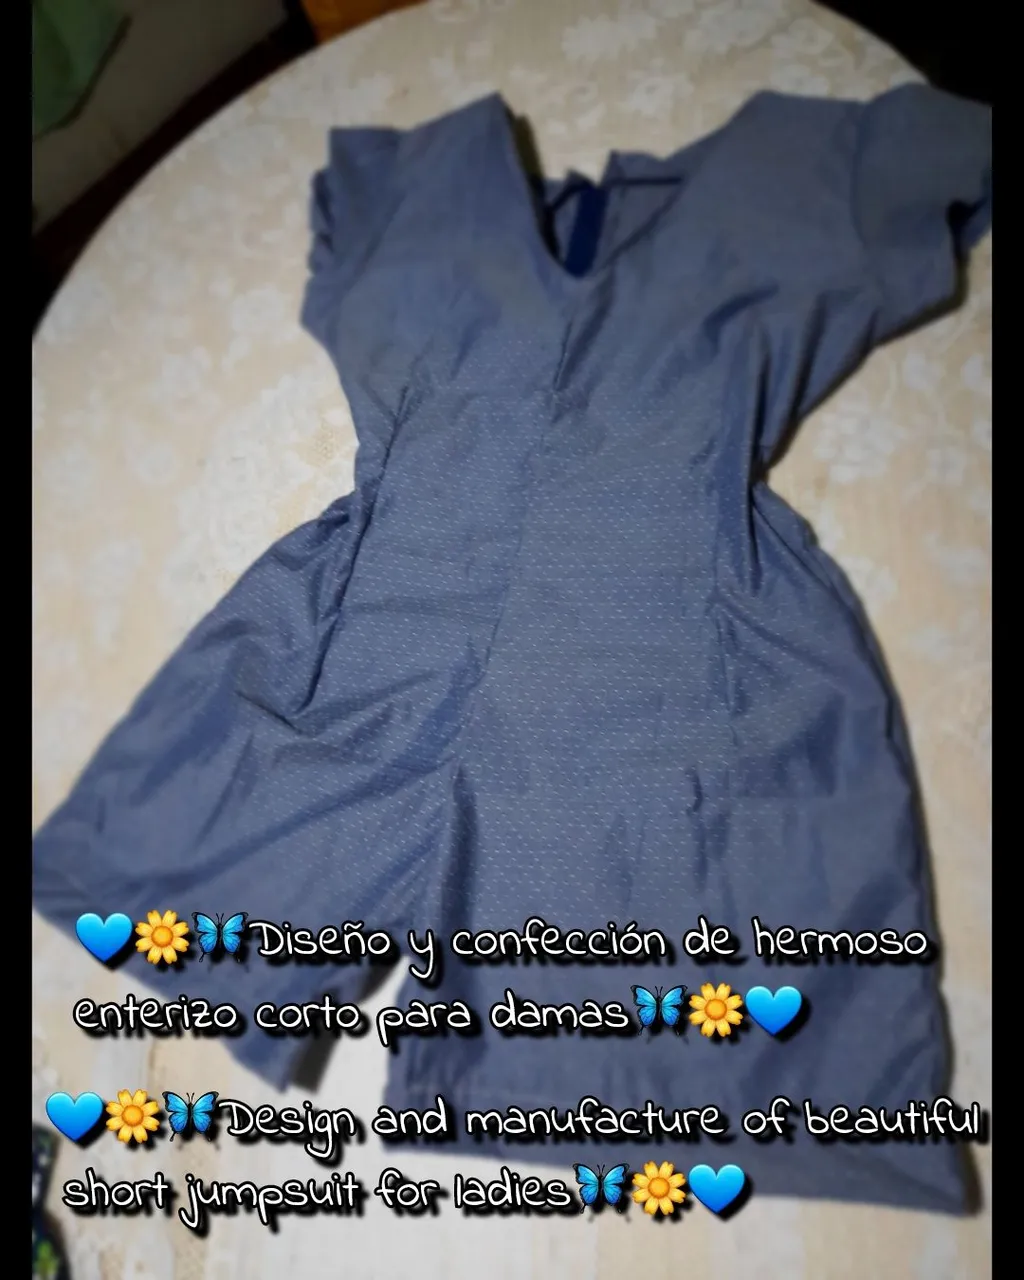
Muy buenas noches para todos queridos amigos de Hive ✨️ espero esten muy bien disfrutando de la noche y que todos hayan tenido un excelente dia 😉 Saludos especiales para todos en esta creativa comunidad de #Diy ❤️ es un gusto enorme saludarlos y compartir con ustedes este pequeño espacio dedicado a la costura ✨️ hoy me gustaría mostrarles el diseño y la confección de un hermoso enterizo corto para damas y el proceso a seguir para que hagan el suyo. Vengan y acompañenme ✨️
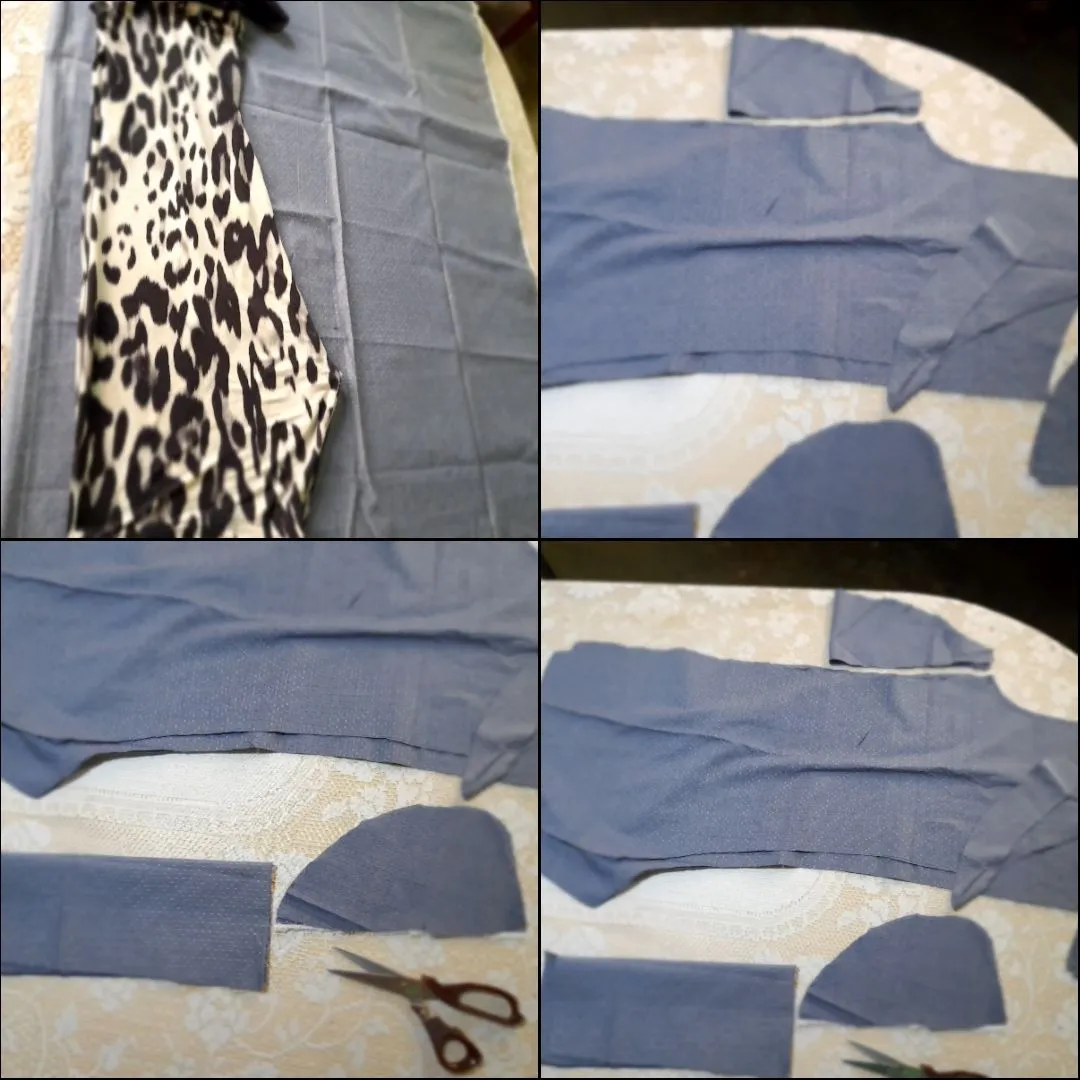
Estos fueron los materiales que use
• Máquina de coser
• Tijera
• Hilo de coser
• Tela
• Prenda de medida
• Cremallera
✨️Pasos✨️
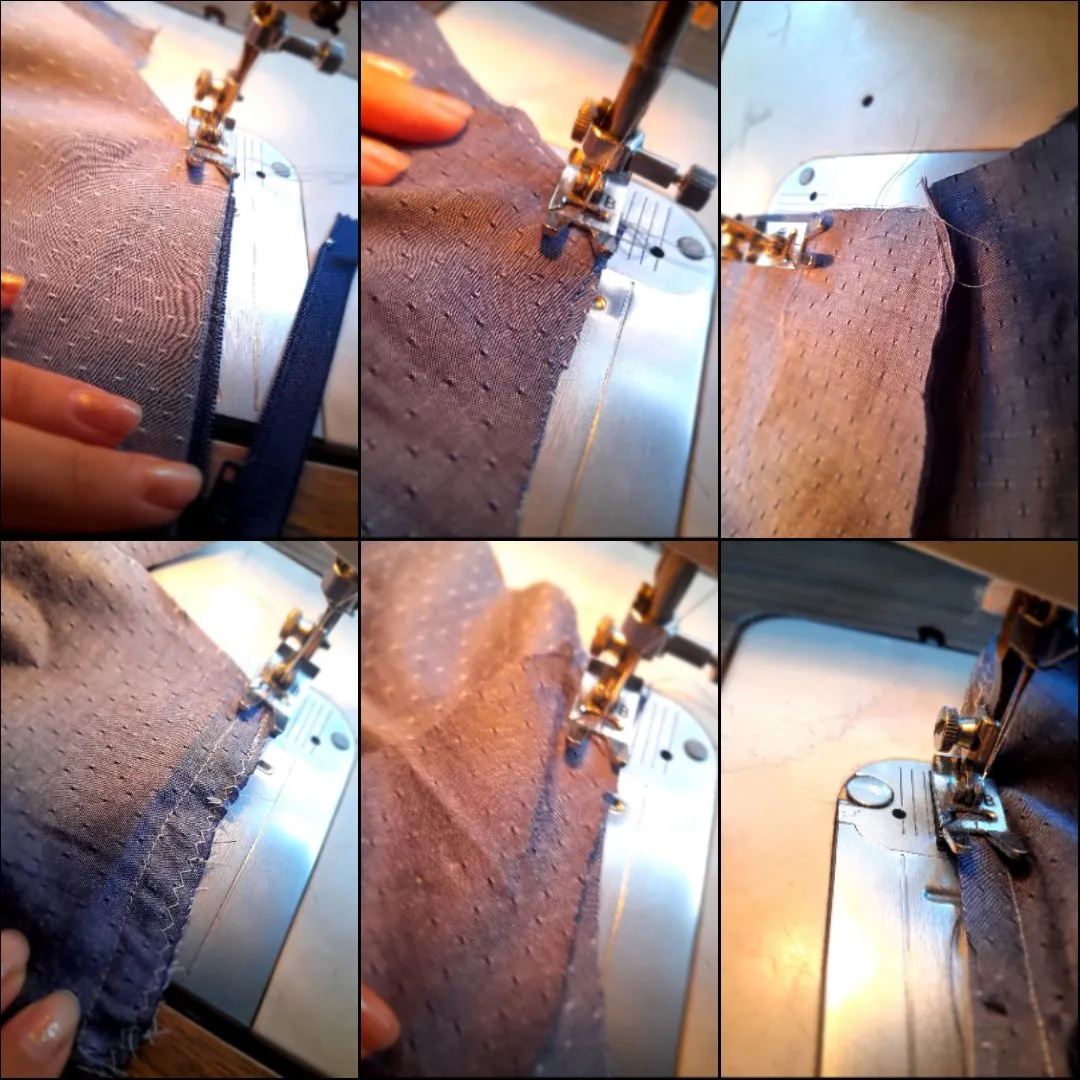
•✨️Voy a cortar dos piezas delanteras y dos piezas traseras, dos mangas, un forro frontal y dos forros traseros y un forro para la cremallera. Todo esto lo corte usando una prenda de medida como método de referencia.
•✨️Continúo cosiendo dos pinzas frontales y traseras para proporcionar forma y caída a la pieza luego voy a unir ambas piezas traseras y ambas frontales con costura recta y zigzag luego voy a coser el forro para la cremallera con costura recta.
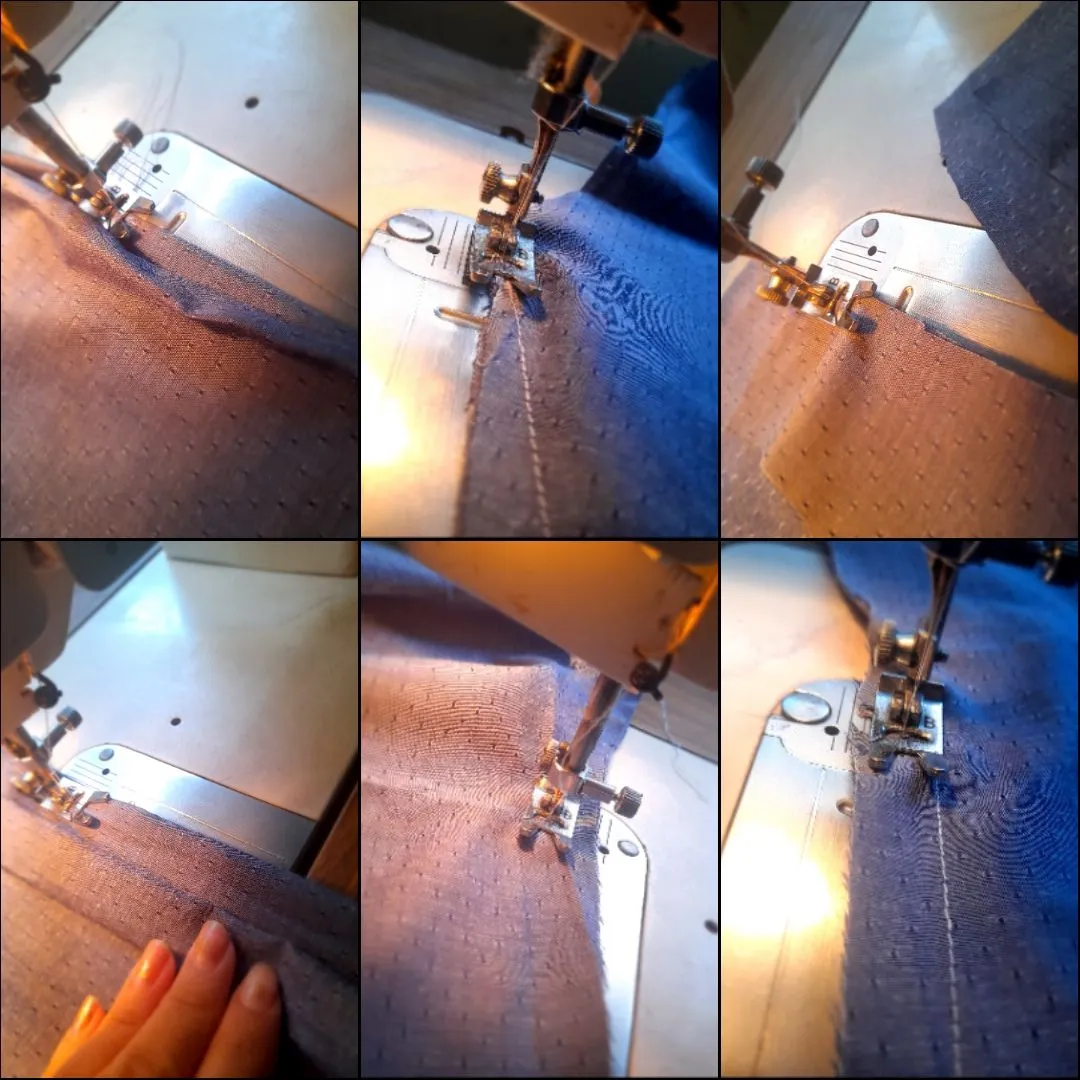
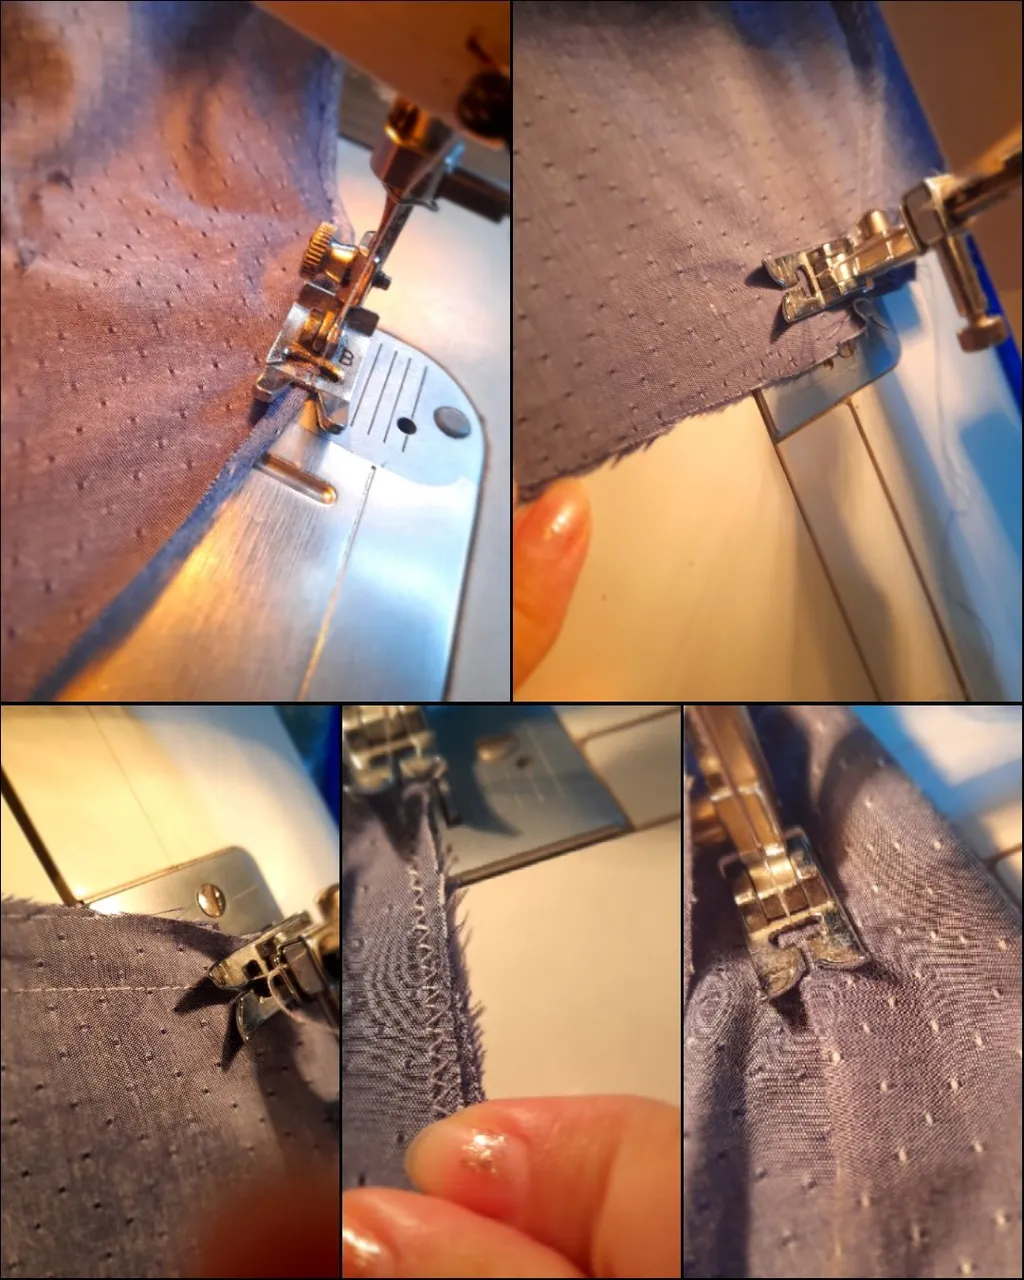
•✨️Voy a coser la cremallera en la parte trasera con una costura recta colocando las orillas del cuerpo de la pieza por encima de la cremallera luego voy a coser las orillas superiores colocandolas en el lado derecho de la tela y cosiendo con costura recta y zigzag y luego unir ambas piezas en la parte de los hombros con costura recta y zigzag para asegurar y sigo cosiendo las mangas con costura recta y zigzag.
•✨️Continúo cosiendo la orilla de las mangas doblando la tela y cosiendo con costura de zigzag y tensión en 1 luego voy a unir la pieza en ambos extremos con costura recta y zigzag para asegurar y luego culminar cosiendo el ruedo doblando la tela y cosiendo con costura recta.
💙🌼🦋Resultados🦋🌼💙
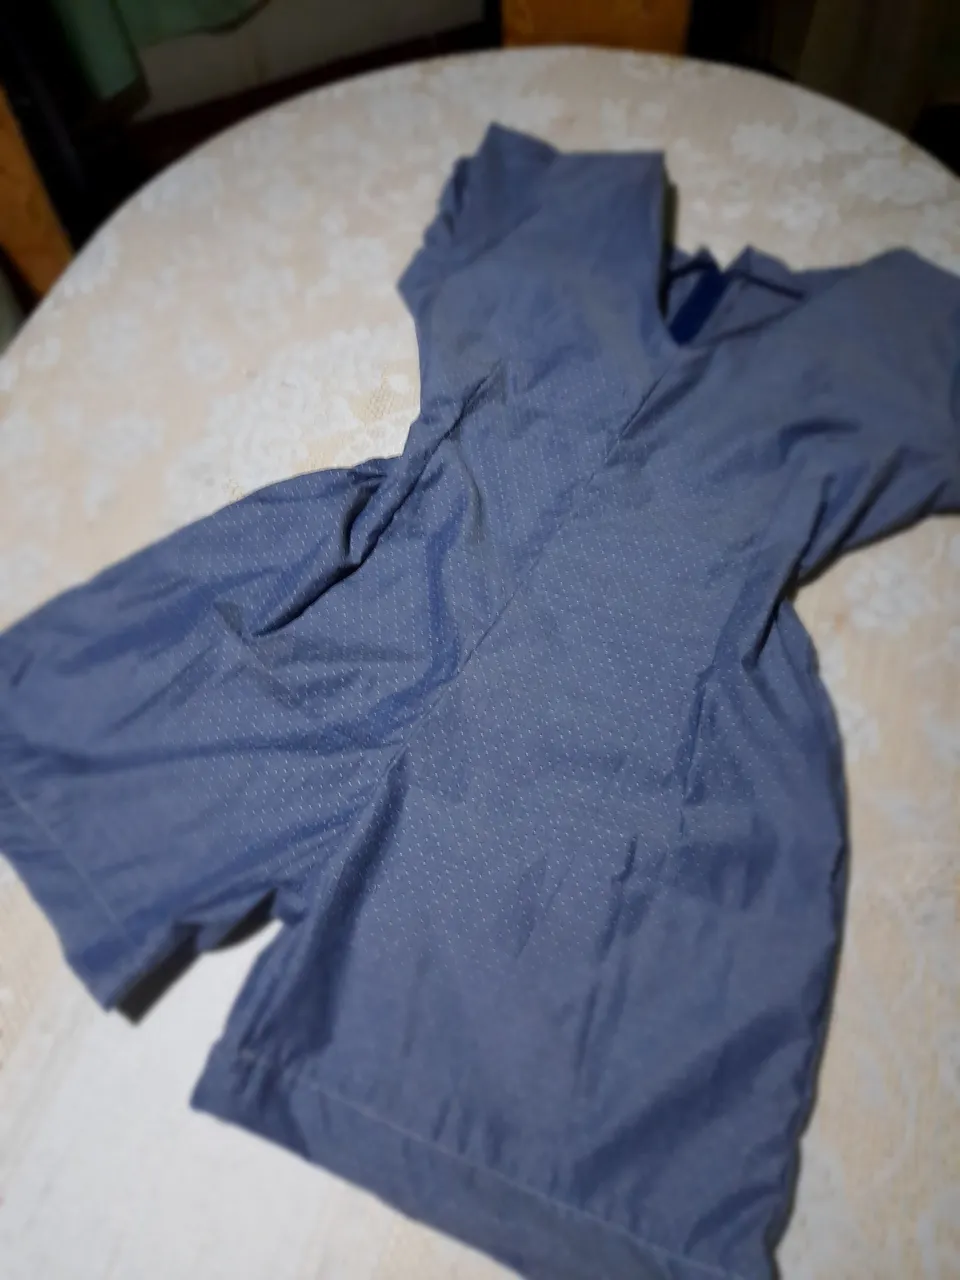
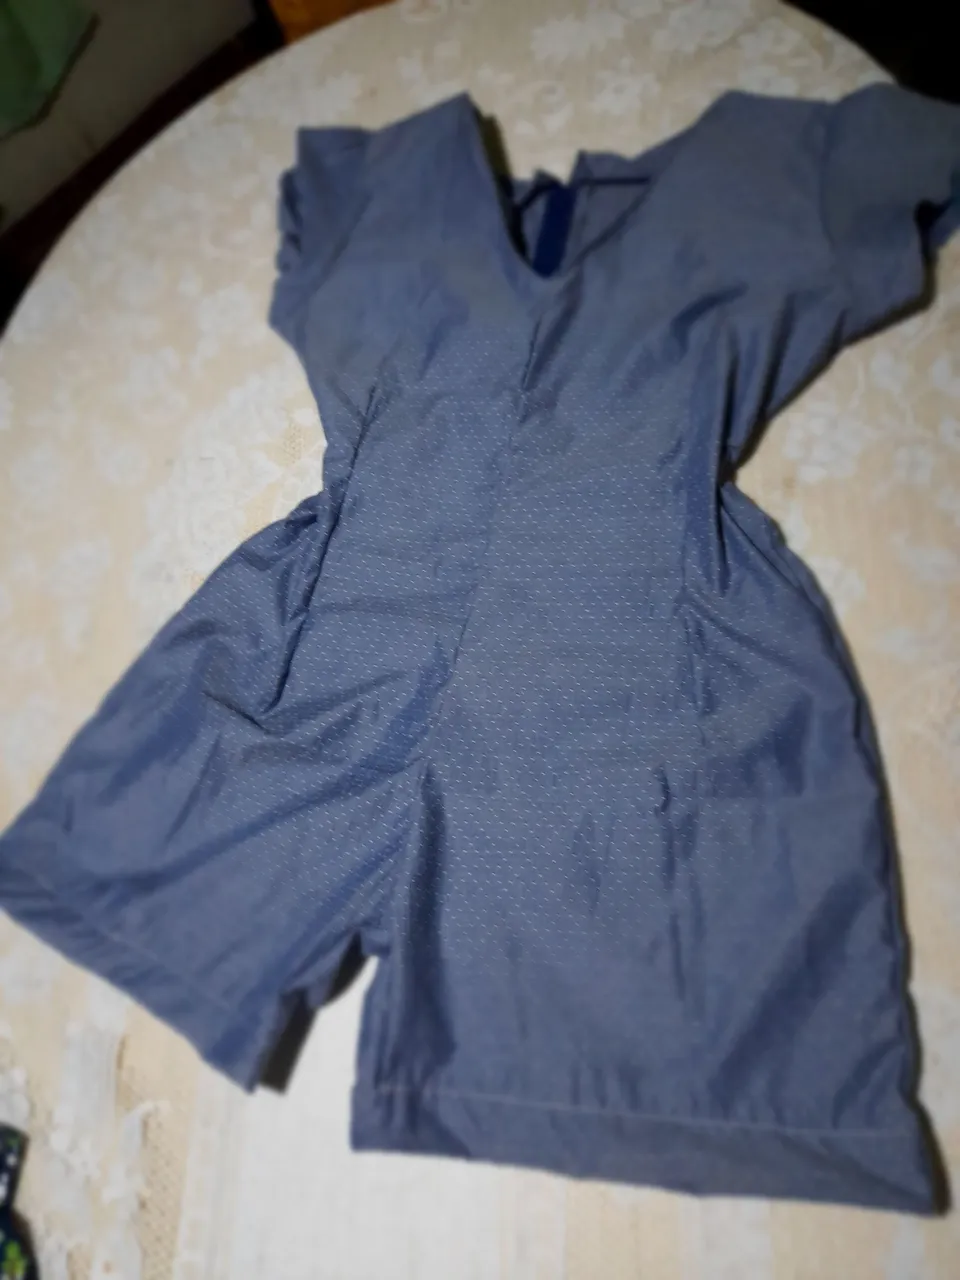
Es un diseño muy sencillo y lindo que contrasta ideal para un look casual ✨️ sus pinzas favorecen a la forma de la pieza resaltando todas las curvas de las reinas ❤️ me alegra mucho haber estado acá compartiendo con todos ustedes espero les haya gustado mi post ✨️ saludos y muy buenas noches para todos gracias por haber tomado un minuto para leer 💕.
💙🌼🦋English🦋🌼💙
Very good night to all dear friends of Hive ✨️ I hope you are well enjoying the night and that everyone had a great day 😉 Special greetings to everyone in this creative #Diy community ❤️ it is a great pleasure to greet you and share this little one with you space dedicated to sewing ✨️ today I would like to show you the design and making of a beautiful short jumpsuit for women and the process to follow to make yours. Come and join me ✨️
These were the materials I used
• Sewing machine
• Scissors
• Sewing thread
• Fabric
• Measurement garment
• Zipper
✨️Steps✨️
•✨️I'm going to cut two front pieces and two back pieces, two sleeves, a front lining and two back linings and a zipper lining. I cut all of this using a garment measurement as a reference method.
•✨️I continue sewing two front and back darts to provide shape and drape to the piece then I am going to join both back pieces and both front pieces with straight and zigzag sewing then I am going to sew the lining for the zipper with straight seam.
•✨️I am going to sew the zipper on the back with a straight seam placing the edges of the body of the piece above the zipper then I am going to sew the upper edges placing them on the right side of the fabric and sewing with a straight and zigzag seam and then join both pieces at the shoulder part with straight and zigzag seams to secure and I continue sewing the sleeves with straight and zigzag seams.
•✨️I continue sewing the edge of the sleeves by folding the fabric and sewing with a zigzag seam and tension in 1 then I will join the piece at both ends with a straight and zigzag seam to secure and then finish by sewing the hem by folding the fabric and sewing with straight seam.
💙🌼🦋Results🦋🌼💙
It is a very simple and cute design that contrasts ideal for a casual look ✨️ its clips flatter the shape of the piece, highlighting all the curves of the queens ❤️ I am very happy to have been here sharing with all of you I hope you liked my post ✨️ greetings and a very good night everyone, thank you for taking a minute to read 💕.
💁♀️Todas las fotografías son de mi autoría capturadas con mi Samsung Galaxy A12 y editadas en GridArt.
El texto y resumen es totalmente de mi autoría.
Texto traducido en el traductor Google.💁♀️
💁♀️All the photographs are my own, captured with my Samsung Galaxy A12 and edited in GridArt.
The text and summary is entirely my own.
Translated text in Google translator.💁♀️