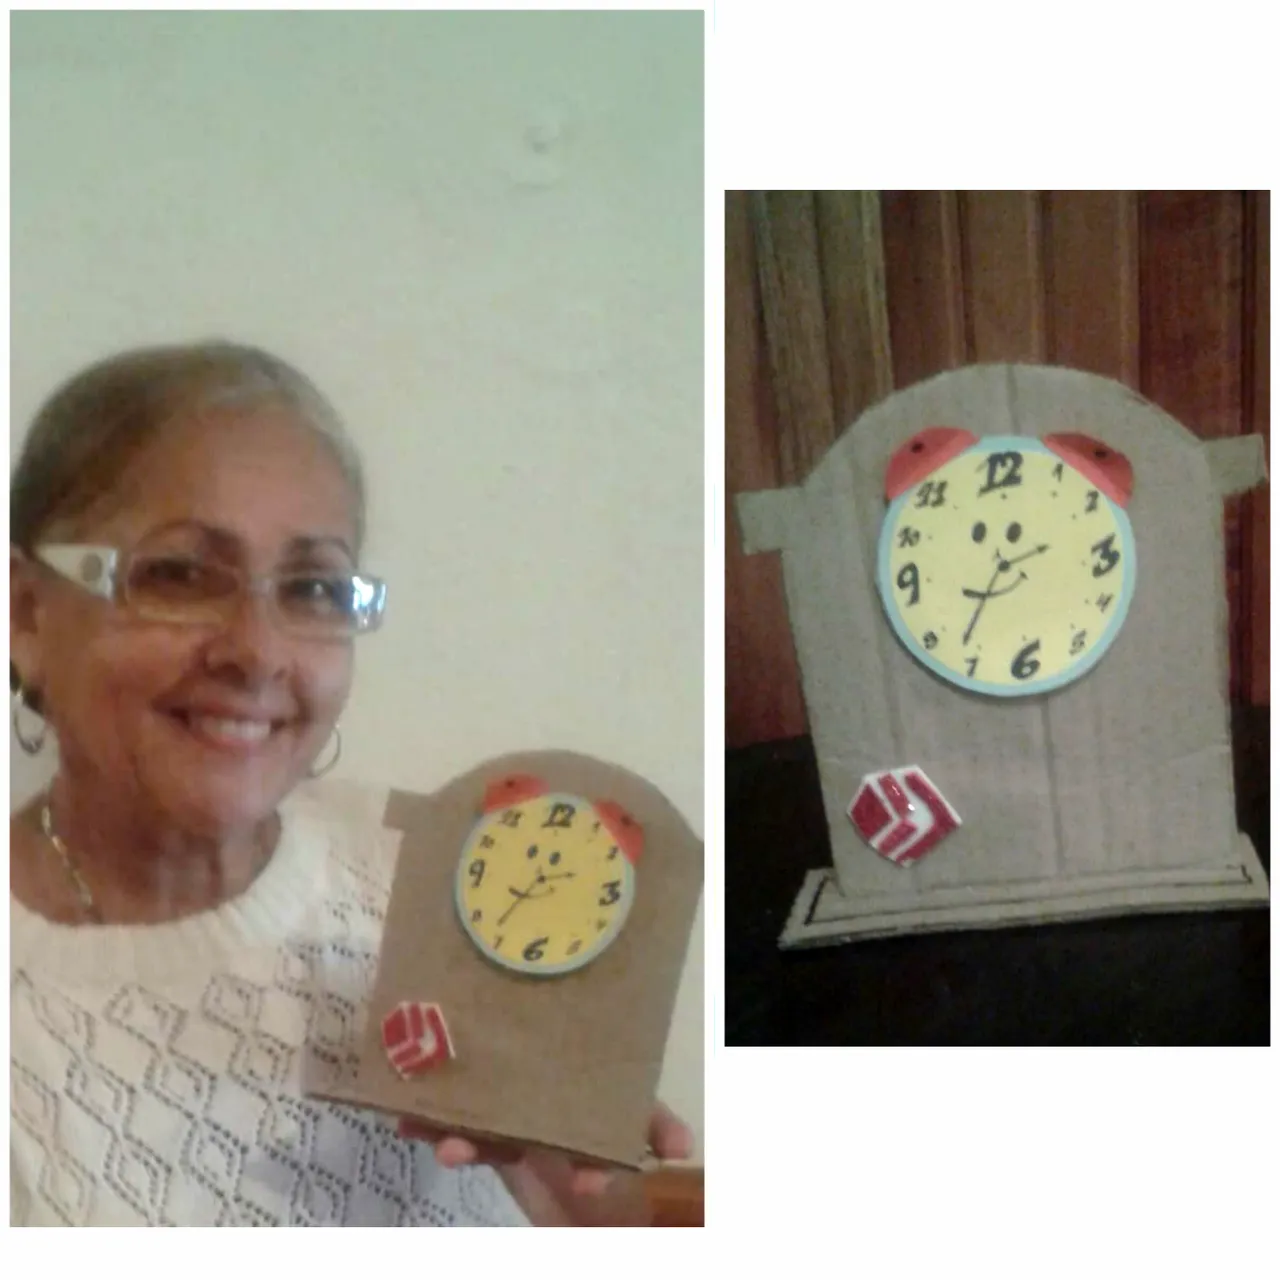
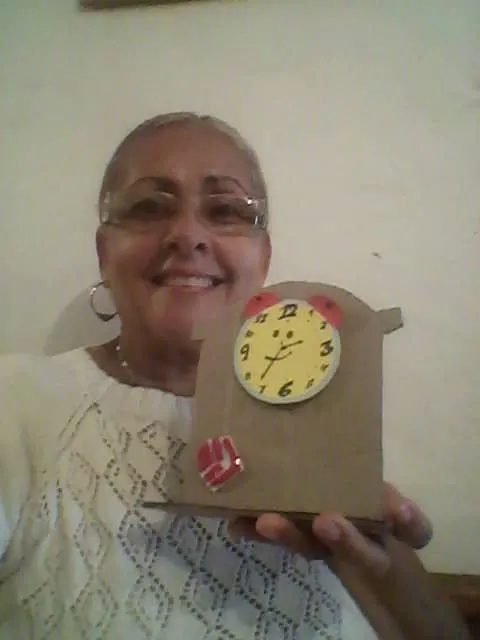
Hello my dear friends of #hive, I hope you are in excellent condition. today I want to share with you a beautiful decorative clock, with recyclable material. very simple to do, you just have to have the will and dedication.
Hola mis queridos amigos de #hive, espero se encuentren en excelente. hoy quiero compartirles un hermoso reloj decorativo, con material reciclable. muy sencillo de realizar solo hay que tener las ganas y dedicación.
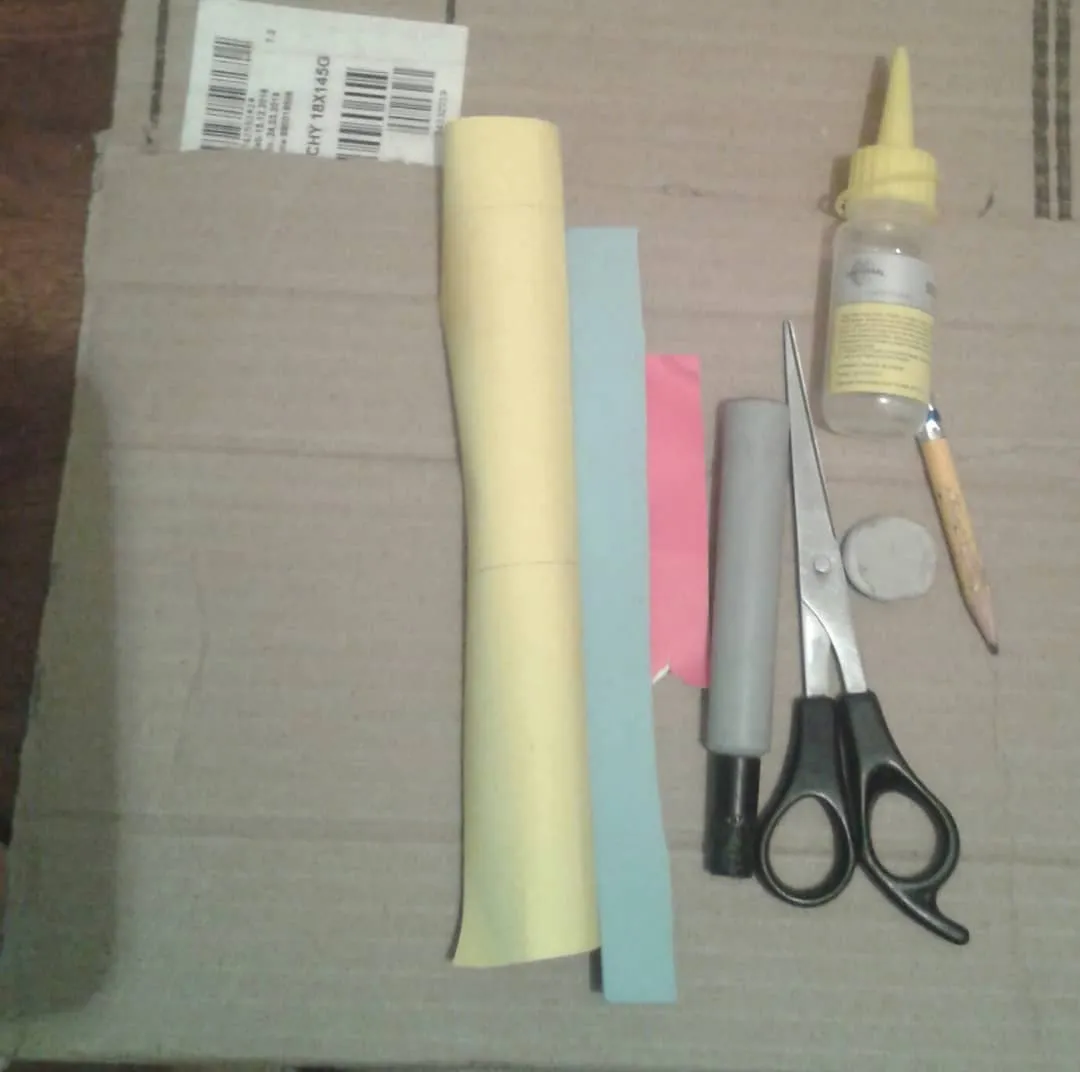
Materials.
▪︎cardboard.
▪︎black marker.
▪︎ yellow, blue and red card.
▪︎silicon.
▪︎scissors.
Materiales.
▪︎cartón.
▪︎marcador negro.
▪︎cartulina amarilla, azul y roja.
▪︎silicon.
▪︎tijera.
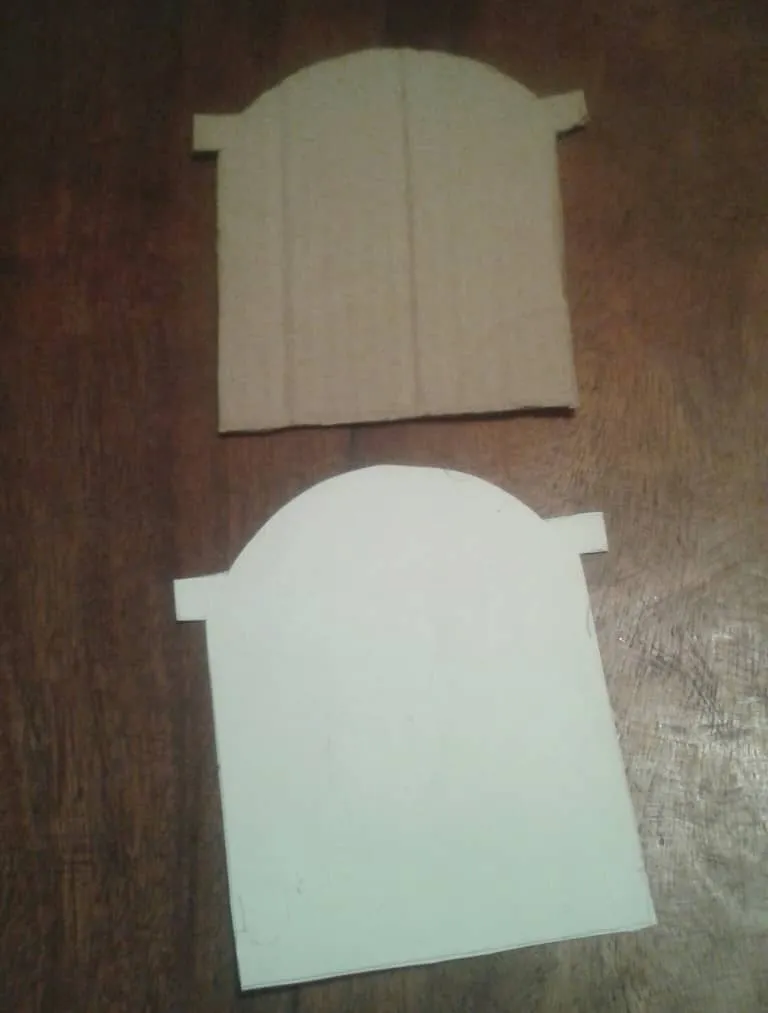
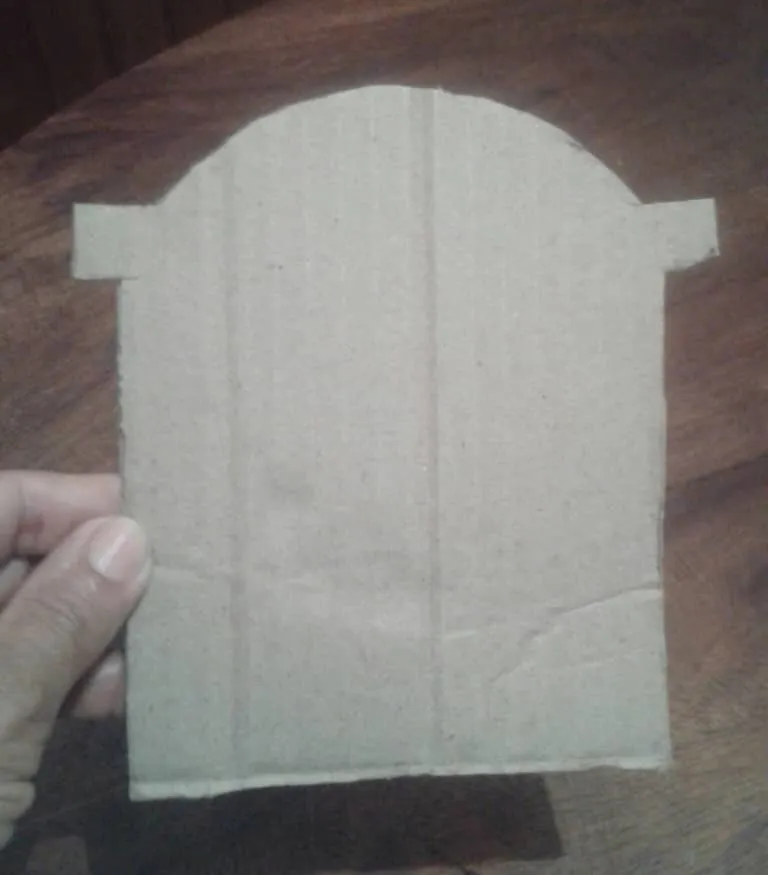
Step 1
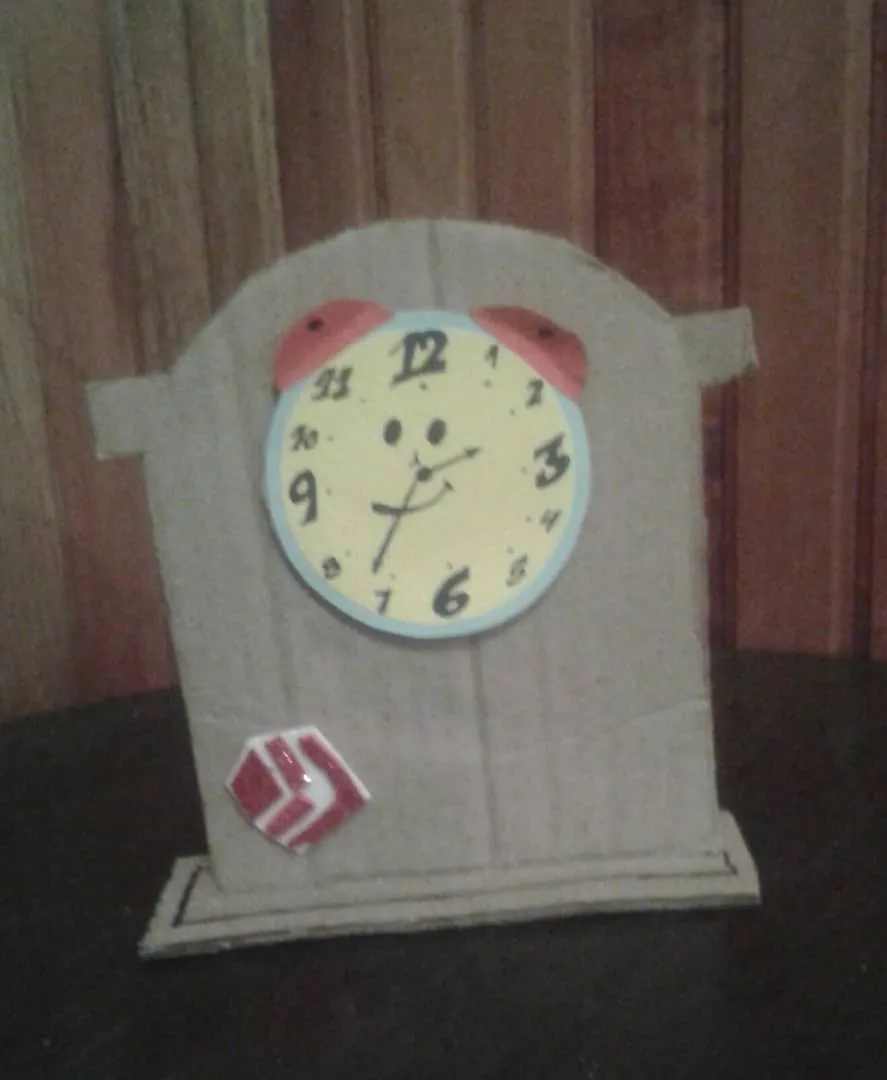
We take the piece of cardboard. And we make the shape of an old clock. And we cut. In which we would stay as well as in the following photos.
Paso 1
Tomamos el pedazo de cartón. Y hacemos la forma de un reloj antiguo. Y recortamos. En lo cual nos quedaría así como en las siguientes fotos.
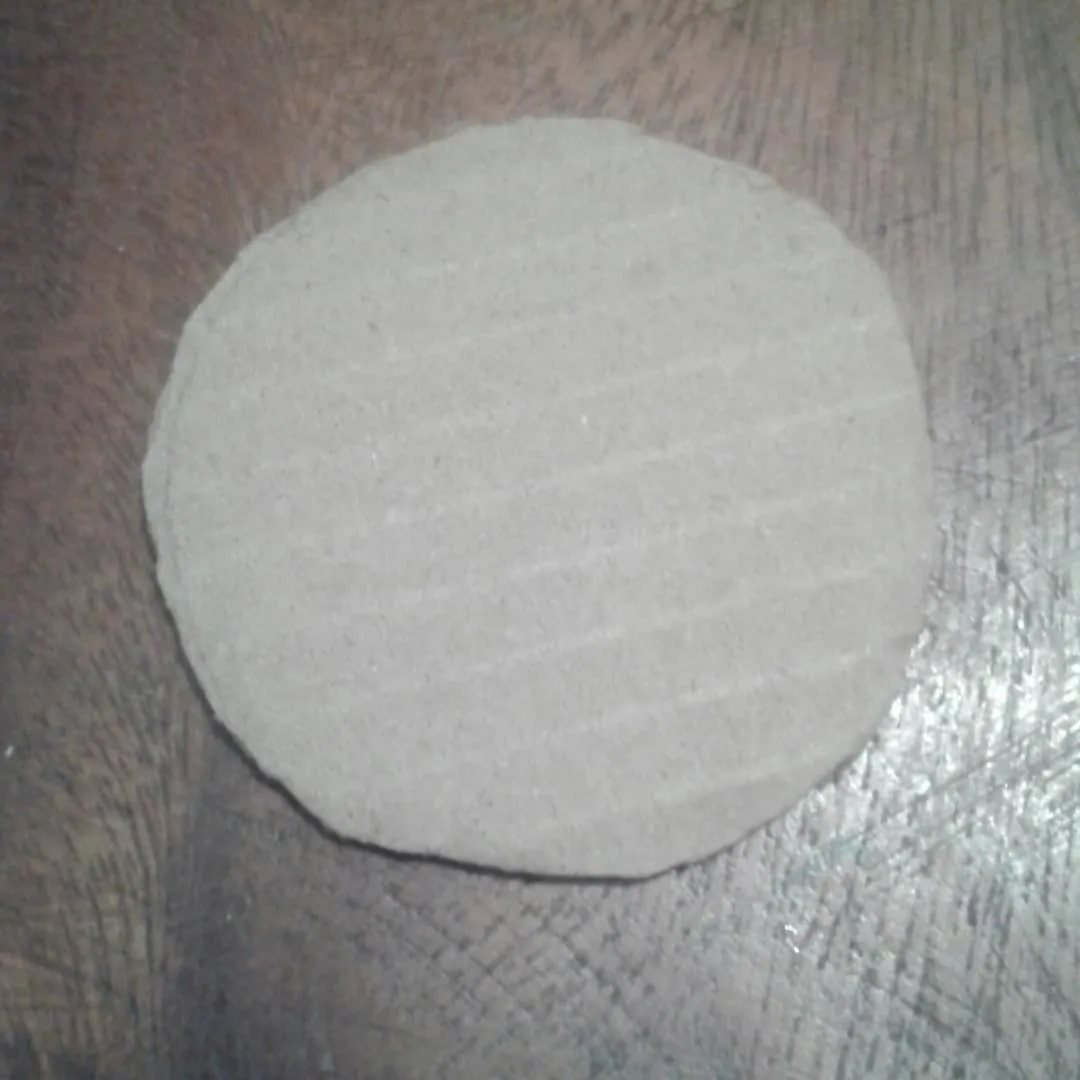
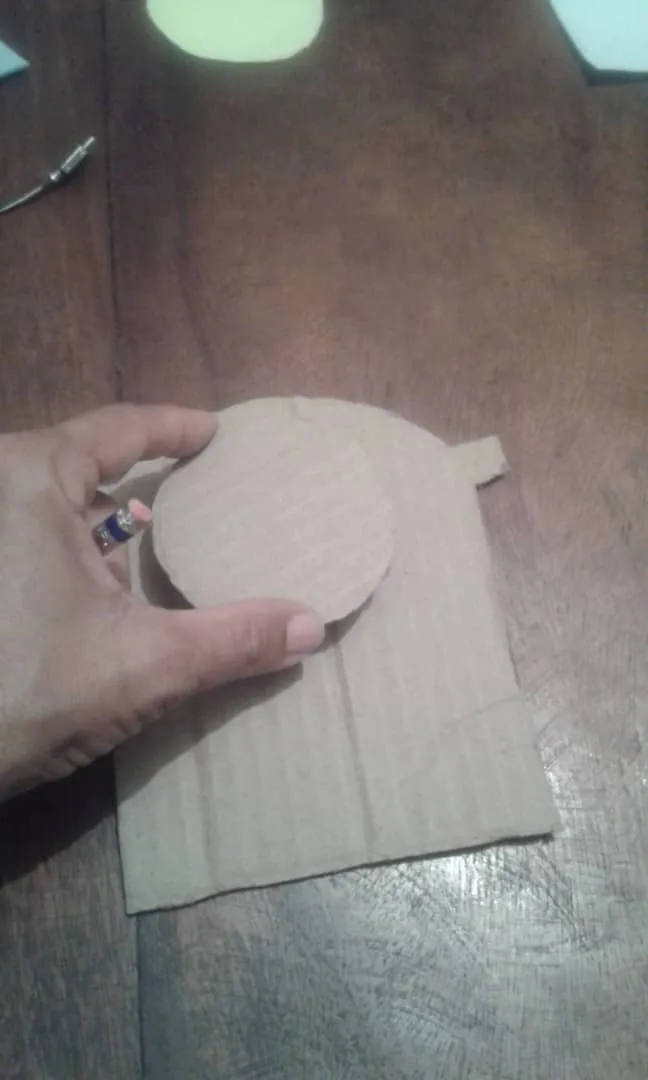
Step 2
With another piece of cardboard, we make a circumference and then glue it in the shape of the clock. It would look like this.
Paso 2
Con otro pedazo de Cartón, hacemos una circunferencia y luego la pegamos en la forma del reloj. Nos quedaría asi.

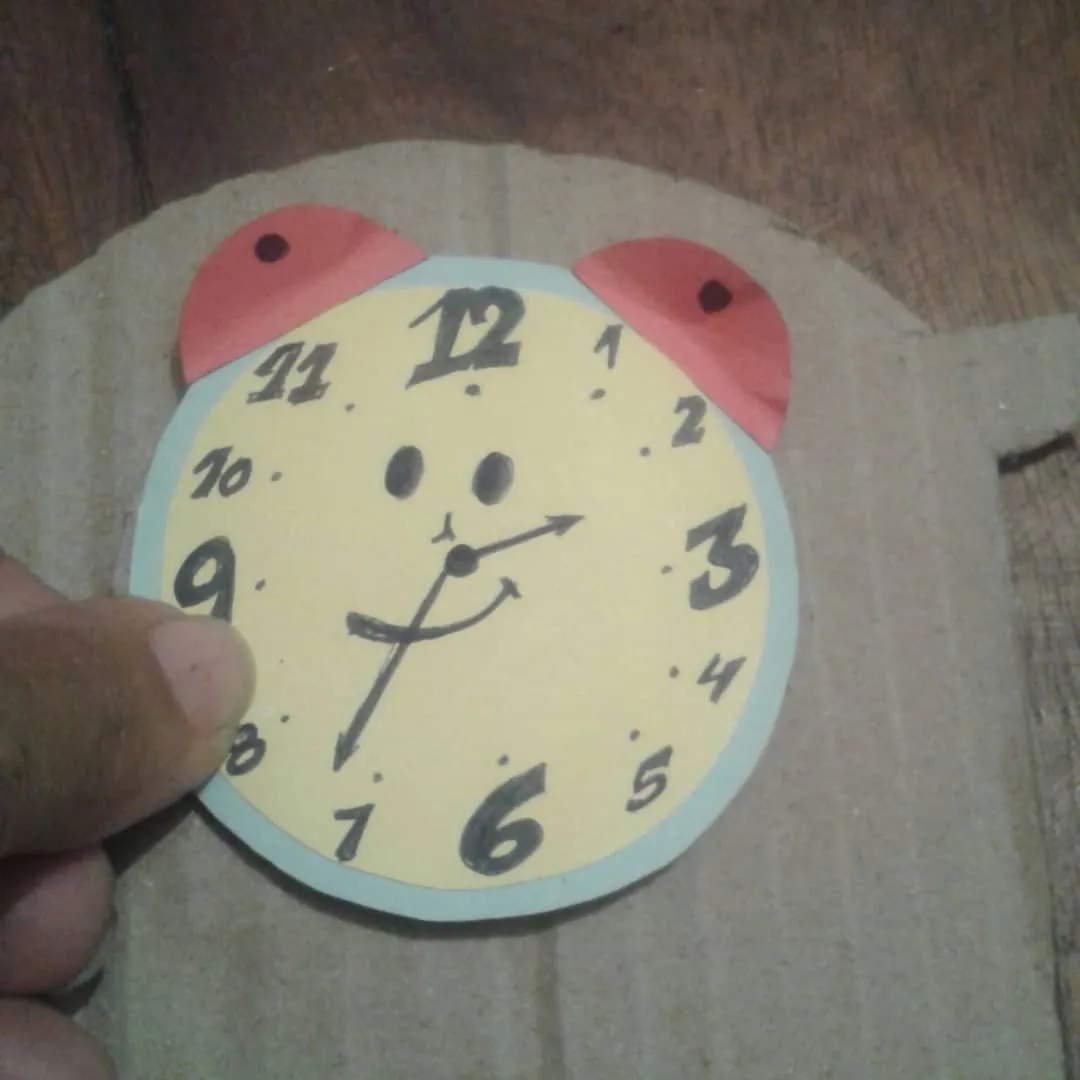
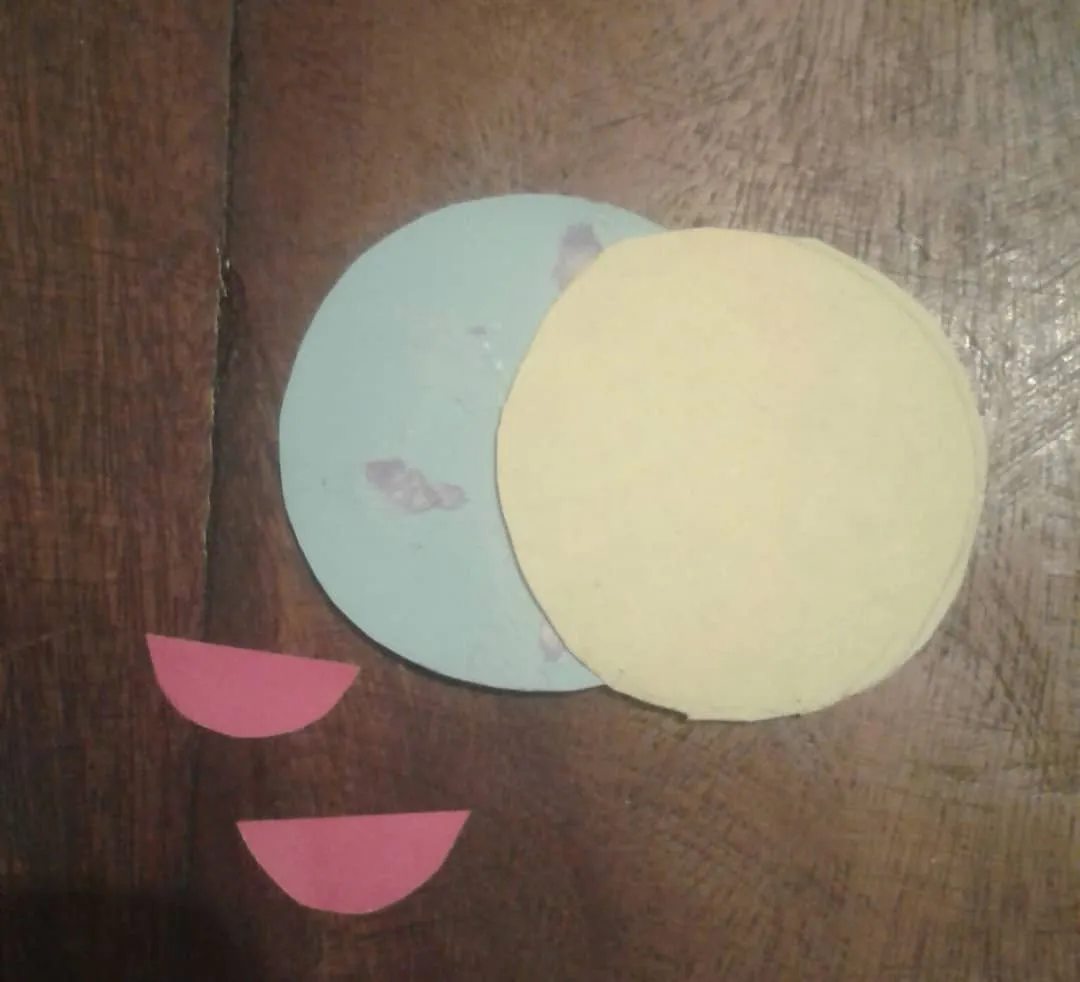
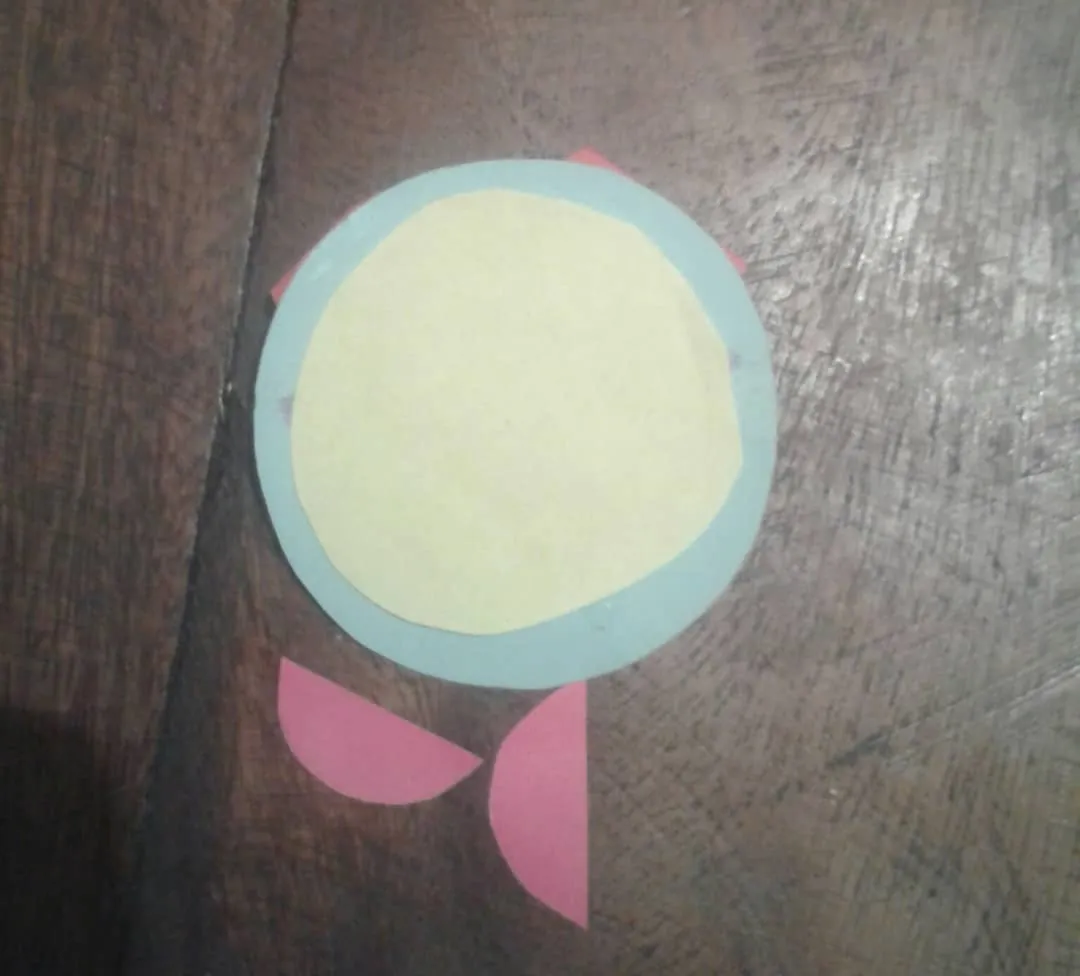
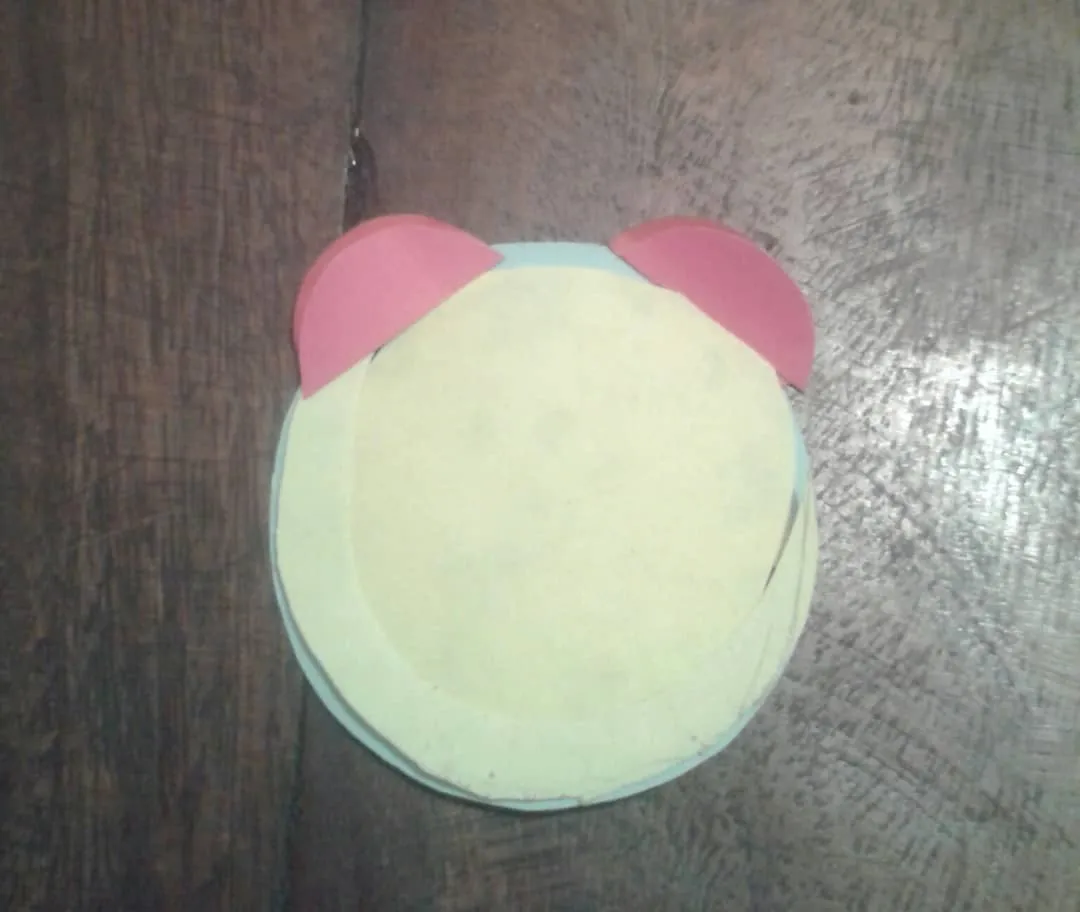
Step 3
In this step we are going to use the cardboard. Cutting 2 circumference the blue one bigger than the yellow one. And with the red cardboard we make two little ears. And we are hitting. In the following photos I will show you in detail.
Paso 3
En este paso vamos a utilizar las cartulinas. Recortando 2 circunferencia la azul más grande que la amarilla. Y con la cartulina roja hacemos dos orejitas. Y vamos pegando. En las siguientes fotos les mostraré detalladamente.
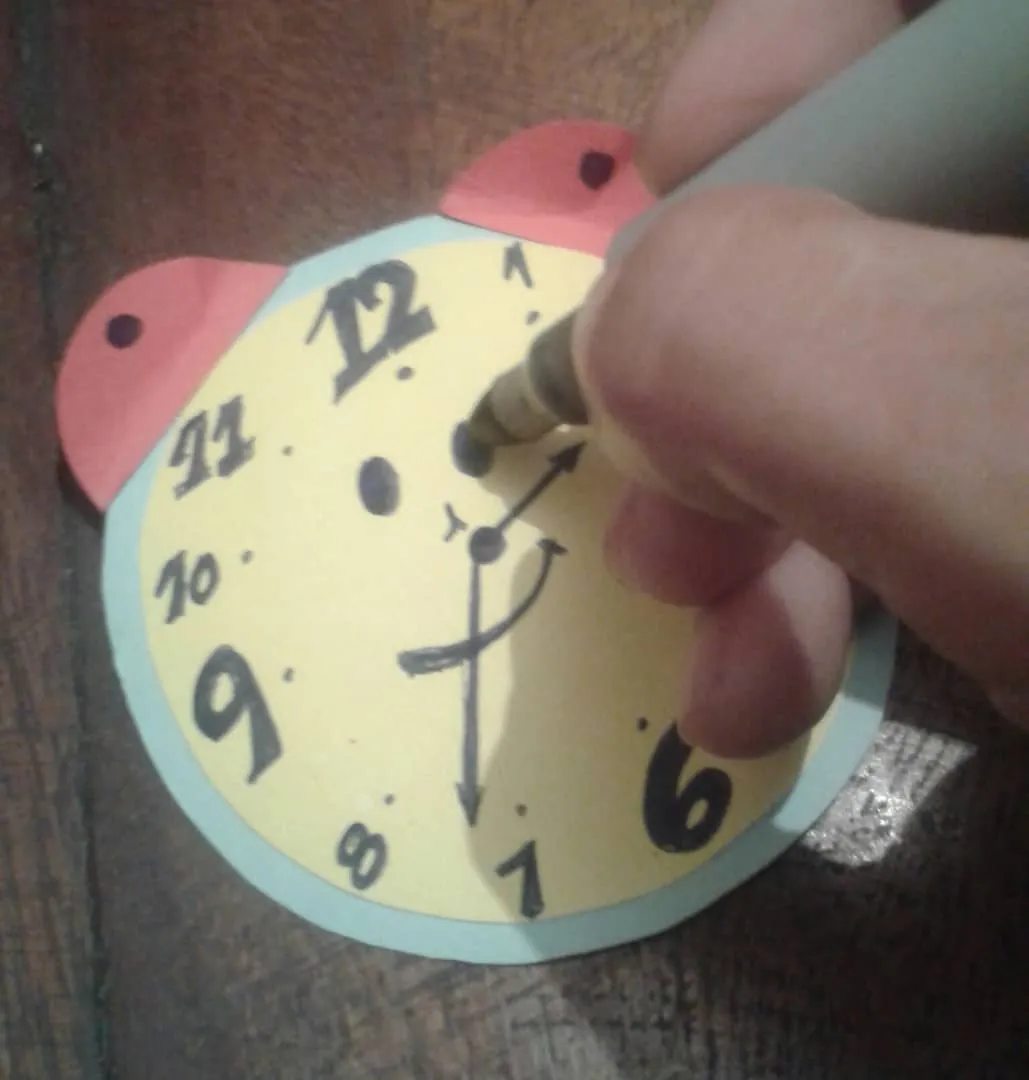
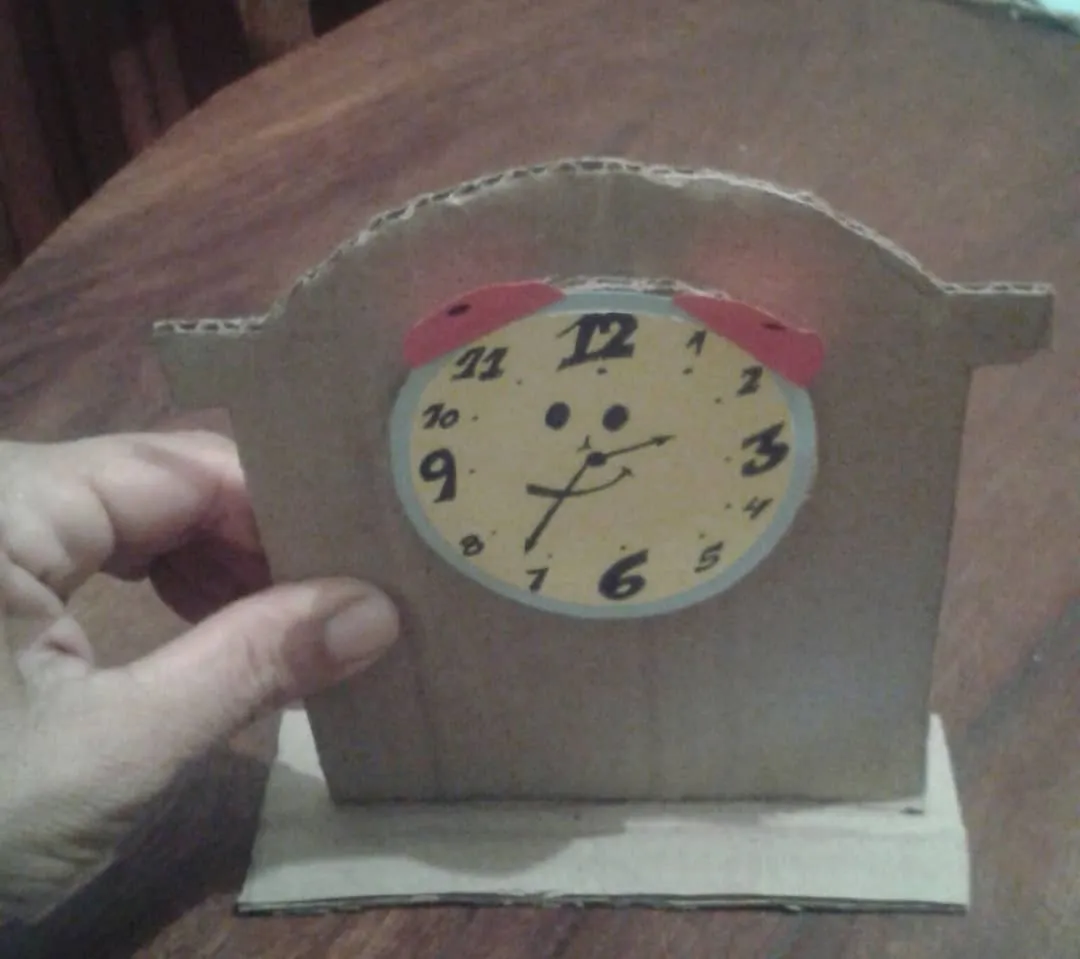
Step 4
With the black marker. We are going to draw the details on top of the ready-made cardboard, that is, draw the numbers and so on. Finally we take an elongated piece of cardboard to hold the clock. In this way.
Paso 4
Con el marcador negro. Vamos a dibujar los detalles encima de la cartulina ya lista, es decir dibujar los números y demás. Por ultimo tomamos un pedazo de cartón de forma alargada para sostener el reloj. De esta manera.