Stitch
Good Hour/ En Hora Buena
I'm very happy with the start of this new community, I love that it encompasses all the handmade arts and it's great, I'll be over here leaving my posts and enjoying all the other works.
Estoy muy contenta con el inicio de esta nueva comunidad, me encanta que engloba todas las artes manuales y es genial, estaré por aquí dejando mis publicaciones y disfrutando de todos los otros trabajos.
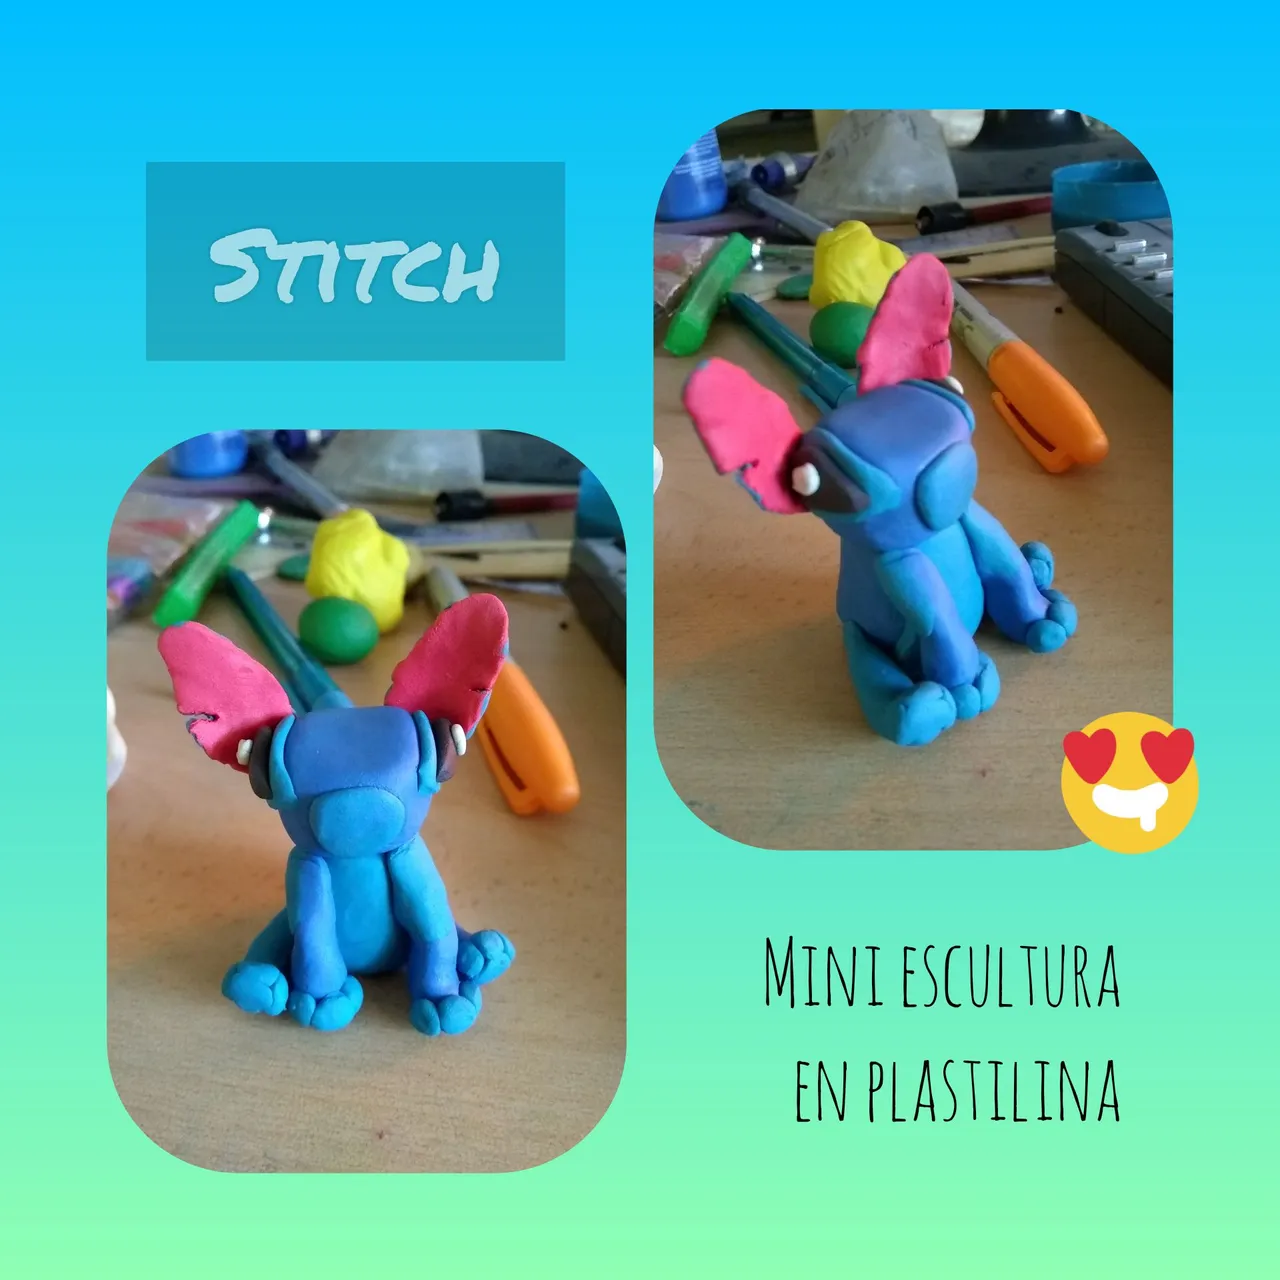
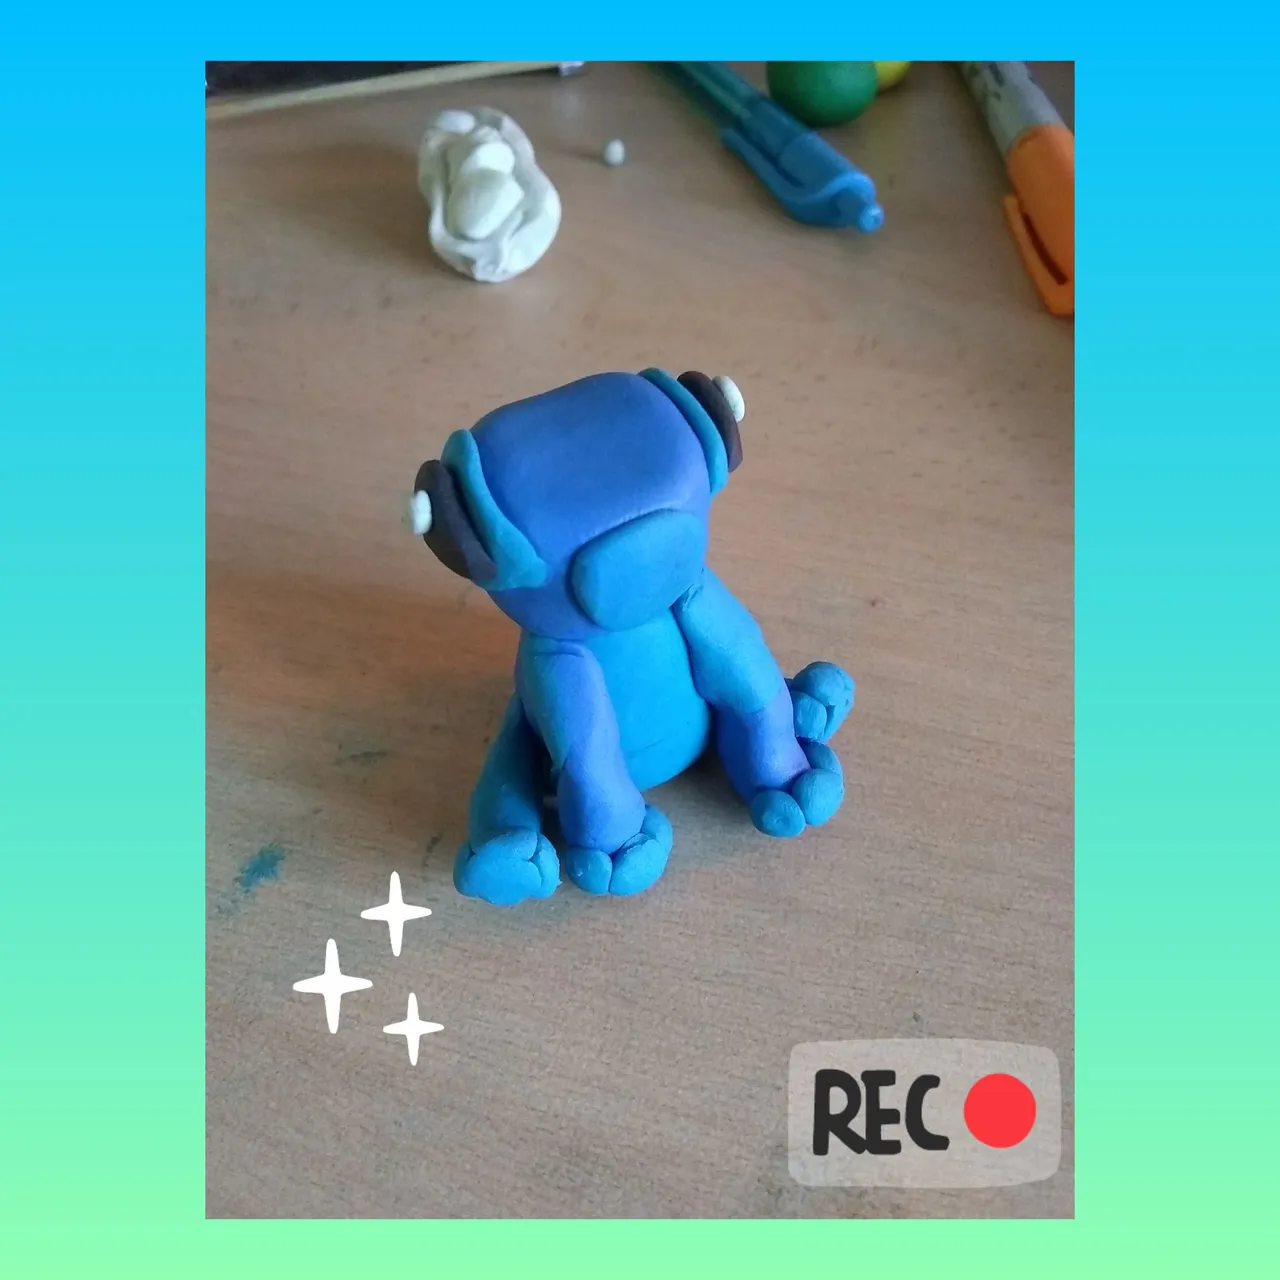
Today I present you a tutorial to make a mini sculpture in plasticine of 5cm high approximately of the sweetest alien we have ever seen Stitch ♥️.
Hoy les presento un tutorial para hacer una mini escultura en plastilina de 5cm de altura aproximadamente del alienígena más dulce que jamás hemos visto Stitch ♥️
This cute little friend arrives on earth and after being run over and mistaken for a dog, he meets Lilo, a little girl who adopts him and takes him out of the kennel, starting countless adventures.
Este simpático amiguito llega a la tierra y después de ser atropellado y confundido con un perro conoce a Lilo una niña quien lo adopta y saca de la perrera dando inicio a innumerables aventuras.
Step by Step/ Paso a Paso
1- Take a portion of plasticine, make a small ball and mold it with your fingers to give it a rounded shape. This will be Stitch's head.
1- Se toma una porción de plastilina, se hace una bolita y se moldea con los dedos para darle forma redondeada. Esta será la cabeza de stitch.

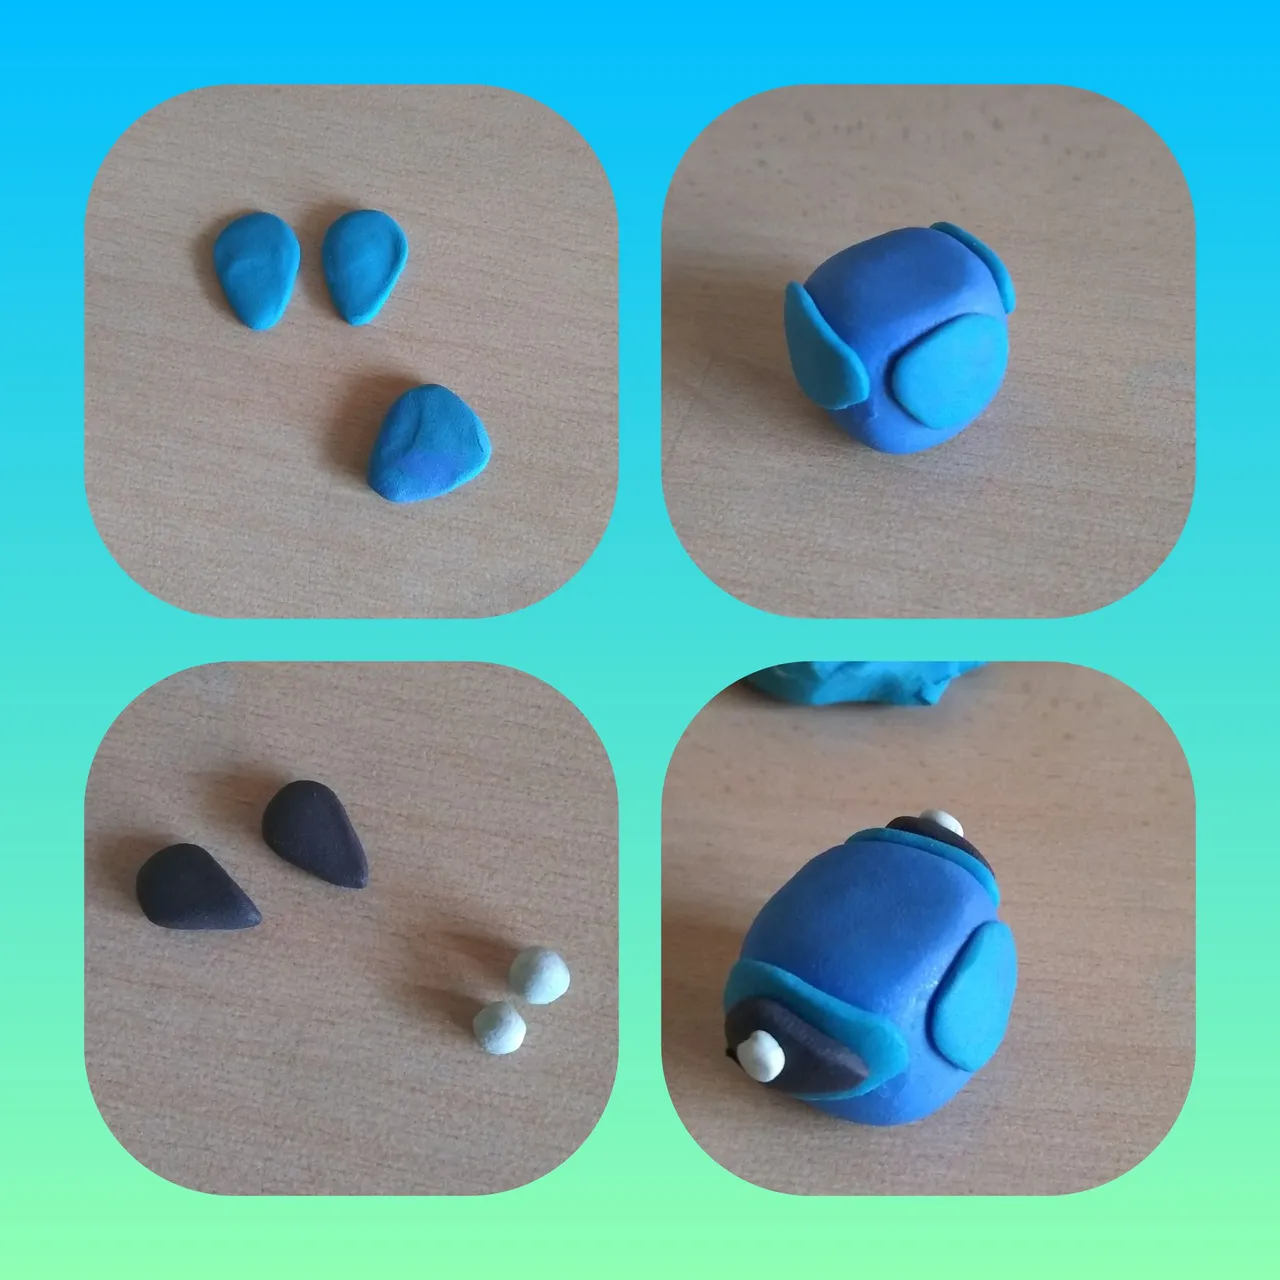
2- Take two portions of small light blue plasticine, make two little balls of plasticine and mold it forming a triangle, round the two corners and it will look like a drop. This will be for the eyes. The same is done with a flattened triangle with rounded corners that would be the nose.
2- Se toman dos porciones de plastilina celeste pequeña, se hacen dos bolitas de plastilina y se moldea formando una triángulo, redondeamos las dos esquinas y quedará como una gota. Esto serán para los ojos. Igual se hace un triángulo aplanado con las esquinas redondeadas que sería la naríz.
3- With black plasticine, repeat the procedure of forming two triangles and rounding the two corners to form a drop. They will be placed on top of the light blue details of the eyes. Form two small balls of white plasticine and place them on top of the black details.
3- Con plastilina negra se repite el procedimiento de formar dos triángulos y redondear las dos esquinas para formar una gota. Se colocarán encima de los detalles celestes de los ojos. Se forman dos bolitas de plastilina blanca y se colocan encima de los detalles negros.
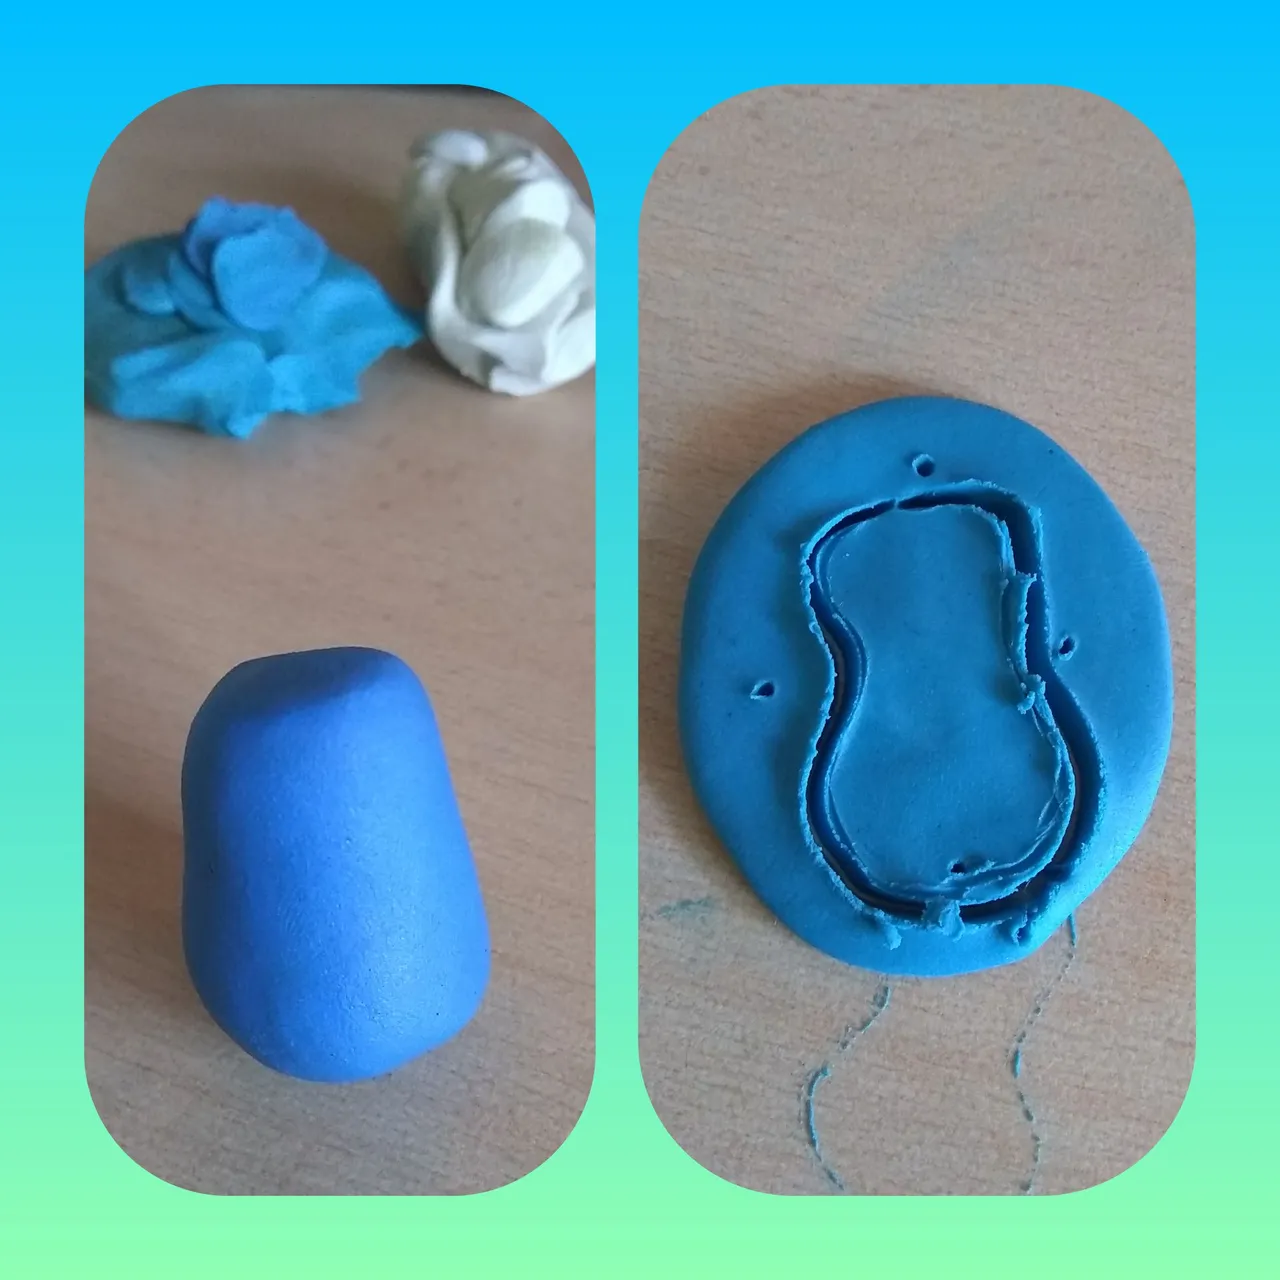
4- Take a second large portion of blue plasticine, form a small ball and press it on one side to form a cone. This will be the body of the stitch.
4- Se toma una segunda porción grande de plastilina azul, se forma una bolita y por un lado se presiona formando un cono. Este será el cuerpo de stitch.
5- Flatten light blue plasticine and draw a pear-shaped figure, this detail is placed on the front part of the body.
5- Aplanar plastilina celeste y dibujar una figura con forma de pera, ese detalle se le coloca en la parte delantera del cuerpo.
6- Join the head with the body.
6- Unimos la cabeza con el cuerpo.
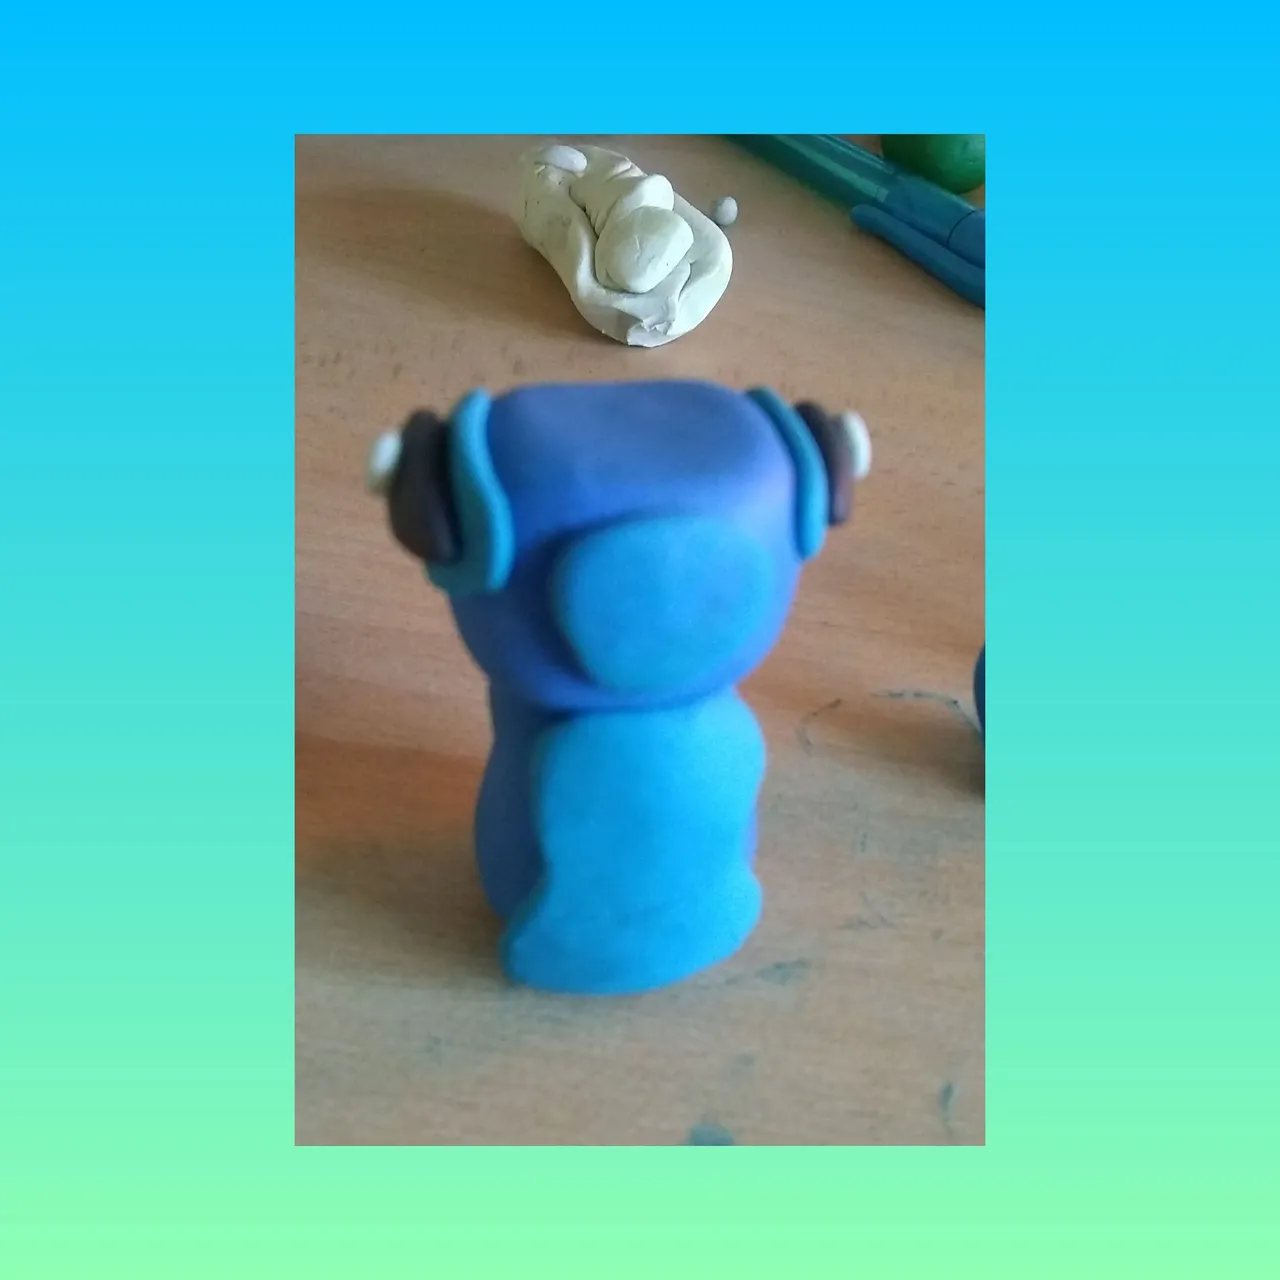
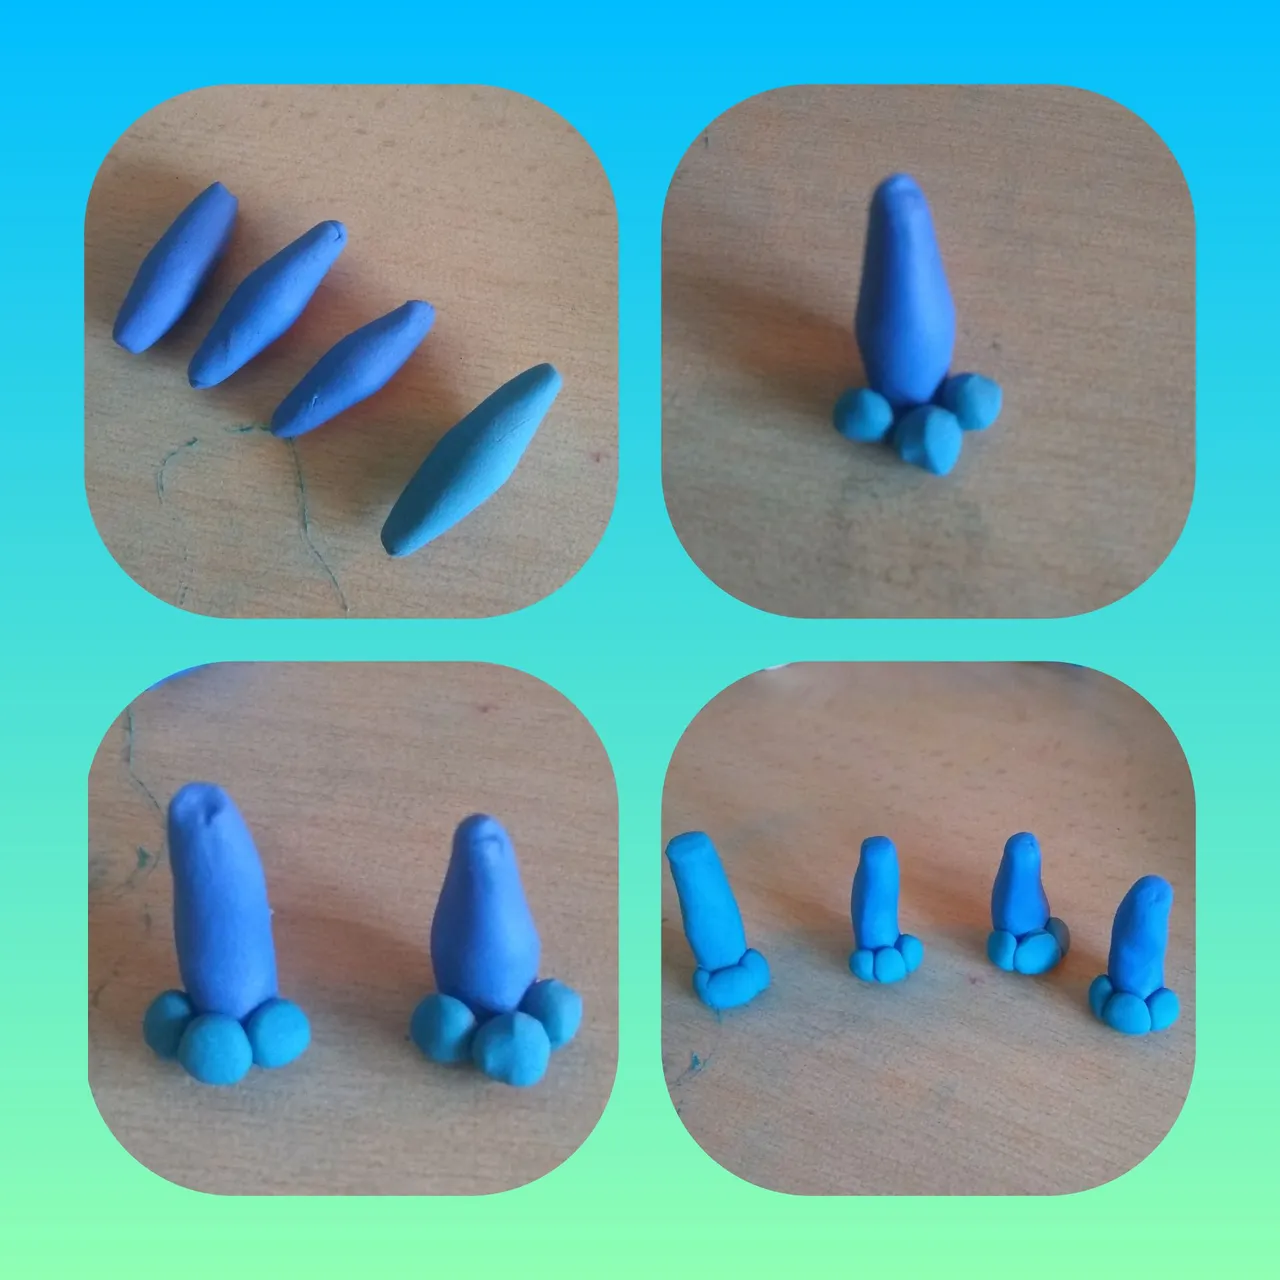
7- Form 4 plasticine sticks for the legs and place three small balls on the lower end of each stick, which would be the fingers.
7- Se forman 4 barritas de plastilina para las patas y a cada barrita se le coloca en el extremo inferior tres bolitas pequeñas que serían los dedos.
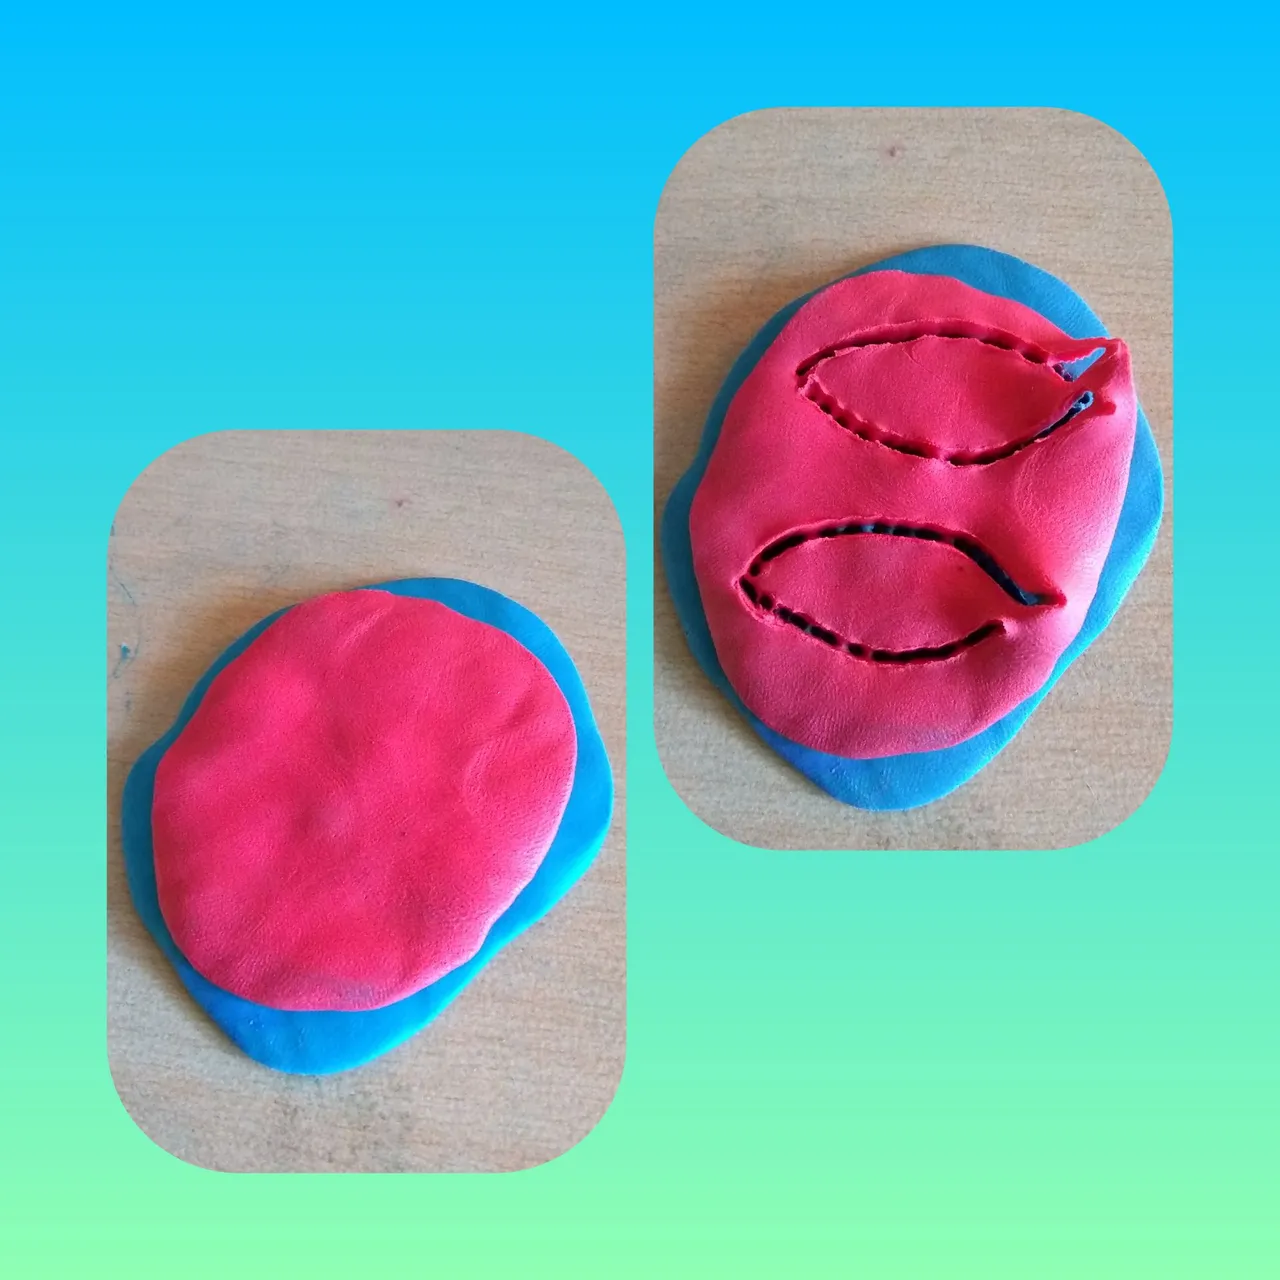
8- We flatten light blue plasticine and on top of it red plasticine to build the ears. With the help of an exacto we mark the shape of the ears, mold and finally we place them.
8- Aplanamos plastilina celeste y encima plastilina roja para construir las orejas. Con ayuda de un exacto marcamos la forma de las orejas, moldeamos y finalmente se las colocamos.
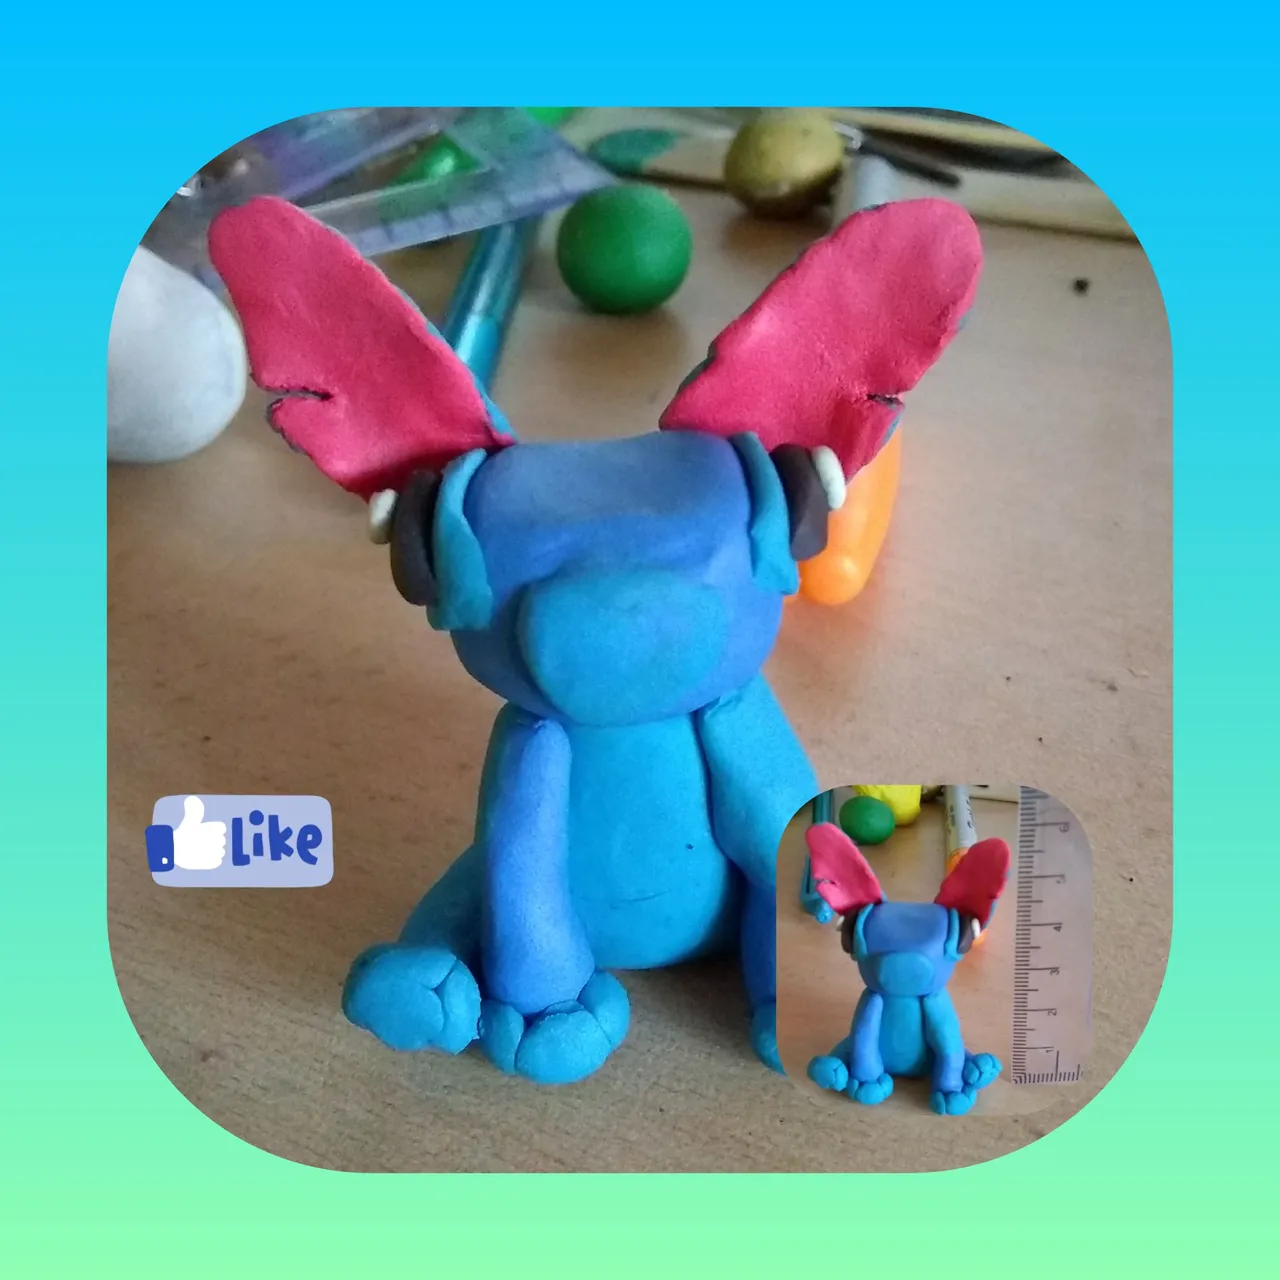
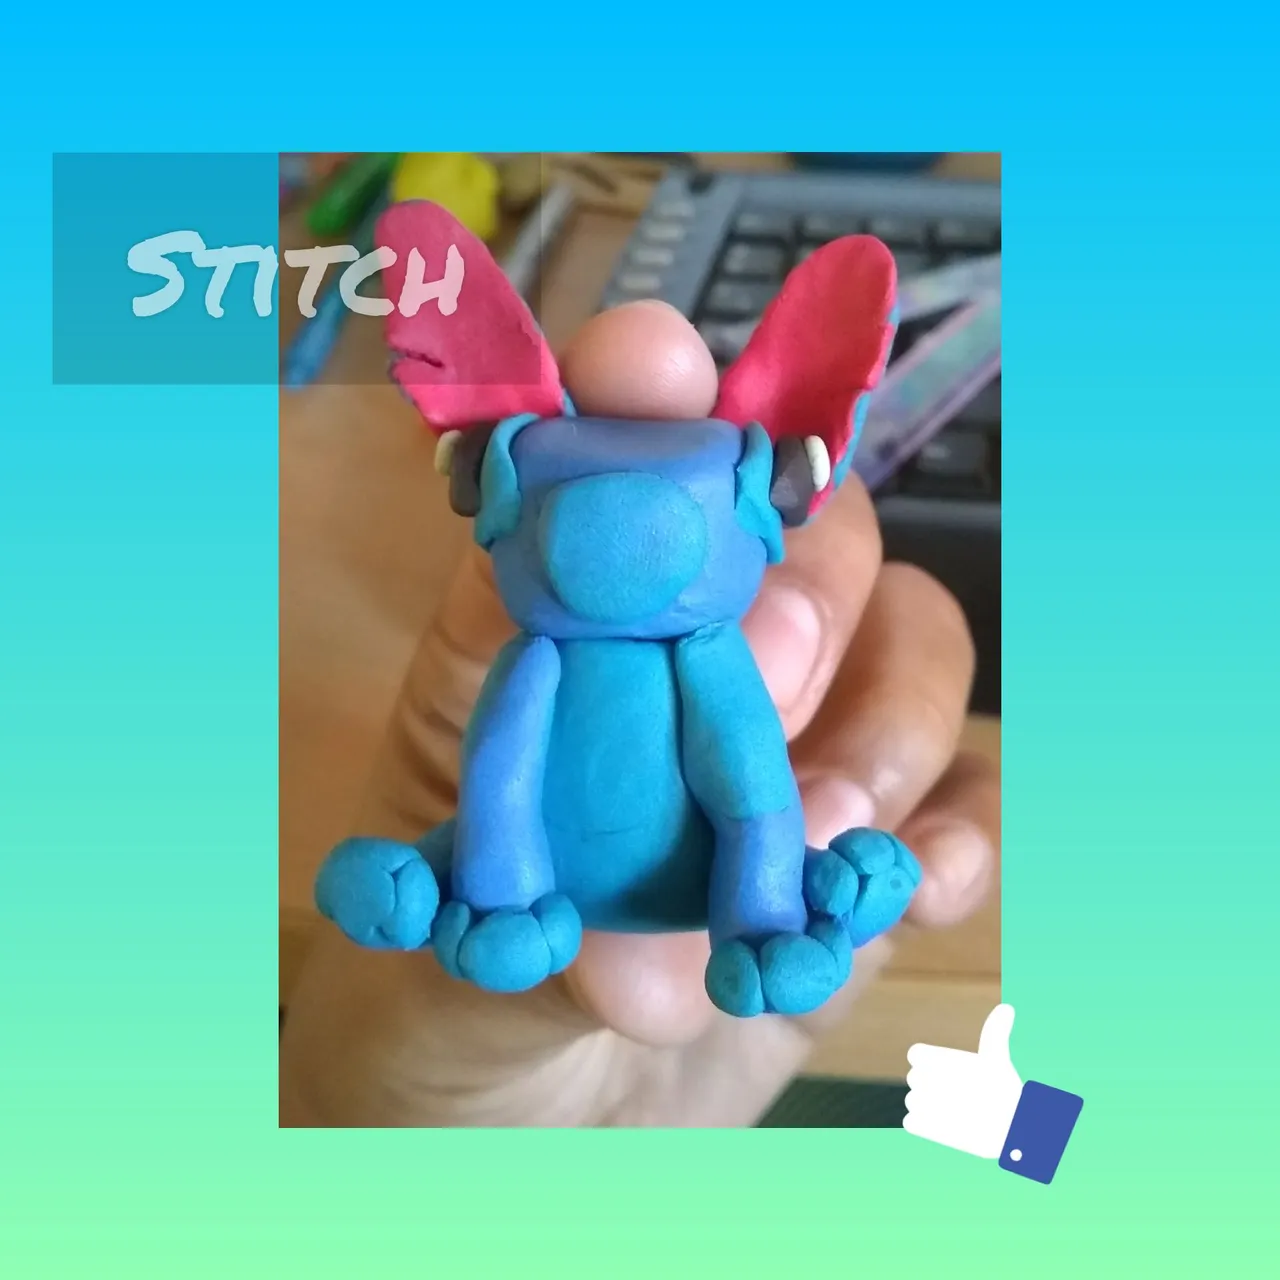
This is what the mini sculpture looks like/Así luce la mini escultura 👇🏽.
I hope you liked this and I encourage you to make it.
Espero les haya gustado y se animen hacerla.

Derechos Reservados®️ 2021
Imágenes propiedad de @pcojines