🌹BIENVENIDOS A MI BLOG | WELCOME TO MY BLOG🌹
Saludos a toda la comunidad de Hivediy! espero se encuentren bien. El día de hoy me complace compartirles mi participación en el concurso ''primavera'', donde elaboré una linda corona en forma de corazón con rosas de papel. Espero les guste y se animen a realizarlo.
Ahora sin más, comencemos.
Greetings to all the Hivediy community, I hope you are well. Today I am pleased to share with you my participation in the ''spring'' contest, where I made a cute heart-shaped wreath with paper roses. I hope you like it and I encourage you to make it.
Now without further ado, let's get started.
Materiales | Materials:
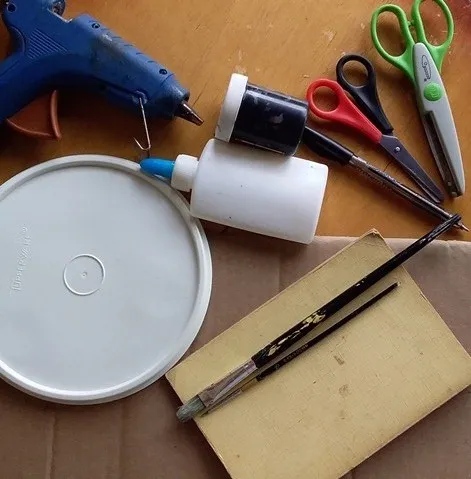
| Silicón | Lápiz | Tijeras |
|---|---|---|
| Pega blanca | Pinceles | Tapa de algún tupper |
| Pintura negra | Cartón | Libro viejo |
| Silicone | Pencil | Scissors |
|---|---|---|
| Glue | Brushes | Lid of a tupper |
| Black paint | Cardboard | Old book |
🌹 Proceso | Process 🌹
Paso 1 | Step 1
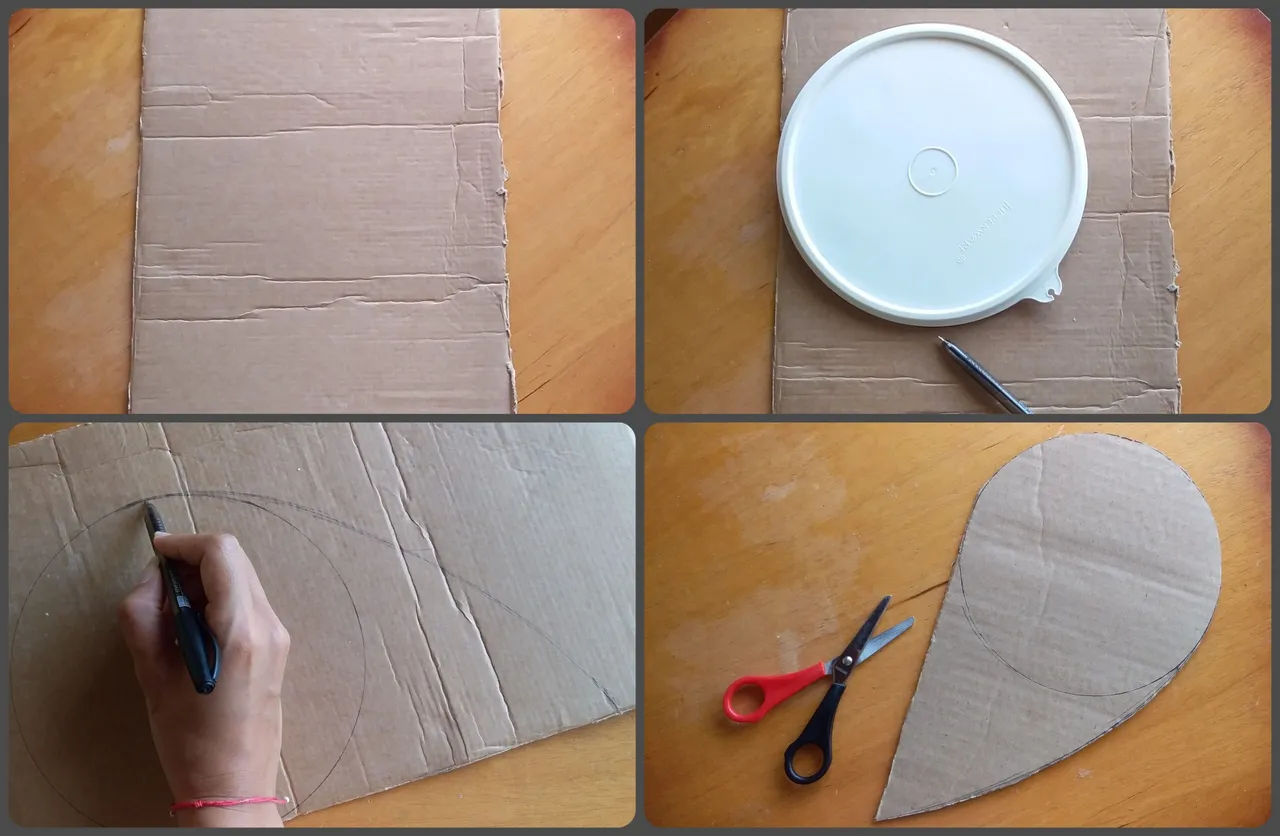
Lo primero que haremos será tomar un trozo de cartón y dibujar un círculo con ayuda de la tapa, luego trazamos una línea curva y cortamos.
The first thing we will do is to take a piece of cardboard and draw a circle with the help of the lid, then draw a curved line and cut.
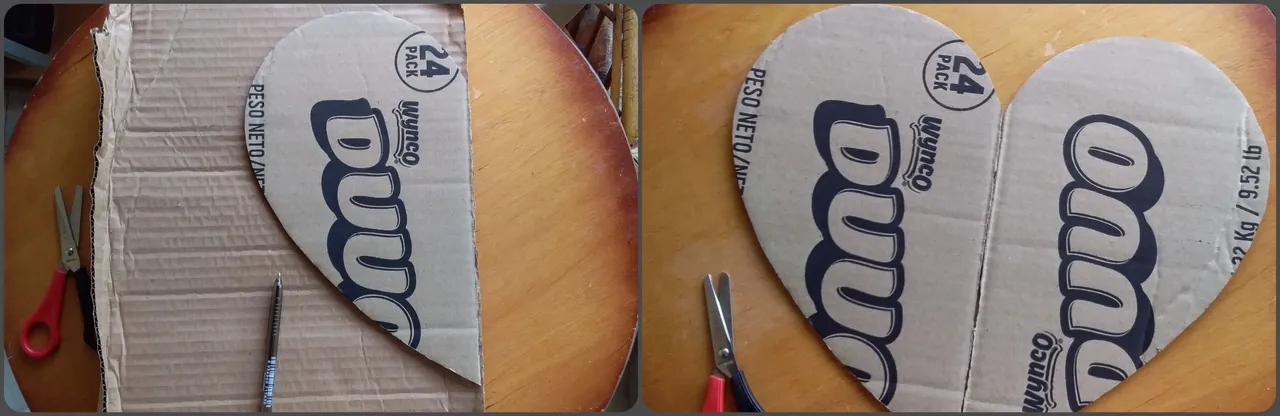
En otro trozo de cartón, ubicamos la pieza ya cortada y trazamos su silueta. Al cortar nos quedaran dos piezas iguales que juntas forman un corazón.
On another piece of cardboard, we place the already cut piece and trace its silhouette. When cut we will have two equal pieces that together form a heart.
Paso 2 | Step 2
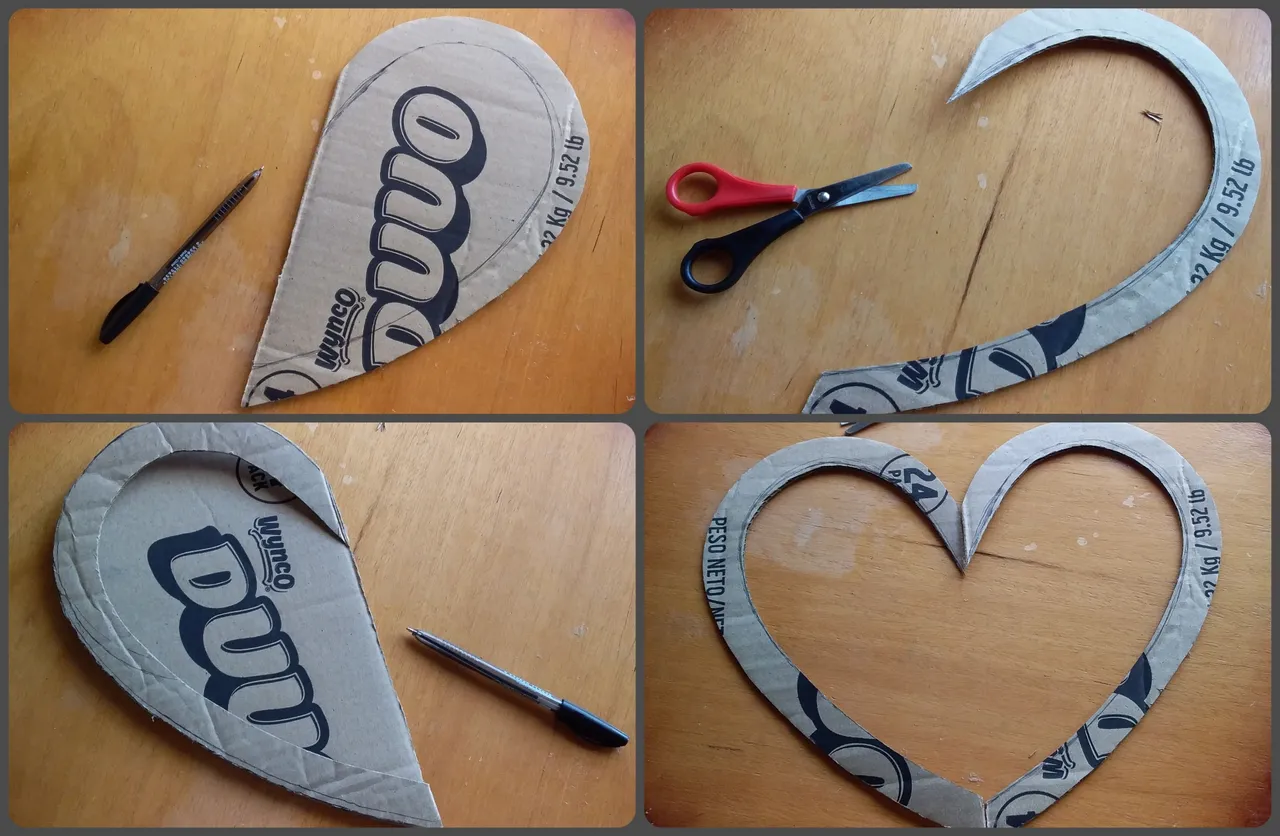
A continuación, realizaremos un marco. Para ello debemos trazar el grosor deseado y cortar ambas piezas.
Next, we will make a frame. To do this we must trace the desired thickness and cut both pieces.
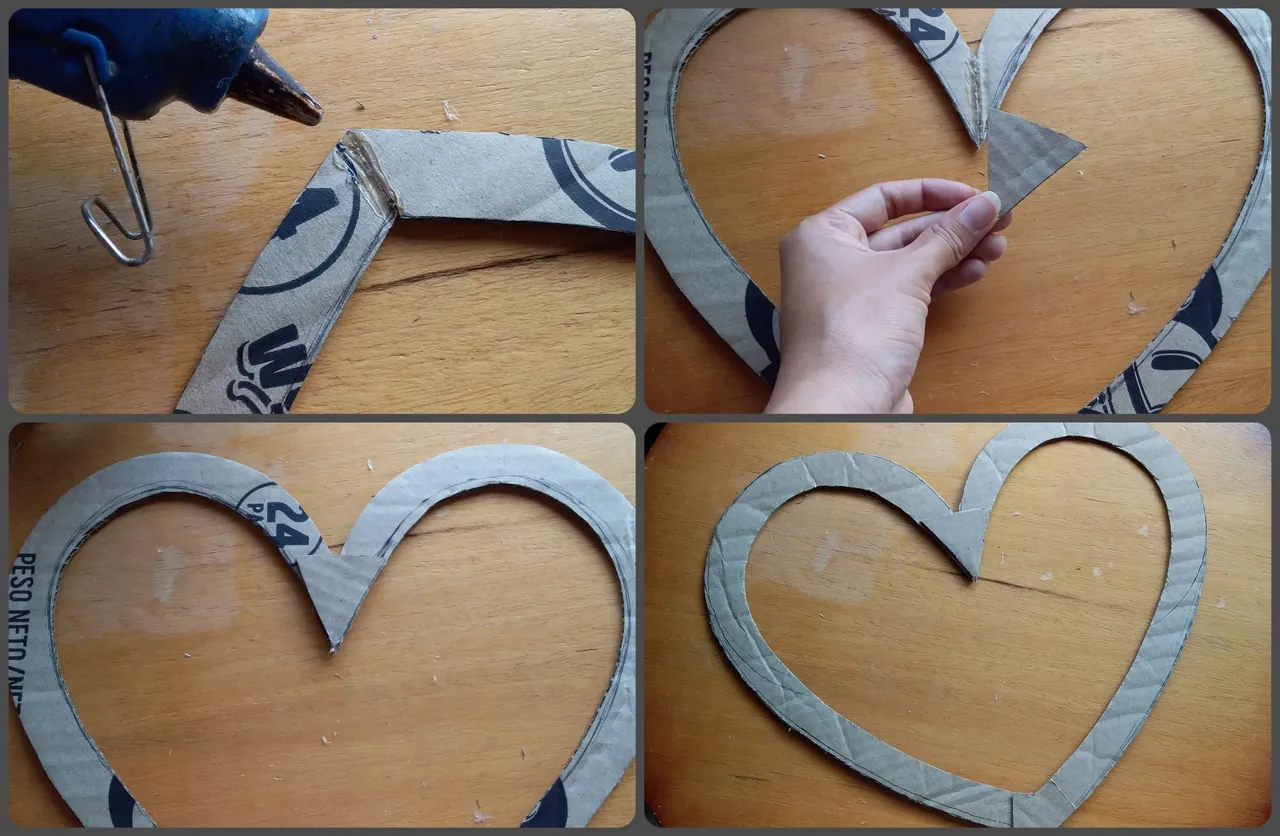
Juntaremos todo con silicón y para reforzar podemos pegar unos pequeños trozos de cartón
We will put everything together with silicone and to reinforce it we can glue some small pieces of cardboard.
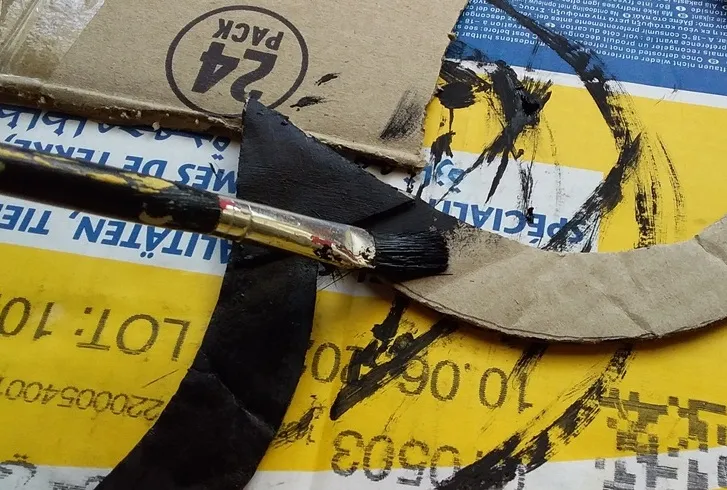
Finalmente pintamos y dejamos secar.
Finally we paint and let it dry.
Paso 3 | Step 3
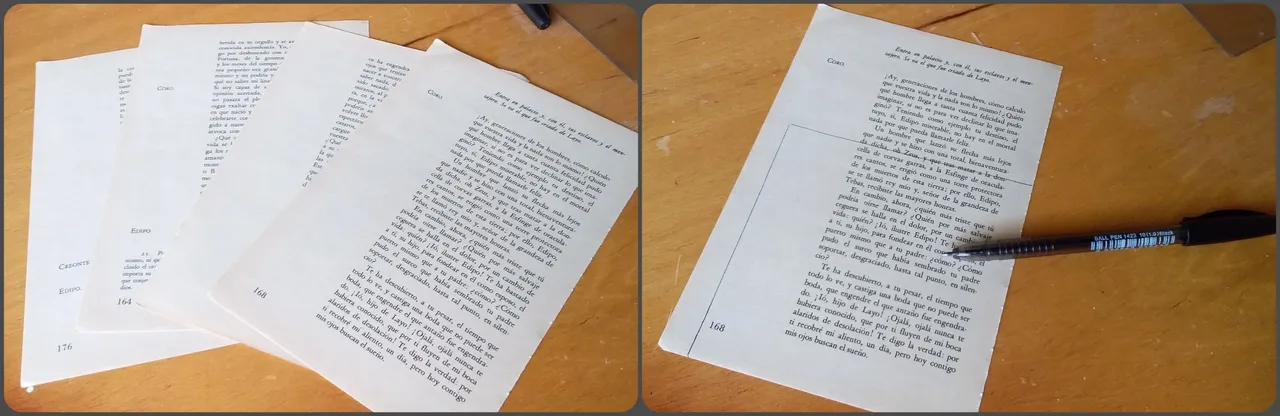
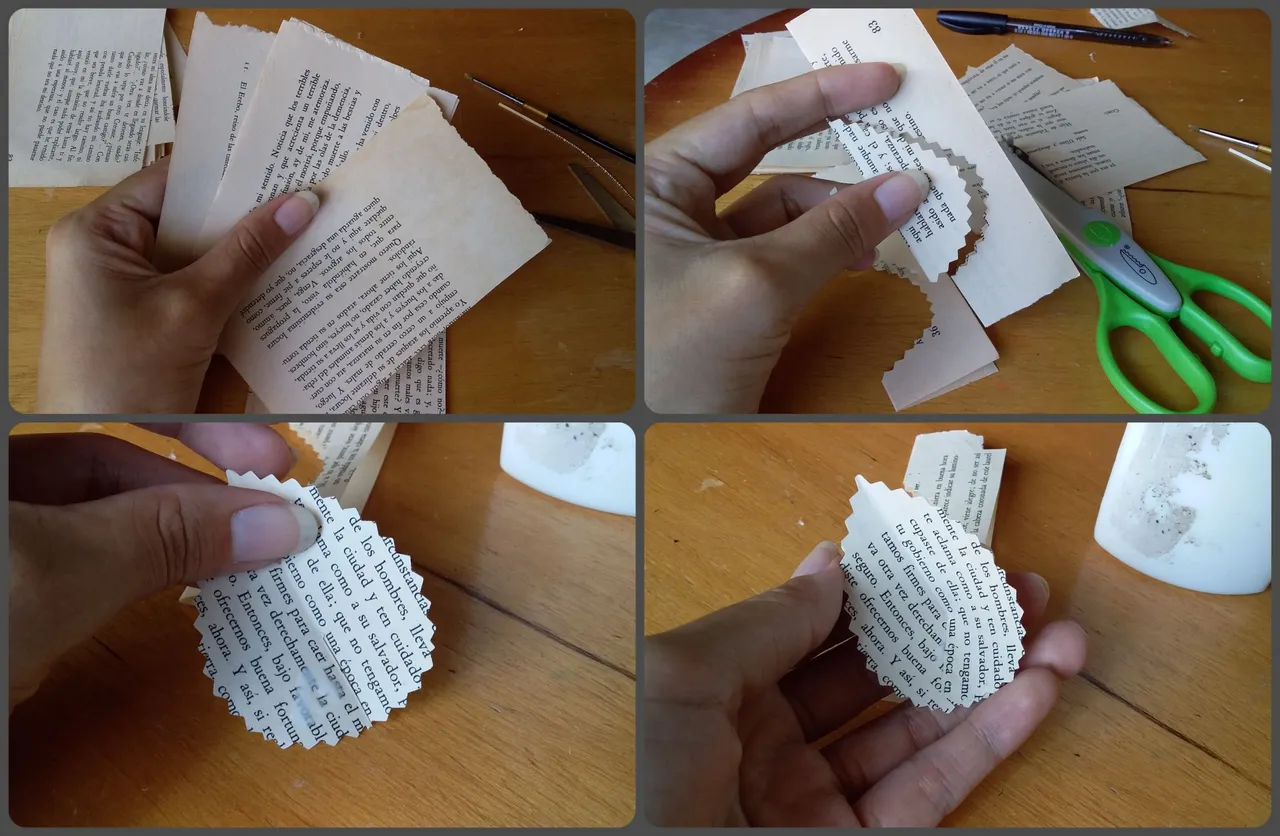
Para las Rosas empezaremos por arrancar varias páginas de nuestro libro viejo y dibujaremos cuadrados del tamaño que queramos, en mi caso los hice de 12cm.
For the Roses we will start by tearing out several pages of our old book and draw squares of the size we want, in my case I made them of 12cm.
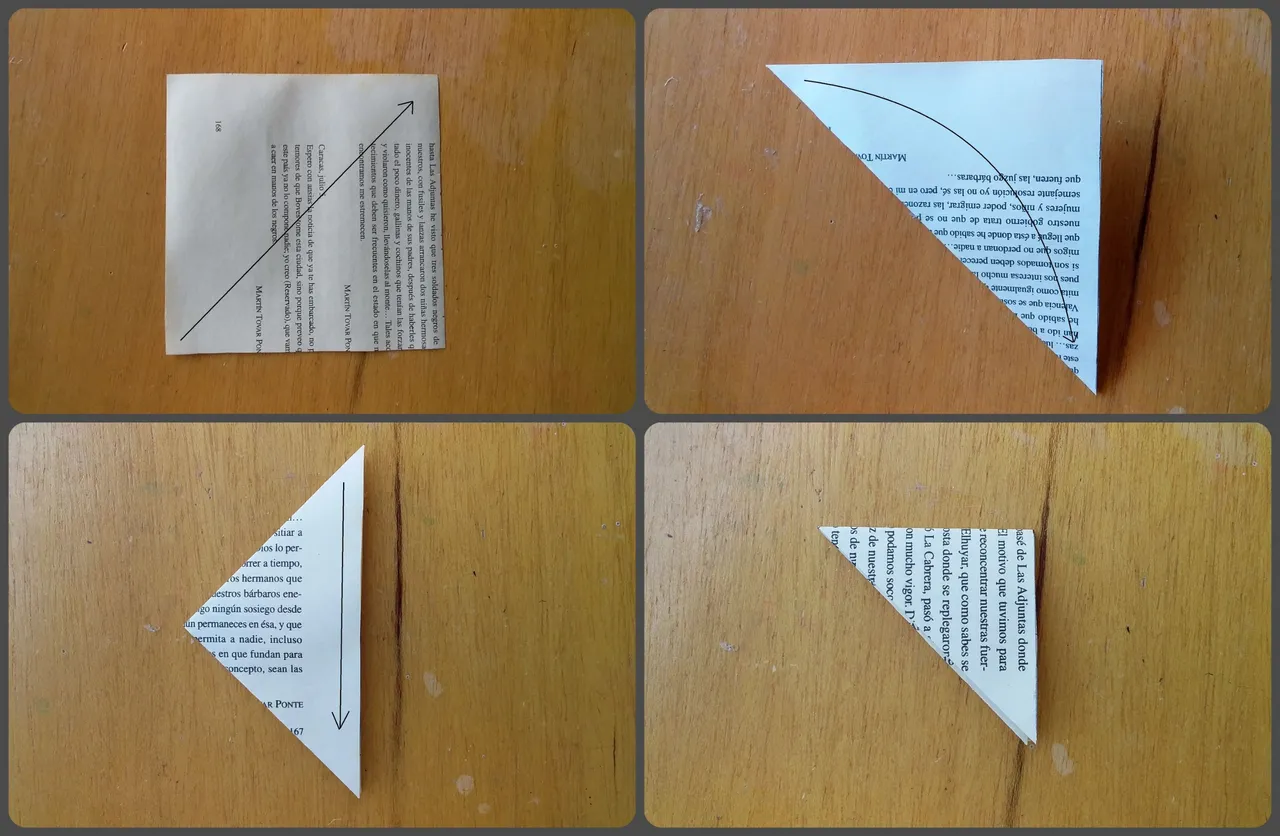
Ya con nuestro cuadrado cortado, haremos un doblez en diagonal (como indica la flecha), luego la punta izquierda la doblamos hacia abajo y por último hacia abajo otra vez.
Once our square is cut, we make a diagonal fold (as indicated by the arrow), then we fold the left end downwards and finally downwards again.

Tomaremos nuestro triángulo y le dibujaremos la forma de un pétalo, cortamos y al abrir tendremos una flor.
We will take our triangle and draw the shape of a petal, cut it and when we open it we will have a flower.
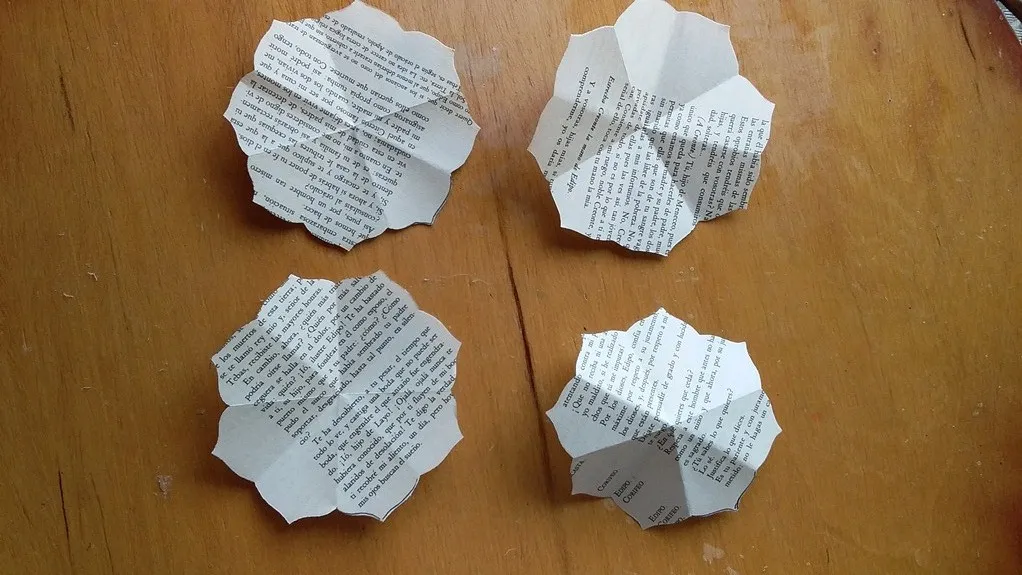
Por cada rosa usaremos 4 de estas.
For each rose we will use 4 of these.
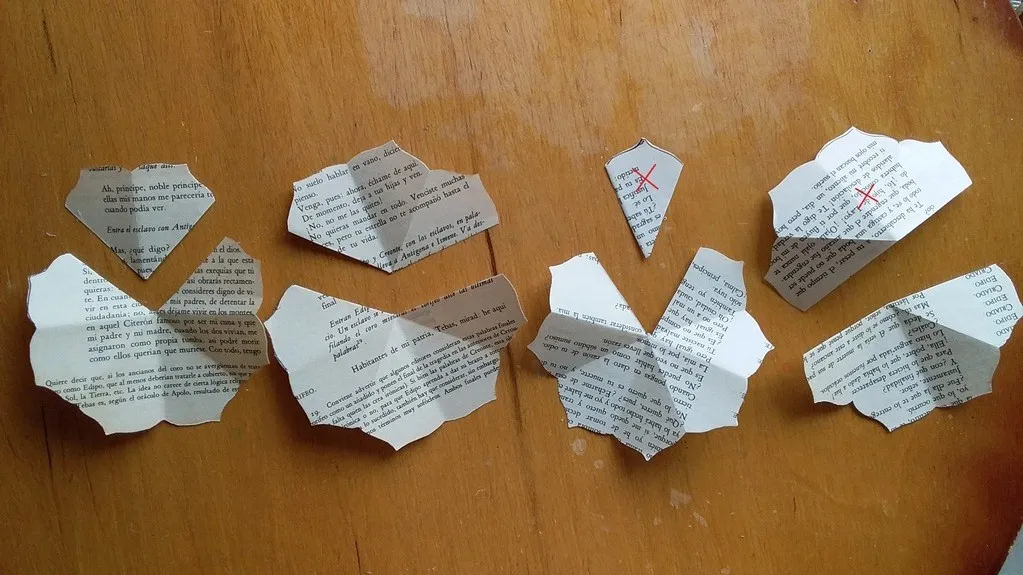
A cada una le cortaremos unos pétalos. A la primera le cortaremos un pétalo, a la segunda 2 pétalos, a la tercera 3 y a la cuarta 4 pétalos (técnicamente la mitad). Usaremos todo, excepto los que tienen una x marcada en rojo.
To each one we will cut some petals. We will cut one petal from the first one, 2 petals from the second one, 3 petals from the third one and 4 petals from the fourth one (technically half). We will use everything except the ones with an x marked in red.
Paso 4 | Step 4
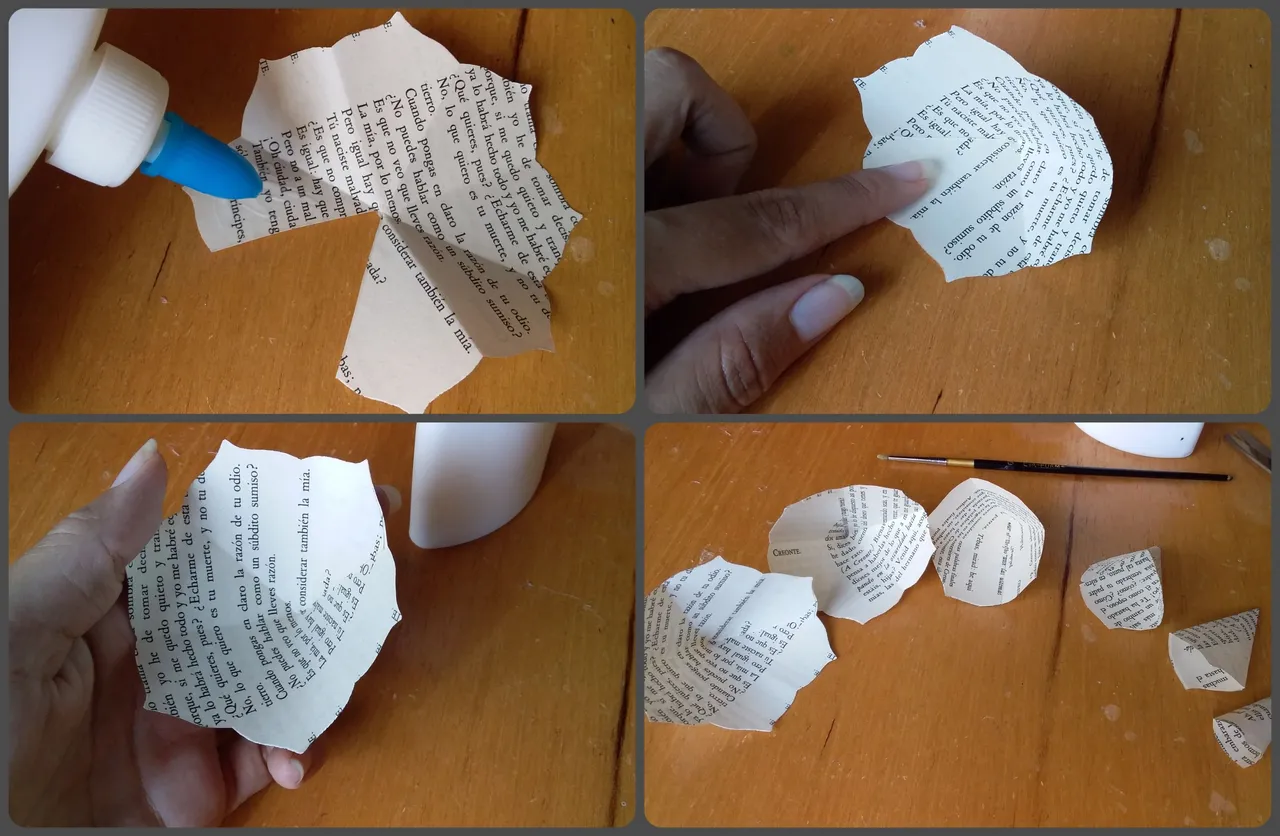
Ahora uniremos los extremos con un poco de pega y deberán tener forma de cono.
Now we will join the ends with a little glue and they should be in the shape of a cone.
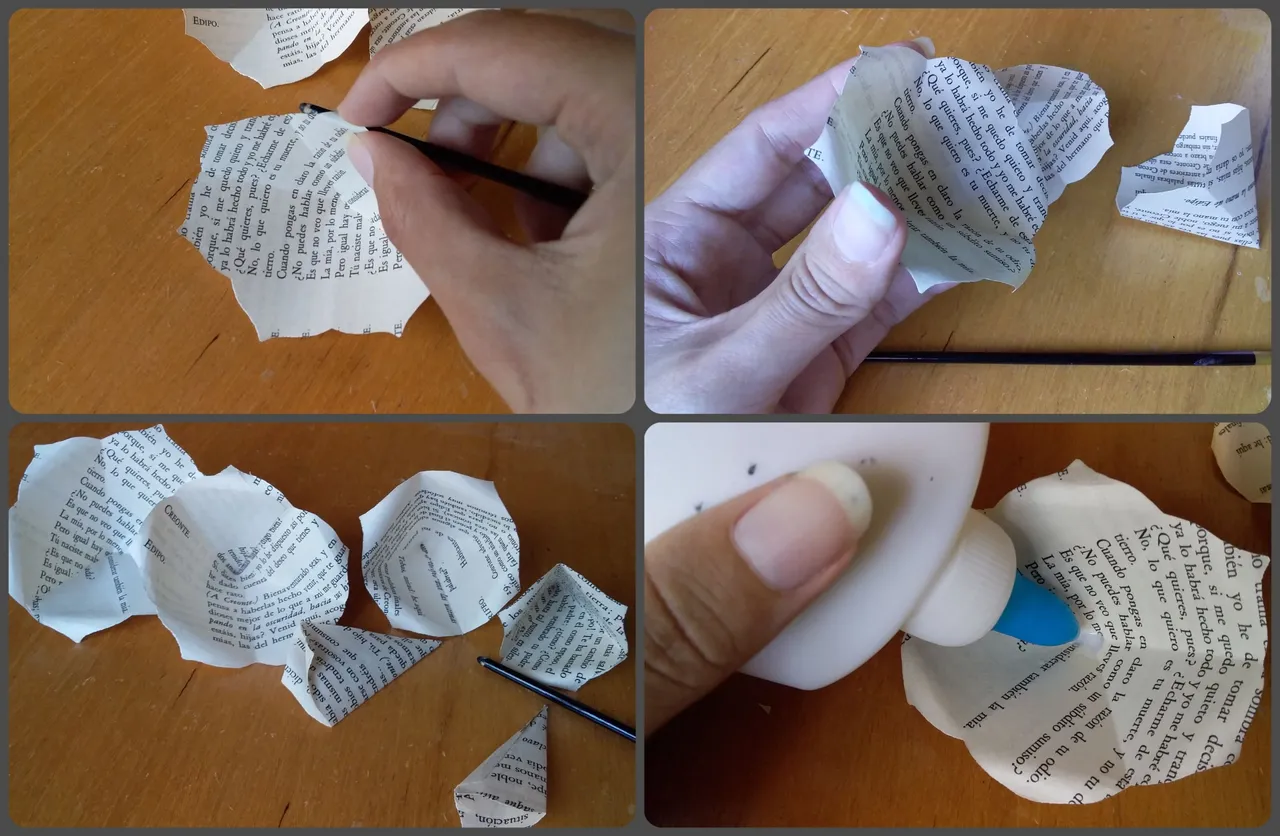
Para darle más aspecto de rosa, rizaremos los pétalos con ayuda de un pincel fino o palillo.
To make it look more like a rose, curl the petals with a fine brush or toothpick.
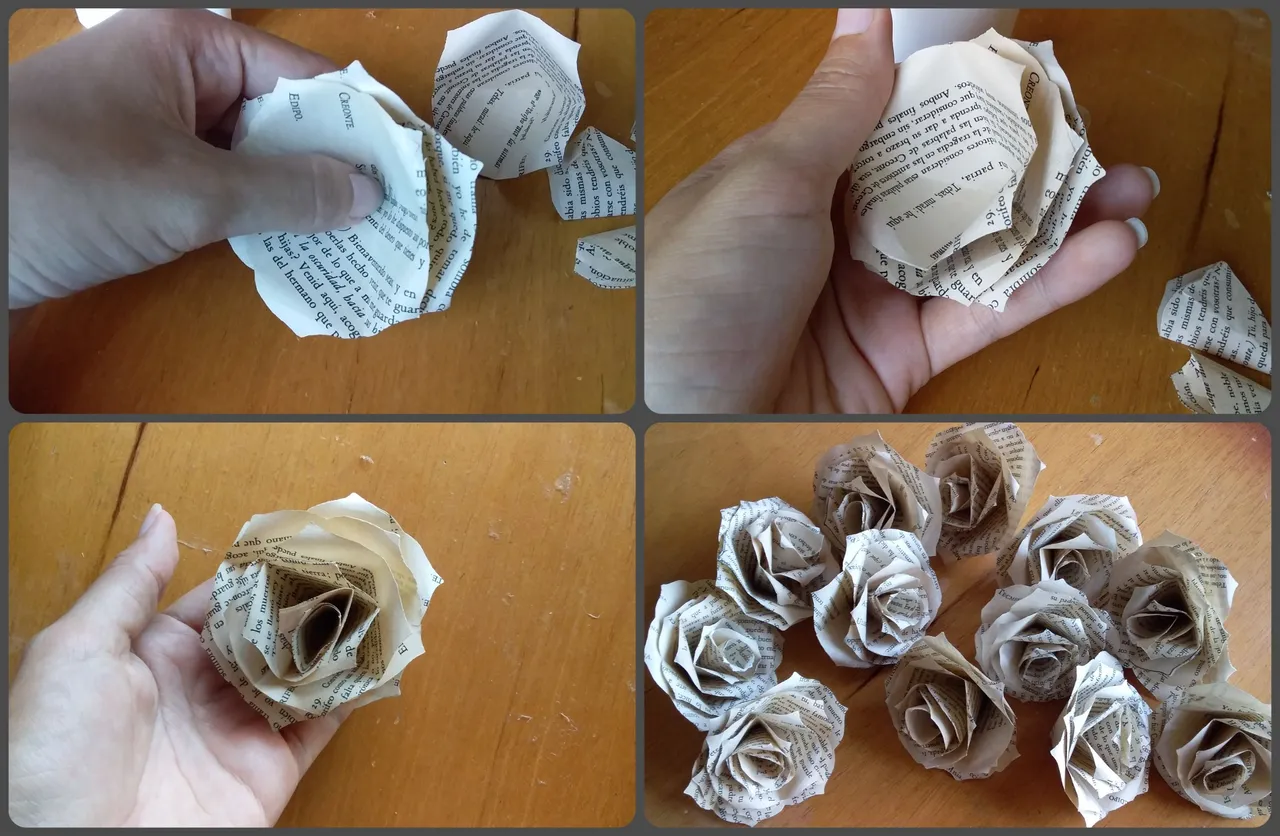
Juntamos todas las piezas por tamaño (desde las más grandes a las más pequeña) y listo! puedes hacer todas las que quieras.
We put all the pieces together by size (from the largest to the smallest) and that's it! you can make as many as you want.
Paso 5 | Step 5
Con las páginas que sobraron podemos hacer unas hojas. Doblamos cada una a la mitad y cortamos en forma de gota, al abrirlas le haremos un pequeño corte en medio y pegaremos los extremos (esto es para darle profundidad).
With the leftover pages we can make some leaves. Fold each one in half and cut in the shape of a drop, when opening them we will make a small cut in the middle and glue the ends (this is to give it depth).
Paso 6 | Step 6
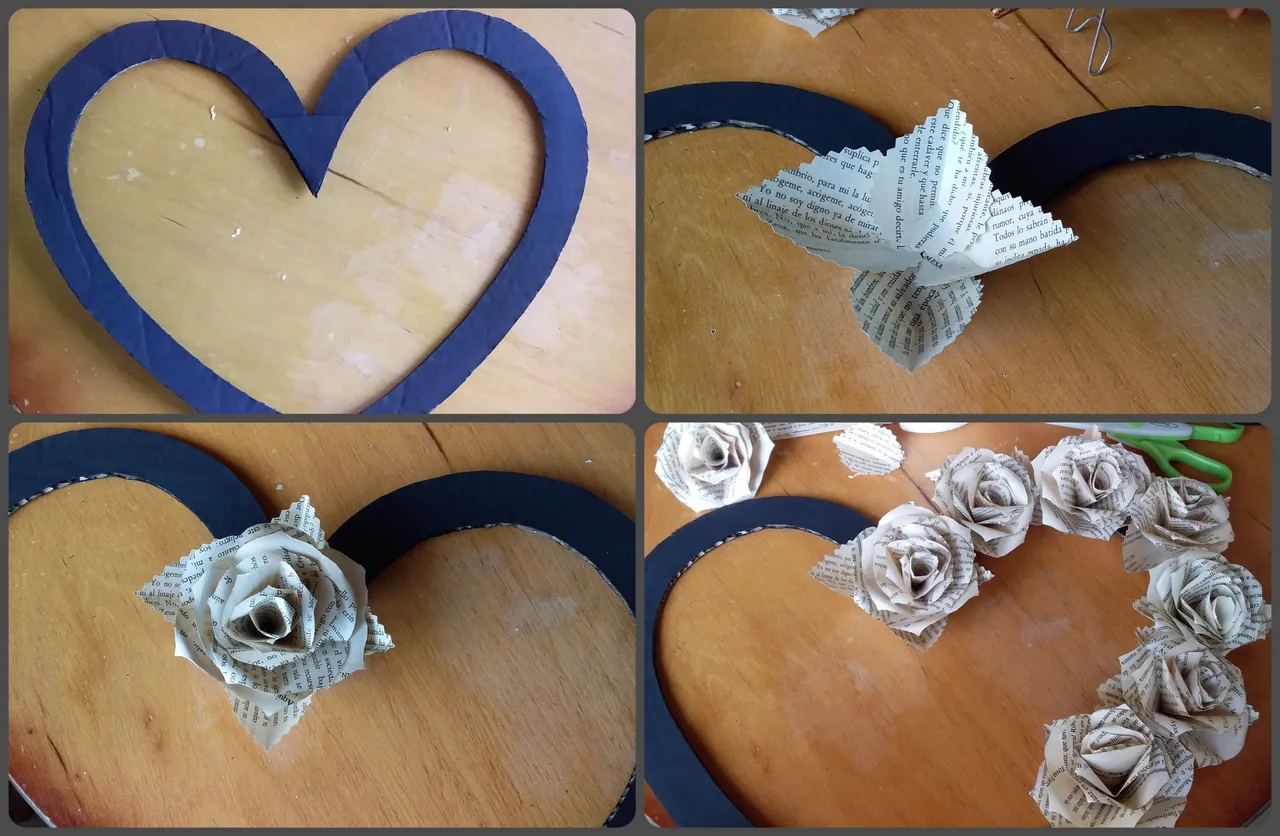
Finalmente empezamos a pegar las rosas y las hojas al marco de cartón. Recomiendo empezar por las hojas y luego las rosas hasta llenar todo.
Finally we start gluing the roses and leaves to the cardboard frame. I recommend starting with the leaves and then the roses until everything is filled.
🌹 RESULTADO | RESULT 🌹
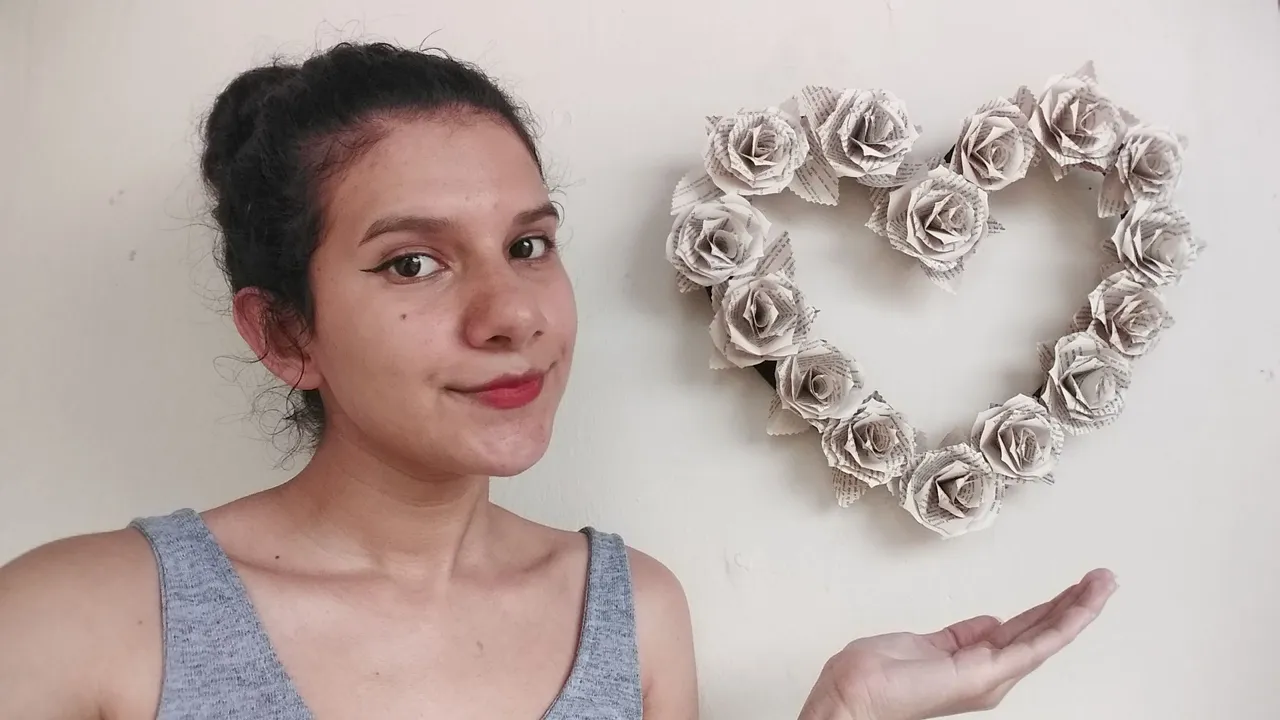
Y listo!, así es como se ve, realmente queda muy hermoso y vale la pena hacerlo. Es ideal para decorar puertas, pero aún así en cualquier rincón de tu casa se verá precioso.
And that's it, that's how it looks, it's really beautiful and worth doing. It is ideal for decorating doors, but still in any corner of your house it will look beautiful.