📖 BIENVENIDOS A MI BLOG | WELCOME TO MY BLOG 📖
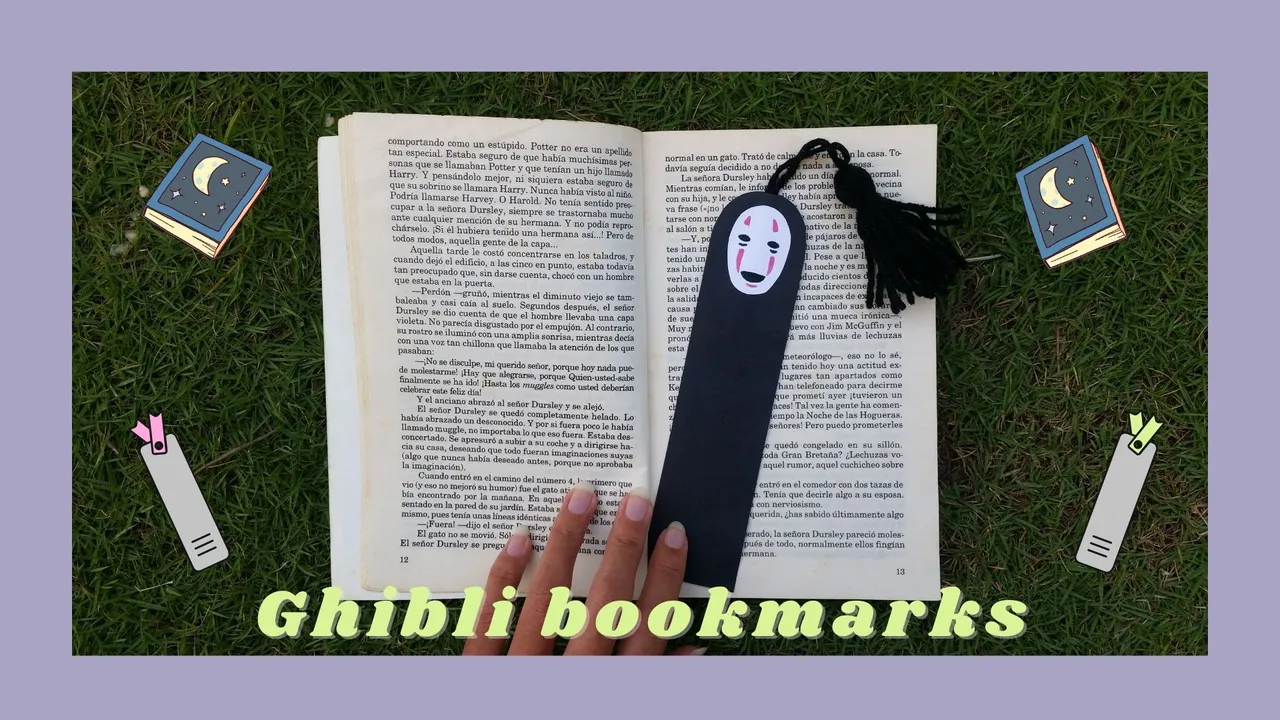
Saludos gente linda de hive, espero se encuentren muy bien. El día de hoy traigo para ustedes una idea súper linda para elaborar un marcalibros con temática Ghibli. Elegí al personaje ''Sin cara'' de la película ''El Viaje de Chihiro'' por su forma alargada, la cual me pareció ideal para este tutorial. Espero les guste!
Greetings beautiful people of hive, I hope you are very well. Today I bring for you a super cute idea to make a Ghibli-themed bookmark. I chose the character ''No face'' from the movie ''Spirited Away'' because of its elongated shape, which seemed ideal for this tutorial. I hope you like it!
Materiales | Materials:
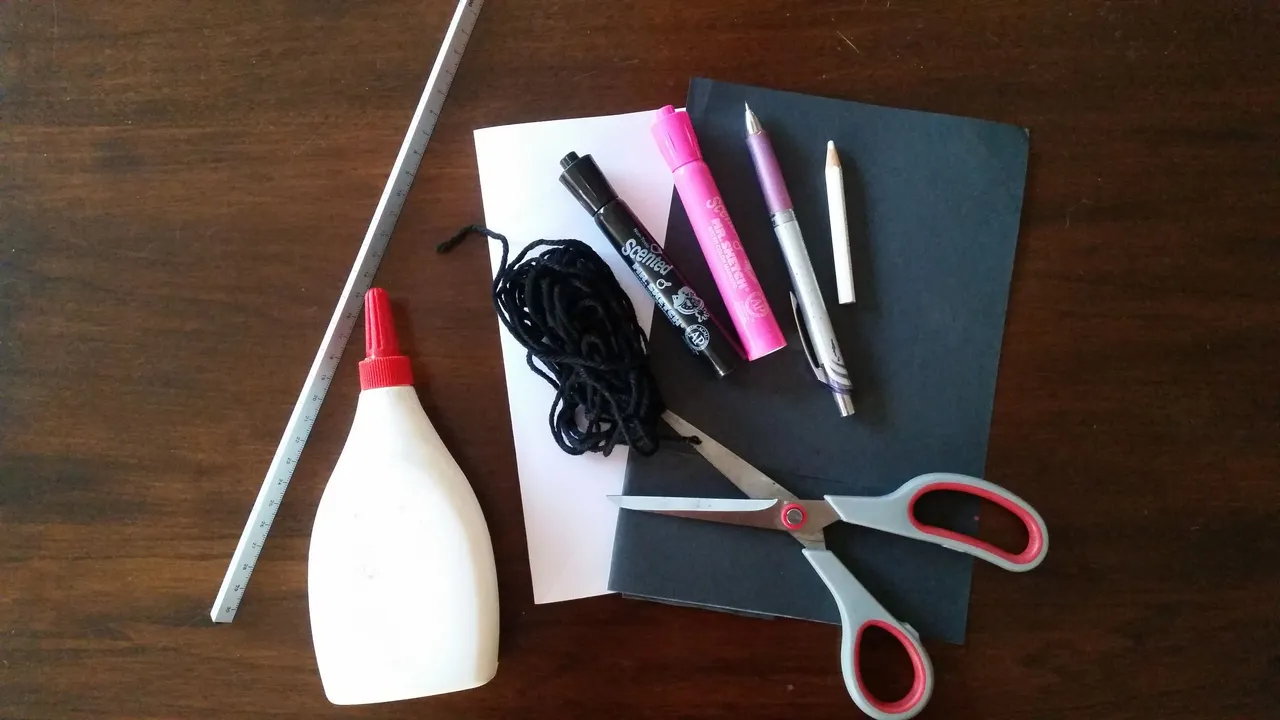
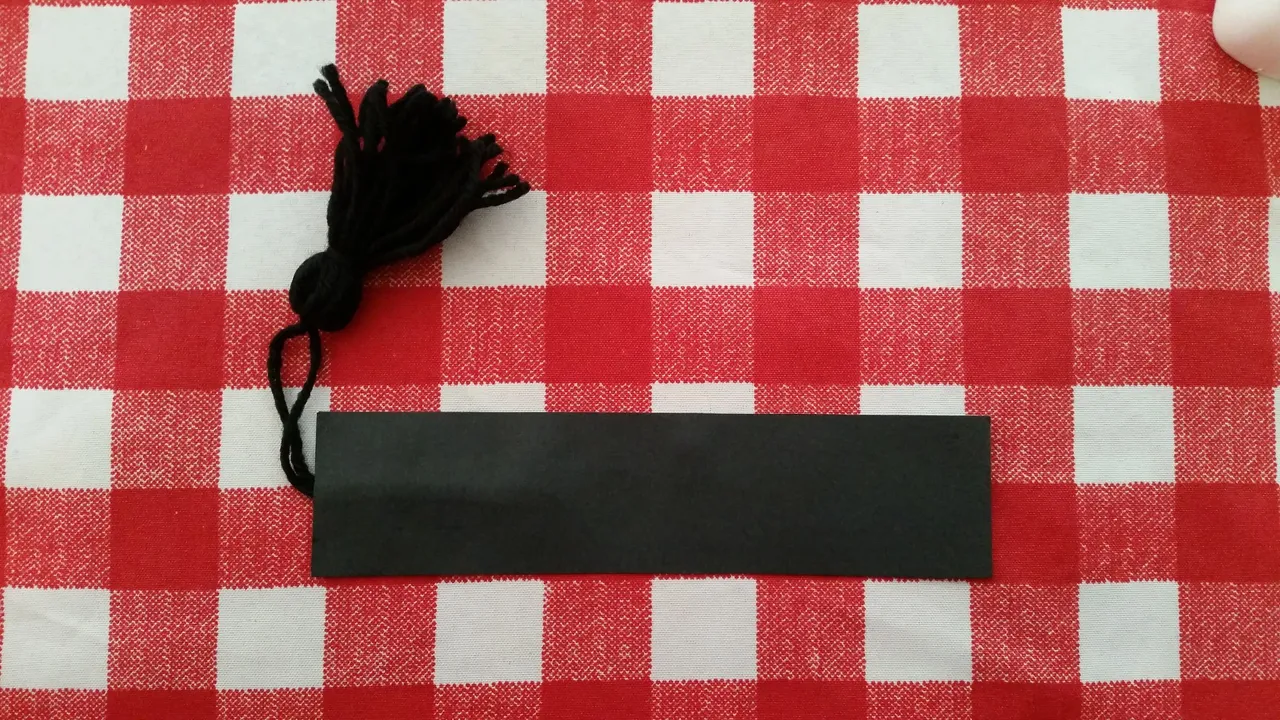
| Cartulina negra y blanca | Tijeras | Estambre |
|---|---|---|
| Pega | Marcador negro y rosa | Lápiz |
| Regla | Lápiz blanco |
| Black and white cardboard | Scissors | Yarn |
|---|---|---|
| Glue | Black and pink marker | Pencil |
| Ruler | White pencil |
📖 Proceso | Process 📖
Paso 1 | Step 1
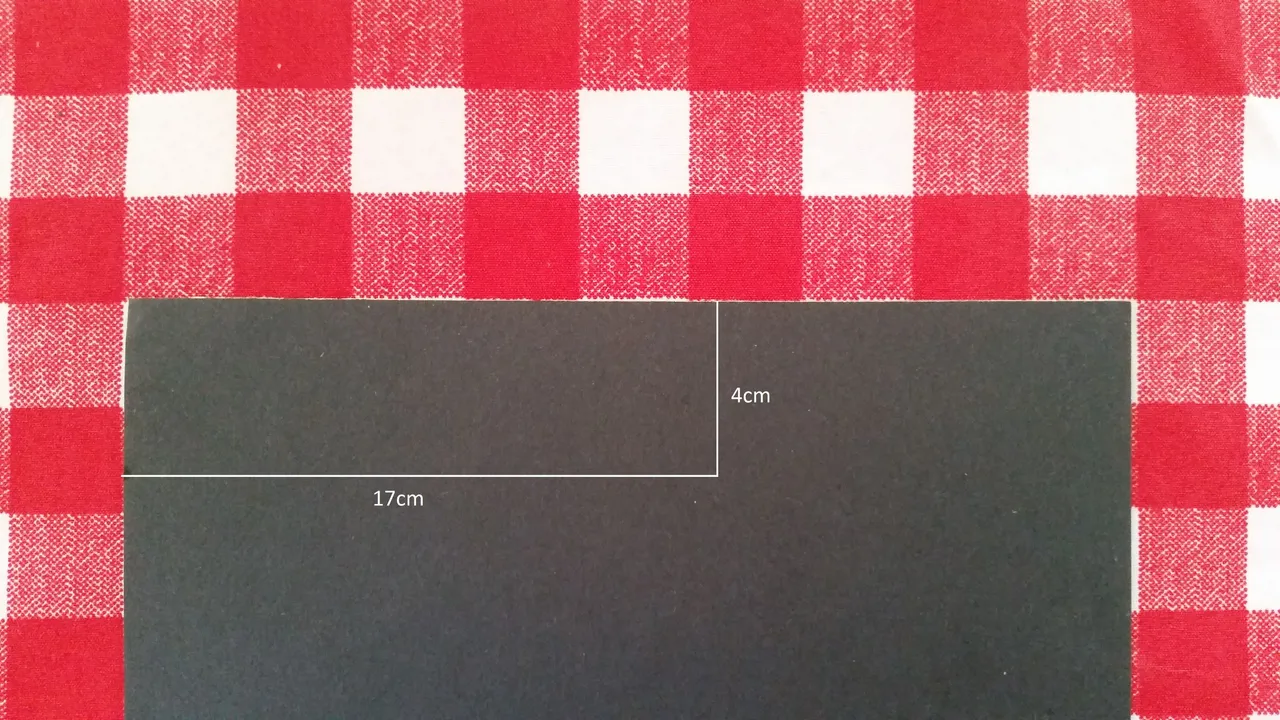
Para empezar, las medidas que usaremos serán de 4cm de alto x 17cm de ancho.
To begin with, the measurements we will use will be 4cm high x 17cm wide.
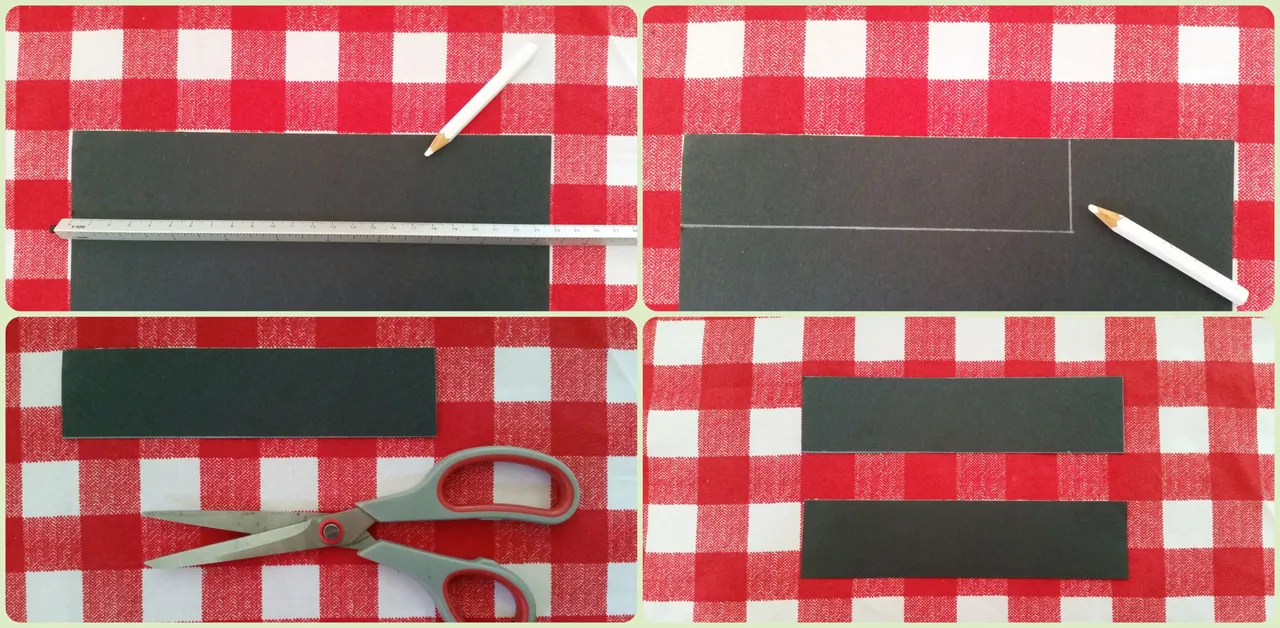
Con un lápiz blanco marcaremos estas medidas sobre la cartulina negra, cortaremos y repetiremos el proceso para tener 2 piezas iguales.
With a white pencil we will mark these measurements on the black cardboard, cut and repeat the process to have 2 equal pieces.
Paso 2 | Step 2
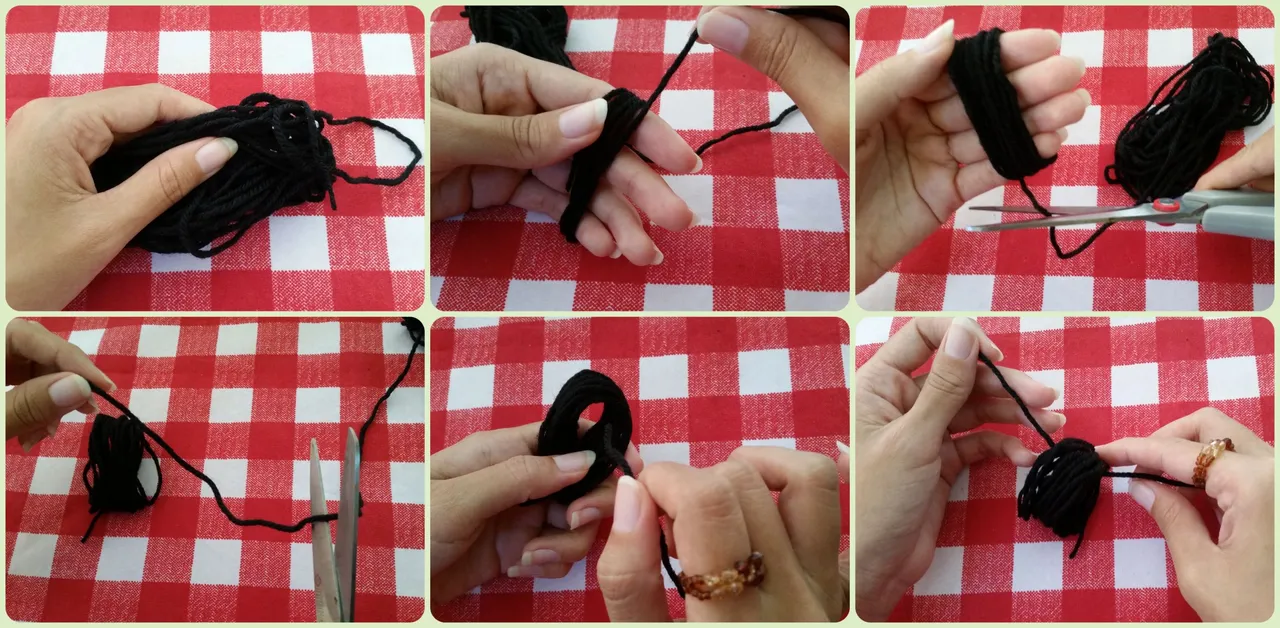
Lo siguiente será elaborar una especie de pompom. Tomaremos el estambre y daremos varias vueltas al rededor de nuestra mano (como se muestra en las imágenes) hasta tener el volumen que queramos y cortamos.
Con un trozo de estambre, atravesaremos ese rollito que hicimos anteriormente...
The next step is to make a kind of pompom. We will take the thread and we will make several turns around our hand (as shown in the pictures) until we have the volume we want and we cut it.
With a piece of thread, we will pass through the roll we made before...
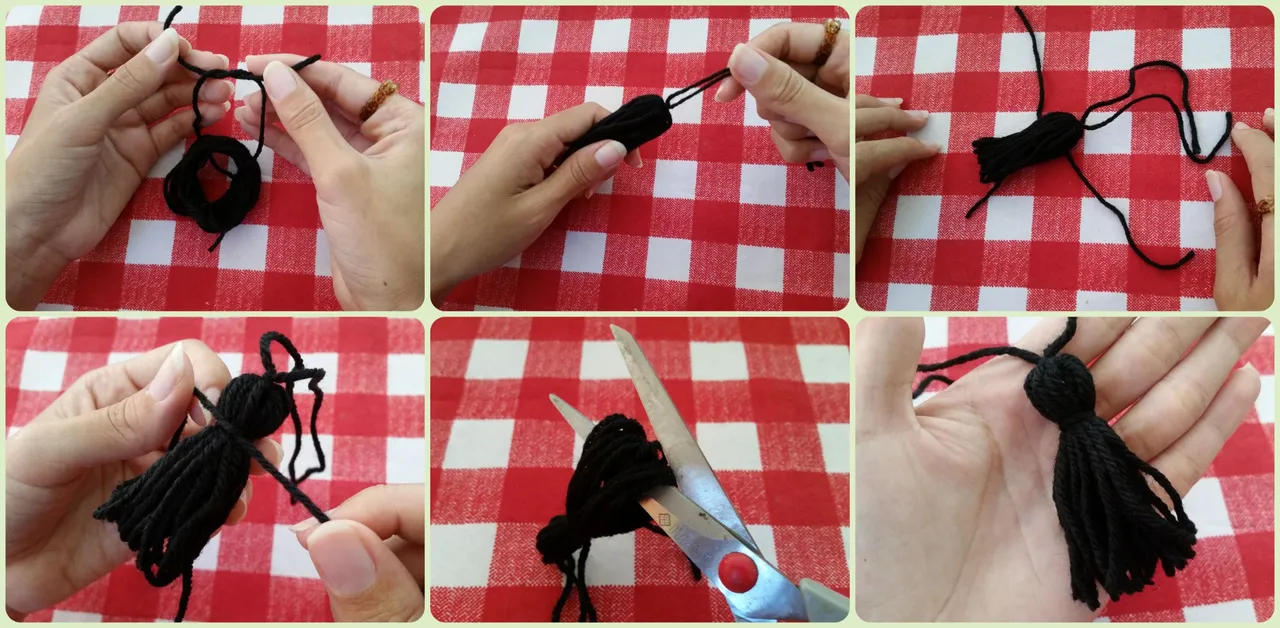
y ataremos un nudo. Ya para terminar, con otro trozo de estambre, ataremos un nudo en la parte superior del rollito para darle una forma redondeada. Luego cortaremos abajo y listo.
and tie a knot.Finally, with another piece of yarn, tie a knot at the top of the roll to give it a rounded shape. Then we will cut at the bottom and that's it.
Paso 3 | Step 3
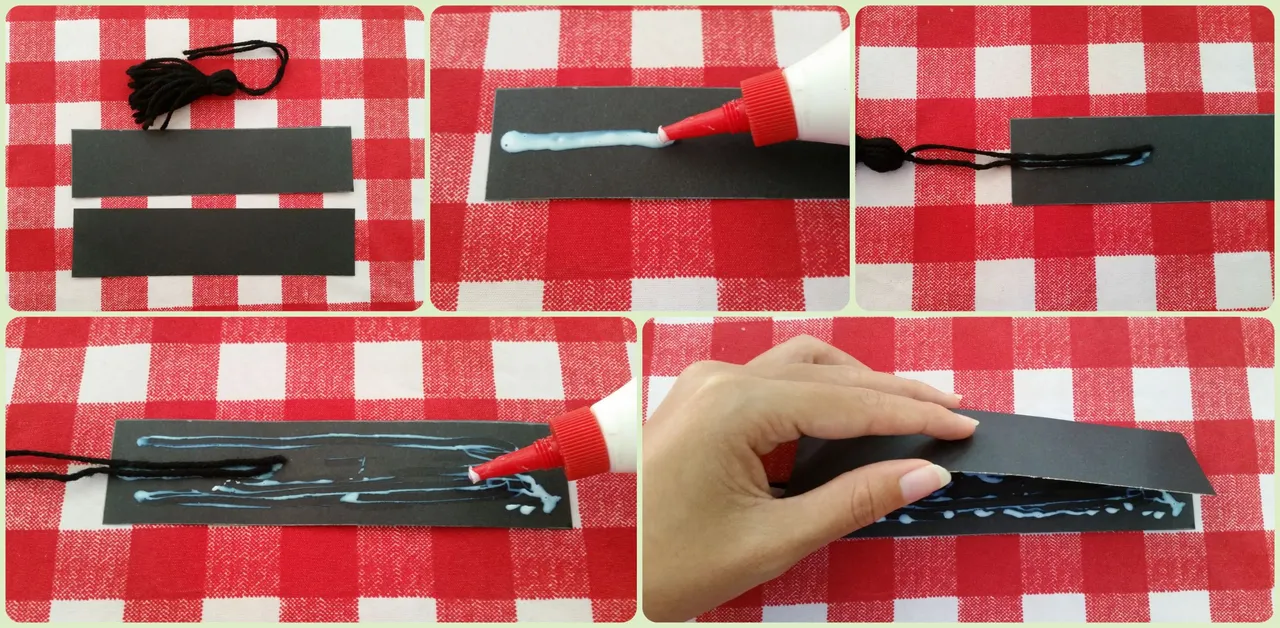
Ahora empezaremos a armar nuestro marcalibros. Primero aplicamos un poco de pega sobre una de las tiras de cartulina, luego pegamos nuestro pompom y encima irá la otra tira de cartulina.
Now we start to assemble our bookmark. First we apply a little glue on one of the strips of cardboard, then we glue our pompom and on top of it will go the other strip of cardboard.
Nos deberá quedar algo así.
We should be left with something like this.
Paso 4 | Step 4
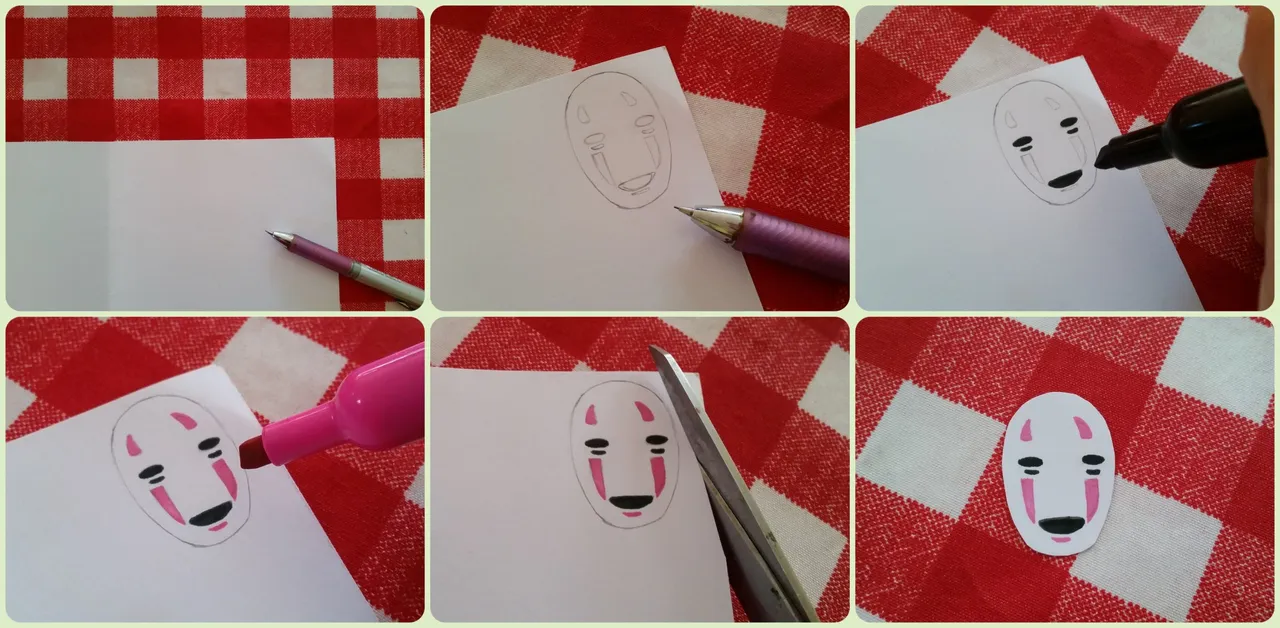
En una cartulina blanca dibujaremos la máscara de ''sin cara'' y con los marcadores haremos los detalles. Por último, cortamos.
On a white cardboard we will draw the ''No face'' mask and with the markers we will make the details. Finally, we cut.
Paso 5 | Step 5
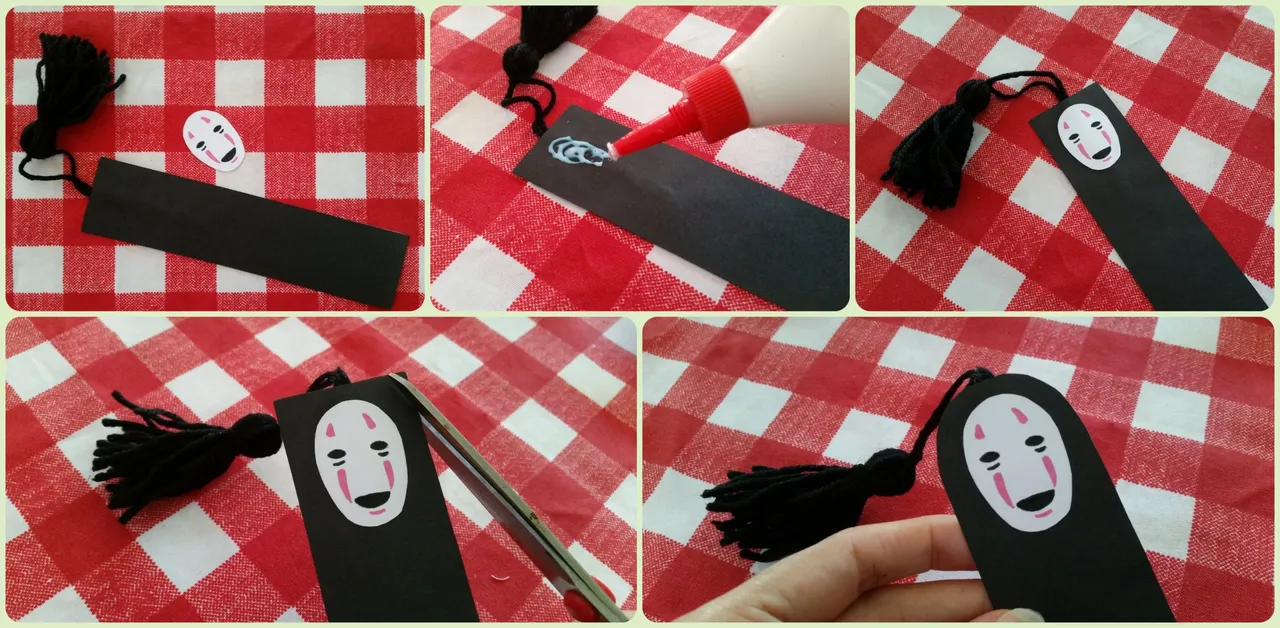
Finalmente pegamos el rostro (o máscara) al cuerpo del marcalibros y con unas tijeras redondeamos las esquinas.
Finally we glue the face (or mask) to the body of the bookmark and with scissors we round the corners.
📖 Resultado | Result 📖
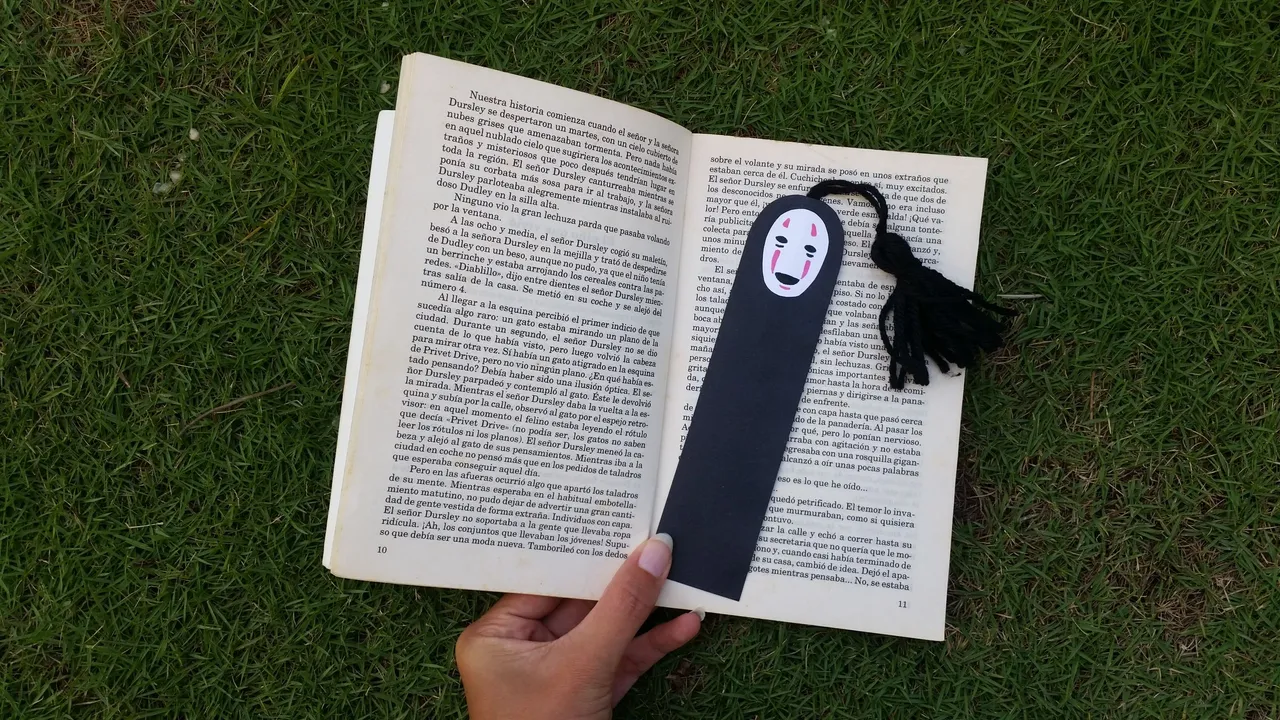
Y listo! este es el resultado de nuestro hermoso marcalibros Ghibli, espero les haya gustado mucho.
Esto ha sido todo, muchas gracias por leerme.
And that's it, this is the result of our beautiful bookmark Ghibli, I hope you liked it a lot.
That's all, thank you very much for reading me.