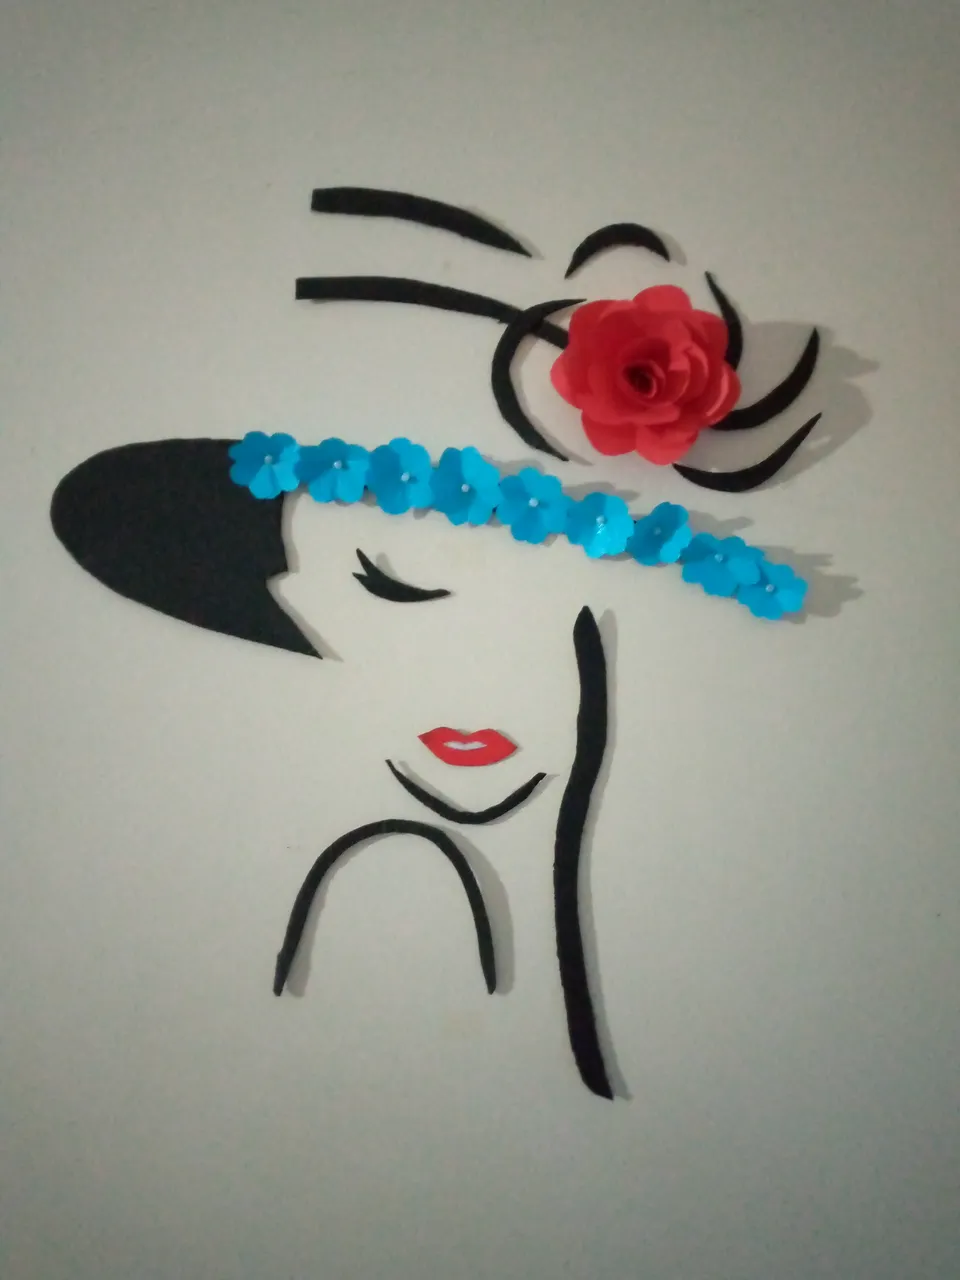
Beautiful day for all friends, today I bring you a super idea to decorate that private space of your home that is your room, especially for teenage girls, a beautiful DIY for wall made of cardboard.
Hermoso día para todos amigos , hoy les traigo una super idea para decorar ese espacio privado de tu hogar que es tu habitación, especialmente para chicas adolescentes, un hermoso bricolaje para pared hecho de cartón.
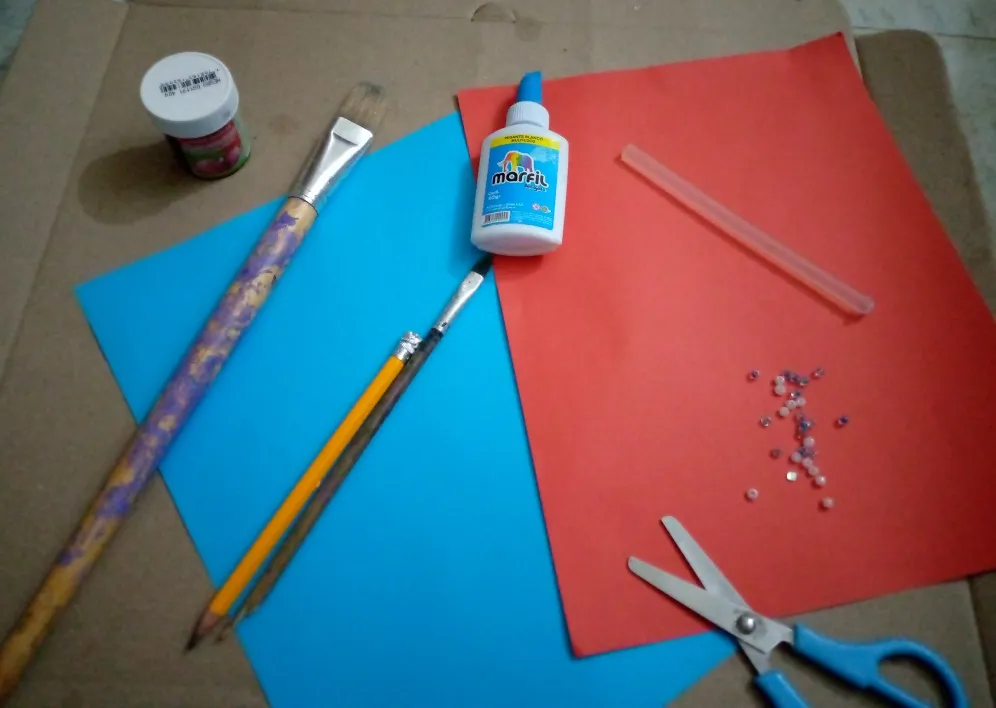
I used:
Thin cardboard
Cold paint black, red and white
Pair of scissors
Brushes
Pencil
Sheets of red and light blue paper
Pearls to decorate
Glue
Utilicé :
Cartón fino
Pintura al frio color negro, roja y blanca
Tijeras
Pinceles
Lápiz
Hojas de papel color rojo y celeste
Perlitas para decorar
Pegamento
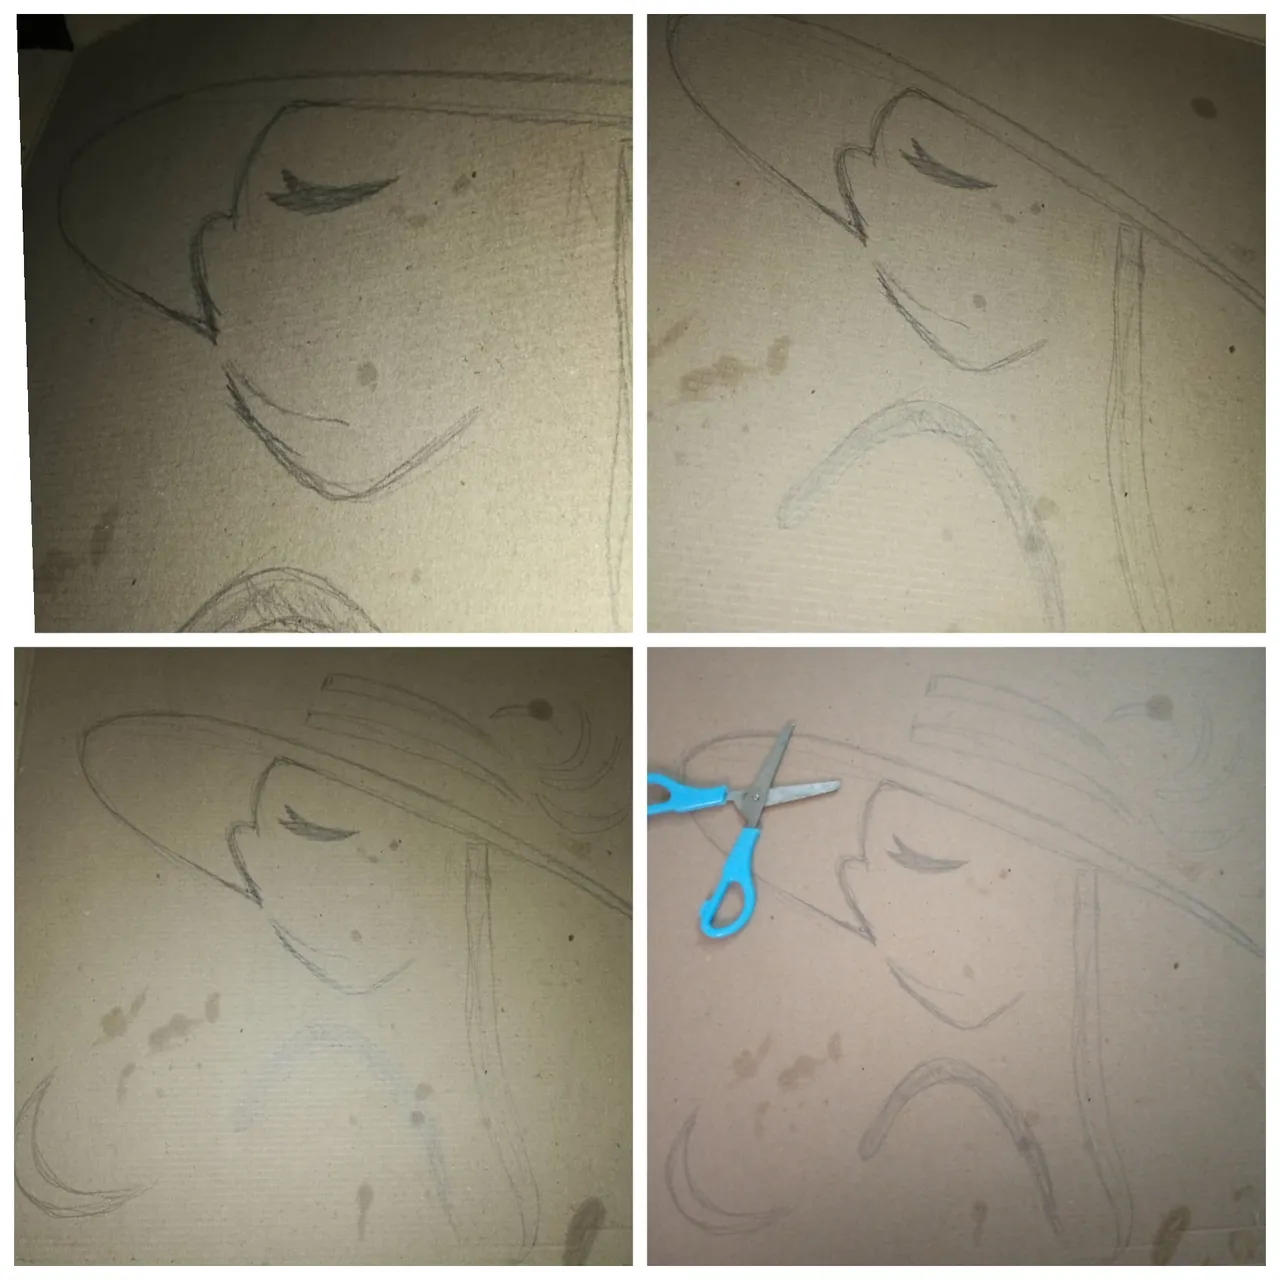
Step by Step
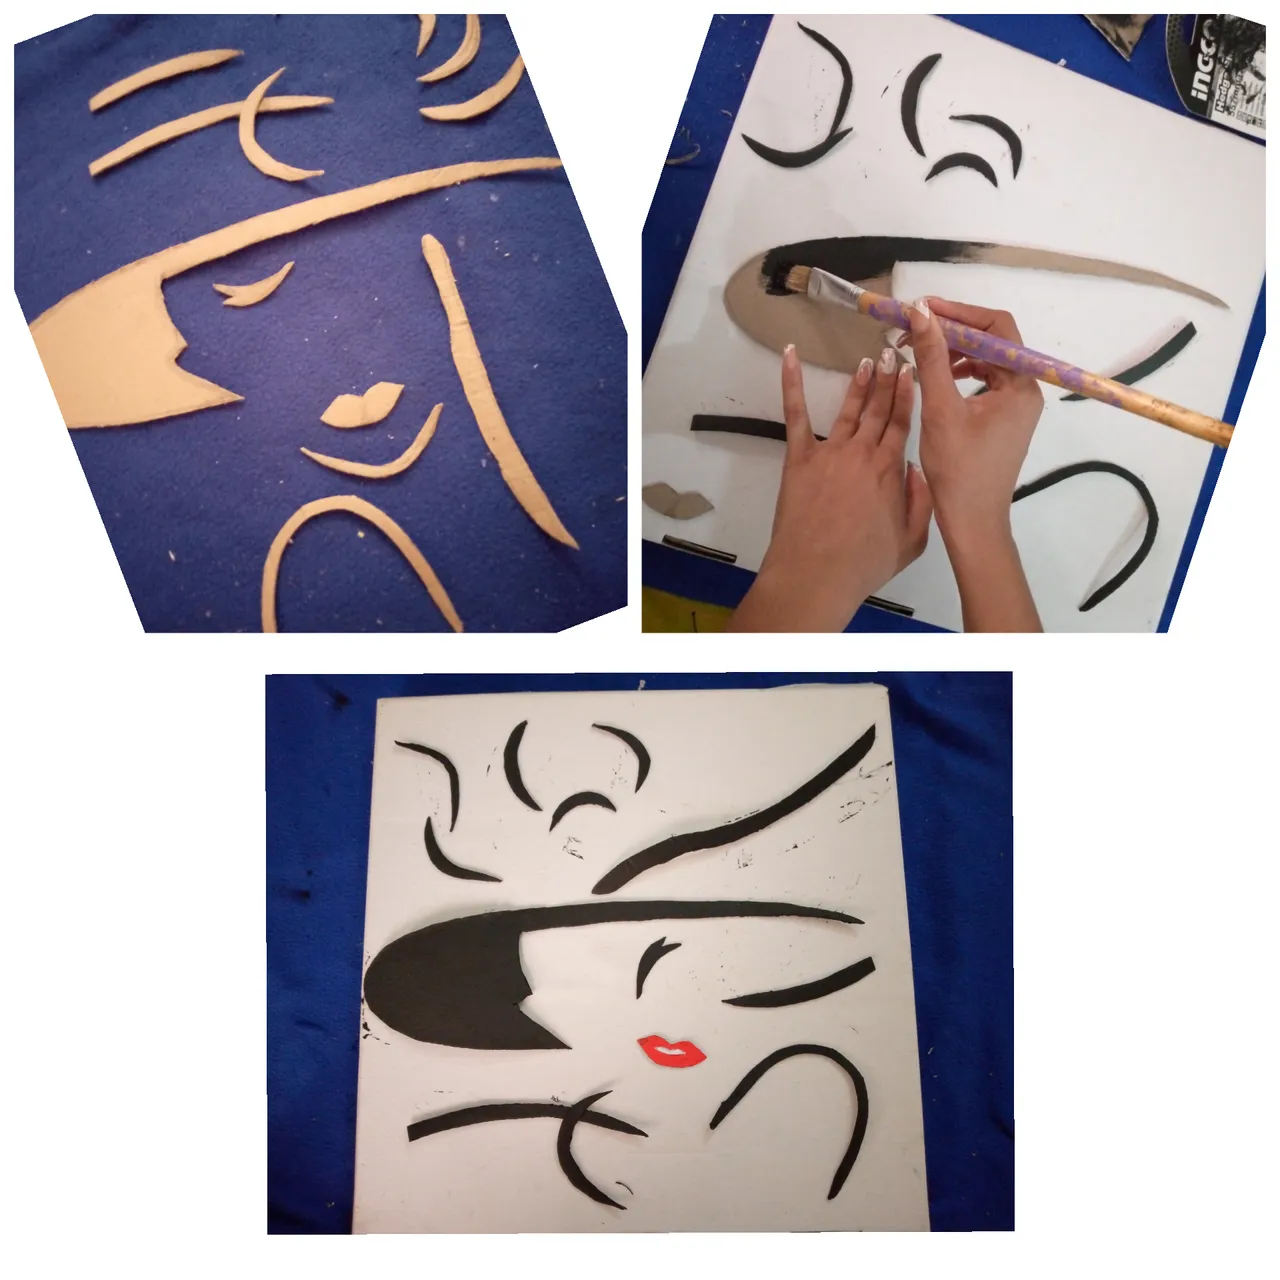
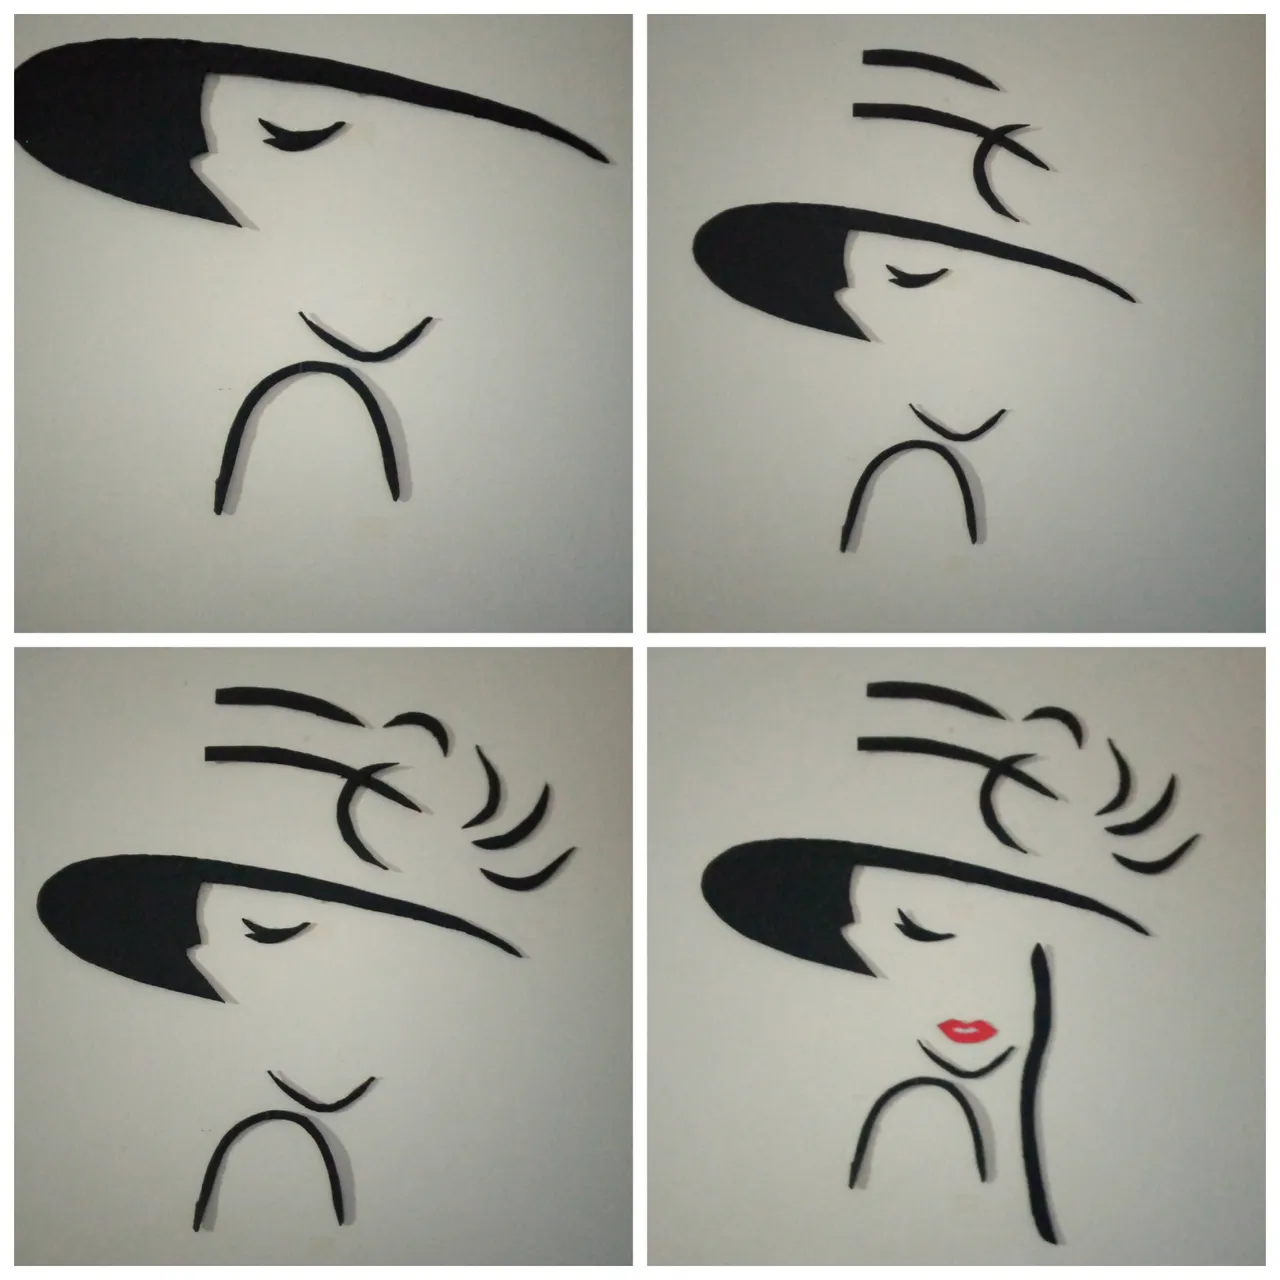
1- The desired figure is drawn on the cardboard, in this case a pretty girl with a hat, then we cut out the pieces.
2- We paint the cut pieces all black, the mouth red with white detail in the center and let it dry.
Paso a Paso
1- Se dibuja sobre el cartón la figura deseada, en este caso una linda chica con sombrero, luego recortamos las piezas.
2- Pintamos las piezas recortadas todas de color negro, la boca roja con detalle blanco en el centro y se deja secar.
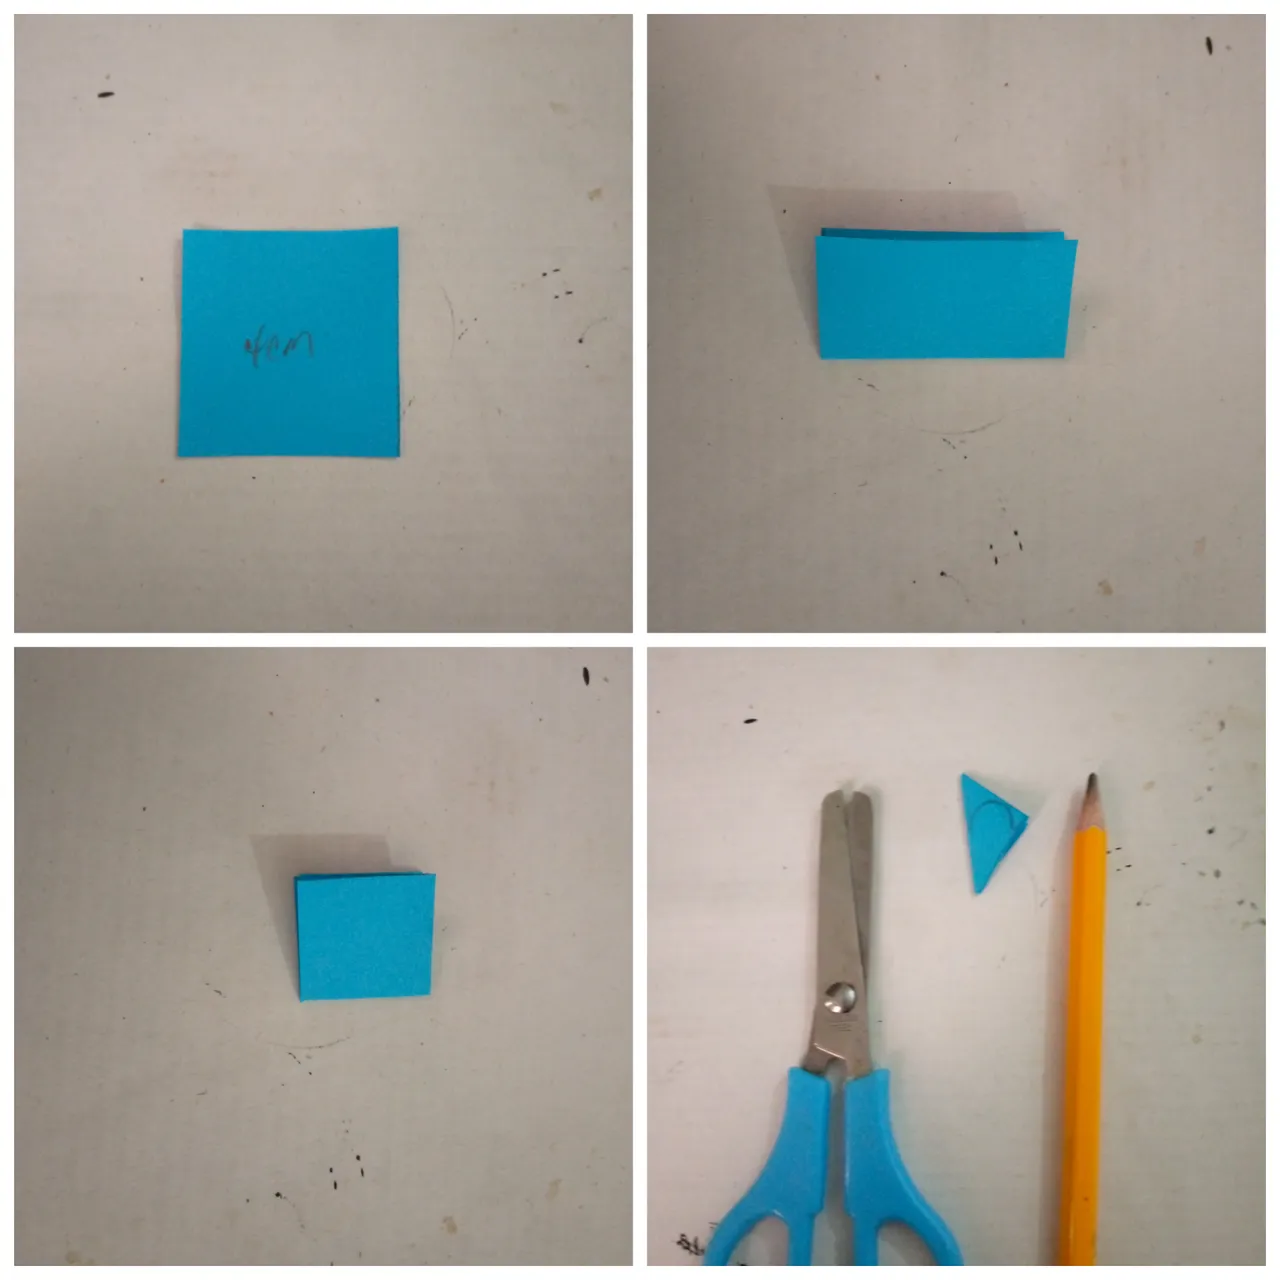
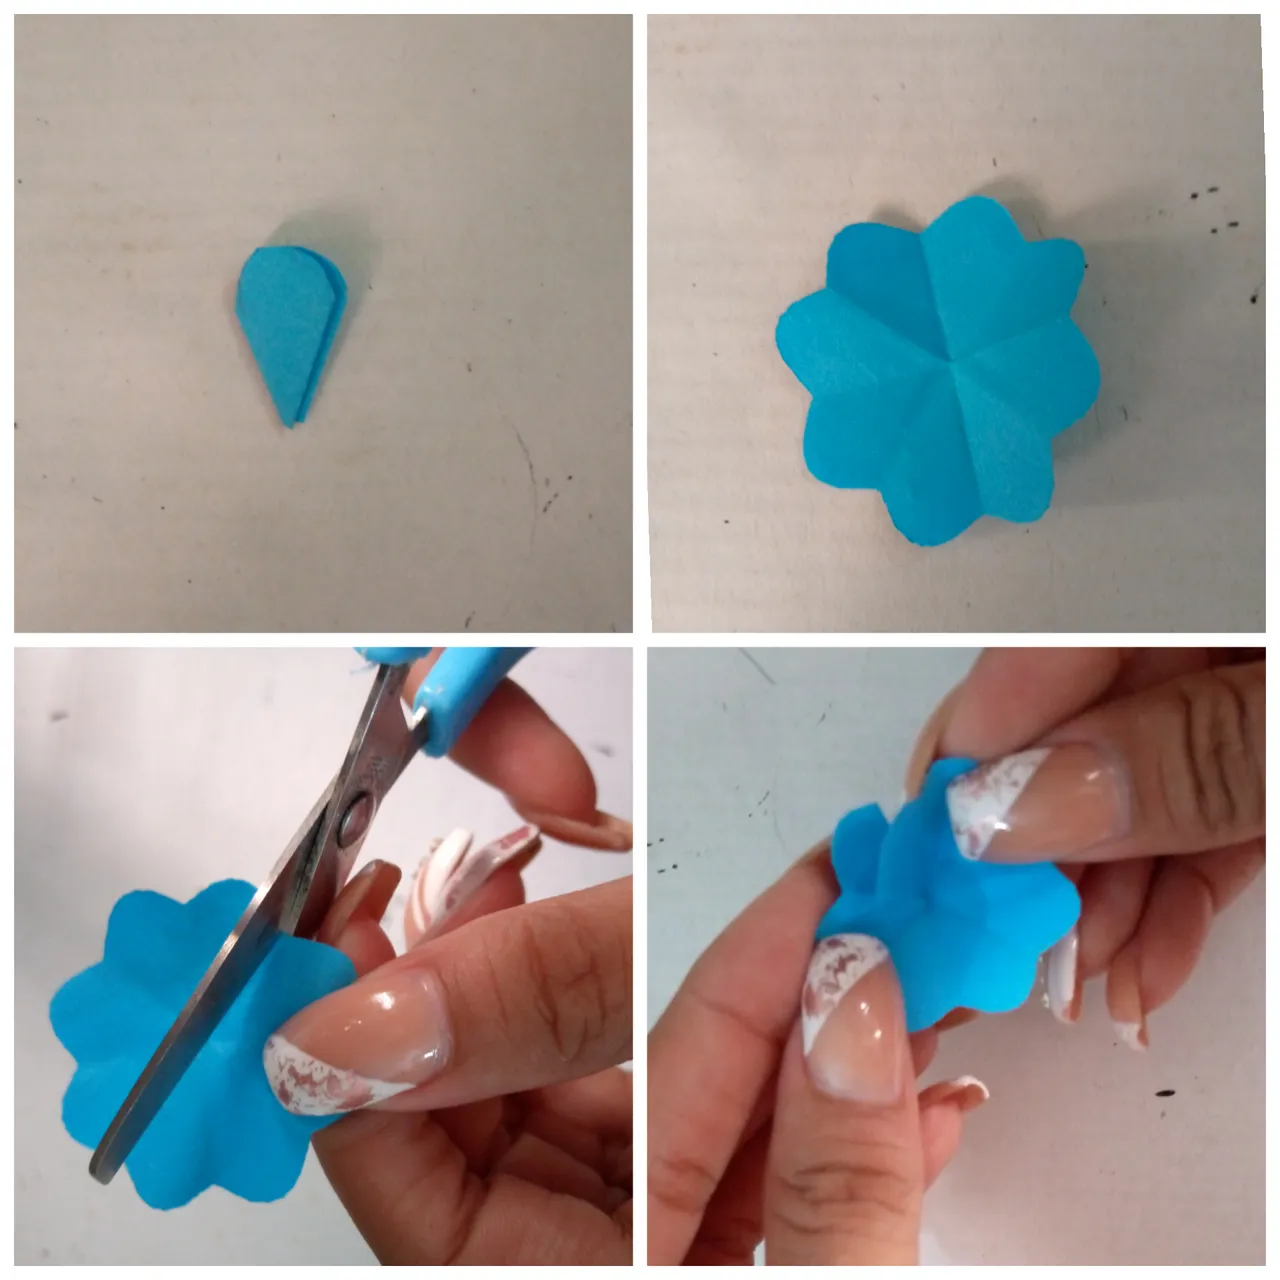
3- While the pieces are drying, we put together some small flowers, a 4cm square is cut out of the blue sheet, fold in half twice then fold a third time diagonally forming a triangle, draw the shape of a petal and cut out.
4- Open the flower, cut one end towards the center and then stick a petal on the other as shown in the image.
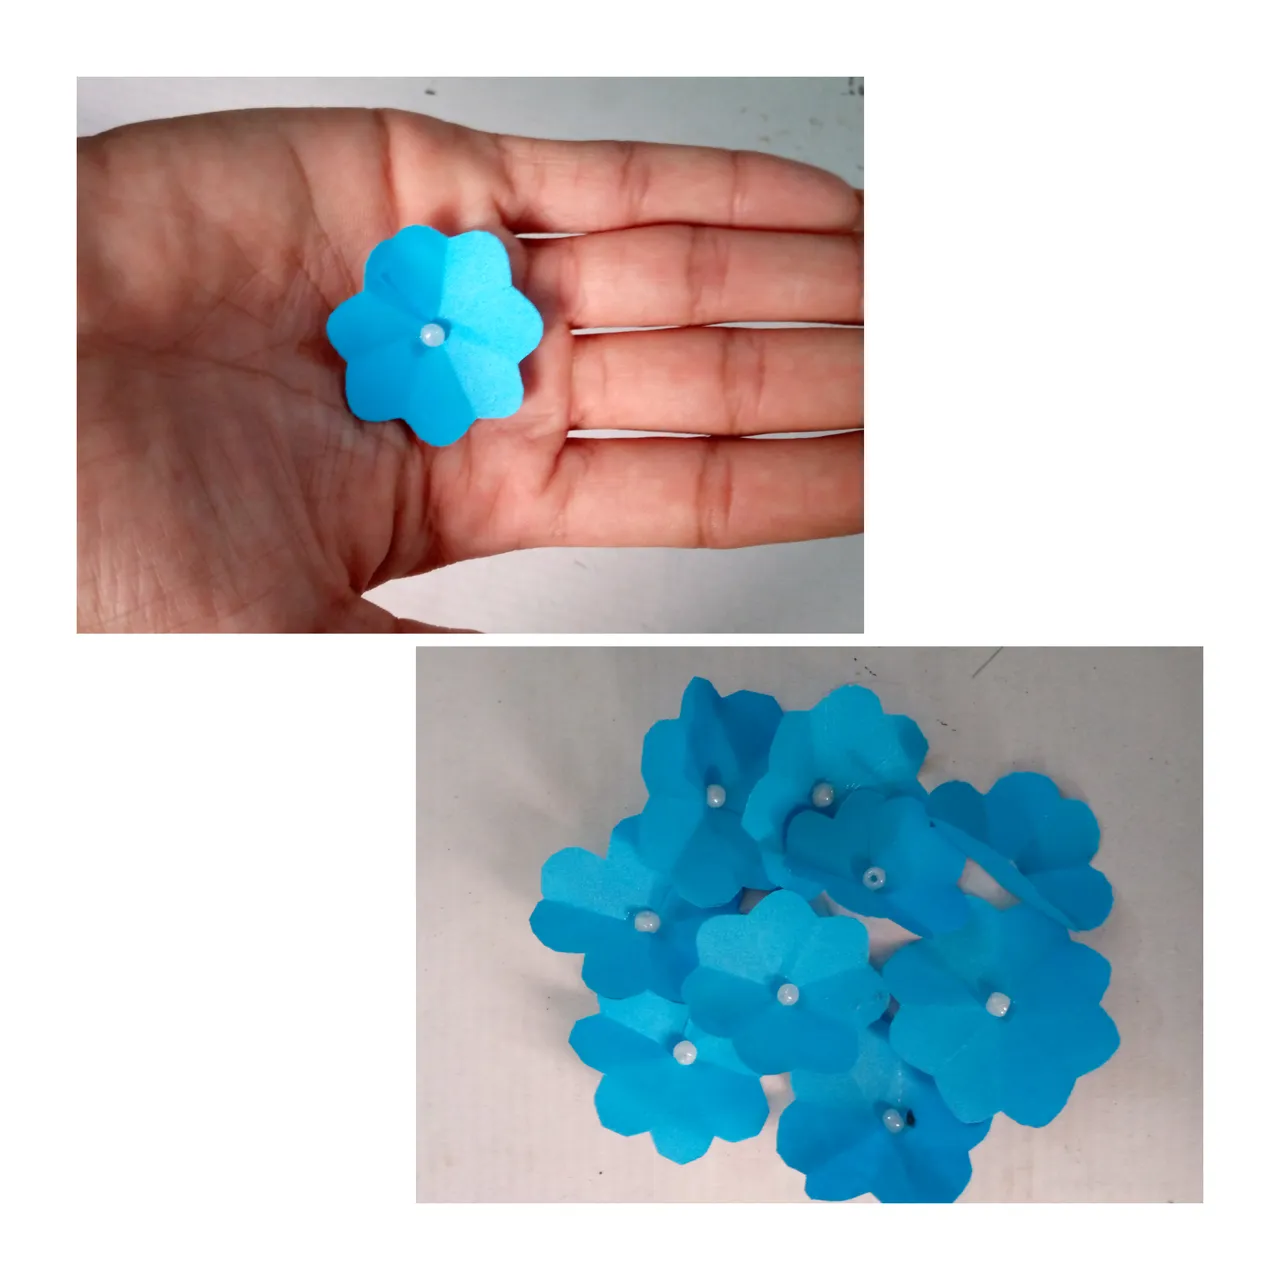
5- Then place a pearl in the center of the flower, do the necessary ones.
3- Mientras secan las piezas, armamos unas pequeñas flores, se recorta un cuadrado de 4cm en la hoja celeste, doble a la mitad dos veces luego doble una tercera vez en diagonal formando un triángulo, dibuje la forma de un pétalo y recorte.
4- Se abre la flor se corta un extremo hacia el centro y luego pega un pétalo sobre el otro como se observa en la imágen.
5- Luego coloque una perlita en el centro de la flor, haga las necesarias.
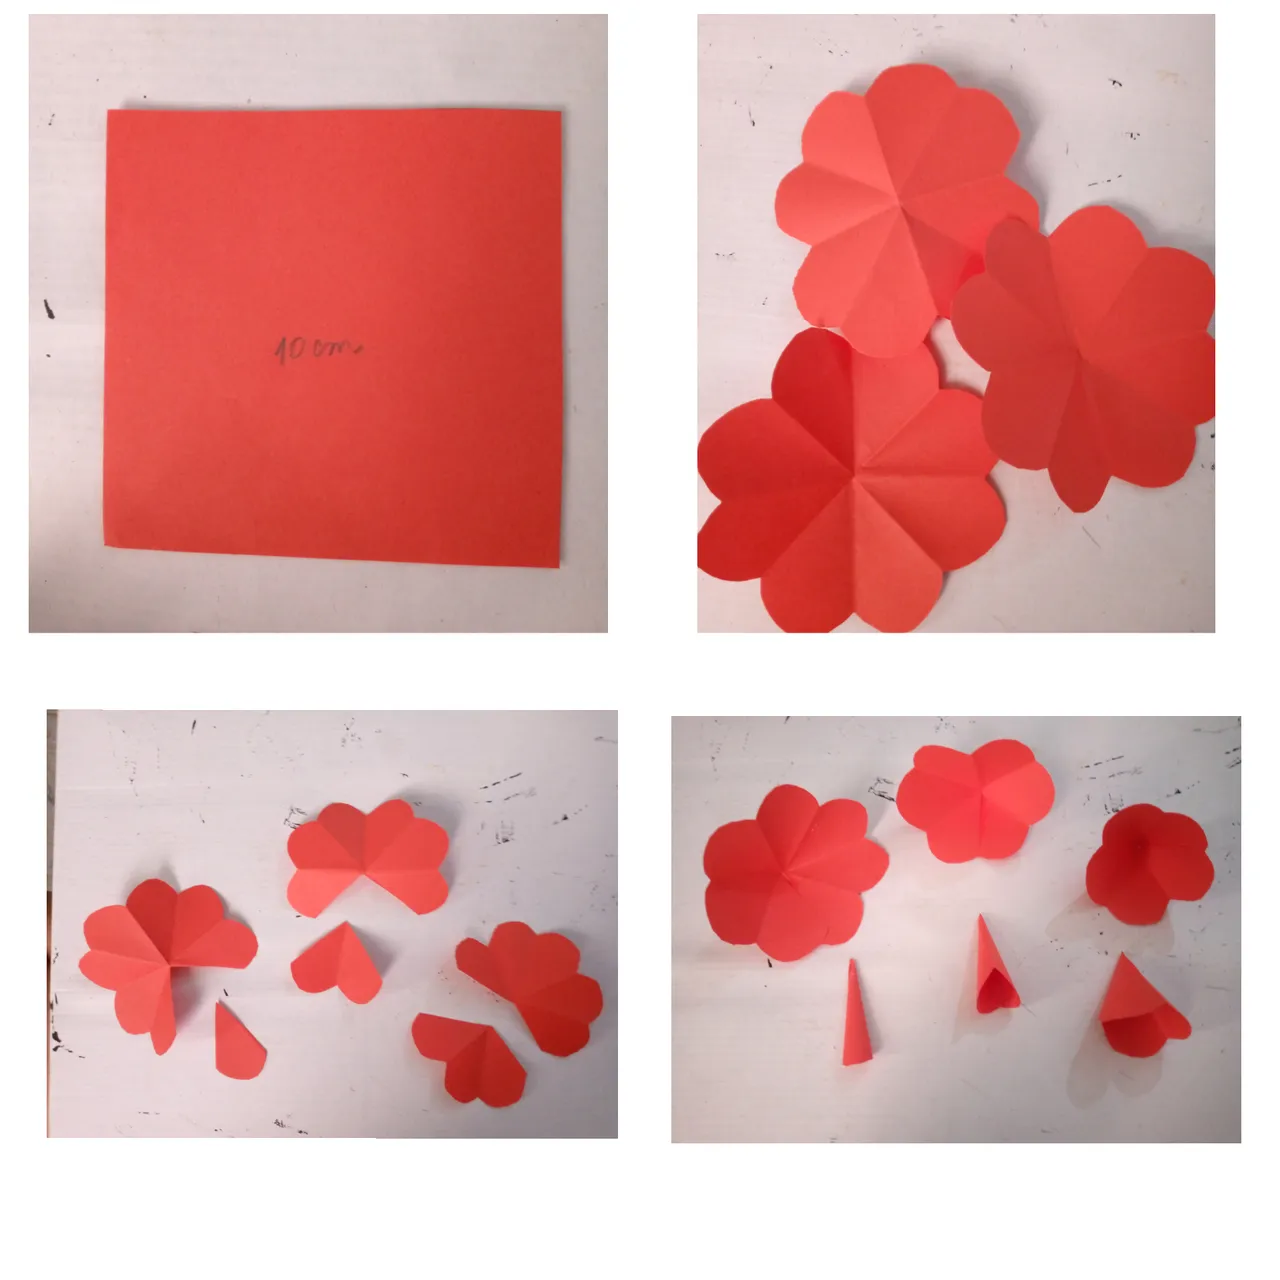
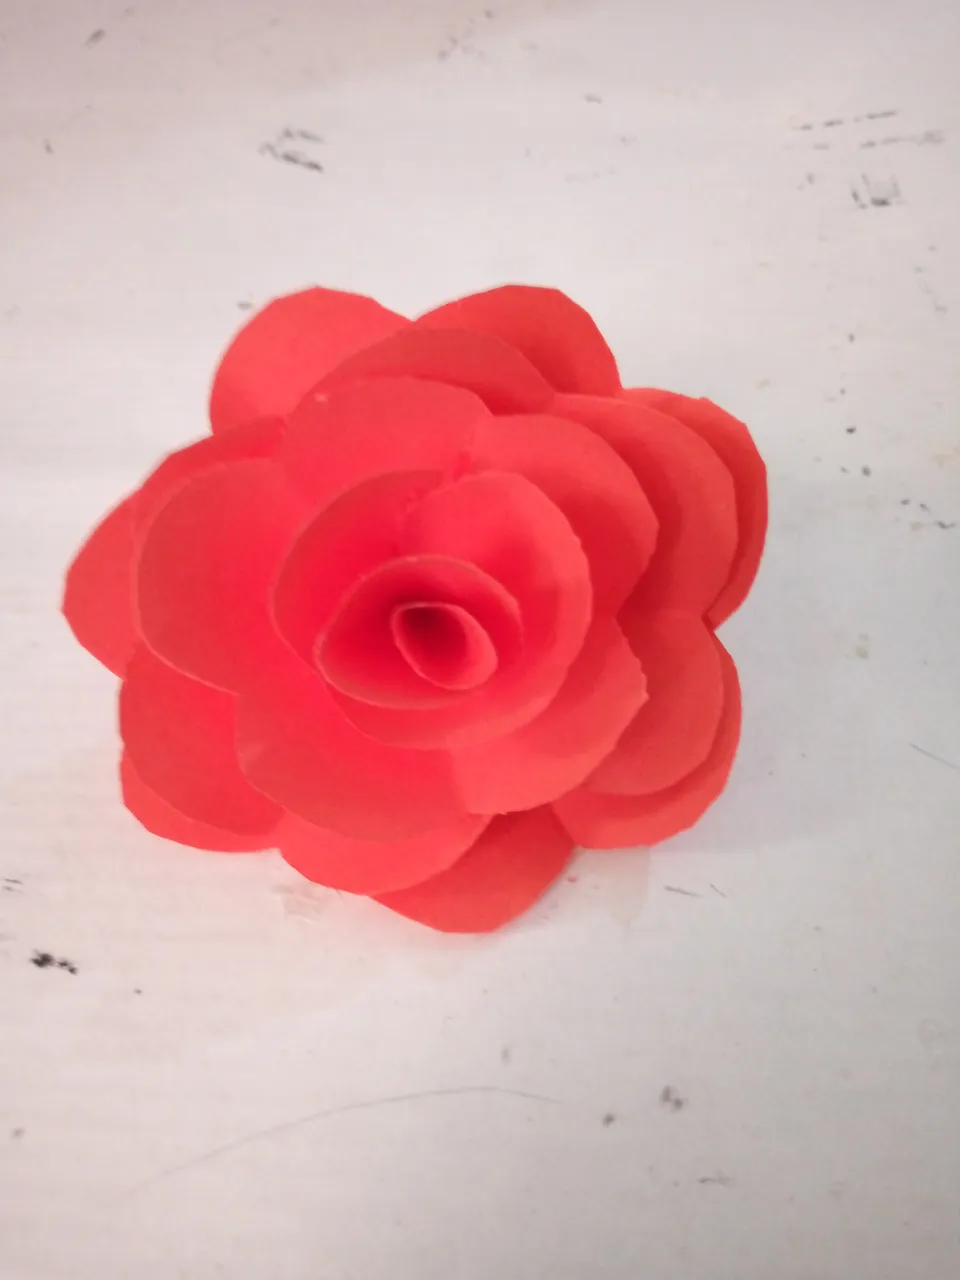
6- We will make a flower larger than 10cm the square with the red paper, the same procedure is followed for the blue flowers, until the step of opening it, from these flowers three will be made, a petal of a flower will be cut , 2 petals of another flower and 3 petals of another flower, the ends of each one are glued including the cut petals, and we make a beautiful rose.
6- Haremos una flor más grande de 10cm el cuadrado con el papel de color rojo, se sigue el mismo procedimiento de las flores celeste, hasta el paso de abrirla, de estás flores se harán tres, se cortará un pétalo de una flor, 2 pétalos de otra flor y 3 pétalos de otra flor, se pegan los extremos de cada una incluyendo los pétalos cortados, y armamos una linda rosa.
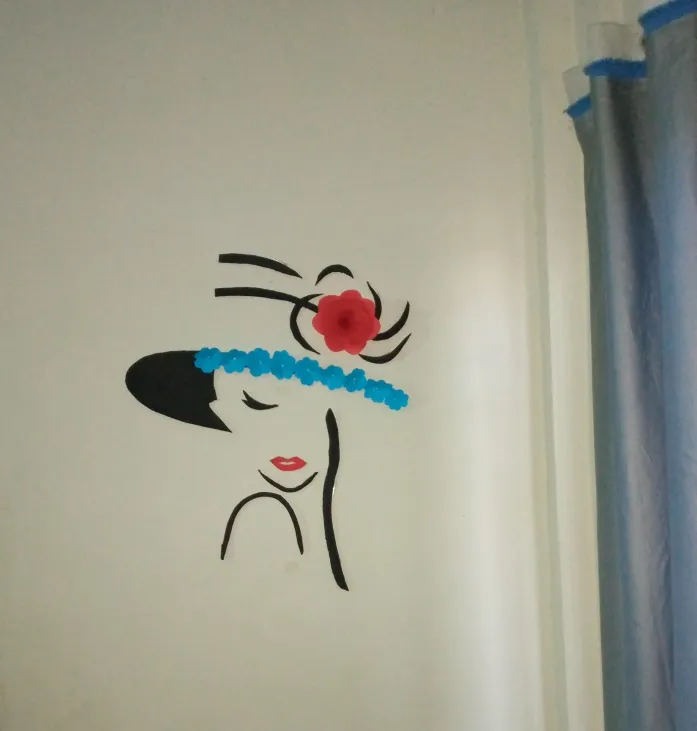
7- With all the pieces ready, we assemble our beautiful DIY on the wall that you have selected in your room.
7- Con todas las piezas listas, armamos en la pared que hayas seleccionado en tu habitación nuestro hermoso bricolaje.
This is how that space in your room is decorated that will make it look very beautiful.
Así queda decorado ese espacio de tu habitación que que luzca muy hermoso.
I hope you liked it, see you soon!
Espero les haya gustado, hasta pronto!