
Diy hermoso pájaro y nido.🐦 / beautiful bird and nest.🐦

Welcome my hives friends, on this occasion I will be showing you how to make a beautiful bird and its nest with few materials, but without a doubt a beautiful result and for that I used:
Materiales / material
- estambre.
- papel higiénico.
- silicon en barra.
- 1 lata de atun.
- tempera negra.
- hilo de yute.
- yarn.
- toilet paper.
- silicone stick.
- 1 can of tuna.
- black tempera.
- jute thread.
Pasos / Steps
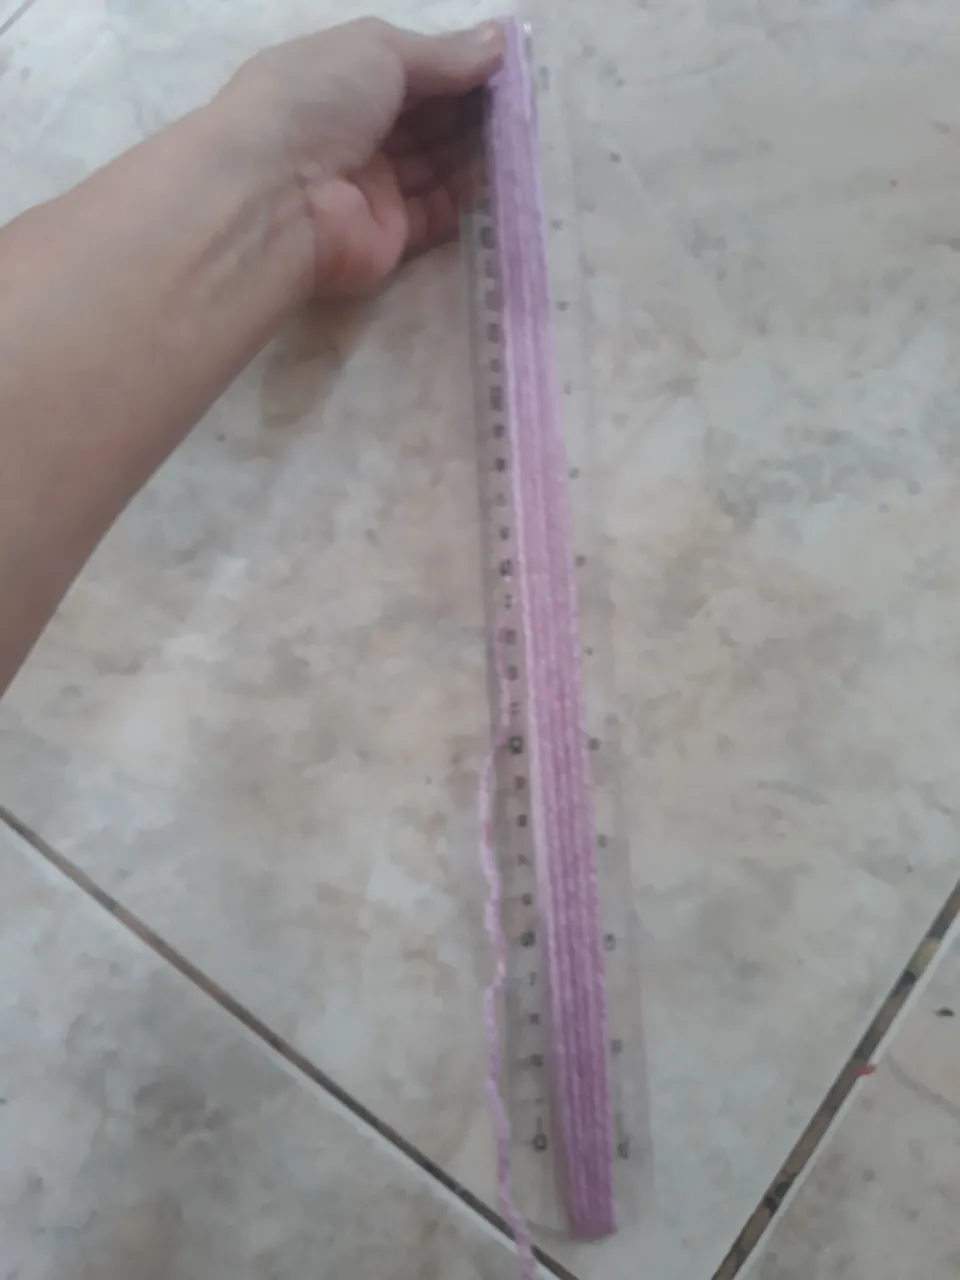
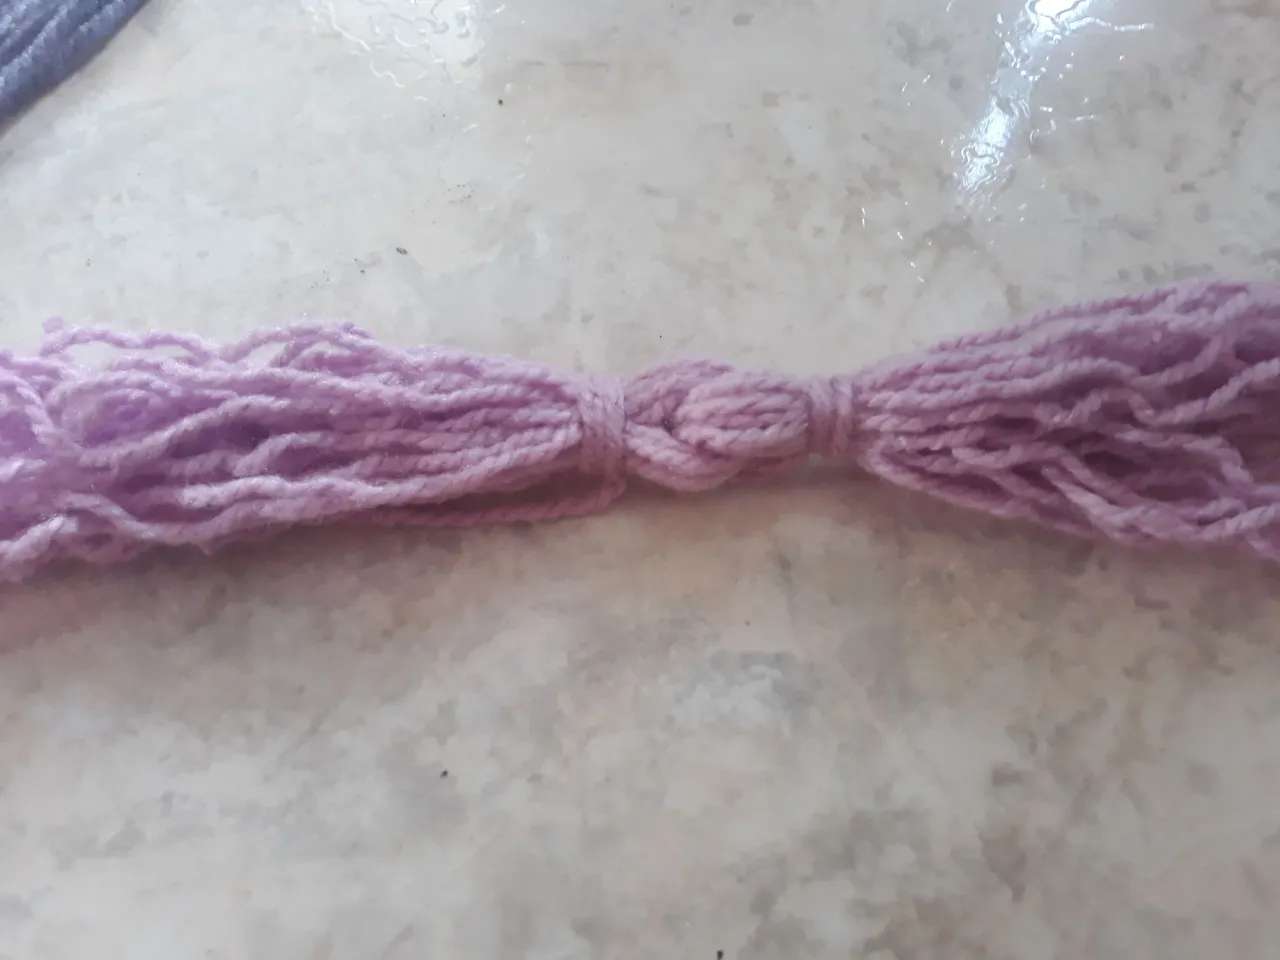
I started taking a ruler and began to wrap the yarn along it as many turns as necessary, in my case were 8, then we cut both ends of the yarn and repeat this step 3 times, the color of the yarn can vary according to the taste of each person, in my case I worked with only 2 colors because they are the ones I had at home.
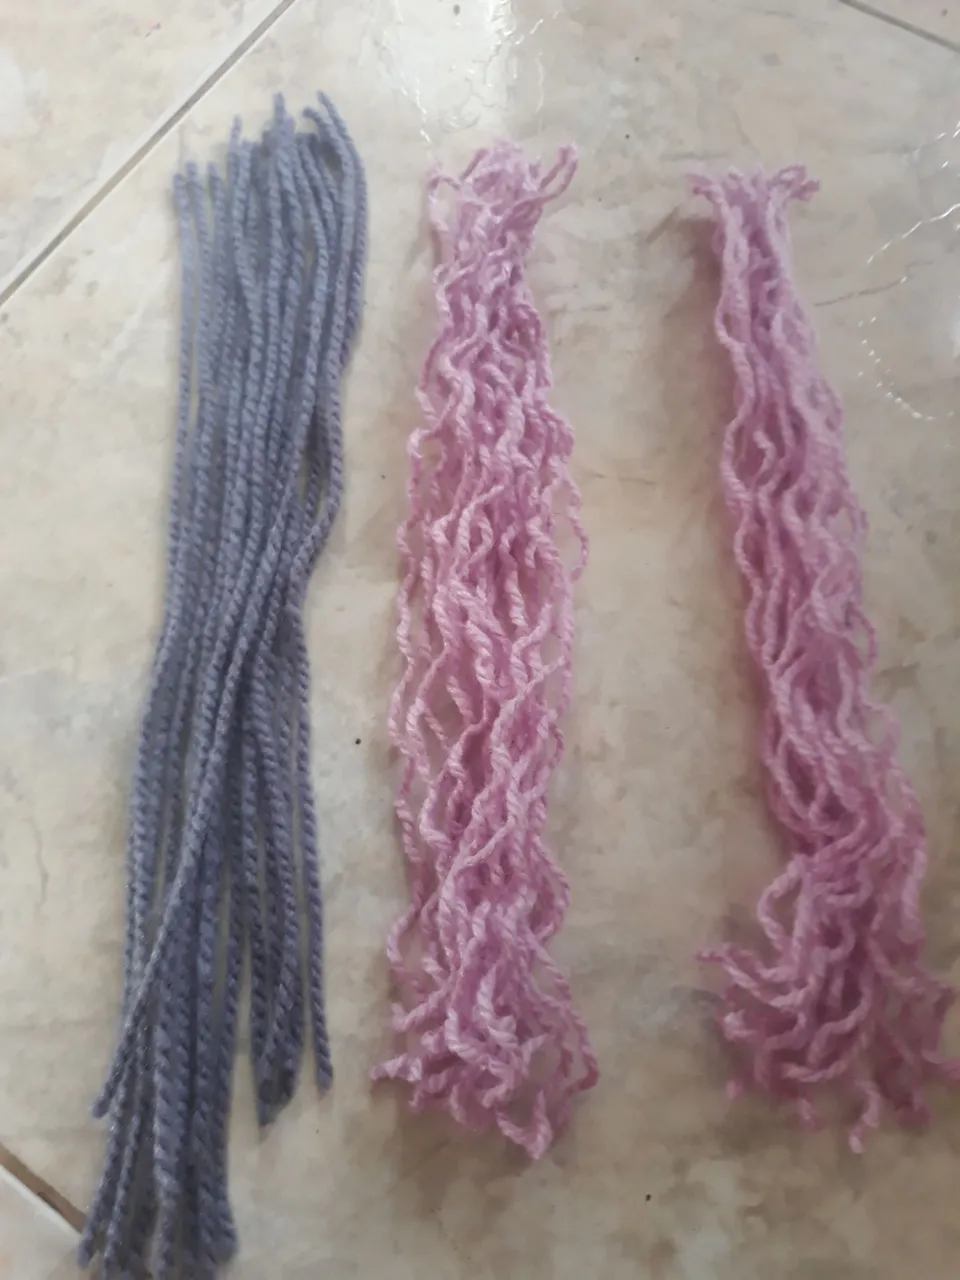
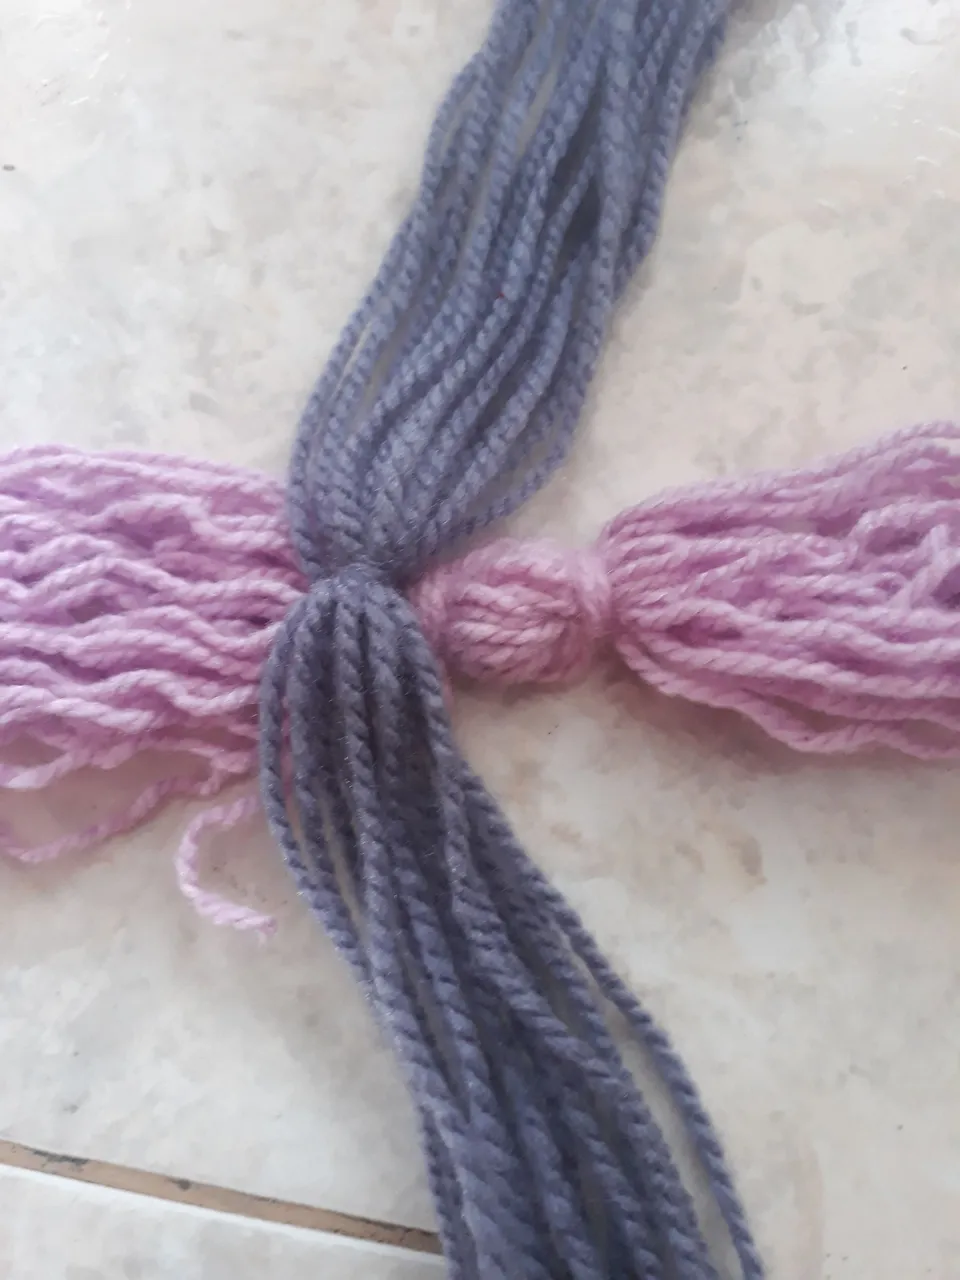
Seguidamente tome 2 de las 3 grupos de estambre y los cruce entre ellos como se visualiza en la foto.
Then take 2 of the 3 groups of yarn and cross them together as shown in the picture.
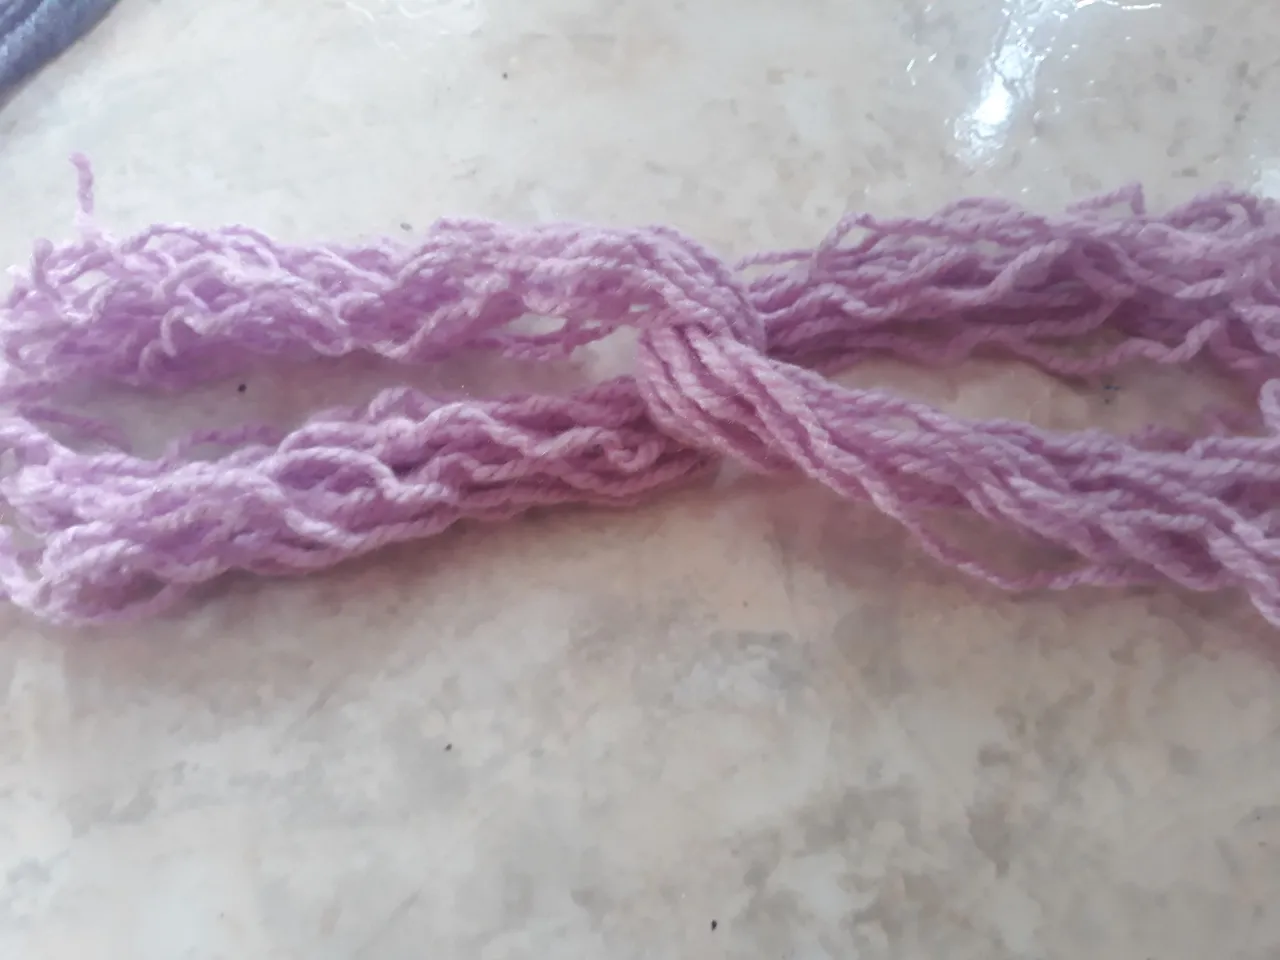
Posteriormente realice un nudo en cada extremo.
Then tie a knot at each end.
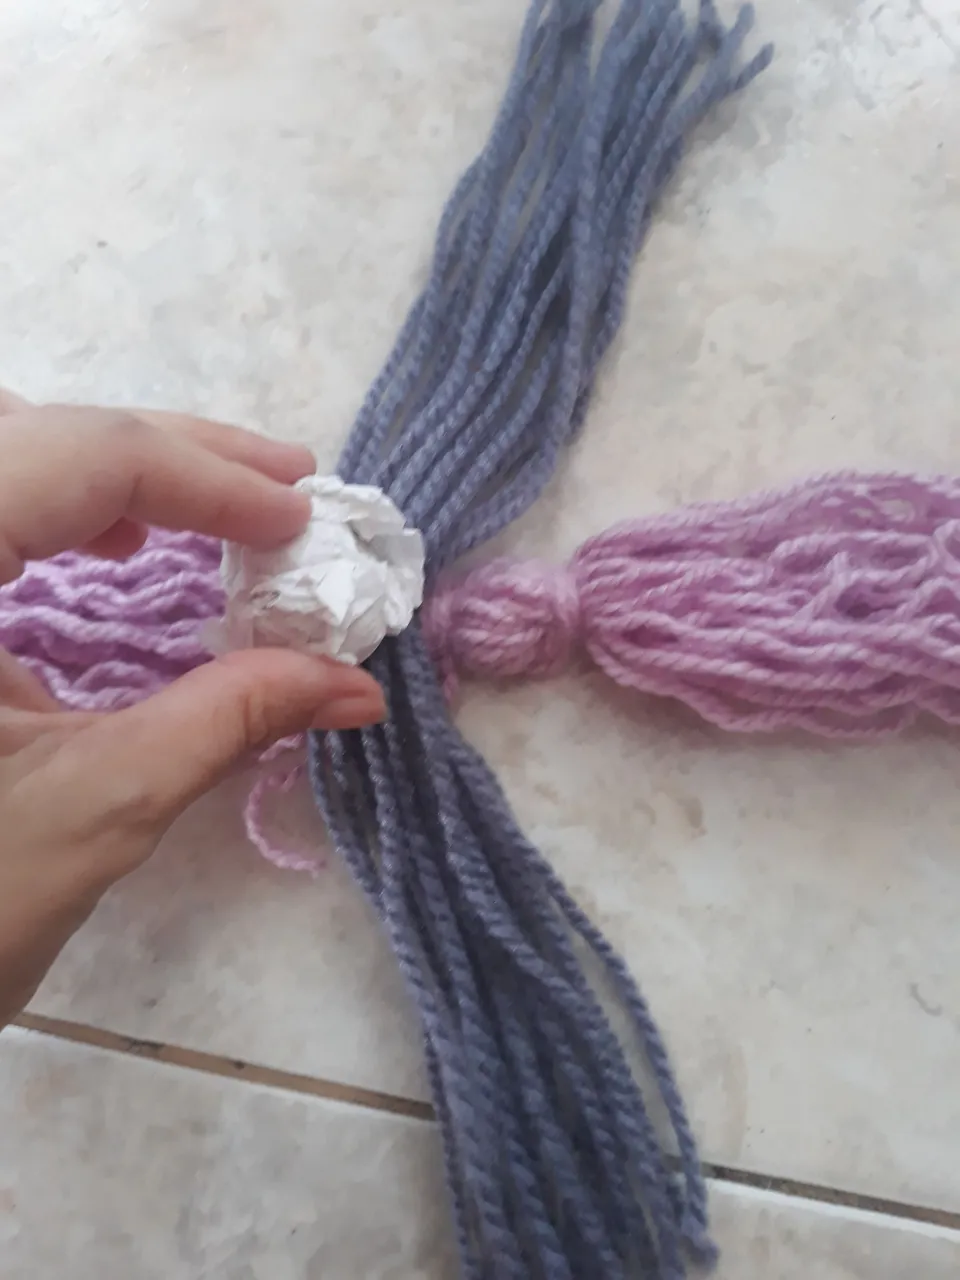
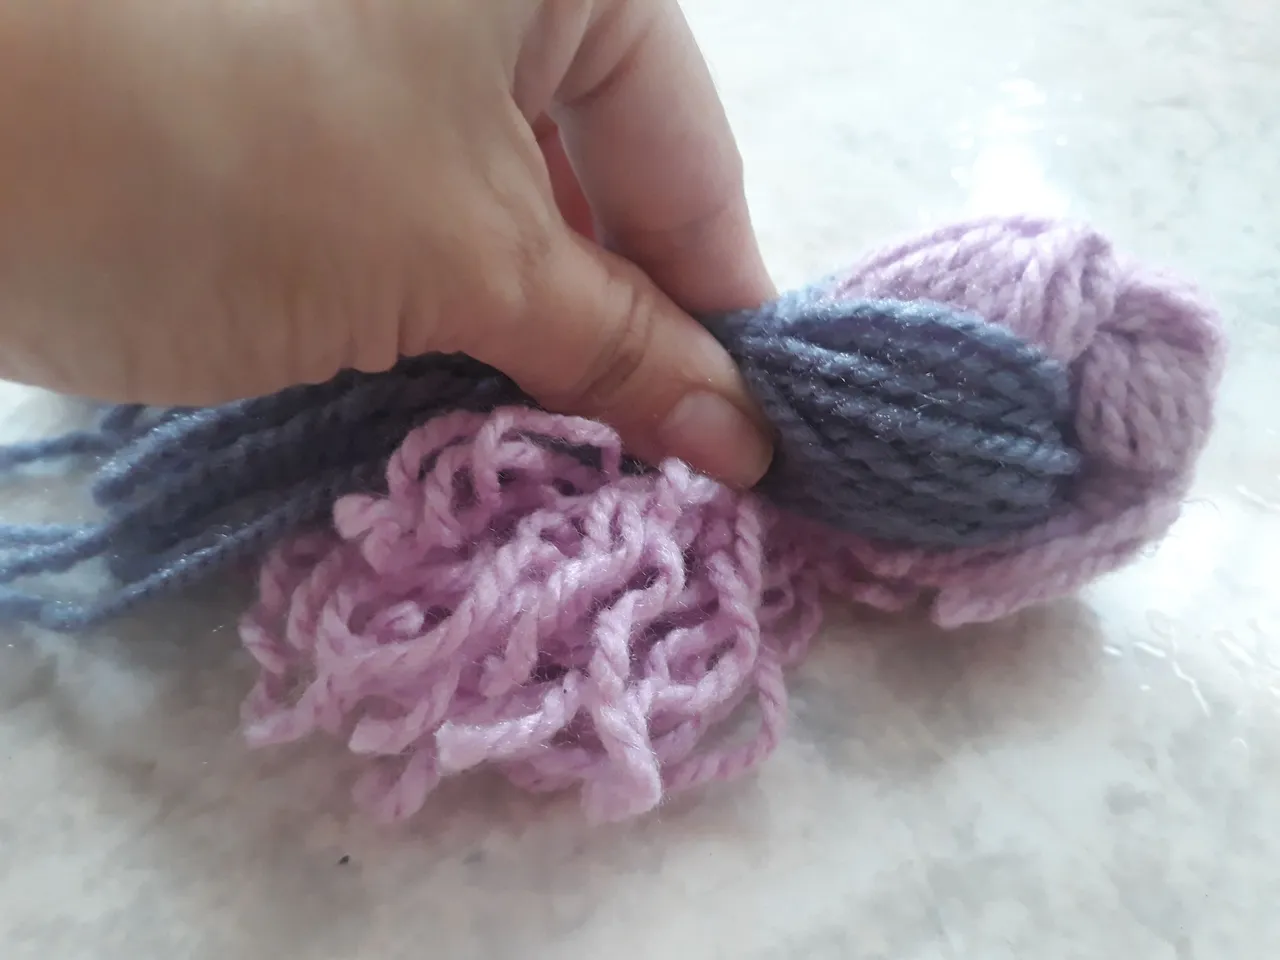
Posteriormente coloque el estambre morado sobre el estambre rosa como se visualiza en la foto, seguidamnete tome una porción de papel higiénico realice una esfera con el y lo coloque sobre el estambre morado, por último procedí a realizar un nudo en el estambre rosado una vez que lo paso por encima de la esfera de papel higienico.
Posteriormente coloque el estambre morado sobre el estambre rosa como se visualiza en la foto, seguidamnete tome una porción de papel higiénico realice una esfera con el y lo coloque sobre el estambre morado, por último procedí a realizar un nudo en el estambre rosado una vez que lo paso por encima de la esfera de papel higienico.
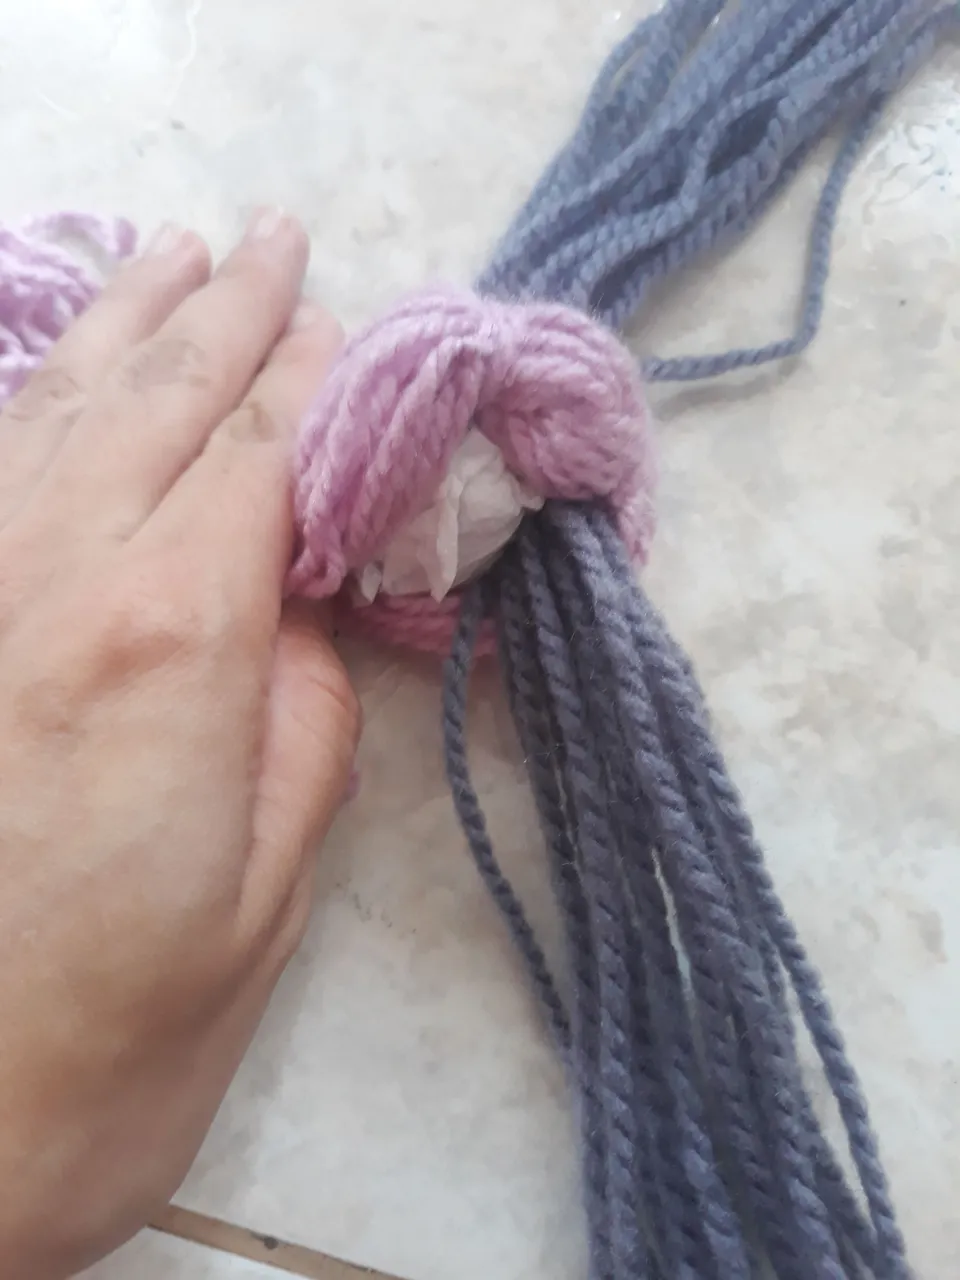
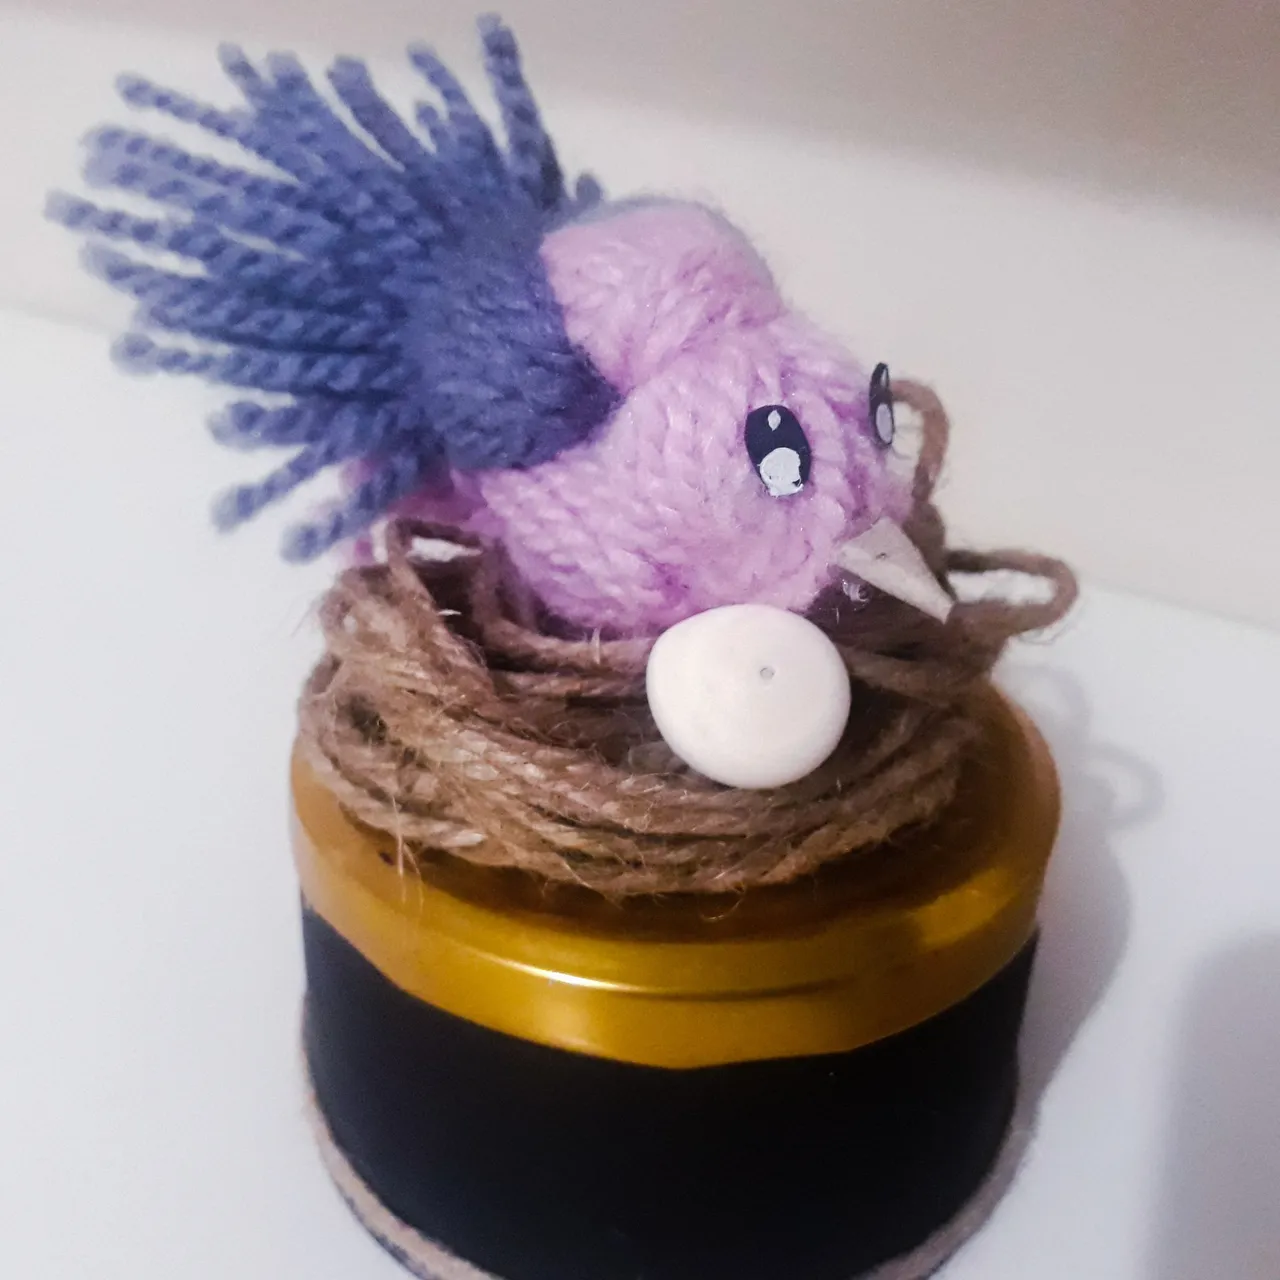
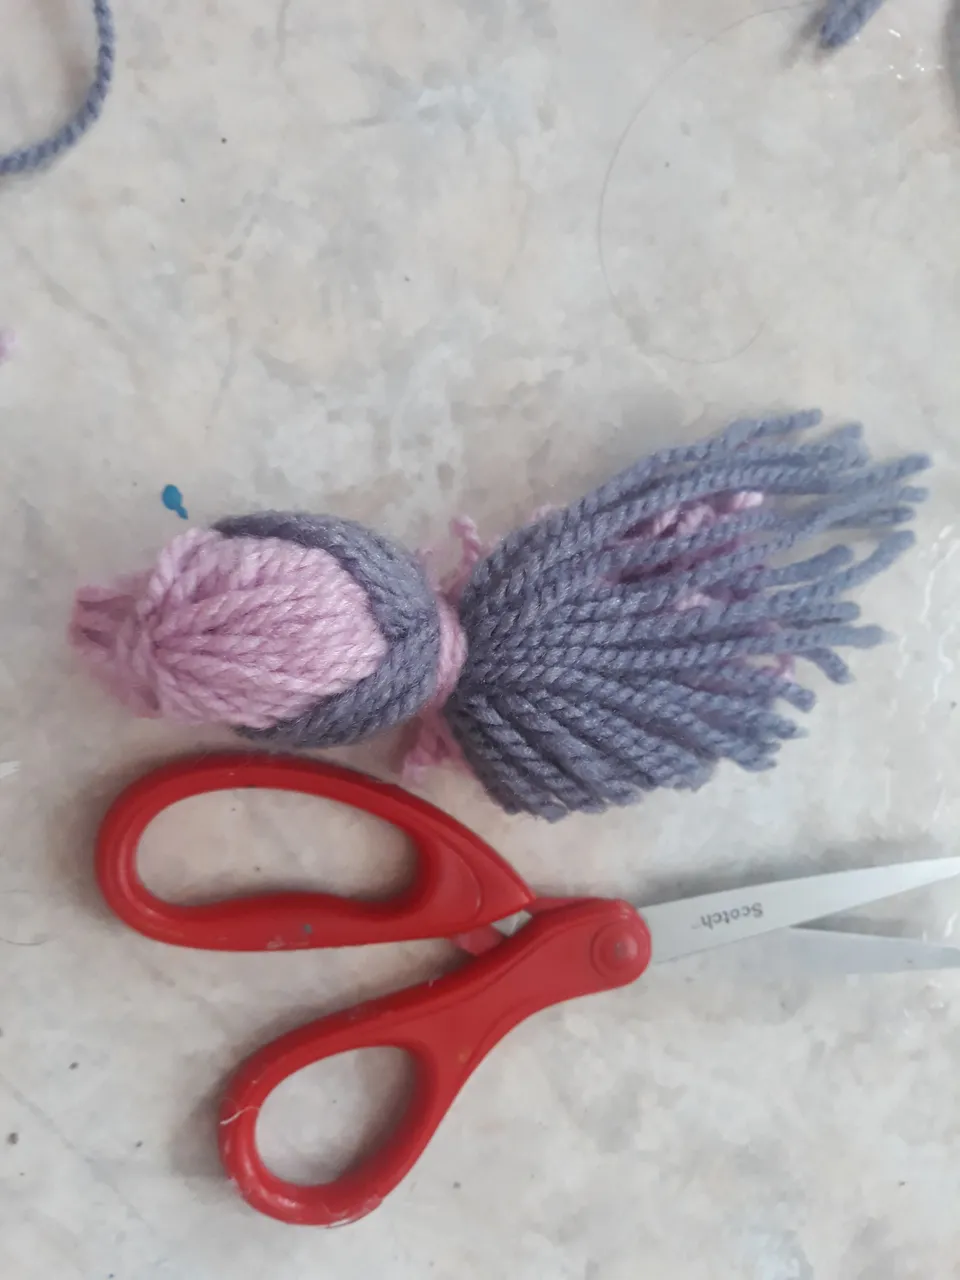
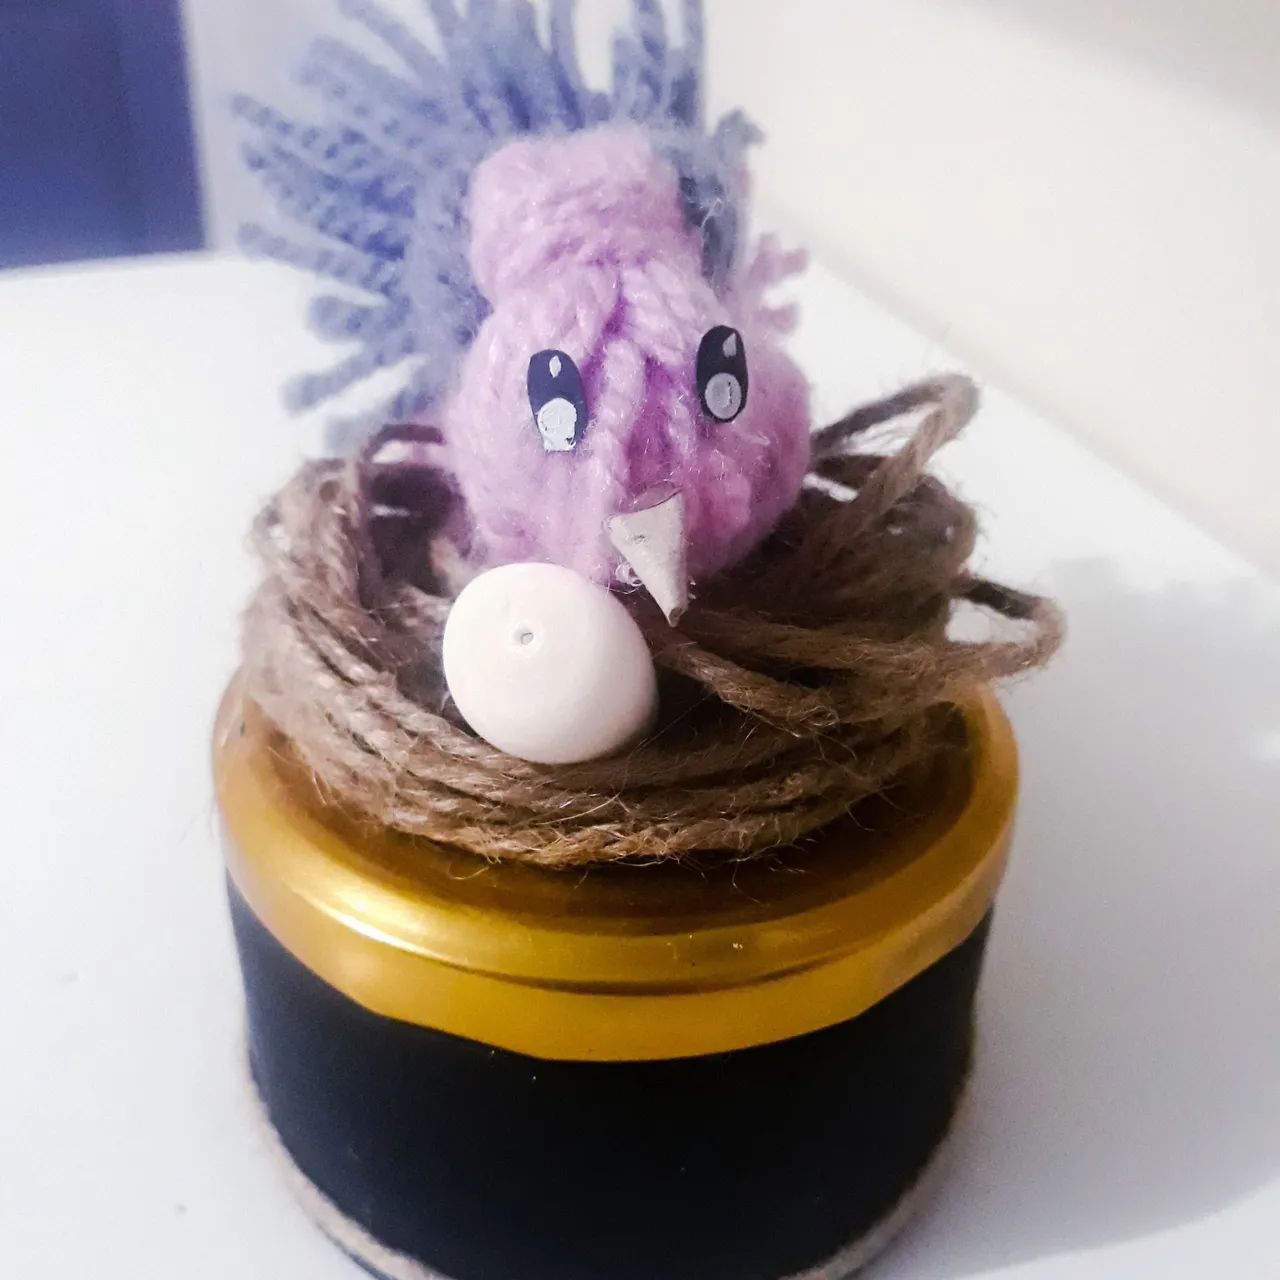
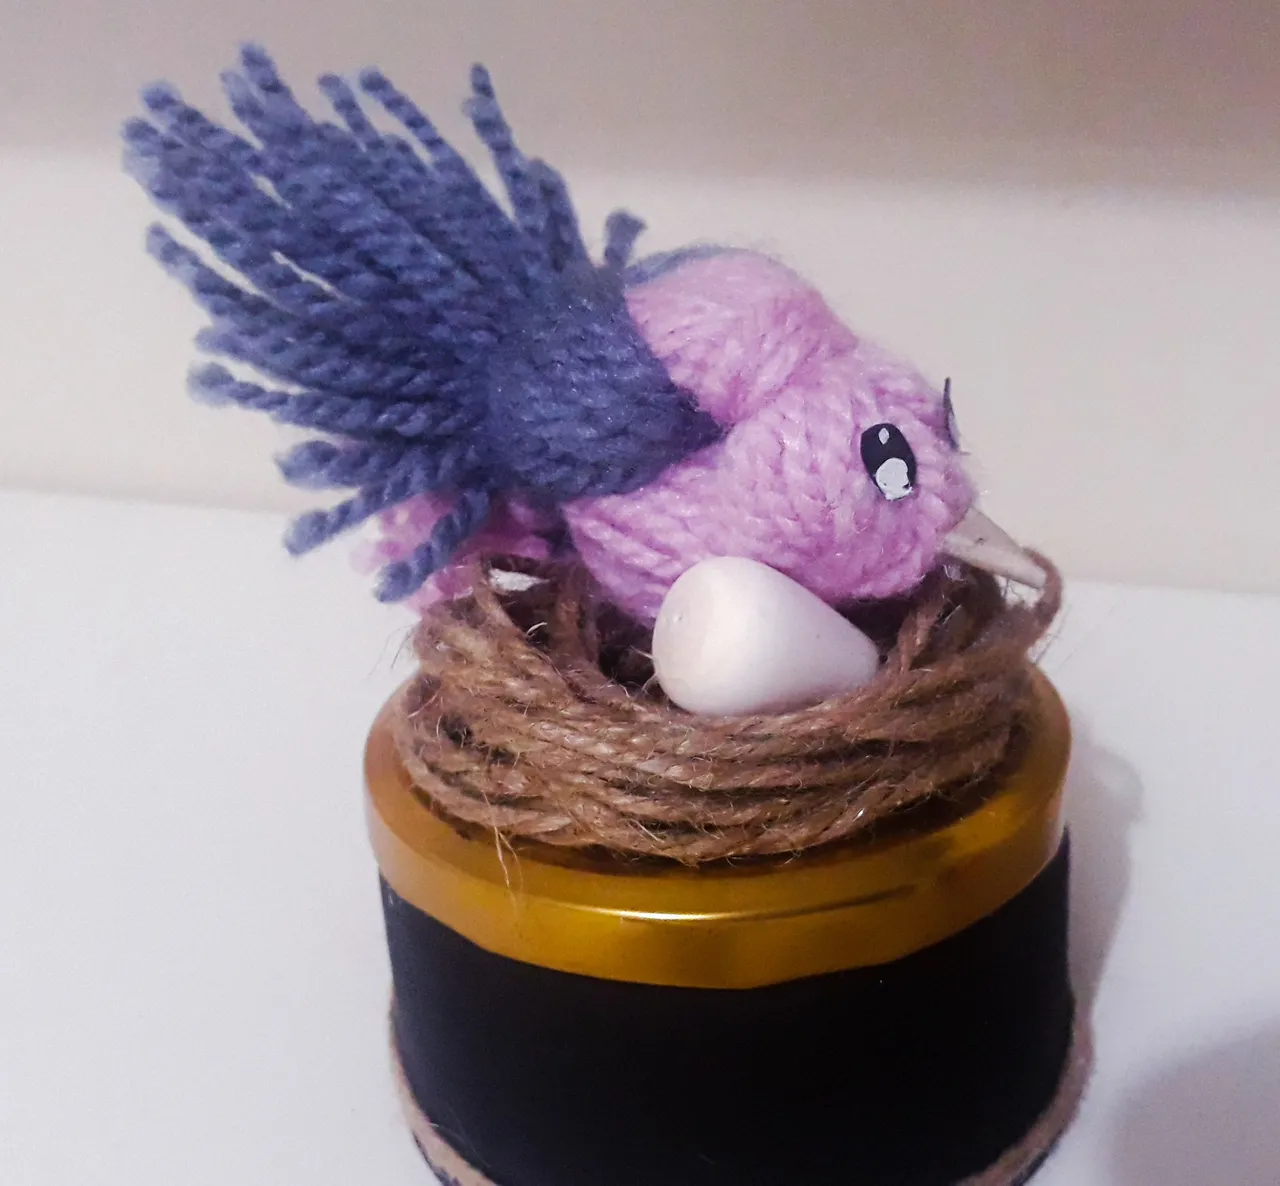
llevo hacia atrás el estambre morado y le realizo un nudo y para darle forma a la cola de nuestra ave procedemos a cortar con una tijera y para darle aún más vida a nuestro pájaro con cartón le realizamos los ojos y el pico y procedemos a fijarlos en la parte frontal de su cabeza.
I take back the purple yarn and tie a knot and to give shape to the tail of our bird we proceed to cut with scissors and to give even more life to our bird with cardboard we make the eyes and the beak and proceed to fix them in the front part of its head.
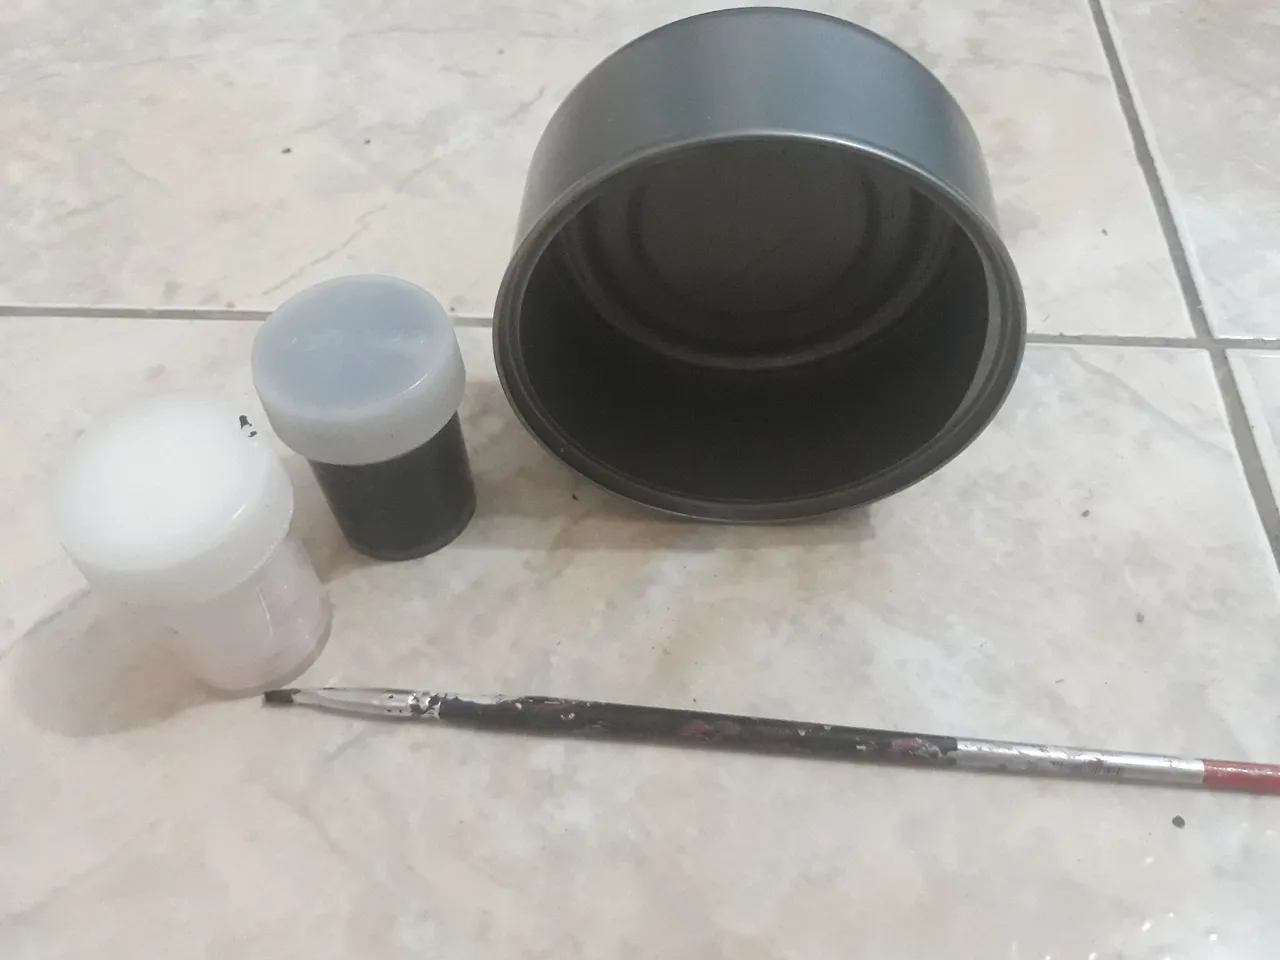
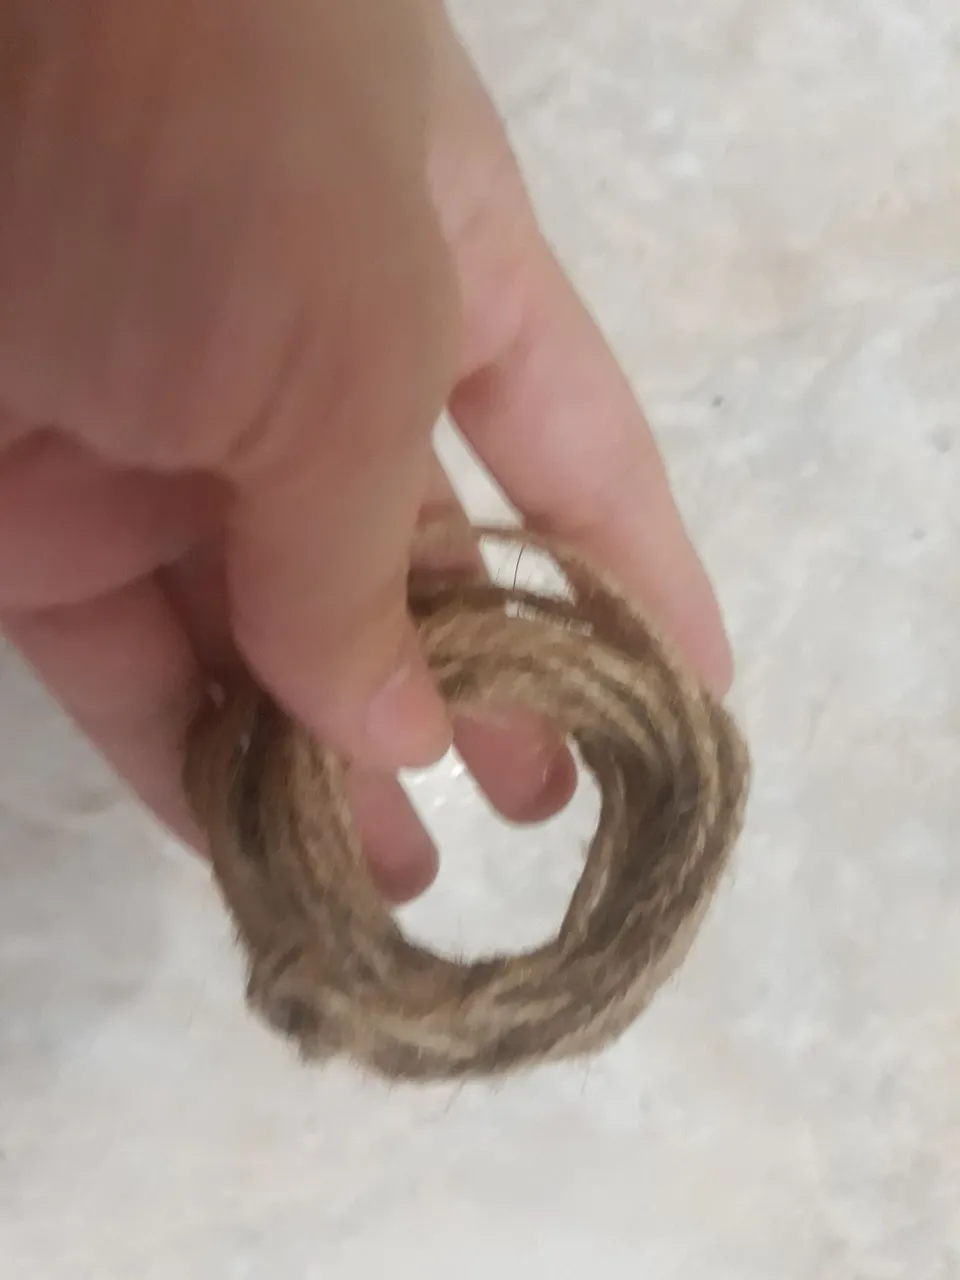
Para el nido utilice una lata de atún la cual pinten de negro en su parte externa, una vez que seco la pintura fije sobre ella una tapa termine de darle un toque con hilo de yute.
For the nest use a tuna can which is painted black on the outside, once the paint is dry fix a lid on it and finish giving it a touch with jute thread.
Resultado / Result
Gracias por llegar hasta aqui, espero que fuese de su agrado esta ingeniosa y linda manualidad, será hasta un proximo post bendiciones y feliz día.
Thank you for coming here, I hope you liked this ingenious and cute craft, will be until a next post blessings and happy day.