Hola gente bonita de #hivediy hoy les traigo un tutorial de como elaborar uno de los instrumentos musicales típicos de mi país Venezuela que me lo pidió mi linda sobrina Lupita para su exposición de fin de curso.
Hello beautiful people from #hivediy today I bring you a tutorial on how to make one of the typical musical instruments of my country Venezuela that my beautiful niece Lupita asked me for her end-of-year exhibition.
Es para mi un honor trae este tutorial sabiendo que se trata de un elemento musical típico de mi folklore, y aunque no fue tan fácil elaborarlo porque mi engrapadora se dañó, igual me divertí mucho haciéndolo aquí les dejo el paso a paso para que se atrevan a realizarlo.
It is an honor for me to bring this tutorial knowing that it is a typical musical element of my folklore, and although it was not so easy to make it because my stapler was damaged, I still had a lot of fun doing it here I leave the step by step for you to dare to do it.
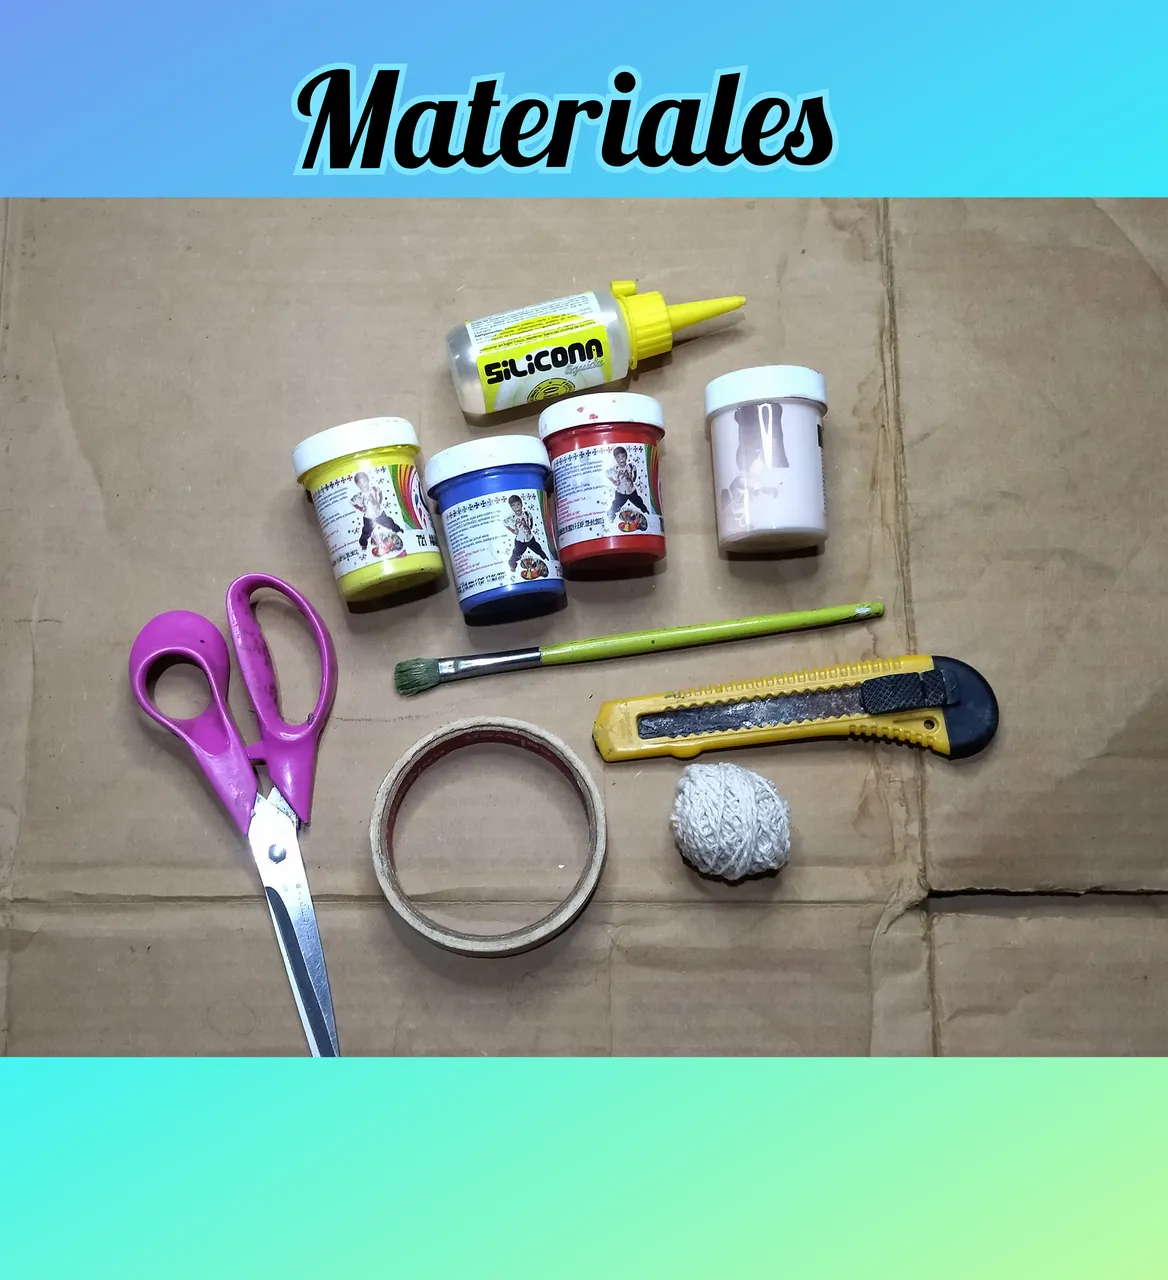
💞MATERIALES//MATERIALS💞
💞 Caja de cartón.
🎶 Silicón líquido.
💞 Pinturas al frío blanca, amarillo, azul y rojo.
🎶 Papel crepé dorado.
💞 Hilo pabilo.
🎶 Regla.
💞 Tijera.
🎶 Palillos.
 💞🎶💞 PASO A PASO // STEP BY STEP 💞🎶💞
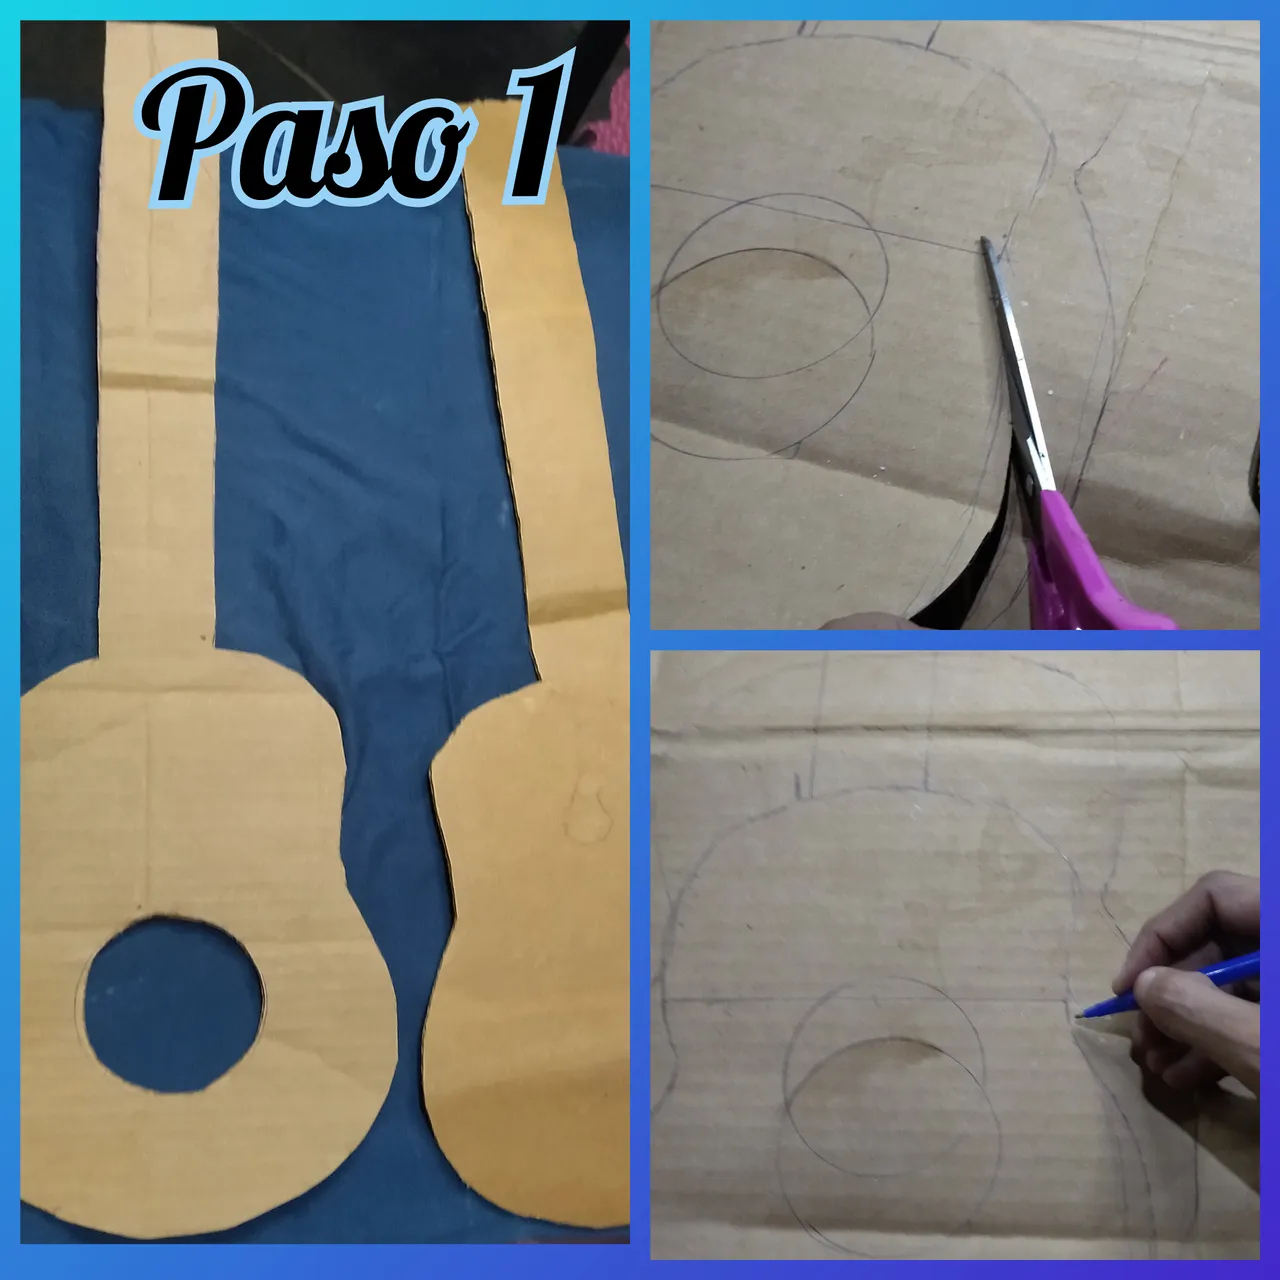
💞🎶💞 PASO 1 // STEP 1 💞🎶💞
💞🎶💞 PASO A PASO // STEP BY STEP 💞🎶💞
💞🎶💞 PASO 1 // STEP 1 💞🎶💞
Tomamos la caja de cartón y con ayuda de un lápiz o de un bolígrafo dibujamos la figura del cuatro, no muy grande porque es para una niña pequeña, luego de haber dibujado con la tijera recortamos dos figuras iguales, una para el frente y otra para la parte de atrás.
We take the cardboard box and with the help of a pencil or a pen we draw the figure of four, not very big because it is for a little girl, after drawing with scissors we cut out two equal figures, one for the front and one for the back.
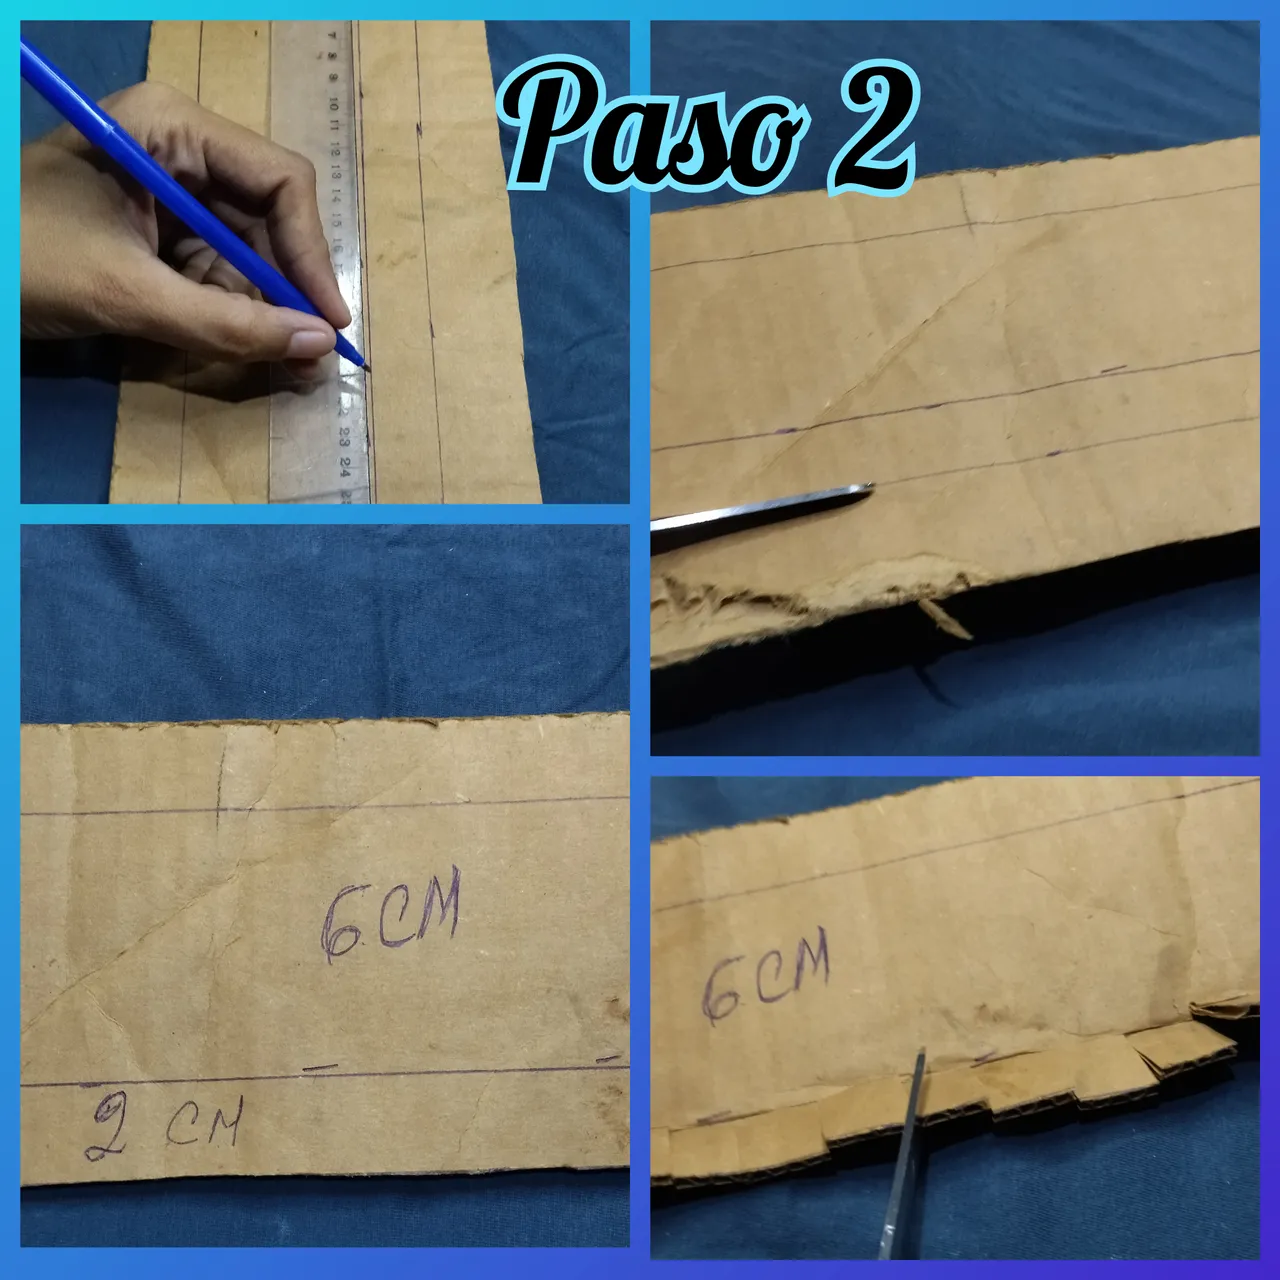
 💞🎶💞 PASO 2 // STEP 2 💞🎶💞
Luego dibujamos en el cartón una tira larga de 6 cm de ancho y unas pestañas de 2cm a cada lado y recortamos.
Then we draw on the cardboard a long strip 6 cm wide and 2 cm tabs on each side and cut it out.
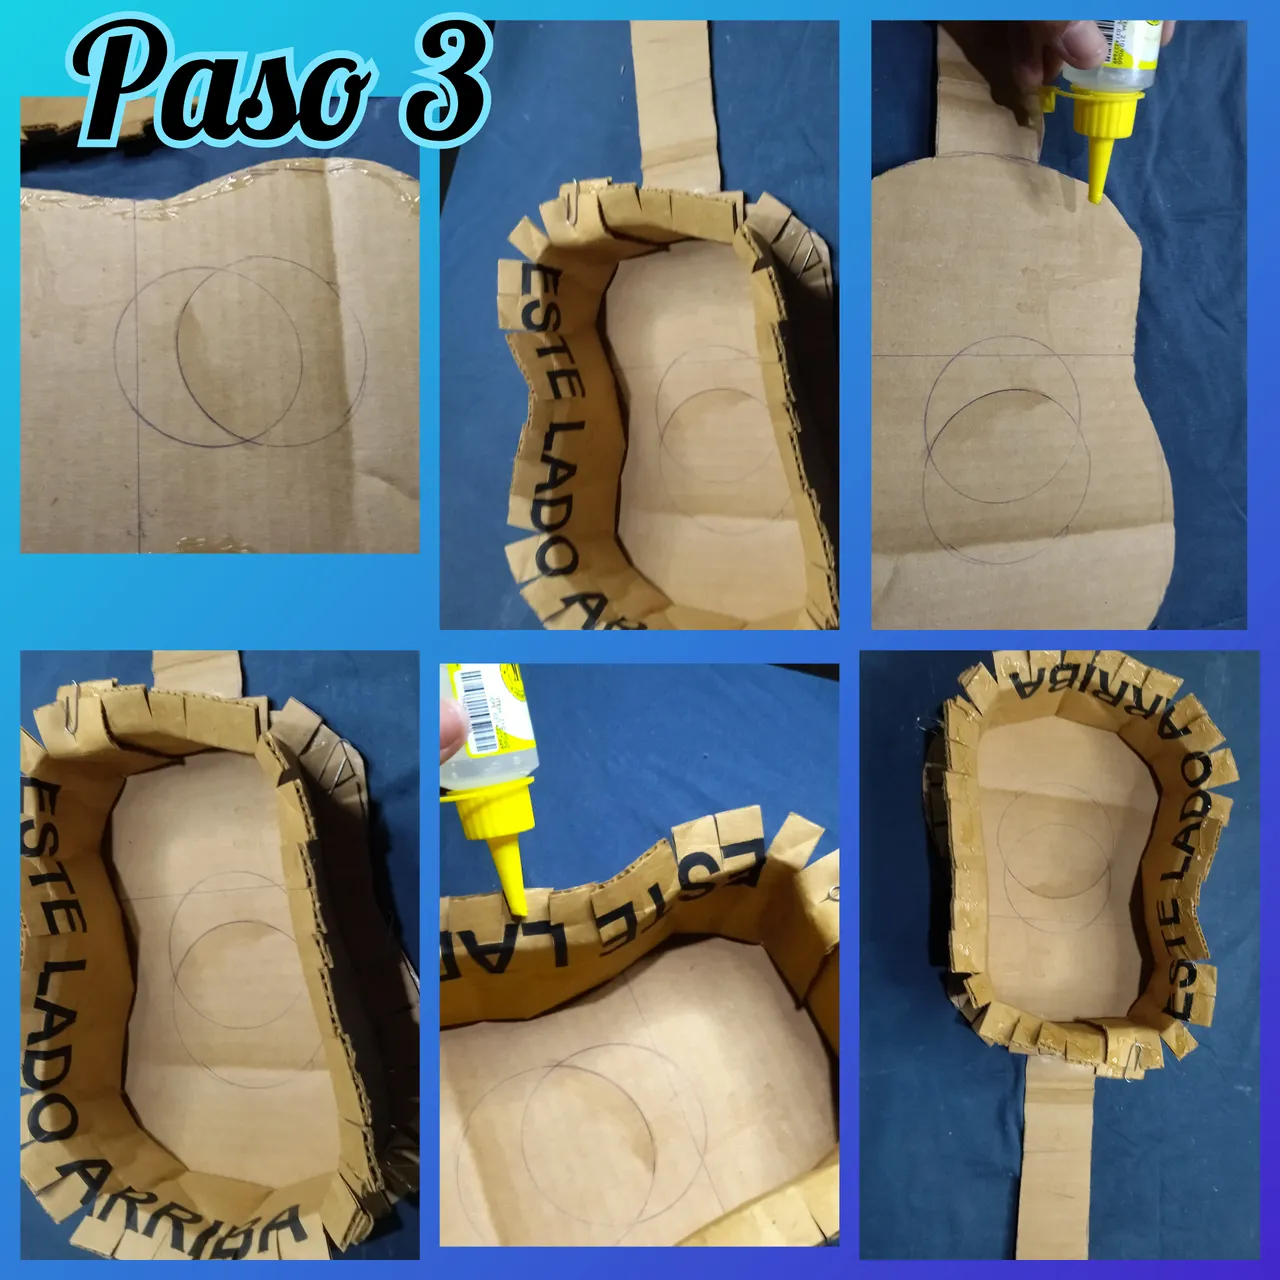
 💞🎶💞 PASO 3// STEP 3 💞🎶💞
Luego recortamos las pestañas y le aplicamos el silicón y pegamos a las dos tapas que hemos recortado.
Then we cut the tabs and apply the silicone and stick to the two covers that we have cut.
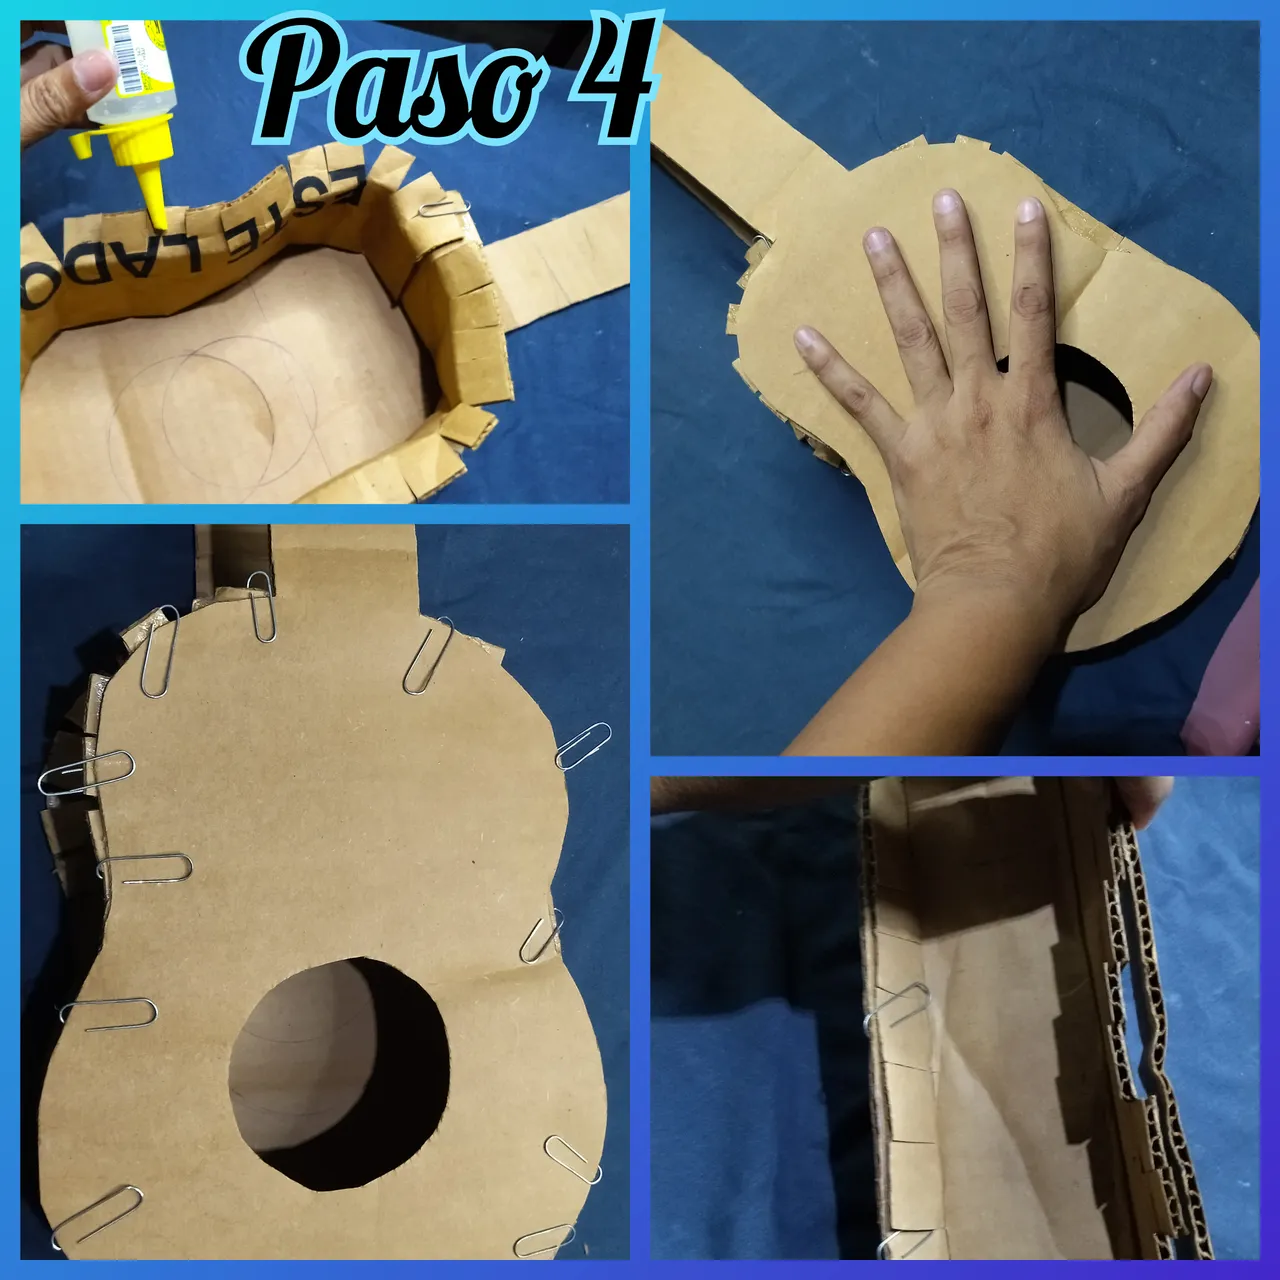
 💞🎶💞 PASO 4 // STEP 4 💞🎶💞
Luego pegamos con el silicón la tira larga a los lados y como mi engrapadora se dañó sujete con unos clip para pegar bien.
Then we glued the long strip to the sides with the silicone and since my stapler was damaged, fasten it with a clip to stick well.
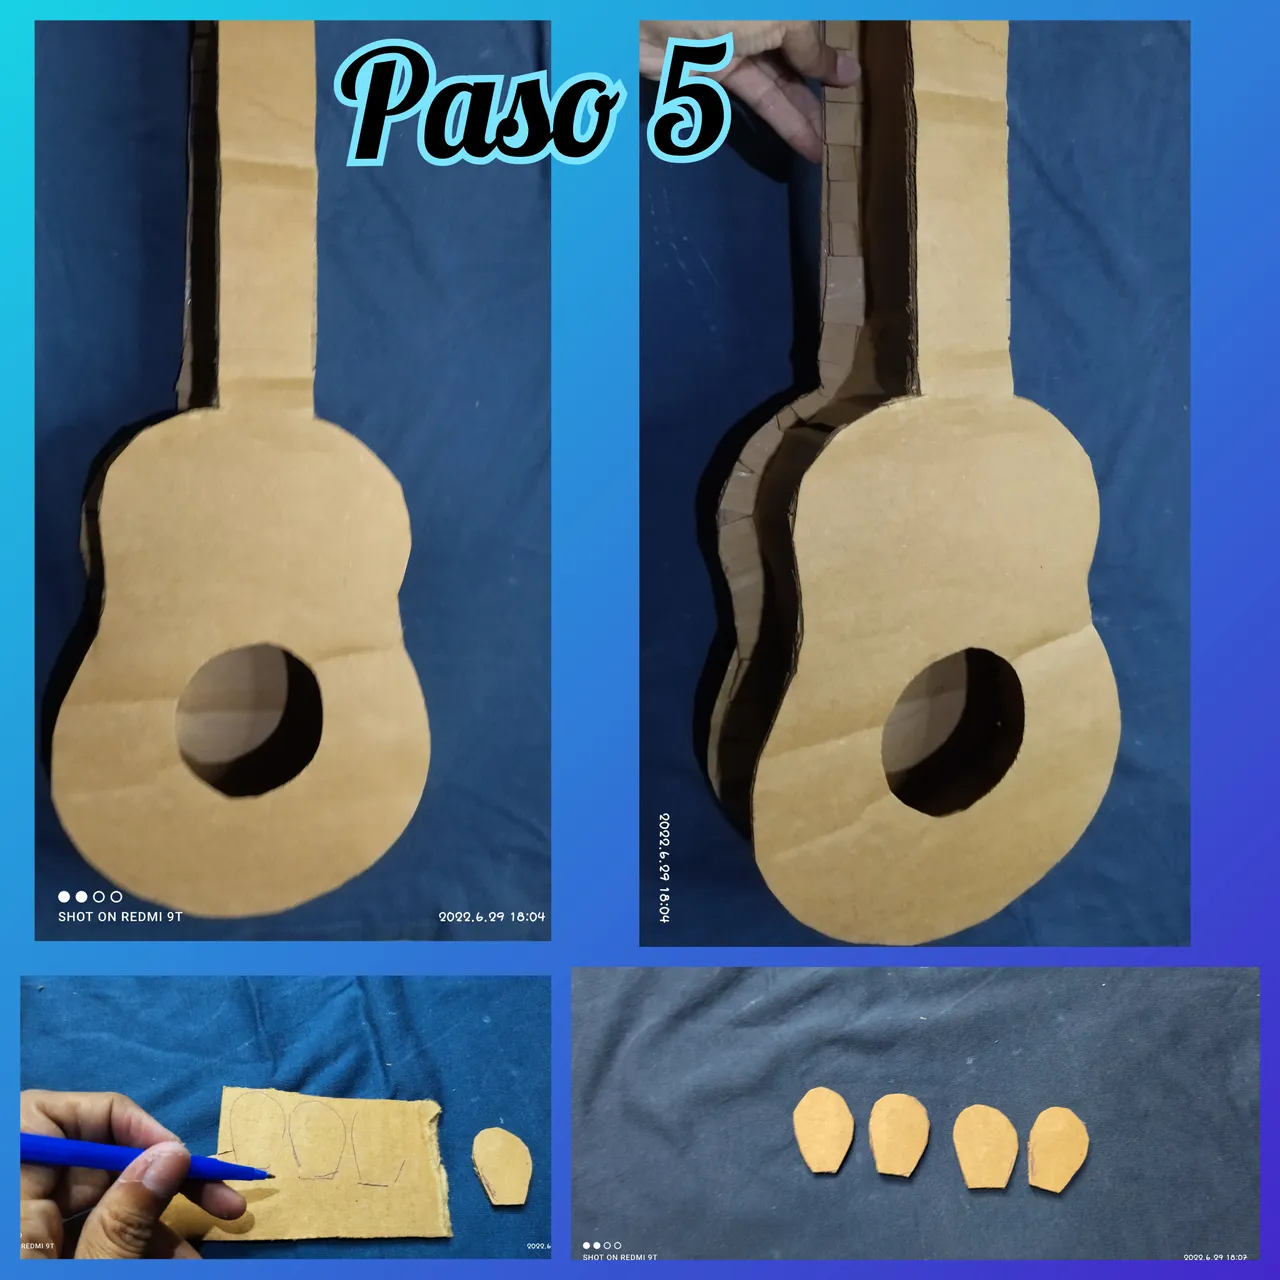
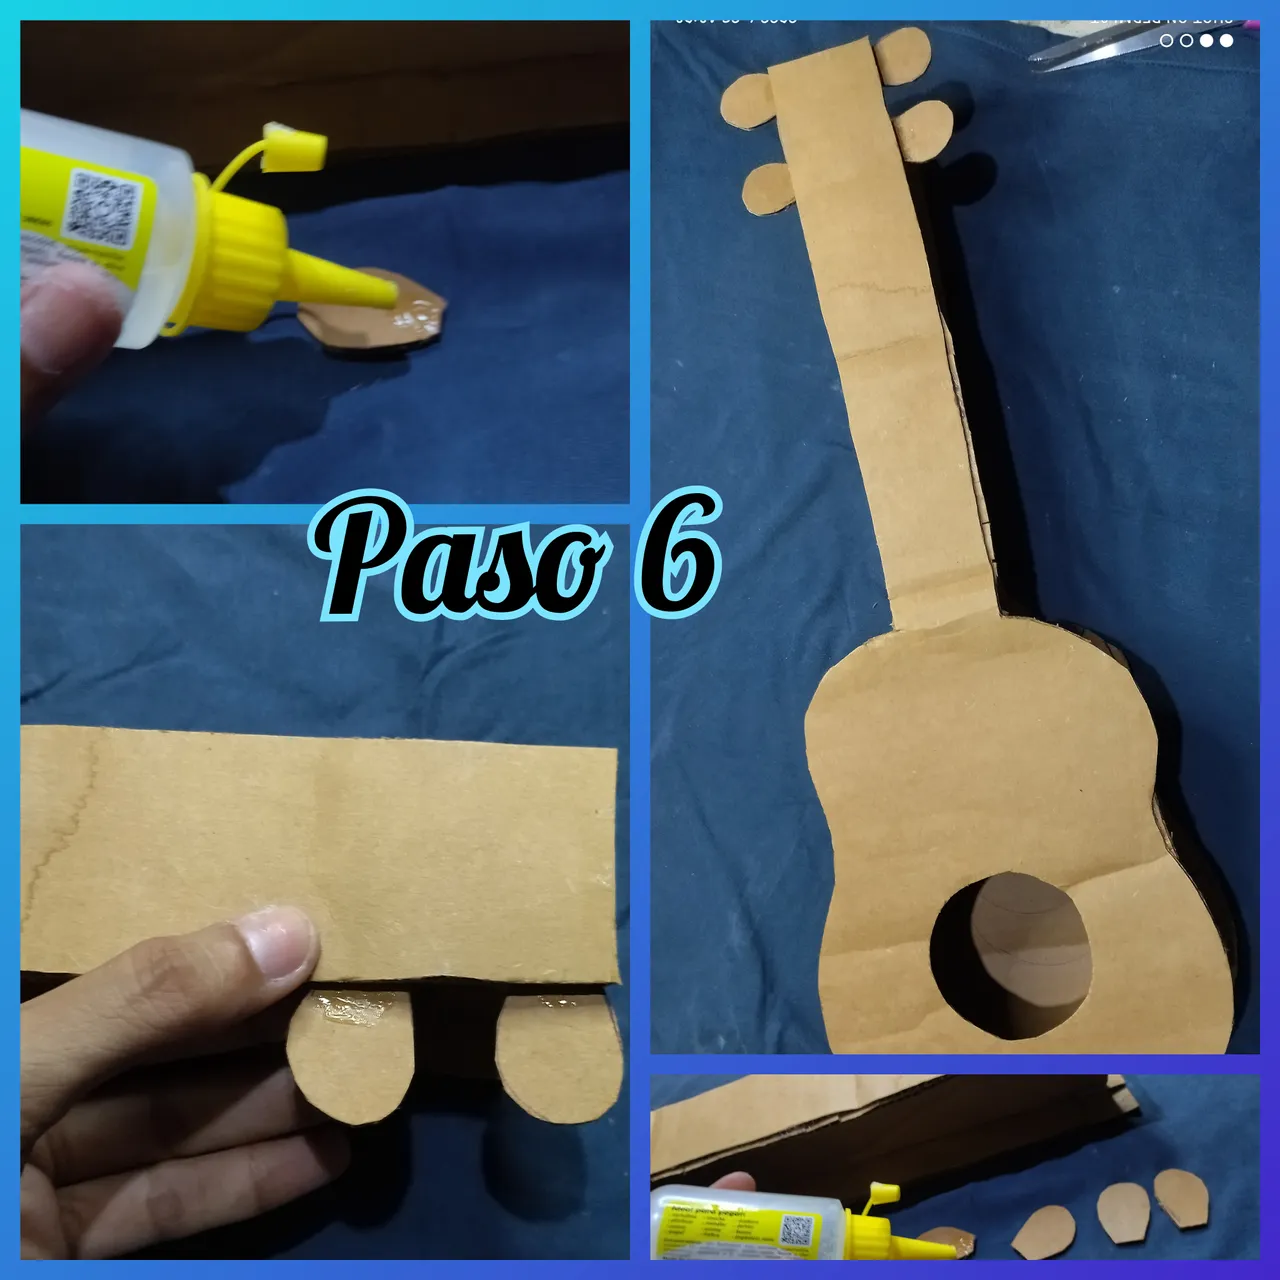
 💞🎶💞 PASO 5-6 // STEP 5-6 💞🎶💞
En un trozo de cartón recortamos las clavijas de nuestro cuatro son 4 y con un poco de silicón las pegamos.
In a piece of cardboard we cut the pegs of our four and with a little silicone we stick them.
 💞🎶💞 PASO 7-8 // STEP 7-8 💞🎶💞
En este paso procedemos a pintarlo, primero el color amarillo, luego el azul y finalmente el rojo y luego con la pintura blanca dibuje las 8 estrellas.
Luego pique los palillos y los pegue para simular los trastes del cuatro.
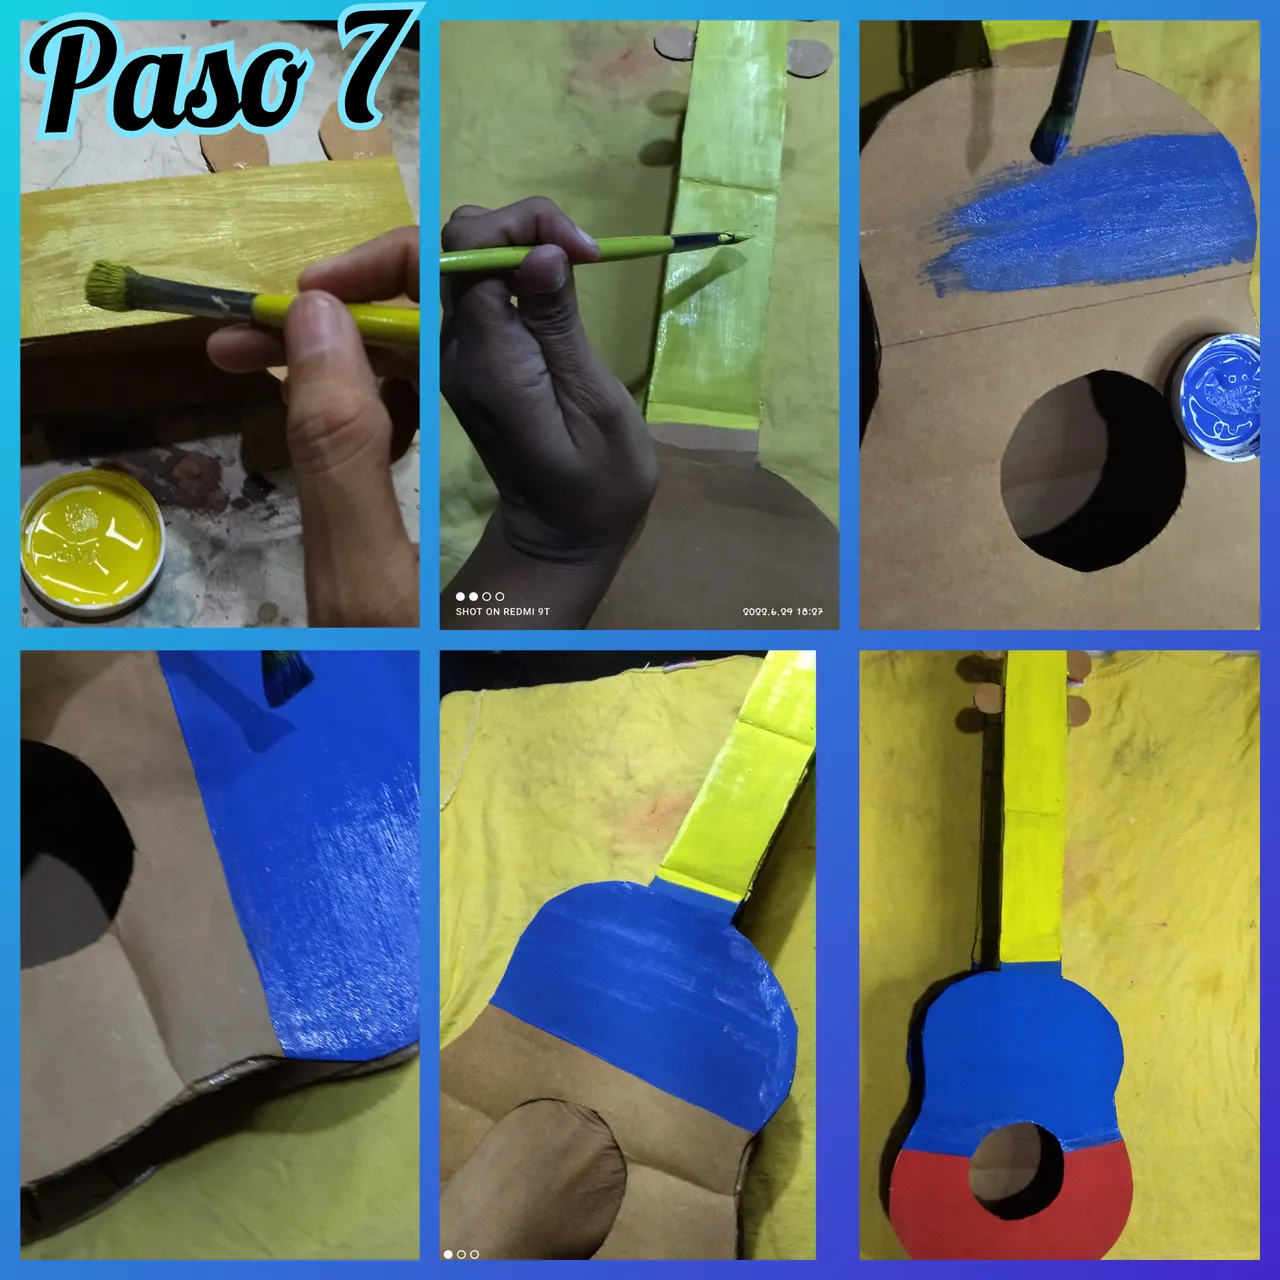
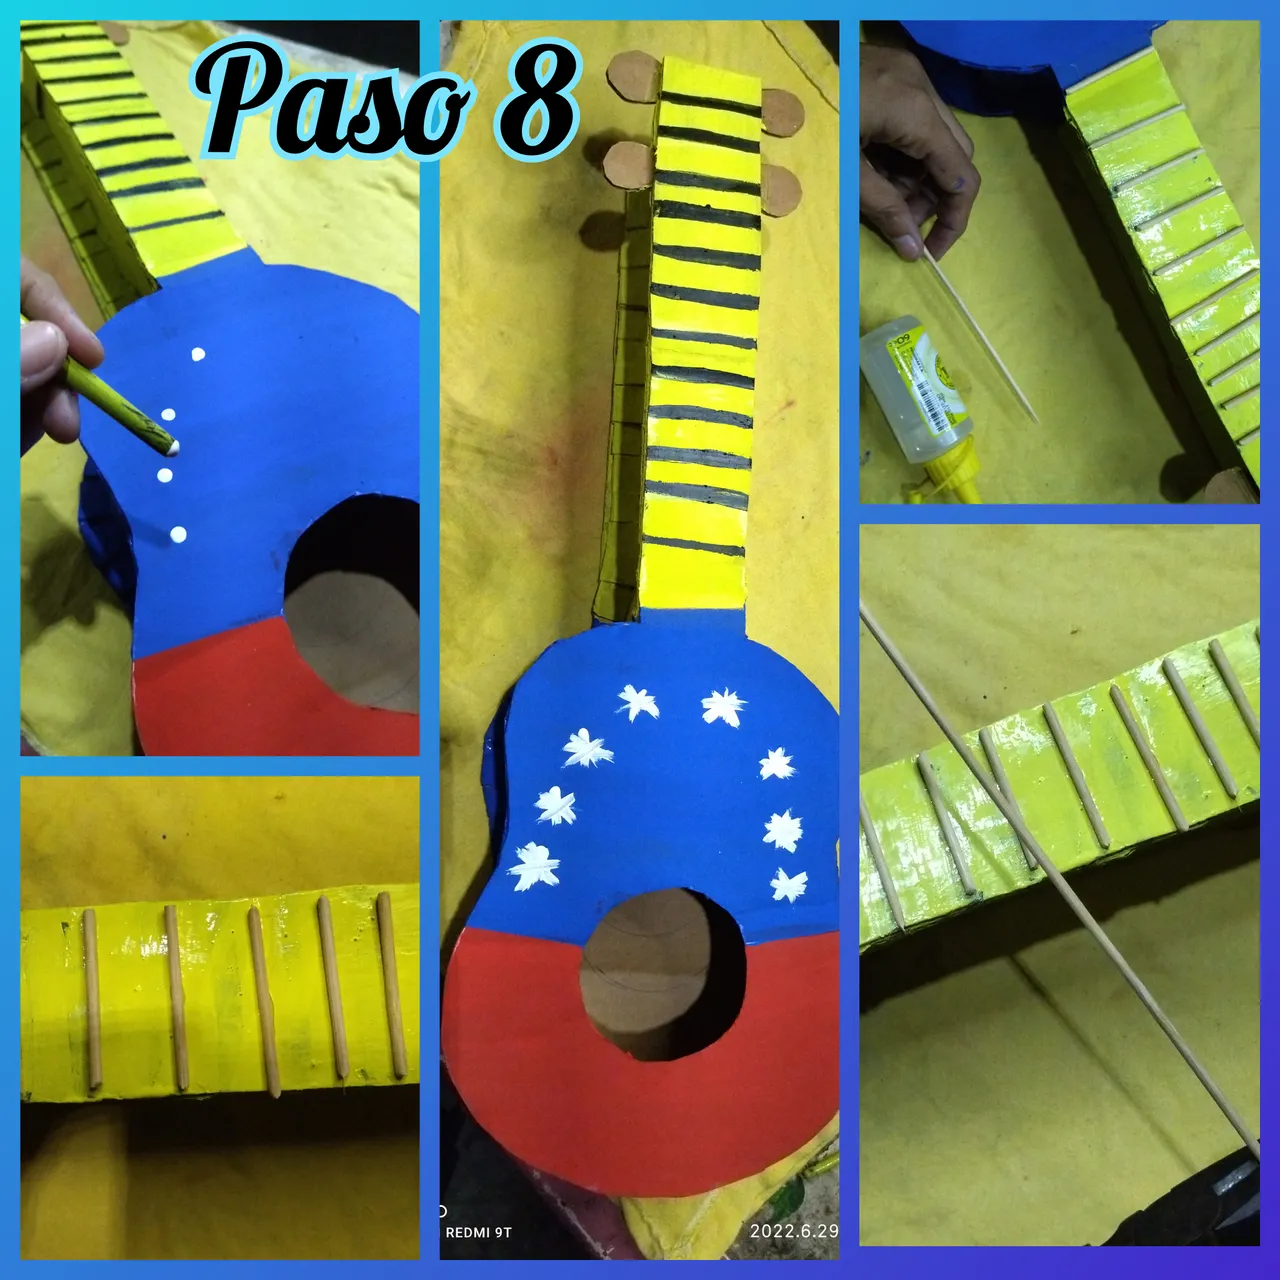
In this step we proceed to paint it, first the yellow color, then the blue and finally the red and then with the white paint draw the 8 stars.
Then chop the toothpicks and glue them to simulate the frets of the cuatro.
💞🎶💞 PASO 9 // STEP 9 💞🎶💞
Con un pedacito de foami picamos dos rectángulo y lo colocamos uno en la parte de arriba y otro en la de abajo, también recorte unas clavijas y las pegue encima de las de cartón que ya había pegado.
With a piece of foami, we cut two rectangles and place one on the top and one on the bottom. I also cut out some pegs and glued them on top of the cardboard ones that I had already glued.
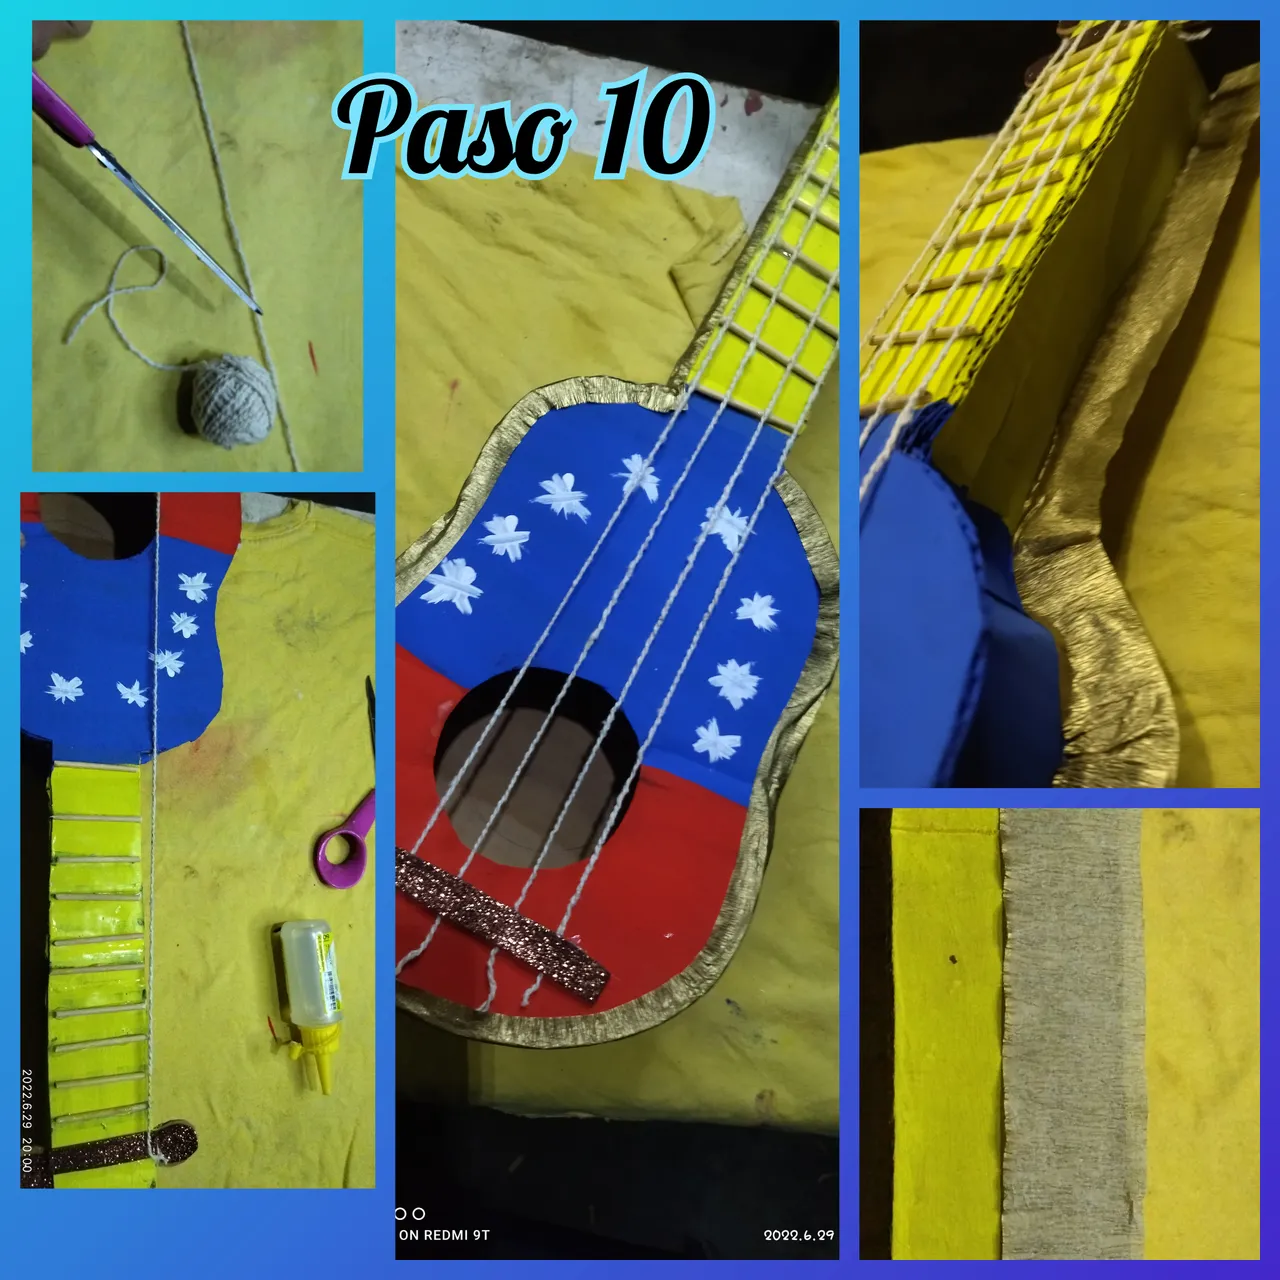
 💞🎶💞 PASO 10 // STEP 10 💞🎶💞
Luego pegamos el pabilo simulando ser las cuerdas del cuatro y como toque final le pegue el papel crepé dorado por todo el borde de la figura, dando así por concluido nuestra creación.
Then we glue the wick pretending to be the strings of the four and as a final touch I glued the golden crepe paper around the edge of the figure, thus concluding our creation.
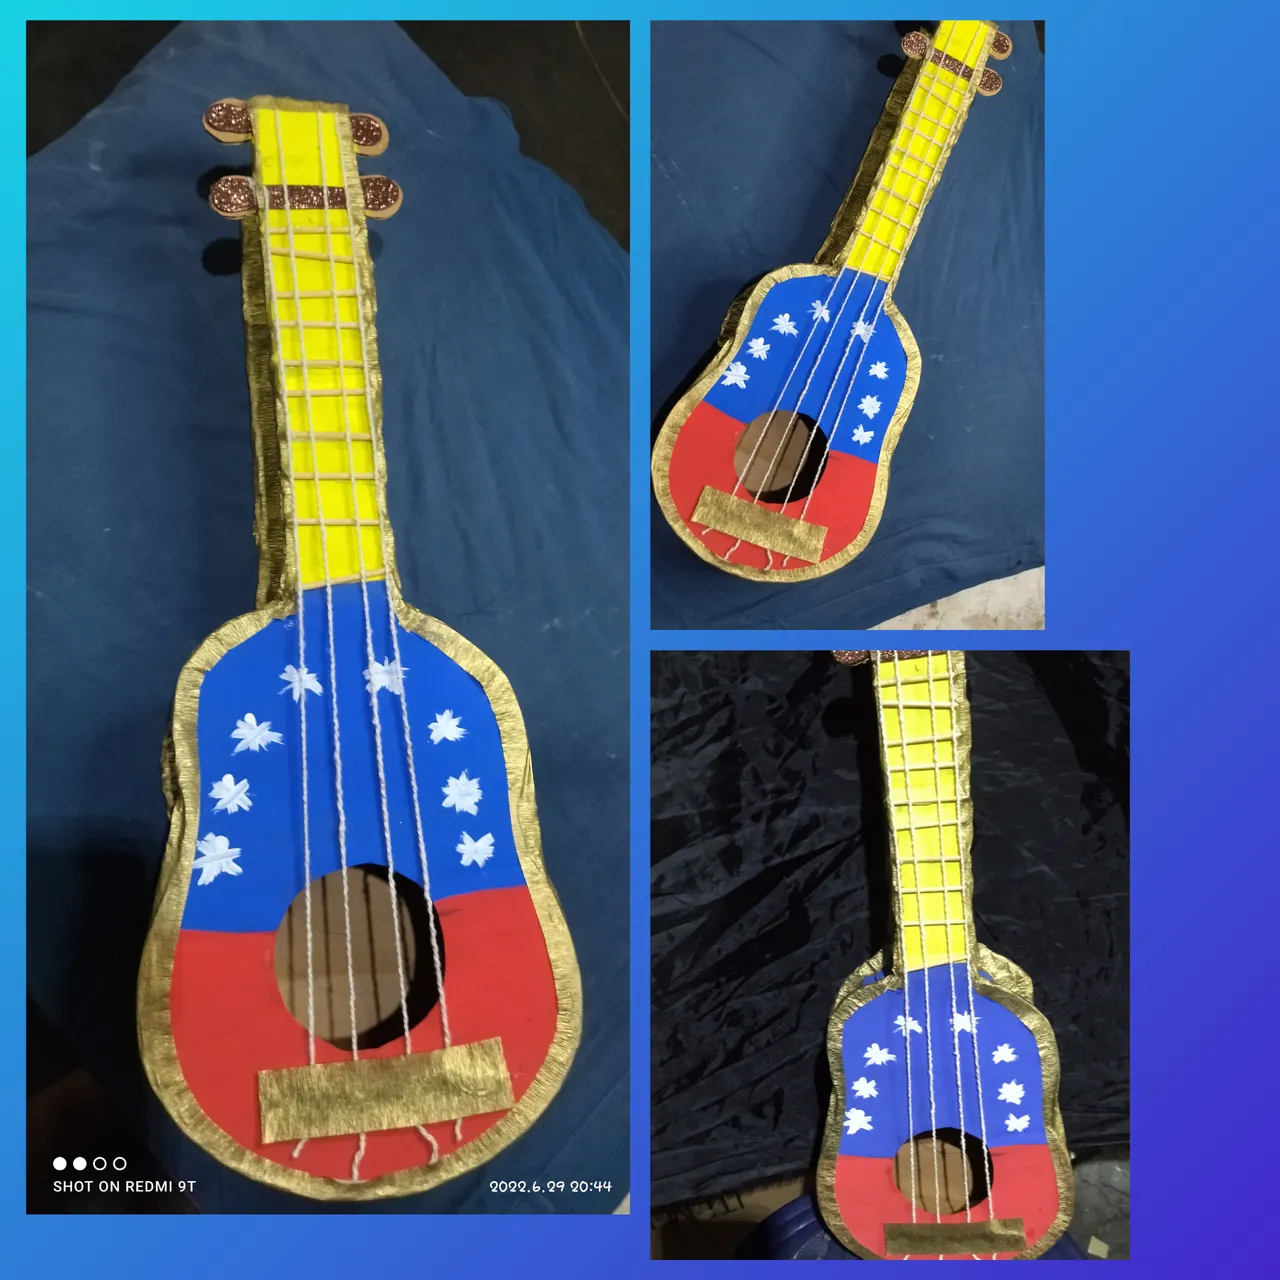
 💞🎶💞 FOTOS FINALES// FINAL PHOTOS 💞🎶💞
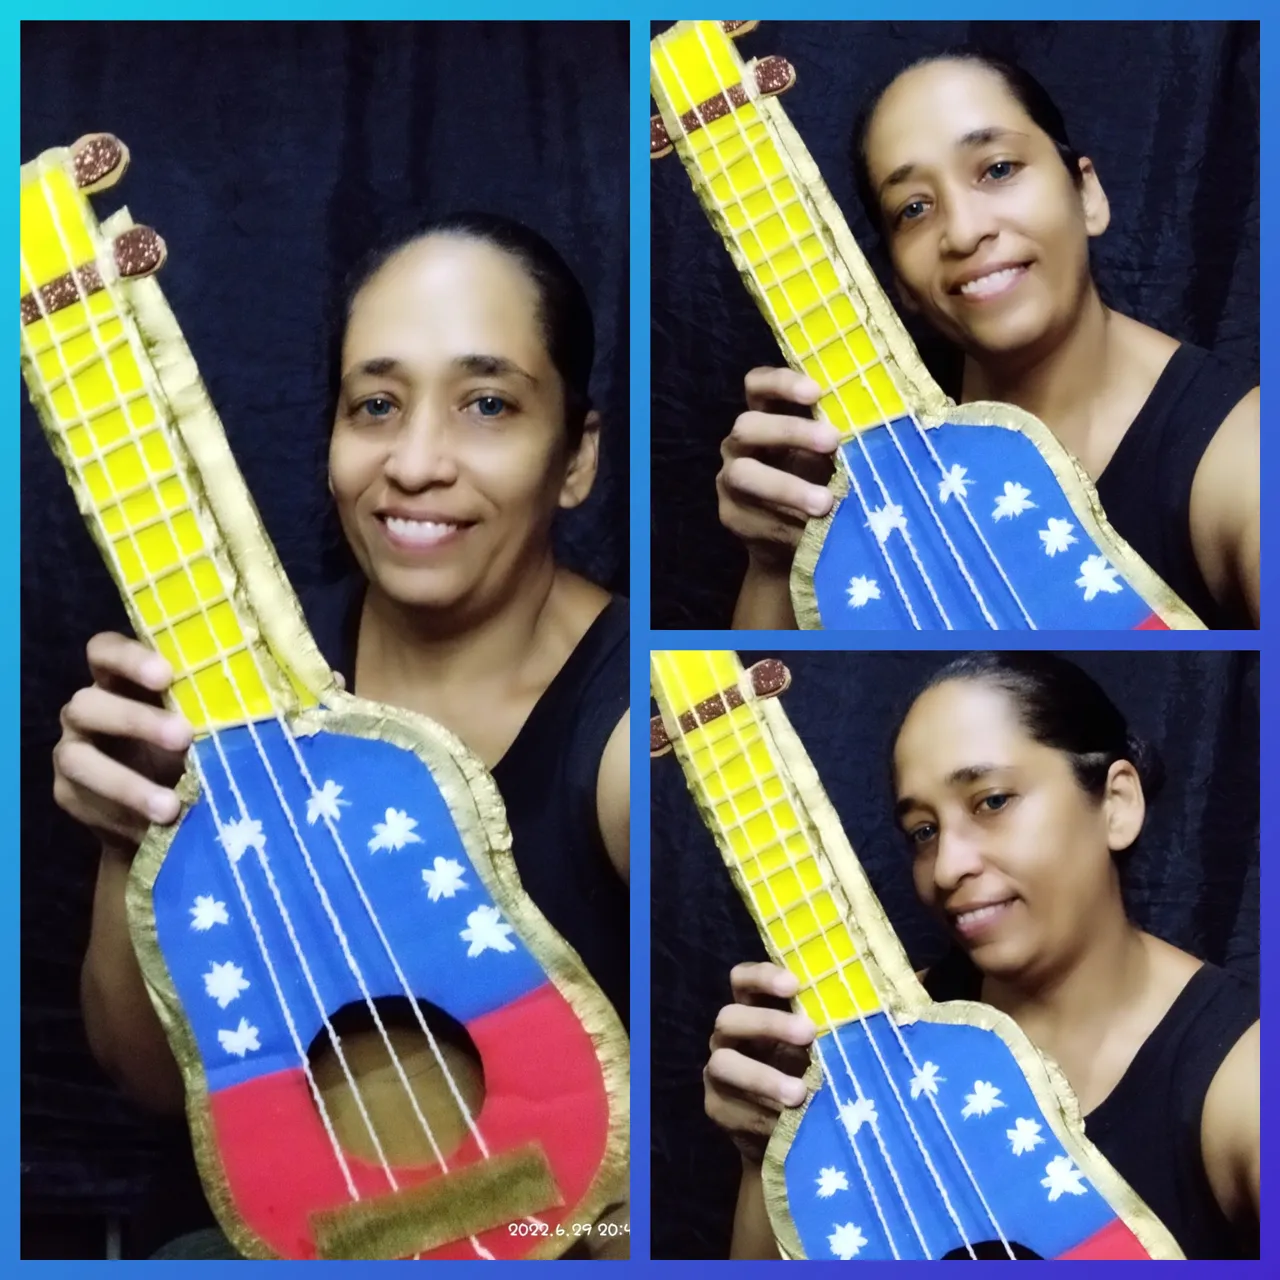
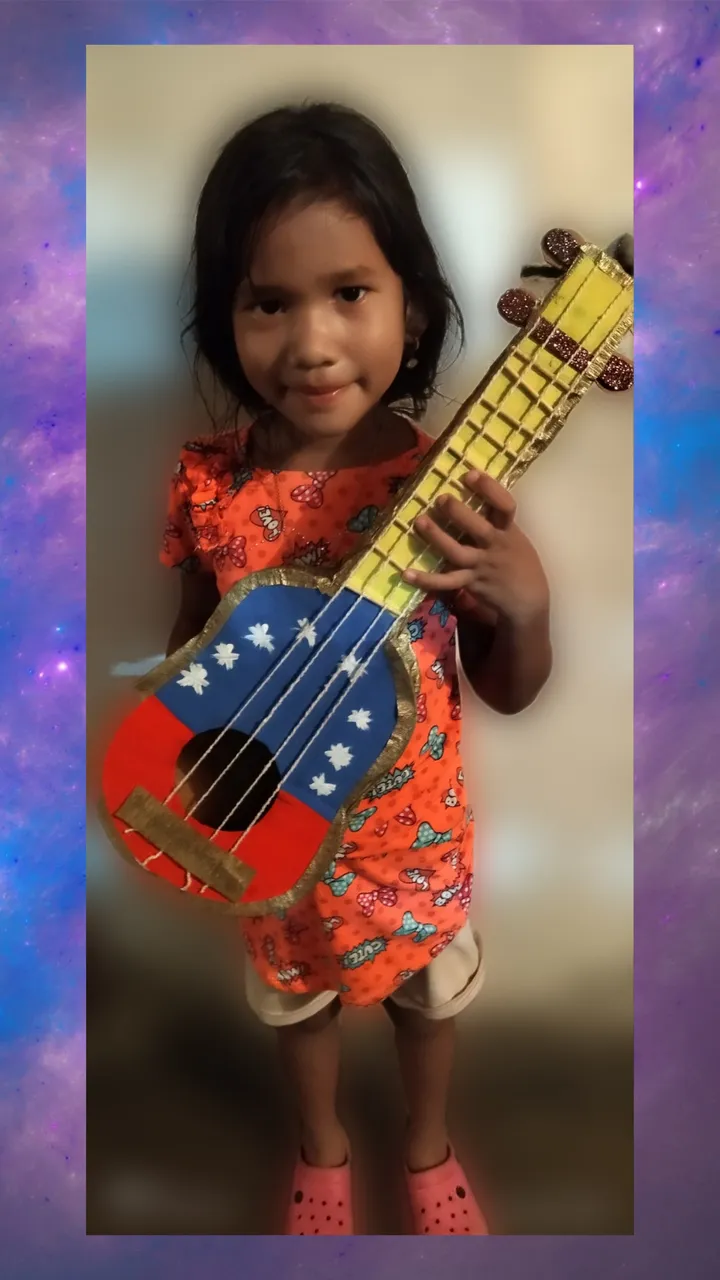
Bueno mis amores espero que esté tutorial haya sido de su completo agrado, por ahora me despido recordándoles que la vida es bella y en colores, hasta la próxima.
Well my loves I hope this tutorial has been to your complete satisfaction, for now I say goodbye reminding you that life is beautiful and in colors, until next time.
📸 Todas las fotos fueron tomadas con mi teléfono Xiaomi readmi 9T y son de mi propiedad.
📸 All photos were taken with my Xiaomi readmi 9T phone and are my property.