Hola amigos de Hive Diy.
Hoy les traigo un tutorial, para que podamos aprovechar esas agendas o cuadernos que aún le sobran hojas, les confieso que me encantan las libretas y las agendas y tengo algunas que estaban usadas hasta la mitad y me negaba a desecharlas, pero tenían el encuadernado tan feo y maltratado que no las usaba y las seguía acumulando. Hasta que, decidí cortarle quitarle el encuadernado y rehacerlas todo con material reciclado.
Hello friends of Hive Diy.
Today I bring you a tutorial, so we can take advantage of those notebooks or notebooks that still have sheets left over, I confess that I love notebooks and diaries and I have some that were used up to half and I refused to discard them, but they had the binding so ugly and battered that I did not use them and kept accumulating them. Until, I decided to cut the binding off and remake them all with recycled material.
Es mi primera vez encuadernando y la verdad es que estoy satisfecha con el resultado, voy a seguir intentando hasta mejorar la técnica.
It is my first time binding and the truth is that I am satisfied with the result, I will keep trying to improve the technique.
Para este proyecto vamos a necesitar:
Una agenda o cuaderno viejo
Cartón puede ser de una caja de un teclado, o algún producto que hayamos comprado anteriormente.
Cutter
Regla
Bolígrafo o lápiz
Sesgo o bies elástico (puede ser un trozo de tela)
Tela de alguna camisa o pantalón viejo ( yo utilice el área de la pierna de un jean)
Pegamento
Tijeras
2 cartulinas
Ganchos o pinzas grandes
Apliques de vinil textil
For this project we will need:
An old notebook or notebook.
Cardboard can be from a keyboard box, or a product we have previously bought.
Cutter
Ruler
Pen or pencil
Bias or elastic bias binding (can be a piece of fabric)
Fabric from an old shirt or pants (I used the leg area of a jean)
Glue
Scissors
2 pieces of cardboard
Hooks or large clothespins
Textile vinyl appliqués
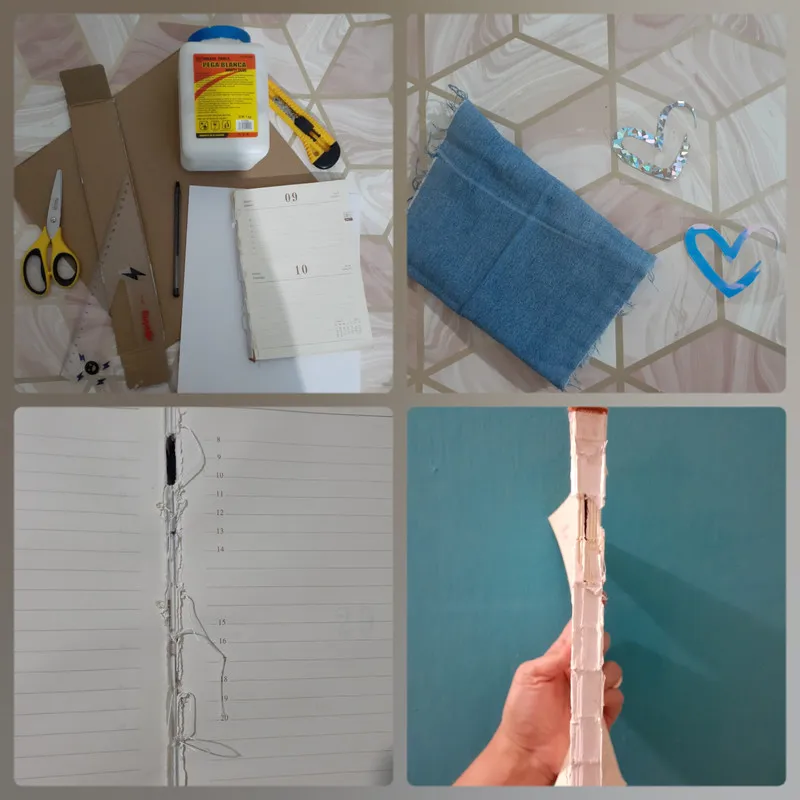
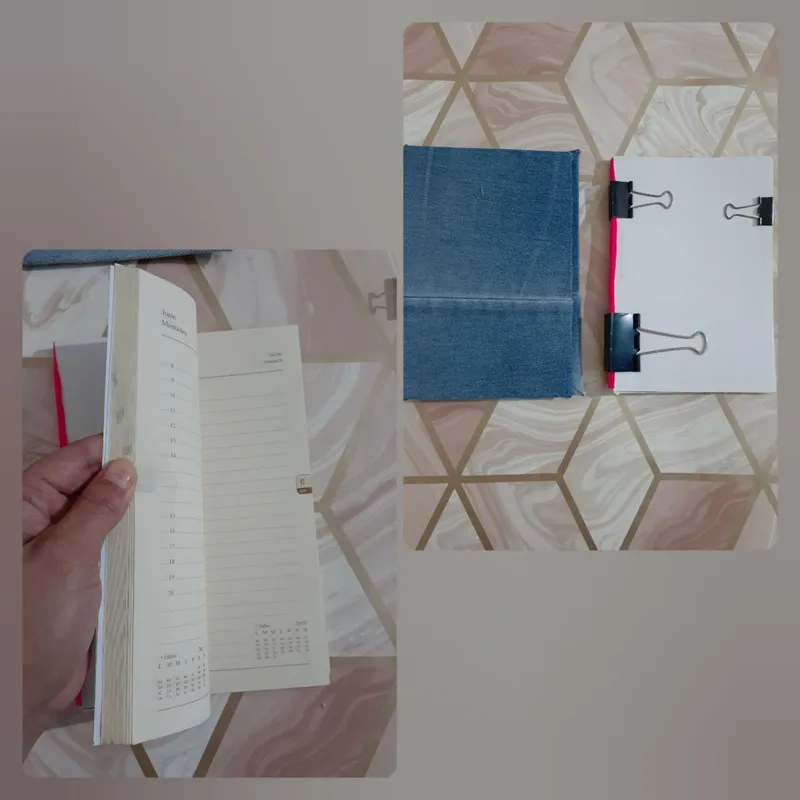
Para realizarla vamos a tomar nuestra agenda vieja y le vamos a quitar todo el pegamento anterior y los hilos y aseguramos con un gancho.
To make it we are going to take our old diary and remove all the previous glue and threads and secure it with a hook.
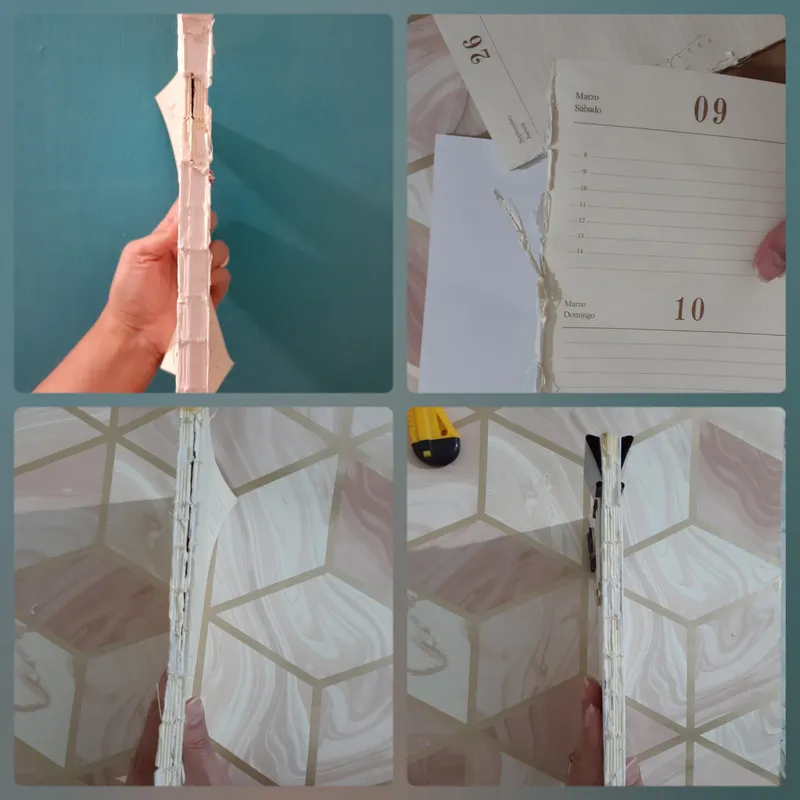
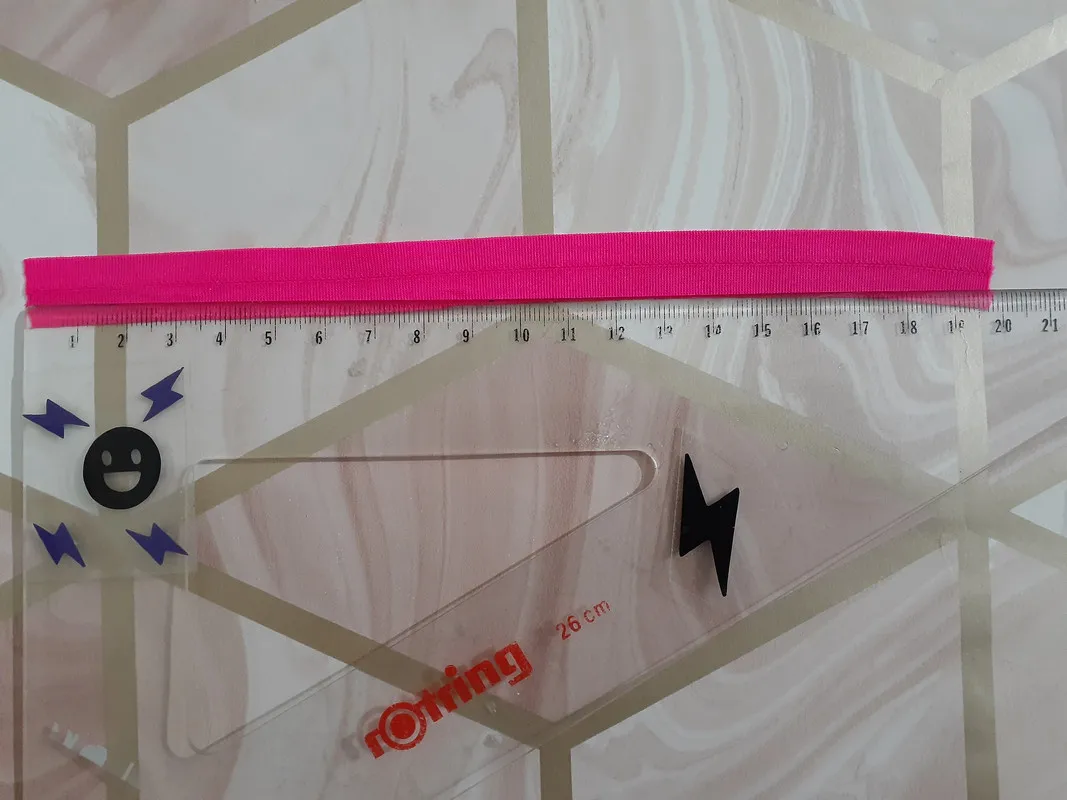
Luego, vamos a cortar un trozo de tela de 1 cm de ancho y 20 cm de largo, yo utilice sesgo elástico (bies)
Then, we are going to cut a piece of fabric 1 cm wide and 20 cm long, I used elastic bias binding (bias binding).
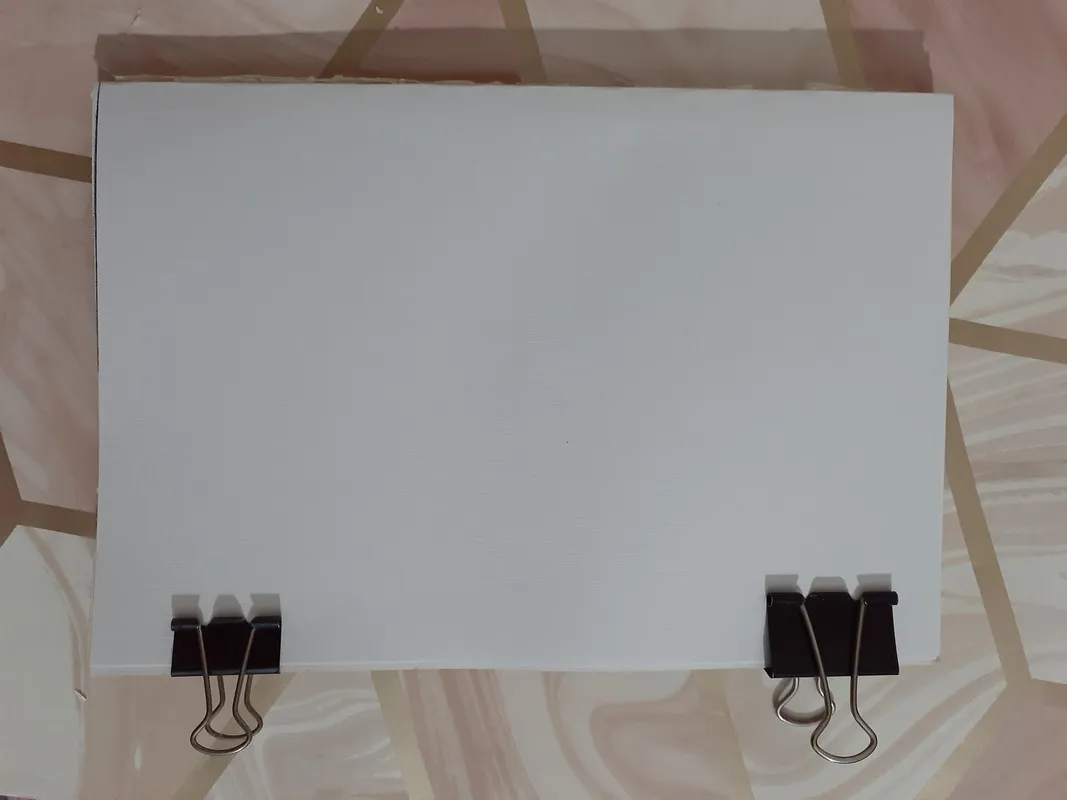
Vamos a tomar dos cartulinas y las dividimos a la mitad. Después, vamos a medir 20 centímetros de largo, cortamos el excedente en ambas cartulinas y fijamos a nuestras hojas por ambos lados.
We are going to take two pieces of light cardboard and divide them in half. Then, we are going to measure 20 centimeters long, cut the excess on both cardboards and attach them to our sheets on both sides.
Cuando fijemos las cartulinas con los ganchos nos quedará así.
When we fix the light cardboard with the hooks, we will have the following result
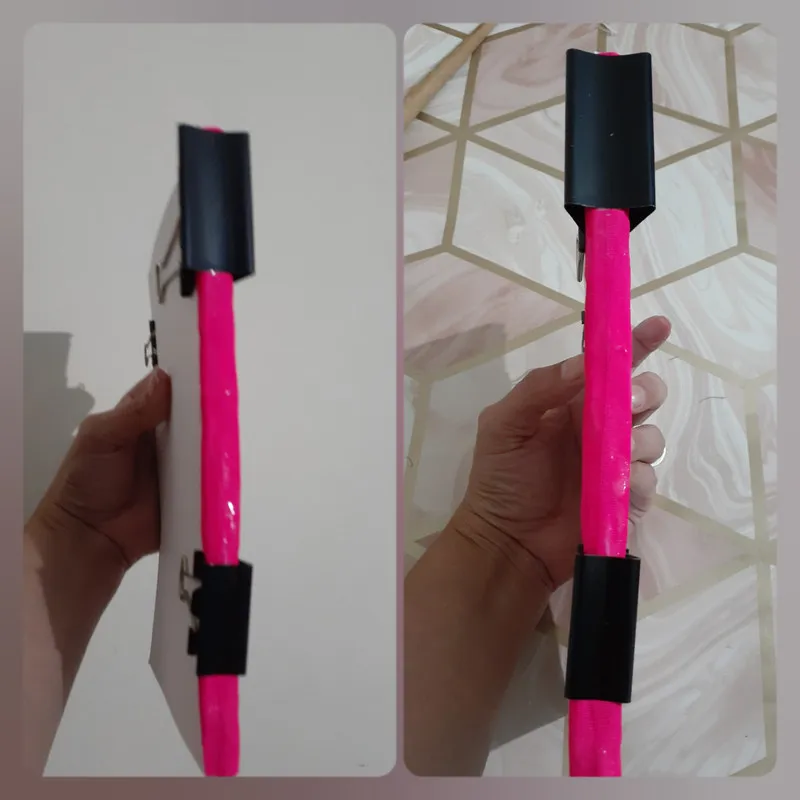
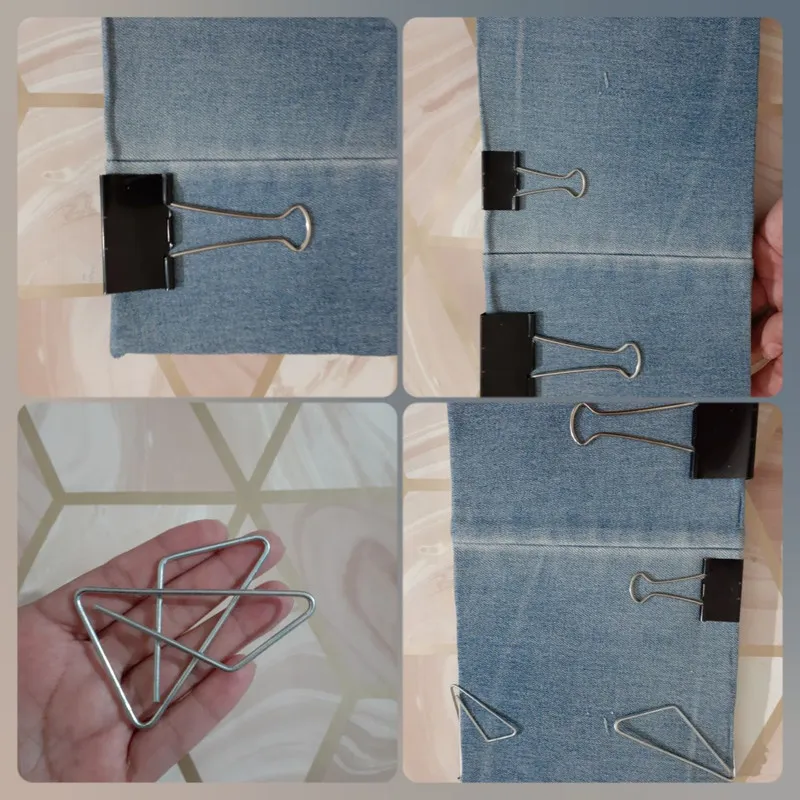
Vamos colocar pega sobre el lomo de nuestra agenda y vamos a colocar el sesgo elástico (bies), que manera que quede firme y que el bies quede bien pegado de las cartulinas y a las hojas de nuestra agenda.
We are going to place glue on the spine of our agenda and we are going to place the elastic bias (bias), so that it is firm and that the bias is well glued to the cardboard and to the pages of our agenda.
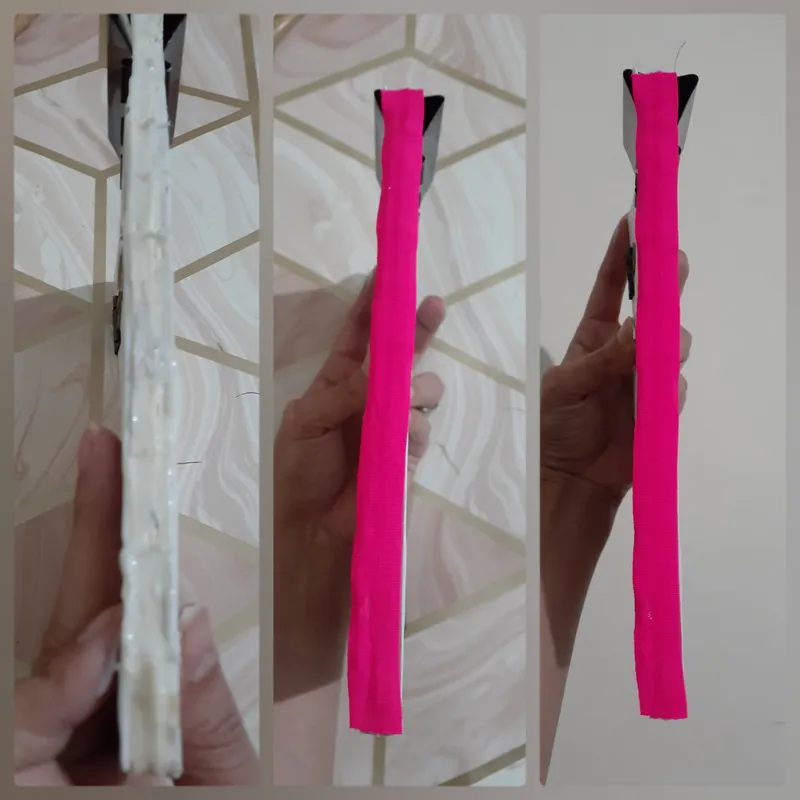
Fijamos con un gancho y dejamos secar bien la pega ( yo lo deje toda una tarde)
We fix it with a hook and let the glue dry well (I left it for a whole afternoon).
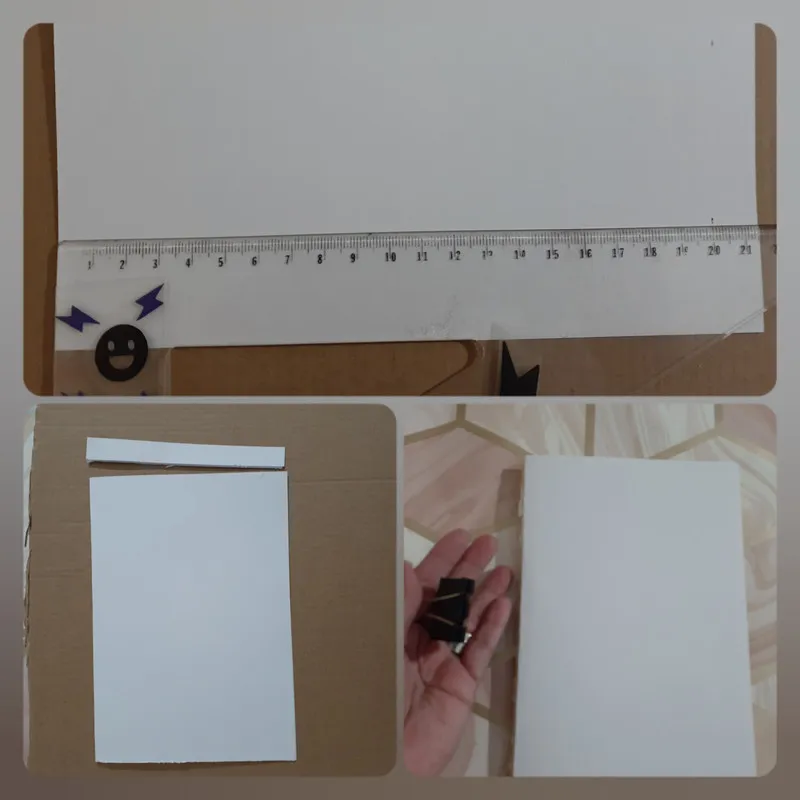
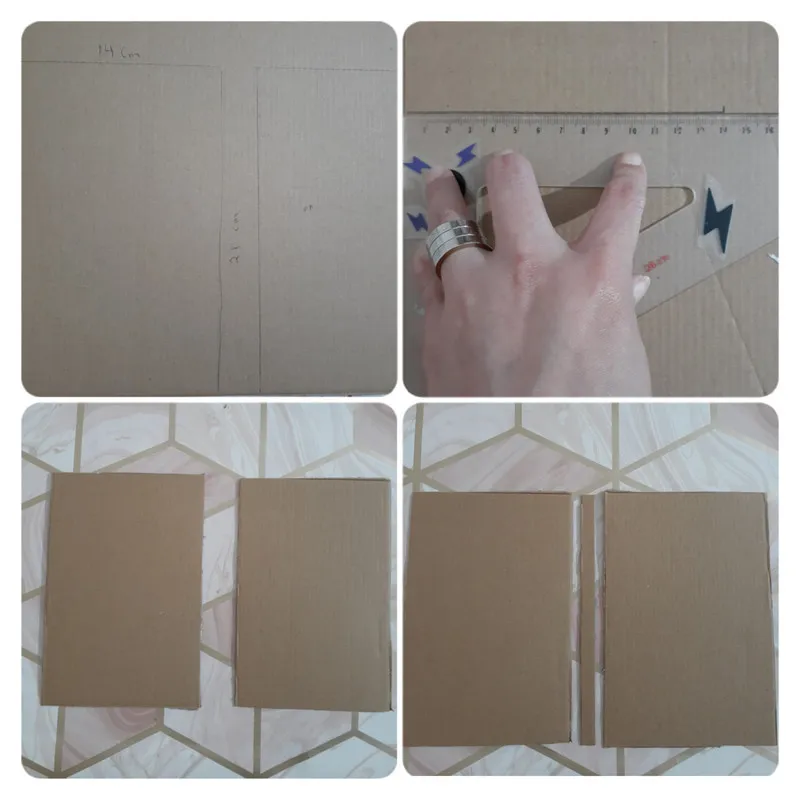
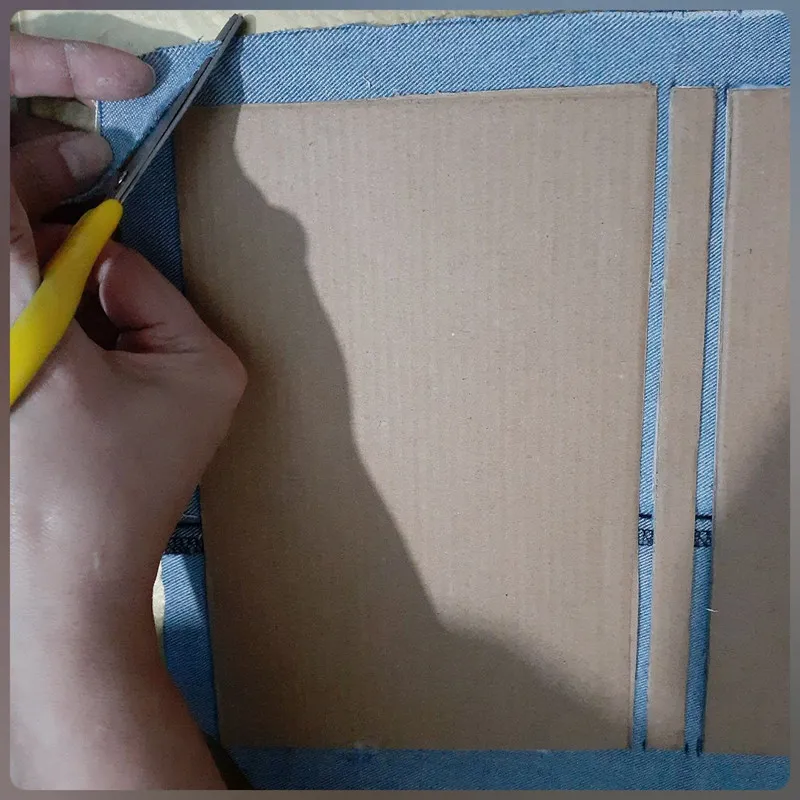
Luego, vamos a tomar nuestro cartón y vamos a medir y cortar 1cm de ancho por 21 centímetros de largo.
Next, we are going to take our cardboard and measure and cut 1cm wide by 21 centimeters long.
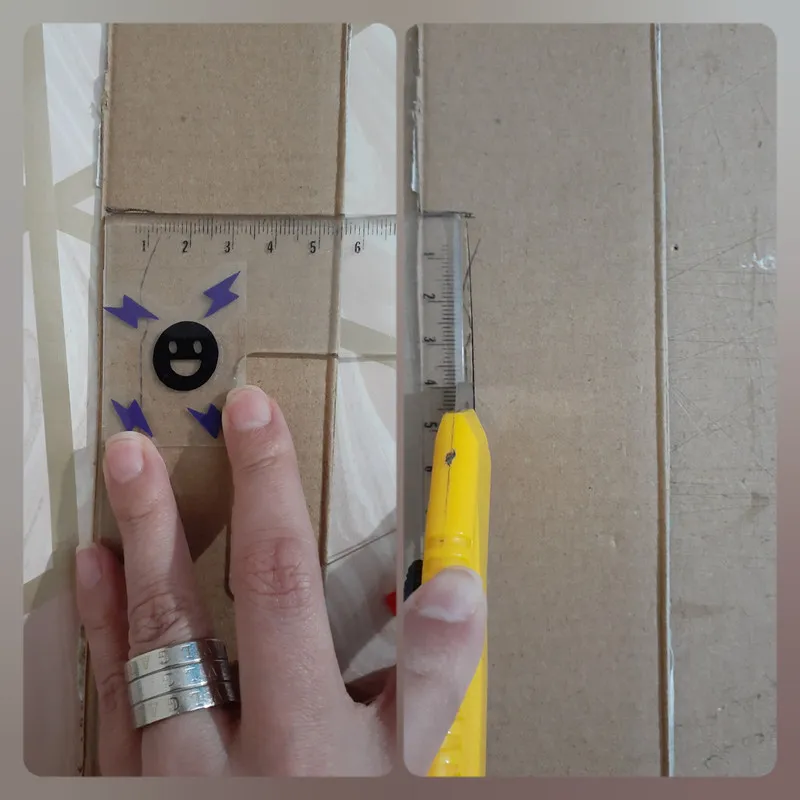
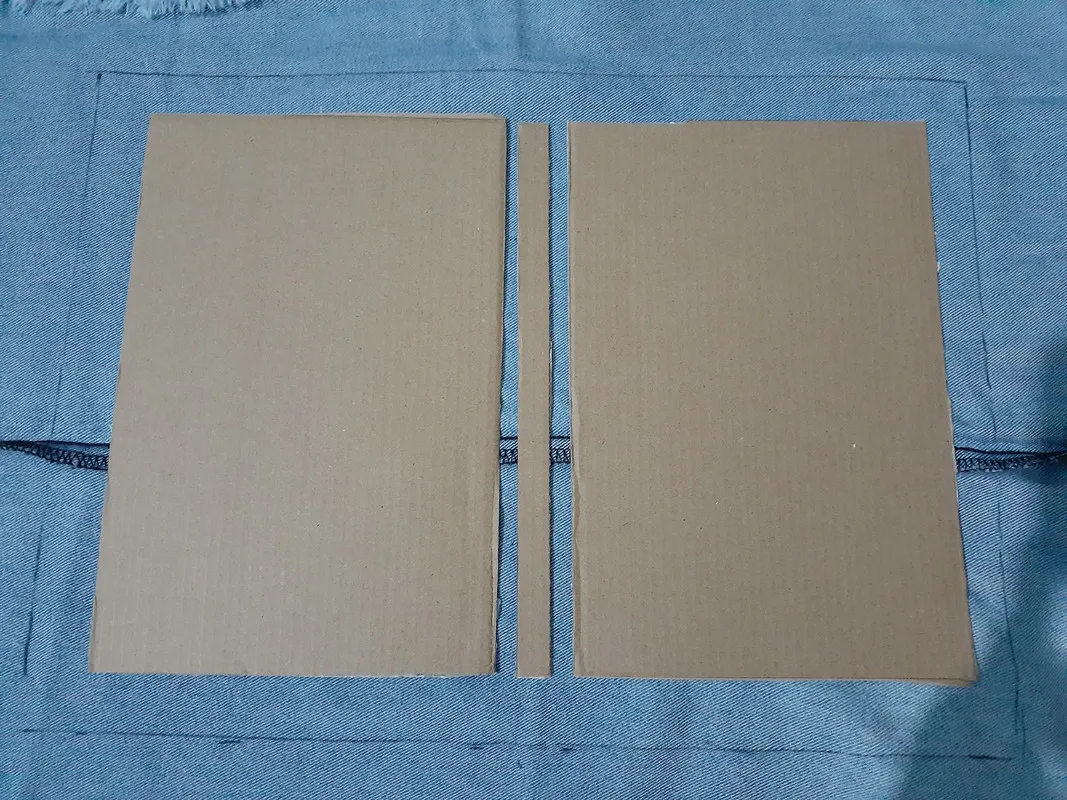
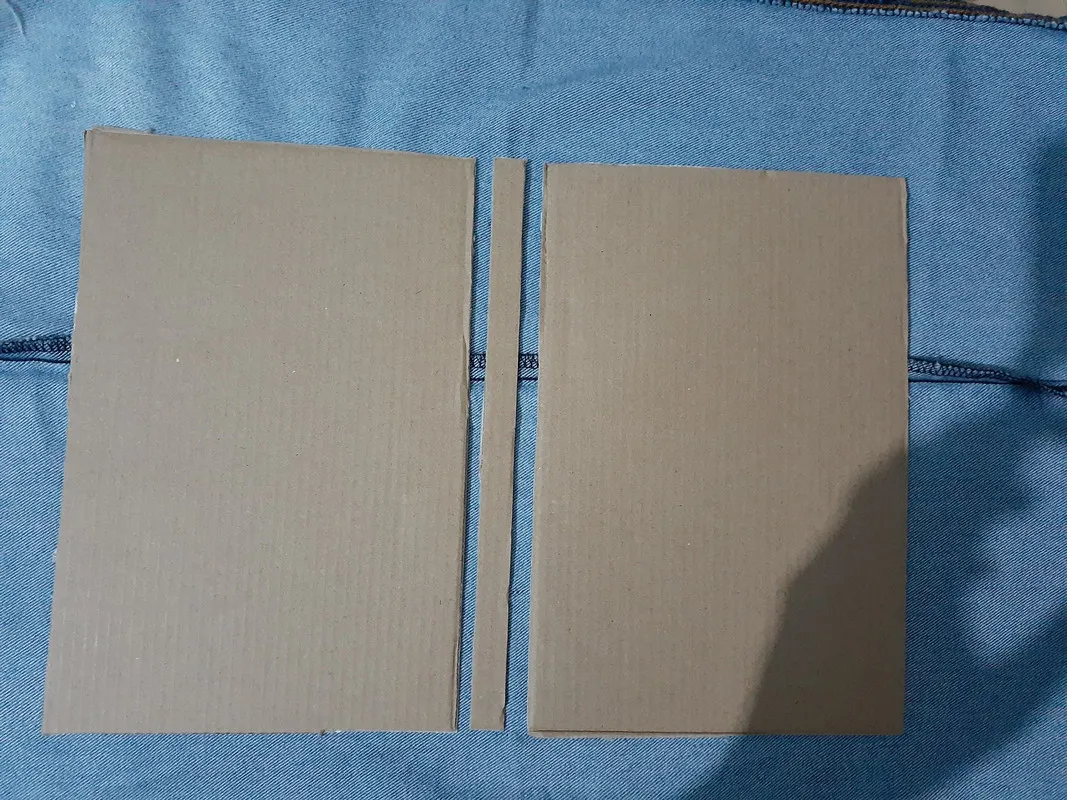
Después con otro cartón medimos 14 cm de ancho por 21 cm de largo, una vez marcado los cortamos y nos quedarán 3 pedazos de cartón que formarán la capa de nuestra agenda.
Then with another cardboard we measure 14 cm wide by 21 cm long, once marked we cut them and we will be left with 3 pieces of cardboard that will form the layer of our agenda.
Para forrarla, aquí podemos dejar volar nuestra creatividad, podemos usar cuero, vinyl, telas, yo usé la parte de las piernas de un jean viejo y medí un cuadrado de 34 centímetros e ancho por 26 de largo.
To cover it, here we can let our creativity fly, we can use leather, vinyl, fabrics, I used the legs of an old jean and measured a square of 34 cm wide by 26 cm long.
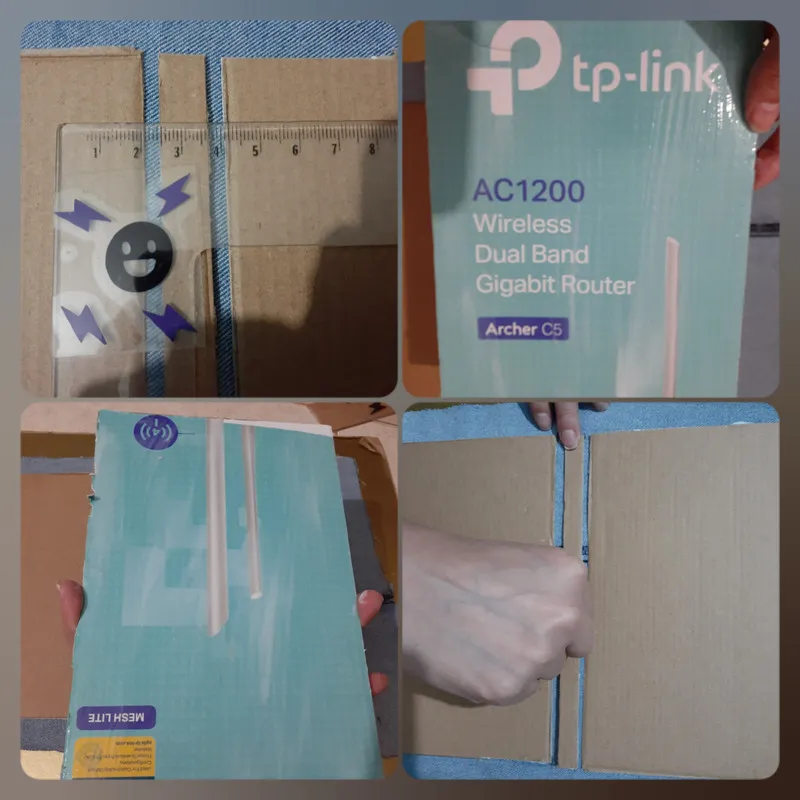
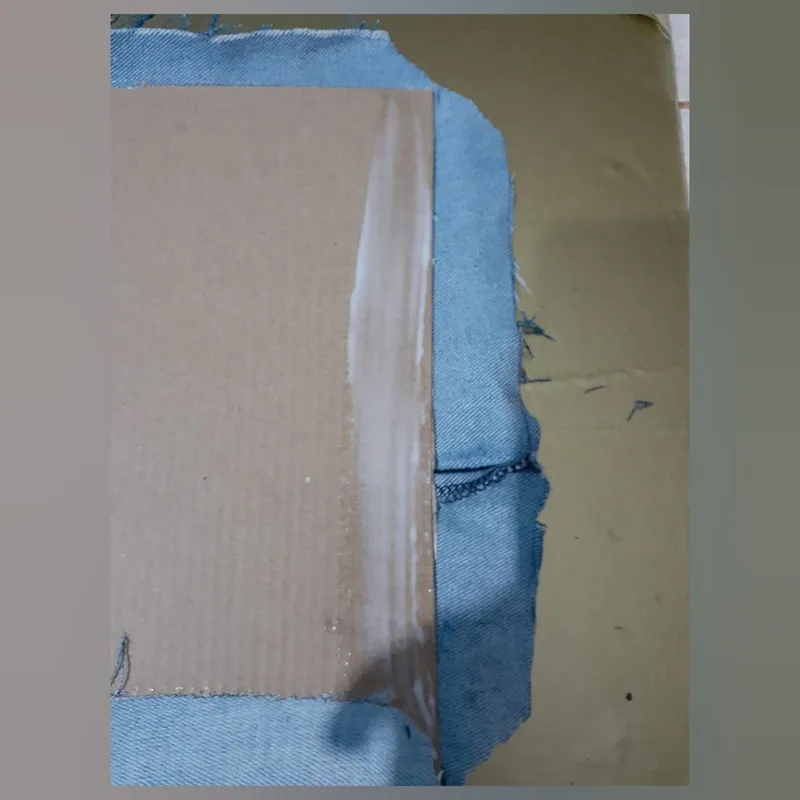
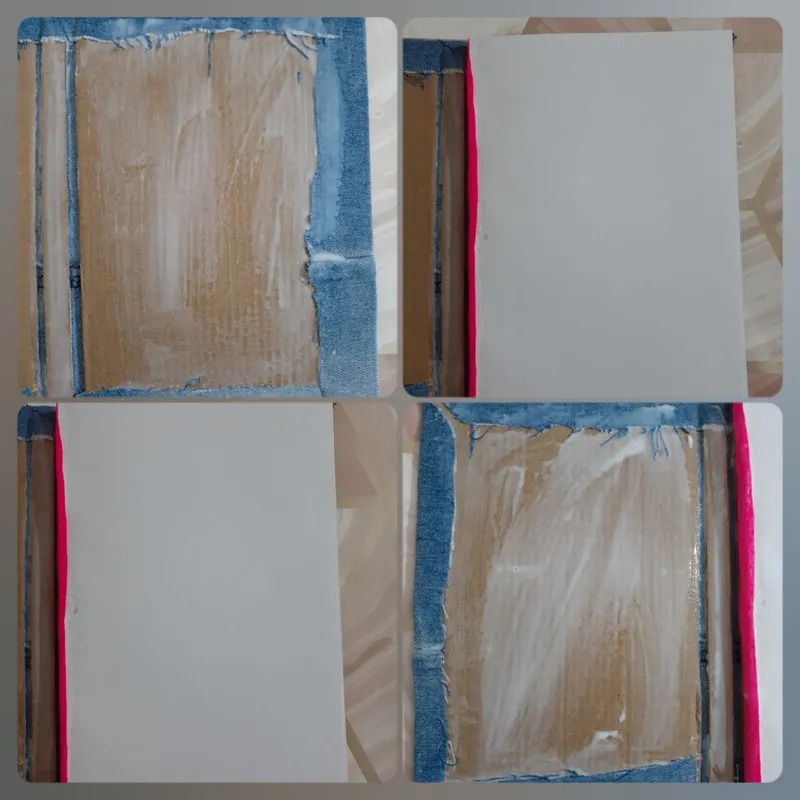
Ahora sí, vamos a pegar nuestros cartones a la tela, vamos a ubicarlos en el centro de la tela dejando 2 cm de cada lado y en el centro ubicamos el cartón más fino.
Now we are going to glue our cardboard to the fabric, we are going to place them in the center of the fabric leaving 2 cm on each side and in the center we place the thinnest cardboard.
Comenzamos a pegar, colocando suficiente pega pero no demasiada porque si la tela es clara quedaran marcas de pega cuando se seque. En el cartón del medio medimos aproximadamente 5 milímetros de lado y lado, colocamos pega y dejamos secar, yo lo deje unas 8 horas y le coloque algo pesado sobre ella para que ejerza presión.
We begin to glue, placing enough glue but not too much because if the fabric is light, there will be glue marks when it dries. In the middle cardboard we measure approximately 5 millimeters from side to side, put glue and let it dry, I left it about 8 hours and put something heavy on it to exert pressure.
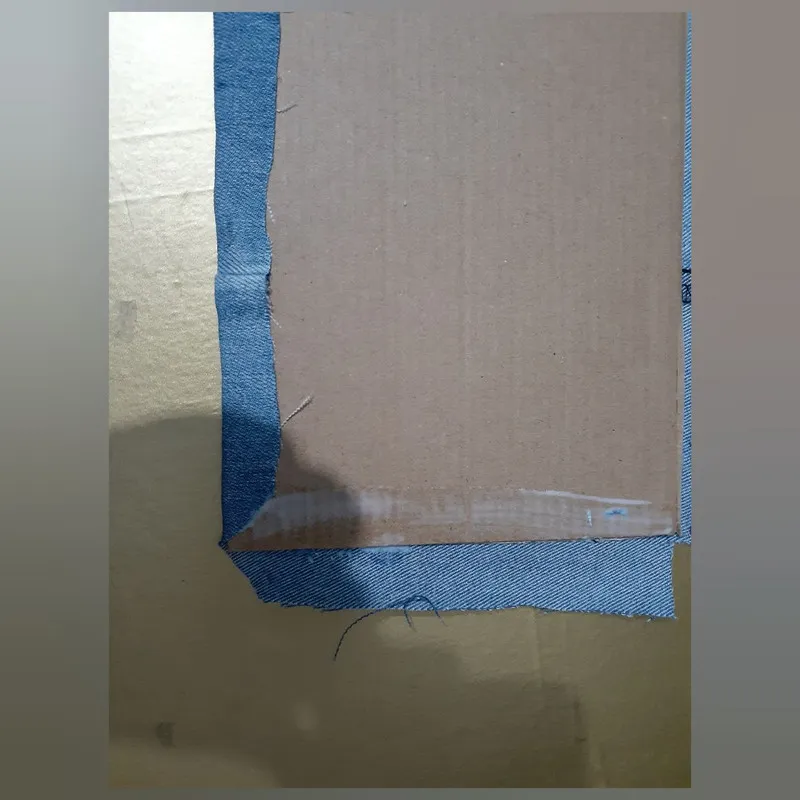
Luego, vamos colocar suficiente pega y terminar de forrar nuestro cartón, en las esquinas cortamos en diagonal, el exceso de tela, pegamos y dejamos secar.
Then, we will place enough glue and finish lining our cardboard, in the corners we cut diagonally, the excess fabric, glue and let it dry.
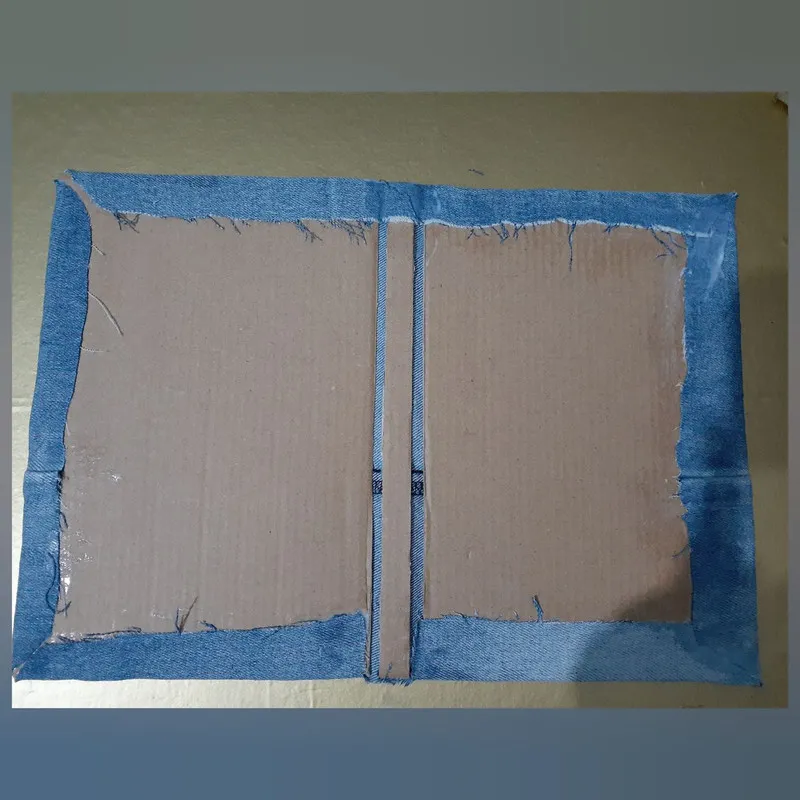
Una vez, que estén totalmente secas nuestra tapa y la parte de las hojas se verán así.
Once, they are completely dry our lid and the leaves part will look like this.
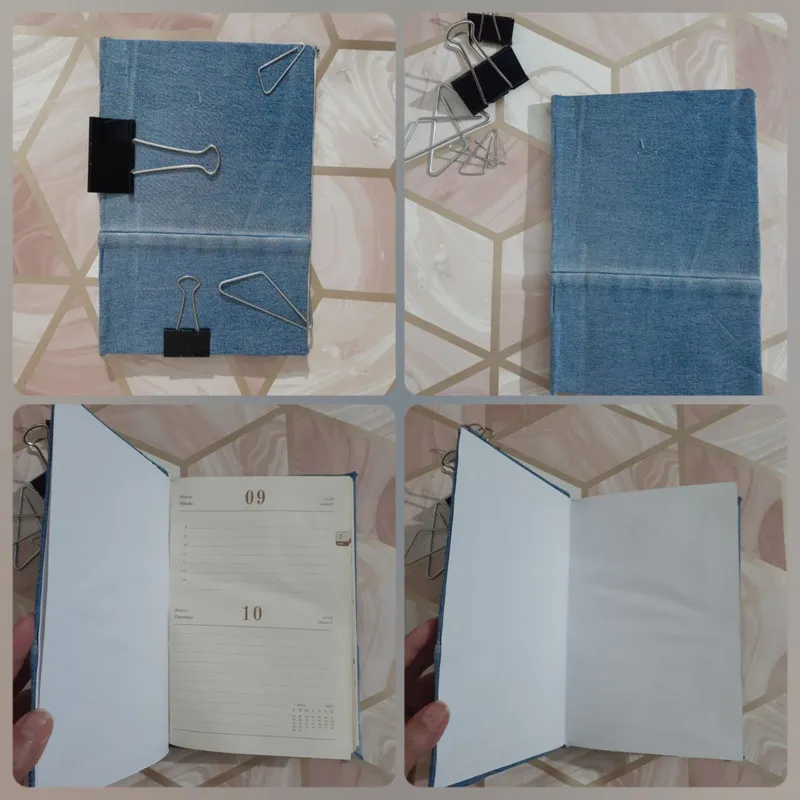
Procedemos con el armando de nuestra agenda, colocamos bastante pega en todo el cartón forrado con la tela y luego pegamos una parte y ejercemos presión, luego la parte el lomo y finalmente la portada retiramos el exceso de pega de los bordes y colocamos ganchos para que ejerzan presión, como sólo tenía 3 ganchos use estos clips grandes para mayor soporte. Dejamos secar unas 8 horas, pero vamos alternando los ganchos para q no queden marcas.
We proceed with the assembly of our agenda, we put enough glue all over the cardboard lined with fabric and then glue a part and exert pressure, then the spine part and finally the cover, we remove the excess glue from the edges and place hooks to exert pressure, as I only had 3 hooks I used these large clips for more support. We let it dry for about 8 hours, but we alternate the hooks so that there are no marks.
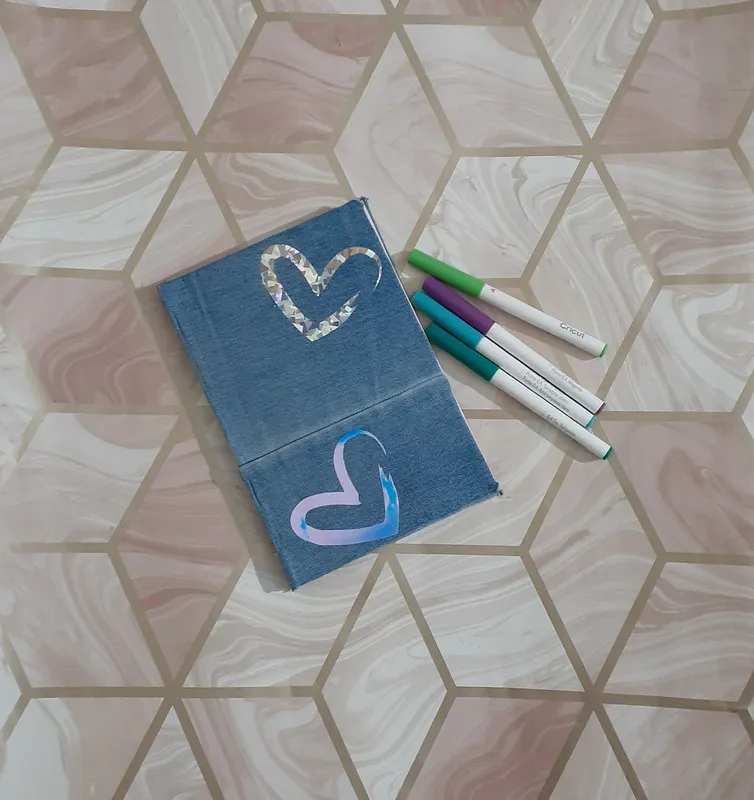
Pasadas las 8 horas, retiramos los ganchos y procedemos a decorar, acá pueden pintarla con pintura de tela colocar algún bordado; yo tenía estos corazones en vinil textil que había cortao con mi plotter de corte y procedí a estamparlos con la easy press 15 segundos a 320 ºF.
After 8 hours, remove the hooks and proceed to decorate, here you can paint it with fabric paint and place some embroidery; I had these hearts in textile vinyl that I had cut with my cutting plotter and proceeded to stamp them with the easy press 15 seconds at 320 ºF.
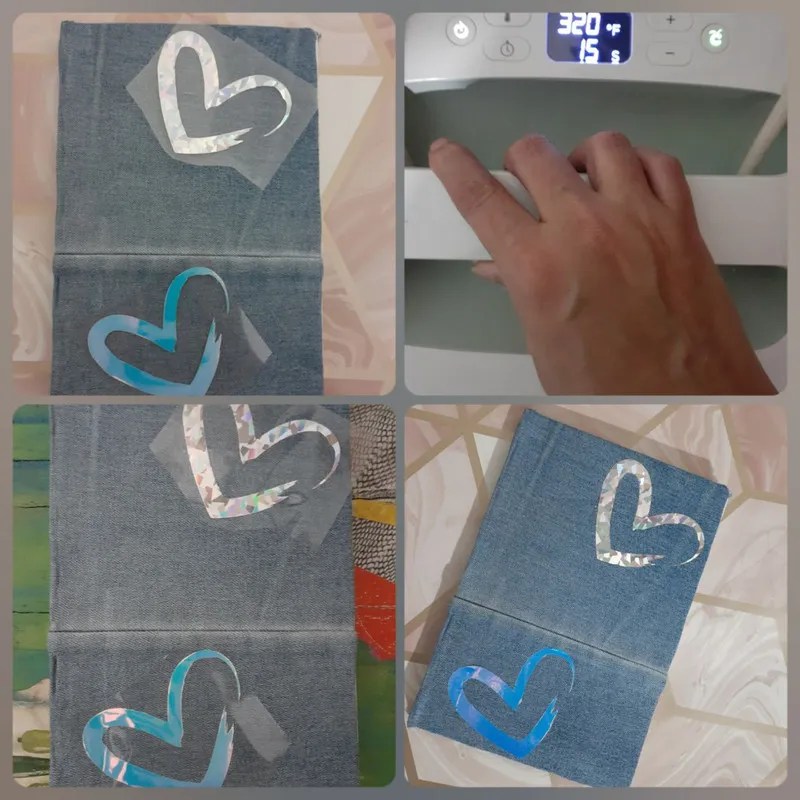
Retire la película protectora, re planchar por 10 segundo más y lista mi nueva agenda.
Remove the protective film, re-iron for 10 more seconds and my new agenda was ready.

Me parece una excelente realizar este tipo de trabajo, ya que podemos reutilizar también hojas de cuadernos hacer no sólo agendas, sino notitas más pequeñas, el cuaderno para la universidad o tener nuestro libro de recetas. Y lo mejor, es que siempre será con material reciclado por lo que ayudamos a el ambiente.
I think it is excellent to do this type of work, since we can also reuse sheets and notebooks to make not only agendas, but also smaller notebooks, the notebook for college or to have our recipe book. And the best thing is that it will always be with recycled material so we help the environment.
Cualquier duda, los leo en los comentarios.
If you have any questions, I'll read them in the comments.
Las fotografías fueron tomadas por mi / The pictures were taken by me