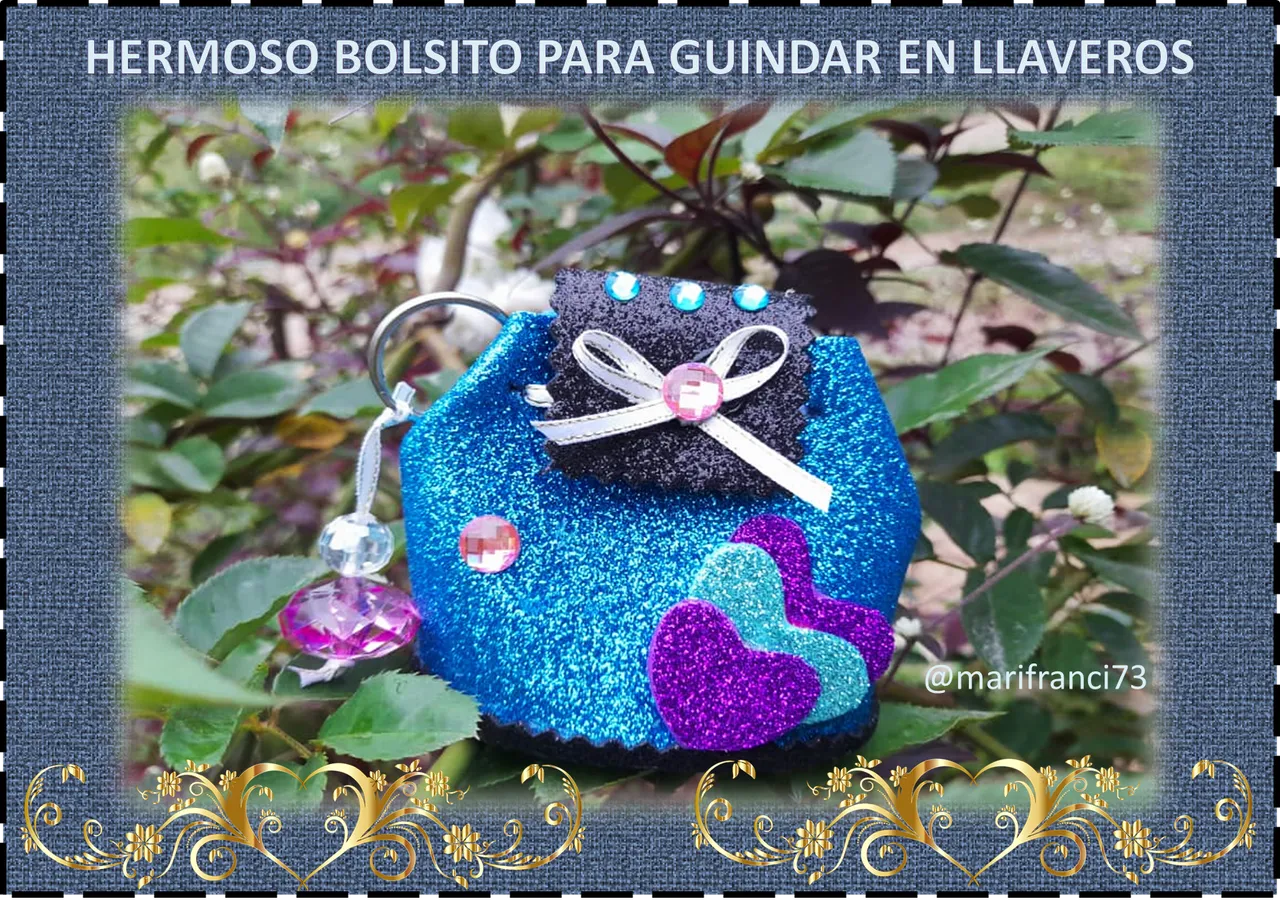
¡Hola!
Muy buenas noches para todos mis amigos de la grandiosa Comunidad de Hive Diy, cada día veo mas integrantes, eso es muy positivo para todos. En la noche de hoy mis queridos artesanos les traigo algo fácil y económico de realizar y lo puedes realizar de muchas maneras y combinaciones, es muy linda esta manualidad cuando la termine me gusto mucho, y se la voy a regalar a mi hija para que la coloque de adorno en su morral del colegio, aunque la realice para ser utilizado en un Llavero, pero depende para que la quieras utilizar, también puedes guardar en él, dinero y la cédula o pasaporte, ya va a depender de la medida y para que lo vas a utilizar, Les mostrare como lo realice explicándole el paso a paso. Manitas a la obra queridos amigos y amigas.
Hello!
Good night to all my friends from the great Hive Diy Community, every day I see more members, that is very positive for everyone. Tonight my dear artisans I bring you something easy and cheap to do and you can do it in many ways and combinations, this craft is very nice when I finish it I like it a lot, and I am going to give it to my daughter so that she place it as an ornament in your school backpack, even if you make it to be used in a Keychain, but it depends on what you want to use it for, you can also keep money and your ID or passport in it, it will depend on the size and for what You are going to use it, I will show you how to do it, explaining the step by step. Handyman to work dear friends and friends.


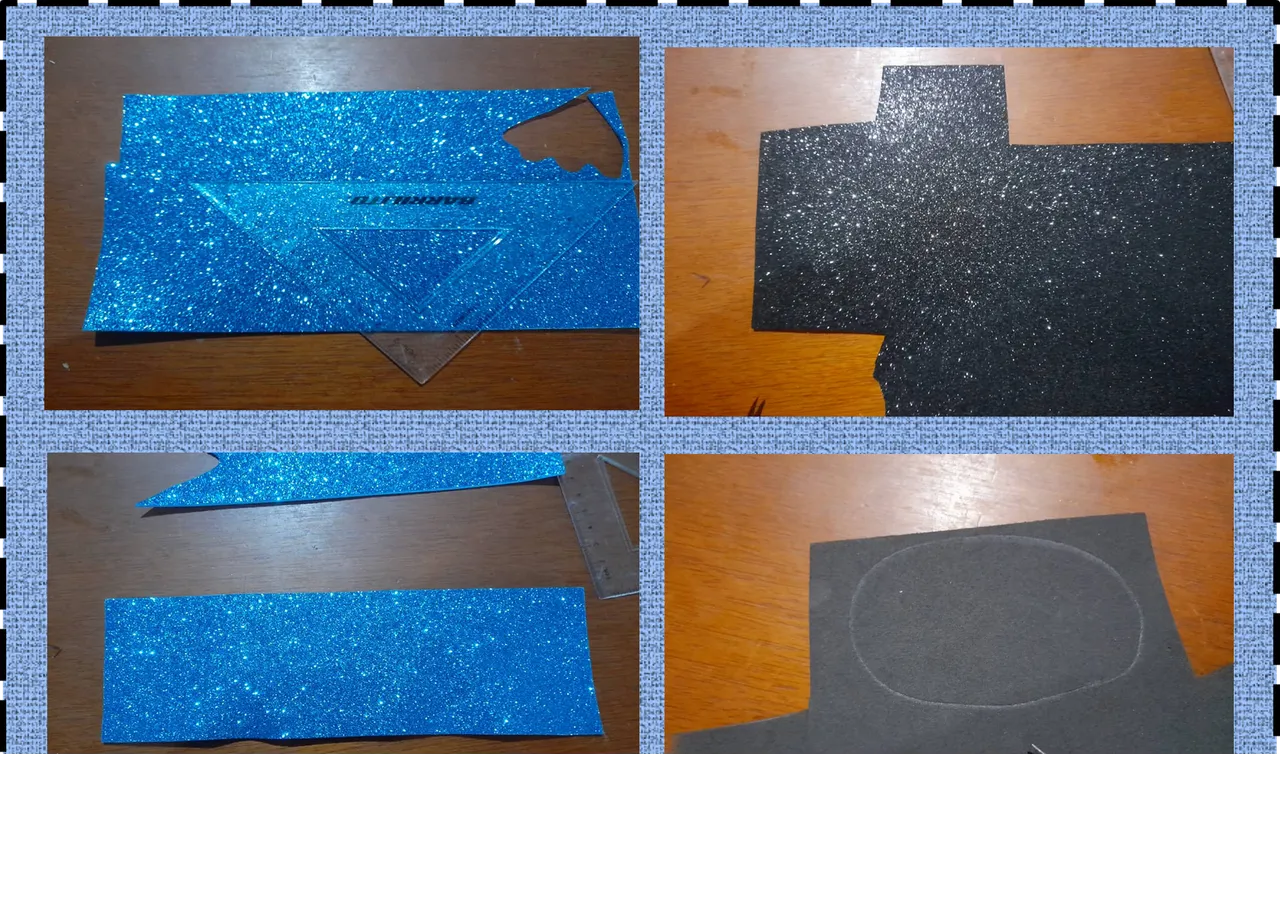
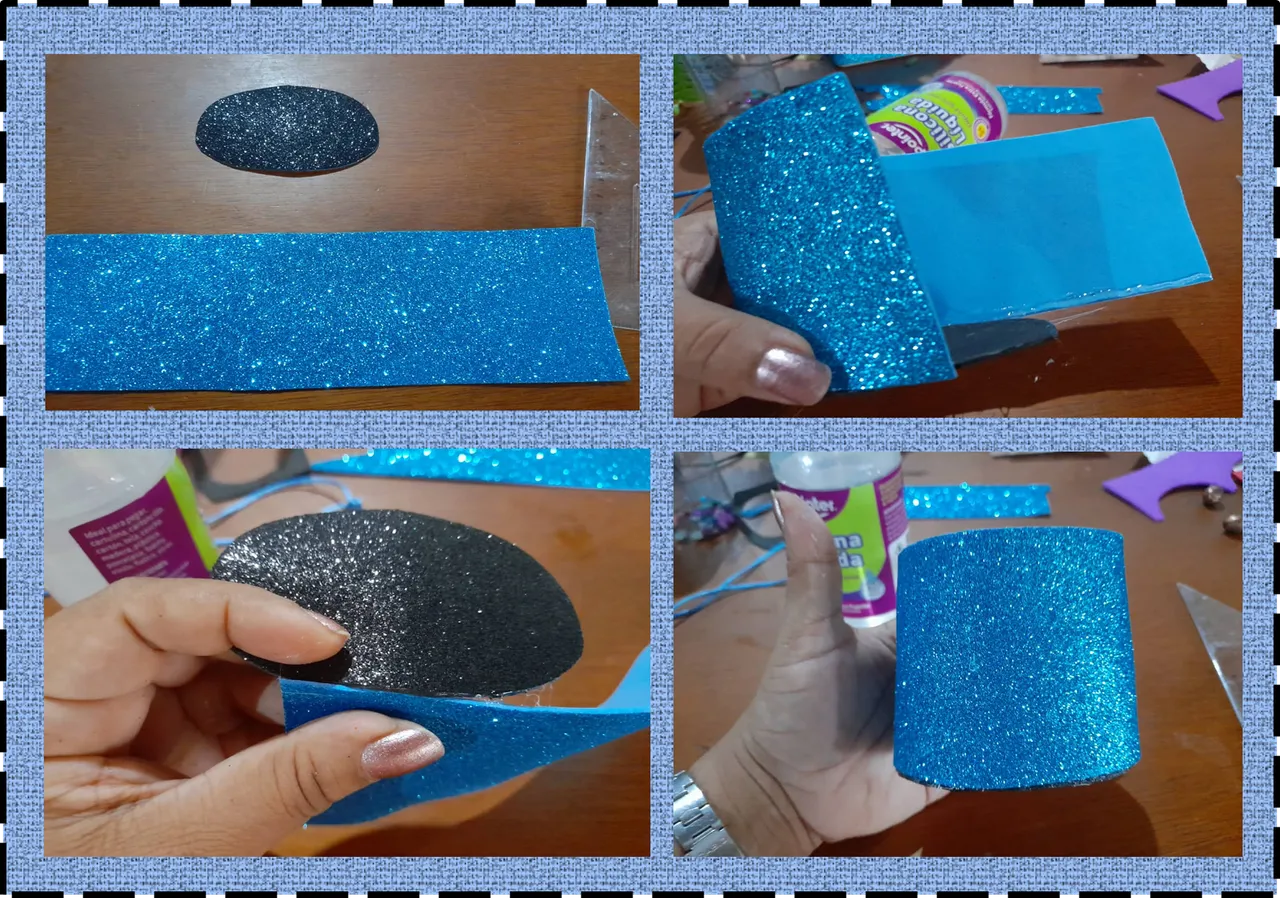
- Medimos y recortamos del foami azul escarchado 23cm de largo por 8cm de ancho, luego con el foami negro escarchado hacemos un ovalo y seguidamente pegaremos por el alrededor el foami azul.
- We measure and cut from the frosty blue foami 23cm long by 8cm wide, then with the frosty black foami we make an oval and then we will glue the blue foami around it.
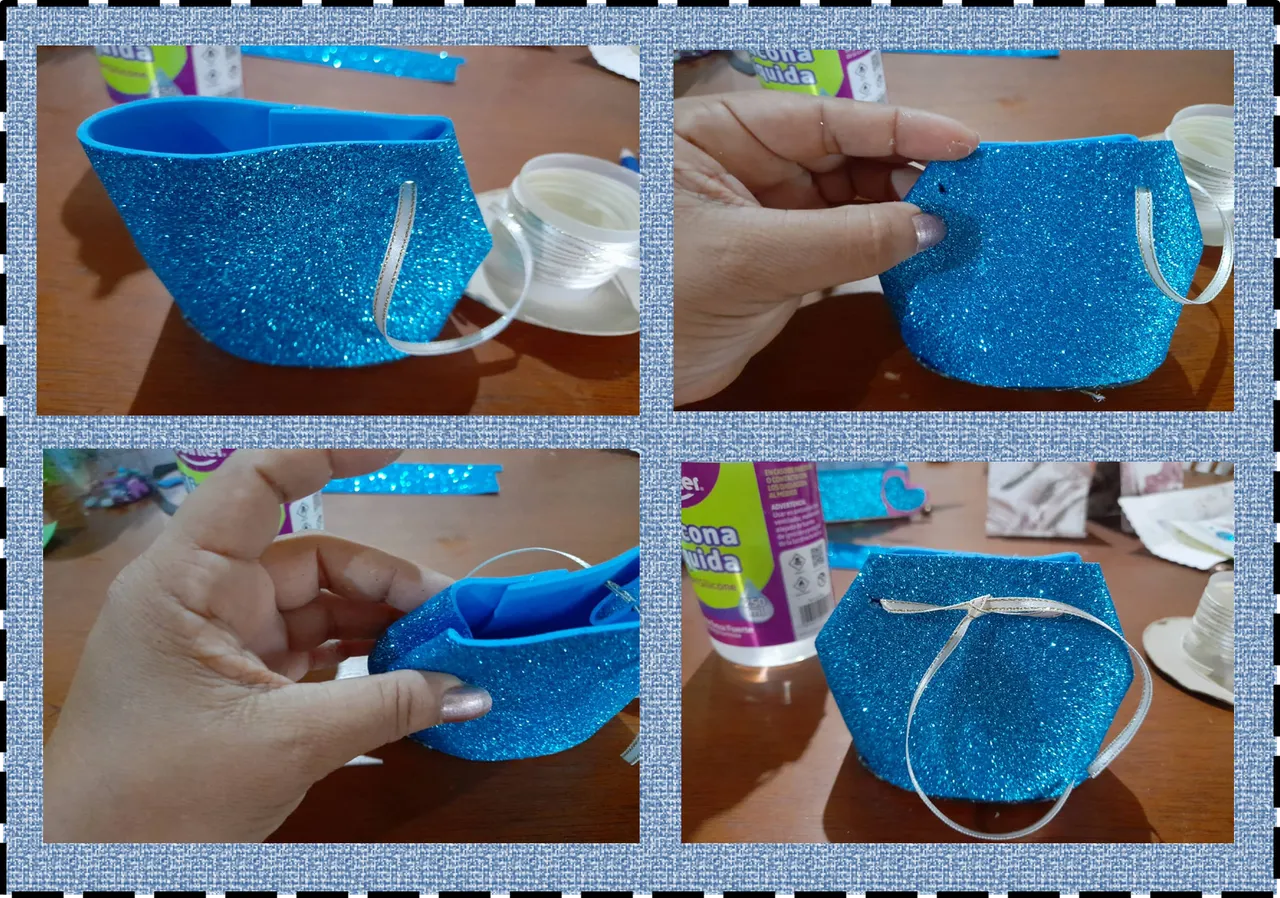
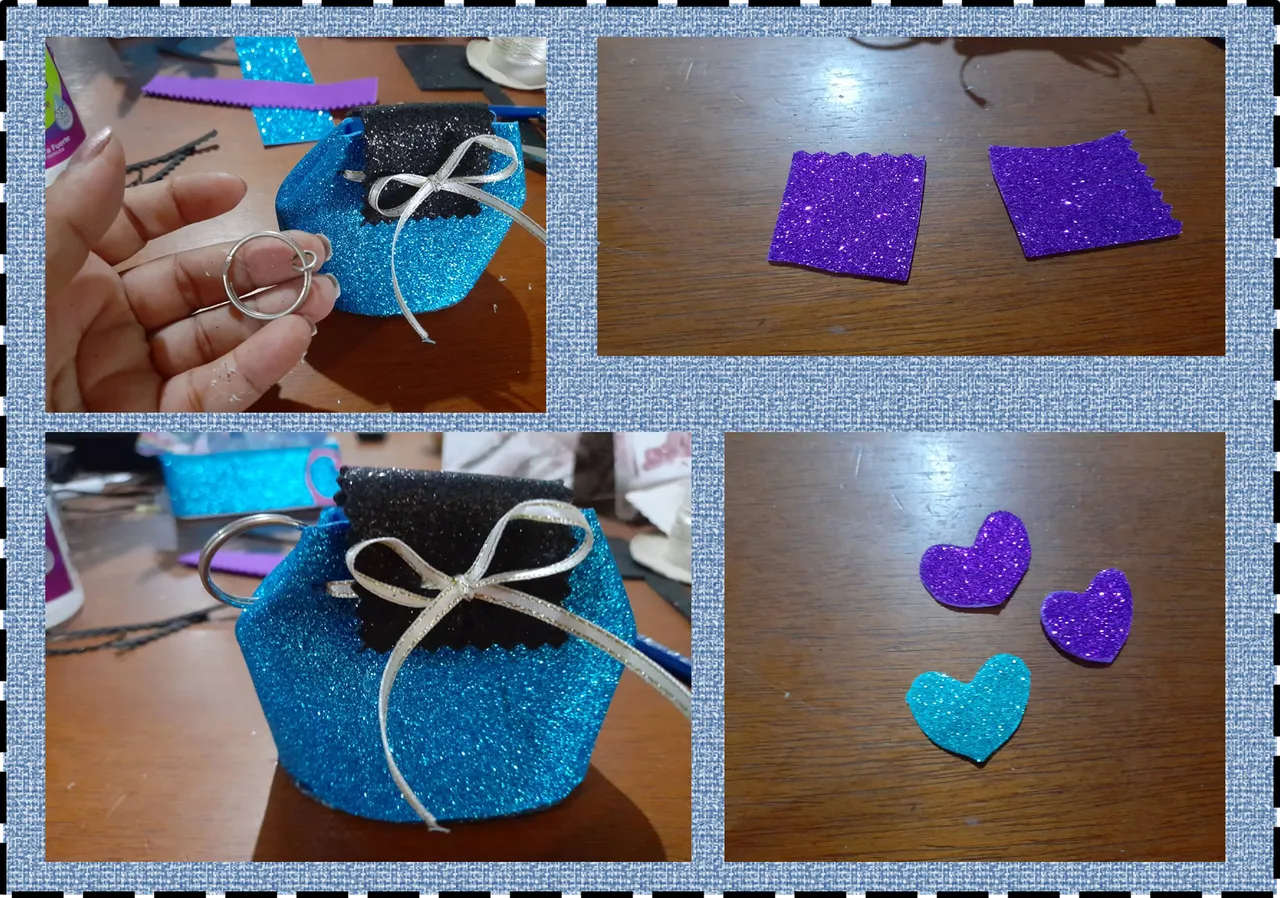
2.-Una vez que tenemos pegado el foami azul y el negro, procedemos a doblar las esquinas como se muestra en la imagen, luego con la punta de un lápiz le hacemos unos huecos pequeños en ambos lados y le colocamos la cinta.
2.-Once we have glued the blue and black foami, we proceed to fold the corners as shown in the image, then with the tip of a pencil we make some small holes on both sides and place the tape.

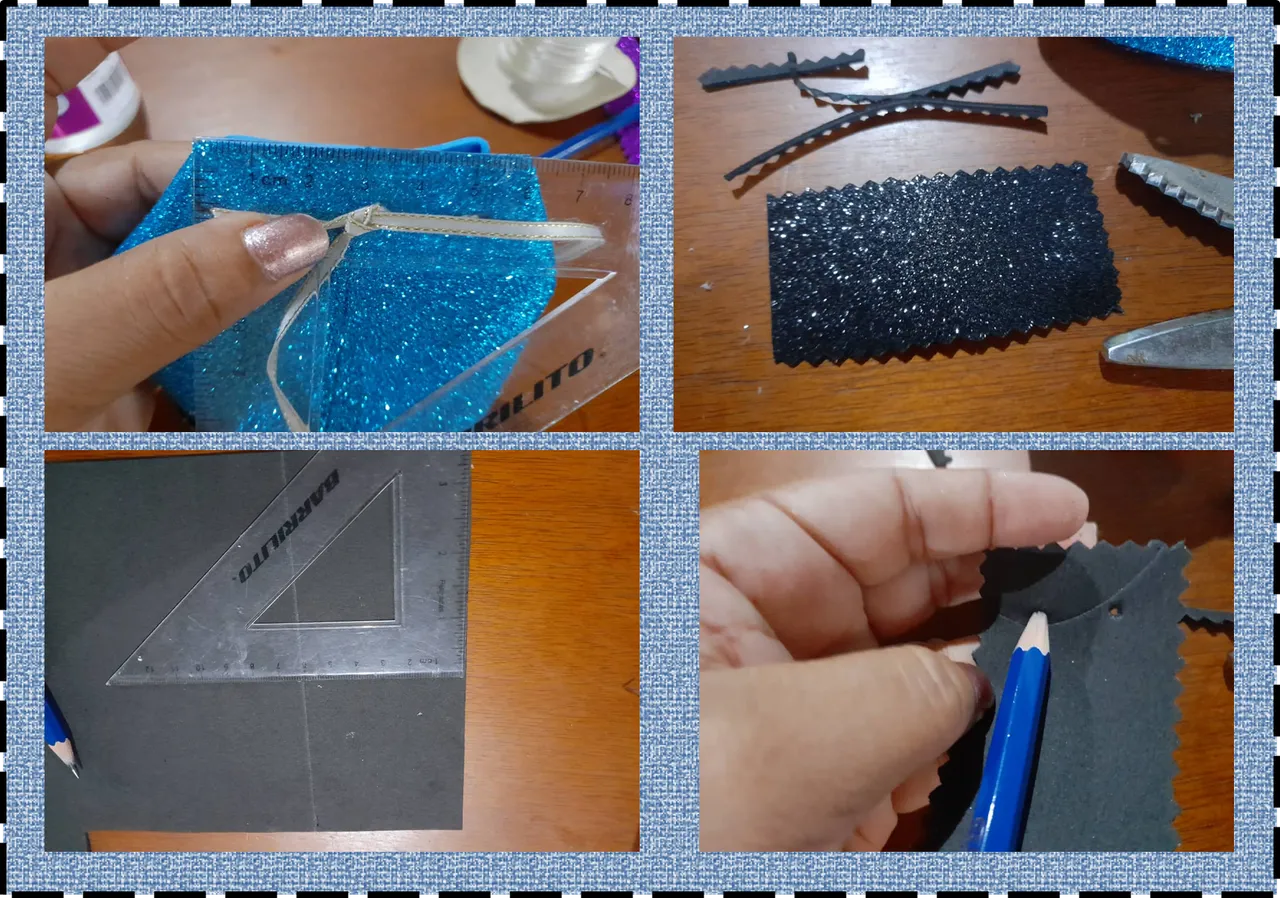
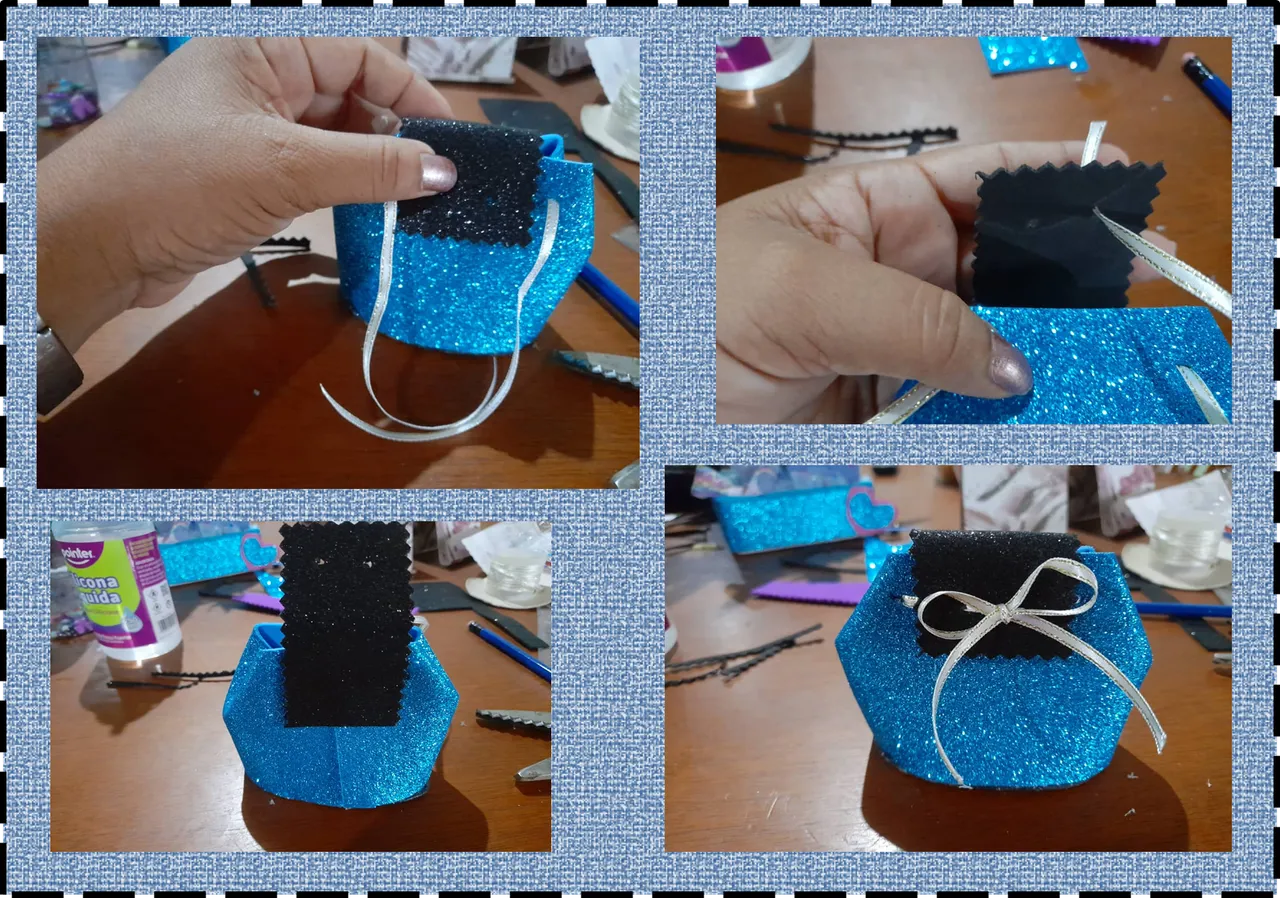
3.- Medimos la parte de arriba del Bolsito en 4cm de ancho por 7cm de ancho y con una tijera de zic zac cortamos por las esquinas, luego con la punta del lápiz hacemos dos huecos que pondremos en la parte de adelante del bolso y la cinta que ya habíamos introducido en el foami azul ahora lo pasamos por el foami negro y hacemos un lindo lacito.
3.- We measure the upper part of the Bag in 4cm wide by 7cm wide and with a zic zac scissors we cut through the corners, then with the tip of the pencil we make two holes that we will put in the front part of the bag and the tape that we had already introduced in the blue foami now we pass it through the black foami and we make a nice little bow.
4.-Procedemos ahora a colocarle la argolla `para el llavero de un lado del Bolsito y luego recortaremos en foami fucsia y en verde agua unos corazones que colocaremos en la parte de adelante del bolso, también con la tijera de zic zac cortamos una tirita que colocaremos en la parte de abajo del bolso.
4.-Now we proceed to place the ring for the key ring on one side of the Bag and then we will cut out some hearts in fuchsia foami and in aqua green that we will place on the front of the bag, also with the zic zac scissors we cut a band-aid which we will place at the bottom of the bag.

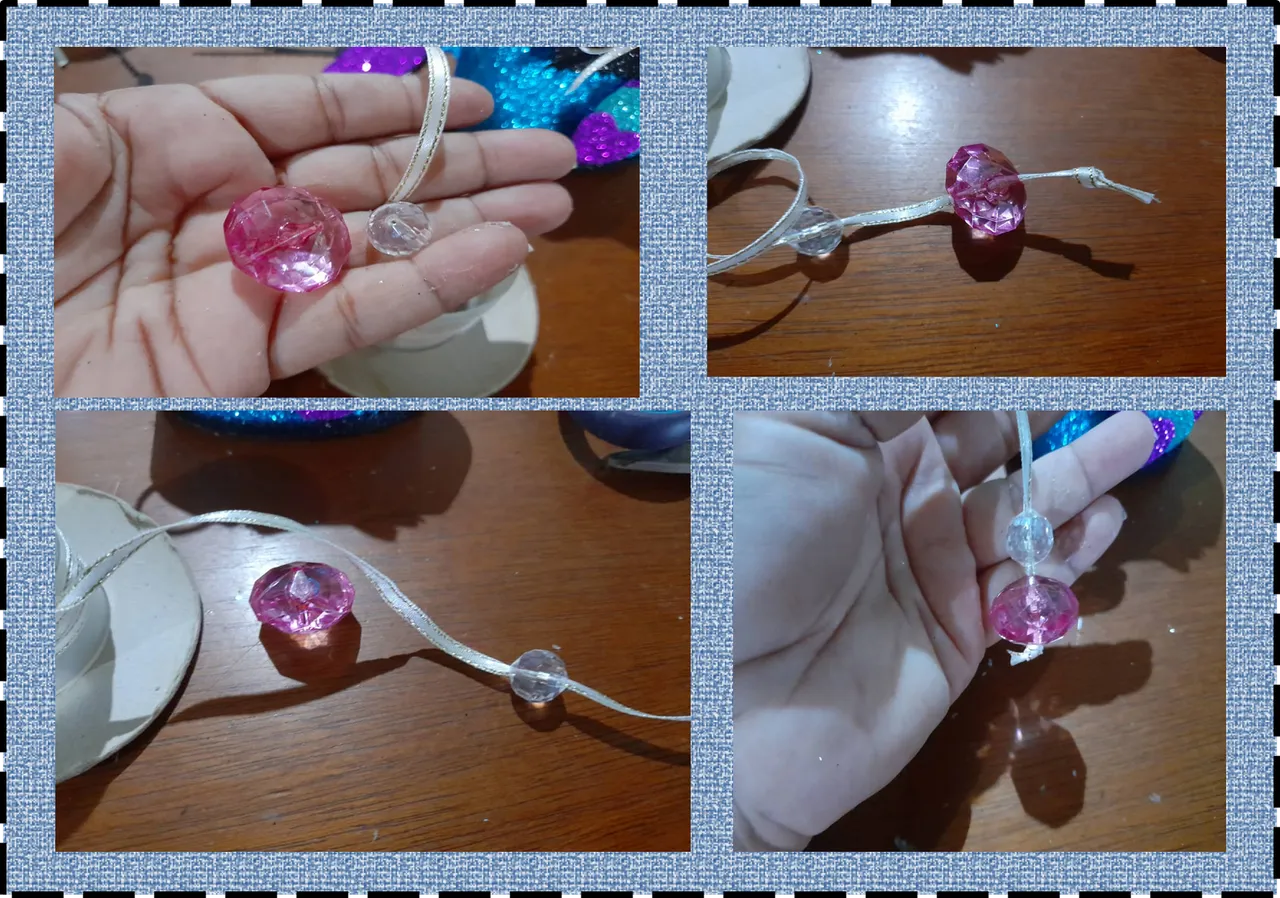
5.-Para finalizar colocaremos en la argolla unos brillantes de plásticos y luego decoramos con algunos accesorios rosados. Vean que Hermoso Bolsito para Guindar en LLaveros hicimos en esta fácil y económica manualidad y ya faltando pocos días para el día del Amor y la Amistad lo puedes obsequiar a esa persona especial que tanto quieres.
5.-To finish we will place some brilliant plastics in the ring and then we will decorate with some pink accessories. See what a Beautiful Bag to Garnish in Keychains we made in this easy and economical craft and with a few days left until the day of Love and Friendship you can give it to that special person you love so much.
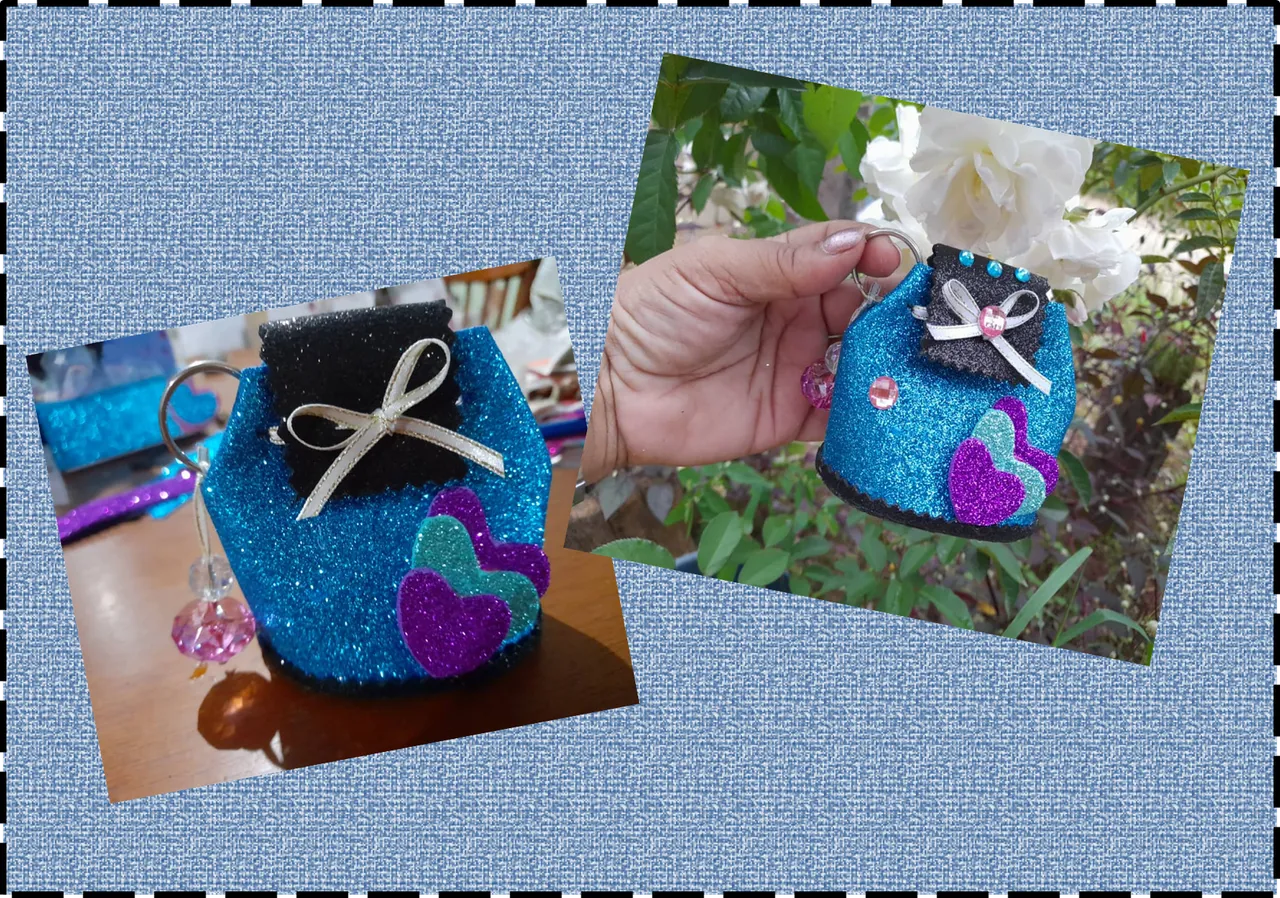
Listo terminado mi proyecto del día de hoy, espero les haya gustado. !Hasta la próxima!
Ready finished my project today, I hope you liked it. !Until next time!
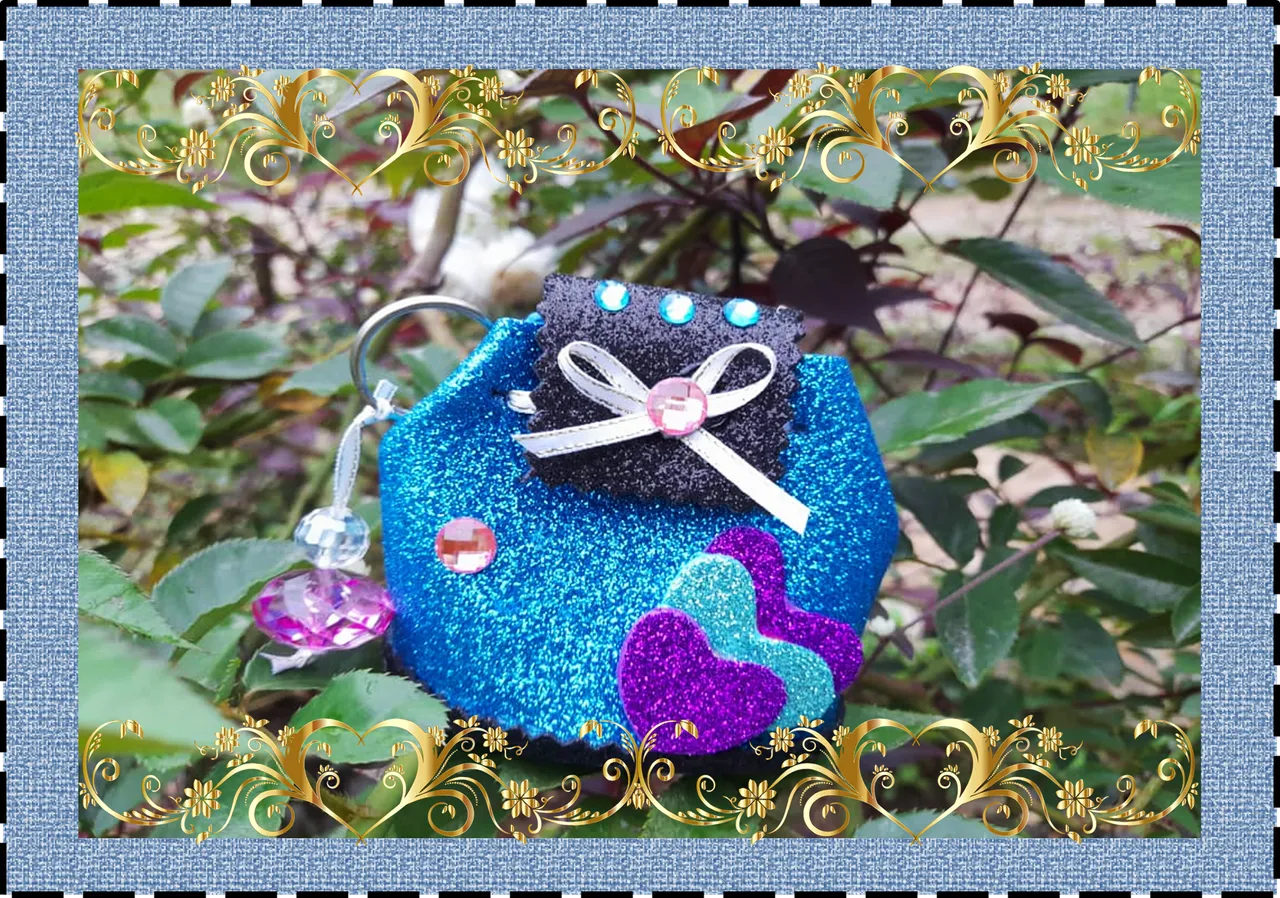

Imagen Portada y SeparadoresFuente
Las fotografías fueron tomadas con un teléfono inteligente Samsung Galaxy A12, el texto fue traducido al inglés con el traductor de Google.
The photographs were taken with a Samsung Galaxy A12 smartphone, the text was translated into English with the Google translator.