Hola amigos de Hive Diy es un gran gusto saludarles en este día, hoy con un nuevo proyecto para mostrarles, es un hermoso moñito para niñas en forma de Flor, lo mejor es que es elaborado con material de reciclaje, materiales que tenemos en casa, es muy fácil de hacer, y le damos una nueva forma y vida a esos materiales.
Hello friends of Hive Diy, it is a great pleasure to greet you on this day, today with a new project to show you, it is a beautiful flower-shaped bow for girls, the best thing is that it is made with recycled material, materials that we have at home, it is very easy to do, and we give a new shape and life to those materials.

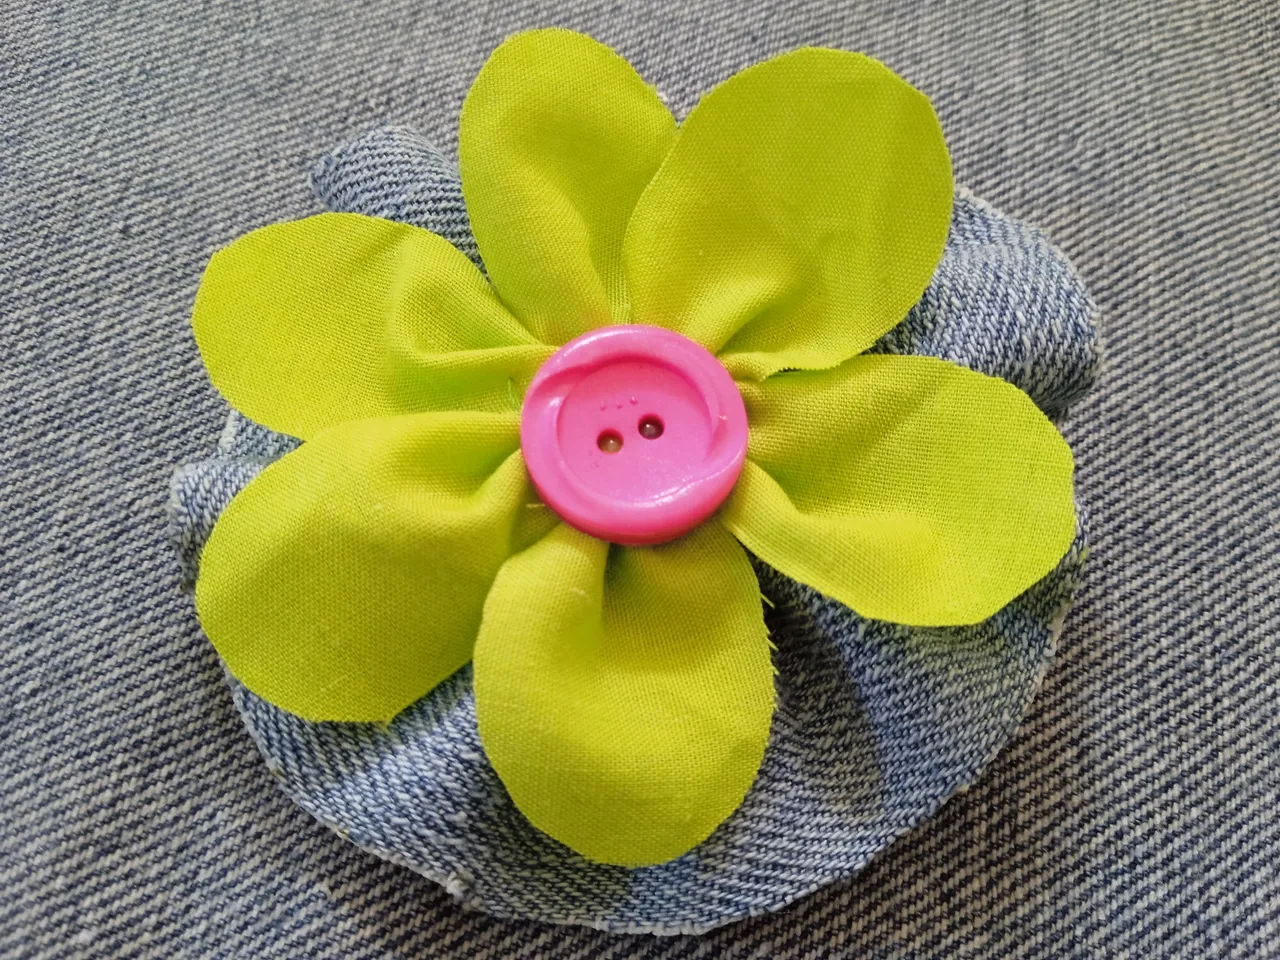
Hermoso Moñito para niñas en forma de Flor, con material de reciclaje 🌺💚👧🏼
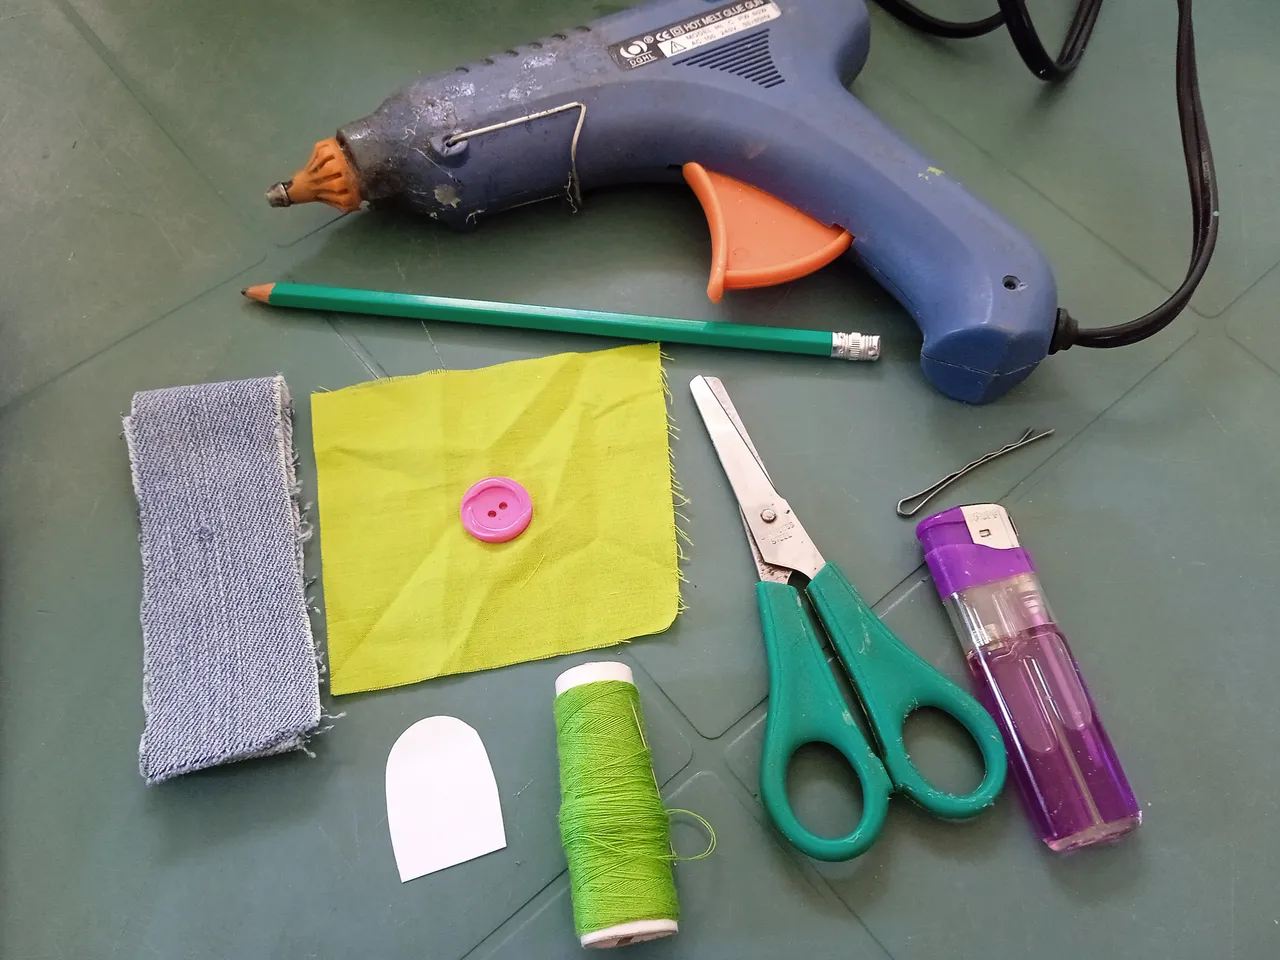
Materiales
Tela de jean reciclado 30x4 cm
Tela verde reciclado 10x10 cm
Hilo de coser color verde
Aguja fina
Lápiz
Tijera
Patrón de pétalo de flor medidas 3.5 largo 2.5 ancho
Yesquero
Silicón caliente
1 botón fuscia
1 gancho para el cabello
Beautiful Flower-shaped Bow for girls, with recycling material 🌺💚👧🏼
Materials
Recycled jean fabric 30x4 cm
Recycled green fabric 10x10 cm
Green sewing thread
fine needle
Pencil
Scissor
Flower petal pattern measures 3.5 long 2.5
wide tinderbox
hot silicone
1 fuchsia button
1 hair clip
Paso a Paso/# Step by Step
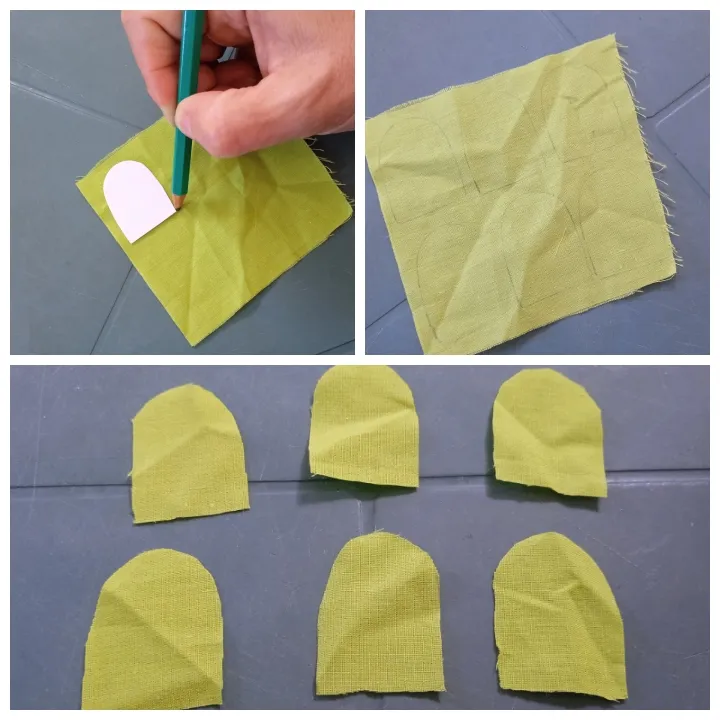
Paso 1
Cómo primer paso vamos a trasferir el patrón del pétalo a la tela verde 6 veces, recortar.
Step 1
As a first step we are going to transfer the petal pattern to the green fabric 6 times, cut it out.
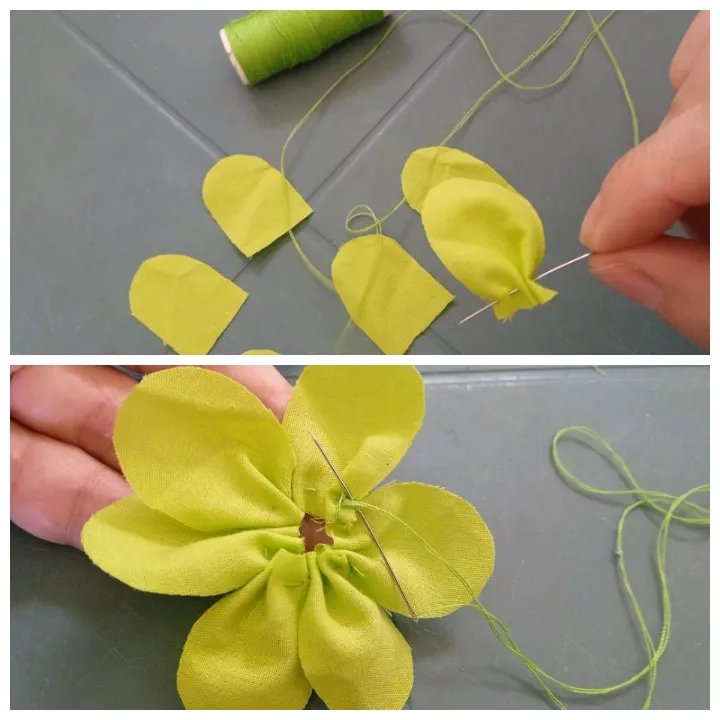
Paso 2
Luego vamos a dar la forma de Flor, insertando cada uno de los pétalos en la aguja con el hilo, arruchar un poco y reforzar al final.
Step 2
Then we are going to give the shape of a flower, inserting each one of the petals in the needle with the thread, curling up a little and reinforcing at the end.
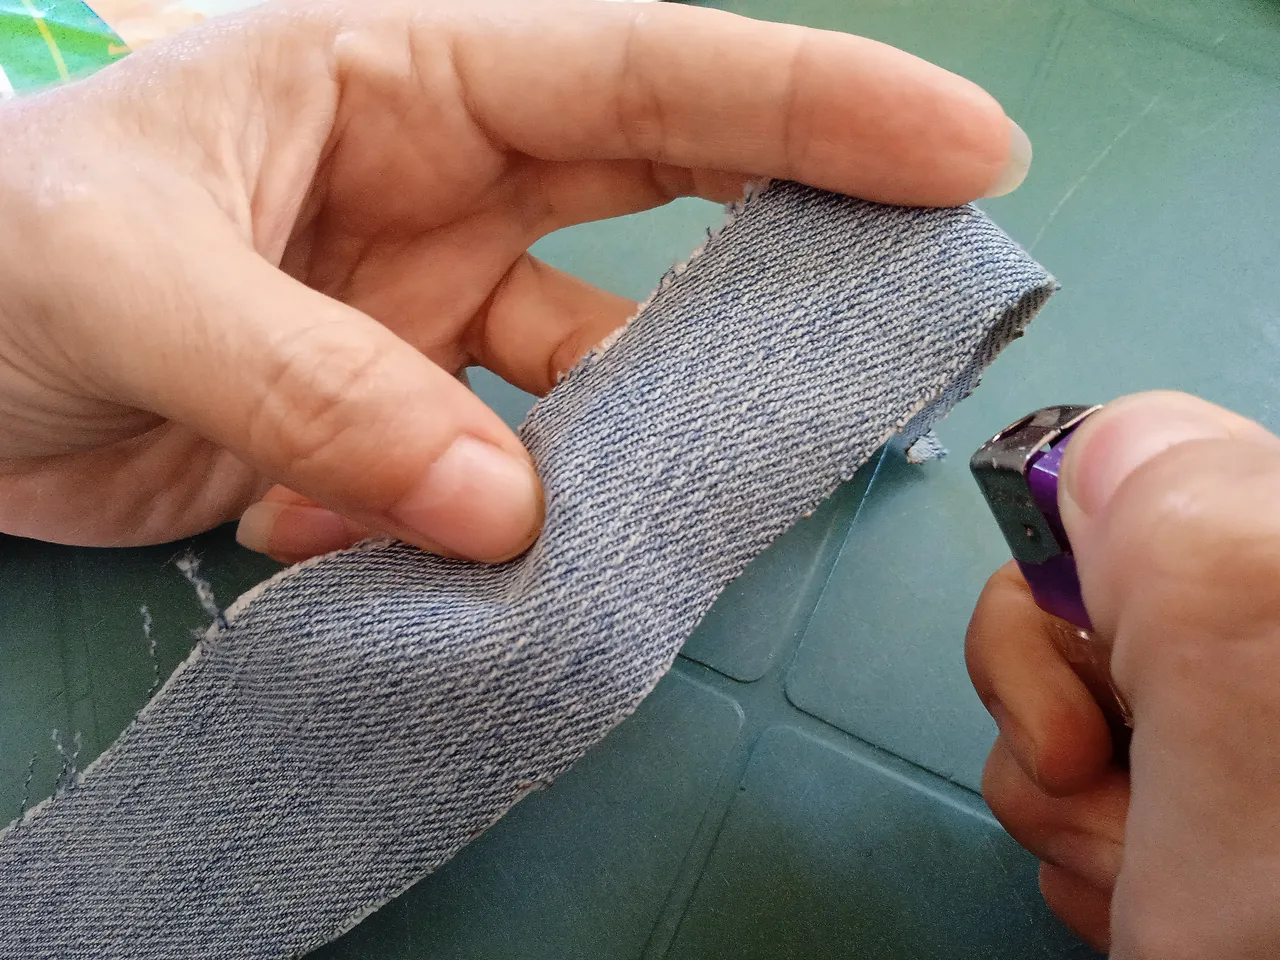
Paso 3
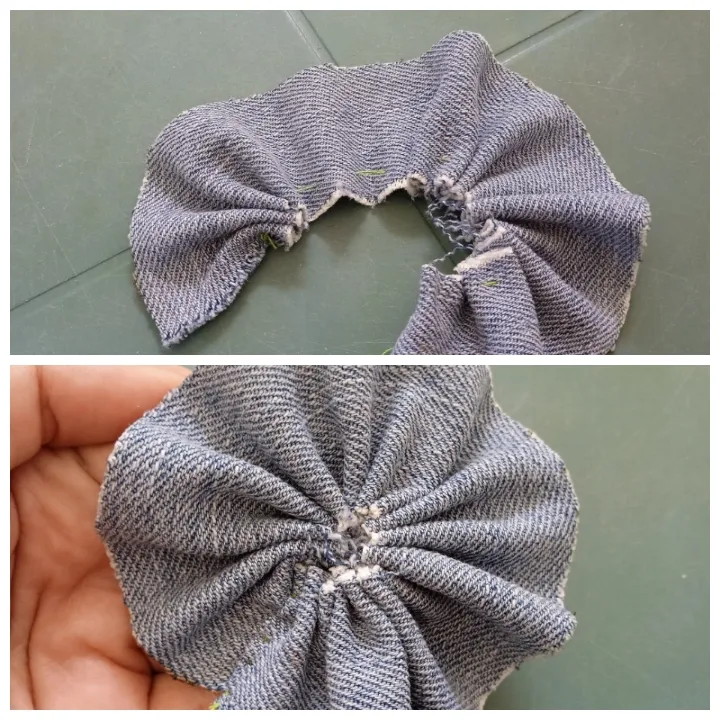
Después haremos la base de la flor, está la haremos con la tela de jean, la cual, primero con ayuda del yesquero, sellamos uno de los extremos, para que no se deshebre.
Step 3
Then we will make the base of the flower, we will make it with the jean fabric, which, first with the help of the tinderbox, we seal one of the ends, so that it does not unravel.
Paso 4
Después con la aguja e hilo hacemos puntadas por todo el otro extremo, la cual después arruchamos y damos forma circular, reforzamos al final.
Step 4
Then with the needle and thread we make stitches all over the other end, which we then curl up and give a circular shape, we reinforce at the end.
Paso 5
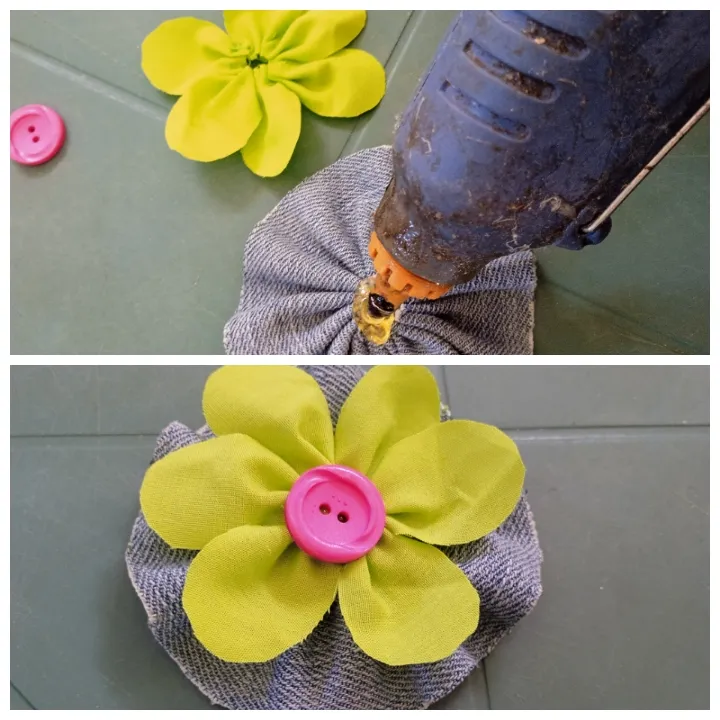
Seguidamente calentamos el silicón y pegamos la flor a la base de jean y luego el botón en el centro.
Step 5
Next we heat the silicone and glue the flower to the jean base and then the button in the center.
Paso 6
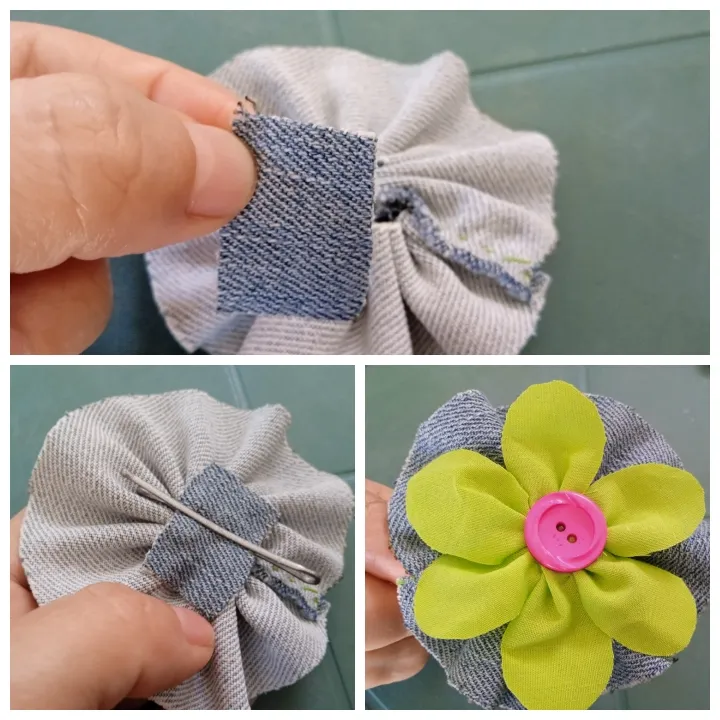
Por último también vamos a recortar un pedacito de jean y pegaremos por los extremos en la parte de atrás del proyecto, colocar el gancho de cabello y listo.
Step 6
Finally we are also going to cut a piece of jean and glue the ends to the back of the project, place the hair clip and that's it.
Un hermoso moñito para nuestras niñas!
A beautiful bow for our girls!
Todas las imágenes son de mi autoria por @mariarodriguez, tomadas especialmente para esta publicación.
All images are my own by @mariarodriguez, taken especially for this publication.