Bendiciones para todos, cómo siempre un gran gusto saludarles amigos de la comunidad de Hive Diy, hoy con un nuevo proyecto, una hermosa manualidad ideal para souvenir de fiesta infantil, con motivo de tigre, es muy fácil de hacer y lo mejor es que estamos reciclando y sale bastante económico, espero sigan este paso a paso.
Blessings to all, as always a great pleasure to greet you friends of the Hive Diy community, today with a new project, a beautiful craft ideal for a children's party souvenir, with a tiger motif, it is very easy to do and the best thing is that we are recycling and it comes out quite cheap, I hope you follow this step by step.

Hermoso Dulcero para Fiesta Infantil, motivo Tigre 🐯🍬
Materiales
1 envase plástico reciclado
Foami color naranja, rosado y blanco
Ojos móviles
Lápiz
Marcador negro
Regla
Tijera
Silicón caliente
Patrón de tigre ( cabeza, cola, patitas, boca)
Color rosado
Cinta de tela estampado
Beautiful Candy for Children's Party, Tiger motif 🐯🍬
Materials
1 recycled plastic container
Orange, pink and white foami
Mobile eyes
Pencil
black marker
Ruler
Scissors
hot silicone
Tiger pattern (head, tail, paws, mouth)
Pink color
Printed fabric tape

Procedimiento/Process
1.Cortemos a 5 cm de ancho una tira de foami color naranja, la cual cubra el alrededor del envase plástico, luego pegamos con el silicón caliente.
1.Let's cut a 5 cm wide strip of orange foam, which covers the area around the plastic container, then we glue it with hot silicone.

2.Luego transferimos el patrón de la cabeza, cola y patitas x 2, todo en el color naranja y recortamos.
2.Then we transfer the pattern of the head, tail and legs x 2, all in orange and cut out.

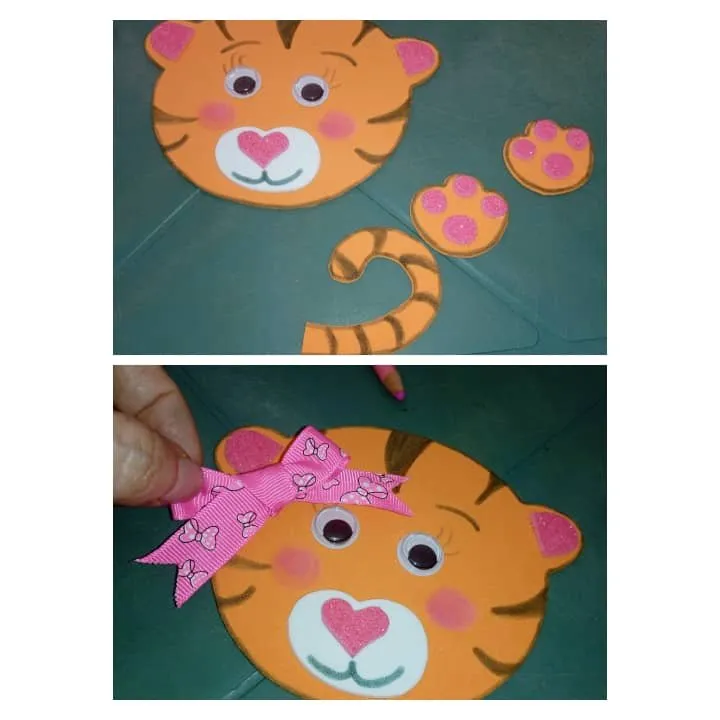
3.Luego recortamos en blanco para la boca del tigre y en rosado la nariz y formas de orejas y patitas, la cual luego vamos a pegar en la cara y patitas y queda así.
3.Then we cut out white for the tiger's mouth and pink for the nose and the shapes of the ears and paws, which we will then paste on the face and paws and it will look like this.


4.En este paso vamos a pegar los ojos móviles.
4.In this step we are going to paste the moving eyes.

5.Seguidamente procedemos a pintar las rayas del tigre en cabeza y cola y también la boca, también repitamos por todo el alrededor de las formas con el marcador negro.
5.Next we proceed to paint the stripes of the tiger on the head and tail and also the mouth, we also repeat all around the shapes with the black marker.

6.Despues pintamos con el color rosado 2 círculos en las mejillas y hacemos el lazo con la cinta, la cual pegamos al lado de una oreja.
6.Then we paint 2 circles on the cheeks with the pink color and we make the bow with the ribbon, which we stick next to one ear.

7.Por último pegamos la cabeza al envase , la colita y las patitas y listo.
7.Finally we glue the head to the container, the tail and the legs and that's it.

Dulcero listo!
Candy ready!

Hasta aquí mi Proyecto de este día, espero les haya gustado, muchas gracias por el apoyo brindado. Saludos 🐯🍬
So Project for this day, I hope you liked it, thank you very much for the support. Greetings 🐯🍬
Todas las imágenes son de mi autoria por @mariarodriguez, tomadas especialmente para esta publicación.
All images are my own by @mariarodriguez, taken especially for this publication.

