Espero estén pasando un lindo día, en esta oportunidad les quiero presentar el paso a paso de cómo realicé esta cafetera de juguete hecha con cartón y otros materiales, espero que les guste tanto como a mí, sin más nada que mencionar, comencemos:
I hope you are having a nice day, this time I want to show you the step by step of how I made this toy coffee maker made with cardboard and other materials, I hope you like it as much as I do, without further ado, let's start:
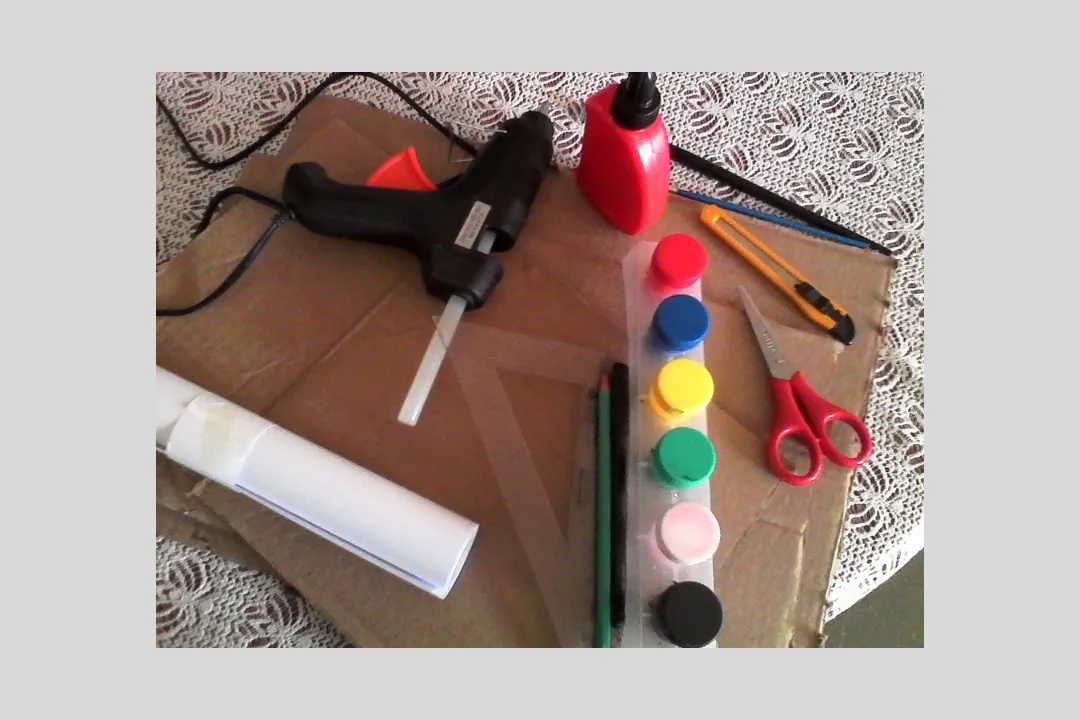
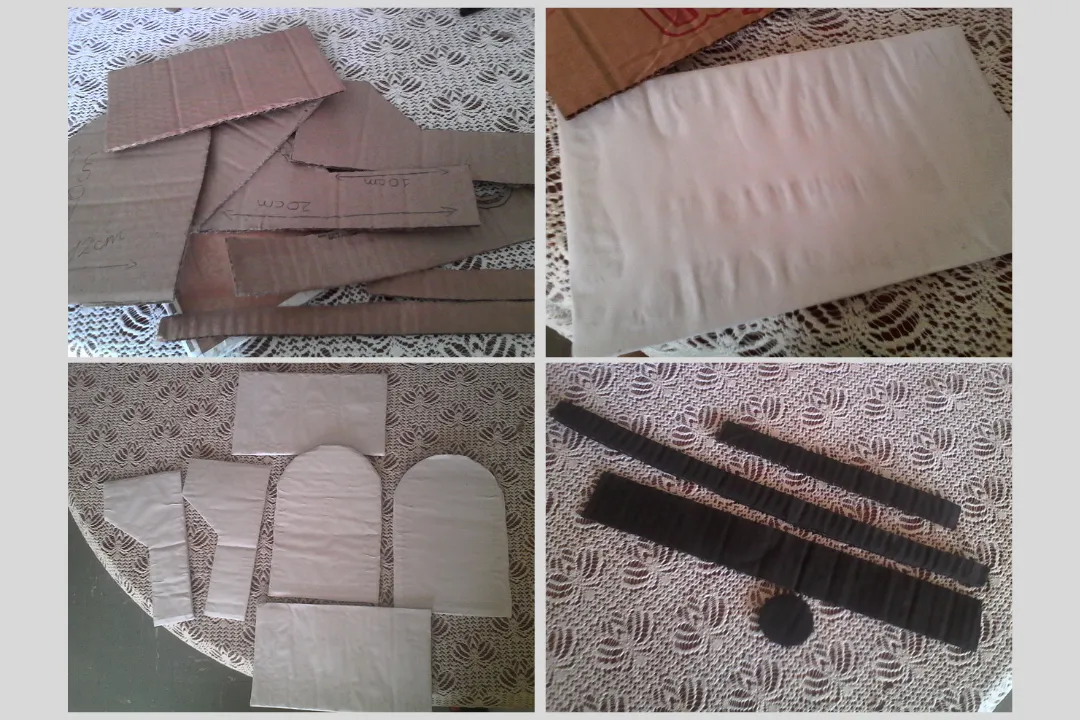
Materiales:
- Cartón.
- Papel blanco.
- Pega.
- Tijera.
- Silicón.
- Pintura negra, roja y blanca.
- Pinceles.
- Bolígrafo.
- Cutter o exacto.
- Regla.
- Compás.
Materials:
- Cardboard.
- White paper.
- Glue.
- Scissors.
- Silicone.
- Black, red and white paint.
- Brushes.
- Ballpoint pen.
- Cutter or exacto.
- Ruler.
- Compass.
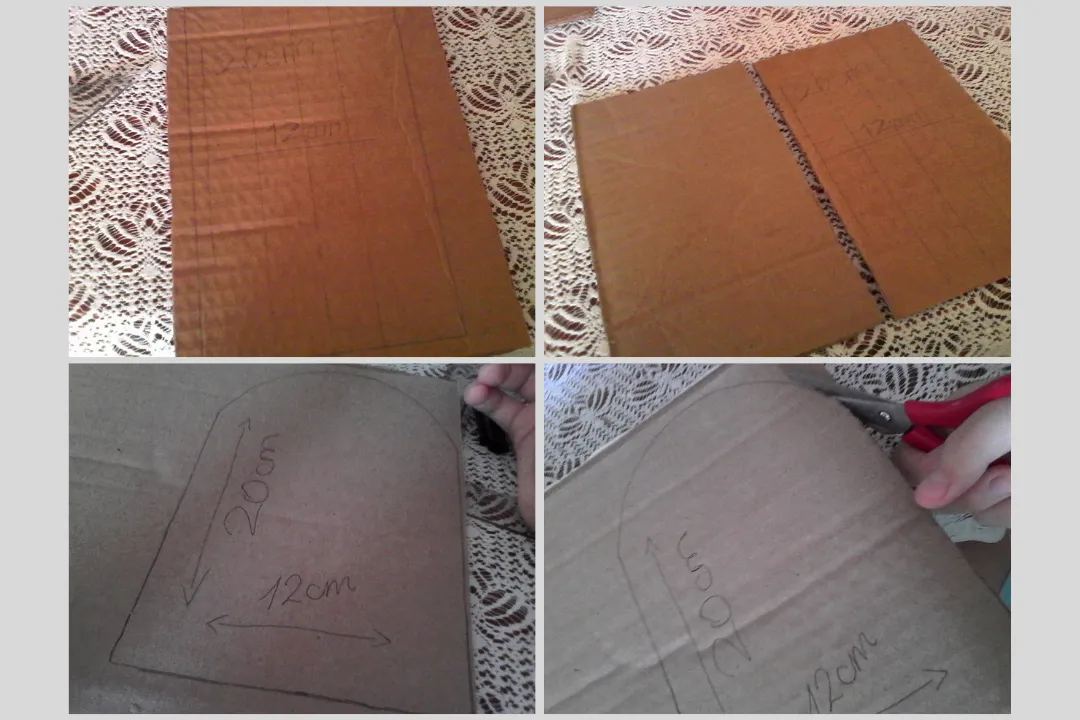
Primero, marqué dos piezas de 20 centímetros de alto y 12 cm de ancho, luego realicé otras dos con las mismas medidas, pero con una parte redonda, como muestro en las imágenes.
First, I marked two pieces of 20 centimeters high and 12 cm wide, then I made another two with the same measures, but with a round part, as shown in the images.
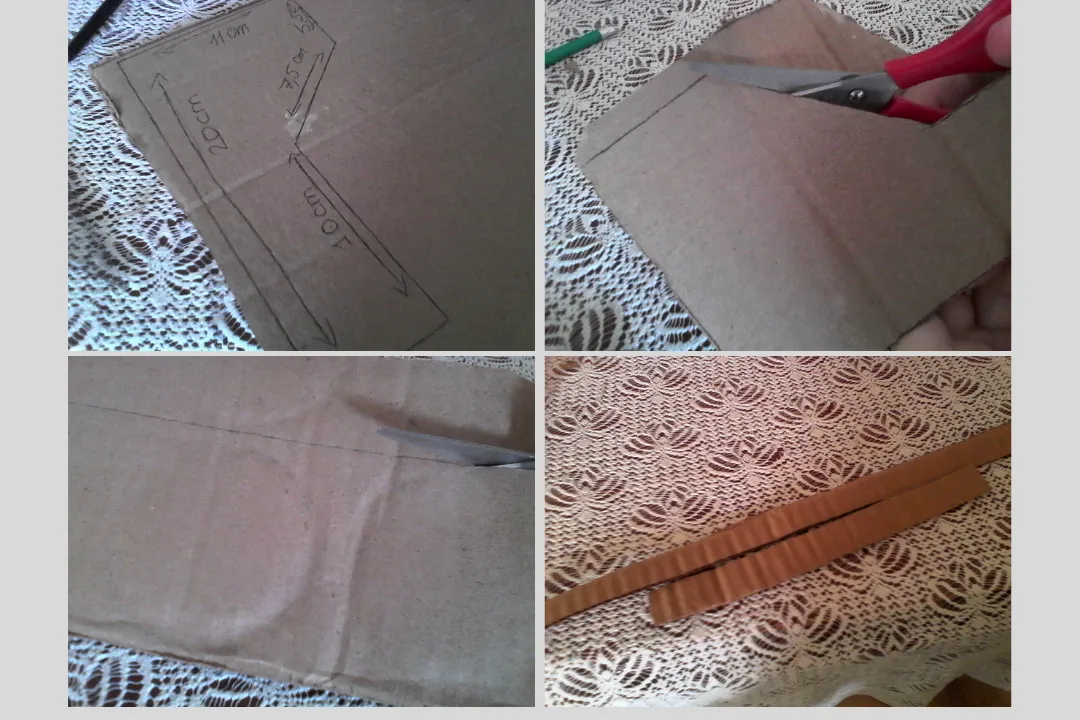
Dibujé las paredes de la cafetera y las corté, en total fueron dos piezas.
También corté dos tiras, una de 4cm de ancho y otra de 2 cm.
I drew the walls of the coffee pot and cut them, in total there were two pieces.
I also cut two strips, one 4 cm wide and the other 2 cm wide.
Luego de tener todas las piezas las forré con papel blanco.
Las tiras y otros detalles los pinté de negro.
After I had all the pieces I lined them with white paper.
The strips and other details were painted black.
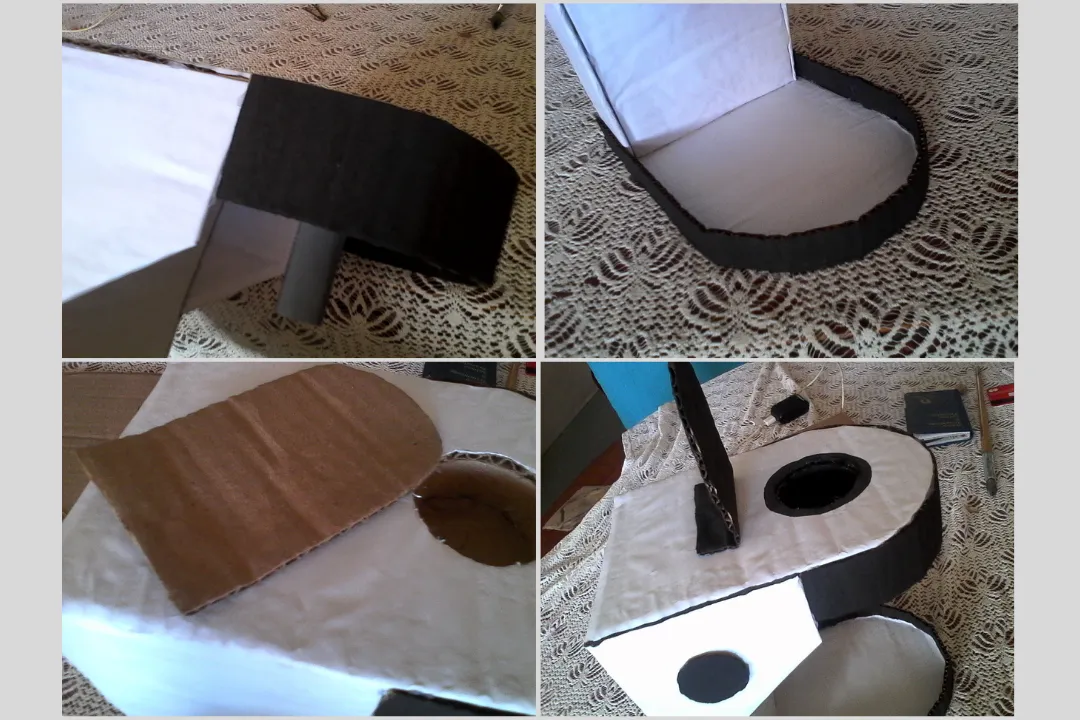
Pegué los dos rectángulos a una de las piezas con la parte redonda dejando un espacio de 5 cm.
Luego pegué las paredes a los lados como muestro en las imágenes.
I glued the two rectangles to one of the pieces with the round part leaving a space of 5 cm.
Then I glued the walls to the sides as shown in the pictures.
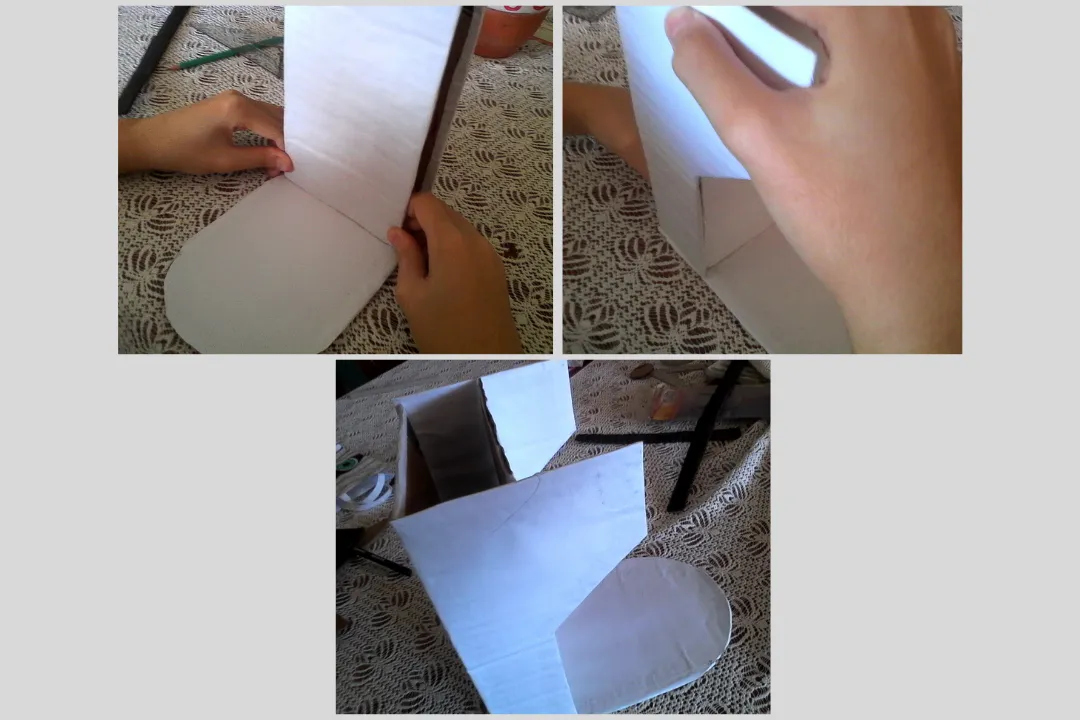
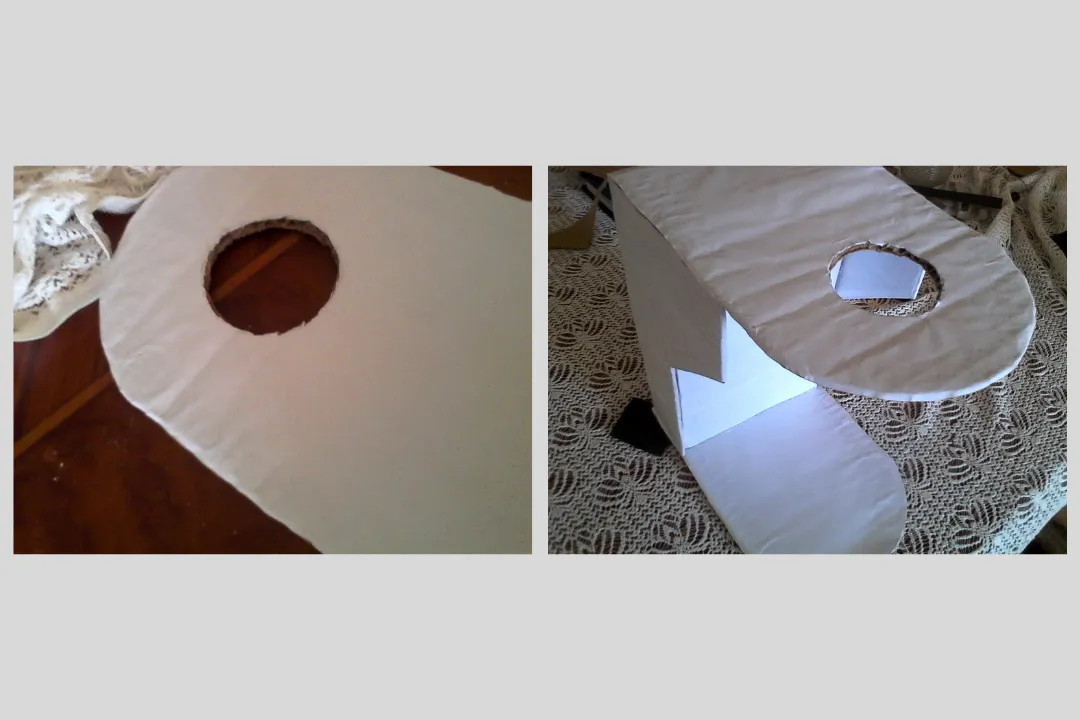
A la pieza que va en la parte de arriba, le corté un círculo con ayuda del cutter, y la pegué.
To the piece that goes on the top, I cut a circle with the help of the cutter, and glued it.
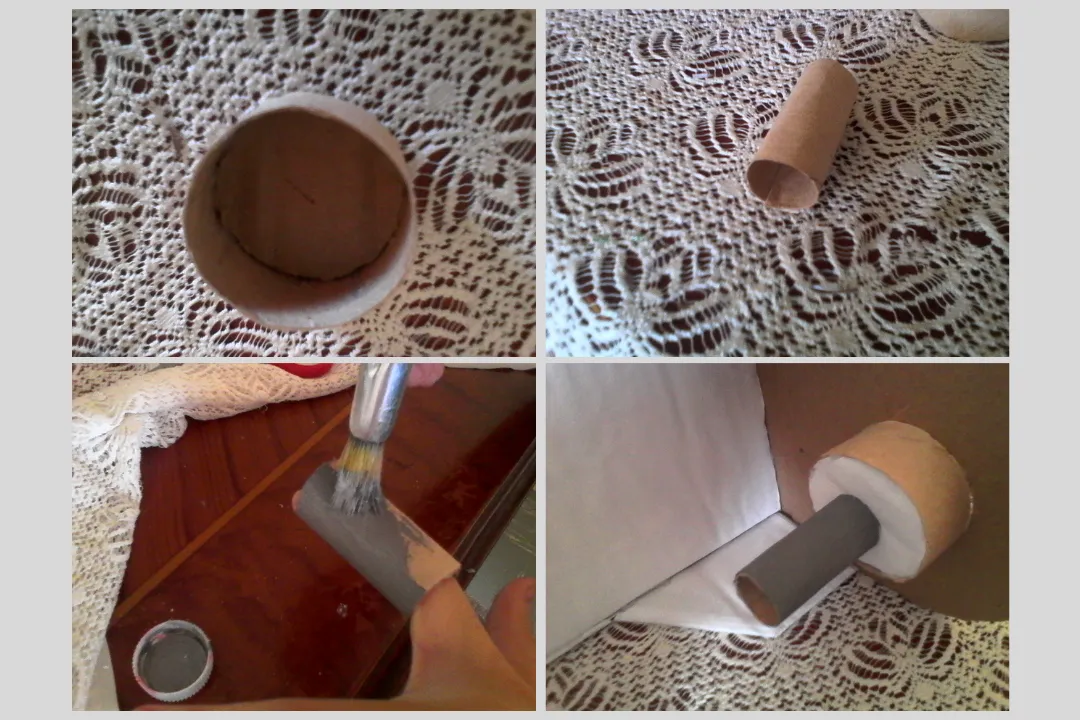
Corté una parte de un tubo de papel de baño, luego le pegué un circulo de cartón.
Procedí a realizar un tubo delgado, lo pinté de gris, y pegué las dos piezas debajo del círculo que ya había hecho.
I cut a part of a toilet paper tube, then glued a cardboard circle to it.
I proceeded to make a thin tube, painted it gray, and glued the two pieces under the circle I had already made.
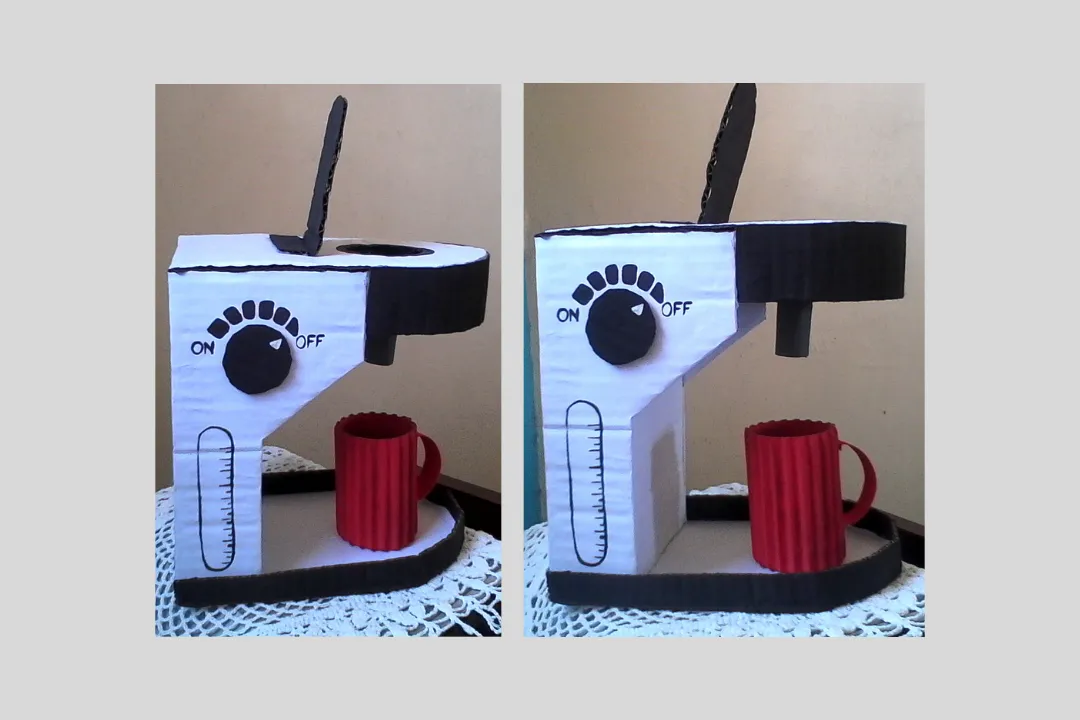
Pegué la tira más gruesa arriba y la delgada abajo.
Luego corté una pieza con una de las partes redondas y la adherí arriba.
I glued the thicker strip on top and the thinner strip on the bottom.
Then I cut a piece with one of the round parts and glued it on top.
Para hacer la taza corté una tira de cartón corrugado, apliqué pintura roja, y enrollé para formar la taza.
Para culminar, pinté los últimos detalles.
To make the cup I cut a strip of corrugated cardboard, applied red paint, and rolled it up to form the cup.
To finish, I painted the last details.

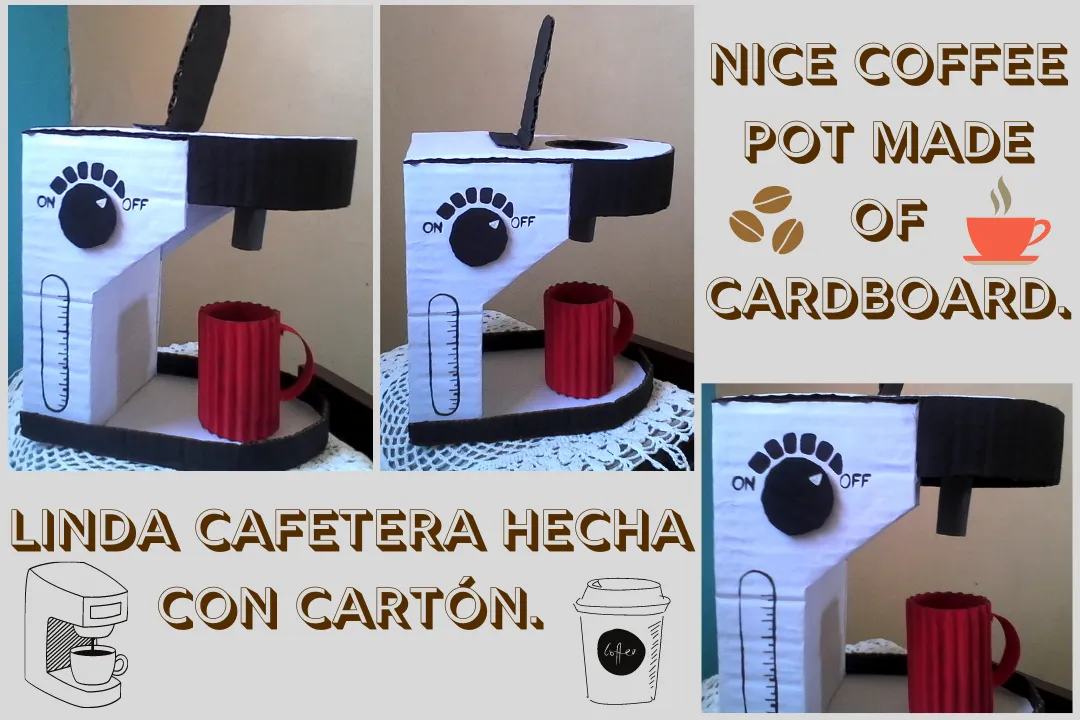
Y listo amigos, este fue el resultado de esta cafetera de juguete, espero que les haya gustado mucho, gracias por llegar hasta aquí. Nos leemos en un próximo post!!☕❤️
And ready friends, this was the result of this toy coffee maker, I hope you liked it a lot, thanks for coming here. See you in the next post!☕❤️
Todas las imágenes son de mi autoría @mariamglow, tomadas con mi teléfono, editadas en Canva, texto traducido con DeepL.
All images are authored by me @mariamglow, taken with my phone, edited in Canva, text translated with DeepL.