Español
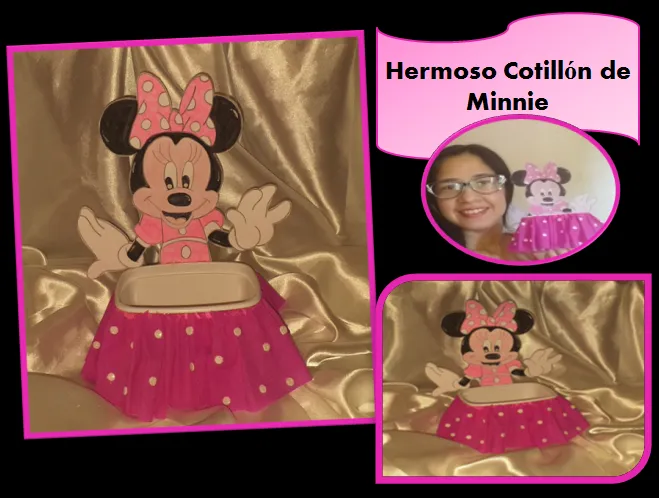
Un gran saludo amigos que hacen vida en esta comunidad creativa #HiveDiy,el día de hoy compartiré con ustedes un hermoso cotillón de minnie mouse,elaborado con mucho amor para todos ustedes,espero les guste.A continuación el paso a paso:
English
A big greeting friends who make life in this creative community #HiveDiy,today I will share with you a beautiful minnie mouse cotillion,made with love for all of you,I hope you like it.Here is the step by step:
Español
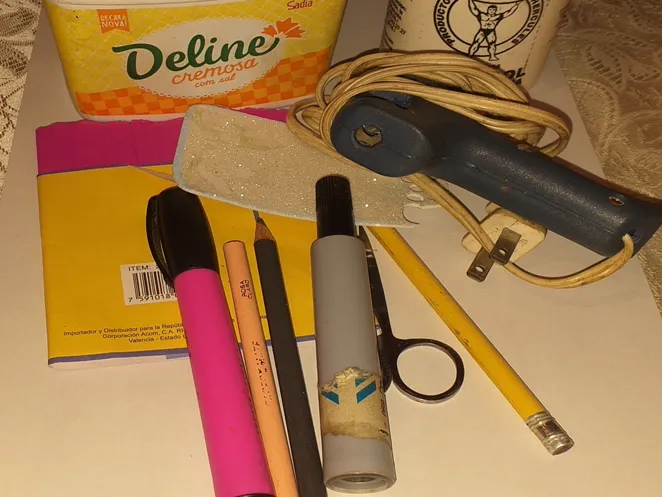
Materiales
*Papel crepe fucsia
*Silicón caliente
*Foami escarchado blanco
*Envase plástico
*Color carne y negro
*Pegamento
*Marcador fucsia y negro
*Cartulina blanca
*Tijera
*Lápiz
English
*Fuchsia crepe paper
*Hot silicon
*White frosted Foami
*Plastic container
*Flesh and black color
*Glue
*Fuchsia and black marker
*White cardboard
*Scissors
*Pencil
Español
Paso a paso
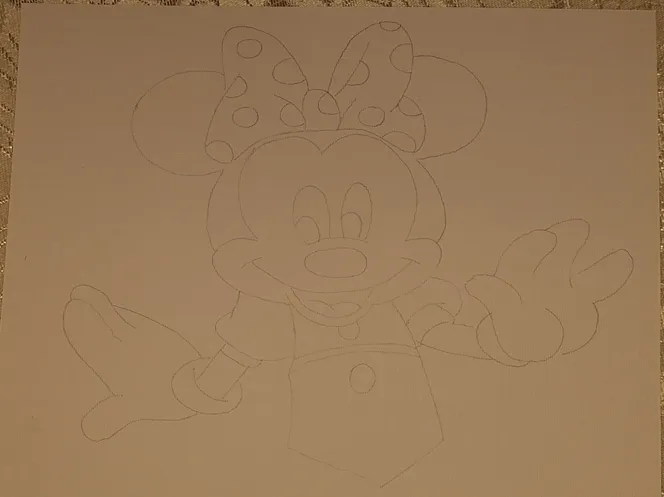
Paso 1
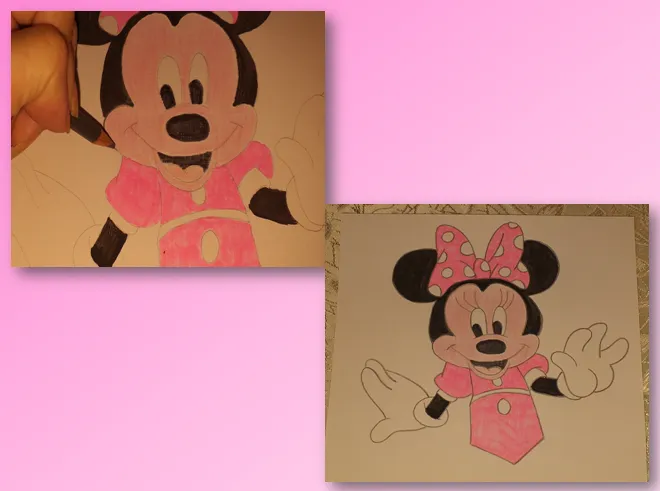
Lo primero que hacemos es tomar el lápiz y la cartulina y realizar el boceto de lo que sera el motivo de nuestro cotillón en este caso minnie mouse.
English
Step by step
Step 1
The first thing we do is to take the pencil and the cardboard and make the sketch of what will be the motif of our cotillion in this case minnie mouse.
Español
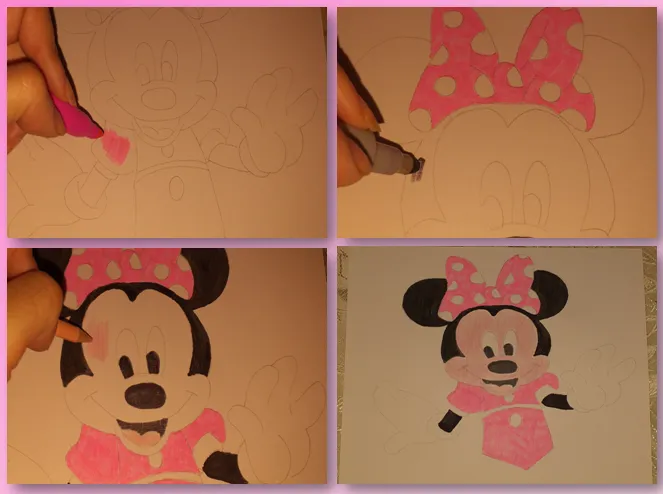
Paso 2
Empezamos a darle vida a nuestra minnie,rellenando cada uno de los espacios,primero rellenamos el traje y el lazo con marcador fucsia,luego las orejas y brazos con marcador negro,por último rellenaremos la cara con color carne.
English
Step 2
We begin to give life to our minnie, filling each of the spaces, first we fill the suit and the bow with fuchsia marker, then the ears and arms with black marker, finally we fill the face with flesh color.
Español
Paso 3
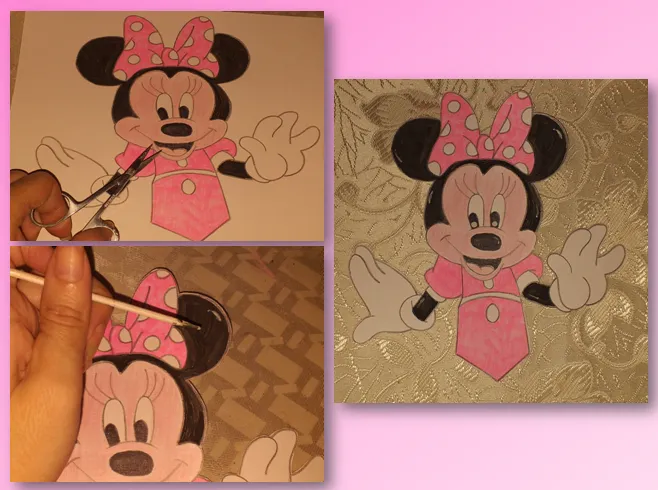
Luego remarcaremos todo el borde de la minnie con color negro de esta forma resaltaremos mas la figura.
English
Step 3.
Then we will highlight all the edge of the minnie with black color in this way we will highlight more the figure.
Español
Paso 4
Seguidamente recortamos y realizamos los detalles con pintura blanca.
English
**Step 4
Next we cut out and make the details with white paint.
Español
Paso 5
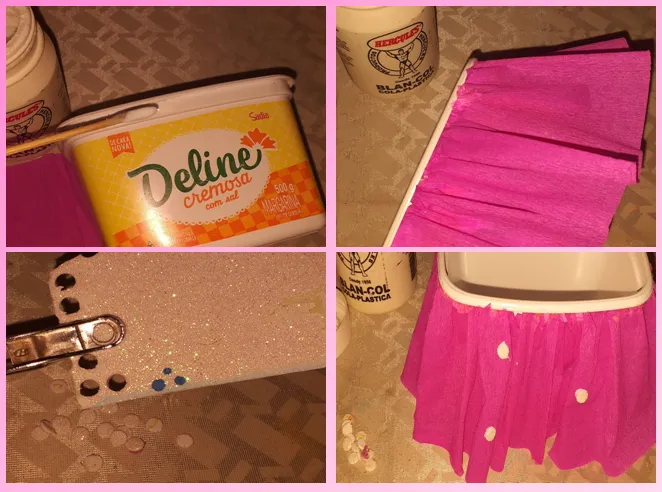
Continuamos con la base de nuestro hermoso cotillon,cortamos un pedazo de papel crepe de 8cm de ancho,colocamos pegamento por el borde del envase y pegamos el papel crepe haciendo pliegues,cortamos unos círculos en foami blanco y pegamos el papel crepe.
English
Step 5
We continue with the base of our beautiful cotillion, cut a piece of crepe paper 8cm wide, put glue around the edge of the container and glue the crepe paper making folds, cut some circles in white foami and glue the crepe paper.
Español
Paso 6
Para finalizar colocamos silicón en la minnie y pegamos en el envase.
English
Step 6
Finally, place silicone on the minnie and glue on the container.
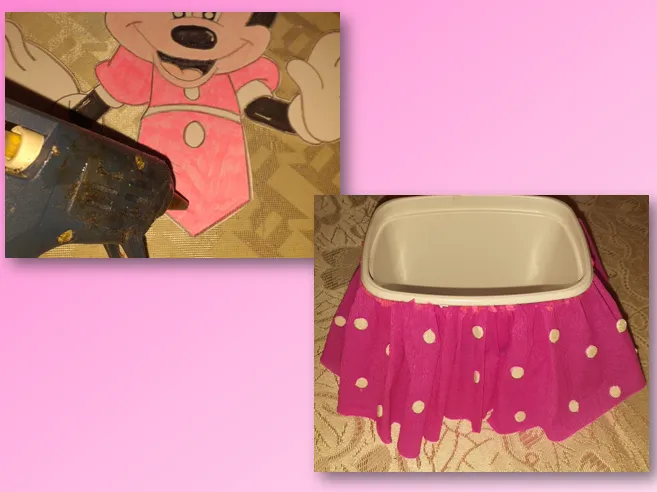
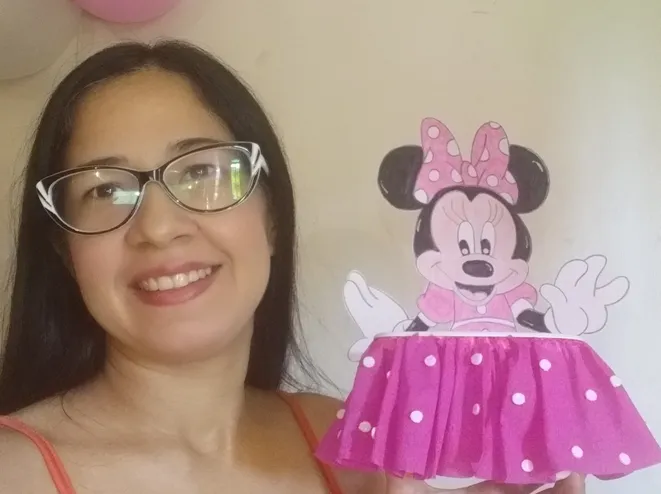
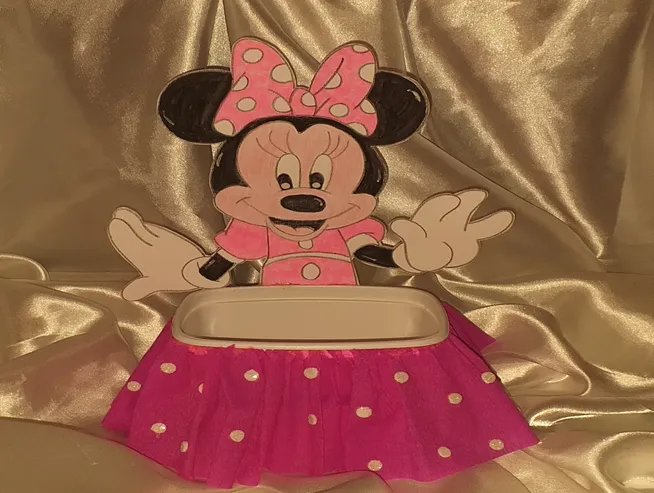
Así de bello quedo mi cotillón de minnie mouse
This is how beautiful my minnie mouse cotillion turned out.
Fotografías de mi Autoria
Photographs of my Authorship
Tomadas de mi Samsung J6
Taken from my Samsung J6
Para la traducción utilice https://www.deepl.com/
For translation use https://www.deepl.com/
¡Gracias por su apoyo, por leerme y votar, GRACIAS!
Thank you for your support, for reading and voting, THANK YOU!