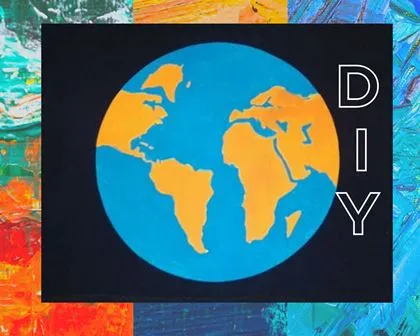
Cada día debemos sorprendernos de las cosas que con tanto gusto podemos realizar con nuestras manos y con creatividad, aquí les traigo el paso a paso sobre un hermoso cuadro decorativo con materiales reutilizables.
Para llevar a cabo este proyecto utilice:
⛳️ Hojas blancas
⛳️ Foami o goma Eva
⛳️ Listones de madera
⛳️ Base de aluminio
⛳️ Teipe doble faz
⛳️ Pinturas
⛳️ Tijeras
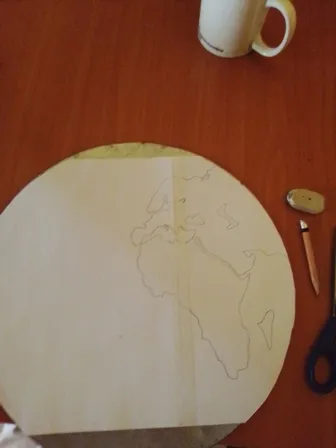
Realizamos nuestro mapa sobre el papel
Confieso que fue un poquito complicado realizar a mano alzada el diseño del mapa
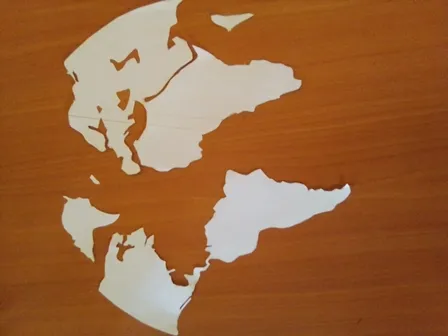
Recortamos con mucho cuidado todos los países, ríos, continentes
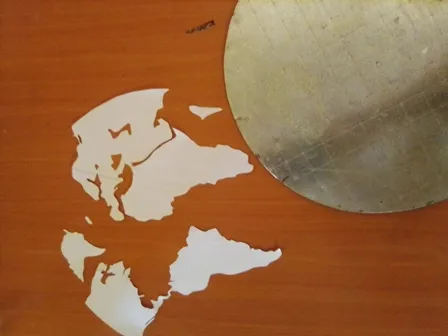
Disponemos nuestro mapa cortado sobre nuestra base de aluminio o cartón y pegamos
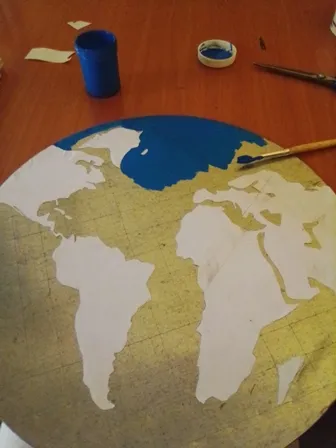
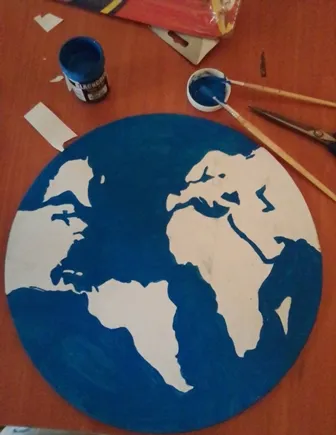
Seguido pintamos la base con pintura acrílica azul, dejamos secar unos minutos
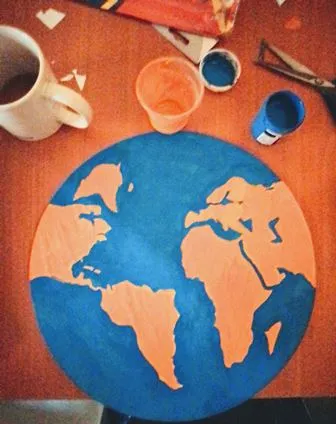
Ahora pintamos el mapa con pintura anaranjada (me descubrieron… Me encanta el café!)
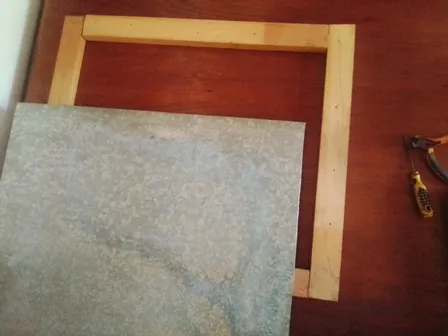
Colocamos la base de madera y una lámina que estaba en el taller que sirva de base para luego forrar
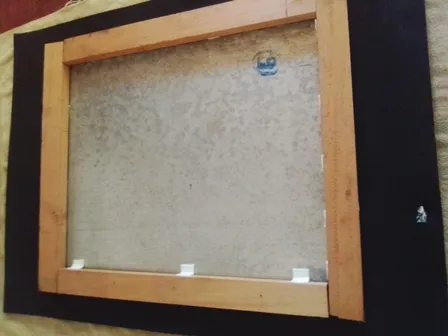
Forramos la lámina y los listones con foami negro
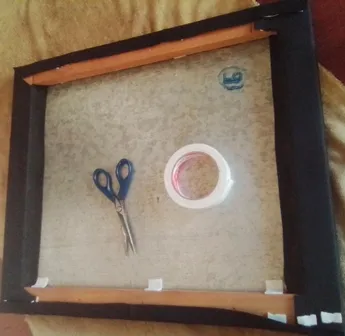
Utilice teipe doble faz para pegar las partes
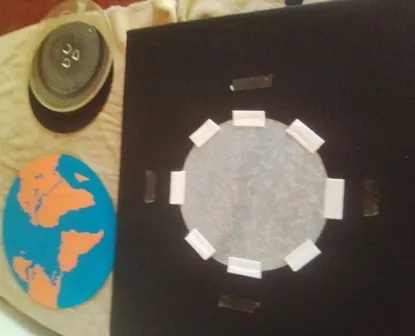
Para que el cuadro tomara una visión 3D le coloque otra base abajo
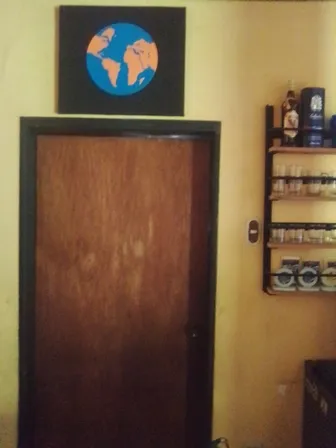
Listo! Así quedo terminado mi cuadro del mapa, adornando un nuevo espacio en mi hogar

Dándole una segunda oportunidad a los materiales que tenemos en casa.
Hasta aquí mi publicación por el día de hoy, espero que sea de tu agrado y pueda leer tus comentarios por alguna duda o sugerencia.
Continúen creando, continúen cuidándose, nos leemos.

- Todas las fotografías aquí presentadas son de mi propiedad, tomadas con mi teléfono Blu Studio X10 así como el collage, con la aplicación Collage Maker
- Los separadores los realice con ayuda de PowerPoint
- Mi idioma natal es el español, realice la traducción con ayuda de Deepl.com
Every day we should be surprised by the things that we can do with so much pleasure with our hands and creativity, here I bring you the step by step on a beautiful decorative painting with reusable materials.
To carry out this project use:
⛳️ White sheets.
⛳️ Foami or Eva rubber.
⛳️ Wooden strips.
⛳️ Aluminum base.
⛳️ Double-sided tape.
⛳️ Paints
⛳️ Scissors.
We made our map on paper
I confess that it was a little bit tricky to freehand the design of the map
We carefully cut out all the countries, rivers and continents
We place our cut out map on our aluminum or cardboard base and paste
Then paint the base with blue acrylic paint, let it dry for a few minutes.
Now we paint the map with orange paint (I've been found out... I love coffee!)
We place the wooden base and a sheet that was in the workshop to serve as a base for later lining
We lined the sheet and the strips with black foami
Use double-sided teipe to glue the parts together
To make the picture take a 3D view I put another base below it
That's it! This is how my map painting is finished, decorating a new space in my home.
Giving a second chance to the materials we have at home.
So far my publication for today, I hope you like it and I can read your comments for any questions or suggestions.
Continue creating, continue taking care of yourselves, we'll read each other.
- All the photographs presented here are my own, taken with my Blu Studio X10 phone, as well as the collage, with the Collage Maker application.
- The separators were made with the help of PowerPoint
- My native language is Spanish, I made the translation with the help of Deepl.com