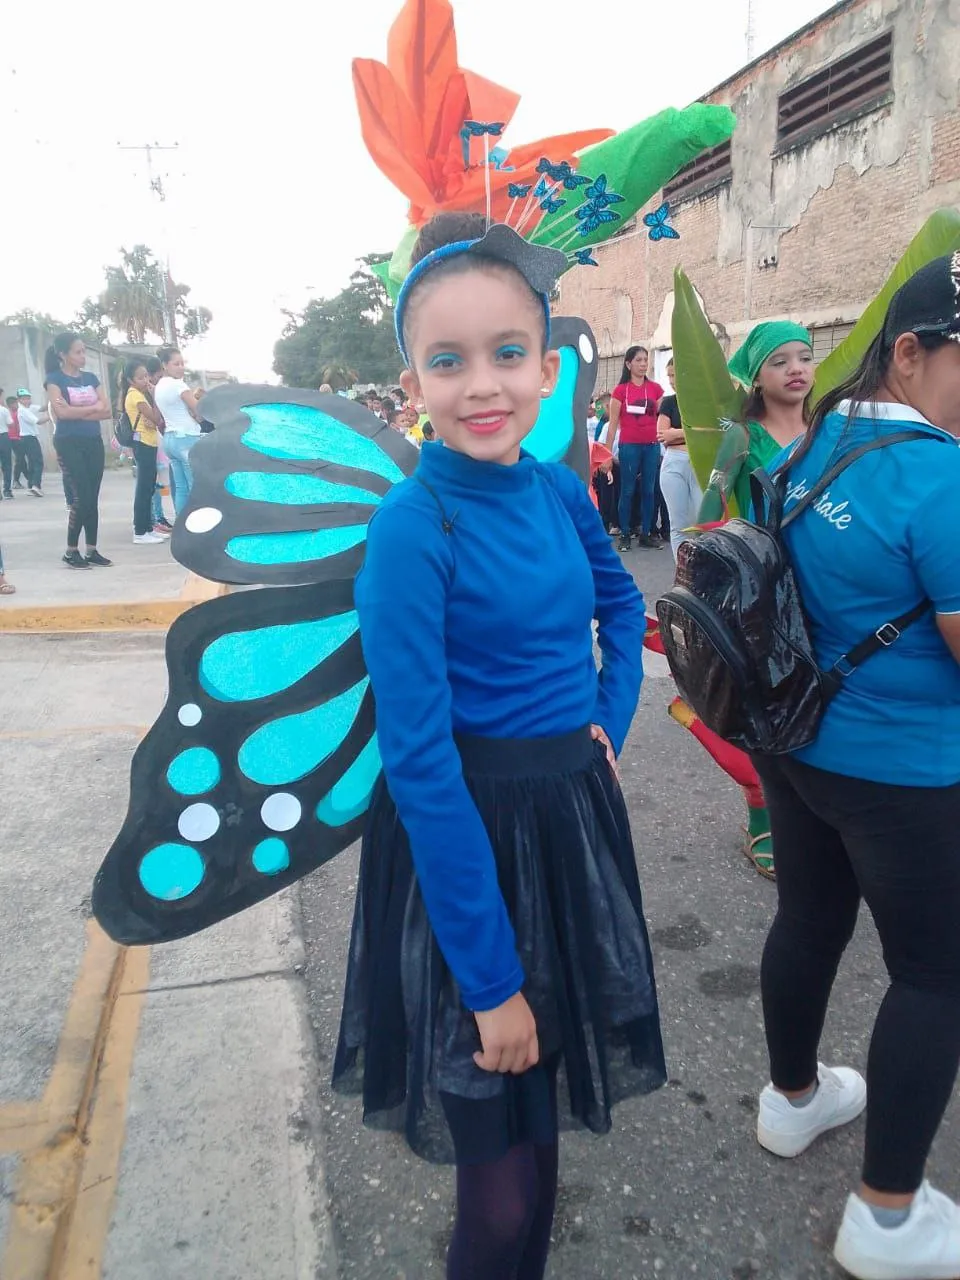
Hola amigos hoy , ante ustedes les traigo esta manualidad que hice para mi sobrina quien participo en un desfile estos carnavales 🦋🦋
Hello friends, today I bring you this craft that I made for my niece who participated in a parade these carnivals 🦋🦋
Primero que nada los materiales que son
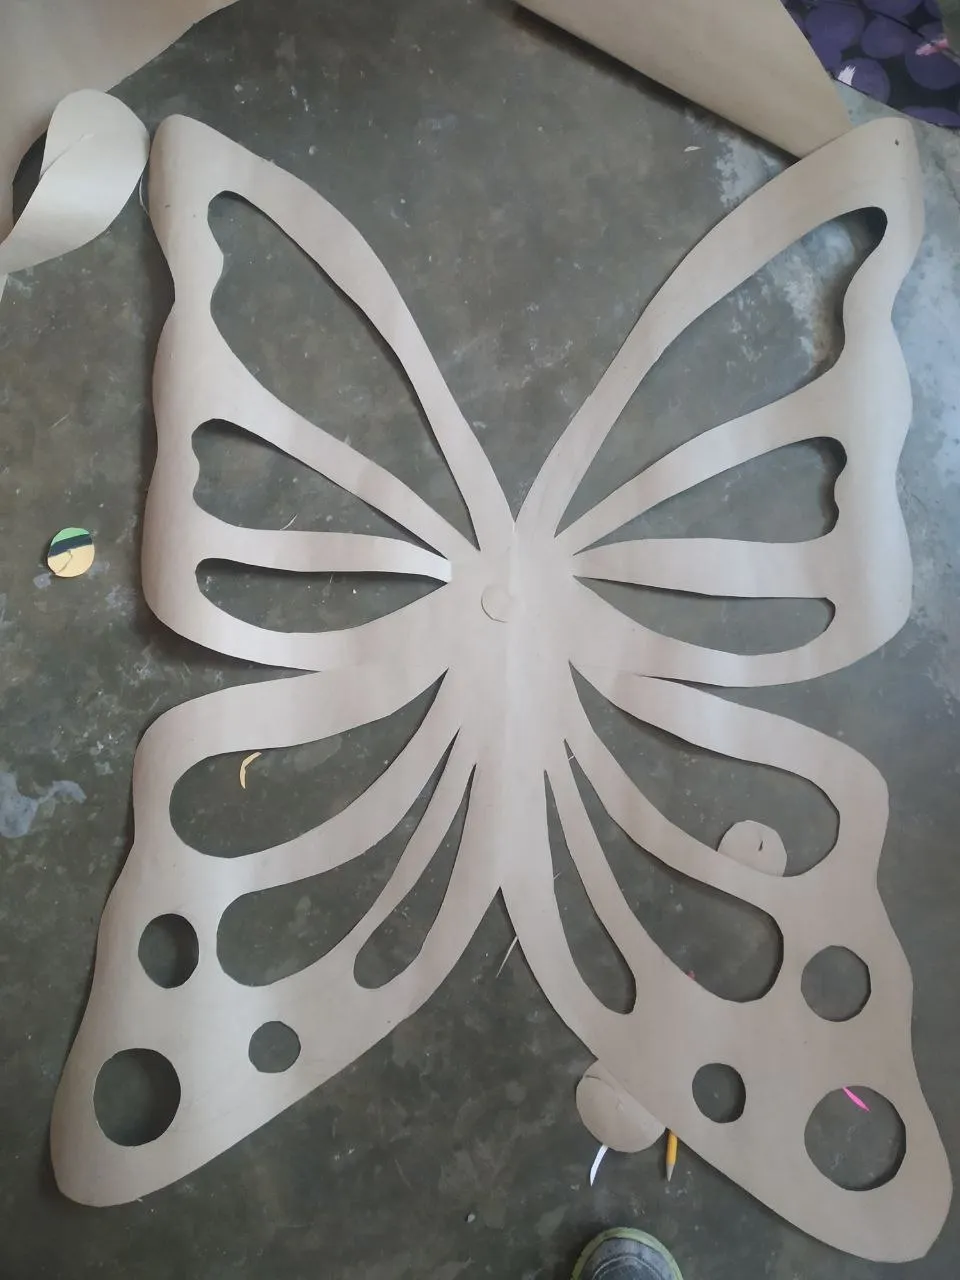
Primer Paso👣 :
Empece recortando el carton de la forma de una mariposa calculando el tamaño de mi sobrina
First step👣 :
I started cutting the cardboard in the shape of a butterfly calculating the size of my niece
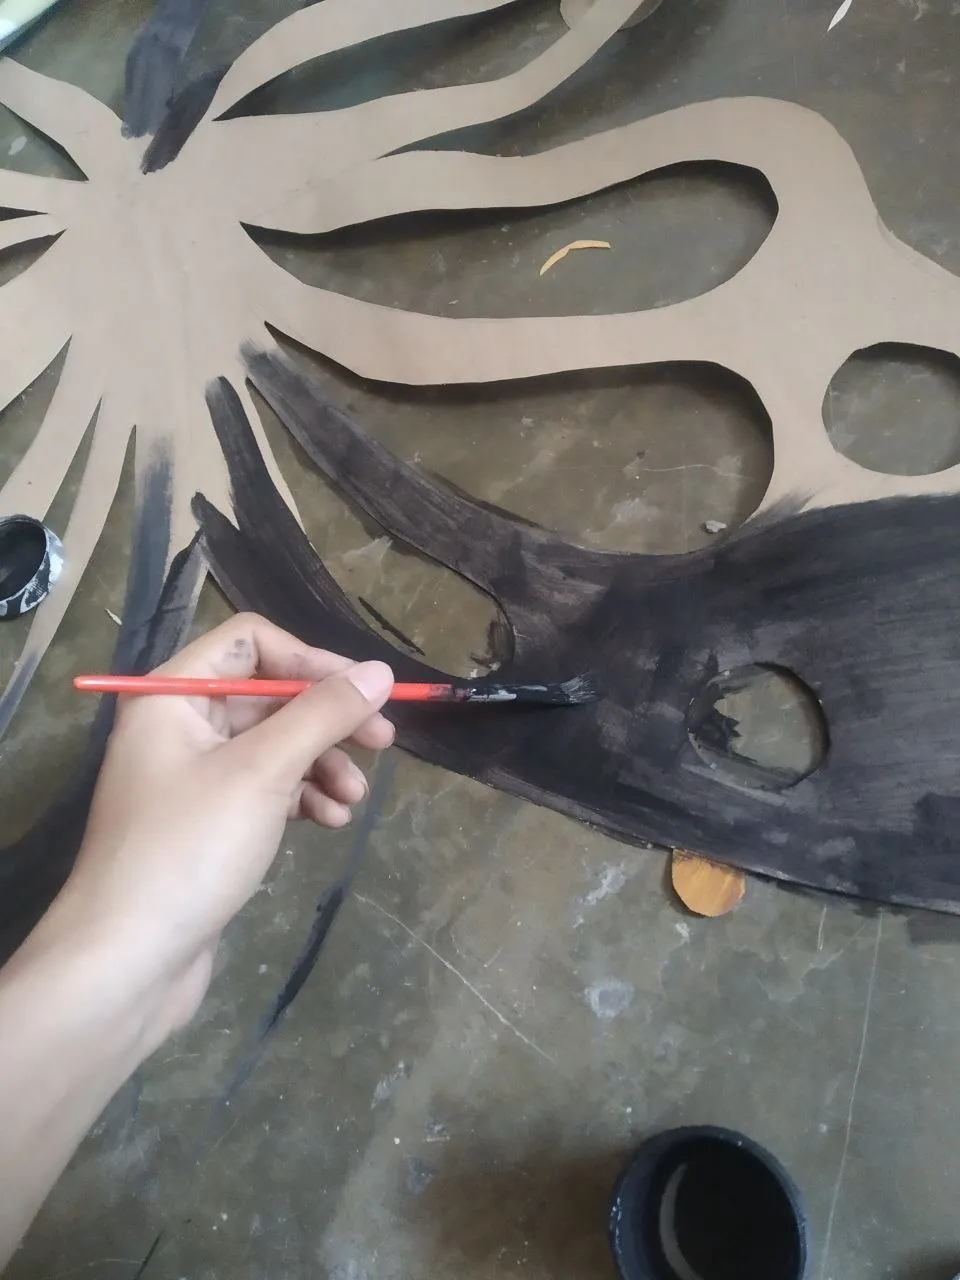
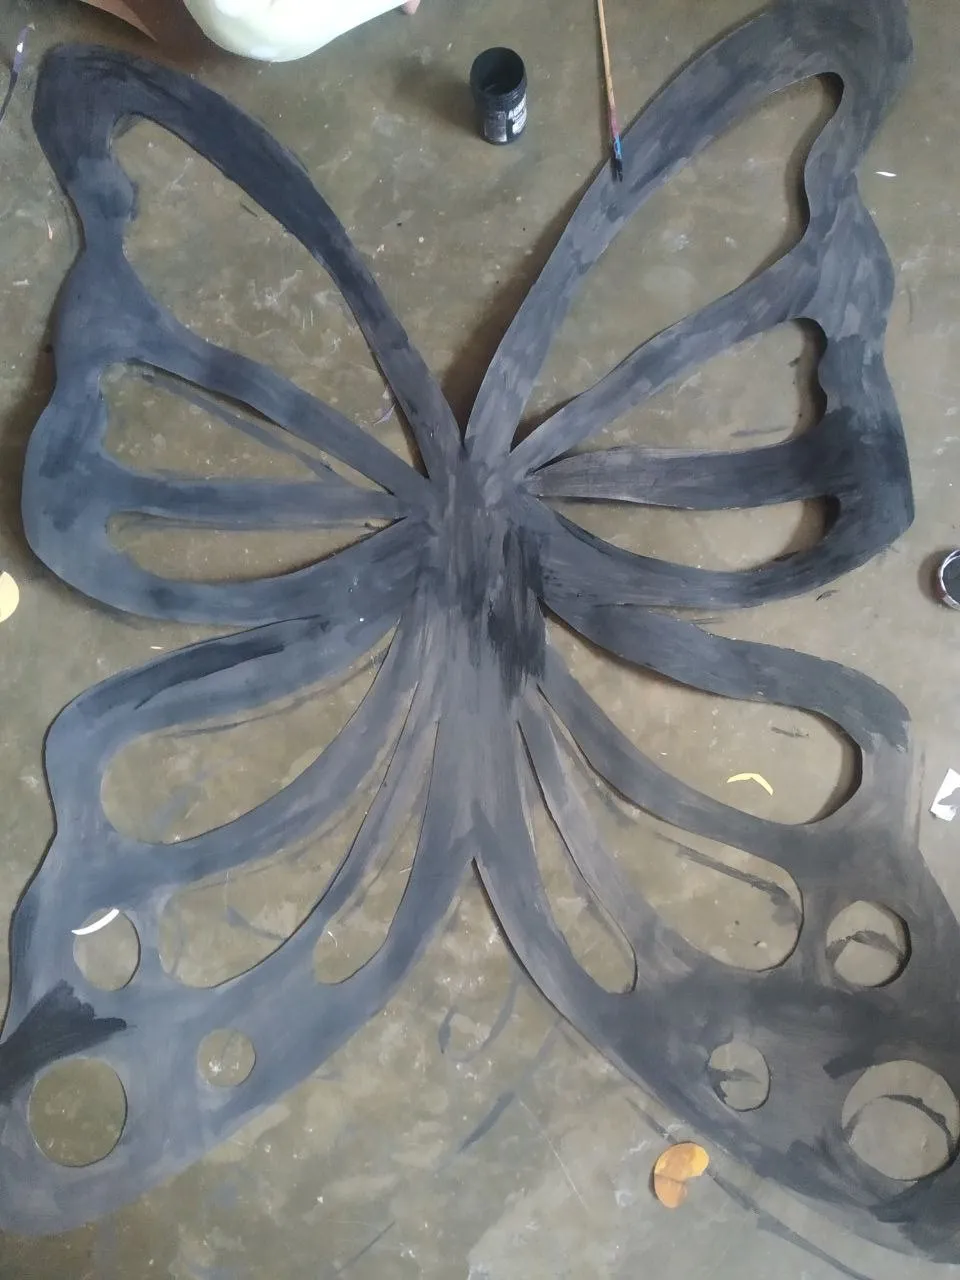
Paso 2👣 :
Con pintura al frio cubri toda la cilueta de carton llevandose las capas necesaria
Step 2 👣:
With cold paint I covered the entire cardboard cutout taking the necessary layers
 |  |
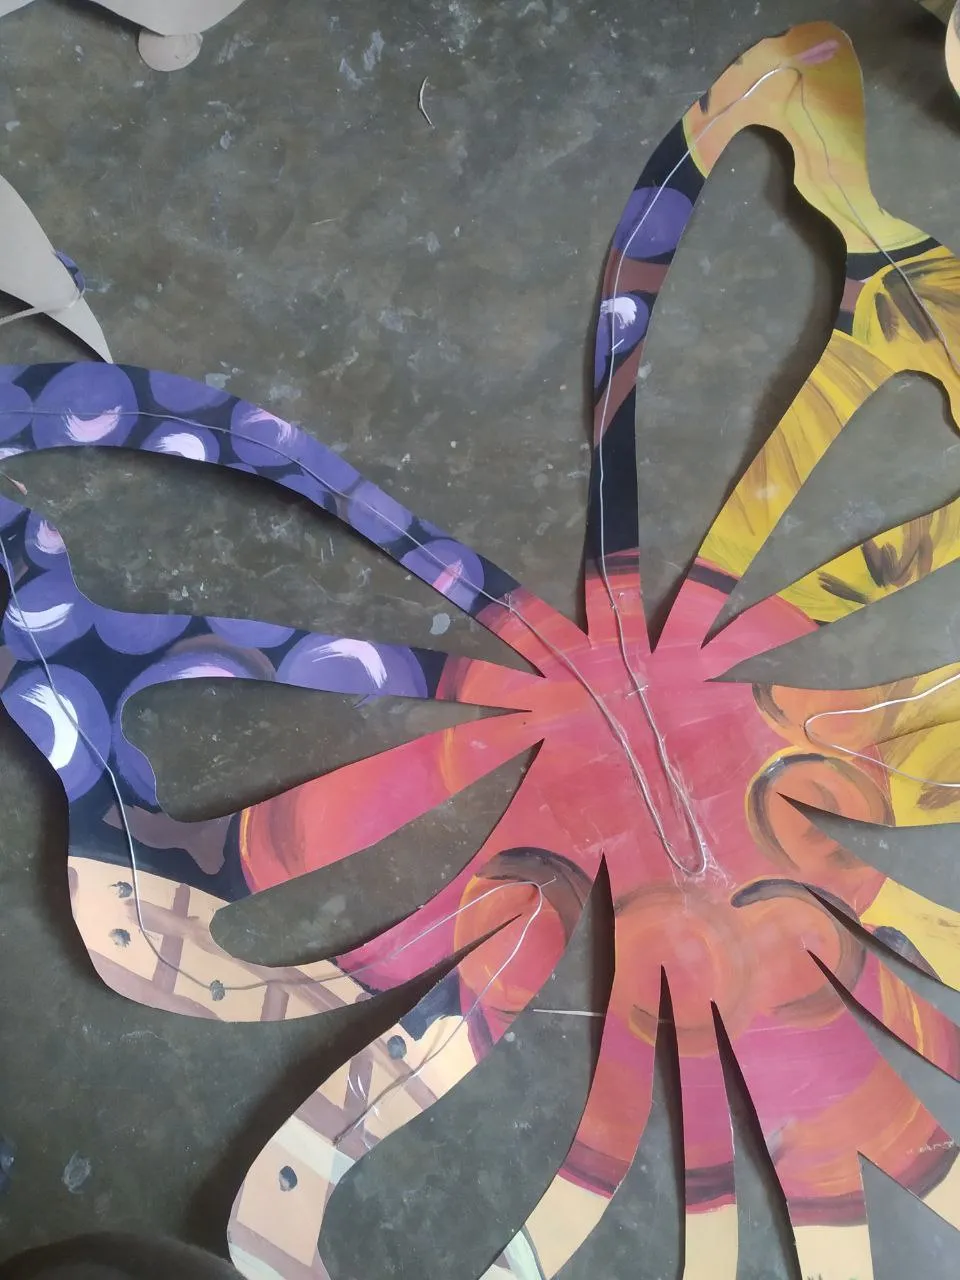
Paso 3 👣:
Con el alambre comece a graparlo por toda la orilla de la mariposa para que esta pudiera quedar estabre pero con movimiento
Step 3👣 :
With the wire, begin to staple it around the edge of the butterfly so that it could remain stable but with movement.
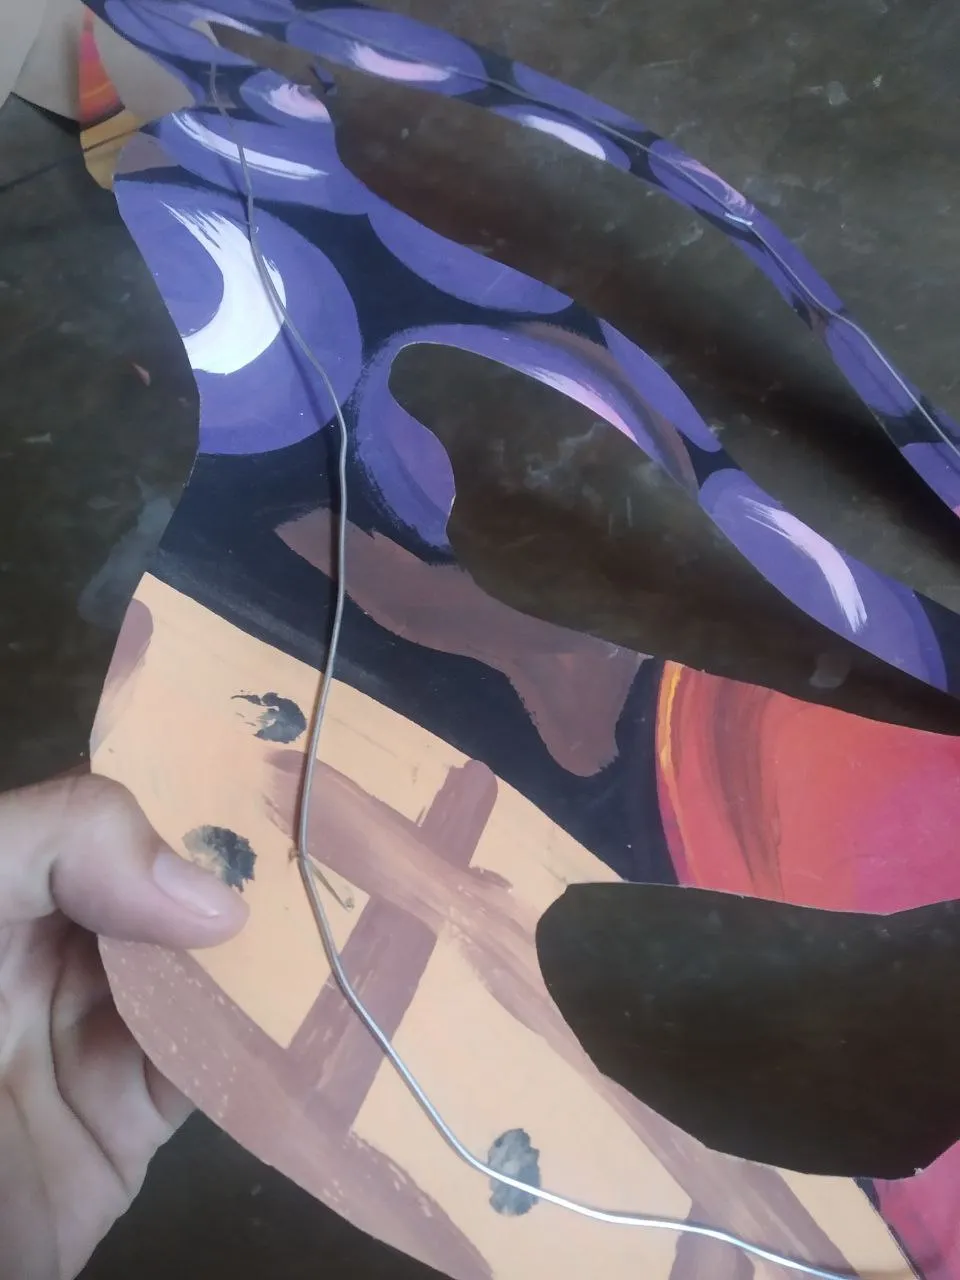
Roforzandolo en la parte central ya que de esa parte la llevara puesta
Strengthening it in the central part since from that part she will wear it
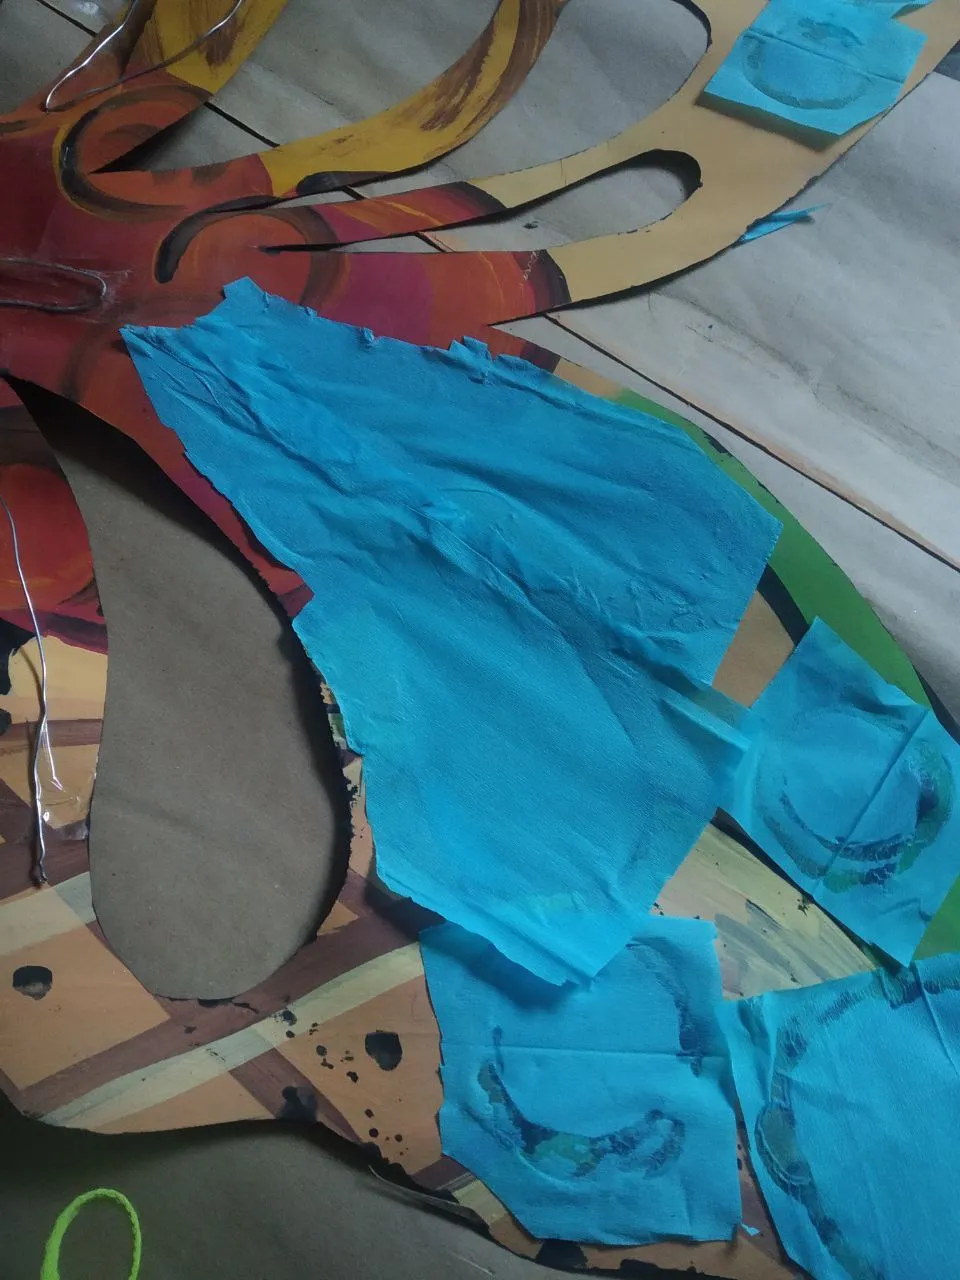
Paso 4👣 :
Con el papel crepe, tijeras y pega en barra comenzamos a pegar en las parte de los agujeros teniendo en cuenta que todos estos paso se realizan en la parte de adentro del carton para el siguiente paso
Step 4 👣:
With the crepe paper, scissors and a glue stick, we begin to glue the part with the holes, taking into account that all these steps are carried out on the inside of the cardboard for the next step.
Seguir reforsando con un carton la parte central
Continue reinforcing the central part with cardboard
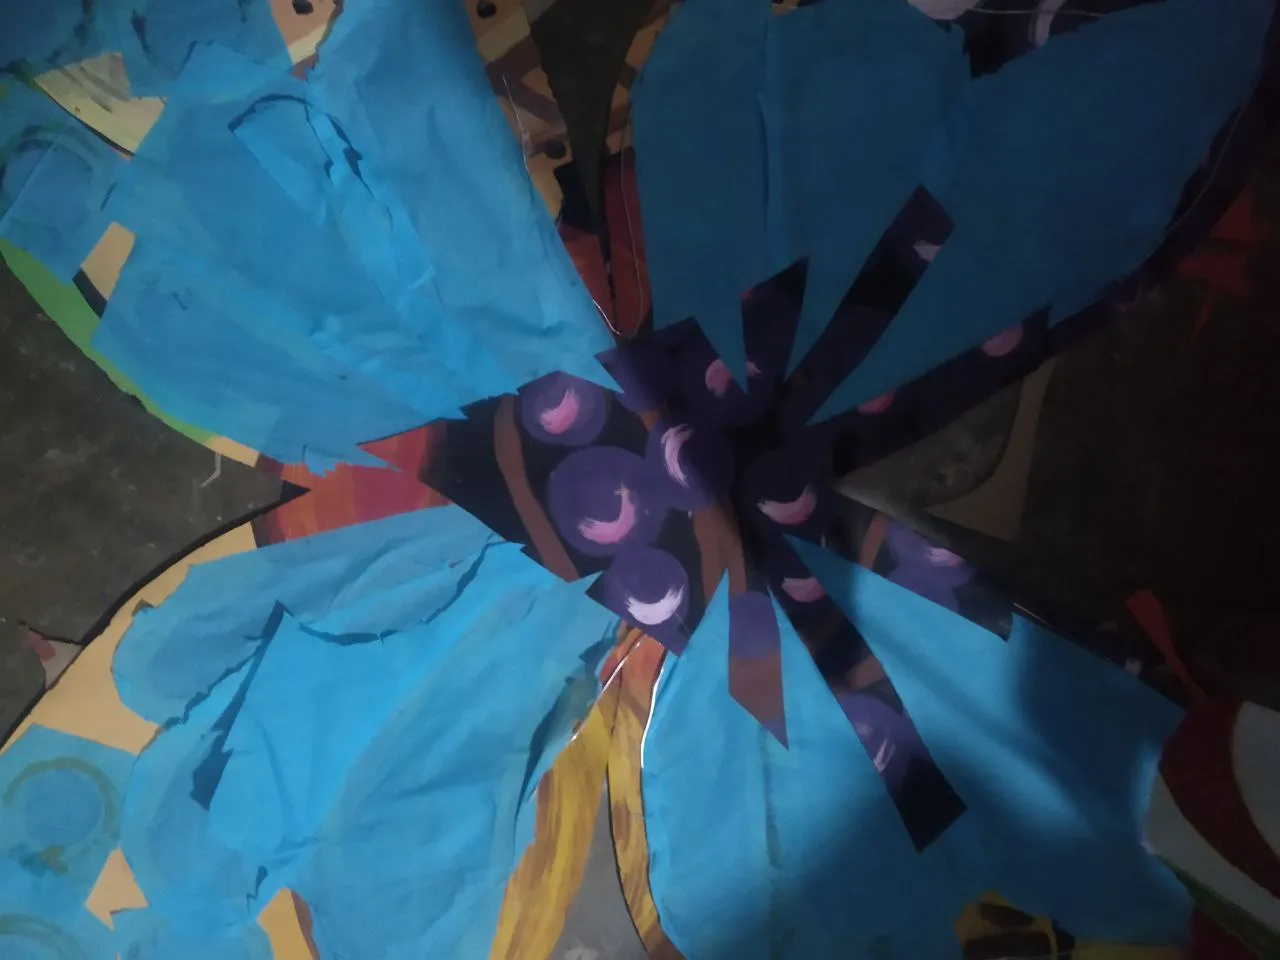
Paso 5👣:
Tapando asi todos los espacios con otra capa de carton grapandola y con pega en barra reforzando los detalles tambien colocamos con pega en barra circulos en blanco para darle mas detalles a esta mariposa de carton , completamos abriendo 4 circulos en la parte central y pasando por esta un cordon en mi caso utilize uno de zapato color negro
Step 5👣:
Thus covering all the spaces with another layer of cardboard, stapling it and with a glue stick, reinforcing the details, we also place blank circles with a glue stick to give this cardboard butterfly more details, we complete it by opening 4 circles in the central part and going through this a shoelace in my case I used a black shoelace
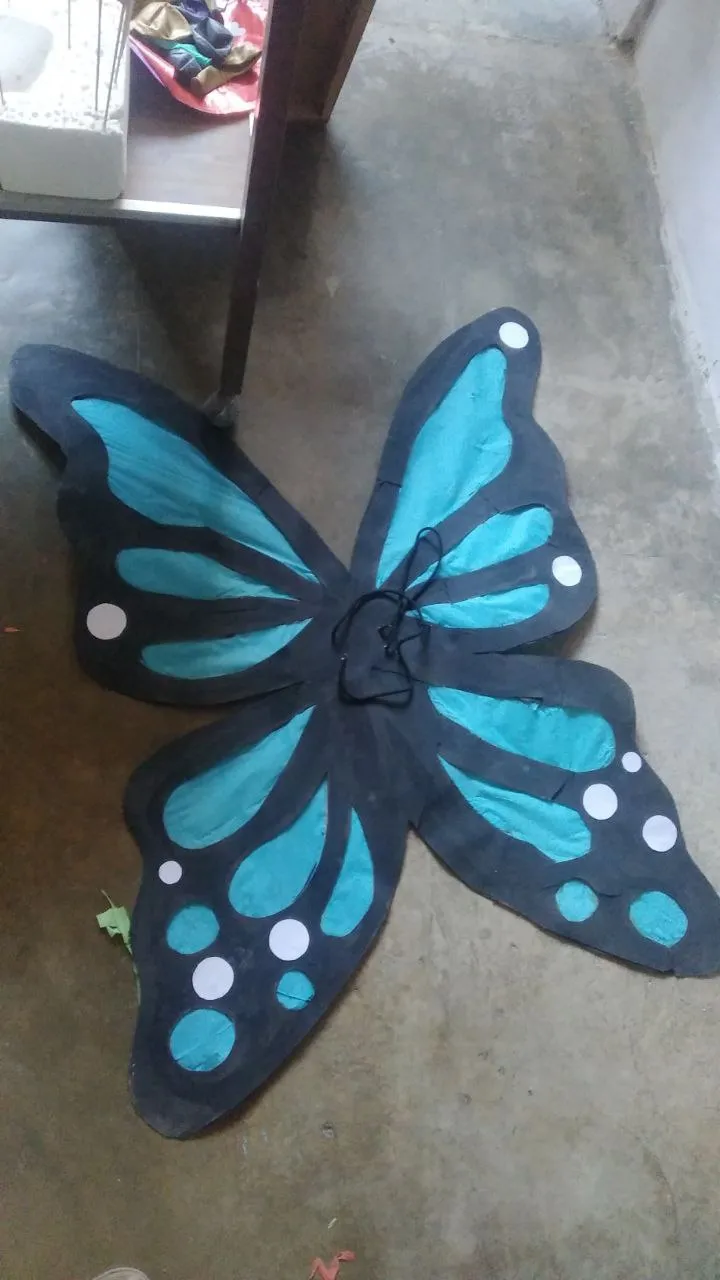
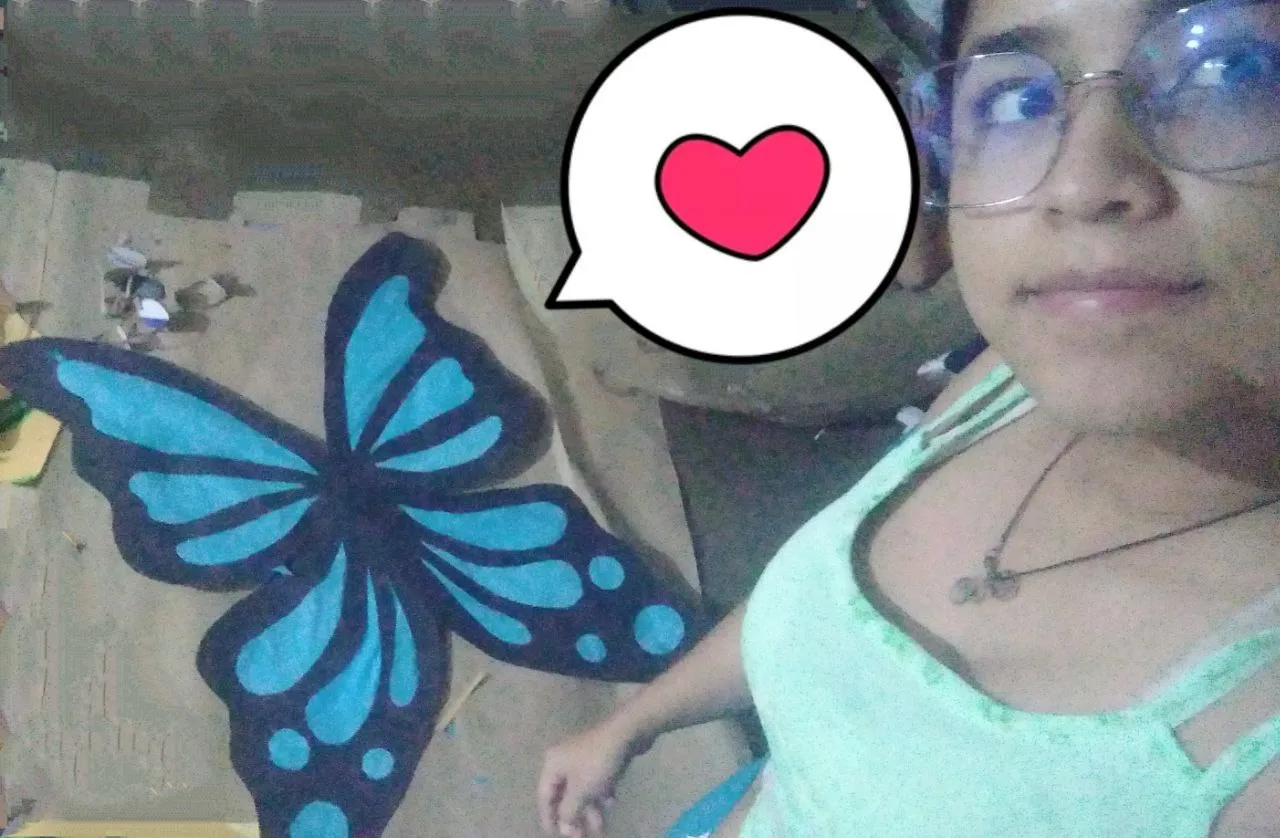
Y esto es todo asi termino de esta manera la mariposa azul para mi sobrina
Espero les guste mi creacion .
And this is all so I end this way the blue butterfly for my niece
I hope you like my creation.
Si quieres saber mas sobre mi Te invito a leer 💐💐
If you want to know more about me I invite you to read💐💐
@larays-13/my-introduction-as-a-new-member-in-hive-or-larays-13
MUCHÍSIMAS GRACIAS, ESPERO Y DESEO PODER HACER AMIGOS ES ESTA COMUNIDAD PARA APOYARNOS MUTUAMENTE💐💐 ❤️👣
Me asesoré revisando a cada uno de los artistas para hacer mi primer post en esta preciosa comunidad.
🔥🔥🔥
THANK YOU SO MUCH, I HOPE AND WISH I CAN MAKE FRIENDS IN THIS COMMUNITY TO SUPPORT EACH OTHER 💐💐❤️
I advised myself reviewing each of the artists to make my first post in this beautiful community.