INGLÉS
Buen día estimados amigos de #hivediy, primeramente desearle un excelente y feliz día para todos y todas los que conforman esta comunidad, como podrán notar soy una nueva participante y esta es mi primera creación, así que espero estar a la altura de tan maravillosas creaciones que se presentan día a día en esta linda comunidad a la cual deseo el mayor de los éxitos.
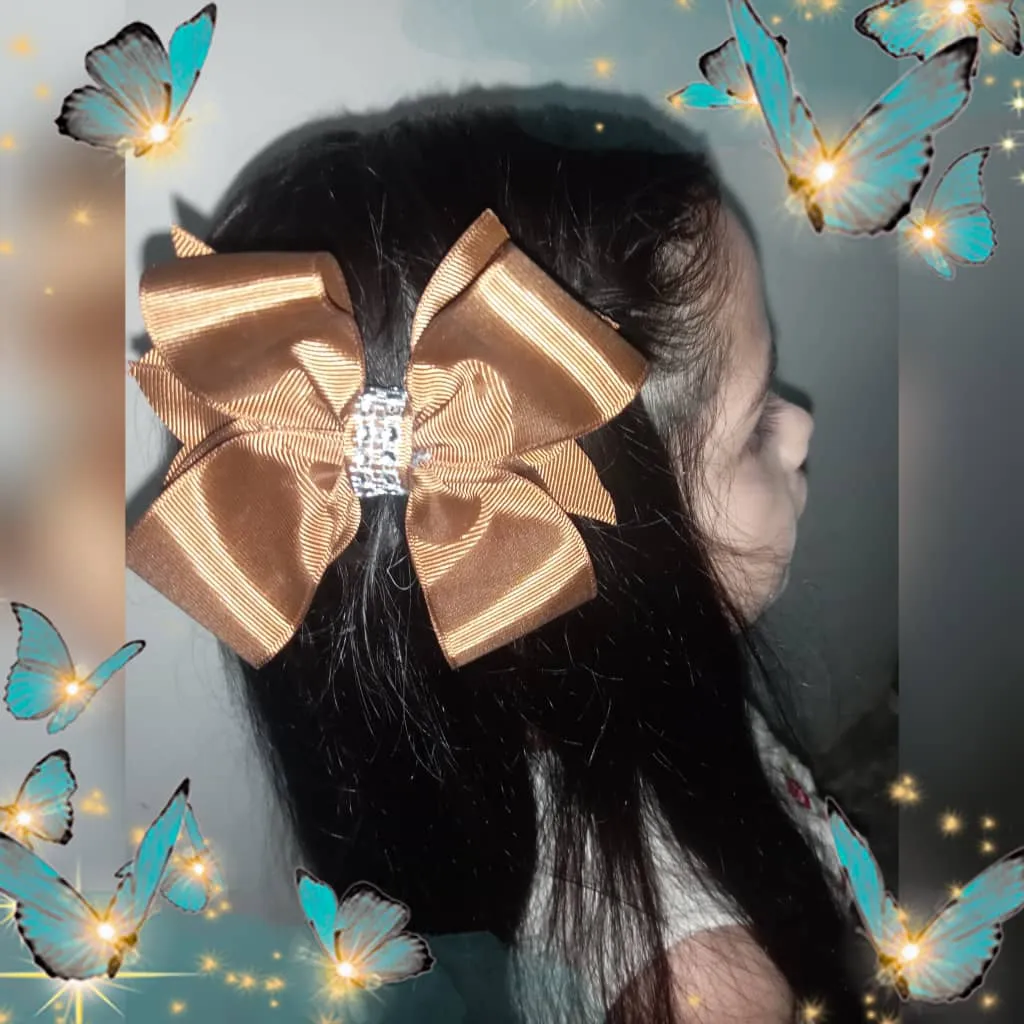
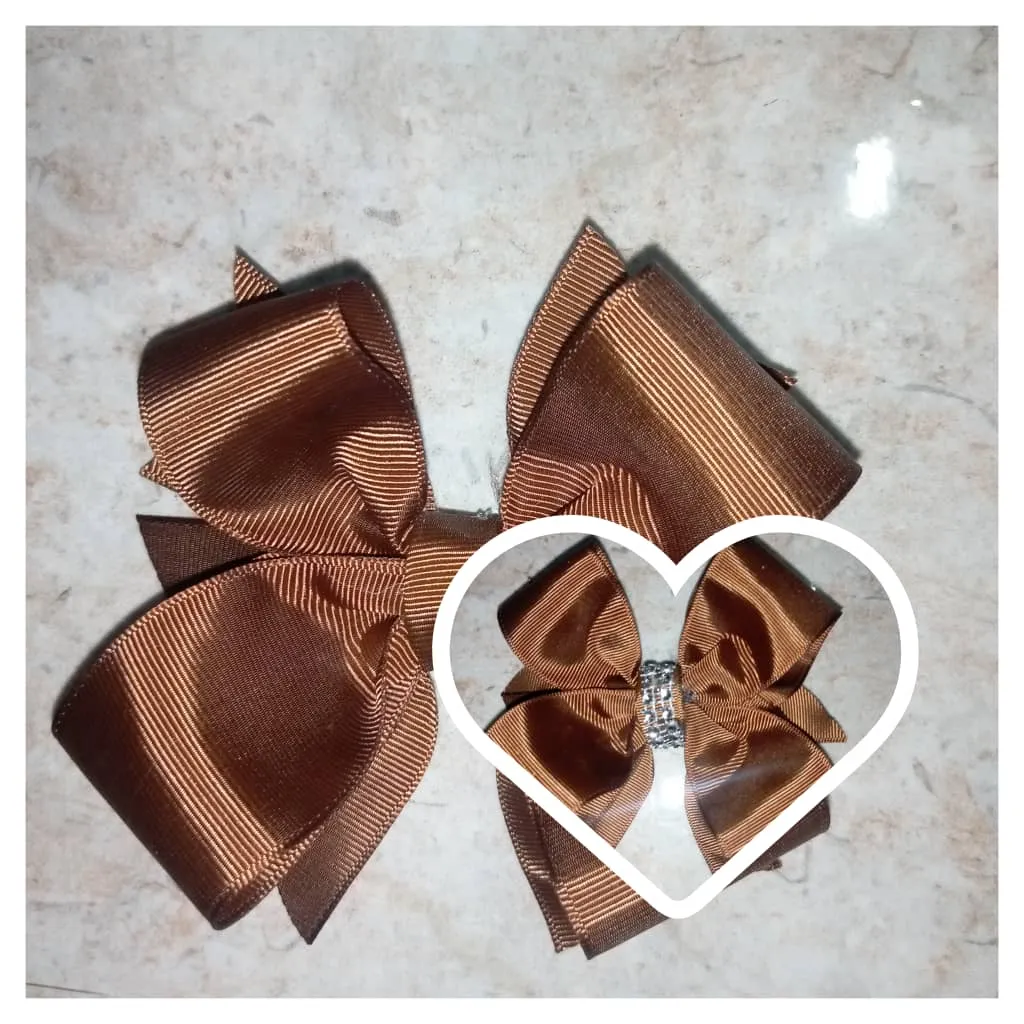
En esta oportunidad les presentaré un lazo realizado con cinta gruesa de color marrón el cual elaboré con mucho amor y cariño para mi hija de 7 años a quien amo y es mi musa para realizar innovaciones en lo que respecta a sus necesidades cotidianas, estos lazos son muy hermosos y hacen lucir muy bien a las personas que lo usan, por ello los invito a que continúen conmigo para conocer los materiales que necesitamos y el paso a paso a seguir para su elaboración.
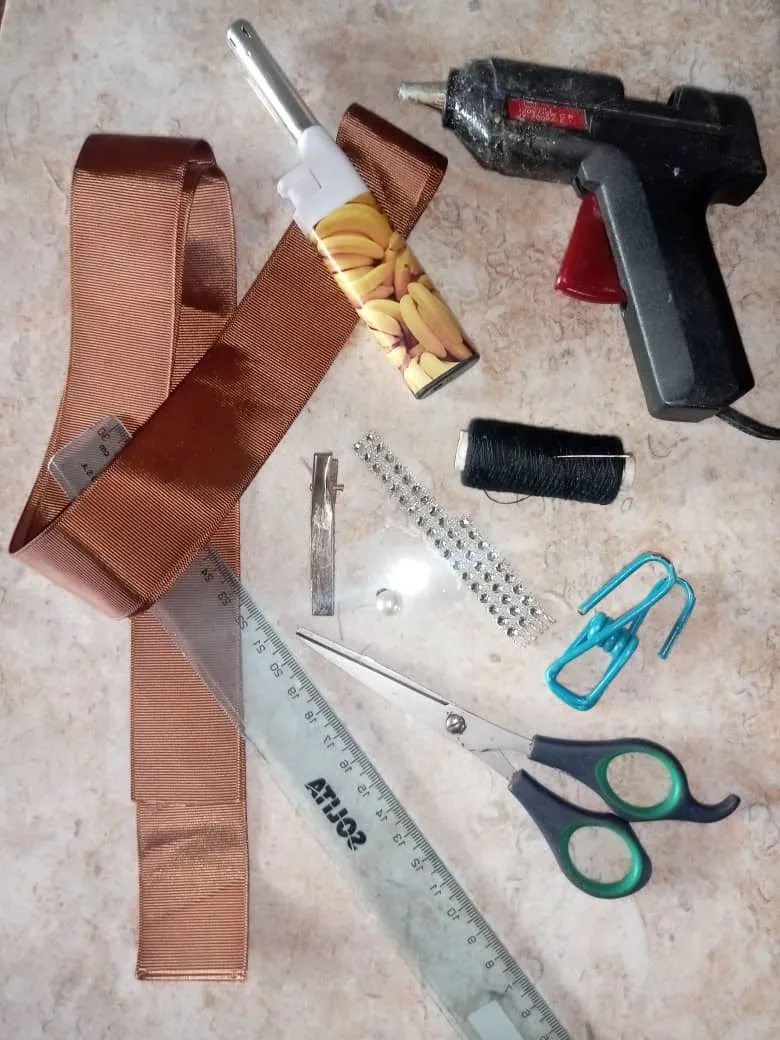
Materiales que utilizamos para la elaboración de un lazo de cinta gruesa.
MATERIALES:
- 1 mts de cinta de 4cm de ancho de color marrón en su caso puede ser del color de su preferencia.
- 1 aguja
- Hilo de coser
- Tijera
- Encendedor
- Ganchitos para cabello
- Regla o cinta métrica
- Accesorios de decoración a su gusto.
- Pistola de silicón.
VAMOS AL PASO A PASO
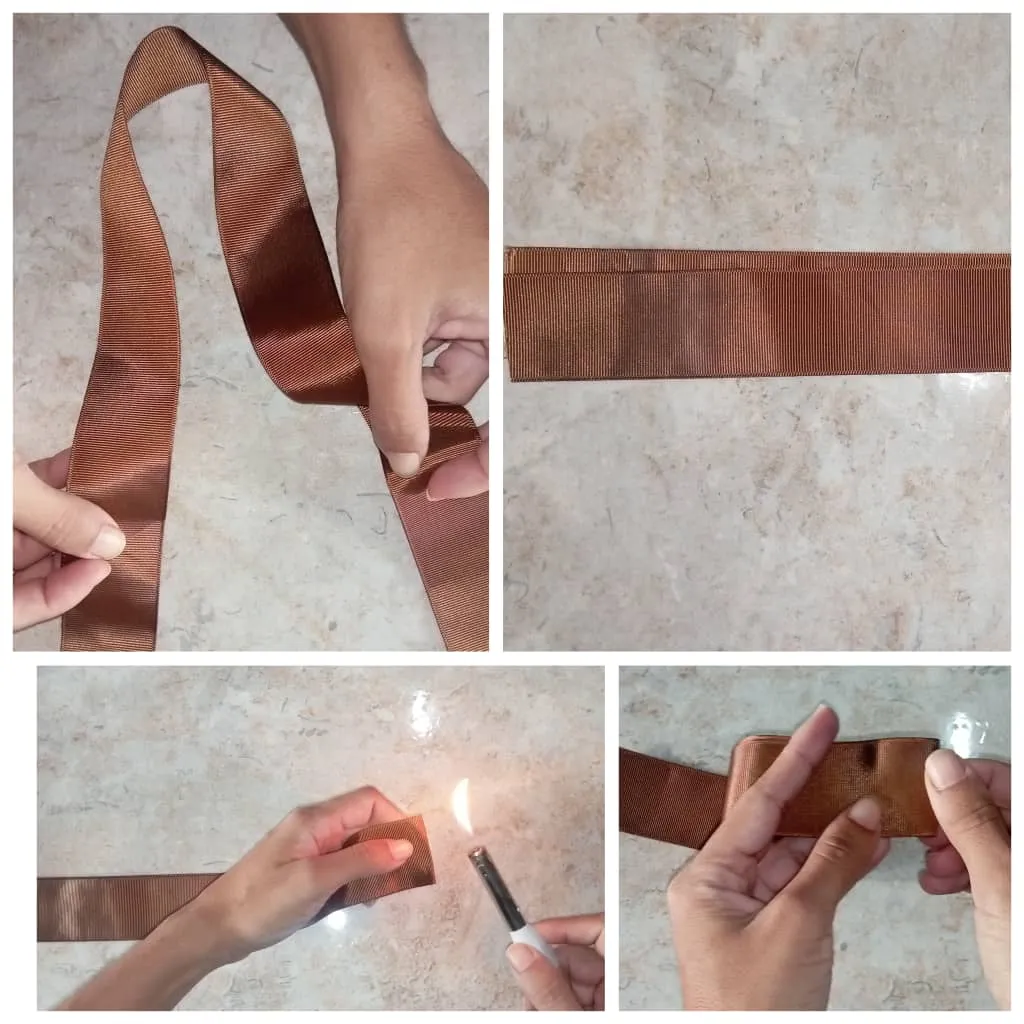
Paso 1:
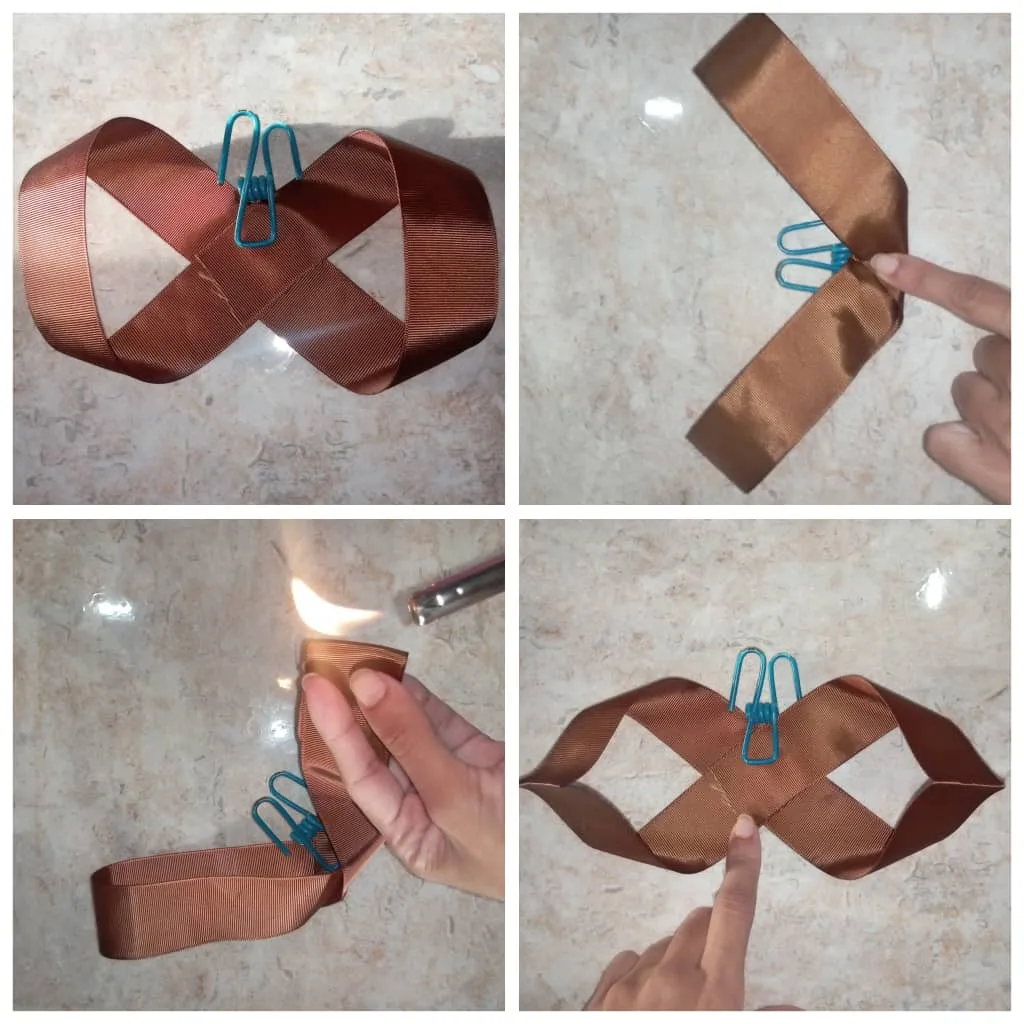
- Tomamos 60 cm de cinta la doblamos hasta la mitad, luego con el encendedor pasamos por el doblé de la cinta y presionamos con los dedos.
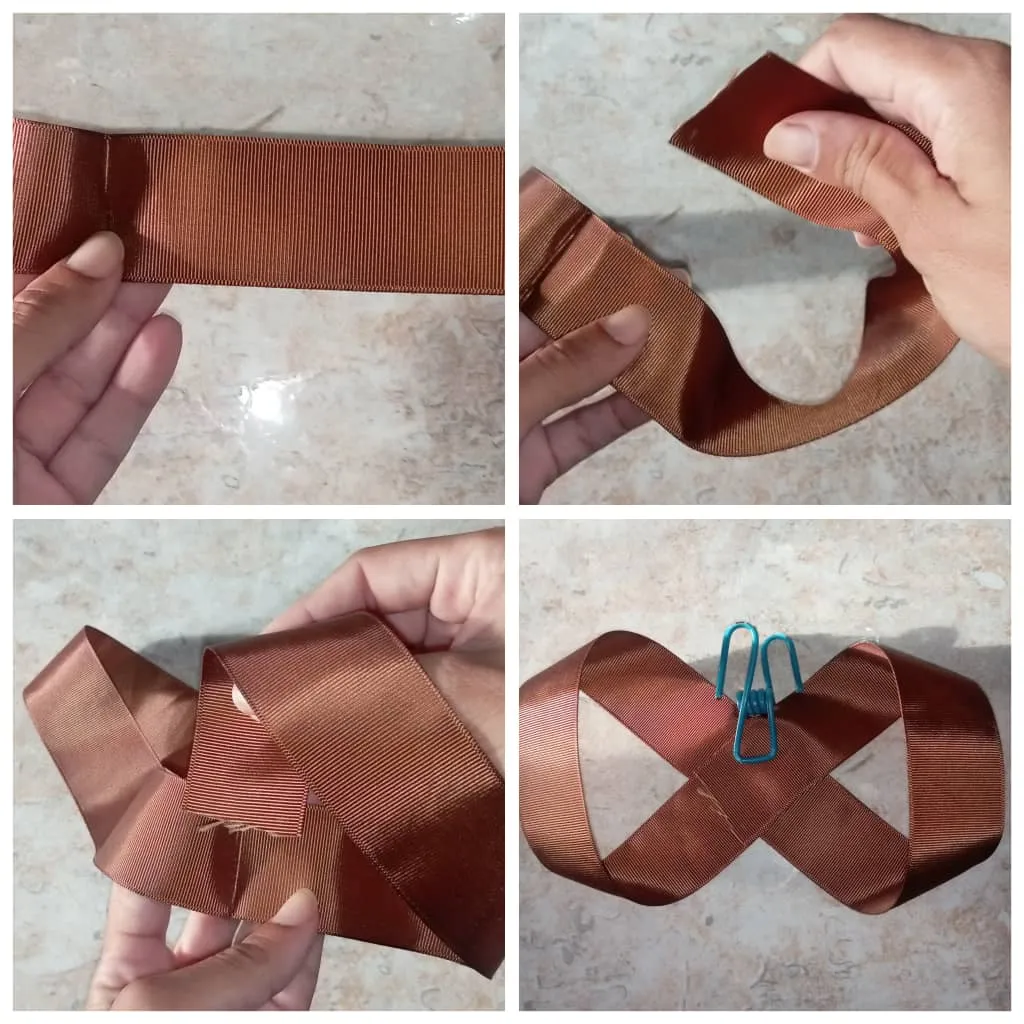
Paso 2:
- Abrimos nuevamente la cinta y doblamos el extremo derecho hacia el centro cruzándolo, que la punta pase por encima de la cinta, de igual manera se hace con el otro extremo pero pasando la punta por debajo de la cinta. Obteniendo la forma del número 8 o del símbolo de infinito.
Paso 3:
- Luego de tener esa forma le colocamos una pinza para sujetar y doblamos a la mitad, a cada uno de los extremos pasamos el encendedor y presionamos nuevamente con los dedos, quedando de la siguiente forma.
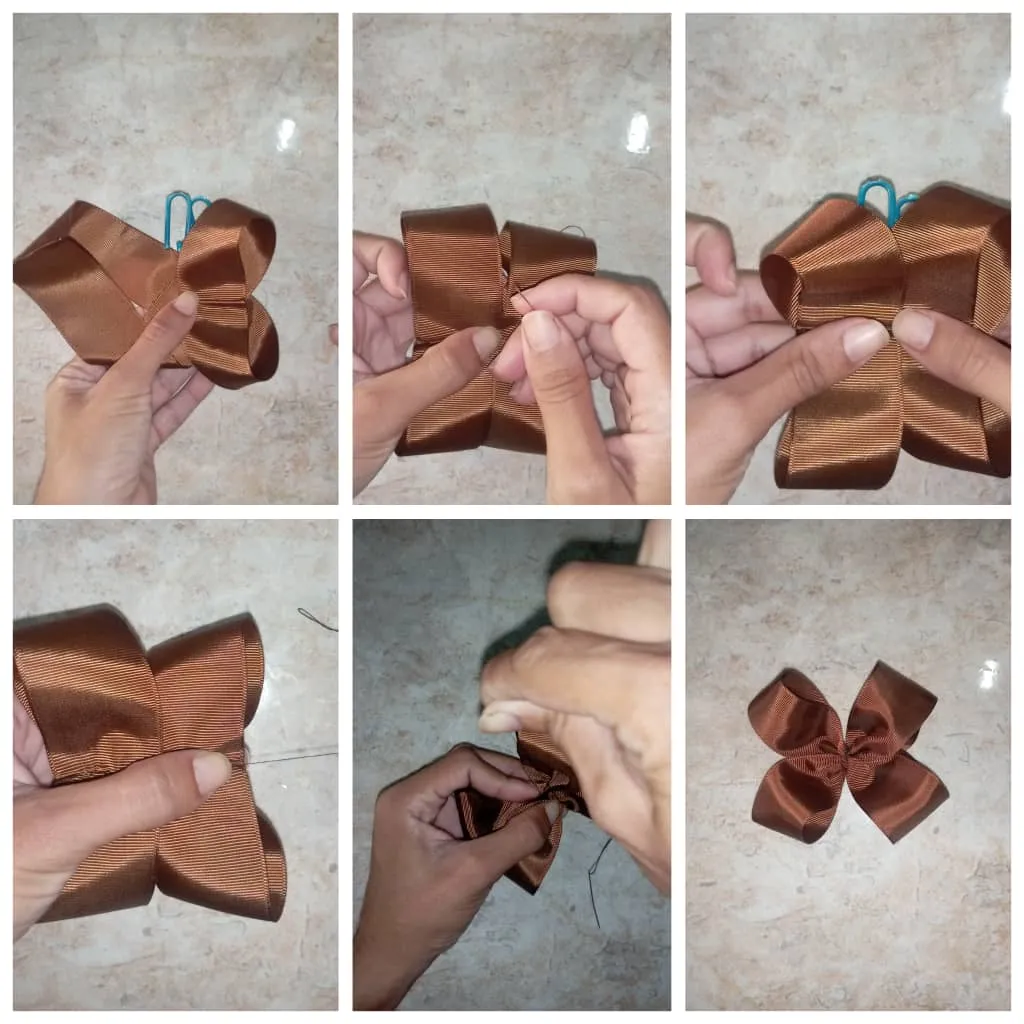
Paso 4:
- Tomamos uno de los extremos y lo llevamos al centro y de igual forma hacemos con el otro extremo. Con el hilo y la aguja cocemos halamos el hilo para arruchar el centro y rodeamos el centro de la cita para ajustar.
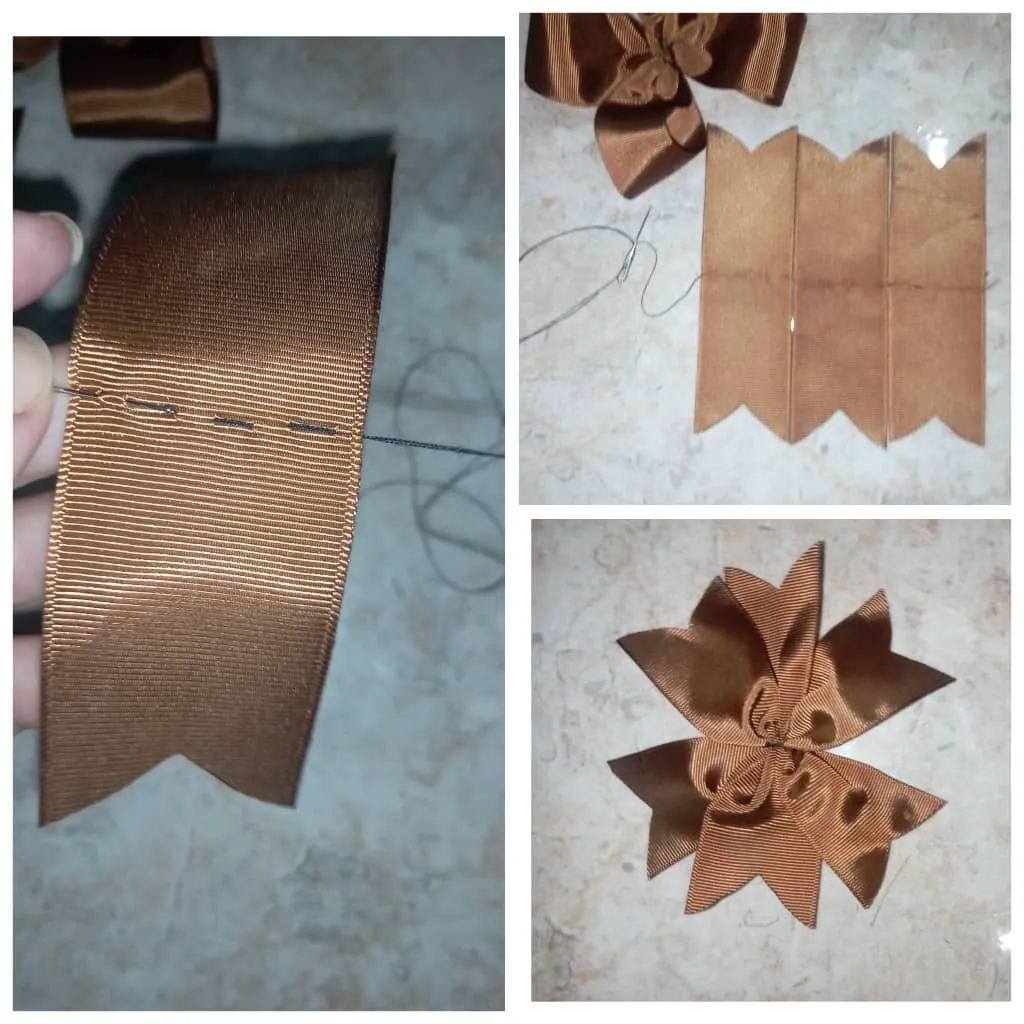
Paso 5:
- Tomamos 3 pedacitos de cinta de 13cm cada una doblamos y cortamos de la siguiente manera. Del mismo modo lo hacemos en el otro extremo, ese mismo acabado lo haremos con el restante de la cinta y pasamos el encendedor en las puntas de cada uno de los tres retazos de cinta para sellarla y evitar que se deshilache.

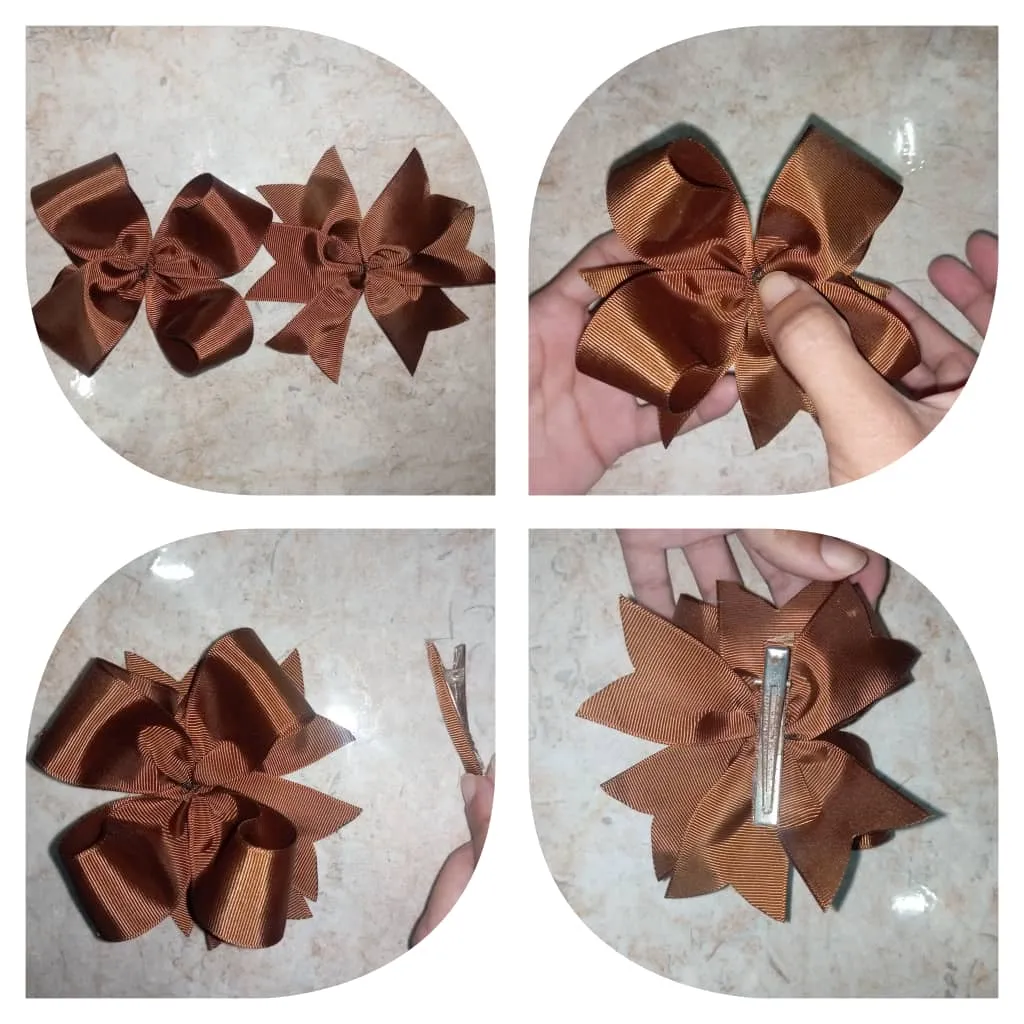
Paso 6:
- Se toma uno de los tres listoncitos de cinta de 13 centímetros y doblamos a la mitad y así con el resto de nuestras cintas para unirlas, luego estiramos el hilo y enrollamos para que quede de la forma que queremos.
Paso 7:
- Por último unimos las dos piezas con un punto de silicón en el centro, luego tomamos el gancho y lo forramos con cinta para pegarlo en la parte posterior de nuestro lazo.
Hermoso lazo para la más pequeñita de la casa, un accesorio verdaderamente lindo que puedes decorar a tu gusto.
Espero que le haya gustado mi contenido, gracias por tomarte un tiempo para leer mi publicación, éxitos.
Las fotos son de mi propiedad tomadas con mi teléfono INFINIX HOT 11 PLAY,editada con incollage y traducida con deelp.
ESPAÑOL
Good morning dear friends of #hivediy, first of all wish you an excellent and happy day to all who make up this community, as you may notice I am a new participant and this is my first creation, so I hope to live up to such wonderful creations that are presented every day in this beautiful community to which I wish the greatest success.
**This time I will present a bow made with thick brown ribbon which I made with love and affection for my 7 year old daughter whom I love and is my muse to make innovations with regard to their daily needs, these bows are very beautiful and make look great to people who use it **, so I invite you to continue with me to know the materials we need and the step by step to follow for their development.
**Materials that we use for the elaboration of a thick ribbon bow.
MATERIALS: 1 MTS OF 4 CM RIBBON.
- 1 mts of ribbon of 4cm wide of brown color in your case it can be of the color of your preference.
- 1 needle
- Sewing thread
- Scissors
- Lighter
- Hair clips
- Ruler or tape measure
- Decoration accessories of your choice.
- Silicone gun.
LET'S GO TO THE STEP BY STEP
Step 1:
- We take 60 cm of ribbon we fold it in half, then with the lighter we pass through the fold of the ribbon and press with our fingers.
Step 2:.
- We open the ribbon again and fold the right end towards the center crossing it, the tip passes over the ribbon, in the same way is done with the other end but passing the tip under the ribbon. Obtaining the shape of the number 8 or the infinity symbol.
Step 3:.
- After having this shape we place a clamp to hold and fold in half, at each end we pass the lighter and press again with your fingers, leaving the following way.
Step 4:.
- We take one of the ends and bring it to the center and in the same way we do with the other end. With the thread and needle we pull the thread to pull the center and go around the center of the date to adjust.
Step 5:.
- We take 3 pieces of ribbon of 13cm each we fold and cut as follows. In the same way we do it on the other end, that same finish we will do with the remaining tape and pass the lighter at the ends of each of the three pieces of tape to seal it and prevent fraying.
Step 6:.
- Take one of the three 13 centimeter ribbons of ribbon and fold it in half and so on with the rest of our ribbons to join them together, then stretch the thread and roll it up so that it is the way we want it to be.
Step 7:.
- Finally we join the two pieces together with a silicone dot in the center, then we take the hook and line it with tape to stick it to the back of our bow.
Beautiful bow for the littlest one in the house, a truly cute accessory that you can decorate to your liking.
I hope you liked my content, thanks for taking the time to read my post, success.
The photos are my property taken with my INFINIX HOT 11 PLAY phone,edited with incollage and translated with deelp.