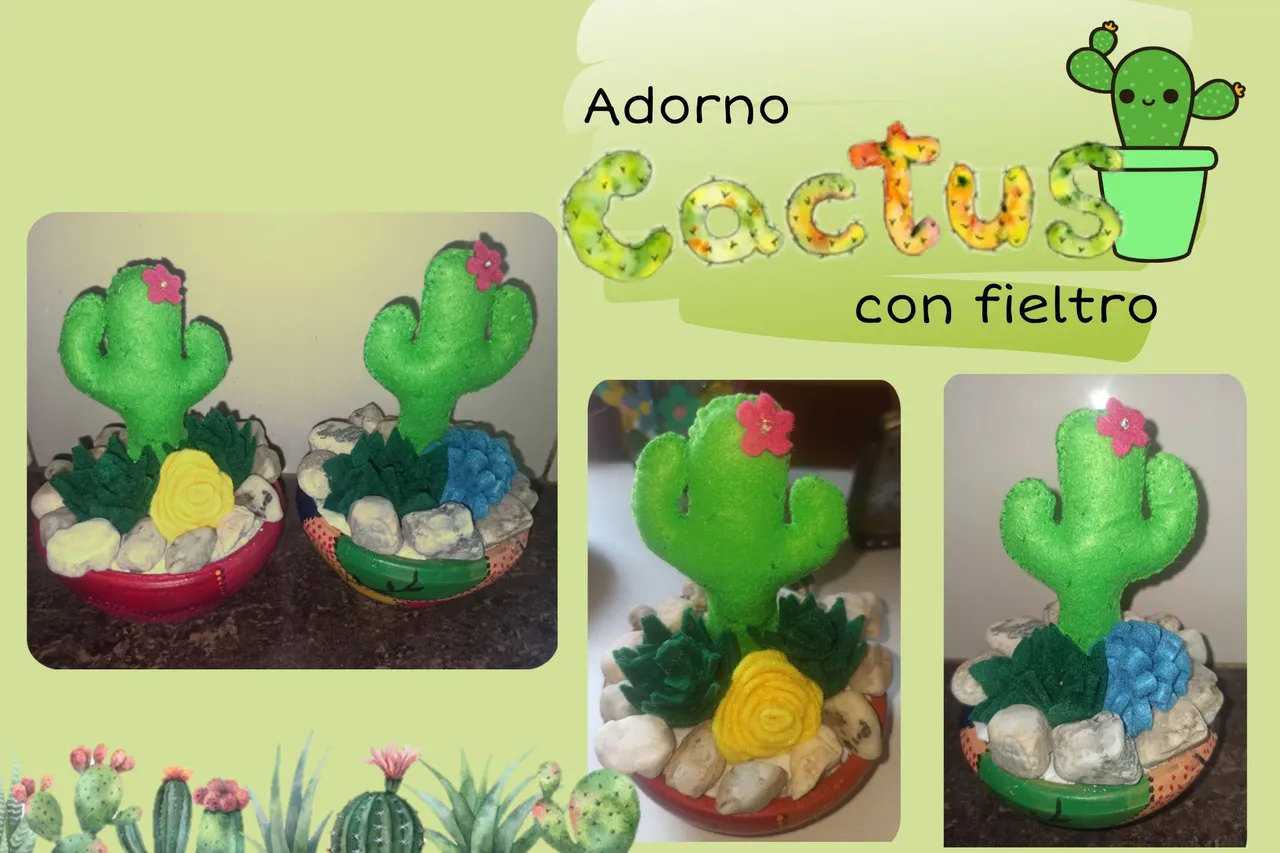
Hola gente bella y creativa. Hace dos semanas cuando fui a hacer mercado , estaban vendiendo unos materos en arcillas muy económicos, compré cuatro. Al momento que los compré pensé de una que iba a hacer con ellos.
Hacer unos cactus con fieltro fue la idea que se me ocurrió, y los quiero para darlos como recuerdo a cuarto personas muy especiales e importas para mí. Quiero darles algo elaborado por mis hermosas y gorditas manos.
Hello beautiful and creative people. Two weeks ago when I went to the market at the fair, they were selling some very inexpensive clay pots, I bought four of them. The moment I bought them I thought of what I was going to do with them.
Making some cacti with felt was the idea that came to my mind, and I want to give them as a souvenir to four very special and important people for me. I want to give them something made with my beautiful and chubby hands.

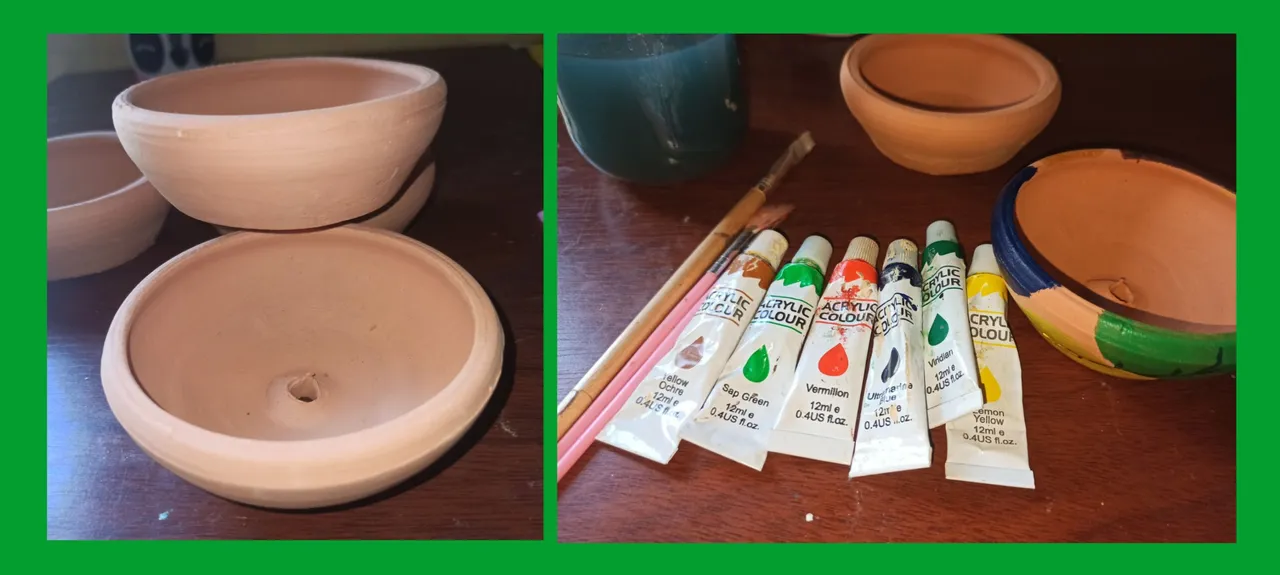
🌵 Fieltro verde claro
🌵 Fieltro verde oscuro
🌵 Aguja e hilo verde
🌵 Matero
🌵 Piedras
🌵 Silicona
🌵 Palito de madera
🌵 Light green felt
🌵 Dark green felt
🌵 Needle and thread green
🌵 Matero
🌵 Stones
🌵 Silicone
🌵 Wooden stick

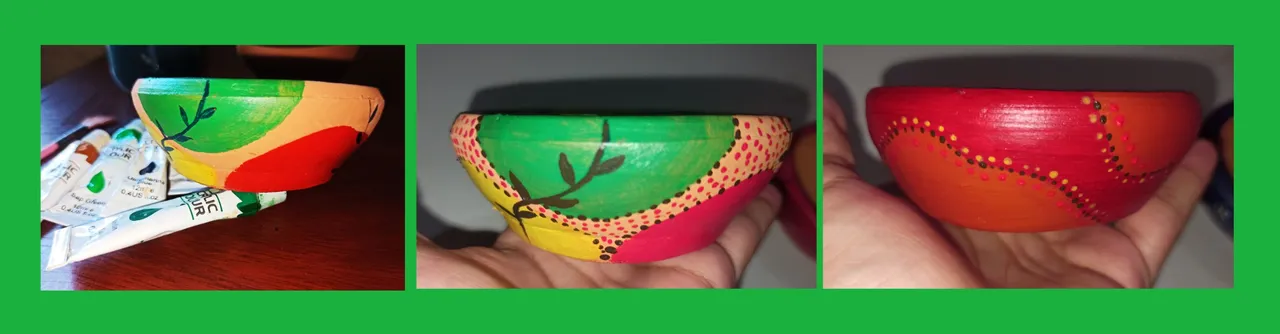
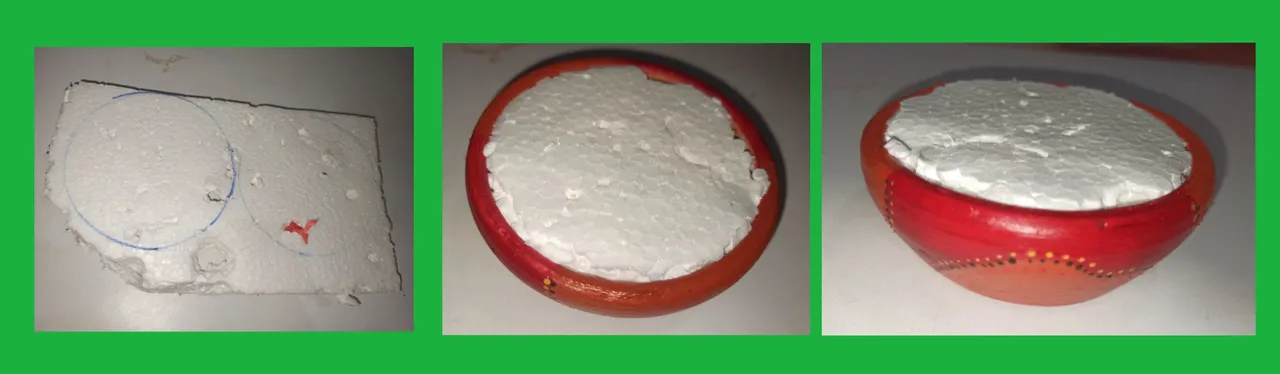
▶️ Paso 1:
- Comencé por pintar el matero, para ello, utilicé pintura acrílica de varios colores, por el momento sólo pinté 2, cada una con un diseño diferente. Uno fue muy colorido, utilicé todos los colores que tenía disponibles, e hice manchas de varios colores, puntos y ramas. El otro lo pinté primero de rojo y luego unas manchas como el otro, pero solo de color naranja, alrededor de las manchas hice puntitos de color marrón, amarillo y rojo.
▶️ Step 1 :
- I started by painting the clay pot, for this, I used acrylic paint of various colors, for the moment I only painted 2, each with a different design. One was very colorful, I used all the colors I had available, and I made spots of various colors, dots, and branches. The other one I painted first red and then some spots like the other one, but only orange, around the spots I made little dots of brown, yellow and red.s.
▶️ Paso 2:
- Dentro del matero vamos a colocar anime (icopor)
▶️ Step 2 :
- Inside the clay pot, we are going to place Expandable Polystyrene.
▶️ Paso 3 :
- En una hoja hago el patrón de la figura, luego trazo dos piezas en el fieltro verde.
▶️ Step 3:
- On a sheet of paper I make the pattern of the figure, then trace two pieces on the green felt.
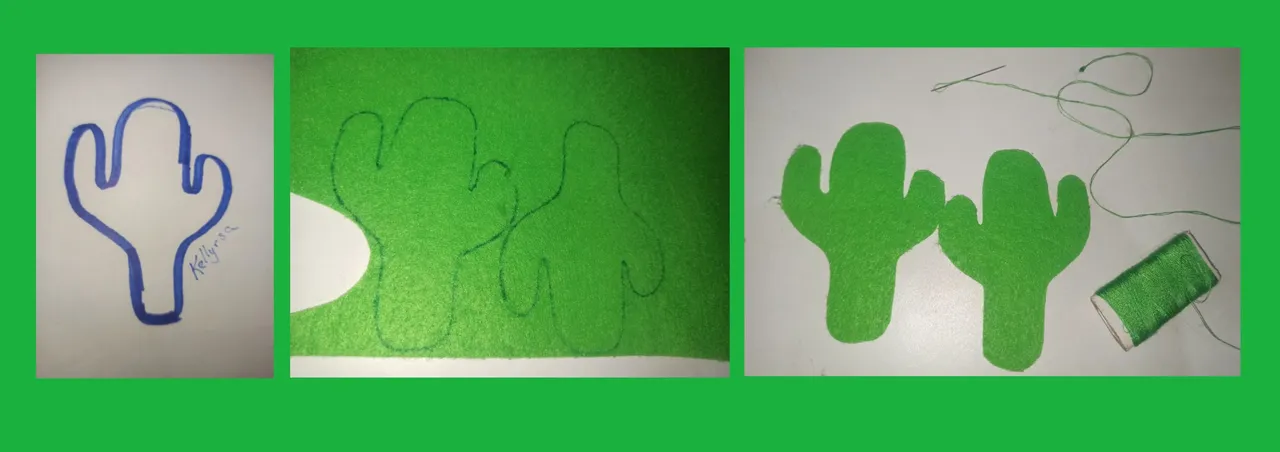
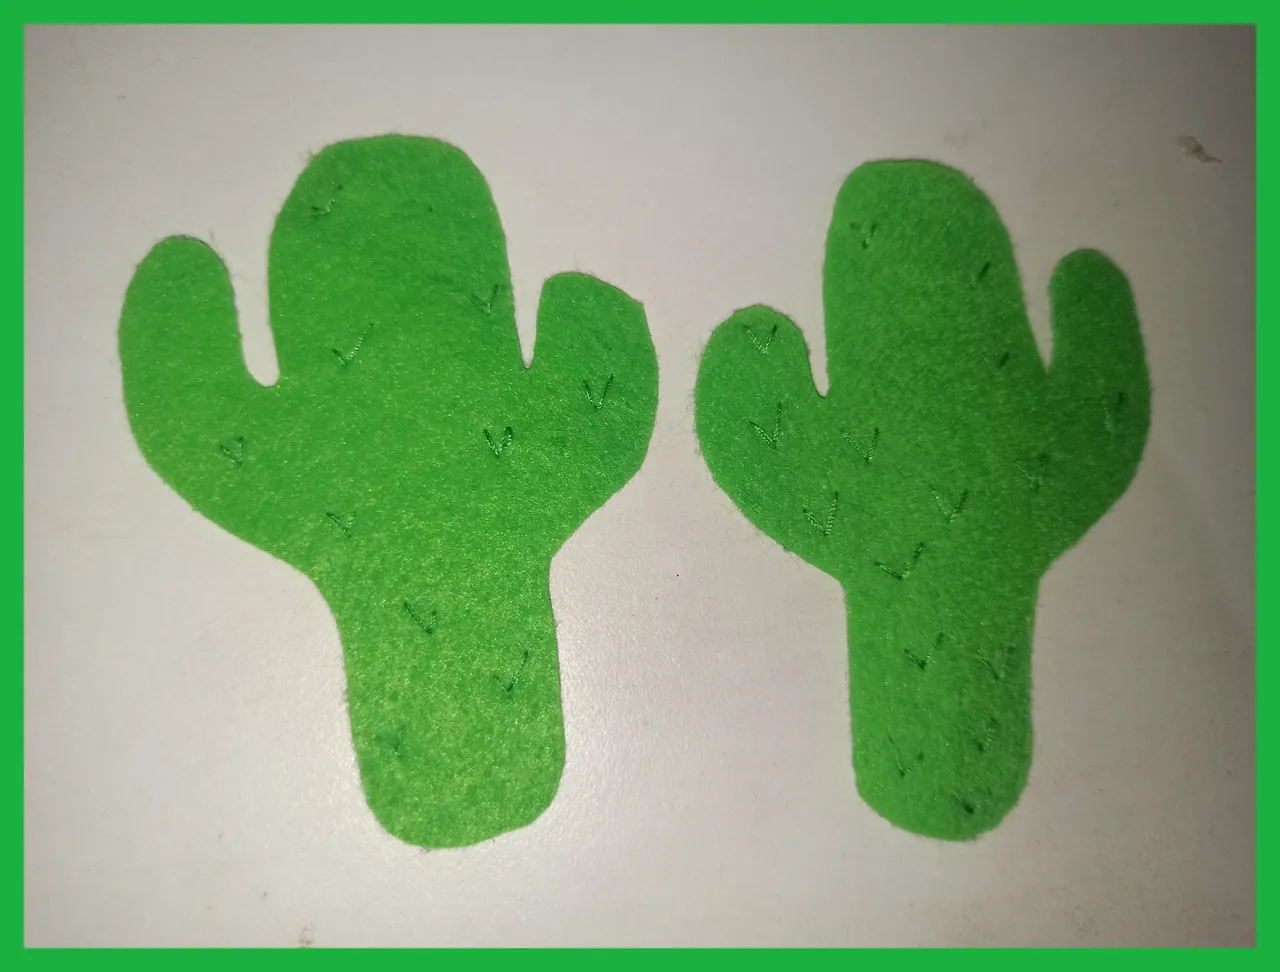
▶️ Paso 4 :
- Para hacer las espinas características del cactus, utilizo hilo verde para hacer una puntada en "v".
▶️ Step 4:
- To make the characteristic spines of the cactus, I use green thread to make a "v" stitch.
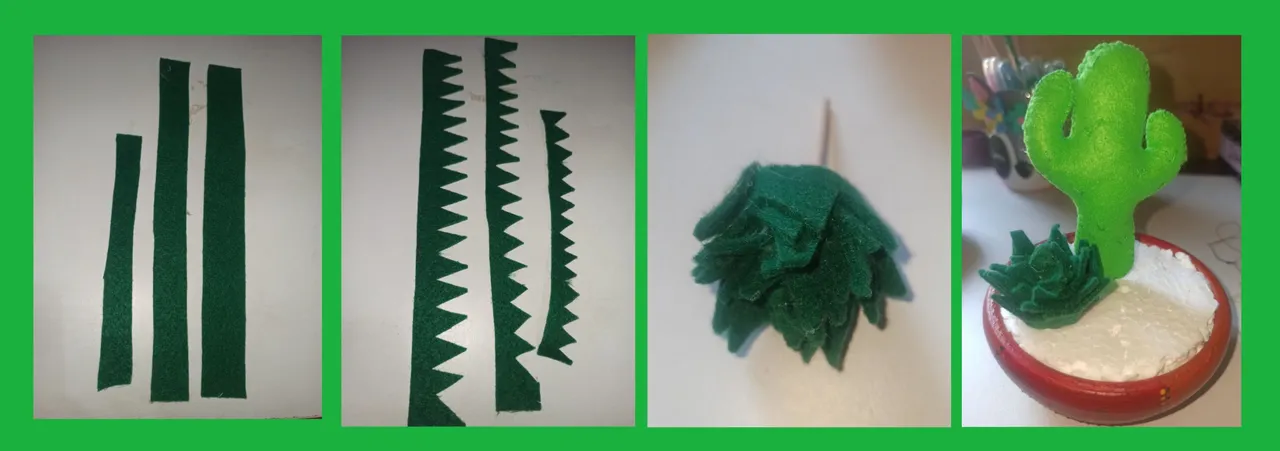
▶️ Paso 5 :
- Procedo a unir las piezas con la puntada sobrehilada. Esta pieza lleva relleno. A mitad de la parte inferior se introduce un palillo de madera para luego insertarlo en el anime.
▶️ Step 5 :
- I proceed to join the pieces with the overcasting stitch. This piece has stuffing. A wooden stick is inserted in the middle of the lower part and then inserted into the anime.

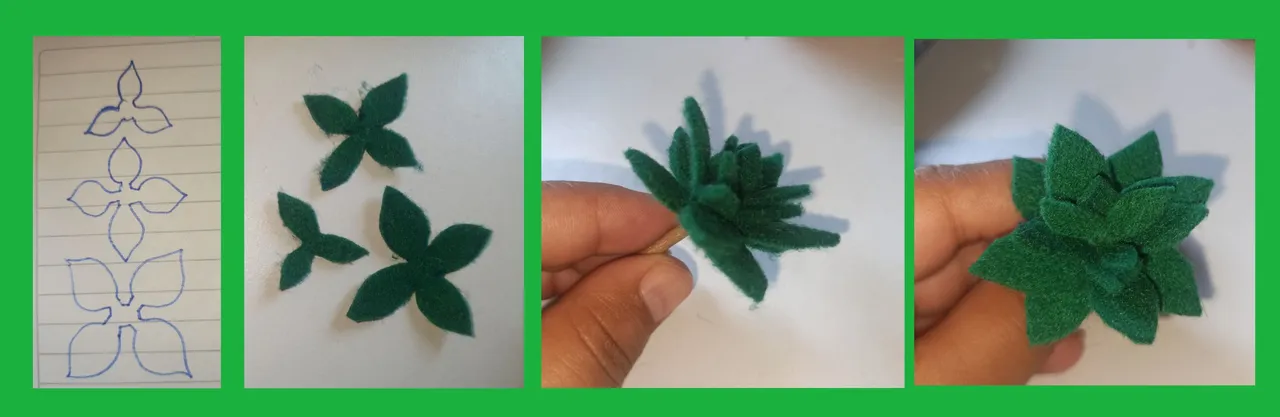
▶️ Paso 6:
- Para acompañar al cactus también realice unas suculentas en fieltro. Esta suculenta puntiaguda es muy fácil, solo hay que cortar tres tiras de fieltro de diferentes grosores, luego se corta las puntas en forma de triángulos. Se va enrollando de la tira más fina a la más gruesa en un palito de madera. Hice dos para luego insertarla en el anime junto al cactus.
▶️ Step 6 :
- To accompany the cactus also make some felt succulents. This pointed succulent is very easy, just cut three strips of felt of different thicknesses, and then cut the tips in the form of triangles. You roll it from the thinnest strip to the thickest on a wooden stick. I made two and then inserted them into the polystyrene foam next to the cactus.
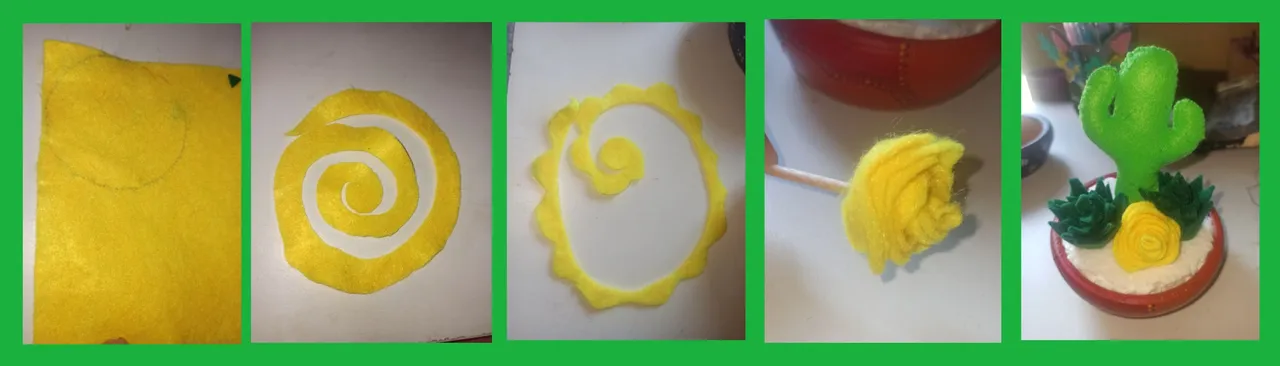
▶️ Paso 7 :
- La otra la hice en color amarillo, hago un círculo, cortar en forma de espiral, a ese espiral le doy forma de ondas. Luego se enrolla y pega en el palito de madera. Se inserta en el anime.
▶️ Step 7 :
- The other one I made in yellow color, I make a circle, cut in a spiral shape, to that spiral I give a wave shape. Then it is rolled and glued on the wooden stick. It is inserted into the Expandable Polystyrene.
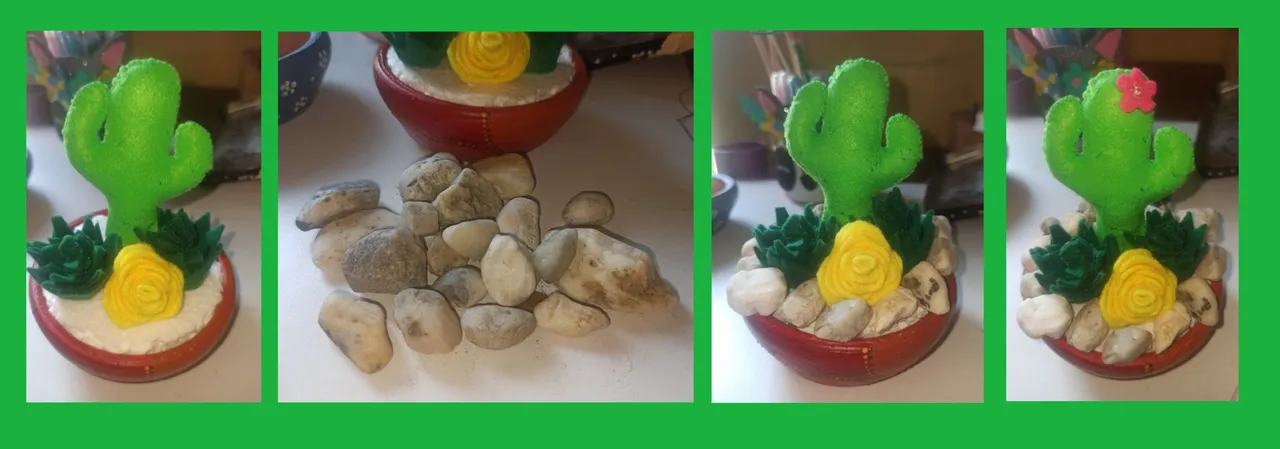
▶️ Paso 8 :
- Para terminar con la decoración. Con fieltro rosa, hice una pequeña flor que pegué en el cactus y utilicé piedras que pegué en los espacios vacíos.
▶️ Step 8:
- To finish with the decoration. With pink felt, I made a small flower that I glued on the cactus and used stones that I glued in the empty spaces.
▶️ Paso 9 :
Como he mencionado al principio, hay 4 de estos adornos. De momento sólo he hecho dos. Para este segundo, hice el mismo cactus, lo diferente son las suculentas.
También es muy fácil de hacer, con los patrones listos, los calco en el fieltro, ya recortados, los inserto en un palo de madera.
▶️ Step 9:
- As I mentioned at the beginning, there are 4 of these ornaments. I have only made two for the moment. For this second one, I made the same cactus, the different thing is the succulents.
Also very easy to make, with the patterns ready, I trace them on the felt, already cut out, I insert them on a wooden stick.
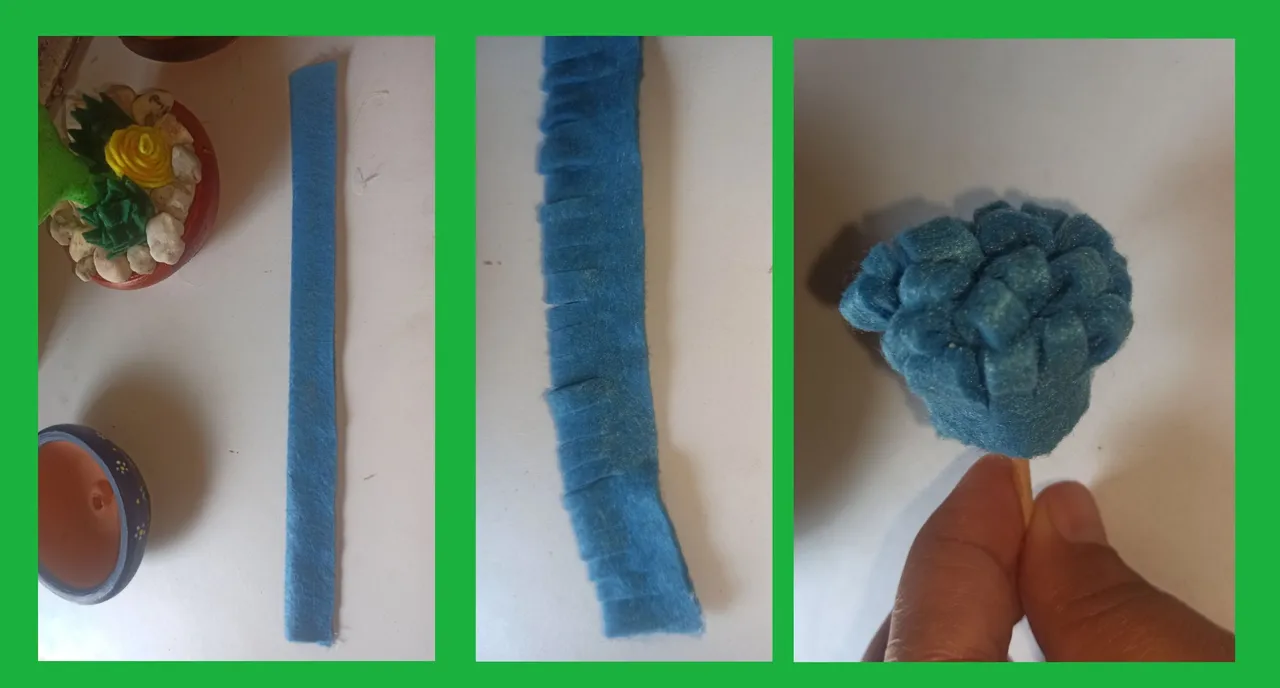
▶️ Paso 10:
- Para darle otro color, utilice fieltro azul. Corte una tira, doble a la mitad y pegue para luego hacer unos piquetes. Lo enrollé en un palo de madera y listo.
▶️ Step 10:
- To give it another color, use blue felt. Cut a strip, fold it in half and glue and then make some picks. I rolled it on a wooden stick and that's it.
▶️ Paso 11:
- Luego el mismo procedimiento. El lazito del cactus y pegar las piedras.
▶️ Step 11:
- Then the same procedure. The cactus ribbon and glue the stones.
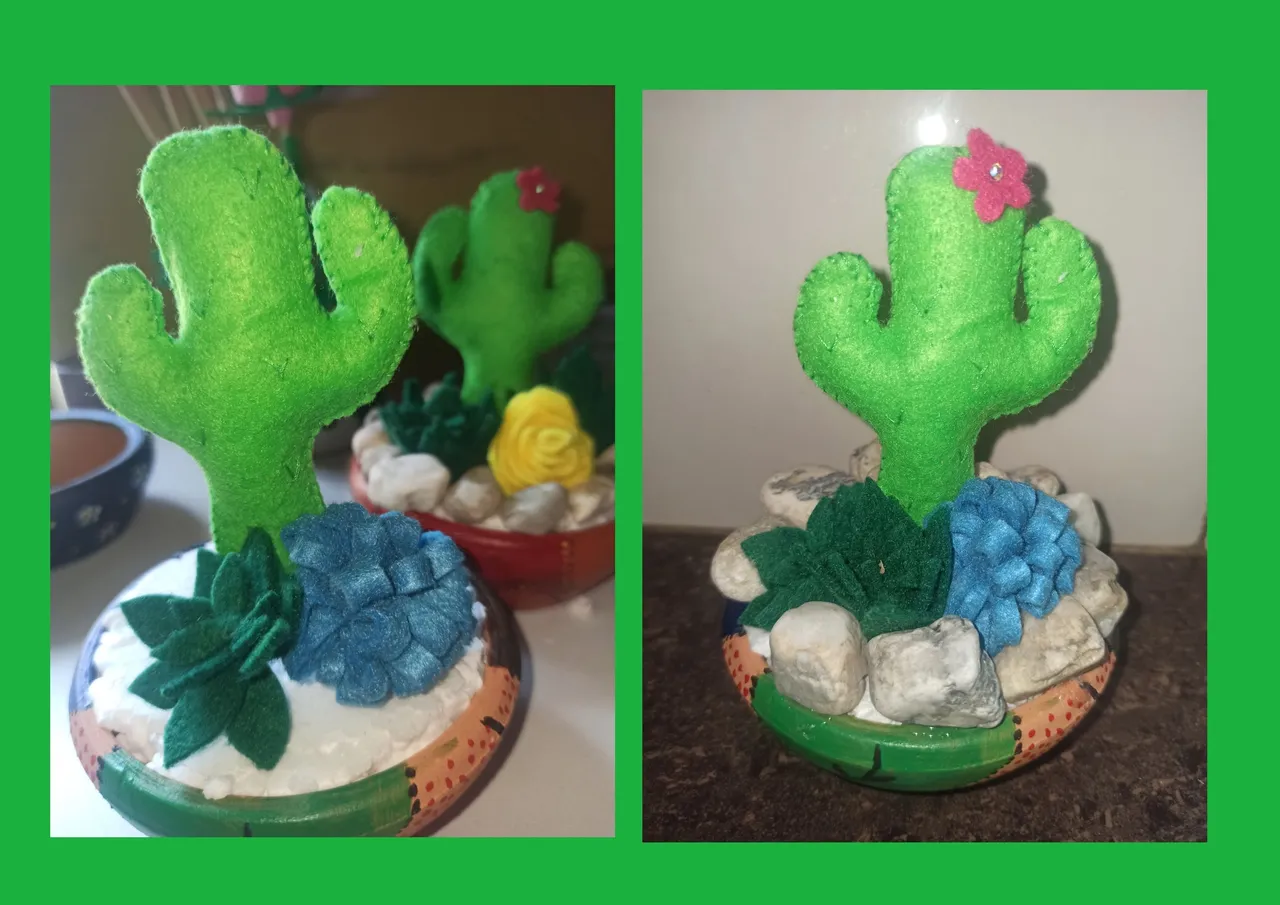
▶️ Resultado :
▶️ Result :
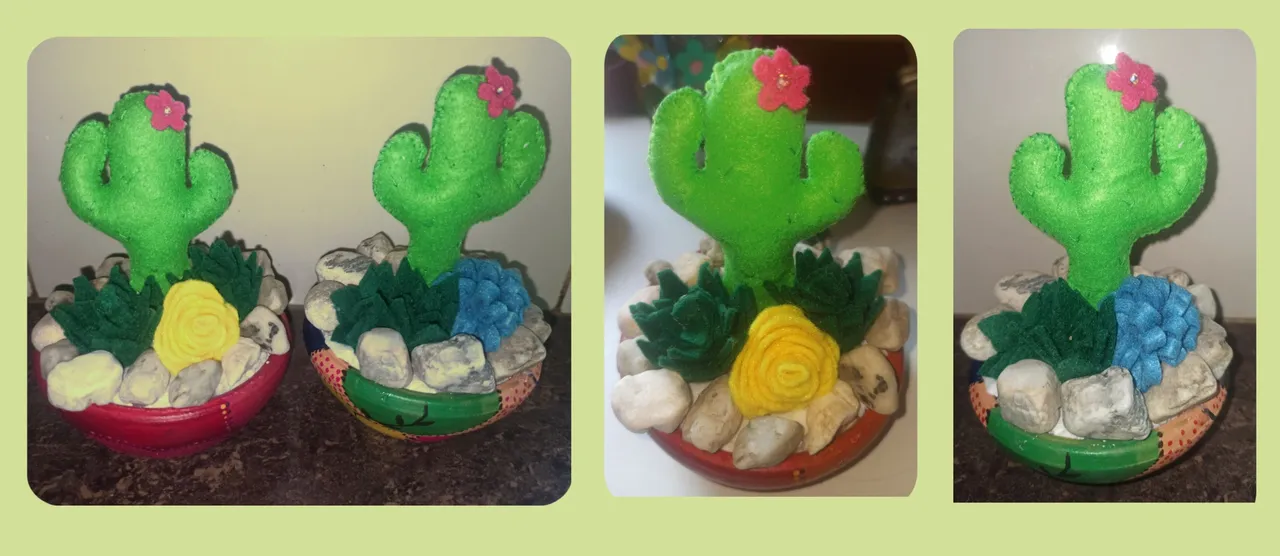
Estos cactus decorativos están listos. ¿ Qué te pareció el procedimiento?
Estaré encantada de leer y responder a sus comentarios. Gracias totales a todos los que aprecian mi contenido, y que se toman el tiempo de leer y dejar un comentario, gracias, muchas gracias. Les deseo lo mejor.
Hasta pronto.
These decorative cacti are ready, what did you think of the process?
I will be happy to read and respond to your comments. Total thanks to all of you who appreciate my content, and who take the time to read and leave a comment, thank you, thank you very much. I wish you all the best.
See you soon.
Otros trabajos con fieltro :
| DIY- Stitch keychain ENG/ESP | DIY- Mickey Mouse keychain ENG/ESP | [ENG/ESP] DIY - Tutorial Llavero y monedero Frida Khalo | DIY- Monster keychains ENG/ESP | DIY- Llavero Hive con fieltro [ENG/ESP] |
|---|---|---|---|---|
 |  |  |  |  |

Fotografías de mi propiedad tomadas con el celular Redmi note 8 pro, editadas en canva
Traducción realizada con la versión gratuita del
traductor DeepL
Todos los diseños fueron creados en canva
Photographs of my property taken with the Redmi note 8 pro cell phone, edited in canva
Translation made with the free version of
translator DeepL
All designs were created in canva