Español
Hola amigos en hive, feliz y bendecido miércoles.
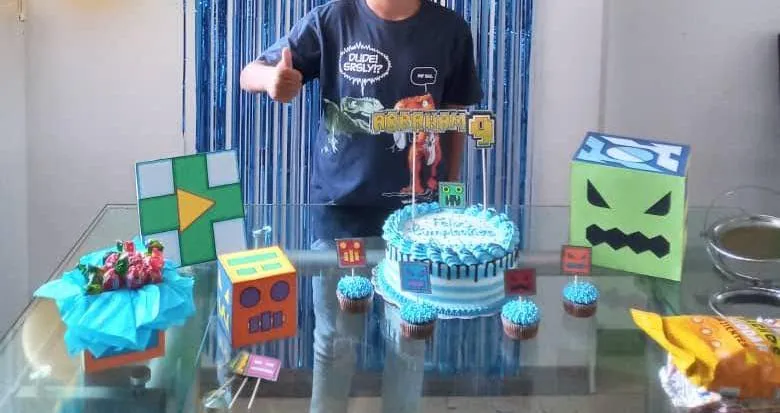
Siguiendo con la decoración inspirada en el videojuego “Geometry Dash” hoy les mostraré como hacer un decoración sencilla y fácil para poner en la mesa. Éste es un video juego muy colorido y cualquier elemento que se realice será alegre y divertido.A nuestro amiguito Abraham le gusta sobre todo las figuras cuadradas presentes en el juego, por eso verán que en casi toda la decoración los cuadros son el elemento central.
Como les comenté en la publicación anterior “ésta decoración se compone de varios elementos, y como cada uno de ellos llevó un proceso distinto, decidí separar los procesos en distintas publicaciones y así puedan apreciar mejor el proceso de cada cosa.”
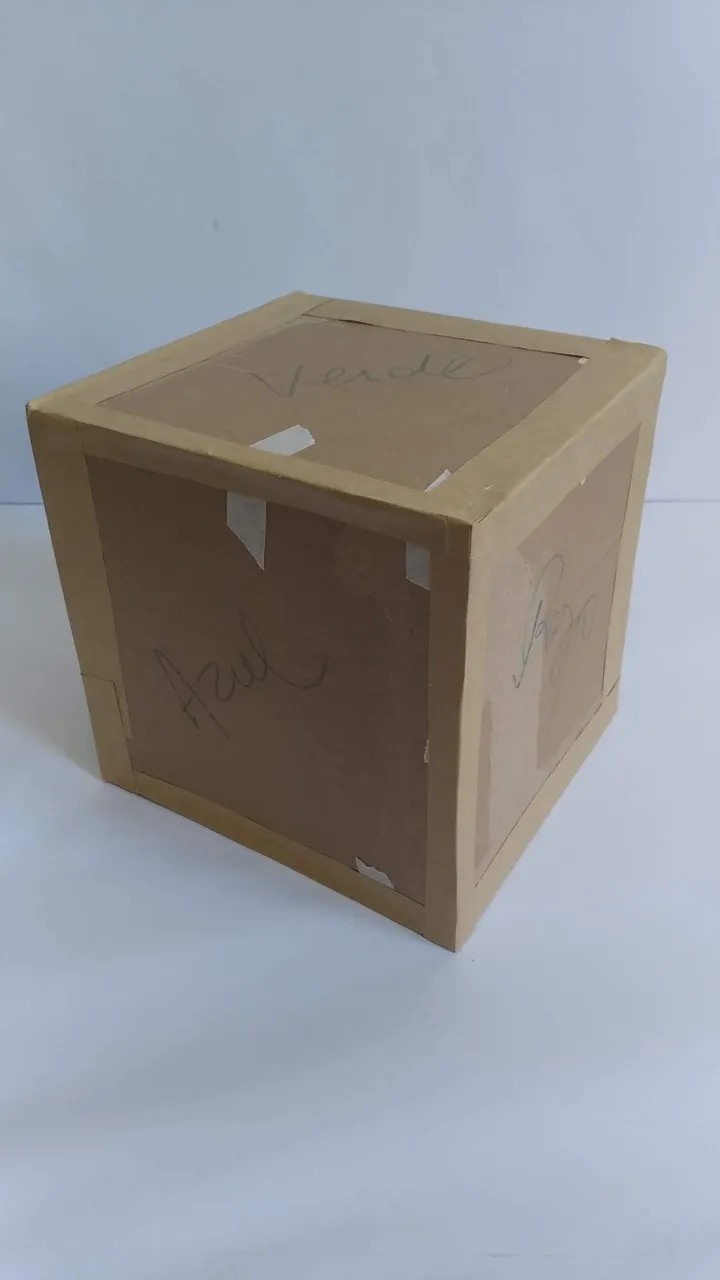
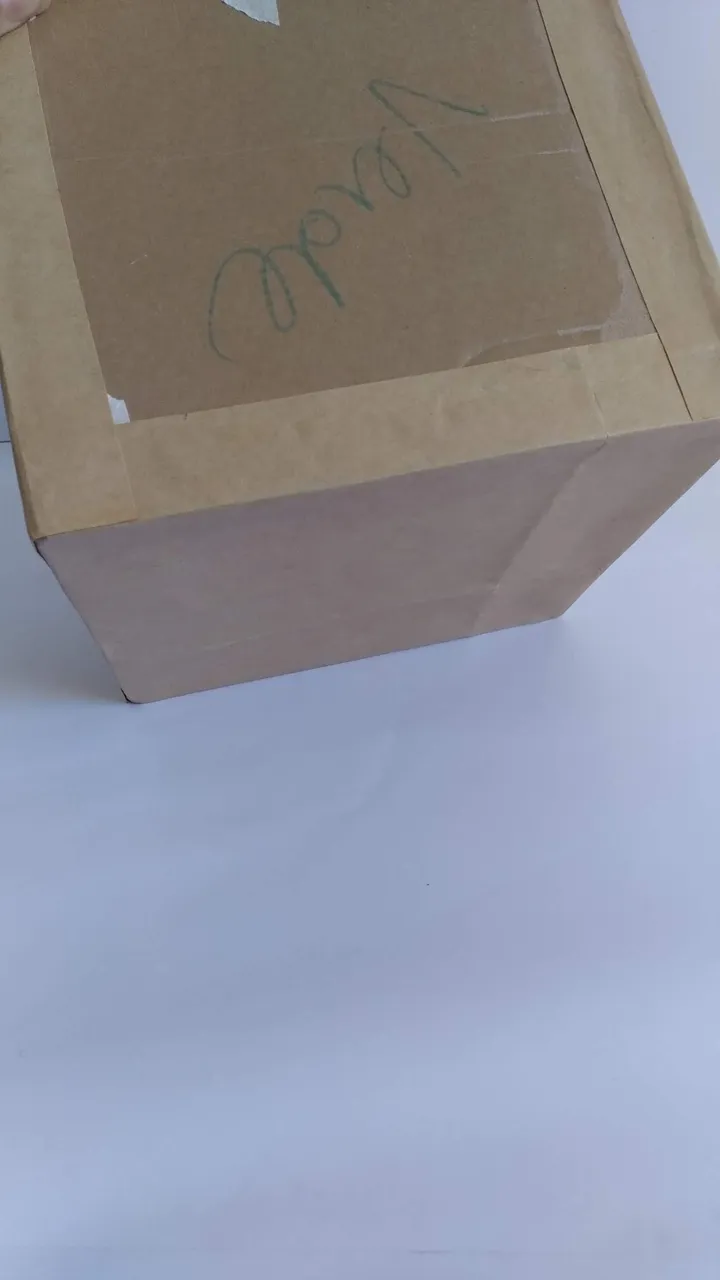
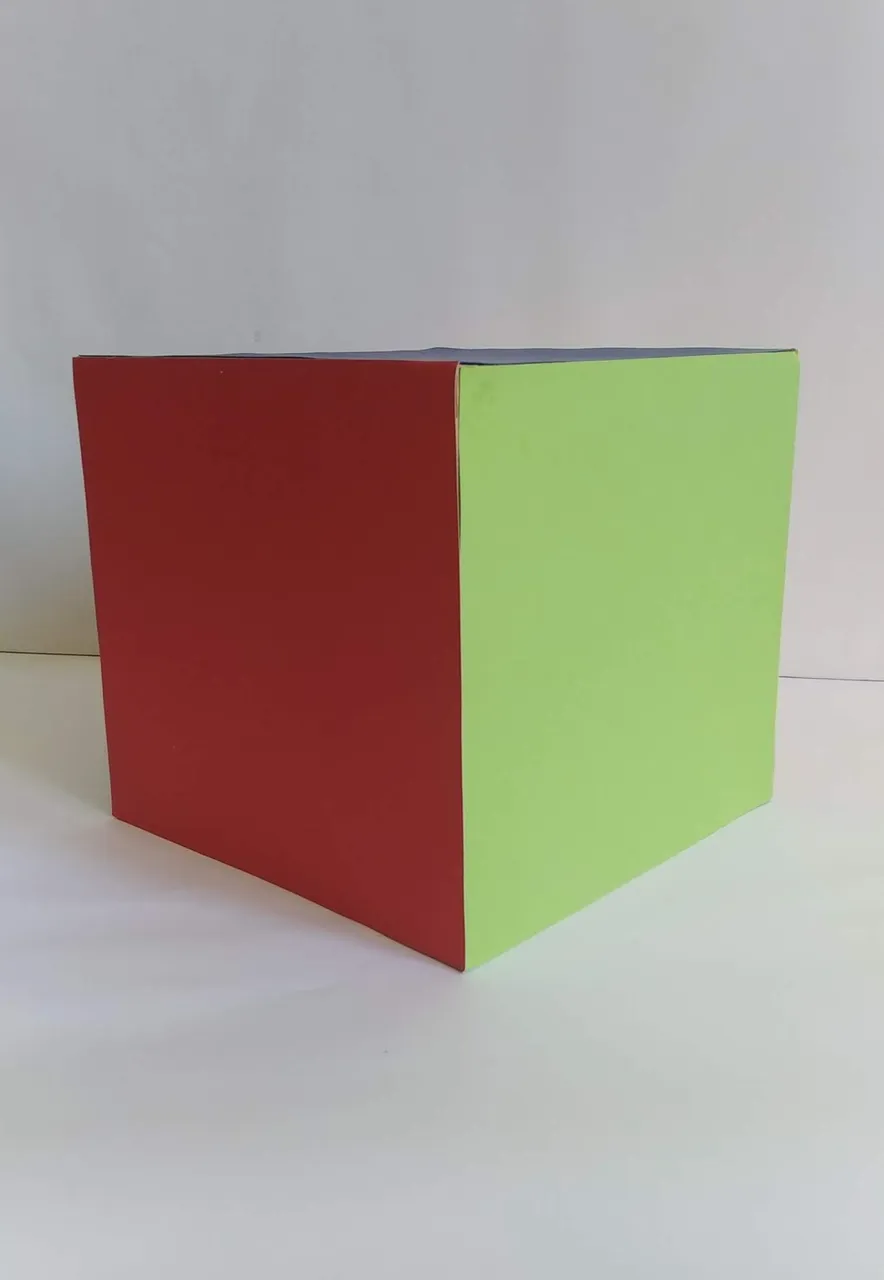
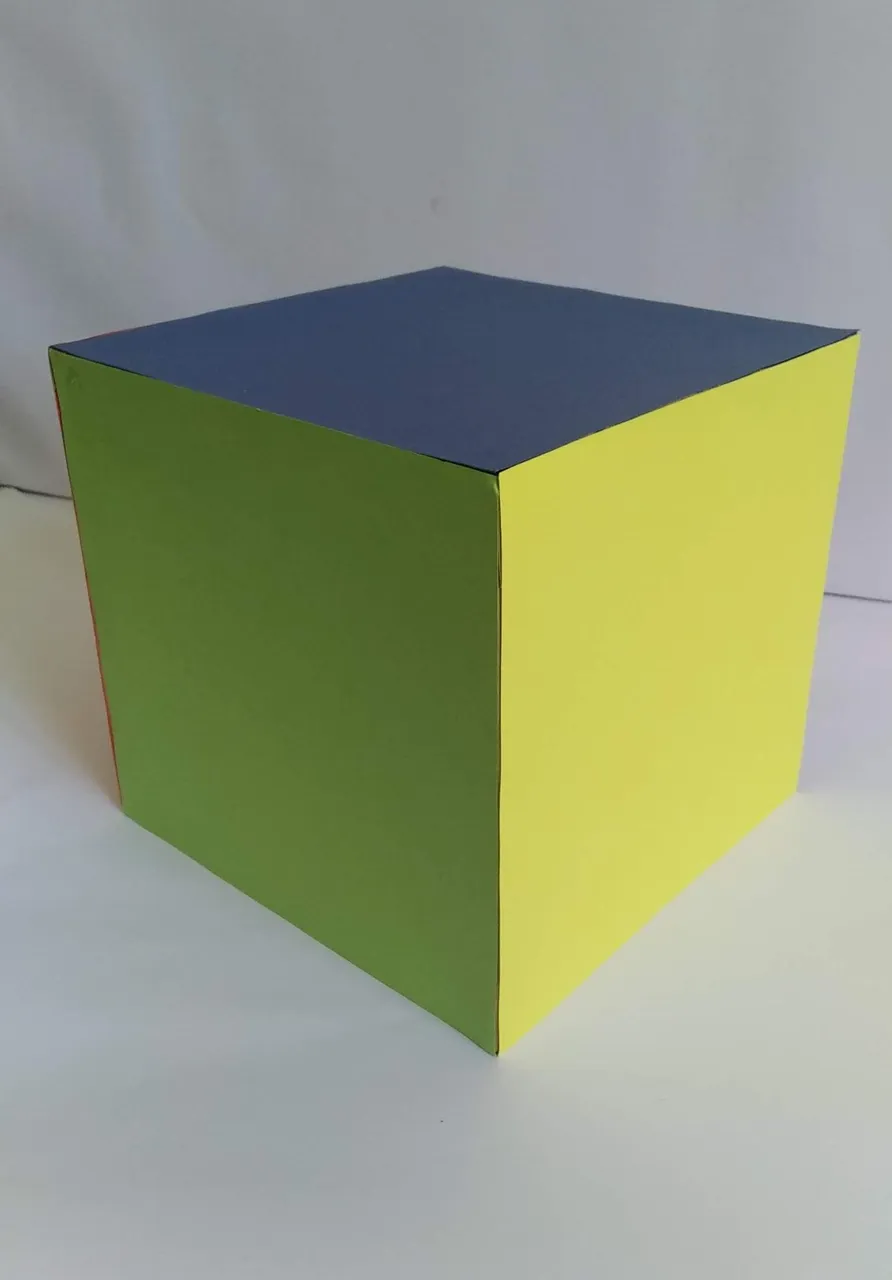
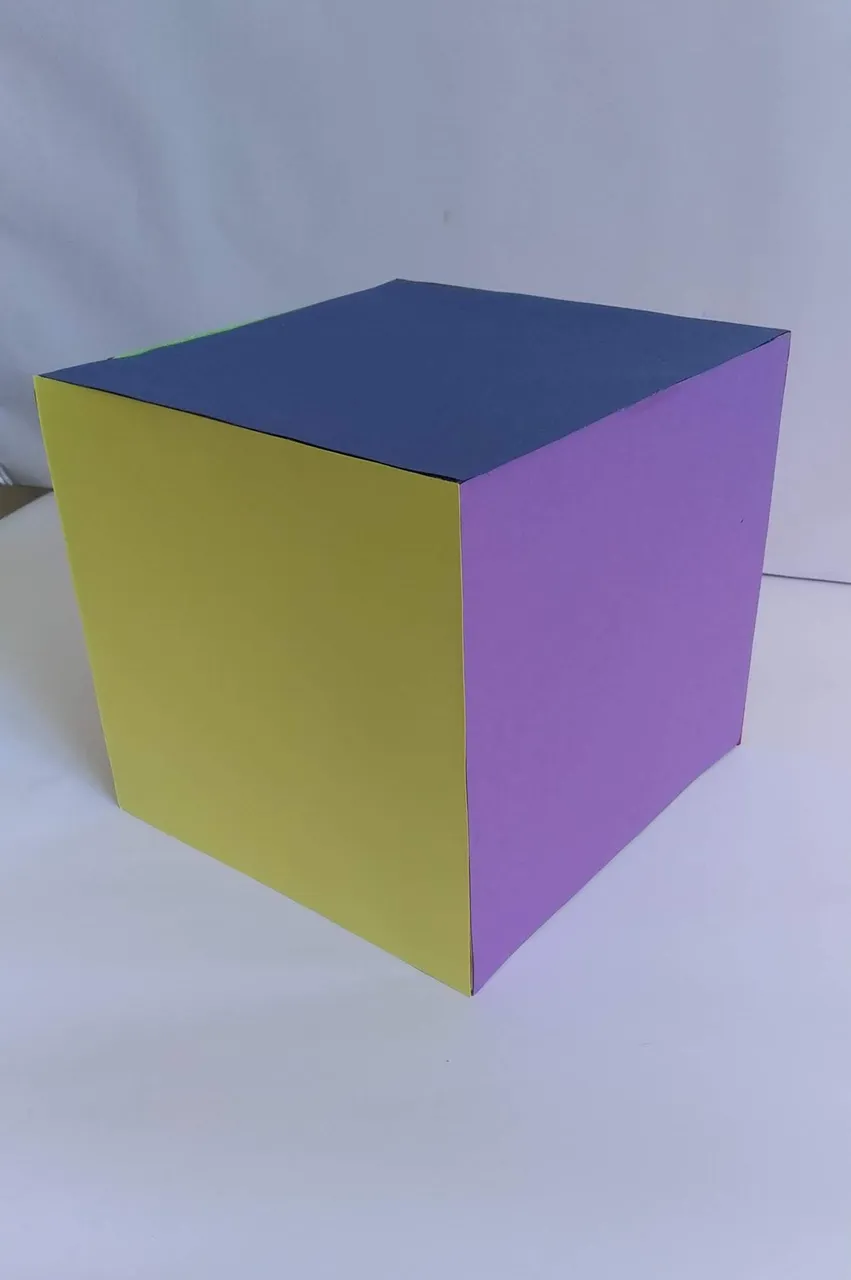
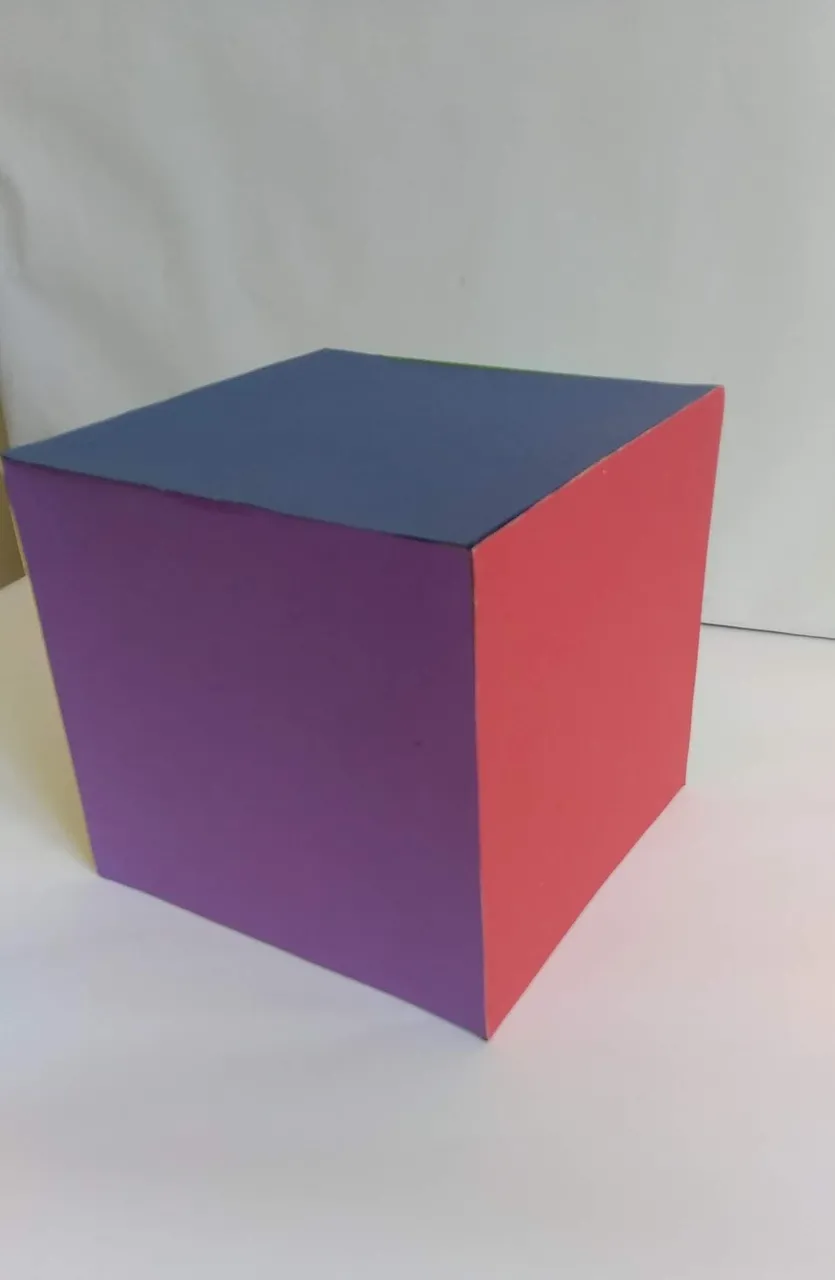
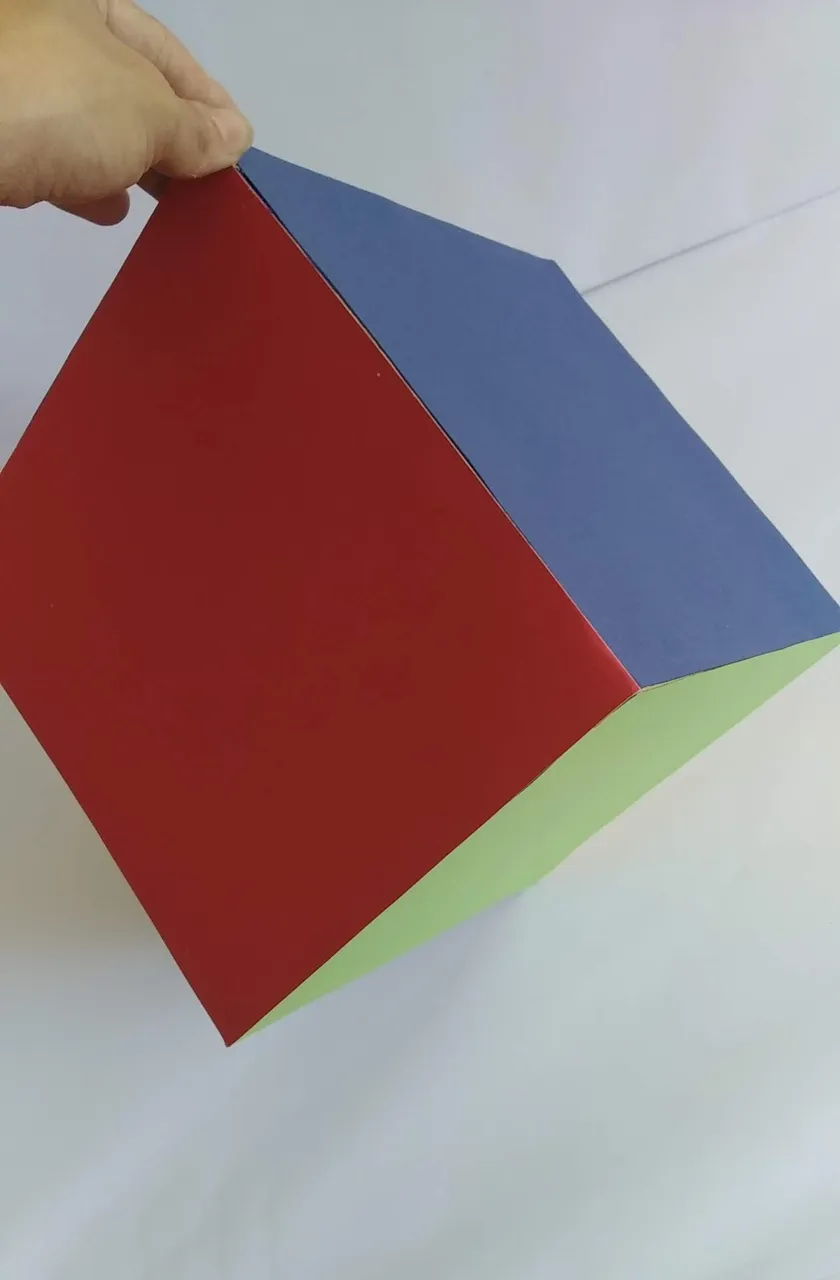
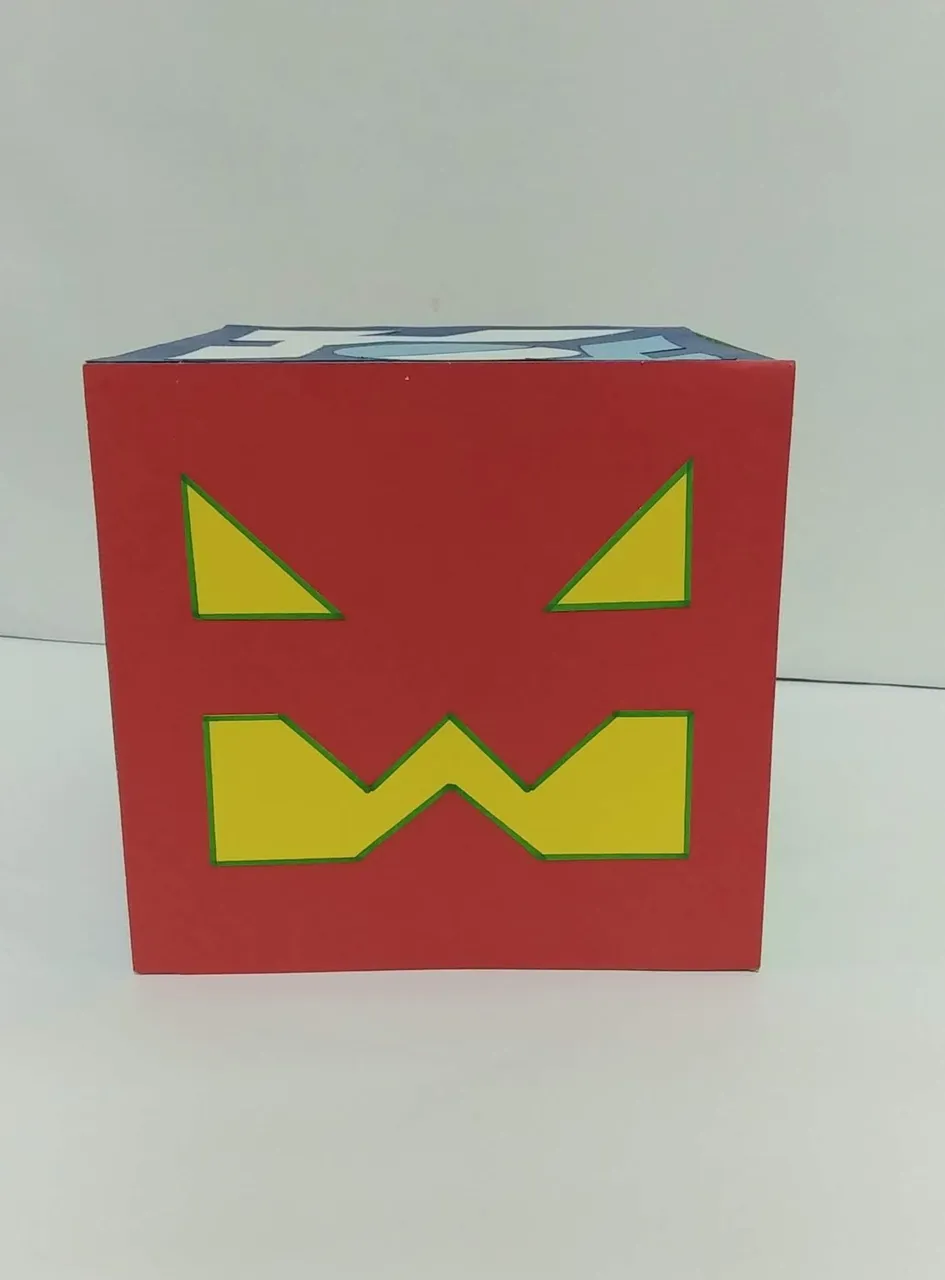
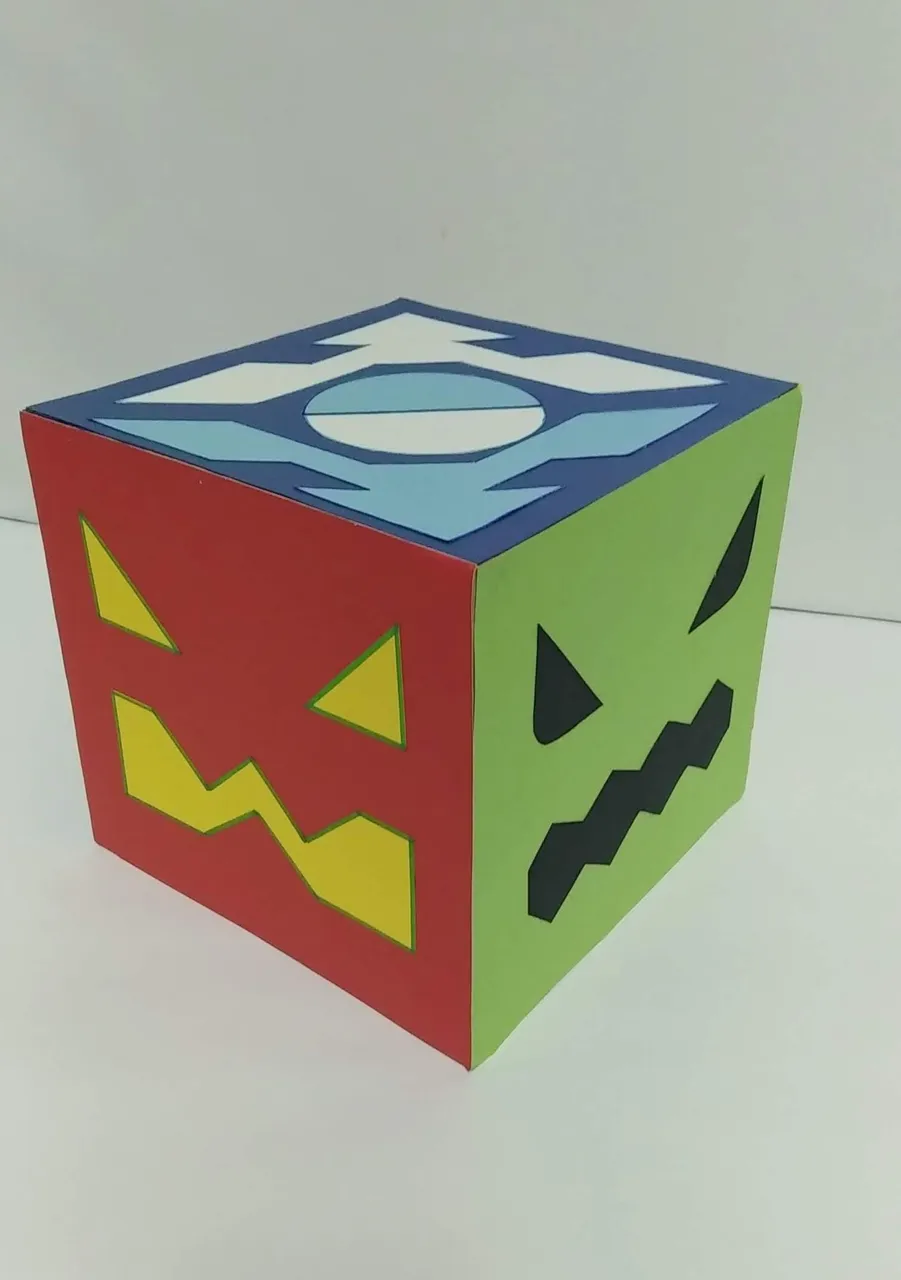
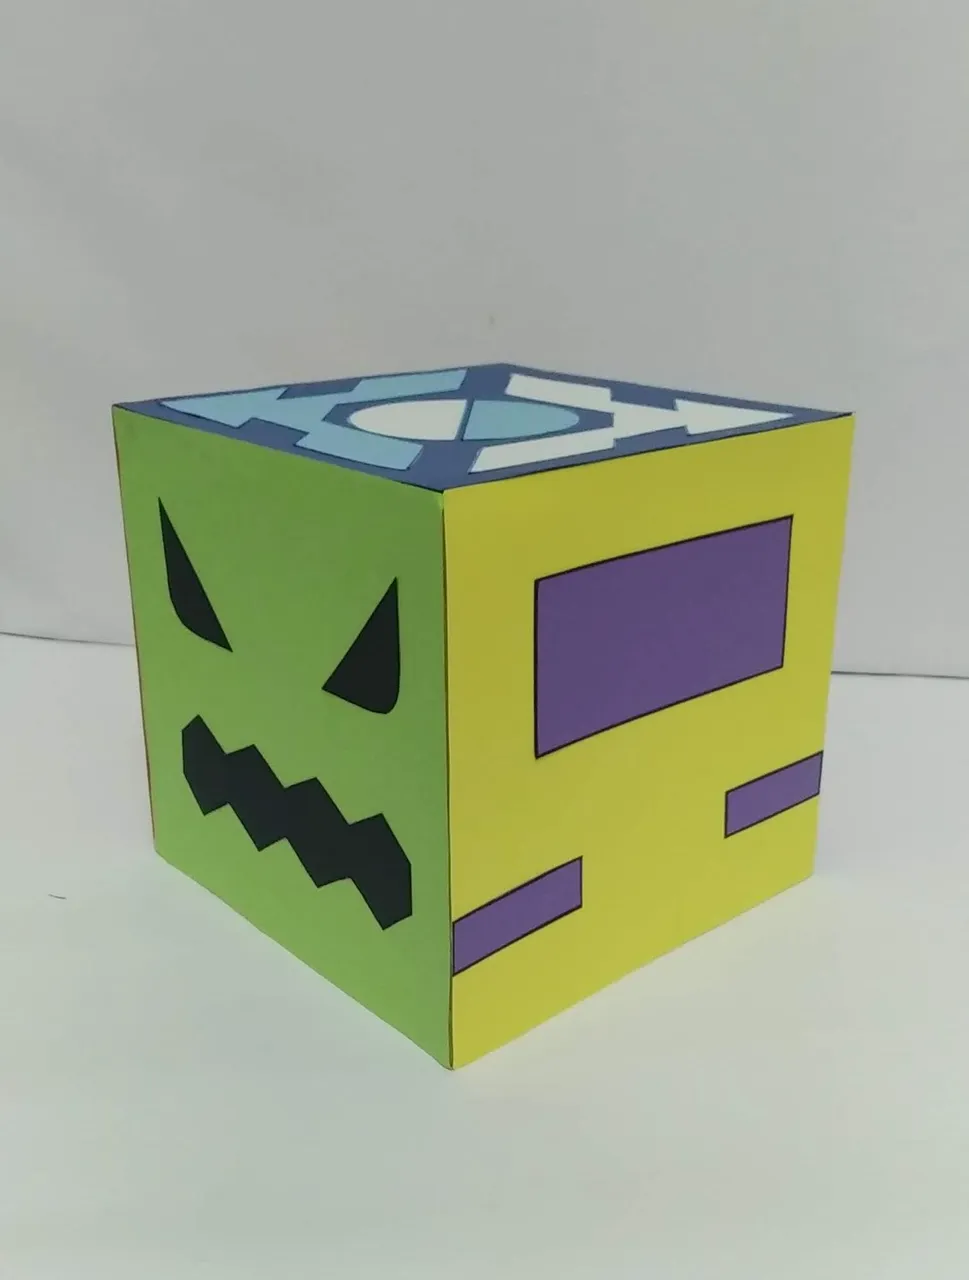
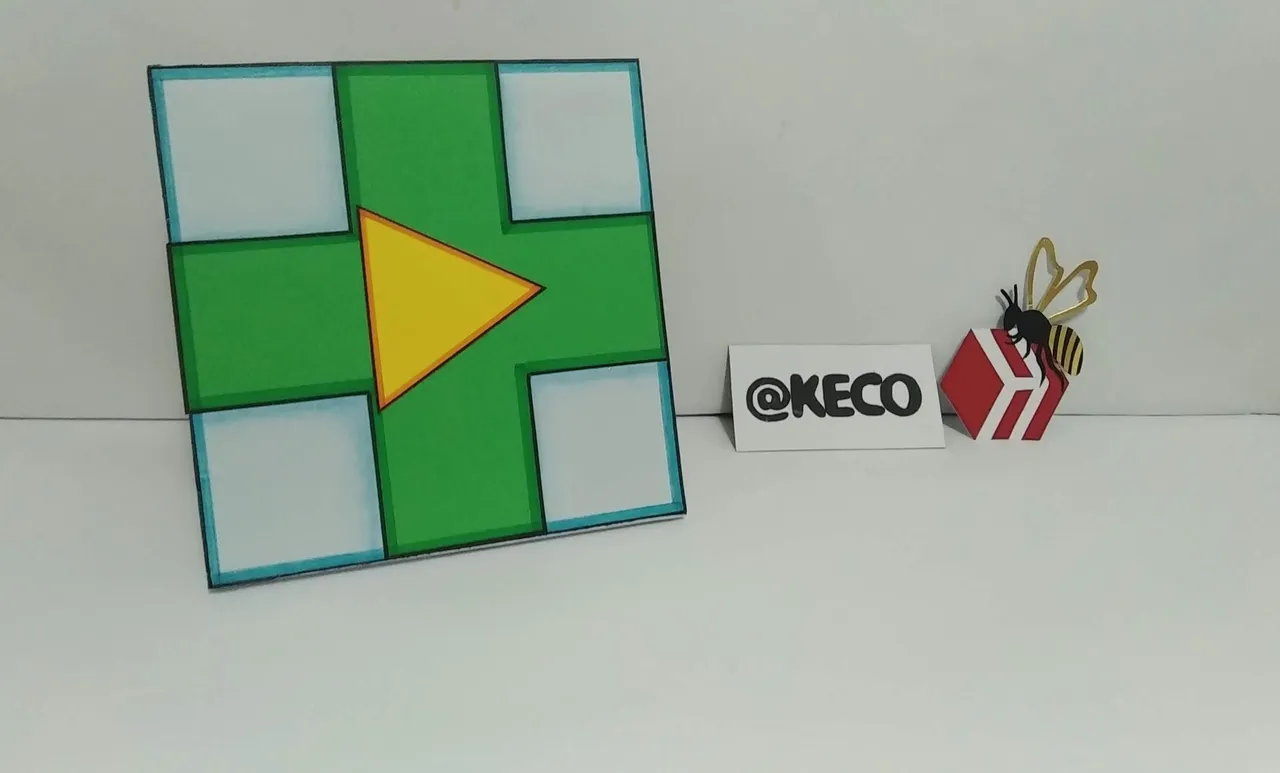
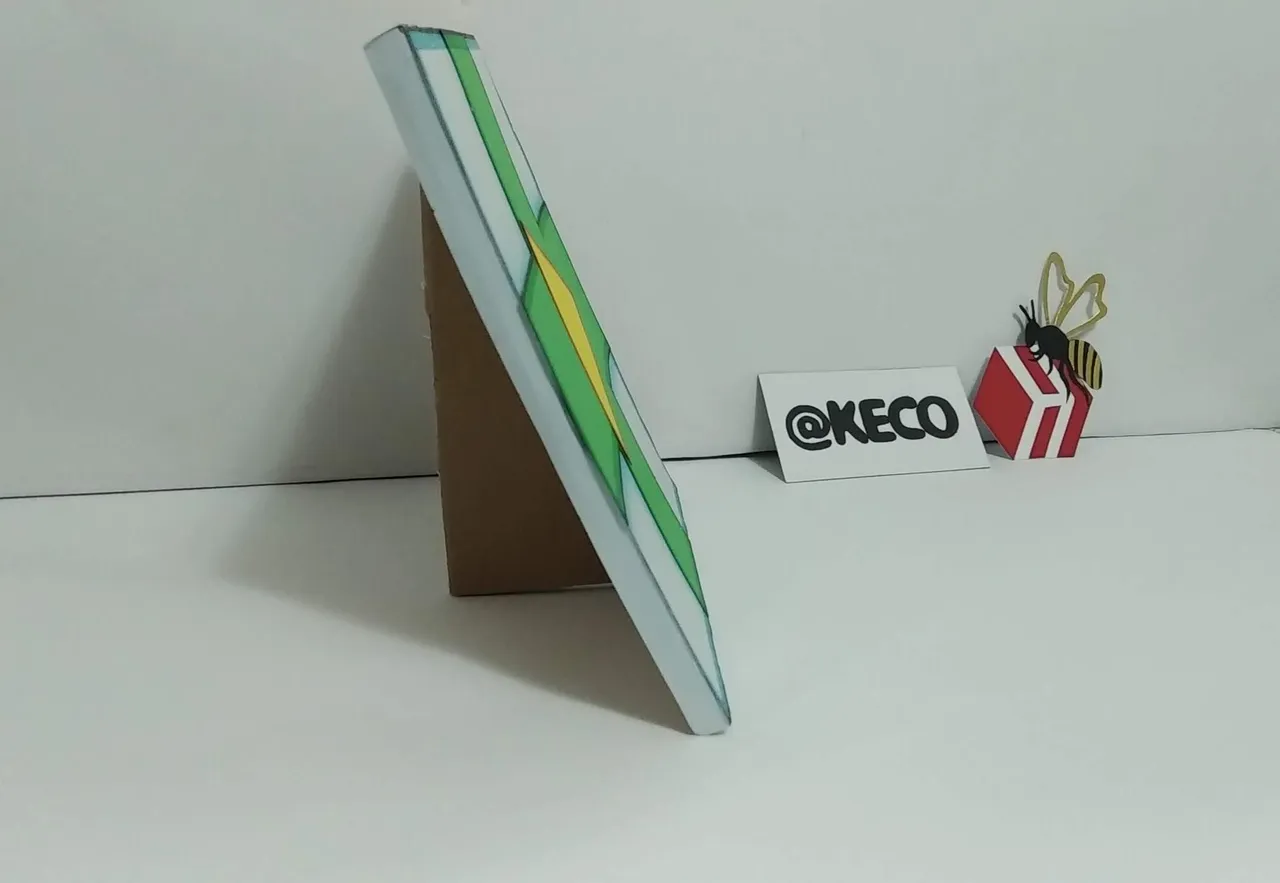
Para decorar la mesa (parte 2) se realizó un cubo de 20x20 cm en donde todos sus lados tuviesen caras distintas, ésto fue pensado así para que desde cualquier angulo que pudiese apreciar las caras de los cuadros. Adicionalmente se realizó un cuadro simulando la tecla de “play” del juego.
Sin más y esperando disfruten del trabajo realizado con amor, les dejo los materiales utilizados, el proceso y las imágenes del trabajo.
- Cartón reciclado, de preferencia doble canal (grueso).
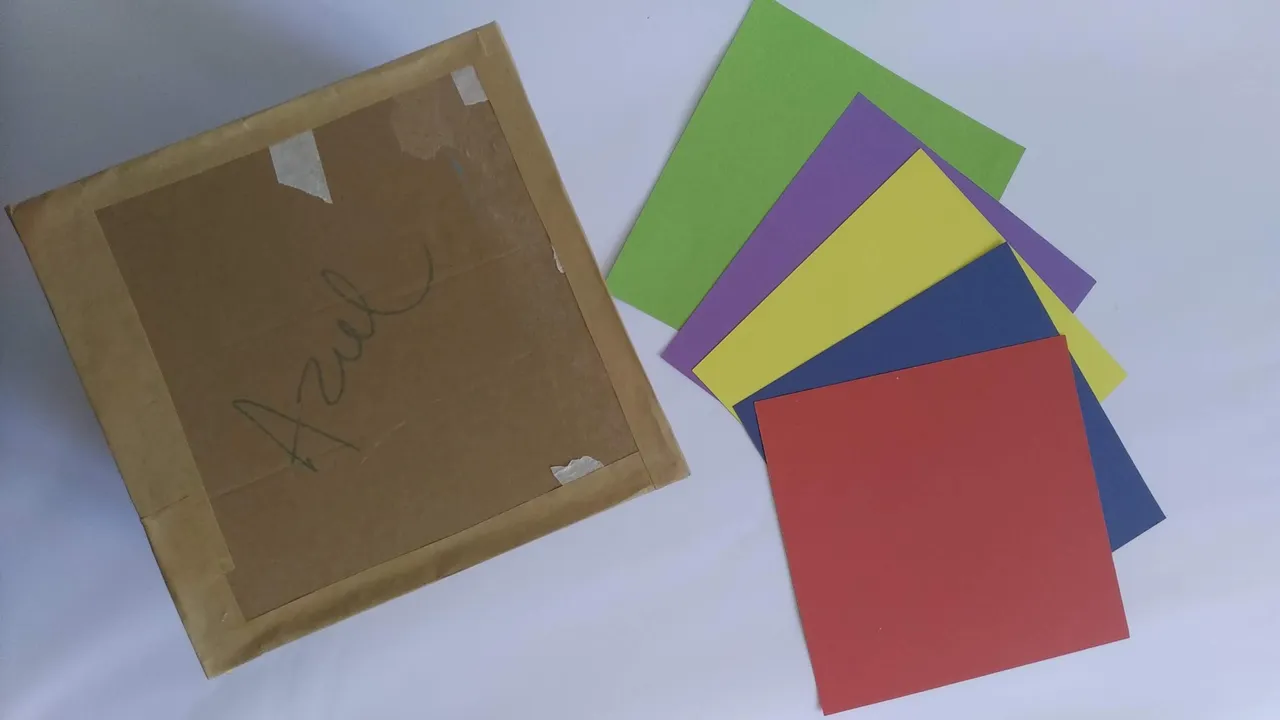
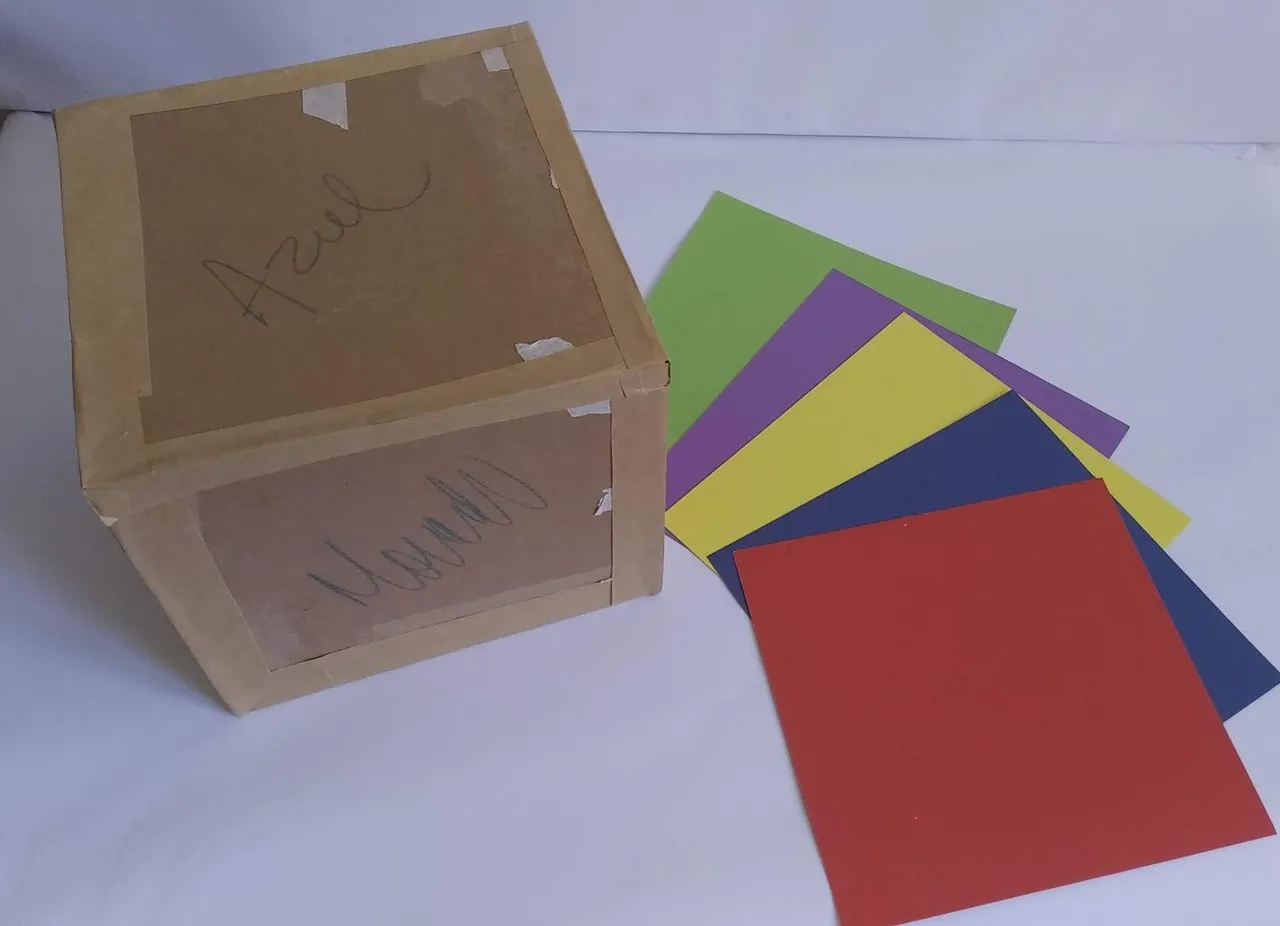
- Cartulina de colores: verde, morada, amarilla, azul, roja, negra, amarilla, blanca, lila, azul claro, etc. (a gusto)
- Tiras de papel craf (o papel blanco)
- Marcadores de colores
- Silicón caliente
- Silicón frio
- Tijera
- Regla
- Lápiz
- Cutter
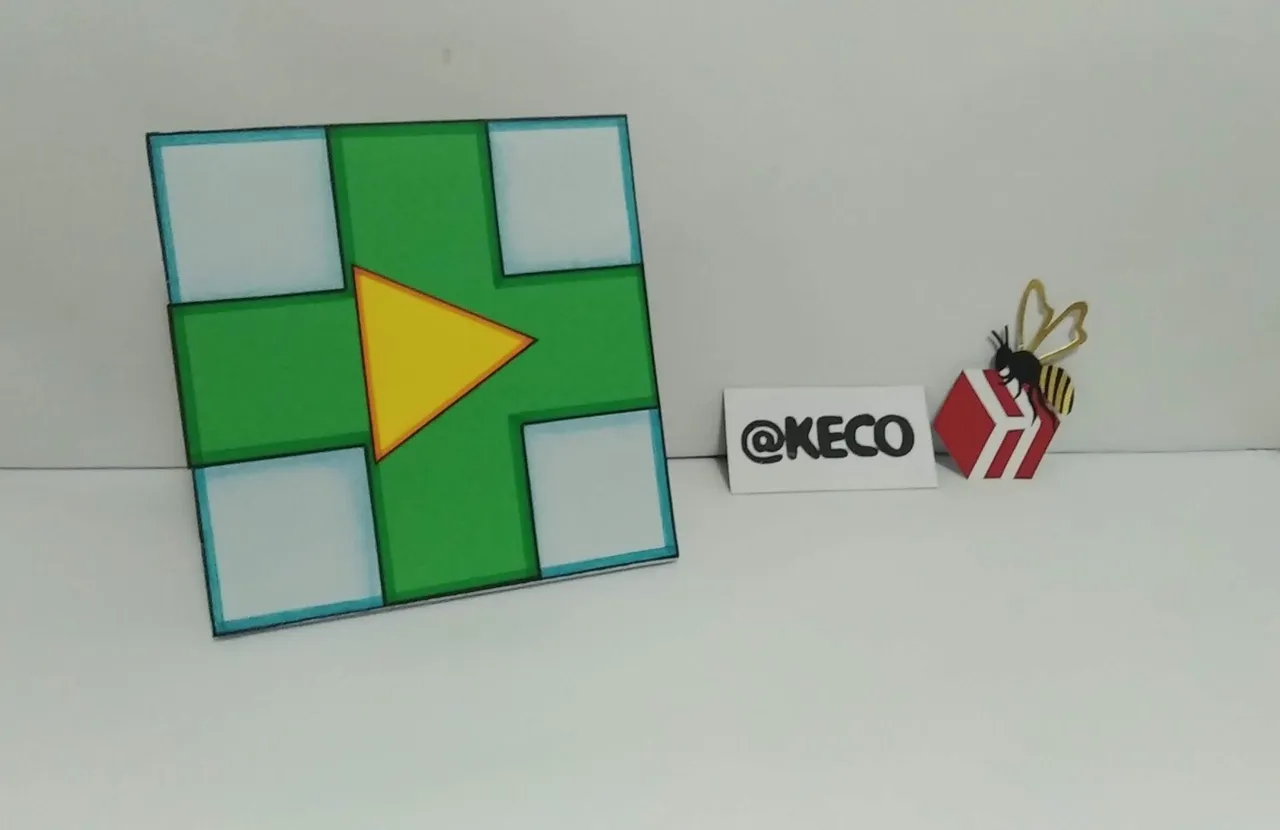
CUADRO PLAY:
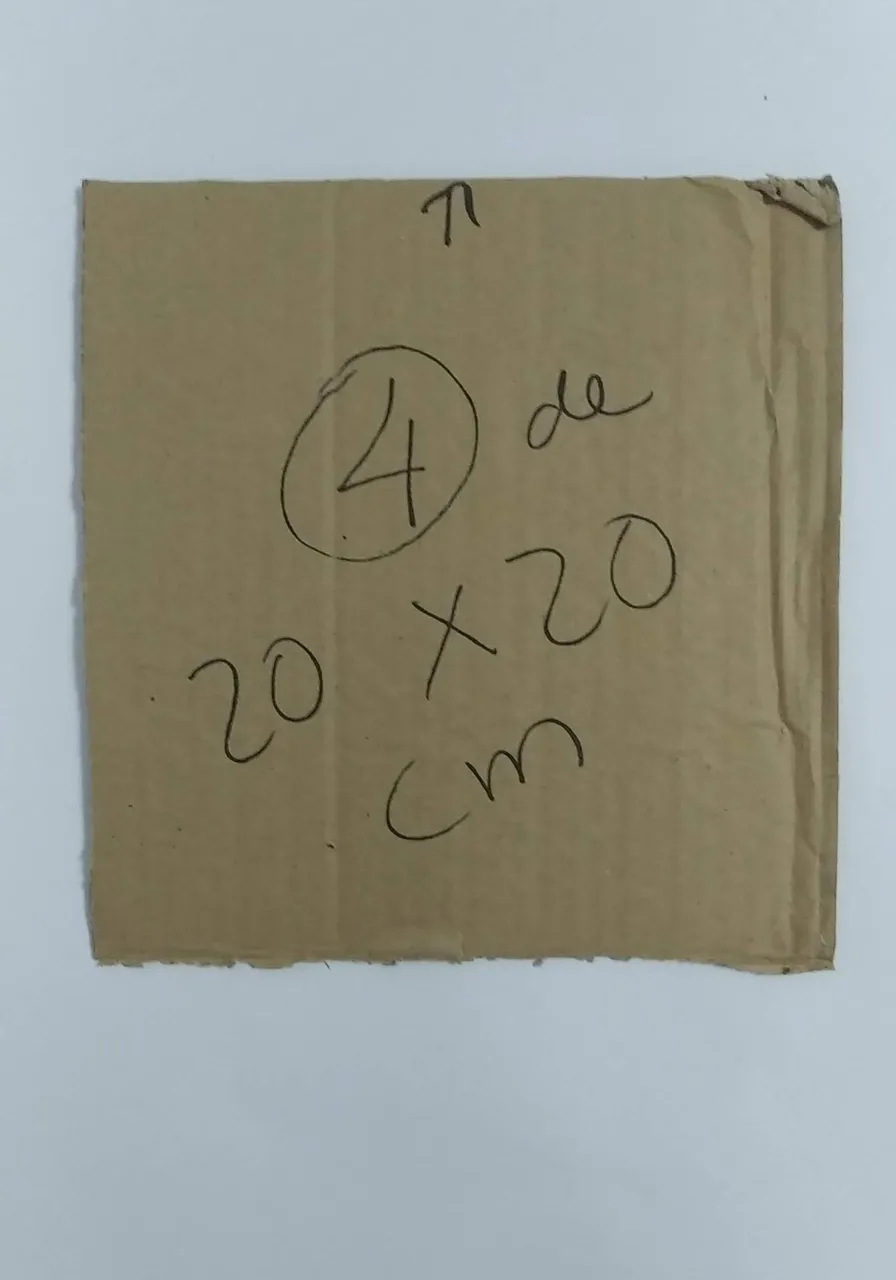
- Marcar en el cartón grueso un cuadrado de 20x20 centímetros y recortar.
- Cubrir los bordes con cartulina para darle un mejor acabado, para eso recortar la cartulina blanca de un centímetro de ancho por 20 cm de largo y pegar con silicón frio por todo el borde.
- Pegar en la parte frontal cartulina blanca y resaltar con marcador azul por todos sus lados.
- Pegar una cruz en cartulina verde, resaltando sus bordes con marcador verde.
- Pegar el símbolo “play” en cartulina amarilla, resaltado con marcador verde.
- Recortar un triangulo en cartón grueso y pegar con silicón caliente en la parte posterior para darle soporte al cuadro.
- ¡Listo a disfrutar de la magia de crear en casa!
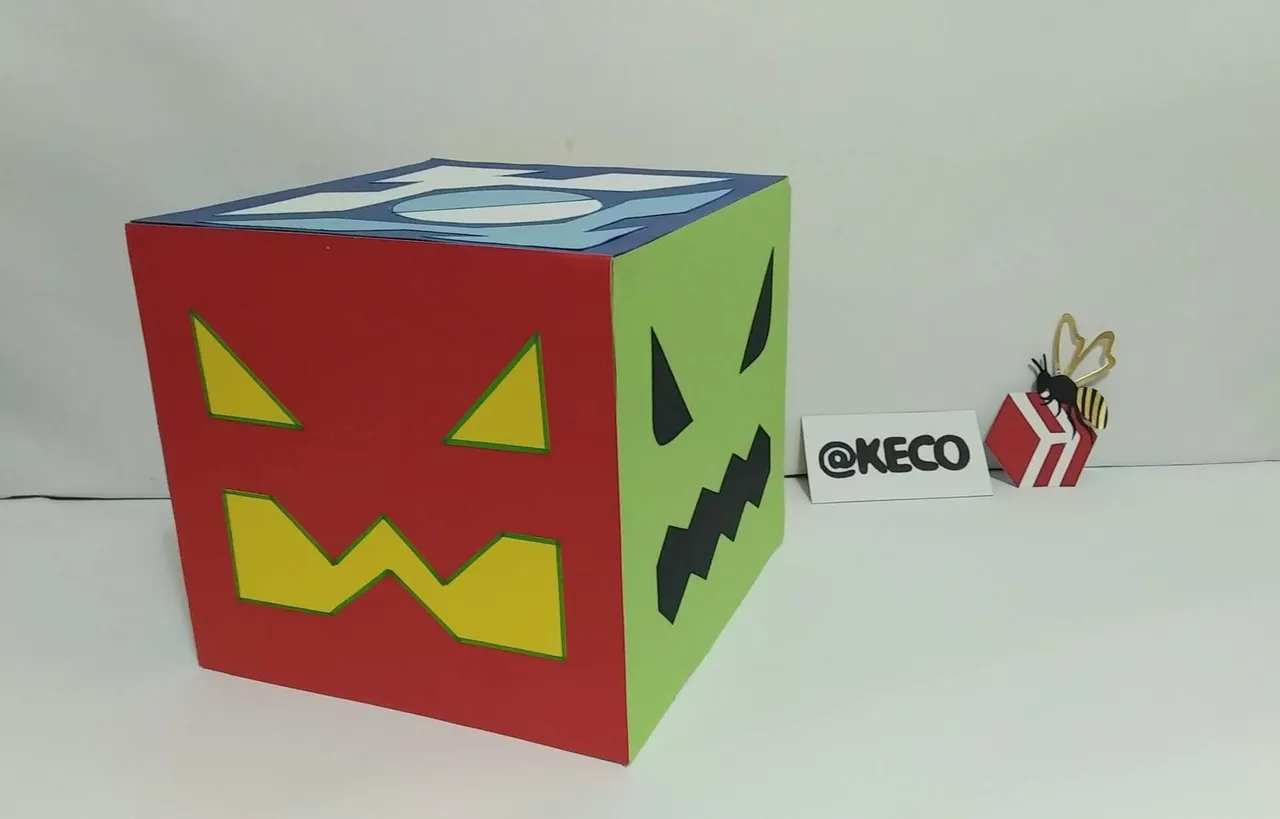
CUBO:
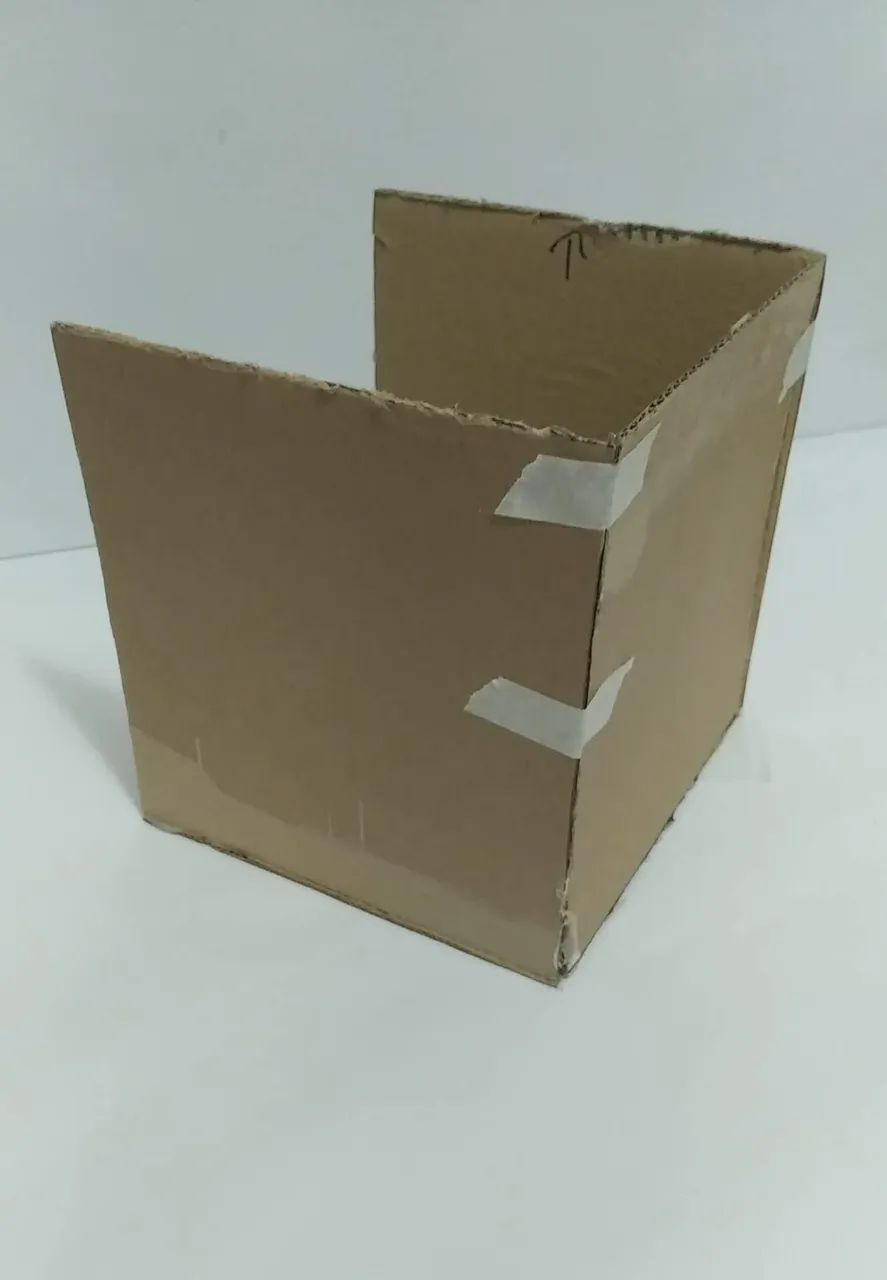
- Marcar en el cartón grueso cuatro (4) cuadros de 20 centímetros por todos sus lados.
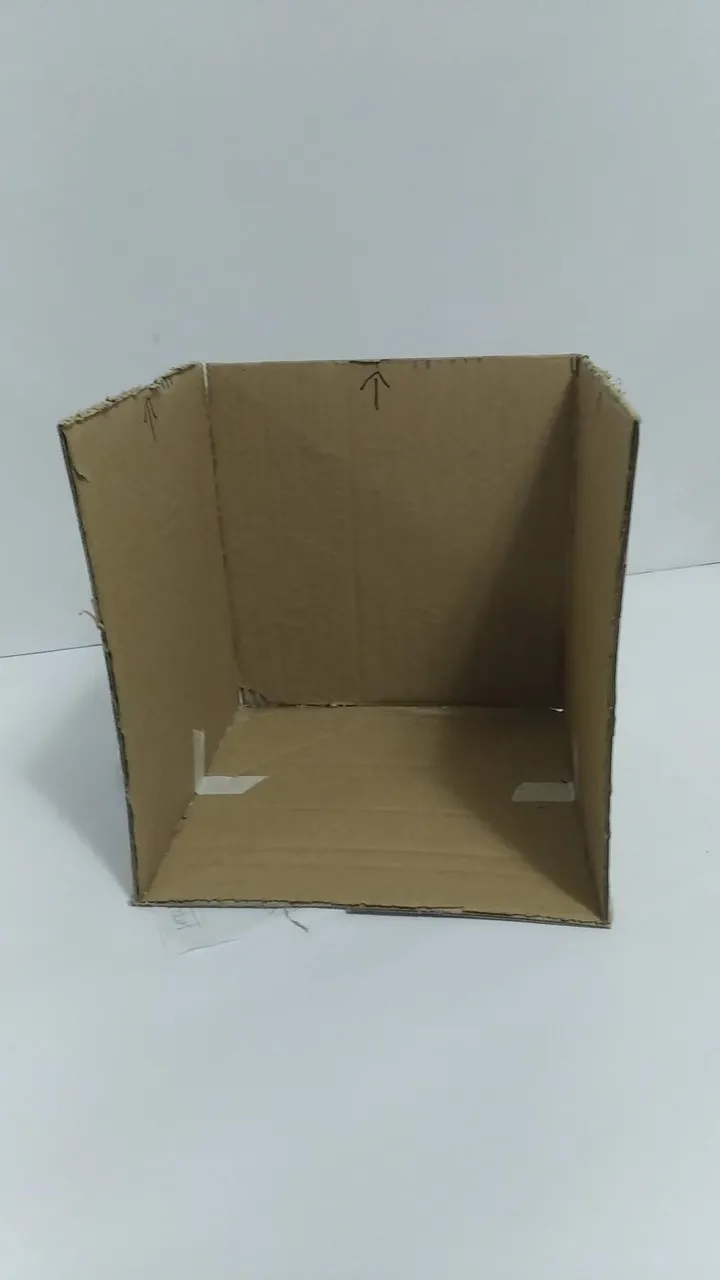
- Recortar los 4 cuadros con la ayuda del cutter.
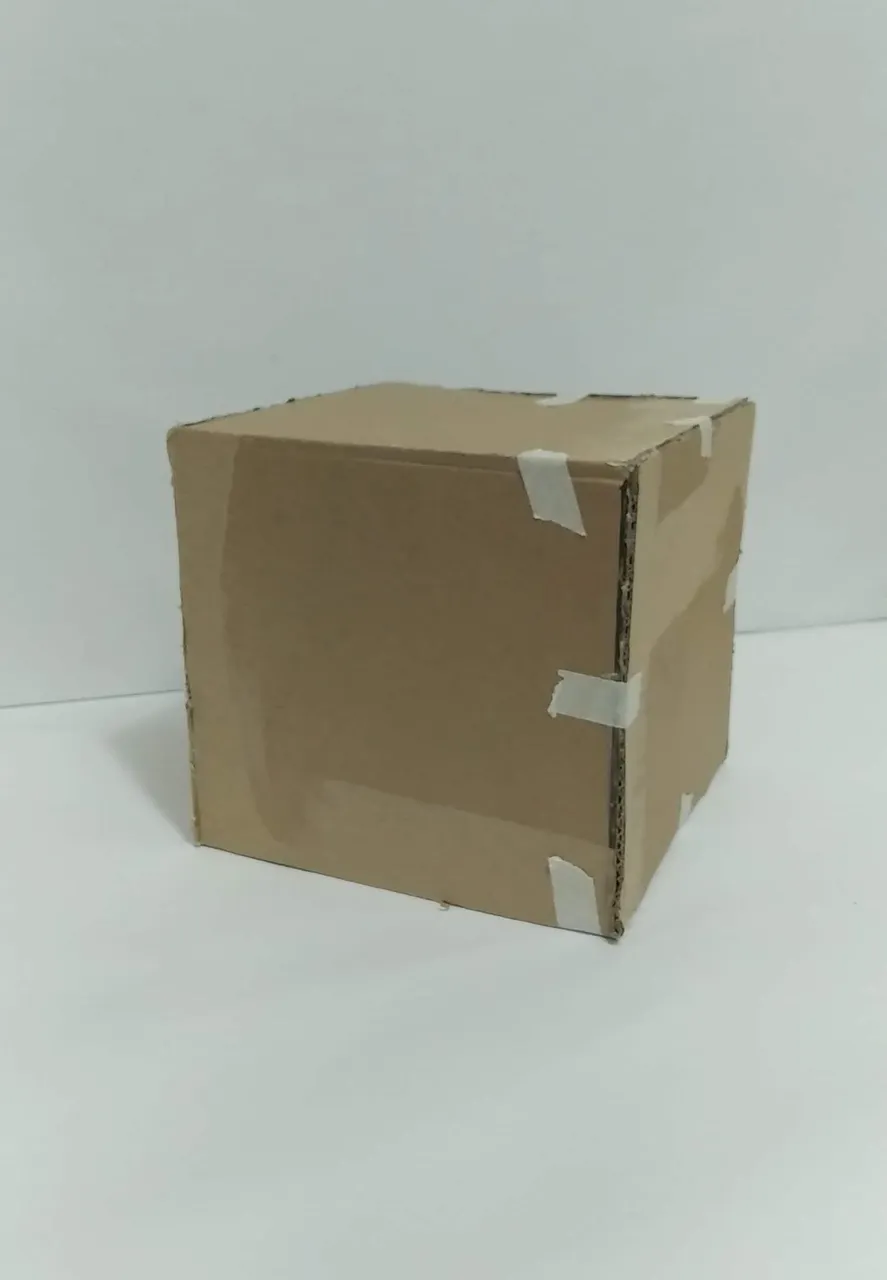
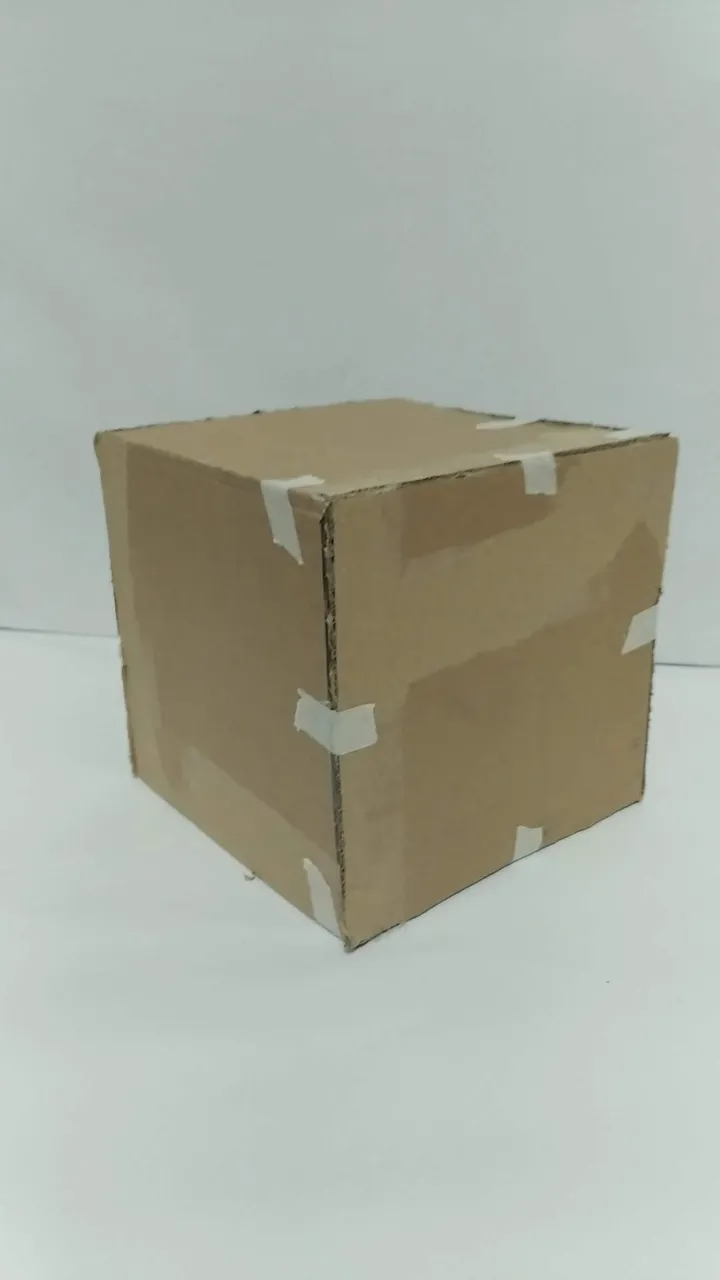
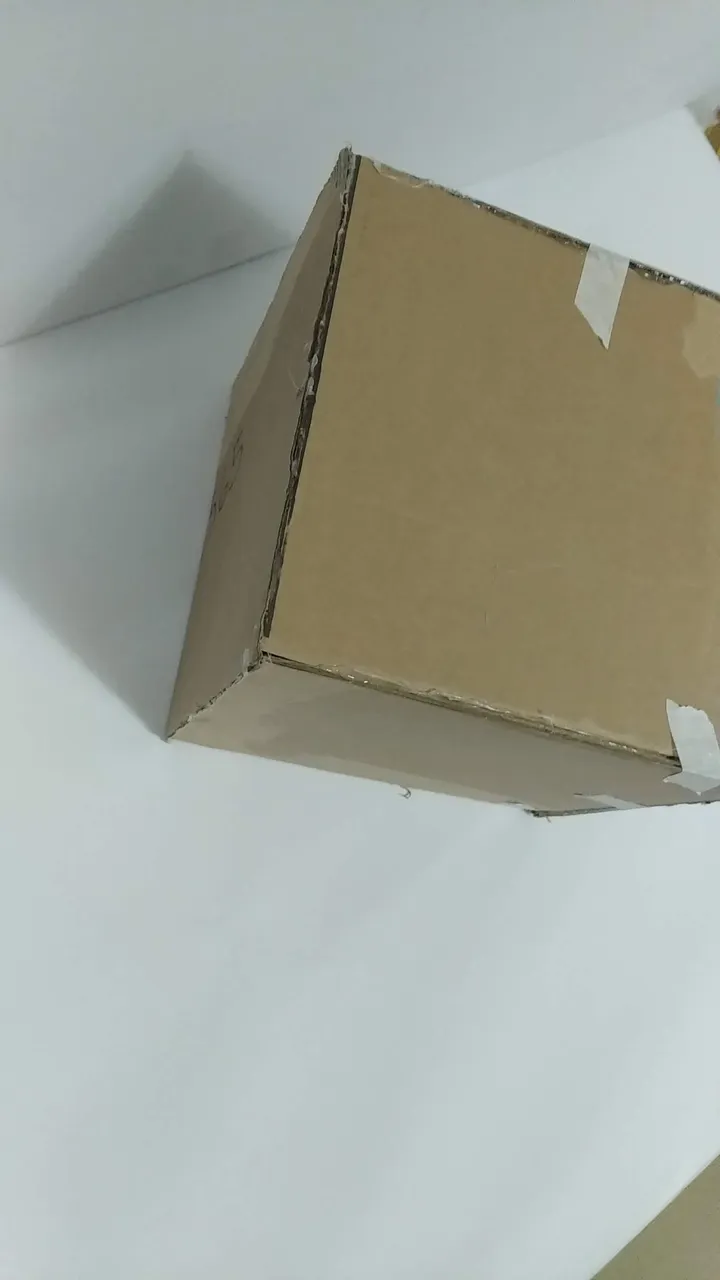
- Pegar con silicón caliente los 4 cuadros hasta formar un cubo.
- Para suavizar los bordes, pegar papel craft (o papel blanco) por todos los bordes del cubo, pegarlo con silicón frio.
- A cada lado del cubo pegar la cartulina de color, cuidando quede bien pegada en todas las esquinas. Utilizar silicón frio.
- Con el fondo de color listo, recortar ojos y bocas de diversas formas (según se presentan en el juego) y pegar con silicón frio. Darle profundidad a los colores con los marcadores de colores.
- ¡Listo a disfrutar de la magia de crear en casa!
English
Hello friends at hive, happy and blessed Wednesday.
Continuing with the decoration inspired by the video game "Geometry Dash" today I will show you how to make a simple and easy decoration to put on the table. This is a very colorful video game and any element that is made will be cheerful and fun.our little friend Abraham likes especially the square figures present in the game, that's why you will see that in almost all the decoration the squares are the central element.
As I told you in the previous post "this decoration is composed of several elements, and as each of them took a different process, I decided to separate the processes in different posts so you can better appreciate the process of each thing."
To decorate the table (part 2) a 20x20 cm cube was made with different faces on all sides, this was thought so that from any angle you could appreciate the faces of the paintings. Additionally, a picture was made simulating the "play" key of the game.
Without further ado, and hoping you enjoy the work done with love, I leave you the materials used, the process and the images of the work.
- Recycled cardboard, preferably double channel (thick).
- Color cardboard: green, purple, yellow, blue, red, black, yellow, white, lilac, light blue, etc. (to taste)
- Strips of craf paper (or white paper).
- Color markers
- Hot glue
- Cold silicone
- Scissors
- Ruler
- Pencil
- Cutter
PLAY PICTURE:
- Mark on the thick cardboard a 20x20 centimeter square and cut out.
- Cover the edges with cardboard to give it a better finish, for that cut out the white cardboard one centimeter wide by 20 centimeters long and glue with cold silicone all around the edge.
- Glue white cardboard on the front side and highlight with blue marker on all sides.
- Glue a cross on green cardboard, highlighting its edges with green marker.
- Paste the "play" symbol on yellow cardboard, highlighting it with green marker.
- Cut out a triangle in thick cardboard and glue with hot silicone on the back to support the picture.
- Ready to enjoy the magic of creating at home!
CUBE:
- Mark on the thick cardboard four (4) squares of 20 centimeters on all sides.
- Cut out the 4 squares with the help of the cutter.
- Glue with hot silicone the 4 squares to form a cube.
- To smooth the edges, glue craft paper (or white paper) all around the edges of the cube, glue it with cold silicone.
- On each side of the cube, glue the colored cardboard, making sure it is well glued on all corners. Use cold silicone.
- With the colored background ready, cut out eyes and mouths in different shapes (as presented in the game) and glue with cold silicone. Give depth to the colors with colored markers.
- Ready to enjoy the magic of creating at home!
Translated with www.DeepL.com/Translator (free version)
IMÁGENES / IMAGES

SALUDOS / REGARDS
Todas las Fotos fueron tomadas con mi teléfono Redmi 7A.
Contenido original de @keco (fotos y texto) - Todos los derechos reservados Publicado en HIVE así como en mi instagram : http://instagram.com/carton_pintura_algo_mas
All Photos were taken with my Redmi 7A phone.
Original content from @keco (photos and text) - All rights reserved Posted on HIVE as well as on my instagram: http://instagram.com/carton_pintura_algo_mas