
Español
Para mis lectores, deseo que ésta sea una gran semana, llena de éxitos..
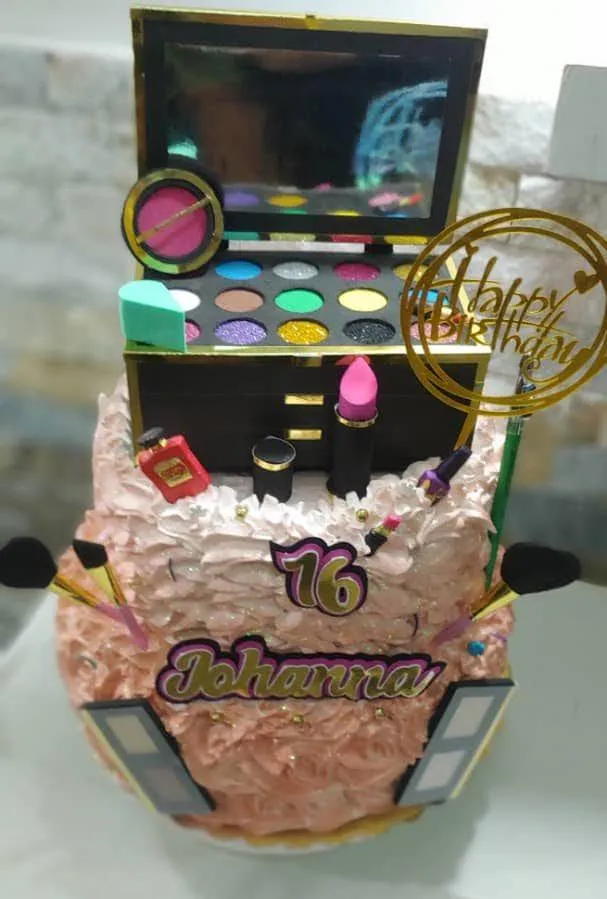
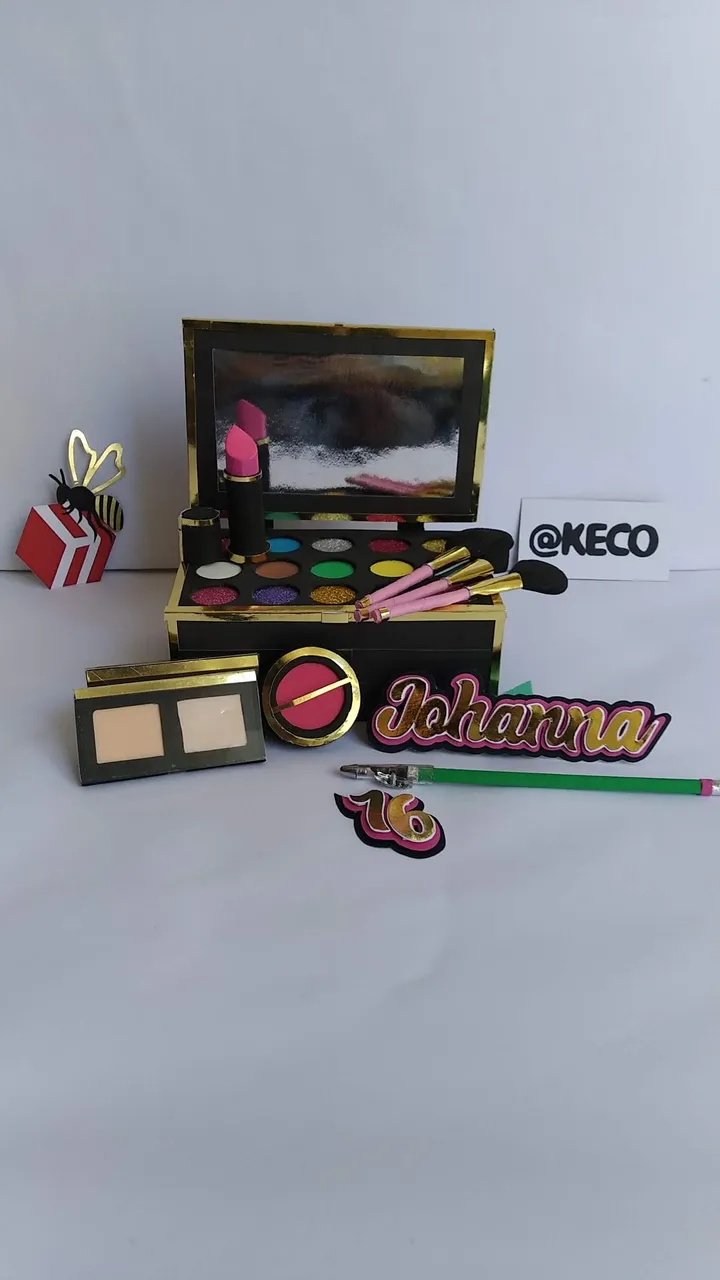
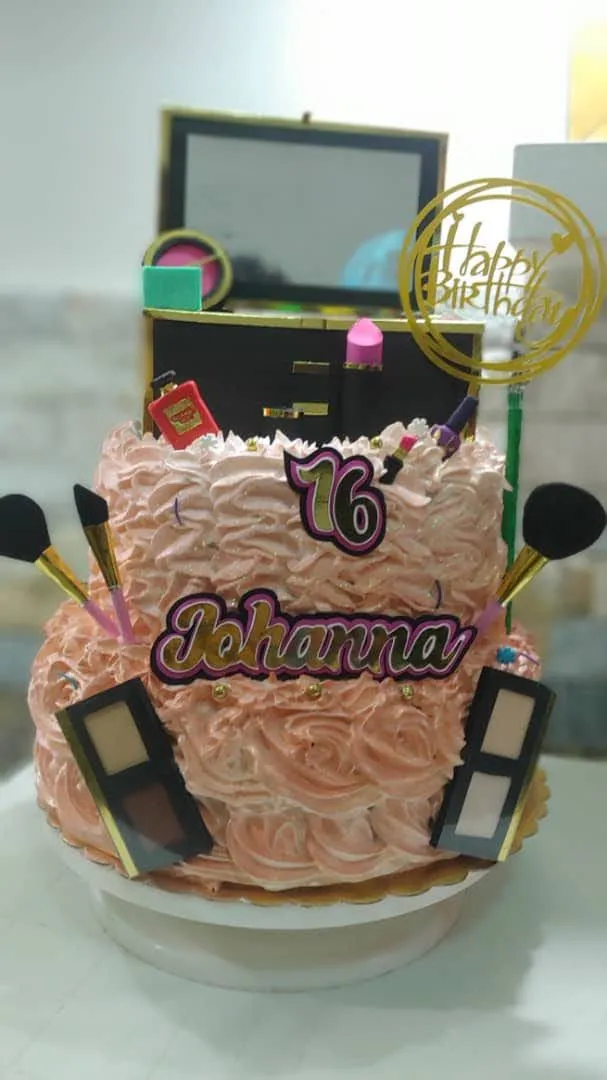
Hoy les mostraré uno de los topper más complejos realizados hasta el momento (je,je,je) no porque fuera difícil, nada que ver, sino por la cantidad de detalles que implicó. Sin embargo, valió la pena hacerlo, pues la homenajeada llamada Johanna fue sorprendida y quedó enamorada del hermoso y delicioso pastel realizado por mi súper pastelera favorita Mayda.
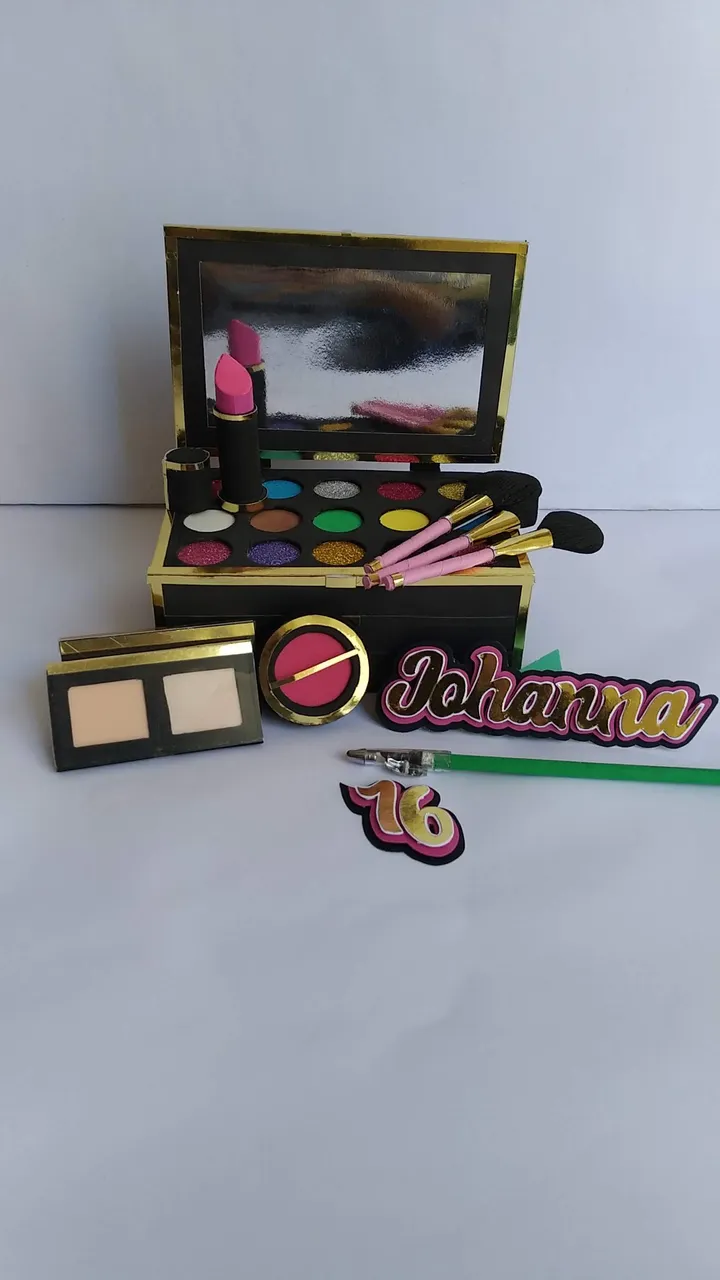
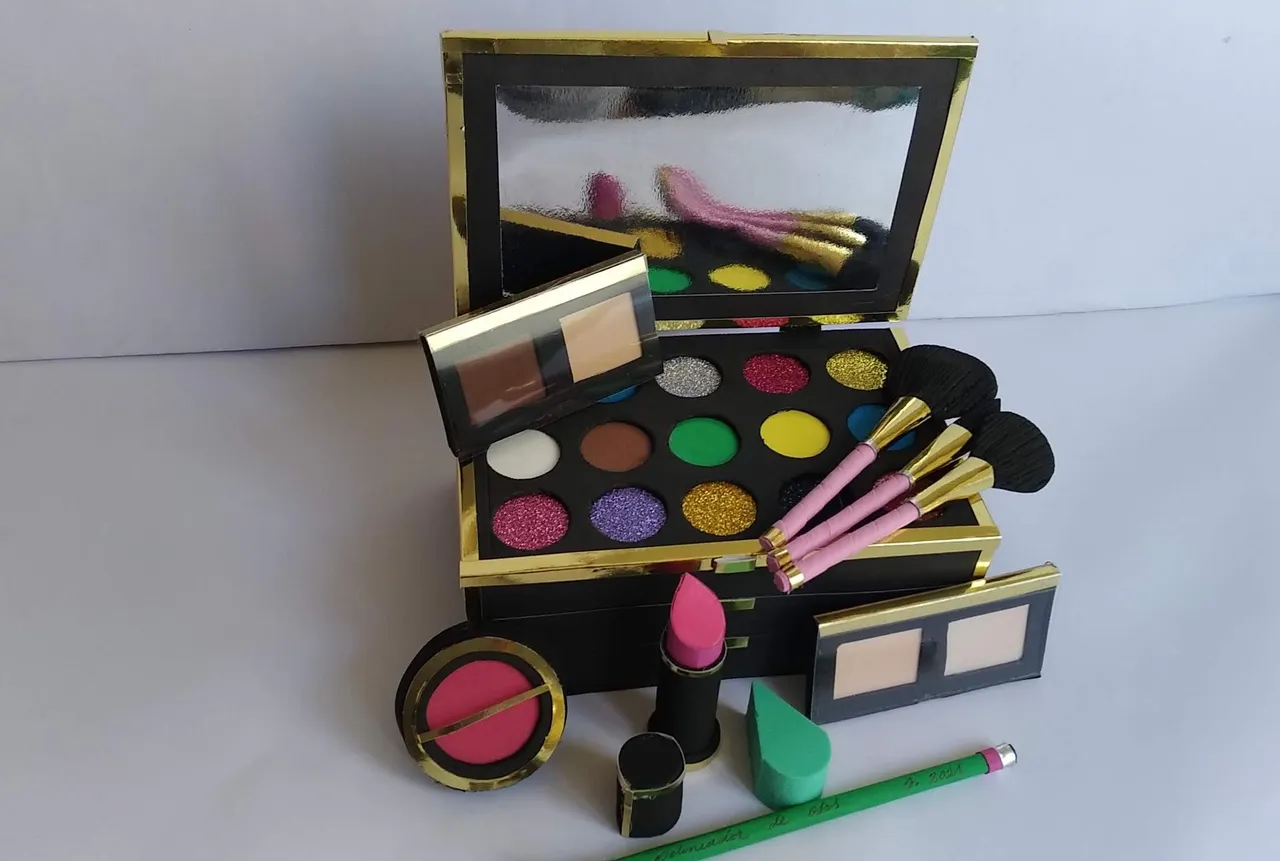
Este topper compuesto de varias piezas esta realizado en su mayoría en foami, cartulina y cartón. Se realizó para la decoración un estuche de sombras, un rubor, tres brochas, una pintura de labios, dos juegos de polvos compactos, un lápiz de ojos, y una esponja para base.
Intentaré describir lo mejor posible el paso a paso (un poco largo) para que aquel que lo desee intente en casa crear algo parecido o mejor y así sorprender a familiares y/o amigos. Sin más y esperando disfruten del trabajo realizado con amor, les dejo los materiales utilizados, el proceso y las imágenes del trabajo.
- Cartón grueso (nuevo o reutilizable)
- Cartón fino (nuevo o reutilizable)
- Carrete de hilo plástico (nuevo o reutilizable)
- 2 Bisagras pequeñas
- Palitos de madera de 12”
- Foami plano negro
- Foami rosado suave
- Foamis de colores diversos mates y brillantes (para las sombras, pequeños retazos)
- Cartulina Negra
- Cartulina Rosada
- Cartulina plateada tipo espejo
- Cartulina dorada tipo espejo
- Acetato (pequeños trozos)
- Cinta adhesiva transparente
- Silicón frío.
- Silicón caliente.
- Cutter.
- Tijera.
- Lápiz.
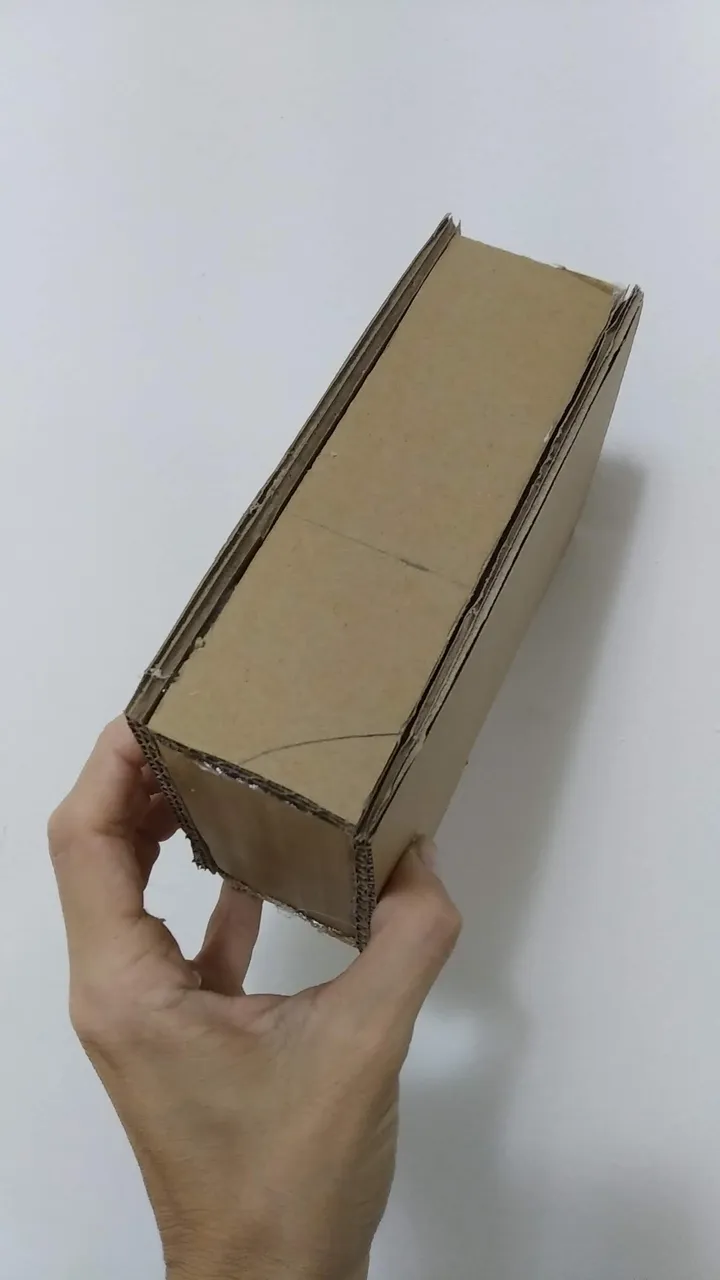
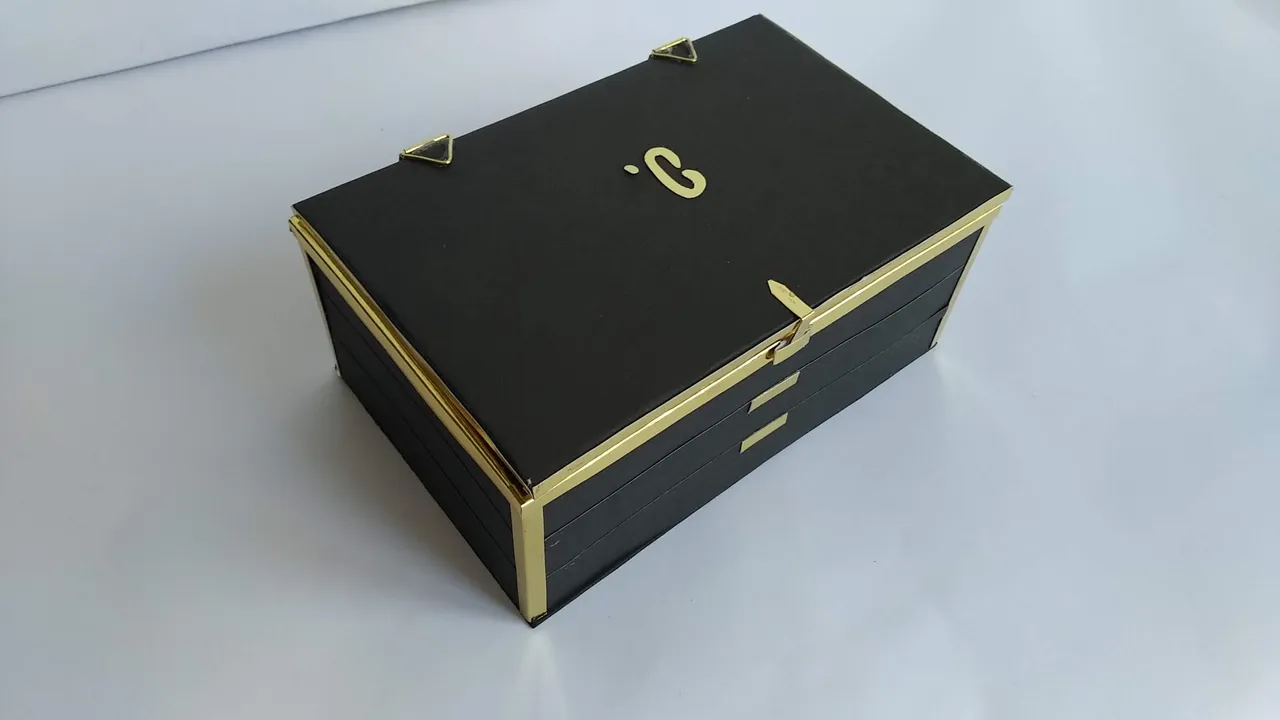
Estuche de Maquillaje:
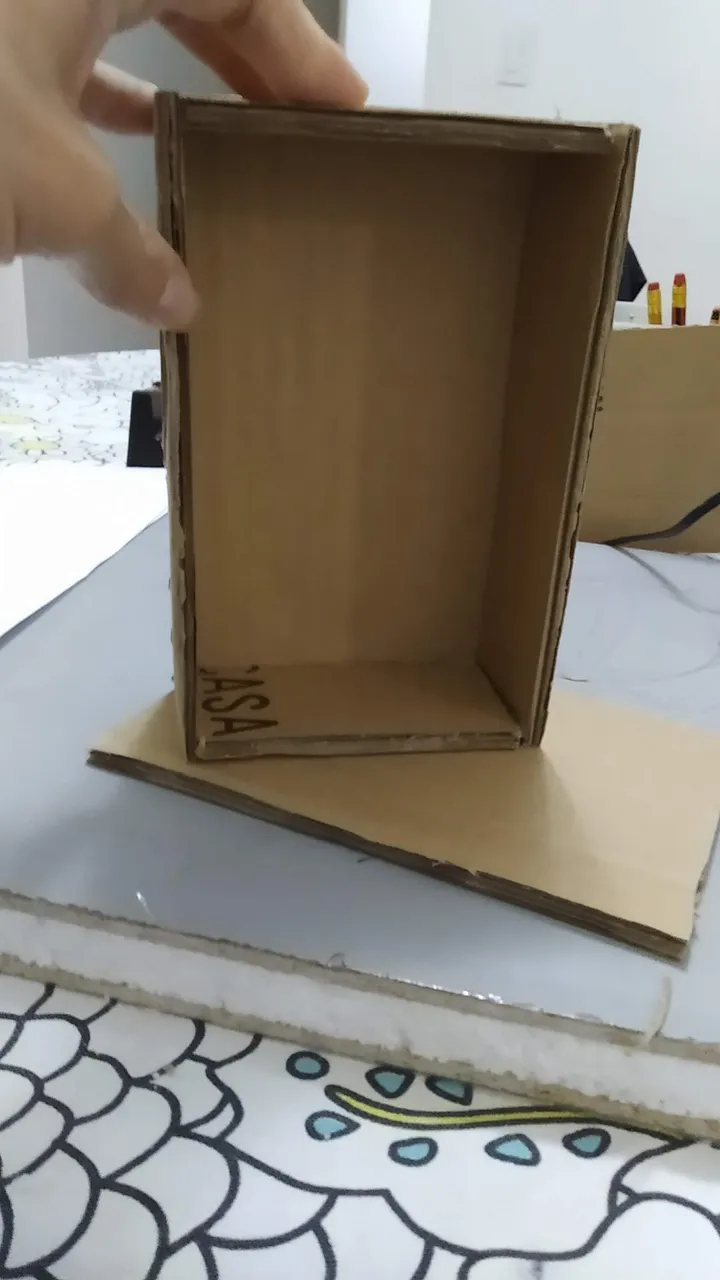
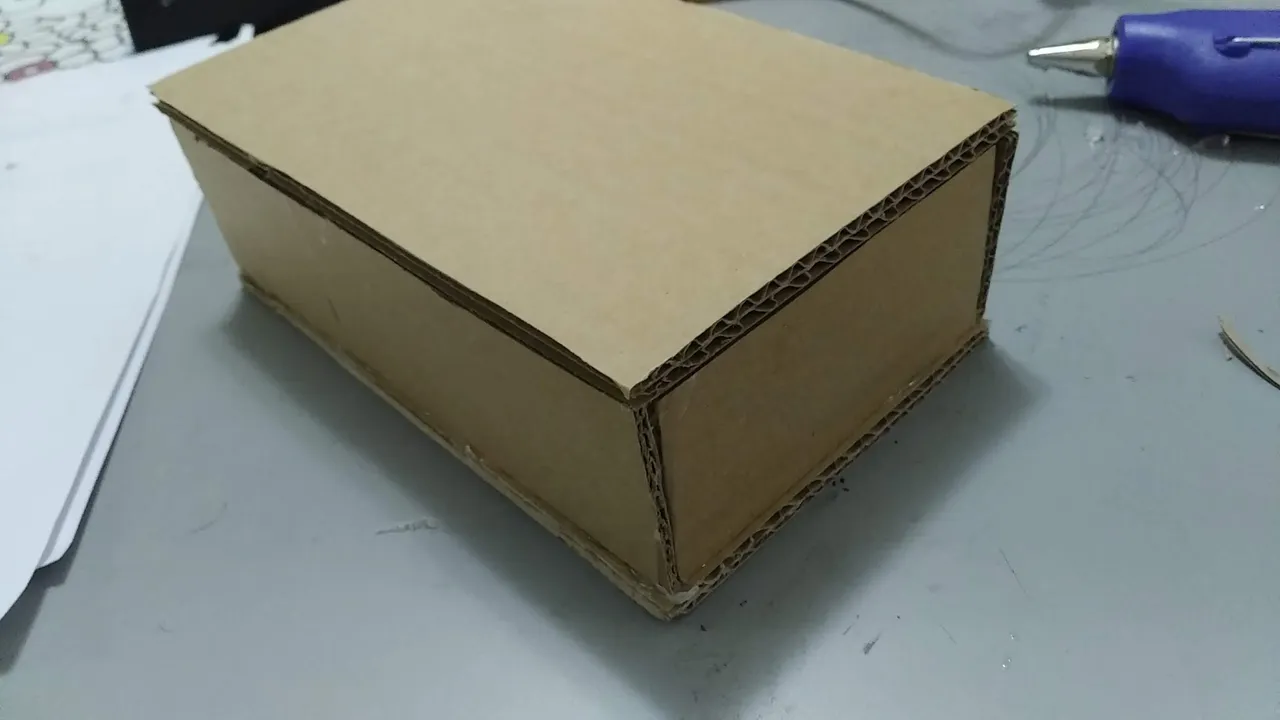
- Debemos hacer una caja rectangular, para ello cortaremos el cartón en las medidas deseadas. Este estuche midió 14 cm de largo por 6 centímetros de alto y 8 centímetros de profundidad.
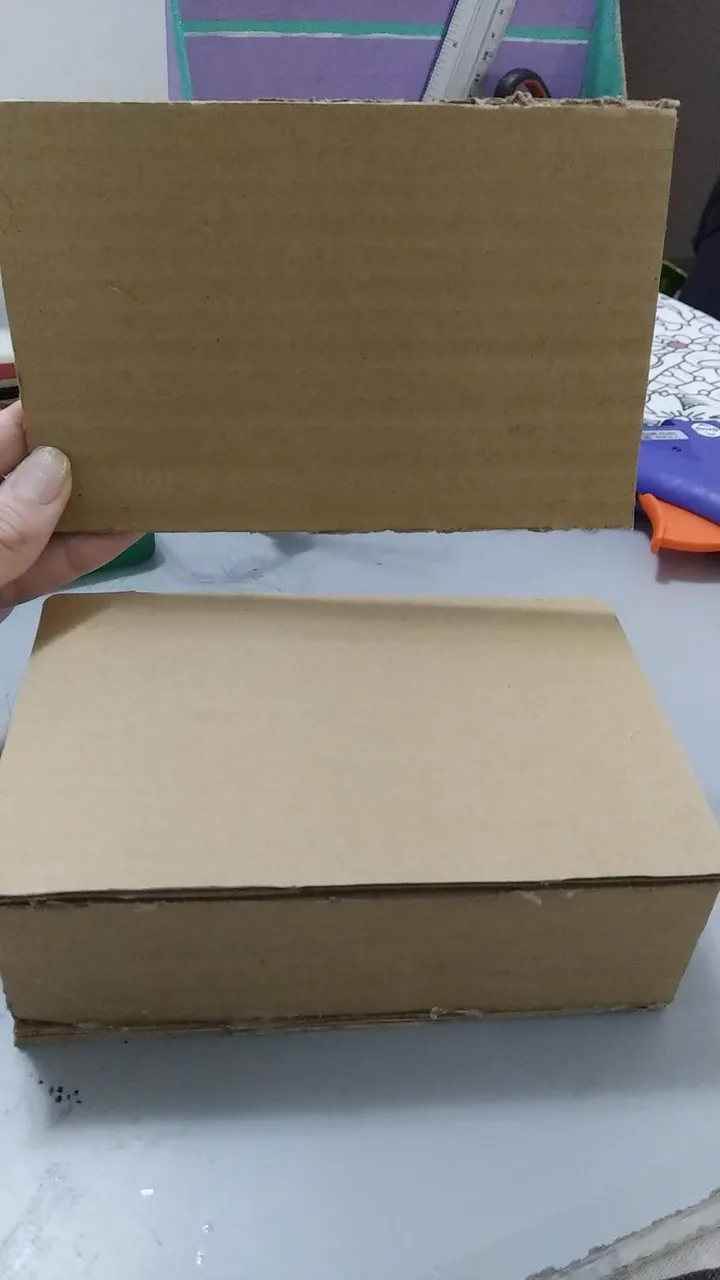
- Pegar con silicón caliente.
- Cortar el cartón que será el espejo a la misma medida del rectángulo anterior 14 x 8 cm.
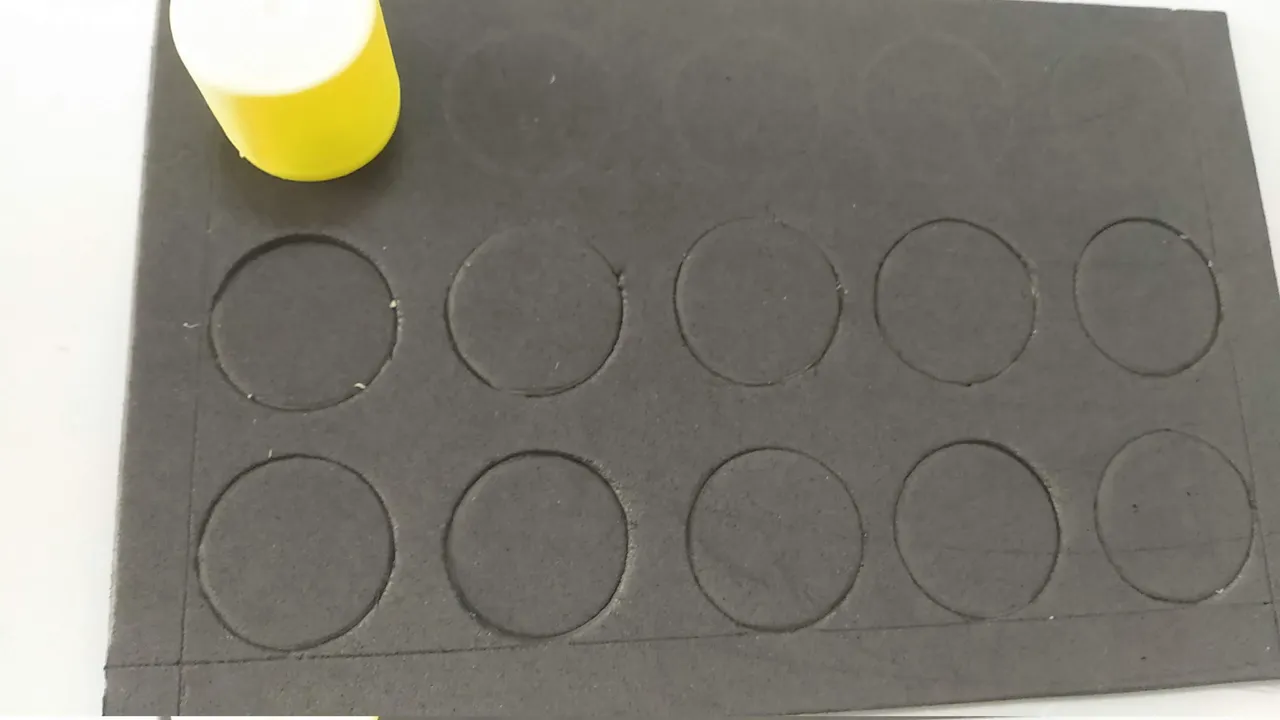
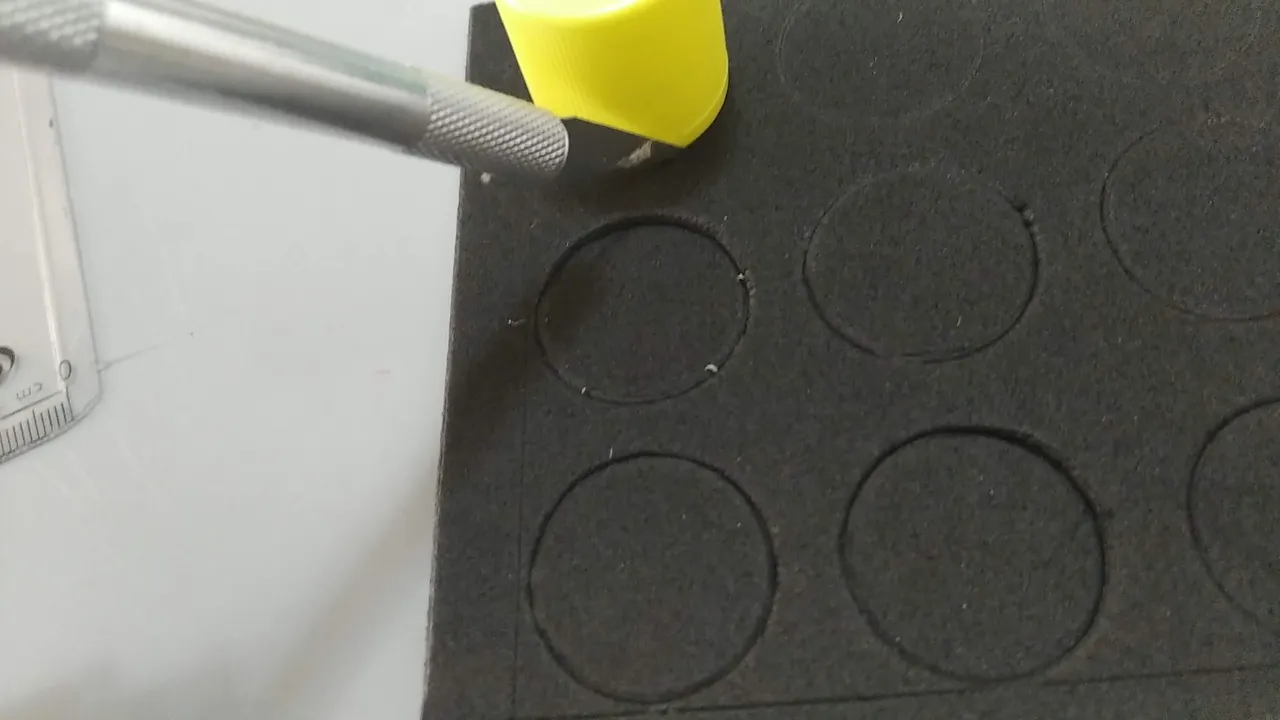
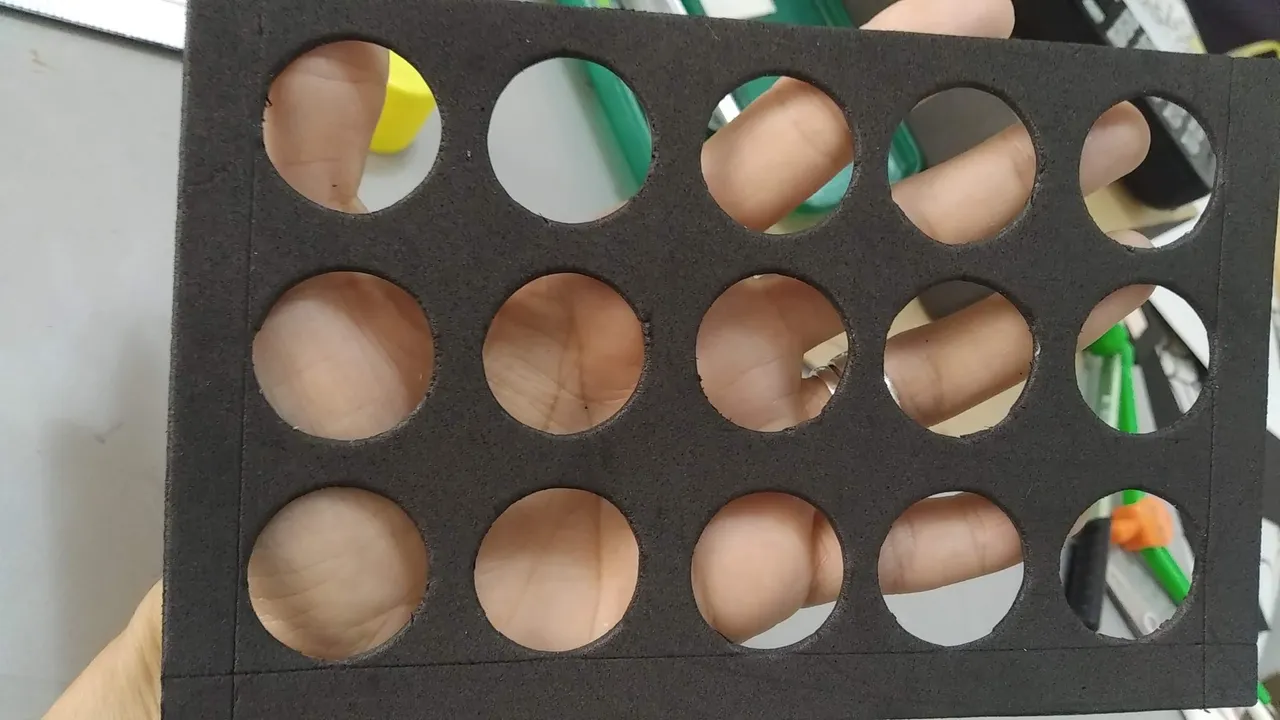
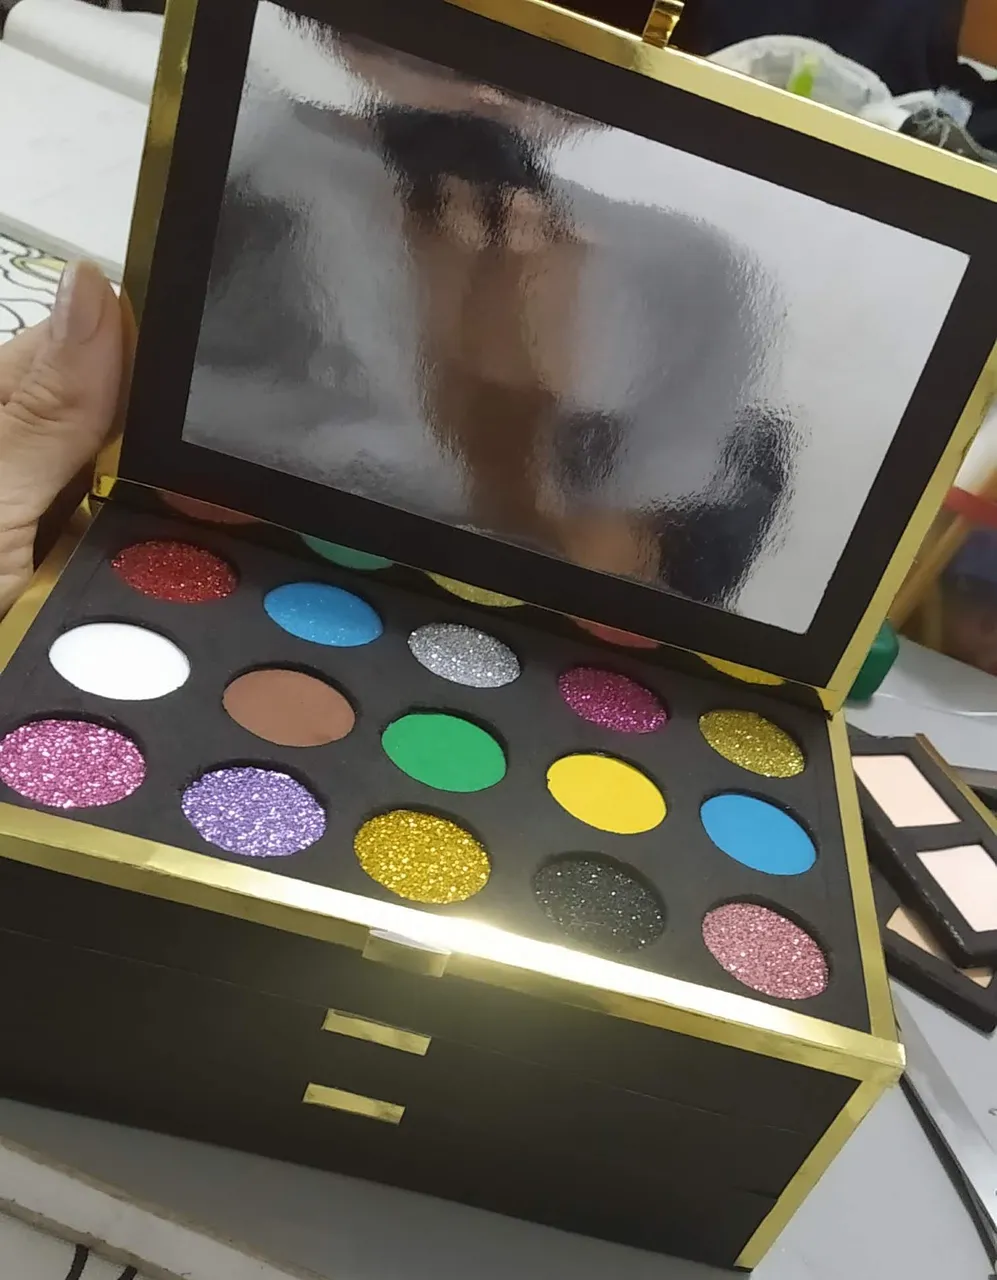
- Medir y cortar el foami negro a la misma medida del rectángulo y hacer perforaciones con la ayuda del cutter.
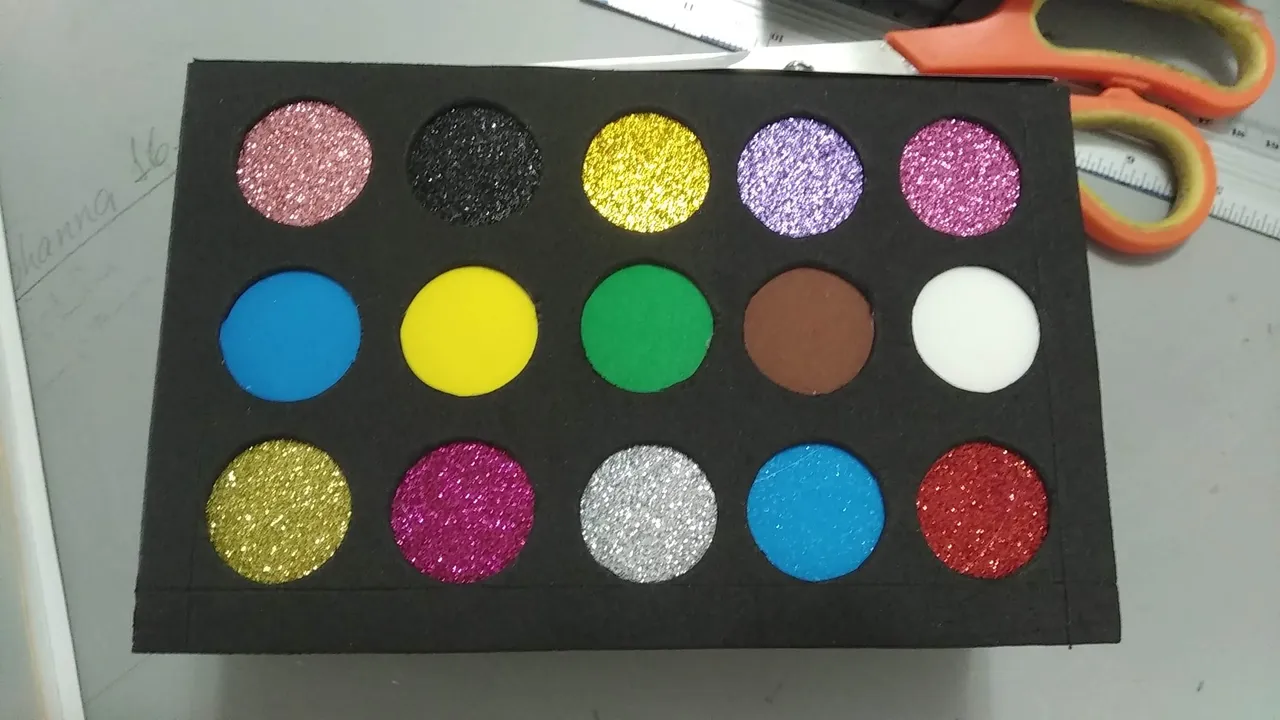
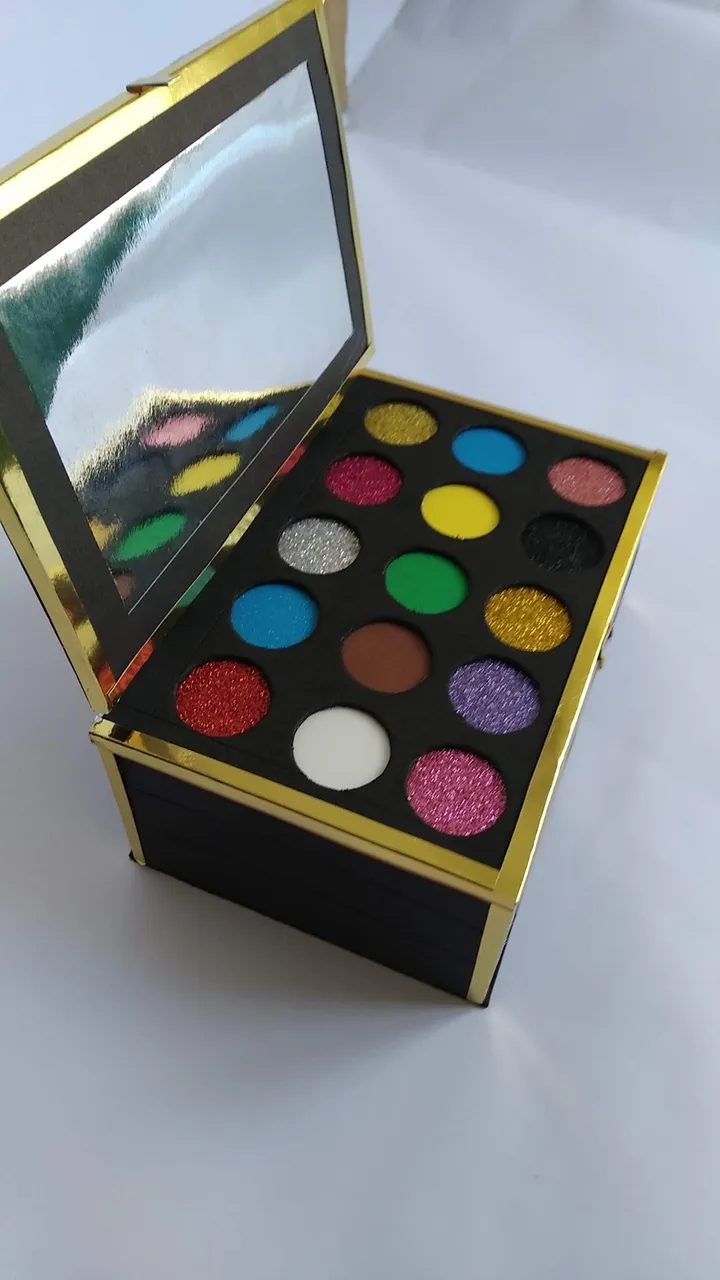
- Cuando se hayan abierto todas las perforaciones de manera simétrica, seleccionar los foamis de colores variados (mates y brillantes) y pegar por al foami negro, cuidando el foami negro quede en la parte superior y los retazos abajo. Utilizar silicón frio.
- Pegar e foami negro al rectángulo de cartón con silicón frio.
- Forrar el resto de la caja por los demás lados con cartulina negra.
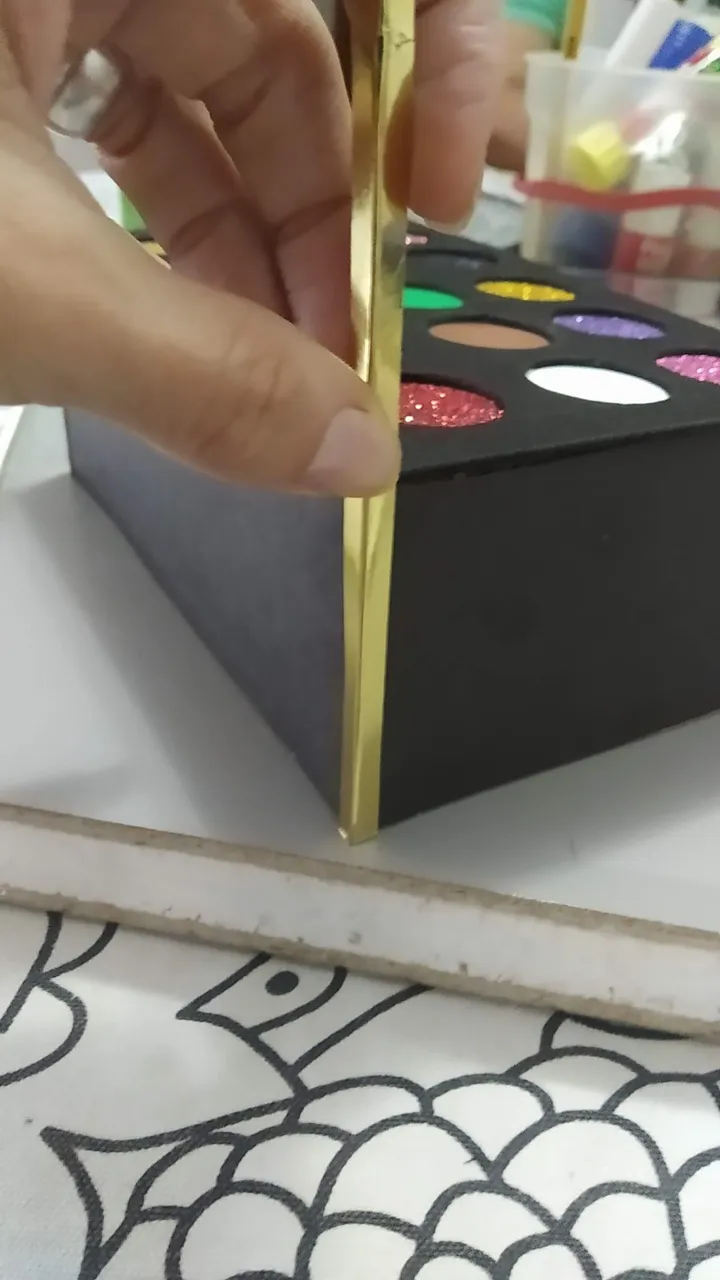
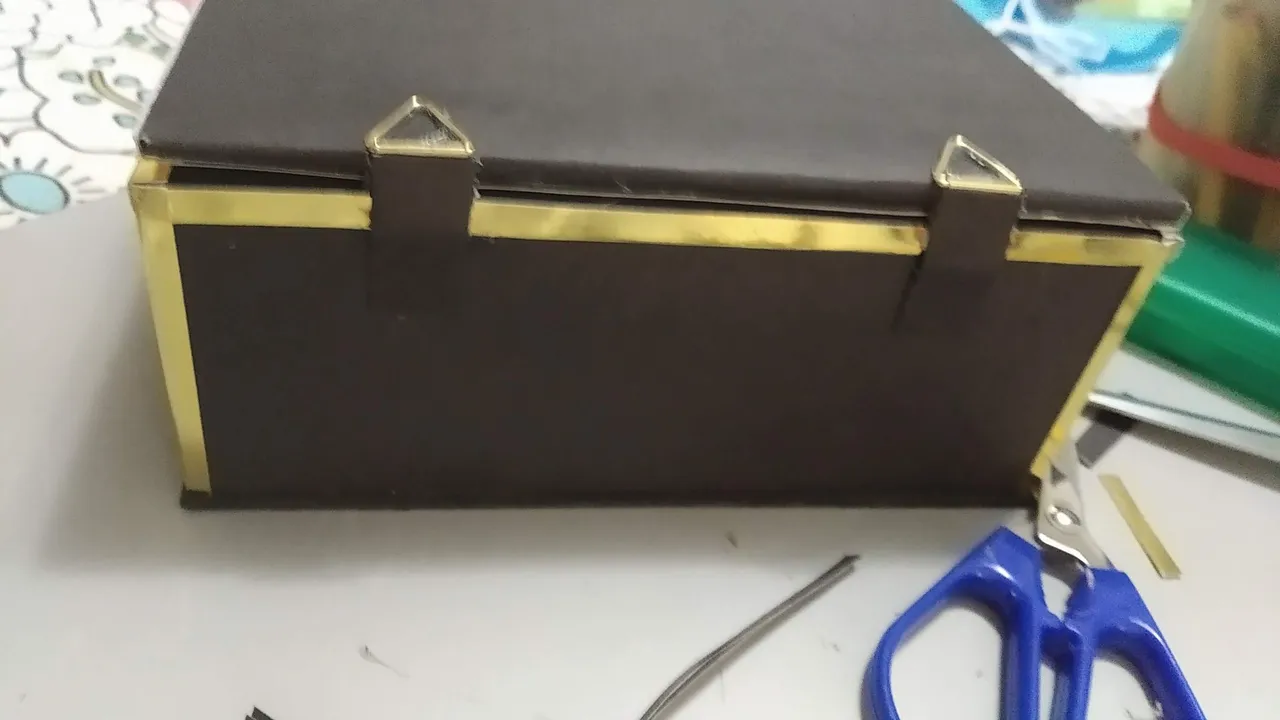
- Marcar y cortar pequeños rectángulos de cartulina dorada metalizada y pegar por las cuatro esquinas de la caja y los bordes superiores de la caja. Este rectángulo deberá doblarse en dos para formar un pequeño perfil que cubrirá dos lados.
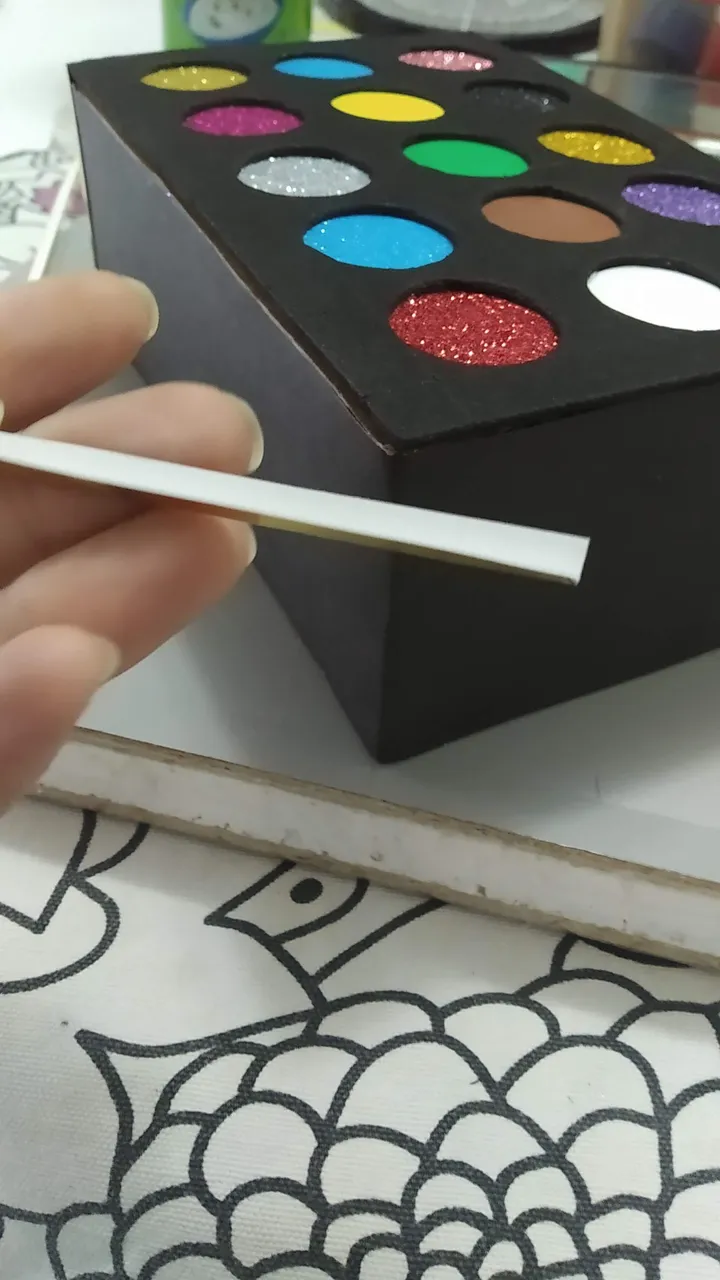
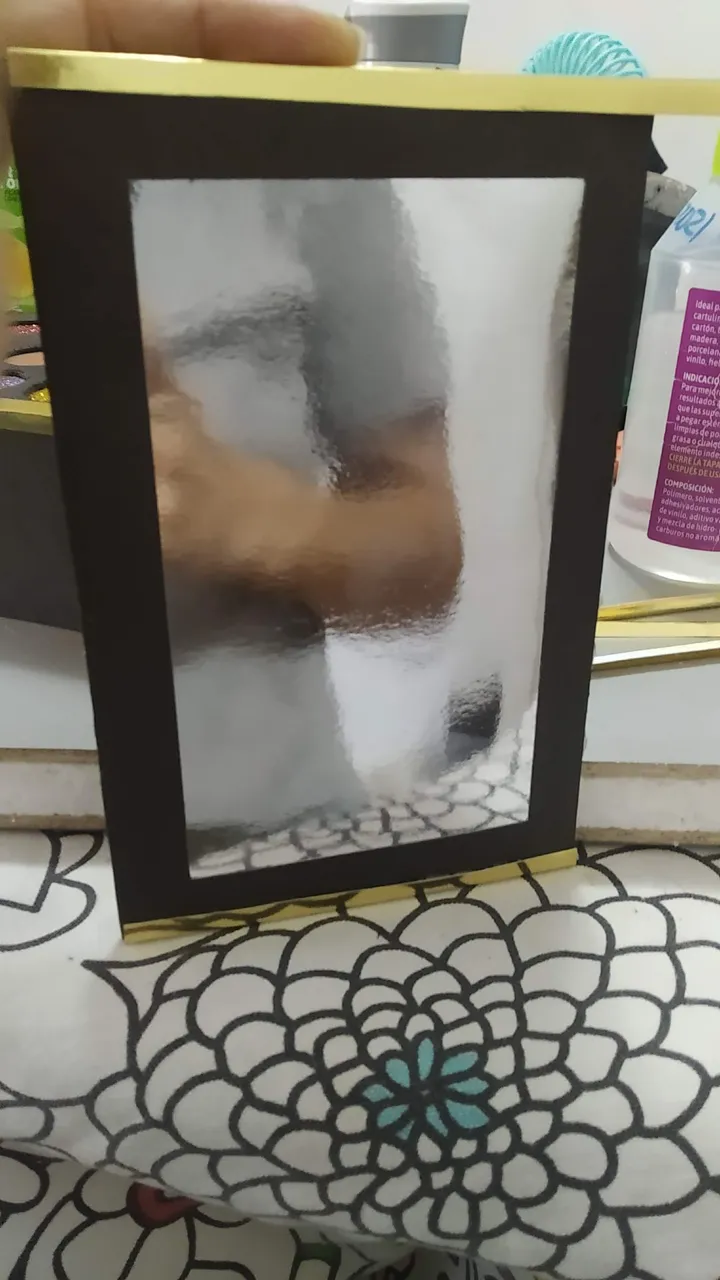
- Forrar la tapa con cartulina negra por un lado y con cartulina plateada por el otro para simular el espejo del estuche. Tres de sus lados deberán tener borde dorado (paso 8)
- Pegar con silicón caliente las bisagras a un lado de la caja y la otra a la tapa, a fin de que pueda abrir y cerrar como un estuche de verdad. Para que se vea estéticamente mejor forrar las uniones con cartulina negra.
Polvos compactos dúos:
- Cortar dos (2) rectángulos de foami negro, éstos midieron 6 cm x 4 cm.
- Uno de los rectángulos perforar con el cutter formando dos cuadrados y pegando en la parte interna foamis de colores pasteles (semejante al paso 5)
- Pegar la base anterior al rectángulo completo y forrar sus bordes con pequeñas tiras de foami para evitar se vea las uniones entre ambos y los foamis de colores pastel.
- Del lado frontal pegarle un borde dorado (el mismo proceso del paso 8).
- Recortar acetato a la medida de la pieza y pegar con cinta adhesiva transparente, esto a fin de simular la tapa plástica del estuche.
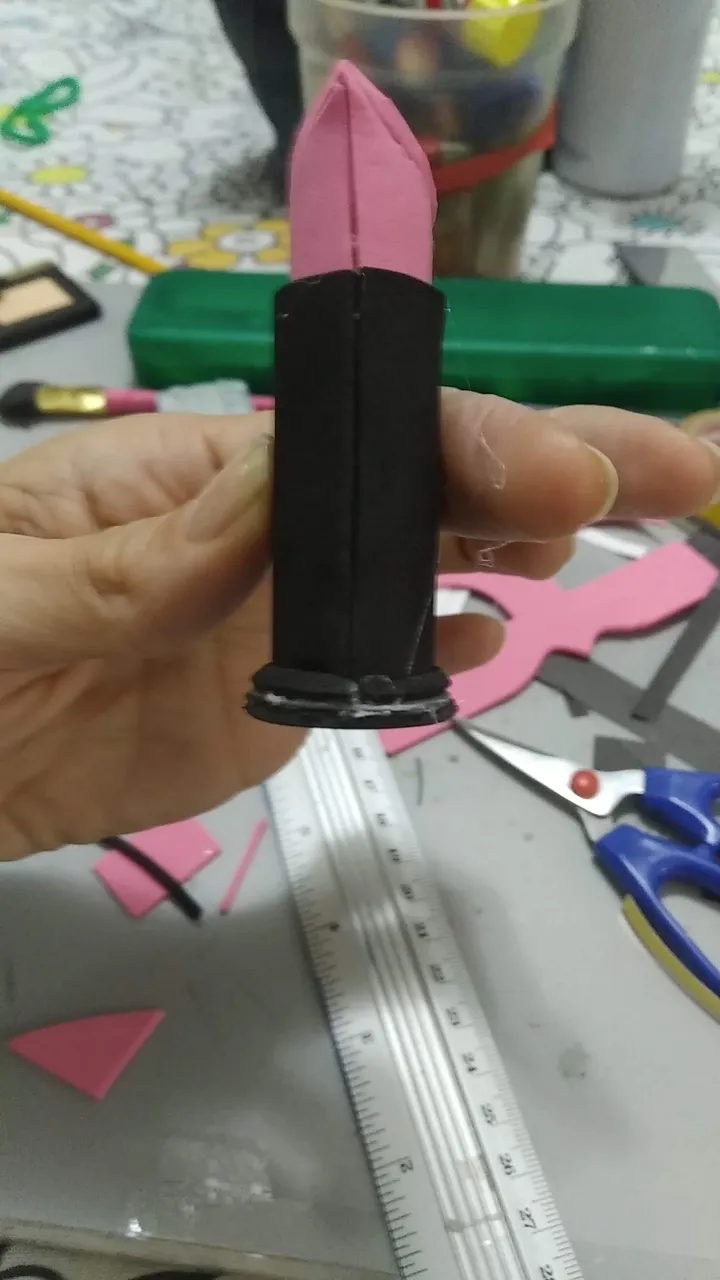
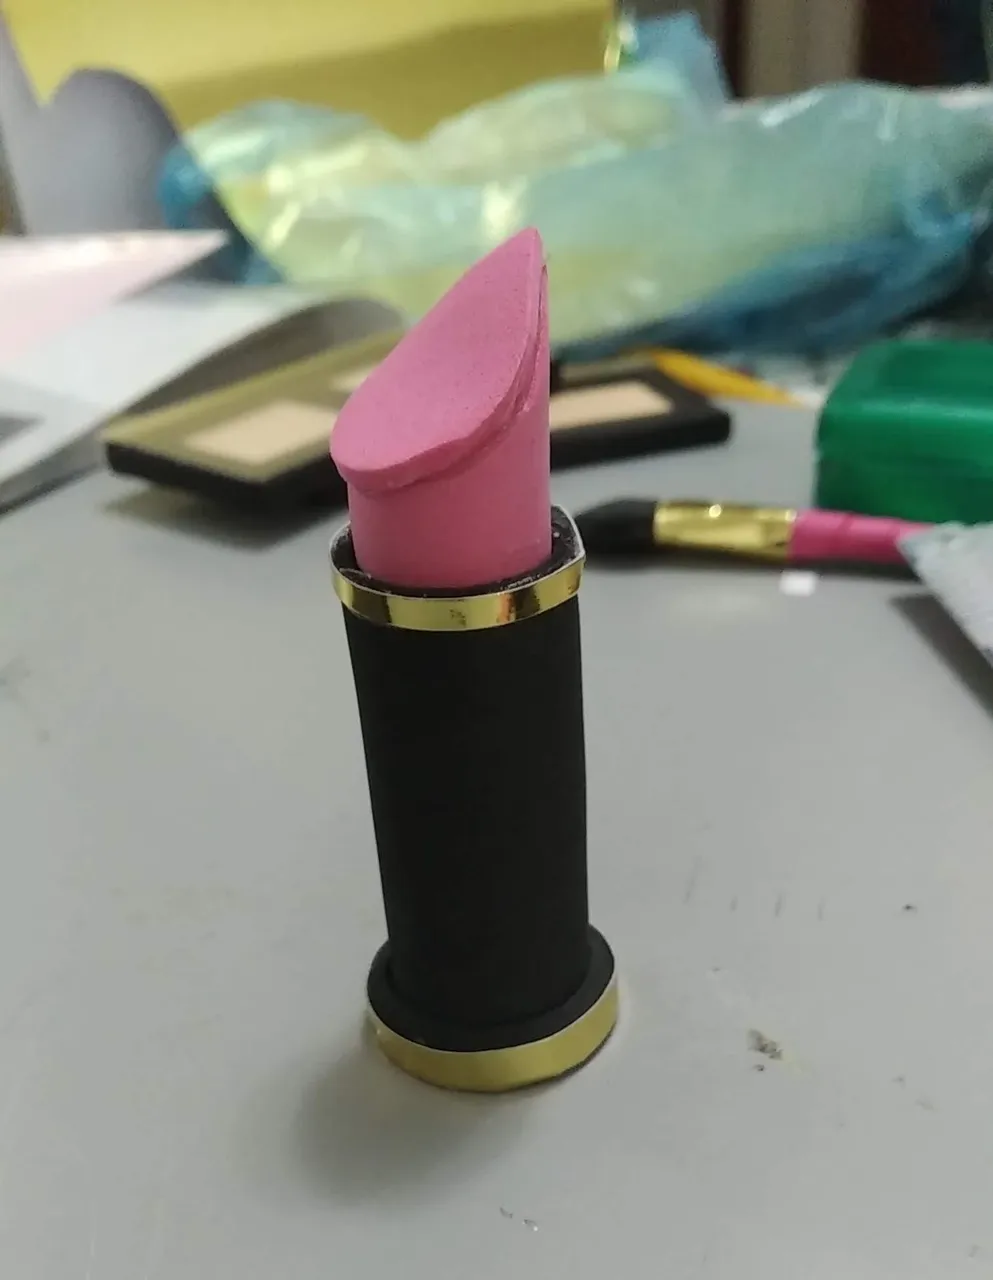
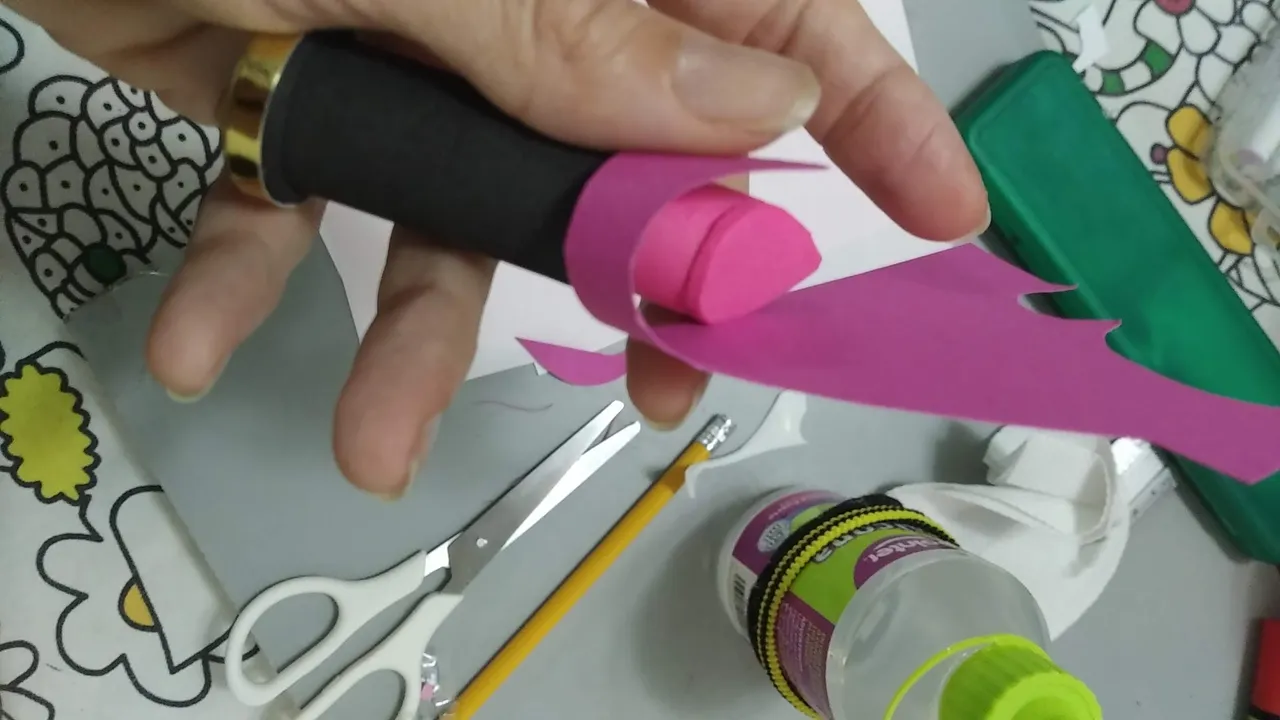
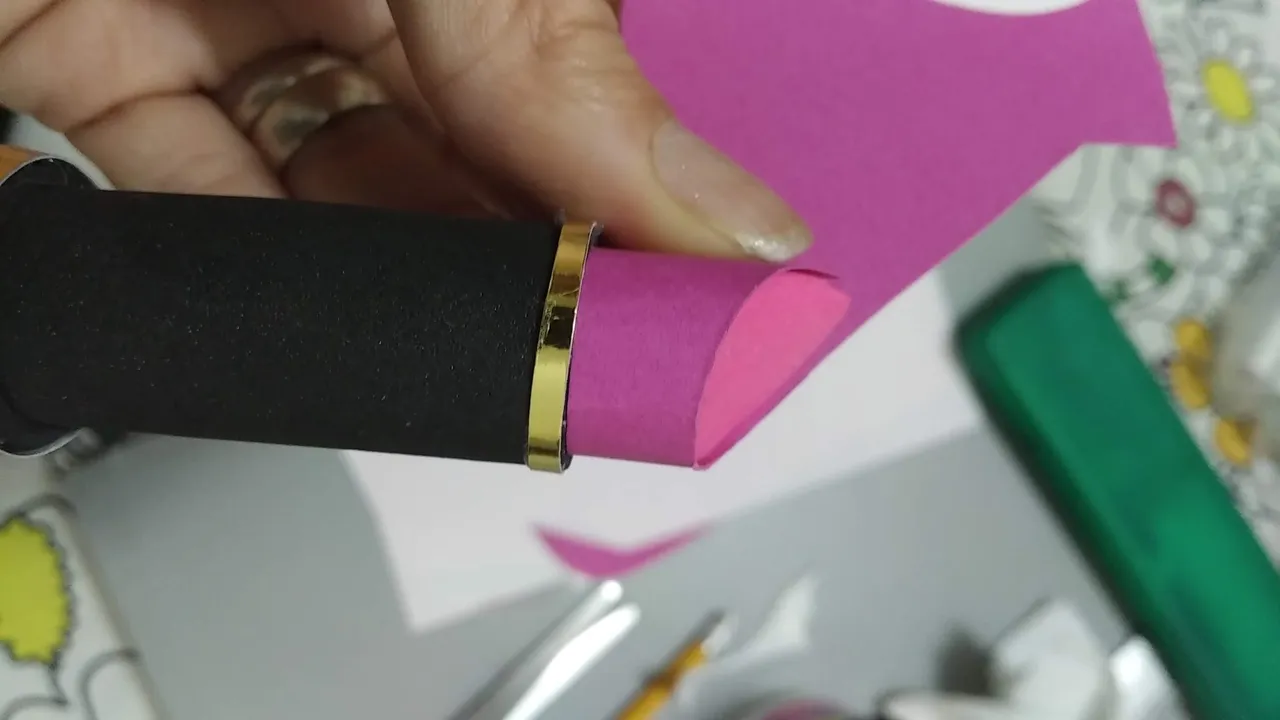
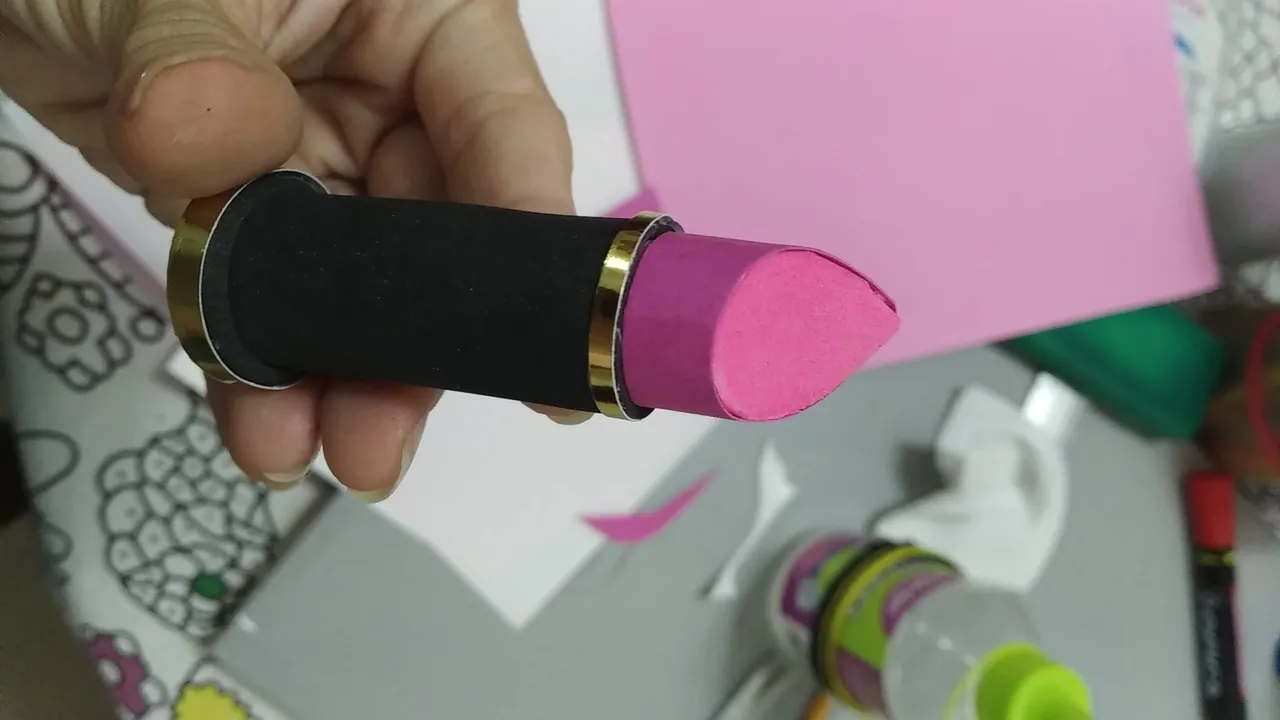
Pintura de Labios:
- Tomar el carrete de hilo y cortarlo en diagonal
- Pegar el foami fucsia y ajustarlo al corte del carrete
- Medir y cortar foami negro y pegarlo a la base restante, este proceso se repetirá dos veces, así se podrá simular que el fucsia esta dentro del negro. En la segunda capa pegar un poco sobre el foami fucsia. Tratar de que los bordes de unión queden ambos a la misma altura (fucsia y negro)
- La base del carrete como sobresale, forrarla con foami.
- Ponerle a los bordes cartulina dorada.
- Para evitar la unión del foami fuscia se vea pegarle un pequeño borde de cartulina de la parte superior hasta el borde negro de la base.
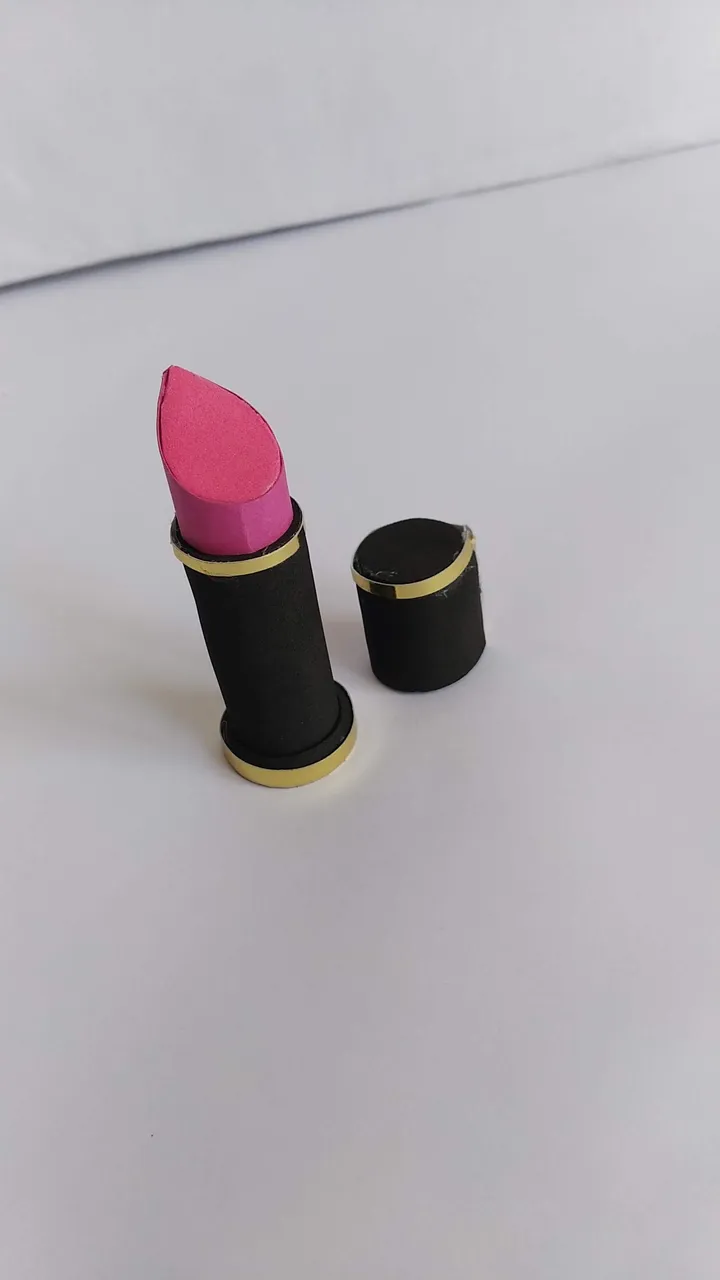
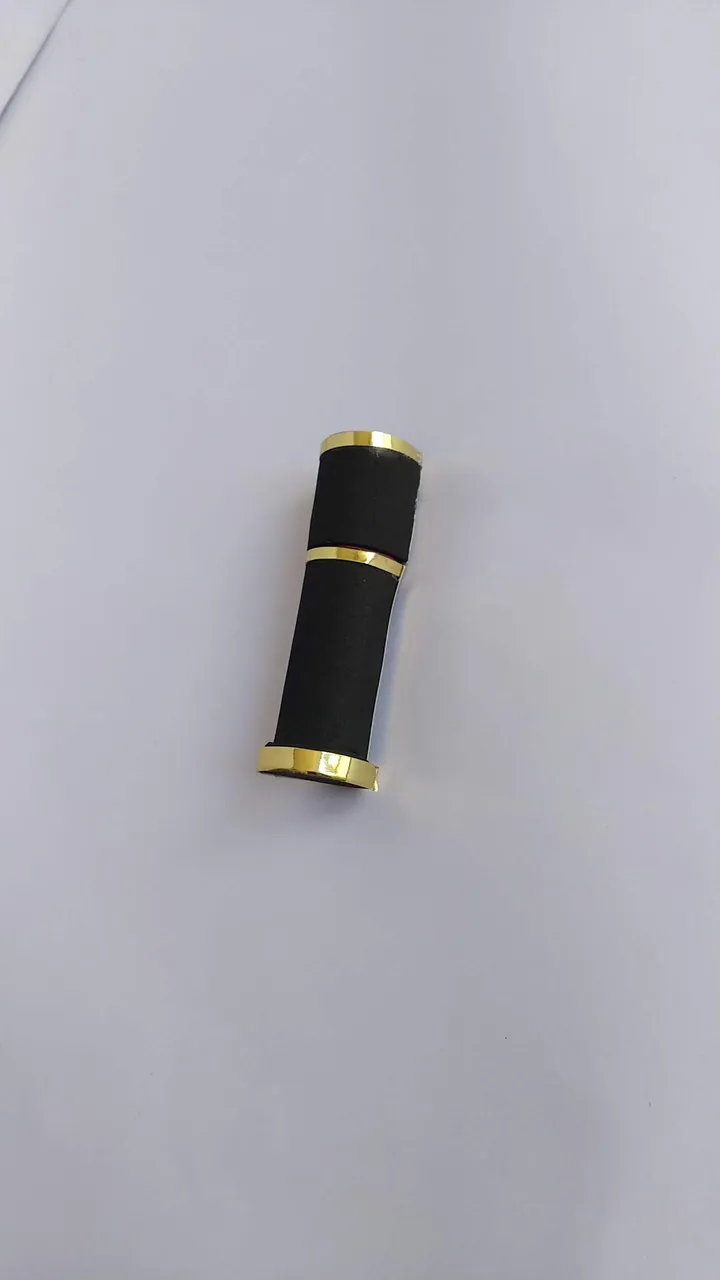
- Para la tapa, hacer un pequeño cilindro de acuerdo al diámetro de la base y al alto de la barra labial y tapar por unos de sus lados, decorando con cartulina dorada por sus bordes.
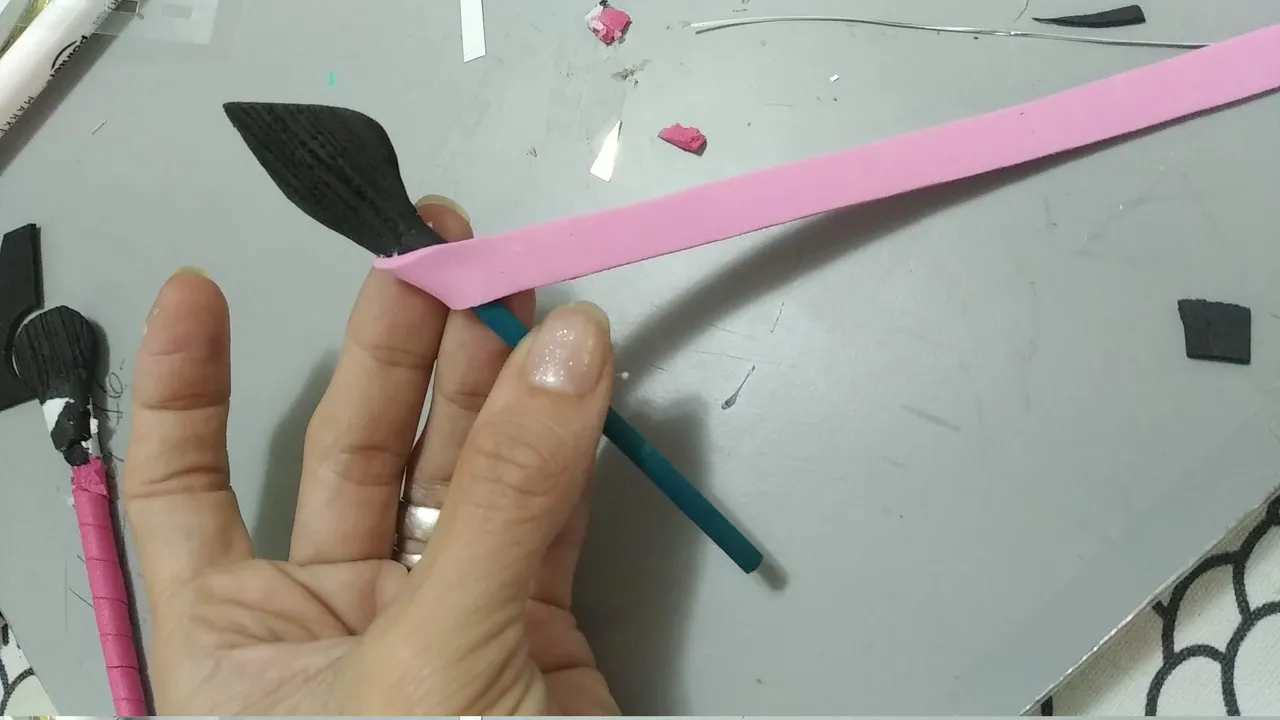
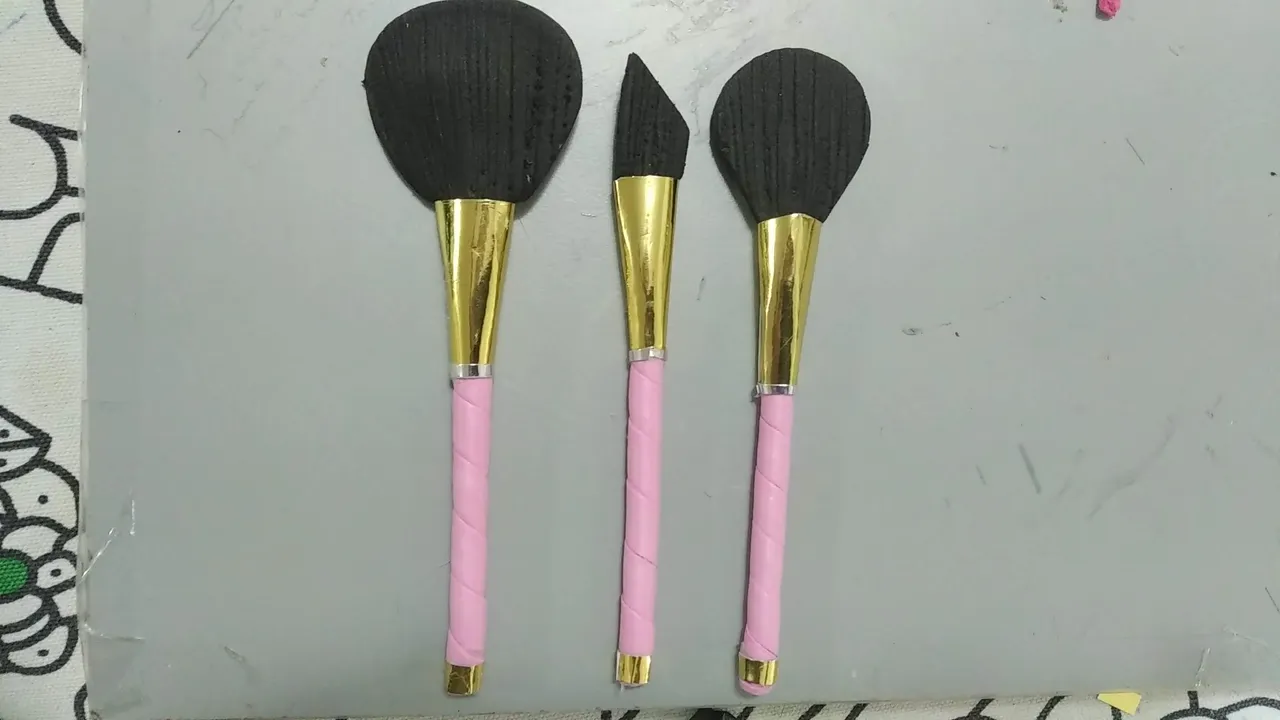
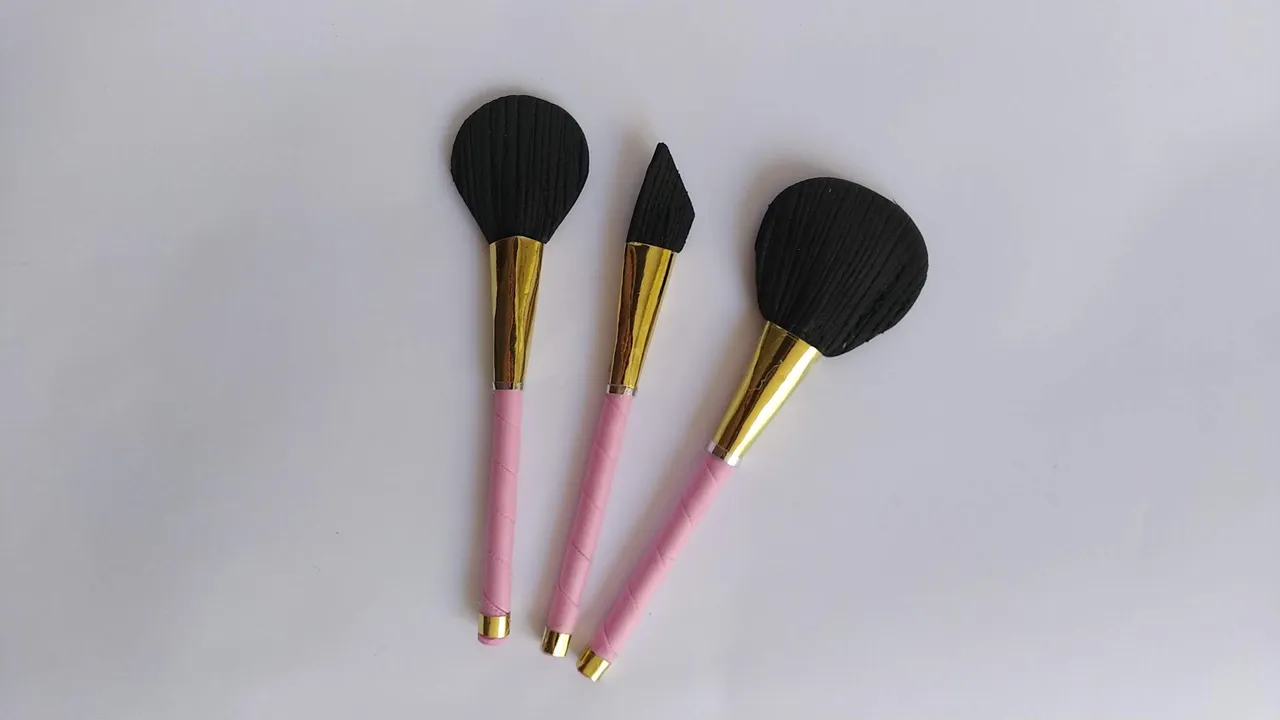
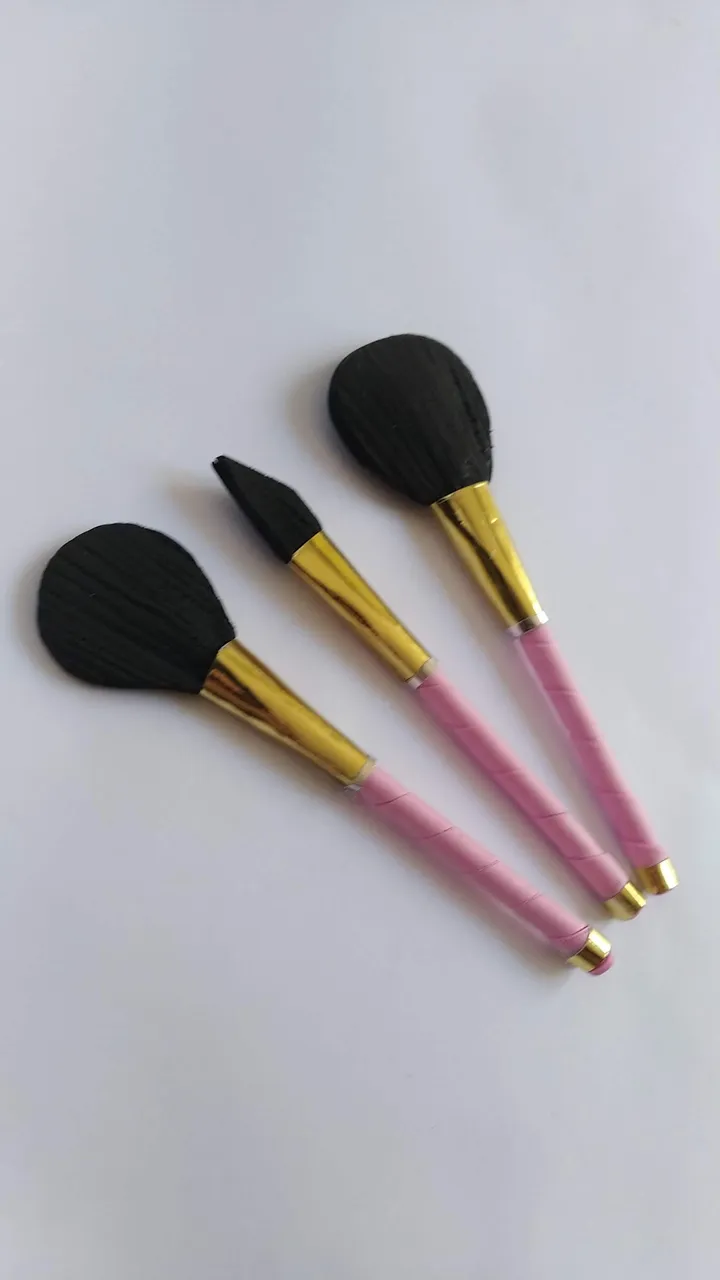
Brochas de maquillaje:
- Cortar los palitos de madera al largo deseado, estas brochas tenían un largo de 9 cm.
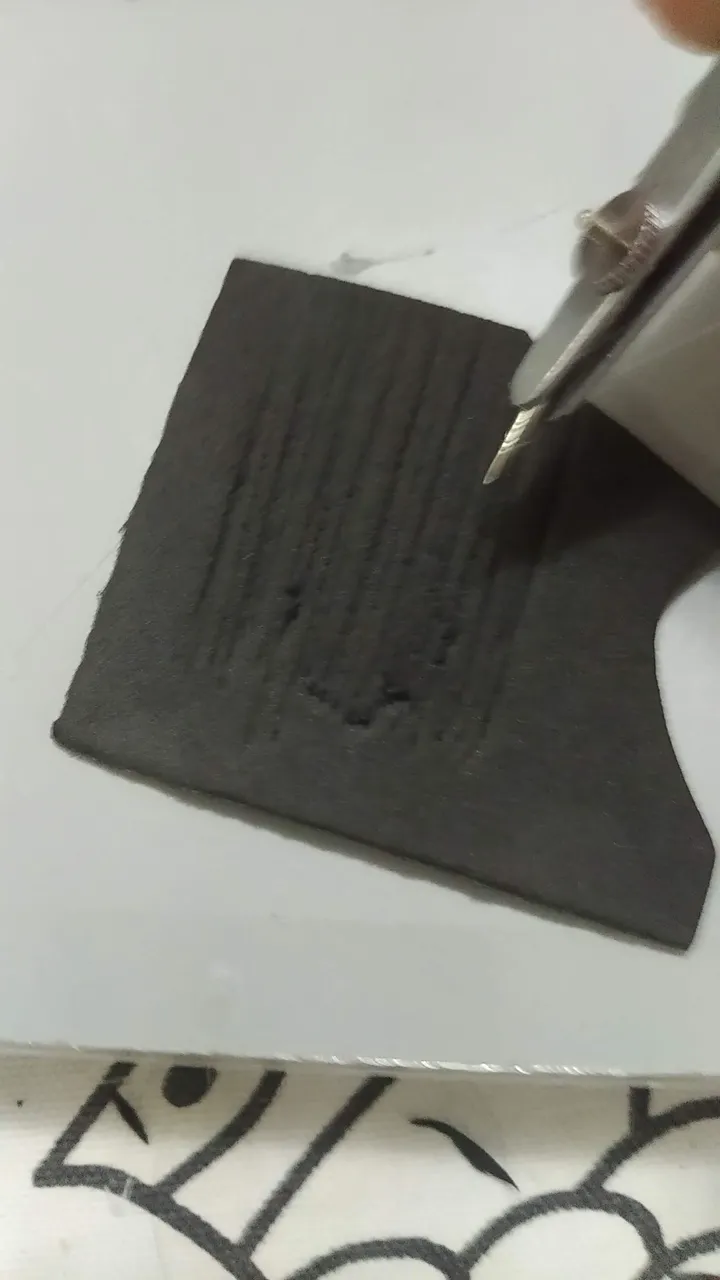
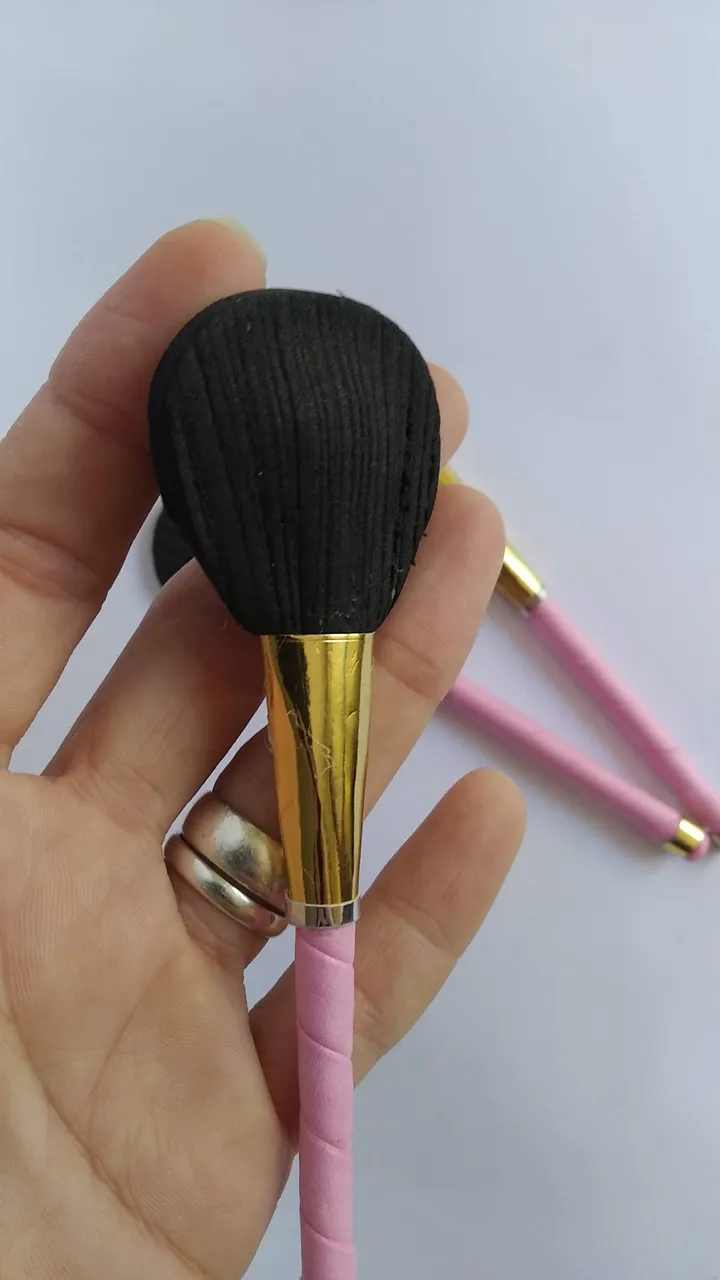
- Marcar y cortar en el foami negro piezas medio ovaladas de diversos tamaños y con la punta de algo filoso hacer pequeñas ranuras al foami. Pegar varias capas entre sí.
- Pegar esas piezas de foami al palito de madera con silicón caliente.
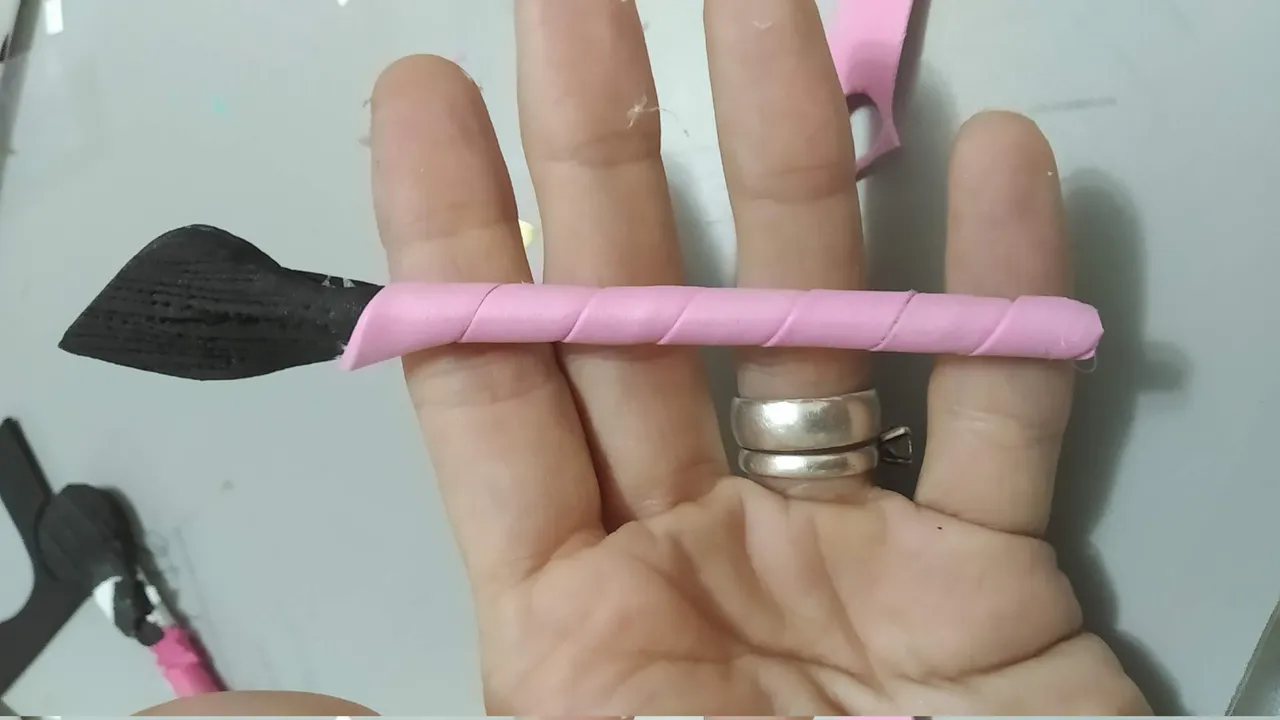
- Marcar y cortar pequeñas tiras de foami rosado y entorchar en el palito de madera desde de arriba hacia abajo.
- En donde se unen los foamis negro y rosa, pegar trozos de cartulina dorada. Pegar con silicón caliente.
- En la parte inferior de los palitos, cubrir igual con dorado para un mejor acabado de la pieza.
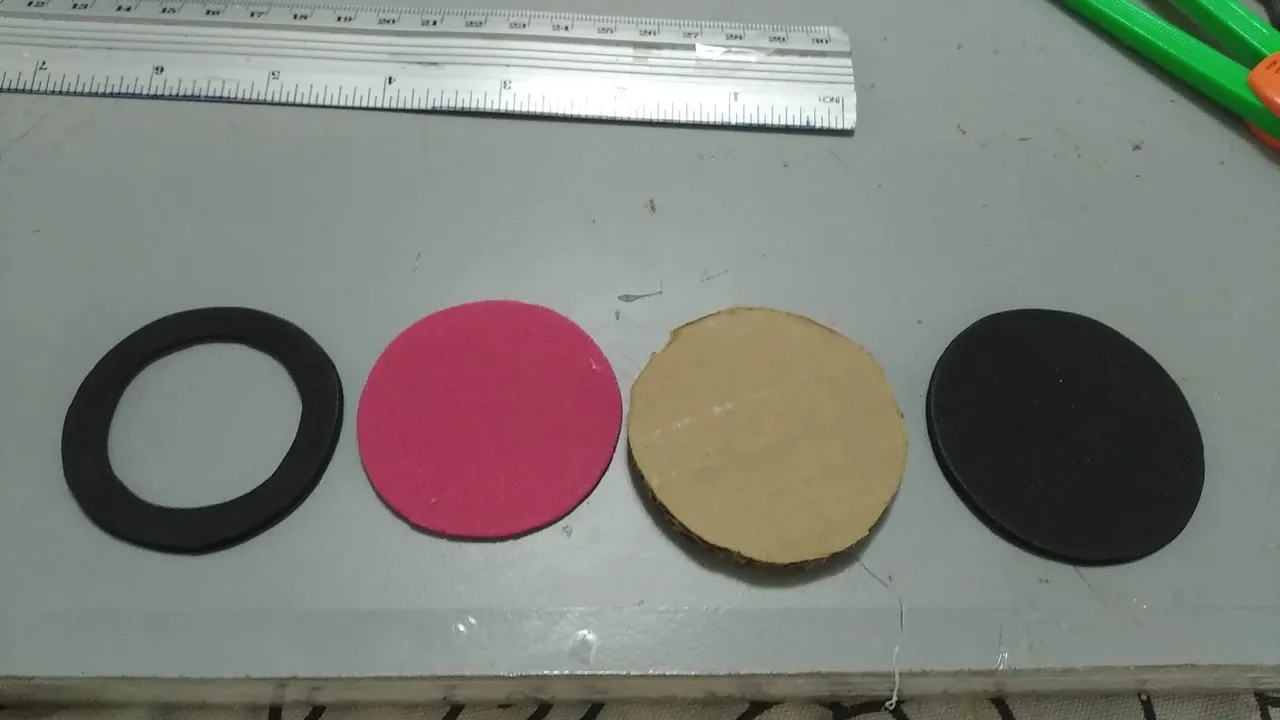
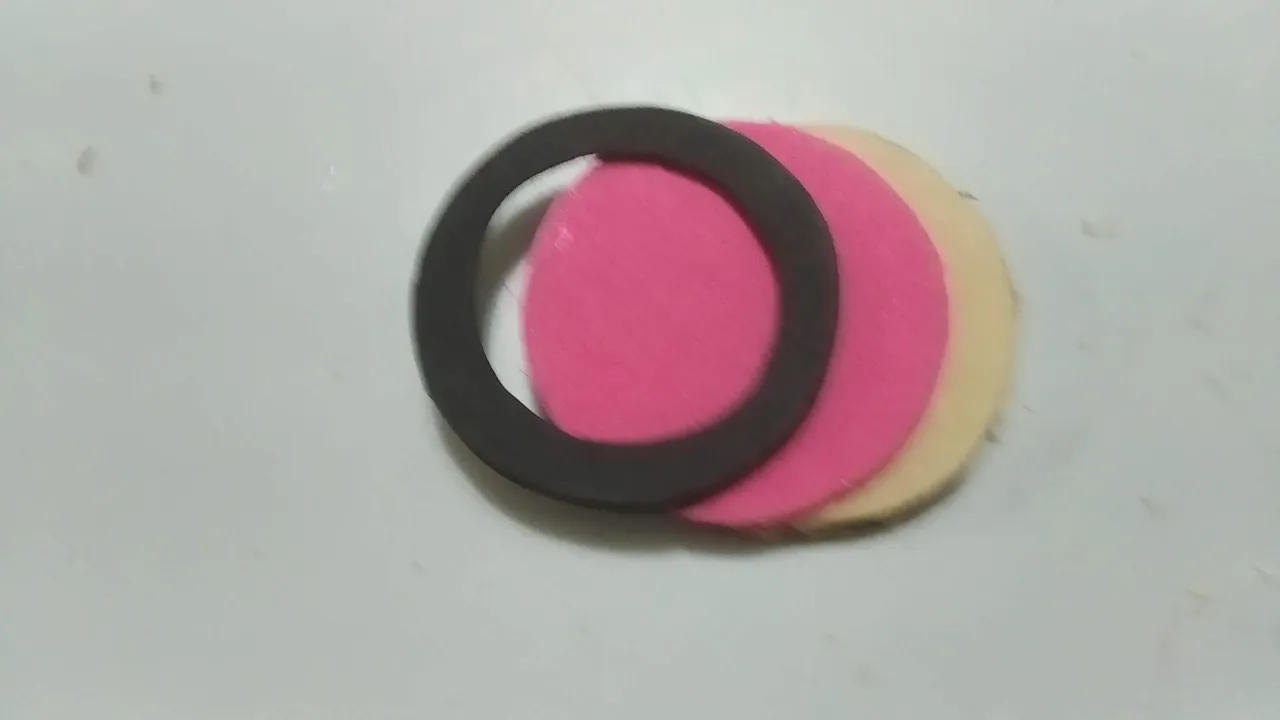
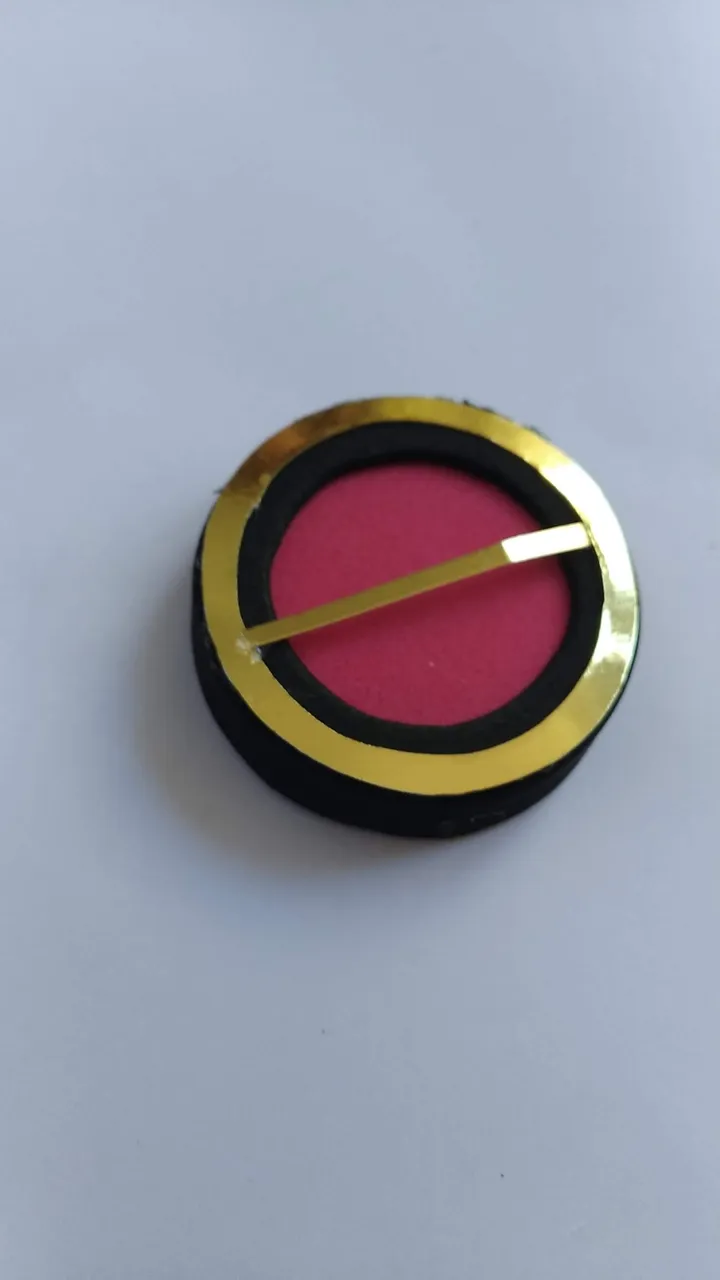
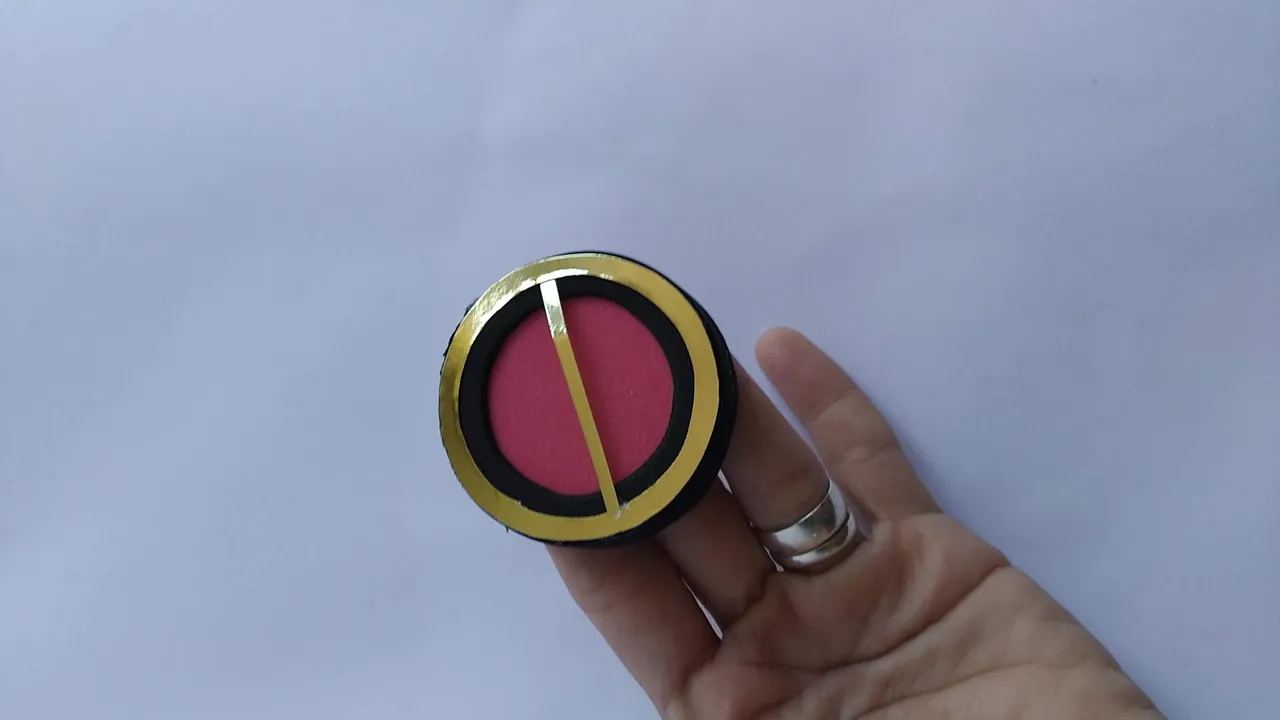
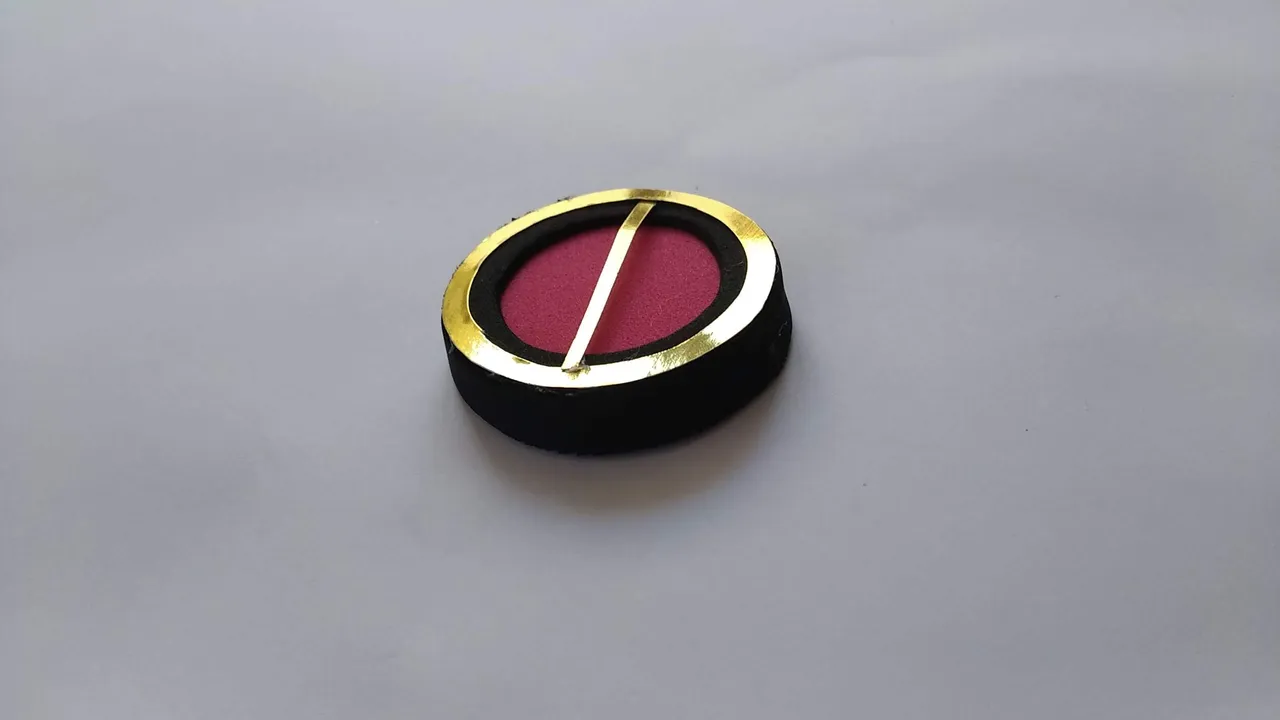
Rubor:
- Marcar y cortar círculos de 5 centímetros de diámetro en cartón (1), foami negro (2), foami fucsia (1).
- A un circulo negro marcar un circulo de 4 cm de diámetro y cortar con la ayuda del cutter.
- Pegar las piezas, en el siguiente orden: el circulo fucsia al cartón, y el negro sobre el fucsia y el otro negro al otro lado del cartón.
- Para cubrir los bordes, cortar una tira de foami del alto que tenga la unión anterior y pegar con silicón frio.
- Decorar con cartulina dorado, formando un aro y pegando al aro negro.
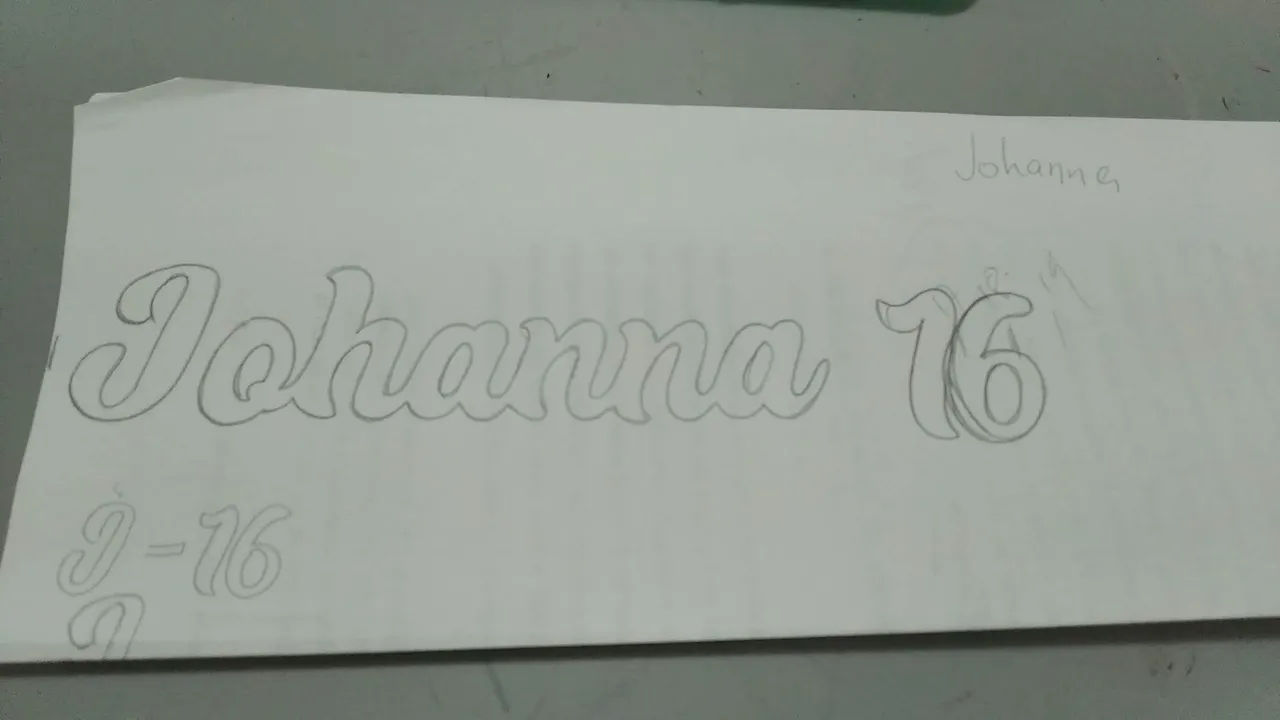
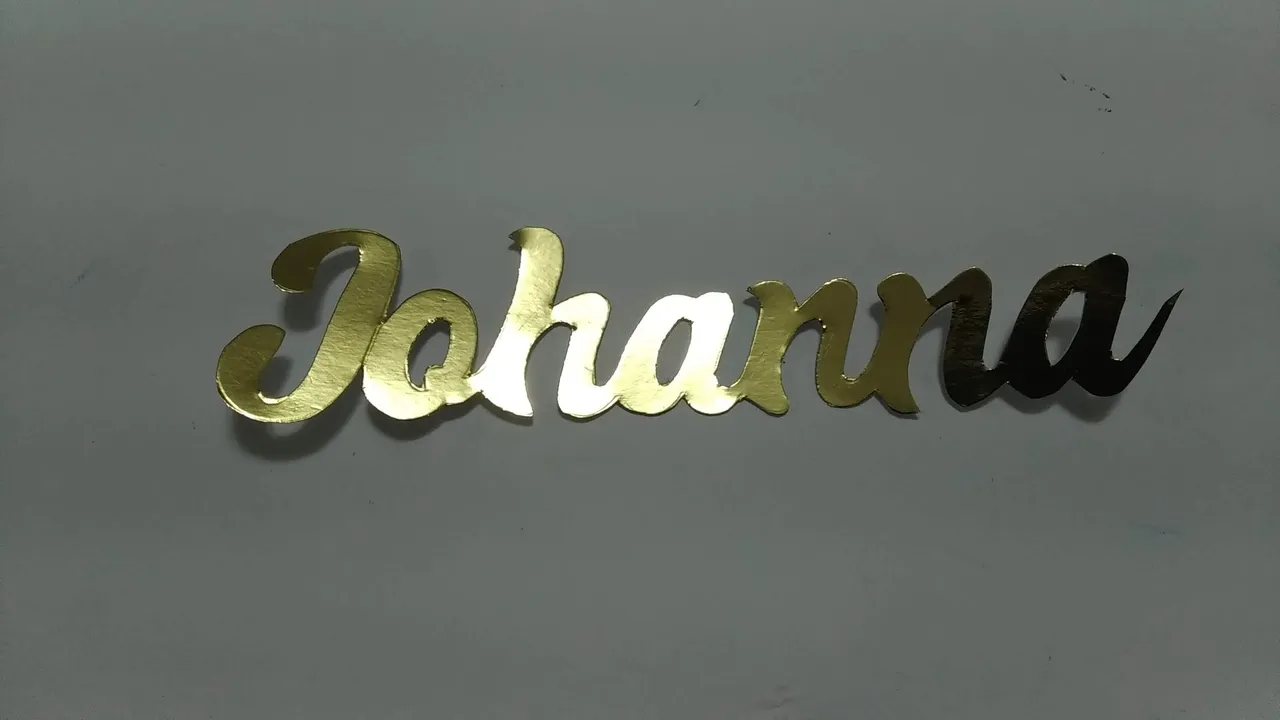
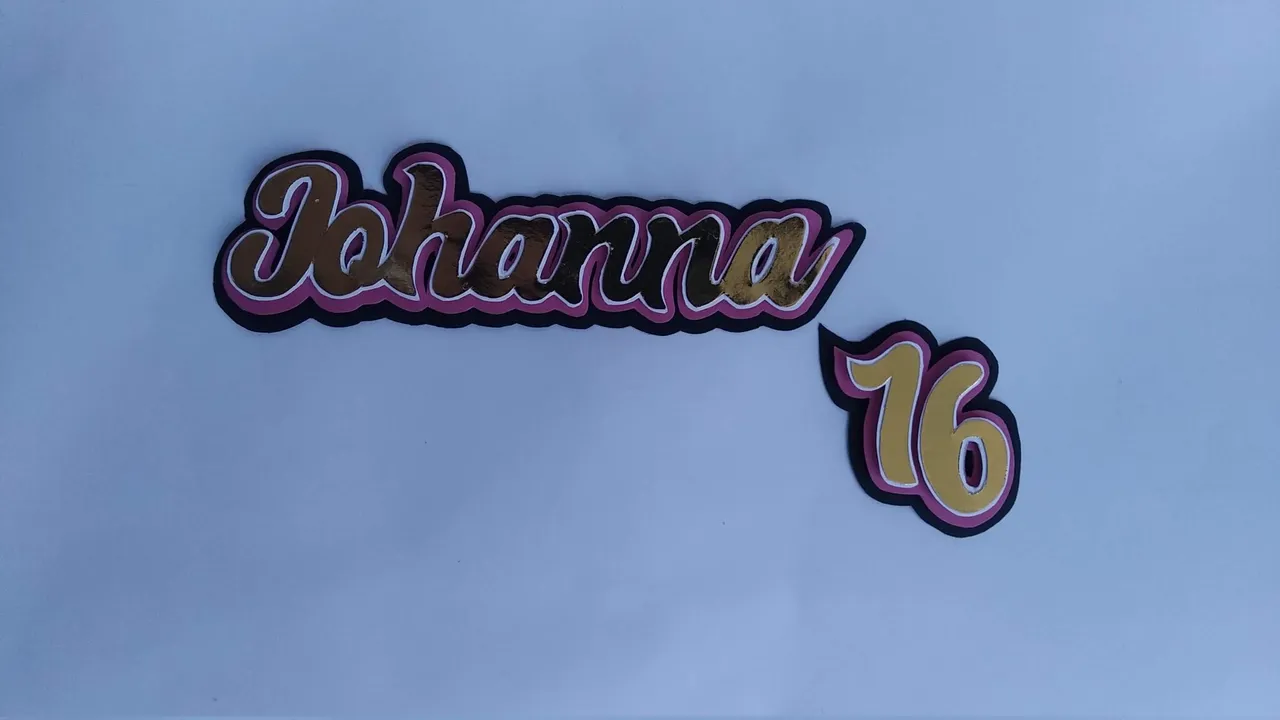
Nombre:
- Marcar y recortar el nombre en la cartulina dorada.
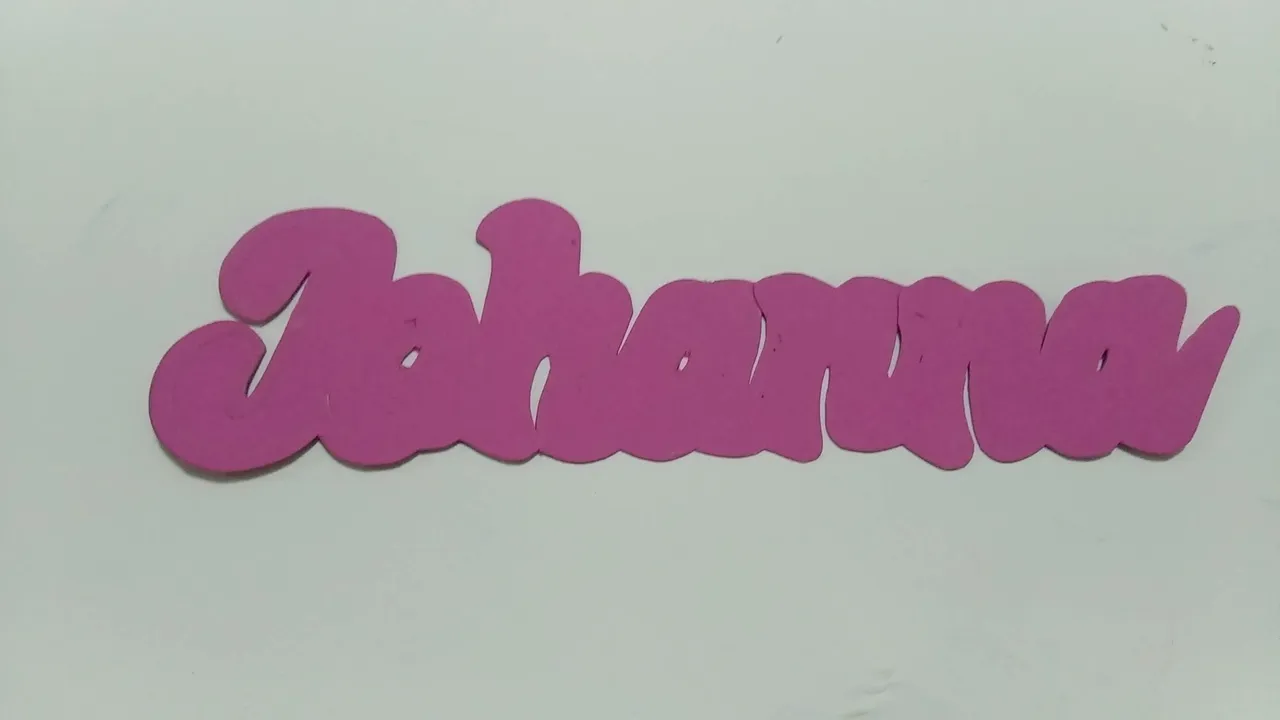
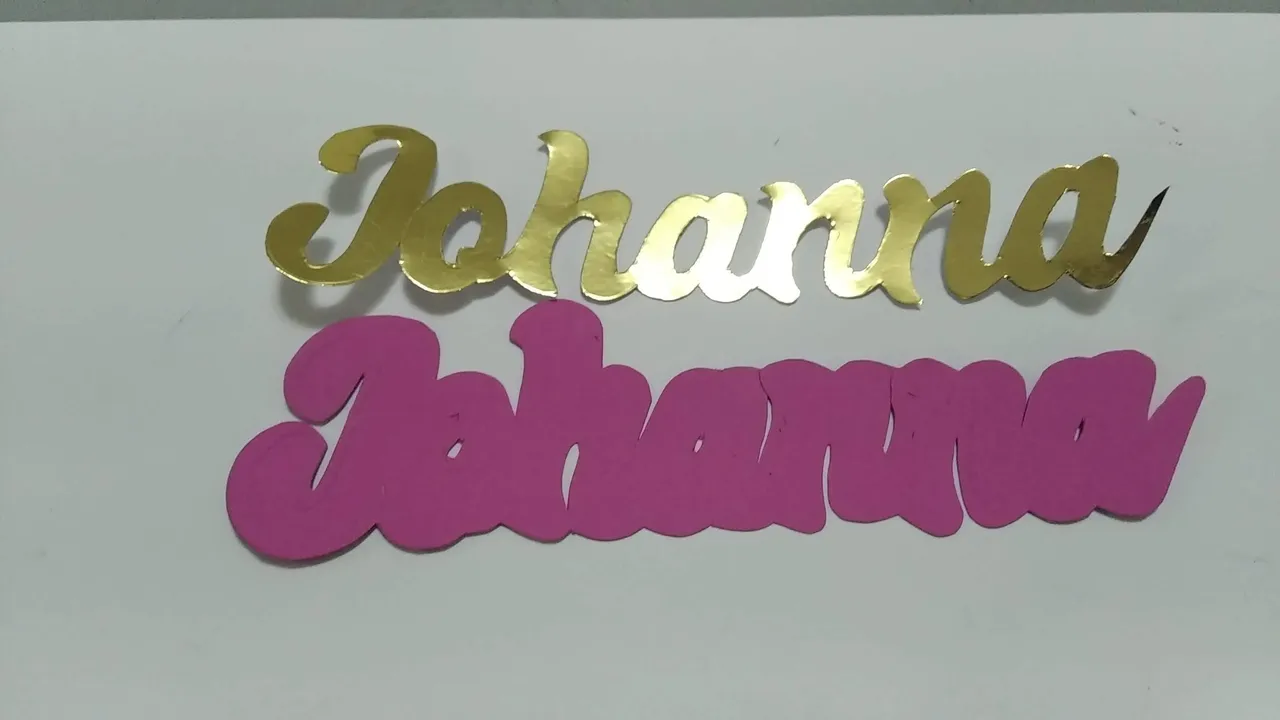
- Utilizando el corte anterior (dorado) marcar y recortar la cartulina fucsia, cuidando este recorte sea mas ancho del anterior (mas grande).
- Utilizando el corte anterior (fucsia) marcar y recortar la cartulina negra, cuidando este recorte sea mas ancho del anterior (mas grande).
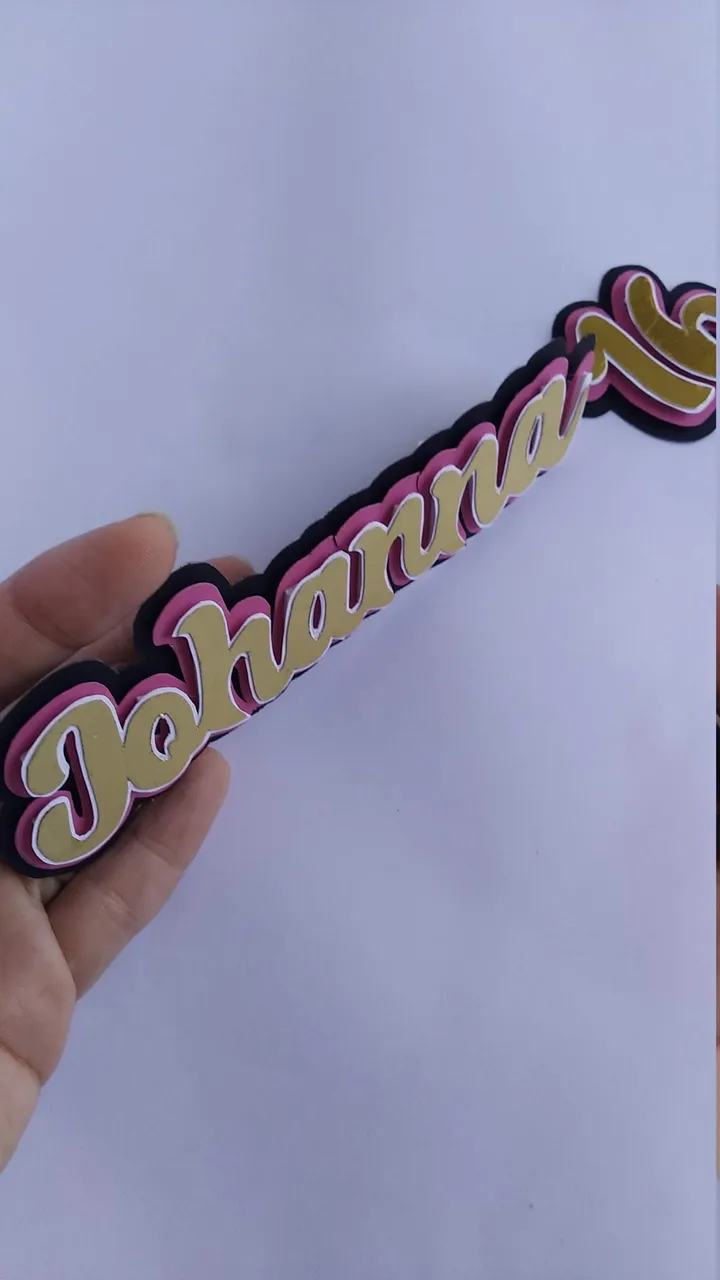
- Pegarle pequeños trozos de foami por la parte trasera al nombre el dorado y al corte en fucsia, pegar con silicón frio para el efecto en capas.
¡Listo!, a disfrutar de la magia de lo creado en casa. Puedes decorarle con mayor detalle a gusto personal…
English
To my readers, I wish you a great week, full of success...
Today I will show you one of the most complex topper made so far (heh,heh,heh) not because it was difficult, nothing to see, but because of the amount of details involved. However, it was worth it, because the honoree named Johanna was surprised and fell in love with the beautiful and delicious cake made by my favorite super cake maker Mayda.
This topper composed of several pieces is made mostly in foami, cardboard and cardboard. A shadow case, a blusher, three brushes, a lipstick, two sets of compact powders, an eye pencil, and a foundation sponge were made for decoration.
I will try to describe as best as possible the step by step (a bit long) so that those who want to try to create something similar or better at home and thus surprise family and / or friends. Without further ado and hoping you enjoy the work done with love, I leave you the materials used, the process and the images of the work.
- Thick cardboard (new or reusable)
- Thin cardboard (new or reusable)
- Spool of plastic thread (new or reusable)
- 2 small hinges
- 12" wooden sticks
- Flat black Foami
- Soft pink foami
- Various colors of matte and shiny Foamis (for shadows, small scraps)
- Black cardboard
- Pink cardboard
- Silver mirror cardboard
- Gold mirror cardboard
- Acetate (small pieces)
- Transparent adhesive tape
- Cold silicone.
- Hot glue.
- Cutter.
- Scissors.
- Pencil.
Makeup Case:
- We must make a rectangular box, for this we will cut the cardboard in the desired measures. This case measured 14 cm long by 6 cm high and 8 cm deep.
- Glue with hot silicone.
- Cut the cardboard that will be the mirror to the same size of the previous rectangle 14 x 8 cm.
- Measure and cut the black foami to the same size of the rectangle and make perforations with the help of the cutter.
- When all the holes have been opened symmetrically, select the foamis of different colors (matte and shiny) and glue them to the black foami, taking care to keep the black foami on top and the scraps at the bottom. Use cold silicone.
- Glue the black foami to the cardboard rectangle with cold silicone.
- Line the rest of the box on the other sides with black cardboard.
- Mark and cut small rectangles of metallic gold cardboard and glue them to the four corners of the box and the top edges of the box. This rectangle should be folded in two to form a small outline that will cover two sides.
- Line the lid with black cardboard on one side and silver cardboard on the other to simulate the mirror of the box. Three sides should have a gold edge (step 8).
- Hot glue the hinges to one side of the box and the other to the lid, so that it can open and close like a real case. To make it look aesthetically better, line the joints with black cardboard.
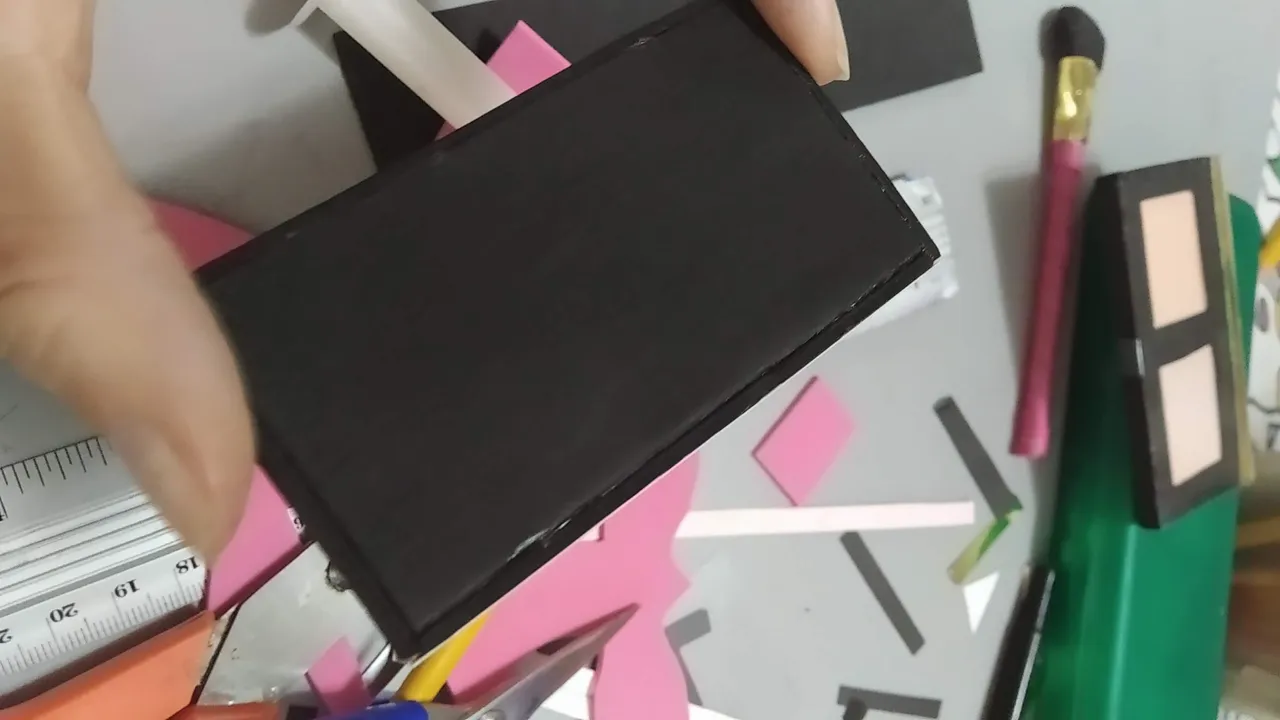
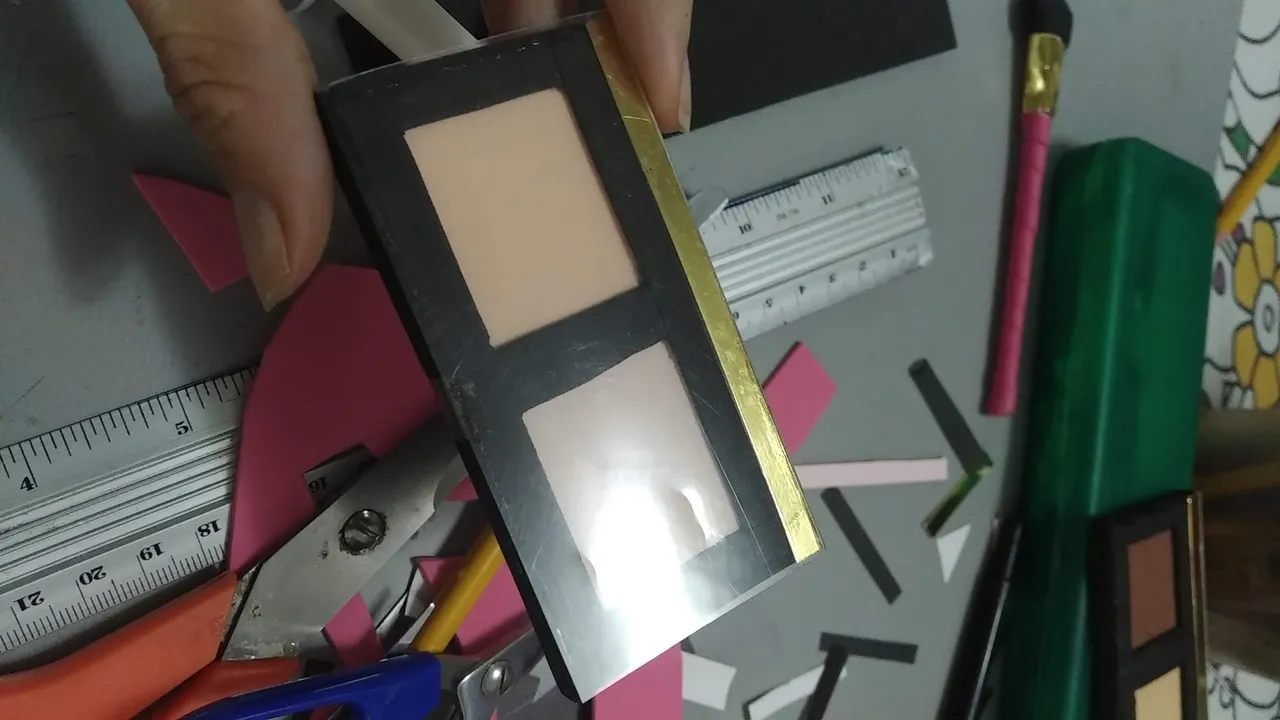
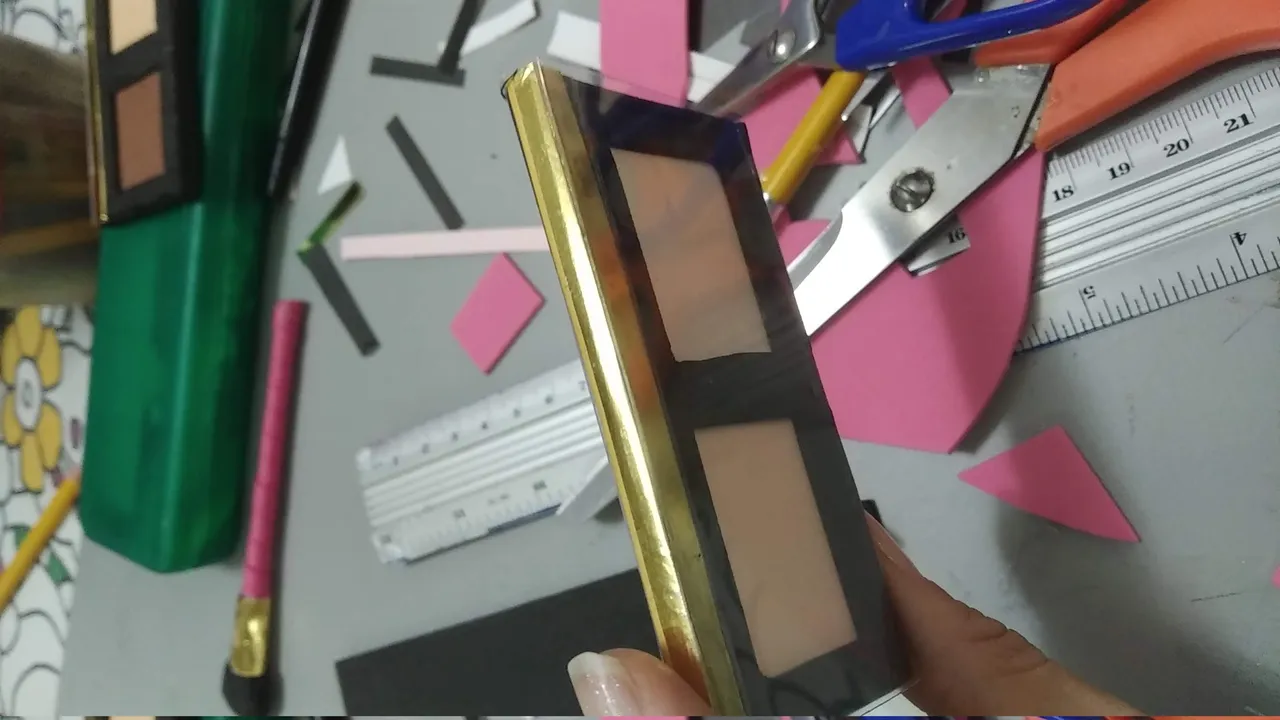
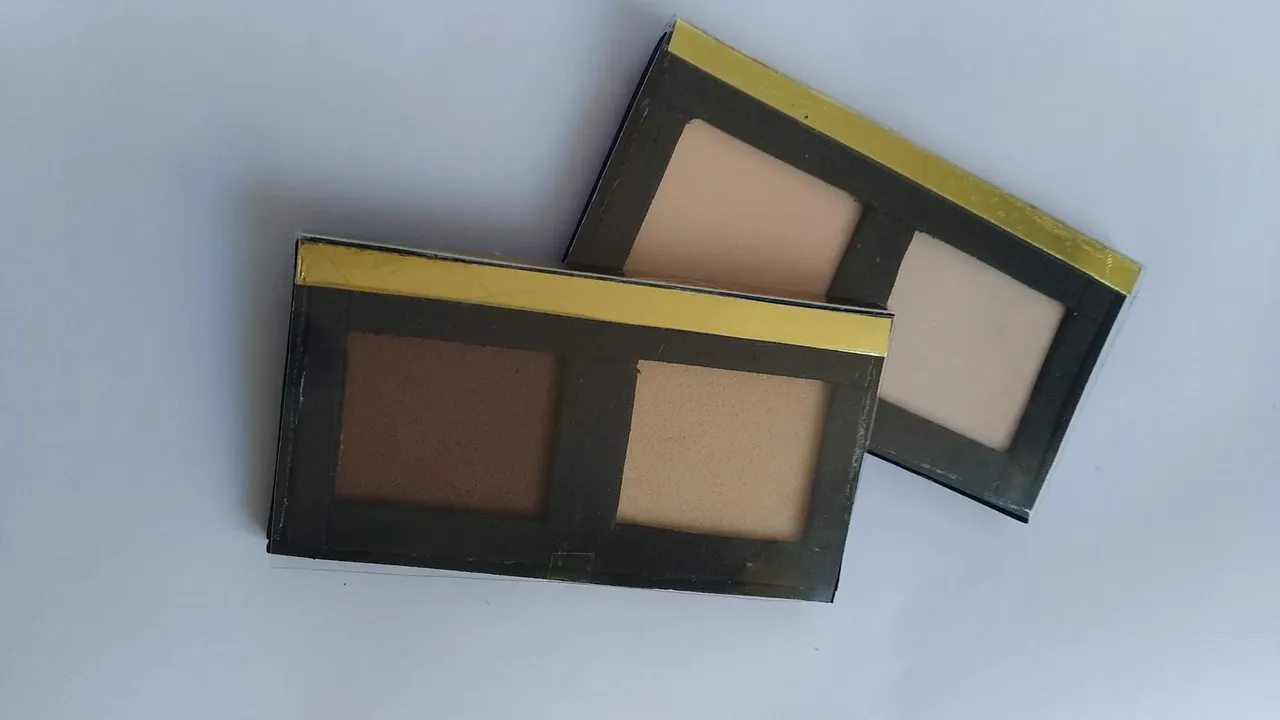
Duo compact powders:
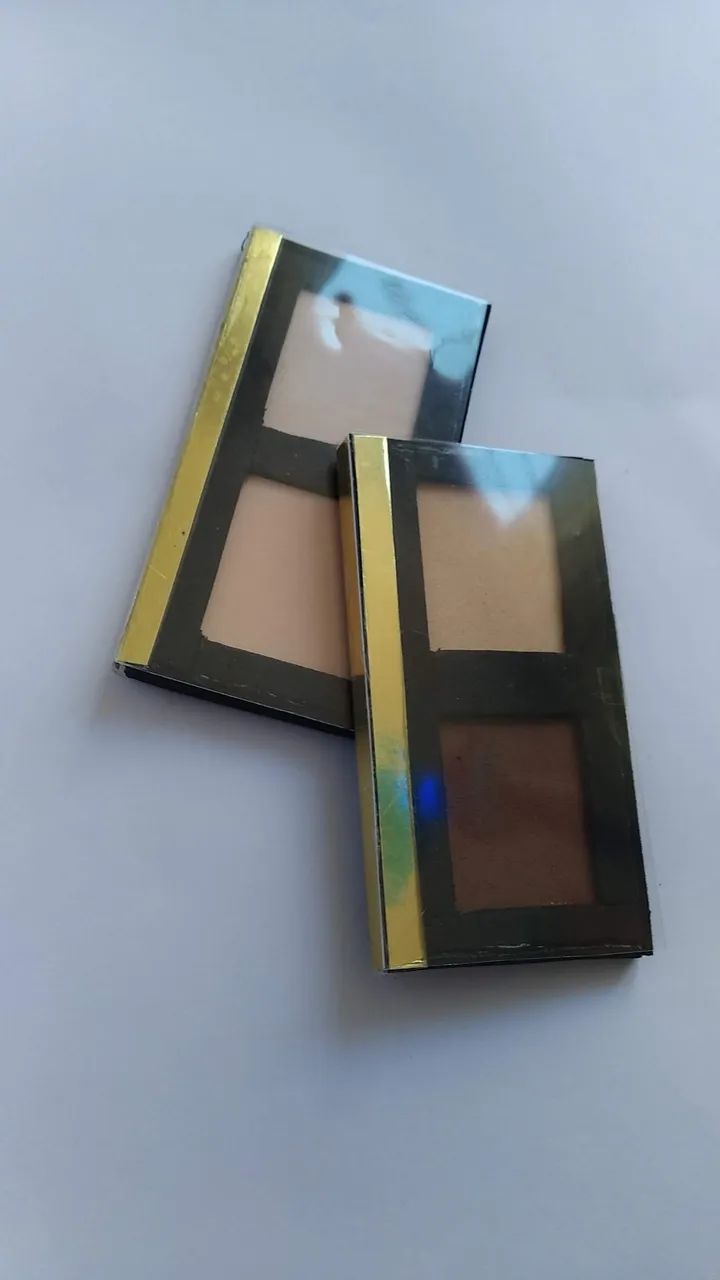
- Cut two (2) rectangles of black foami, these measured 6 cm x 4 cm.
- Pierce one of the rectangles with the cutter forming two squares and glue pastel-colored foamis on the inside (similar to step 5).
- Glue the previous base to the complete rectangle and line its edges with small strips of foami to avoid showing the joints between the two and the pastel-colored foamis.
- Glue a golden border on the front side (same process as in step 8).
- Cut acetate to the size of the piece and glue with transparent adhesive tape, this in order to simulate the plastic lid of the case.
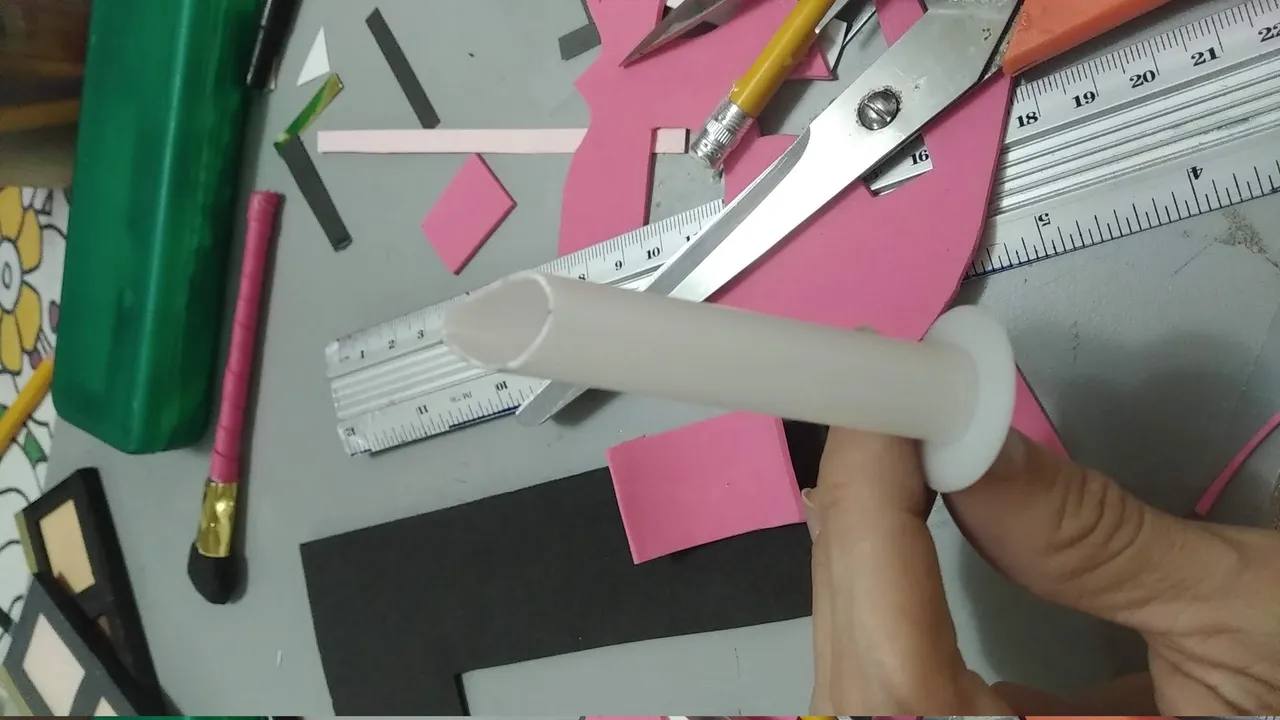
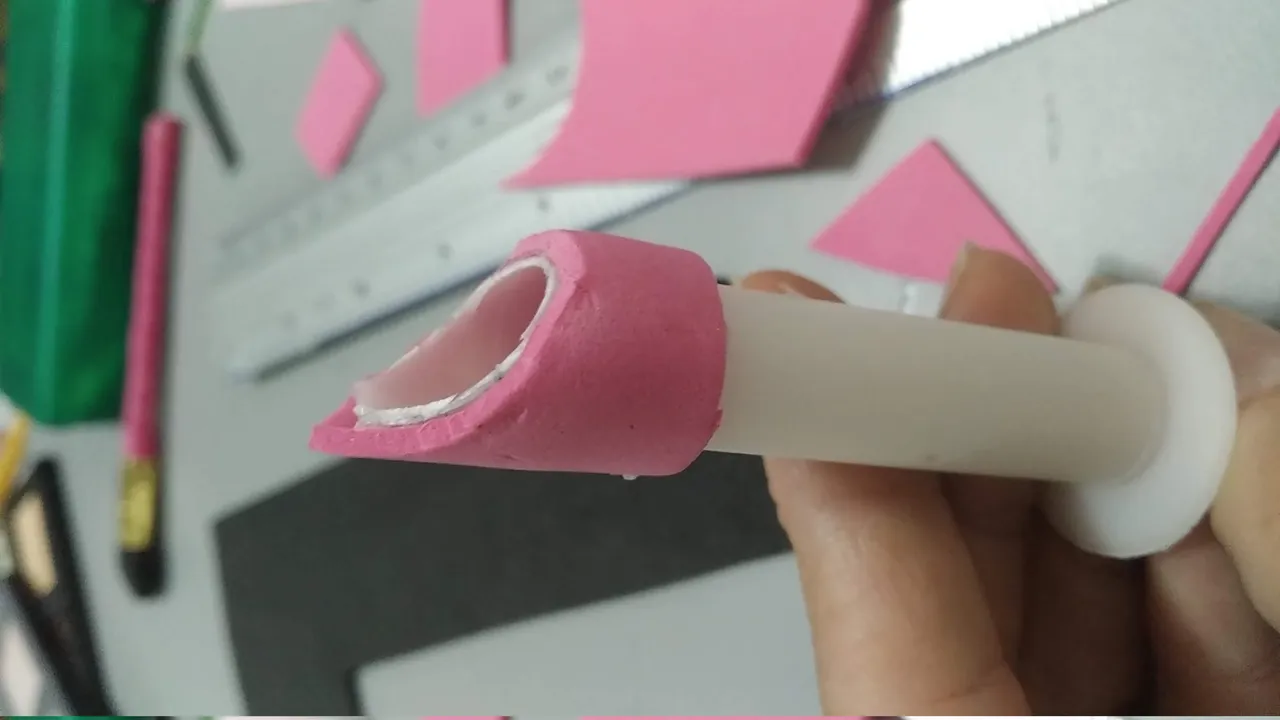
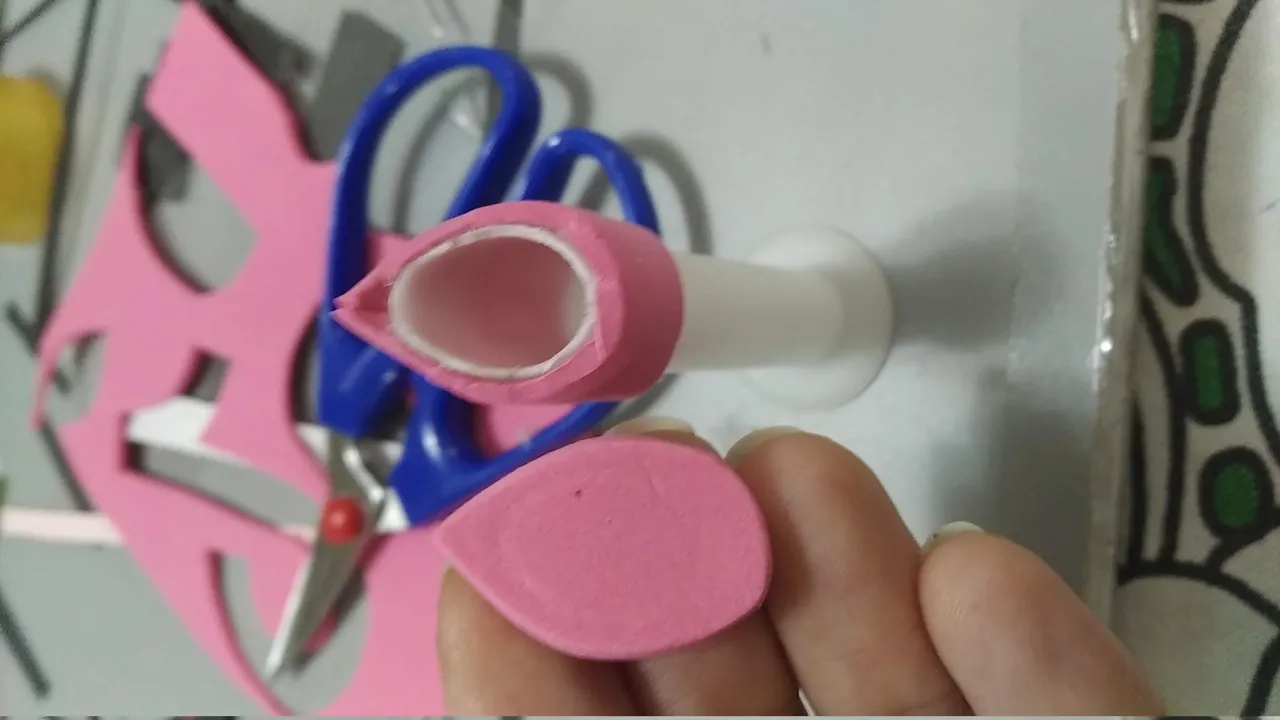
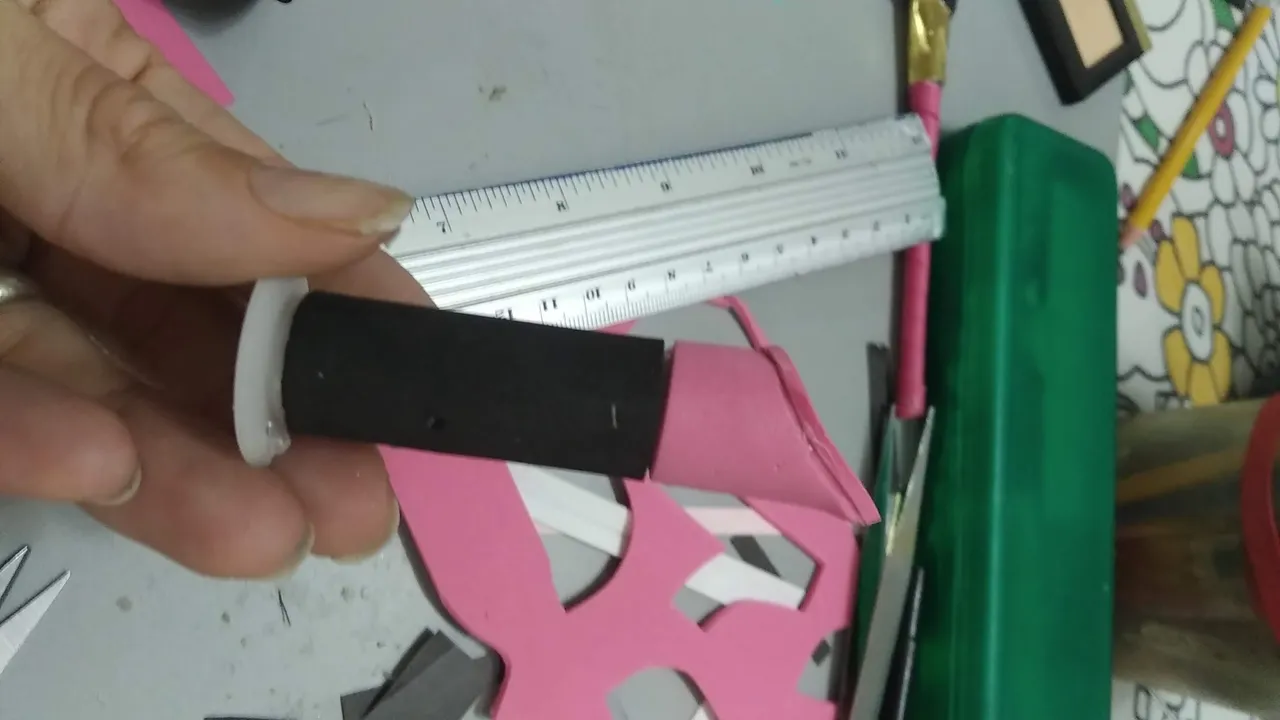
Lipstick:
- Take the spool of thread and cut it diagonally.
- Glue the fuchsia foami and adjust it to the spool cut.
- Measure and cut black foami and glue it to the remaining base, this process will be repeated twice, so you can simulate that the fuchsia is inside the black. In the second layer glue a little on the fuchsia foami. Try to make sure that the union edges are both at the same height (fuchsia and black).
- The base of the spool as it protrudes, cover it with foami.
- Put gold cardboard on the edges.
- To prevent the fuscia foami from sticking together, glue a small border of cardboard from the top to the black edge of the base.
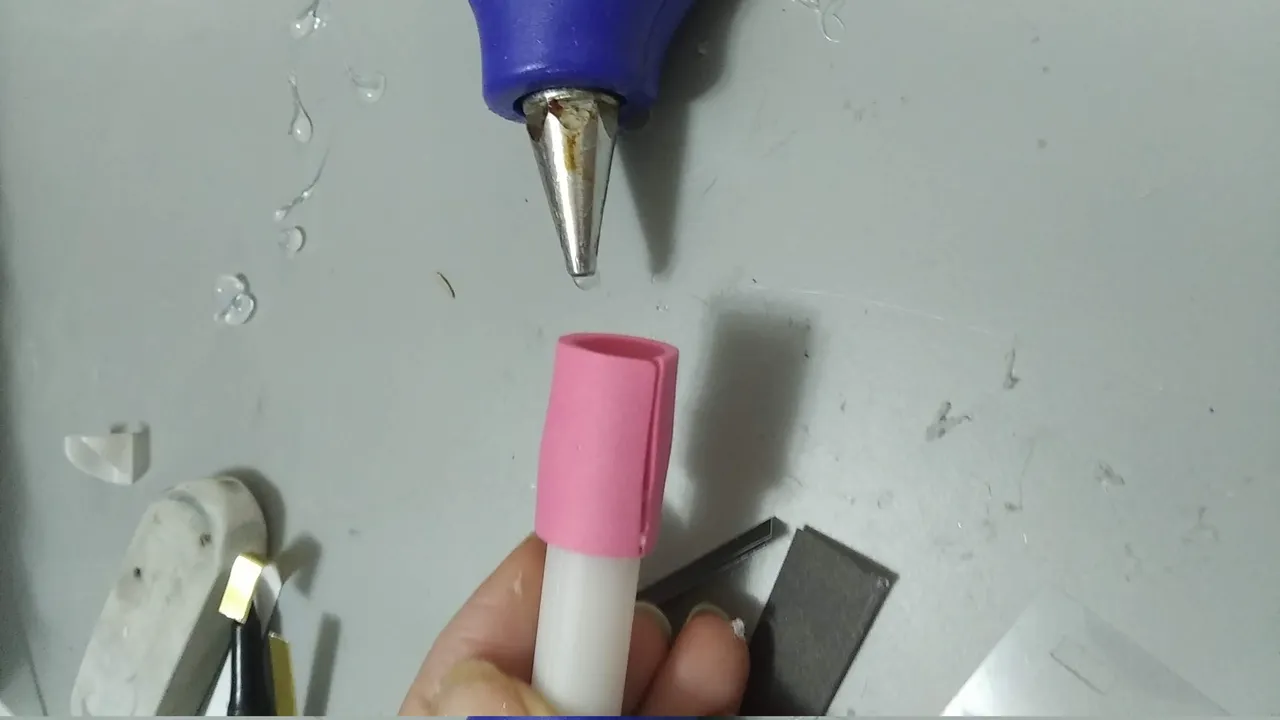
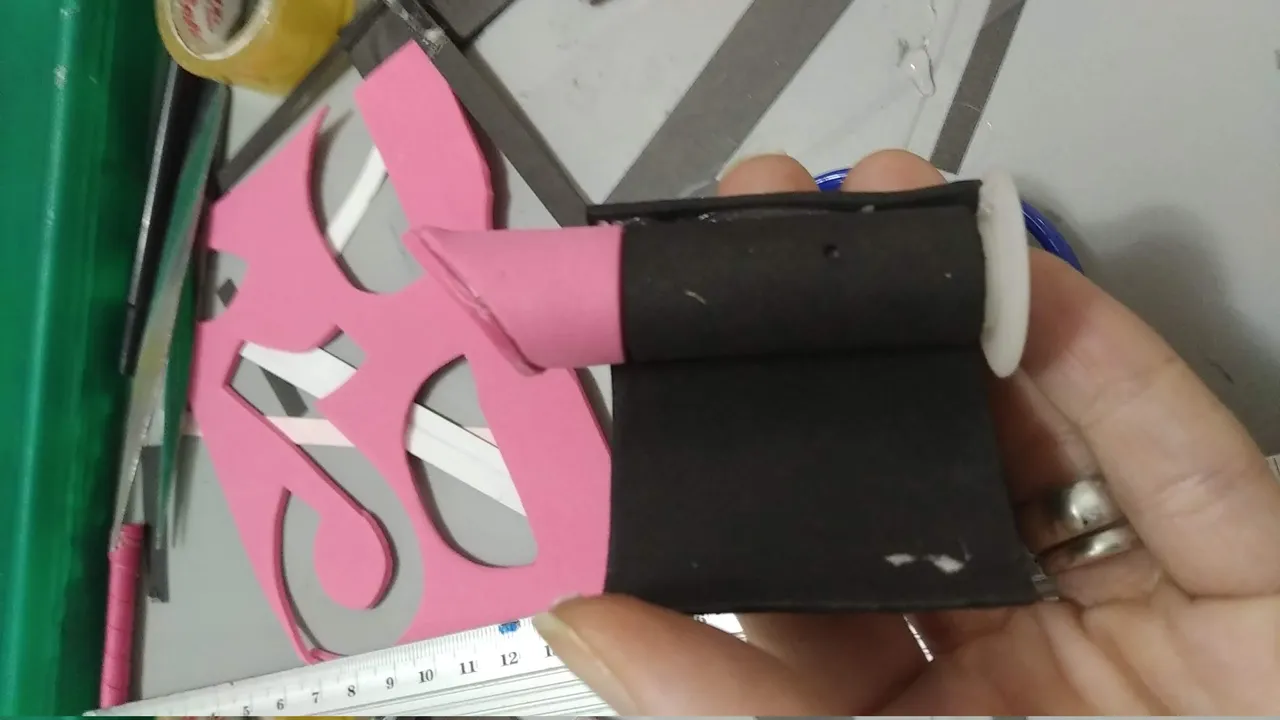
- For the lid, make a small cylinder according to the diameter of the base and the height of the lipstick and cover one of its sides, decorating with golden cardboard around the edges.
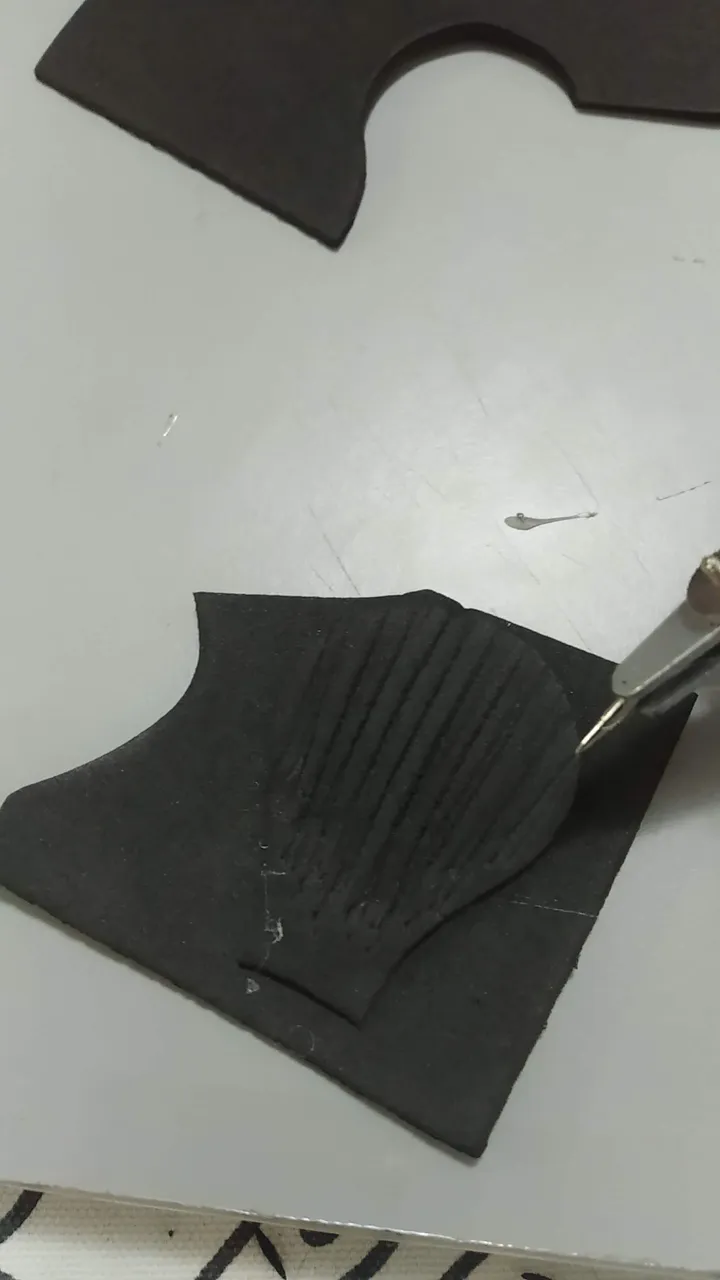
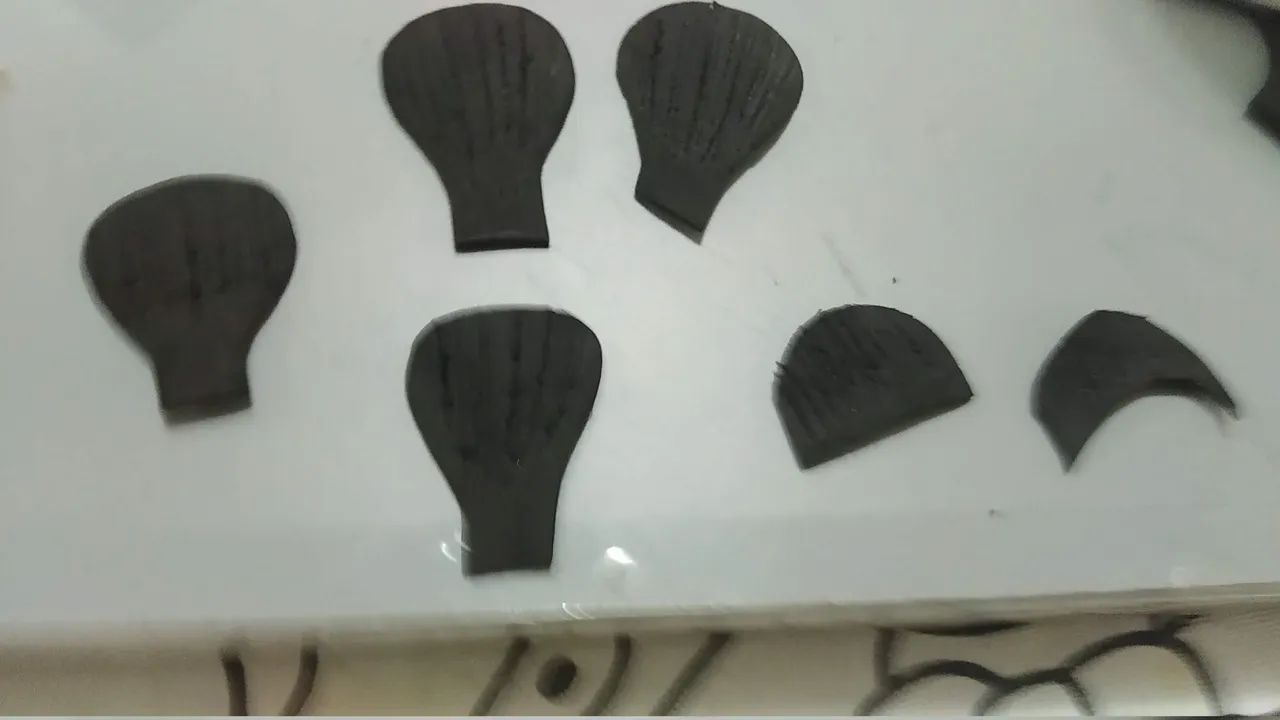
Makeup brushes:
- Cut the wooden sticks to the desired length, these brushes had a length of 9 cm.
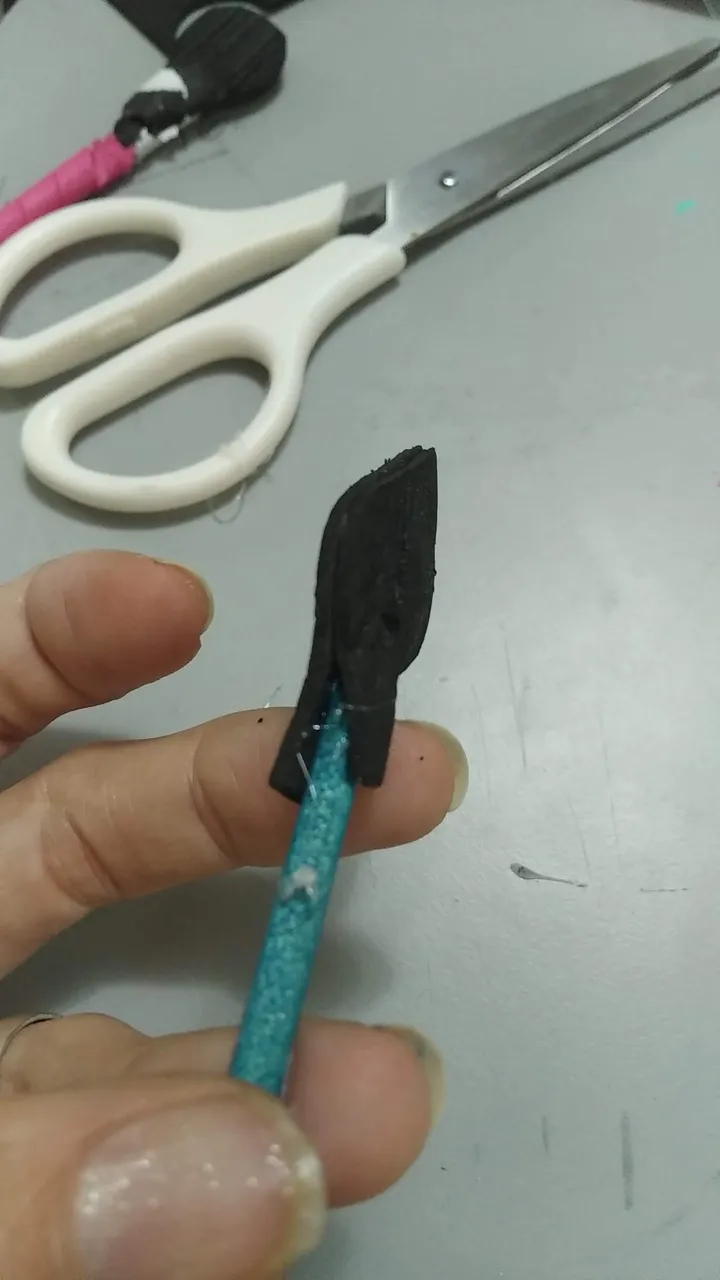
Mark and cut in the black foami half oval pieces of various sizes and with the tip of something sharp make small grooves in the foami. Glue several layers together. - Glue these pieces of foami to the wooden stick with hot silicone.
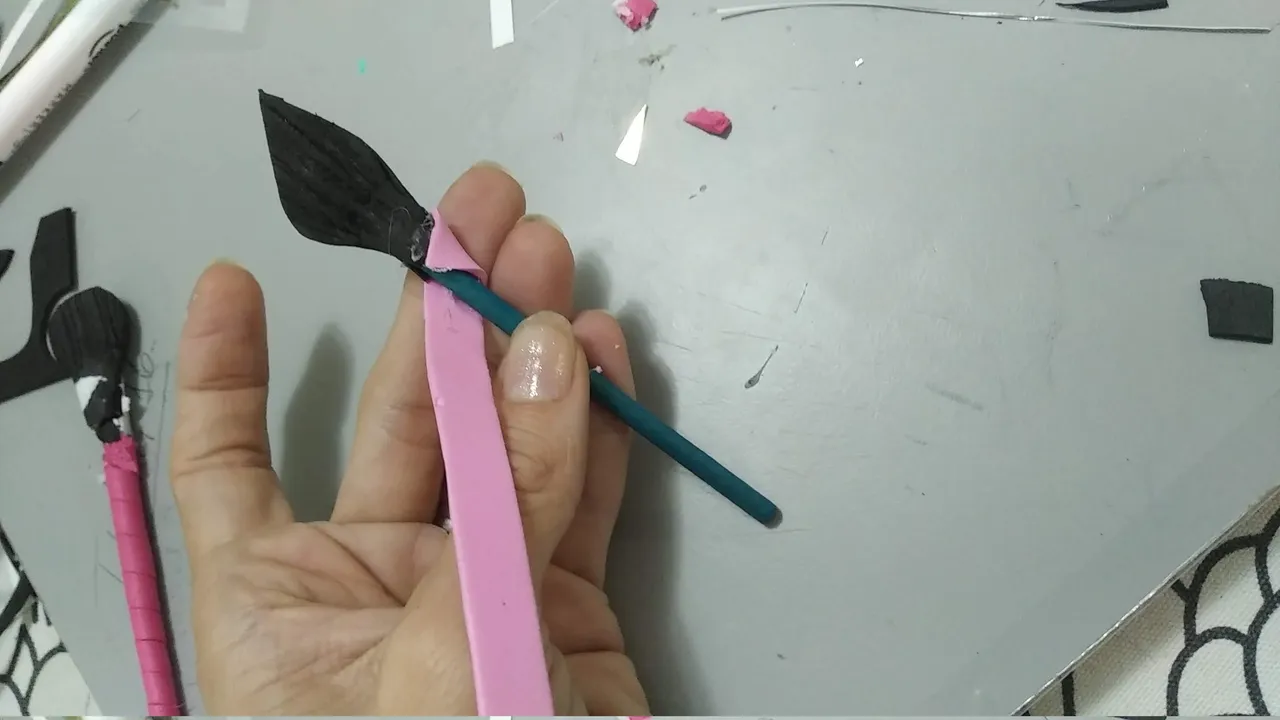
- Mark and cut small strips of pink foami and stick them on the wooden stick from top to bottom.
- Where the black and pink foamis join, glue pieces of gold cardboard. Glue with hot silicone.
- At the bottom of the sticks, cover the same with gold for a better finish of the piece.
Blush:
- Mark and cut circles of 5 centimeters in diameter in cardboard (1), black foami (2), fuchsia foami (1).
- To a black circle mark a circle of 4 cm in diameter and cut with the help of the cutter.
- Glue the pieces in the following order: the fuchsia circle to the cardboard, the black one on the fuchsia one and the other black one on the other side of the cardboard.
- To cover the edges, cut a strip of foami as high as the previous joint and glue it with cold silicone.
- Decorate with gold cardboard, forming a ring and gluing it to the black ring.
Name:
- Mark and cut out the name on the gold cardboard.
- Using the previous cut (gold) mark and cut out the fuchsia cardboard, making sure this cut is wider than the previous one (larger).
- Using the previous cut (fuchsia) mark and cut out the black cardboard, making sure this cutout is wider than the previous one (larger).
- Glue small pieces of foami on the back of the gold name and the fuchsia cut, glue with cold silicone for the layered effect.
Ready, enjoy the magic of what you have created at home. You can decorate it with more details as you like...
Translated with www.DeepL.com/Translator (free version)
IMÁGENES / IMAGES
ESTUCHE DE MAQUILLAJE / MAKEUP CASE::
POLVOS COMPACTOS DÚOS / DUO COMPACT POWDERS:
PINTURA DE LABIOS / LIPSTICK :
BROCHAS DE MAQUILLAJE / MAKEUP BRUSHES:
RUBOR / BLUSH:
NOMBRE / NAME :
SALUDOS / REGARDS
Todas las Fotos fueron tomadas con mi teléfono Redmi 7A.
Contenido original de @keco (fotos y texto) - Todos los derechos reservados Publicado en HIVE así como en mi instagram : http://instagram.com/carton_pintura_algo_mas
All Photos were taken with my Redmi 7A phone.
Original content from @keco (photos and text) - All rights reserved Posted on HIVE as well as on my instagram: http://instagram.com/carton_pintura_algo_mas