
Español
Hola...
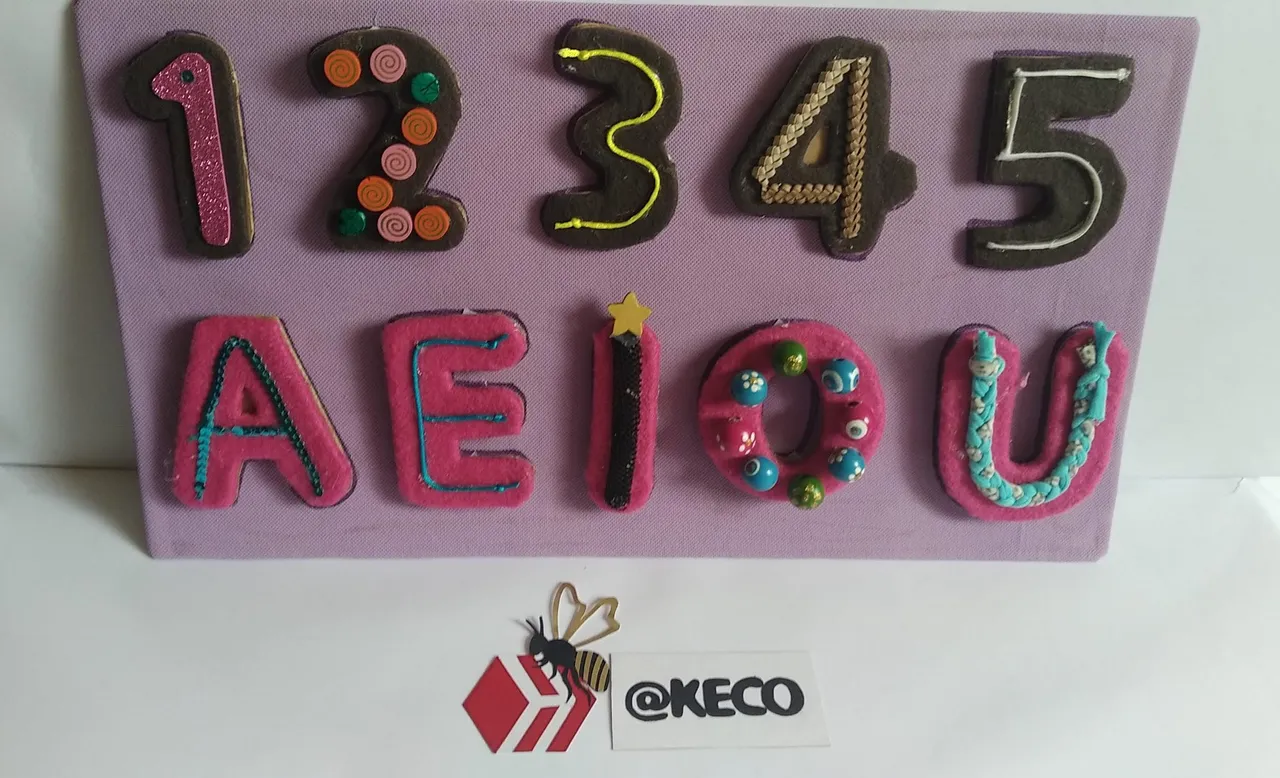
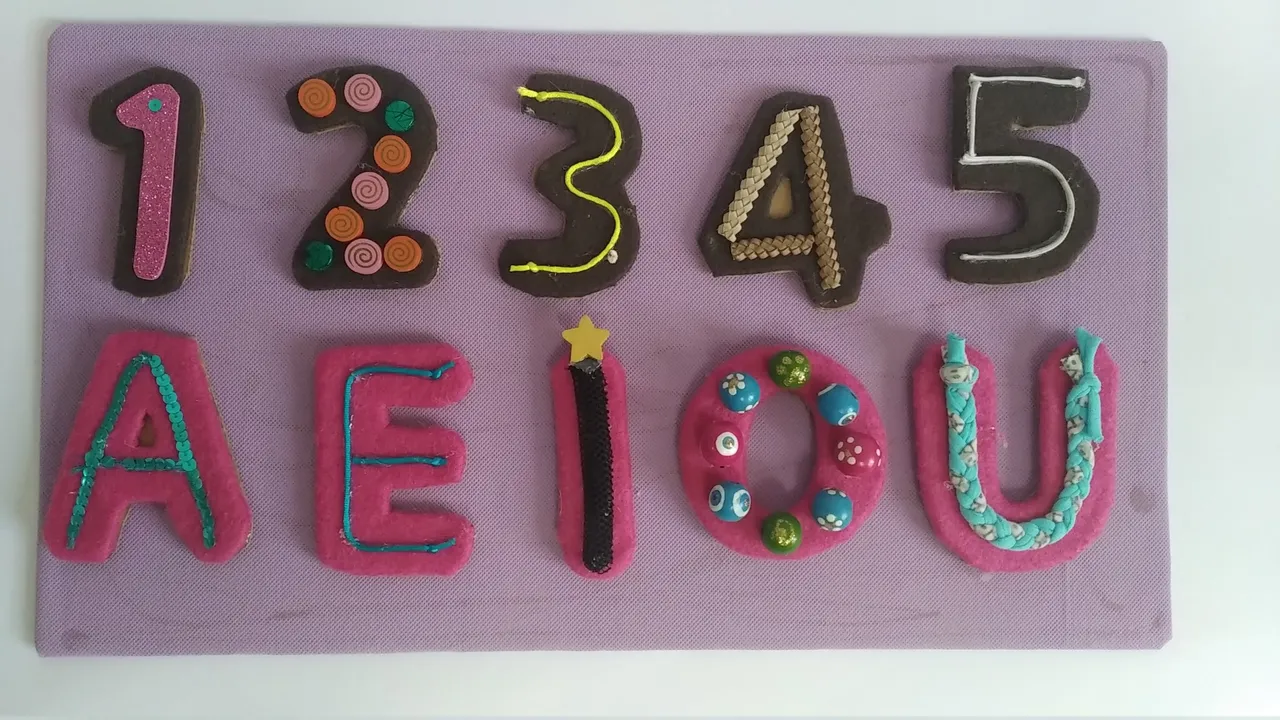
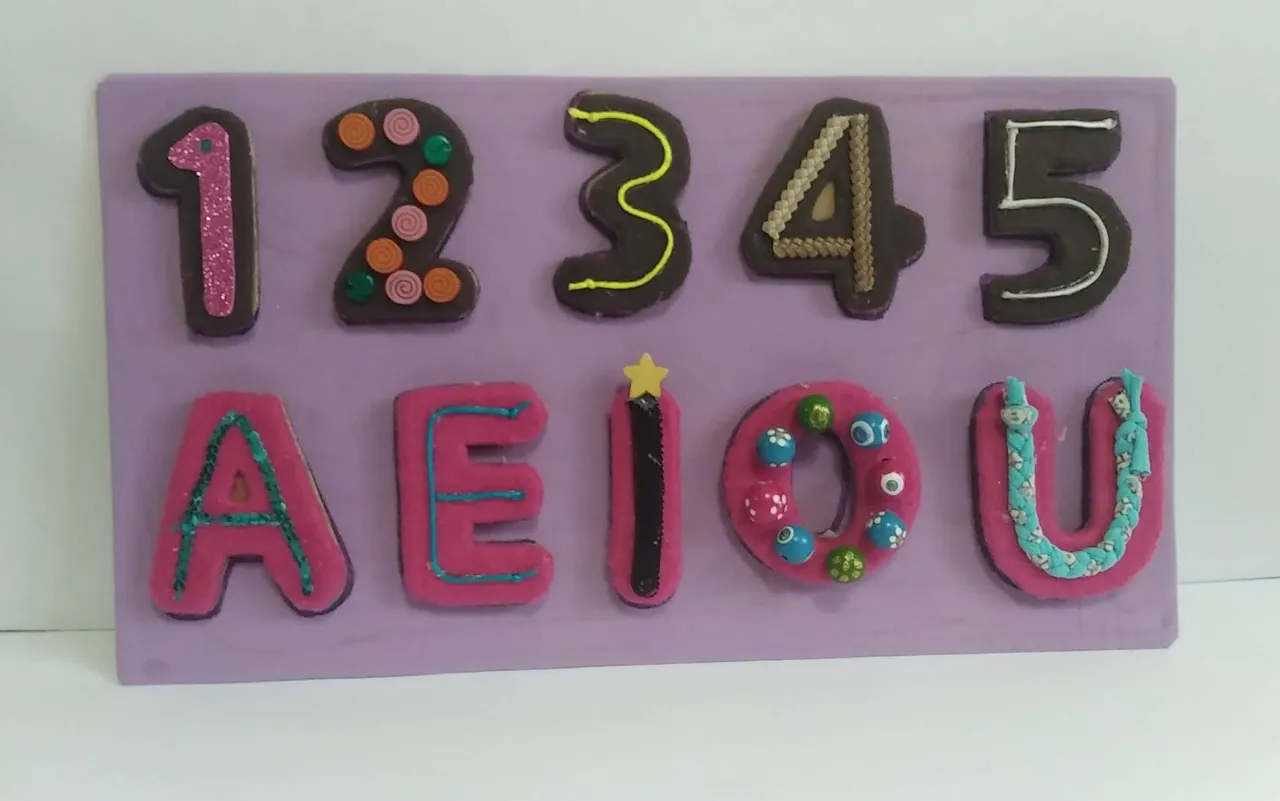
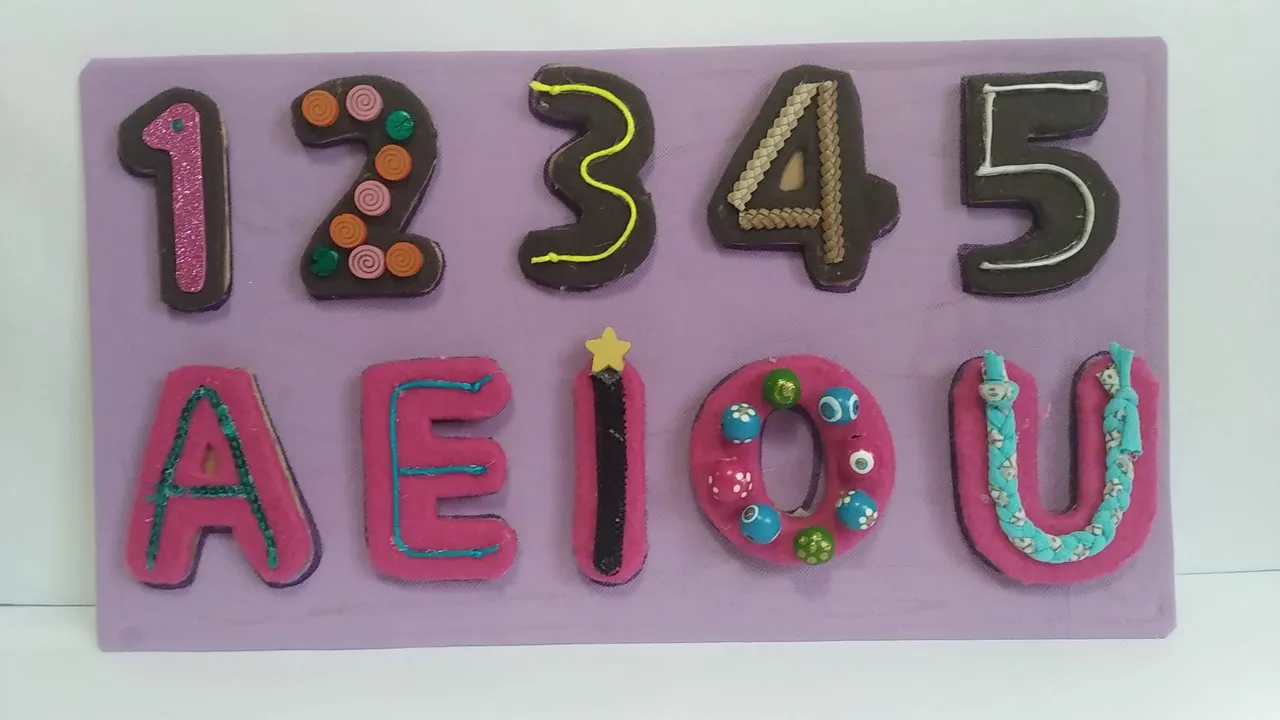
Hoy quiero mostrarles unas letras y números sensoriales que realicé para una hermosa niña de 2 años. Dicen es la edad perfecta para la estimulación inicial en el proceso de aprendizaje y su mamá quiso iniciar este proceso de forma divertida en medio de esta pandemia mundial que nos mantiene en casa, resguardados y activos en el proceso de enseñanza.
Éstas letras, fáciles y económicas de realizar, permiten a Tamara lo siguiente:
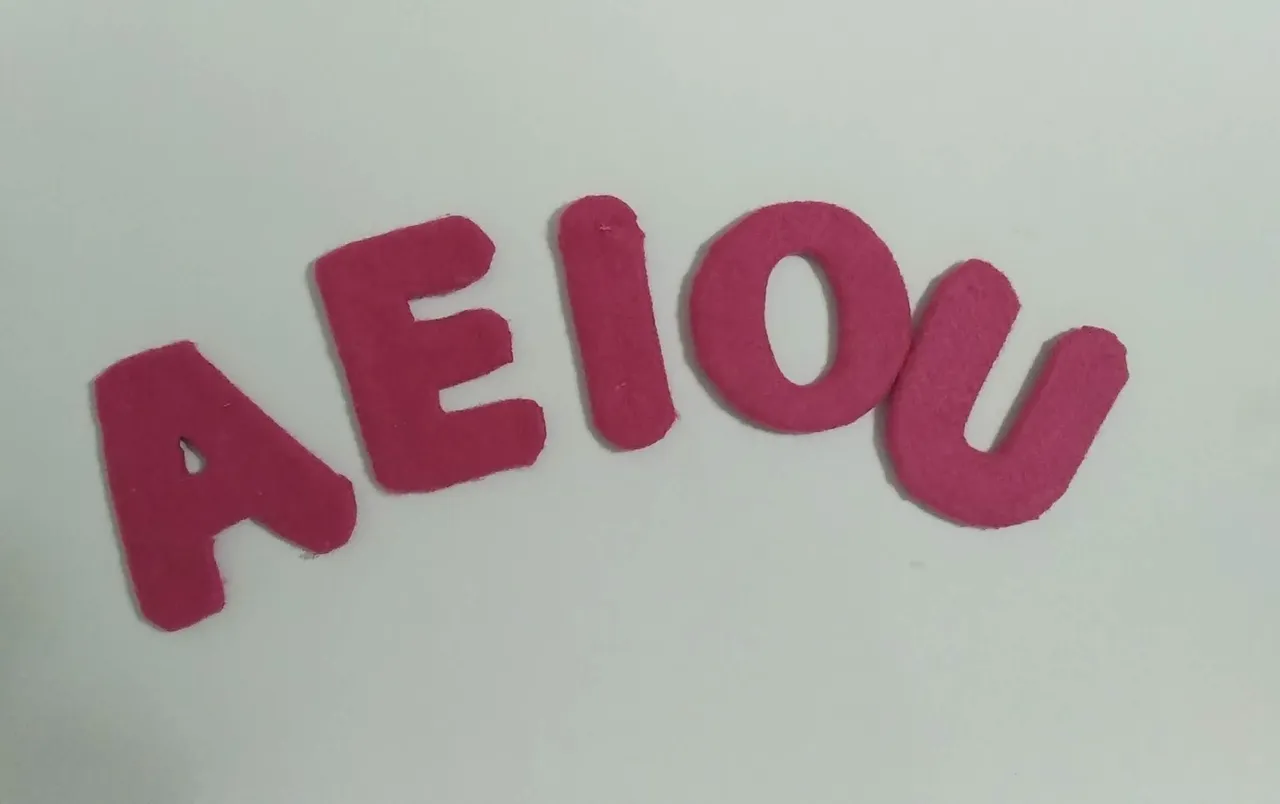
- Identificar las vocales por forma (visual)
- Identificar las vocales por forma de acuerdo a la textura (siguiendo el patrón de textura establecido)
- Identificar los números por forma (visual)
- Identificar los números por forma de acuerdo a la textura (siguiendo el patrón de textura establecido)
- Asociar piezas, logrando reconocer las formas en físico y en siluetas del cartón.
- Acatar instrucciones, cuando el juego se hace con papá y/o mamá y se le indica que pegue o despegue alguna letra o numero especifico.
- Reconocer Colores, aunque acá solo se usaron dos colores (fucsia y marrón) se pueden usar colores variados.
- Mantener estimulado el sentido visual y táctil para el reconocimiento de objetos.
Sin más y esperando disfruten del trabajo realizado con amor, les dejo los materiales utilizados, el proceso y las imágenes del trabajo.
- Cartón reciclado (resistente)
- Fieltro Rosado
- Fieltro Marrón
- Tela POP de color lila
- Cinta o cierre mágico blanco (puede ser de cualquier color)
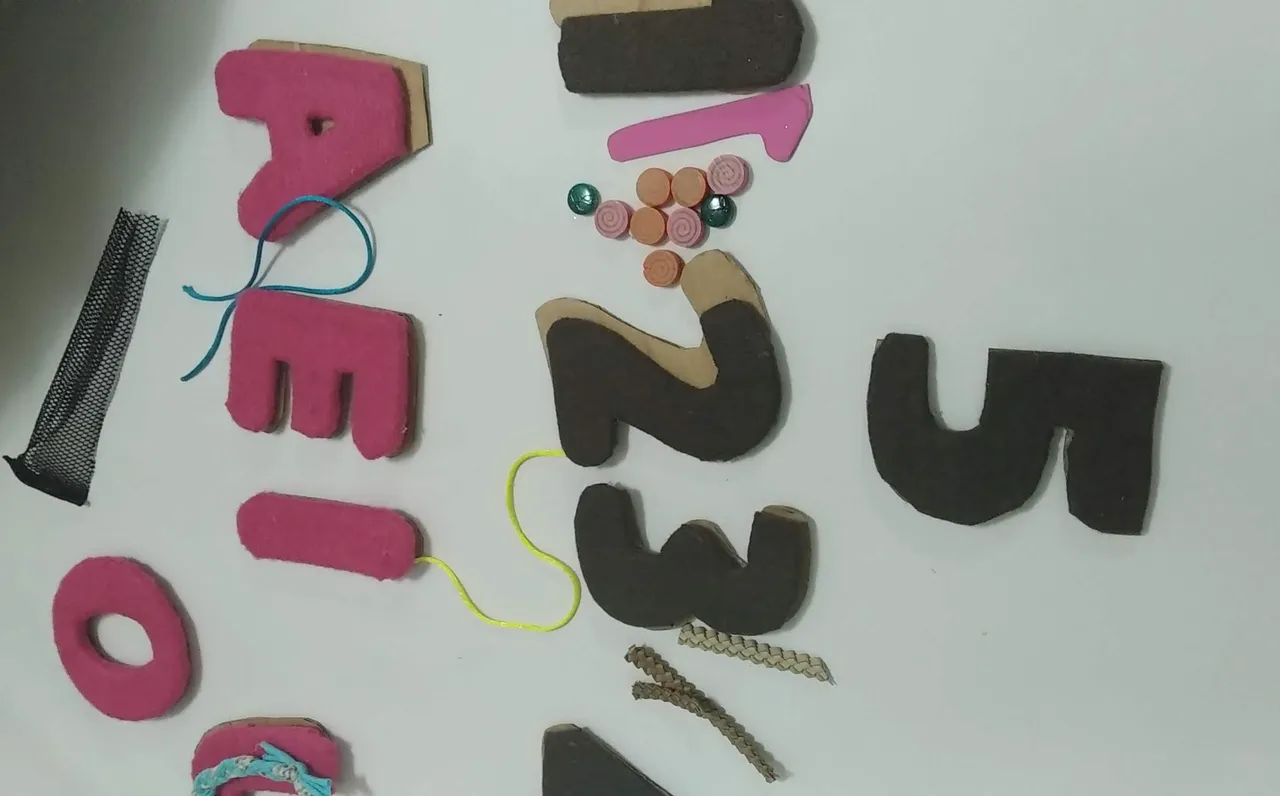
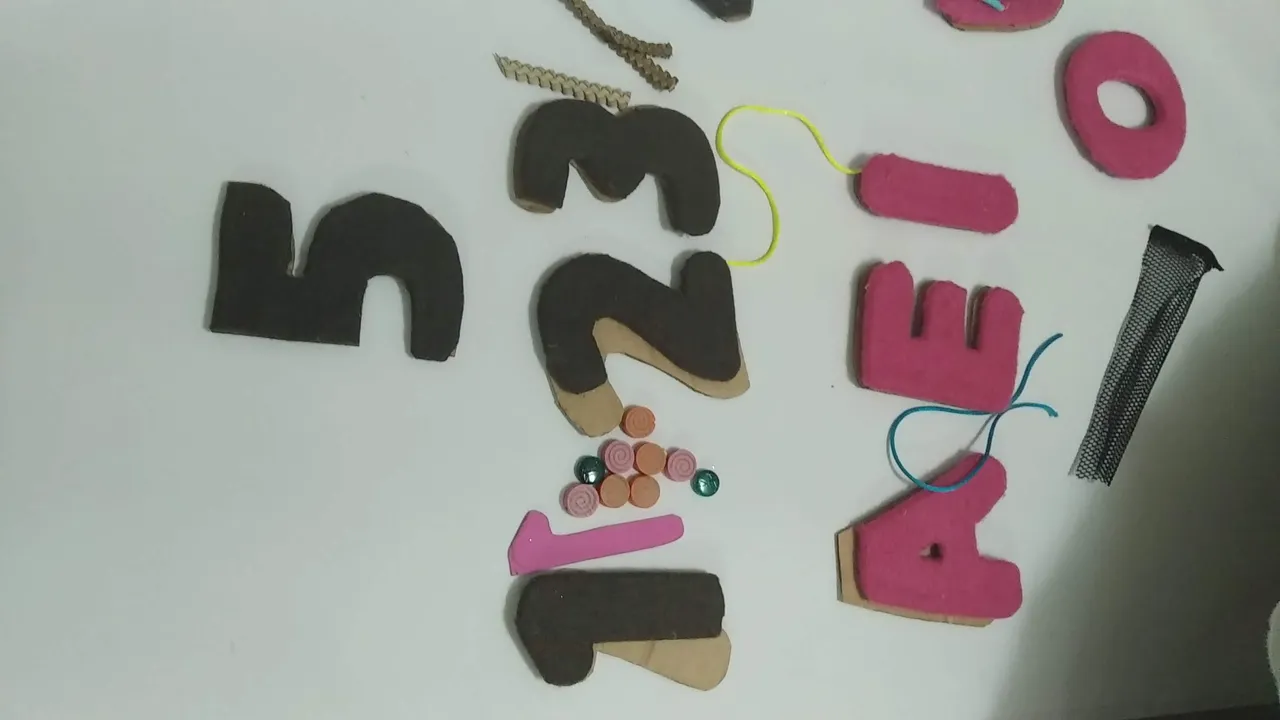
- Cosas para texturizar (cuerdas, tiras, botones, malla, foami, cuero, etc. LO QUE SE TENGA EN CASA con forma y relieve).
- Marcador grueso morado.
- Silicón Caliente
- Tijera.
- Regla.
- Lápiz.
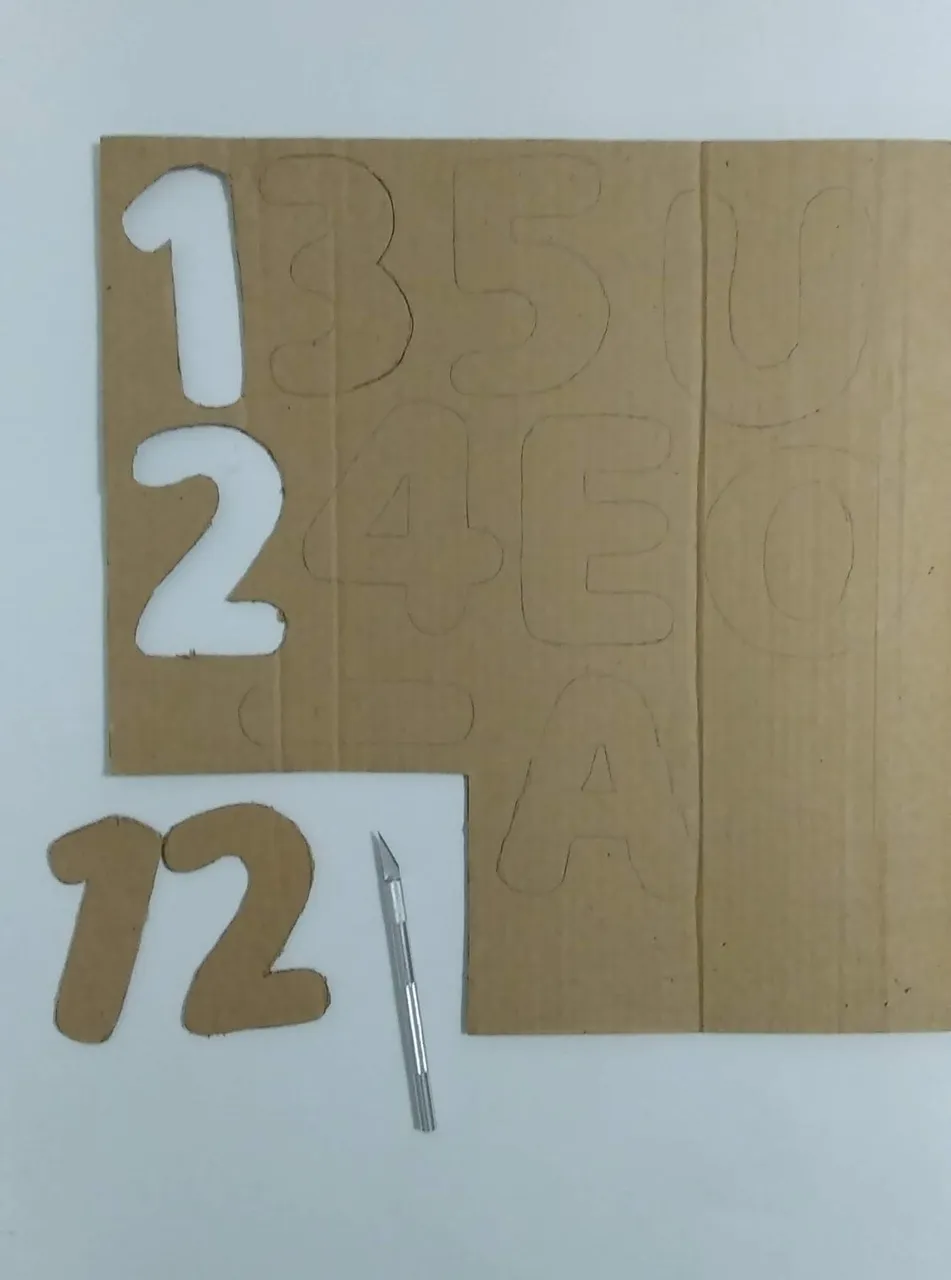
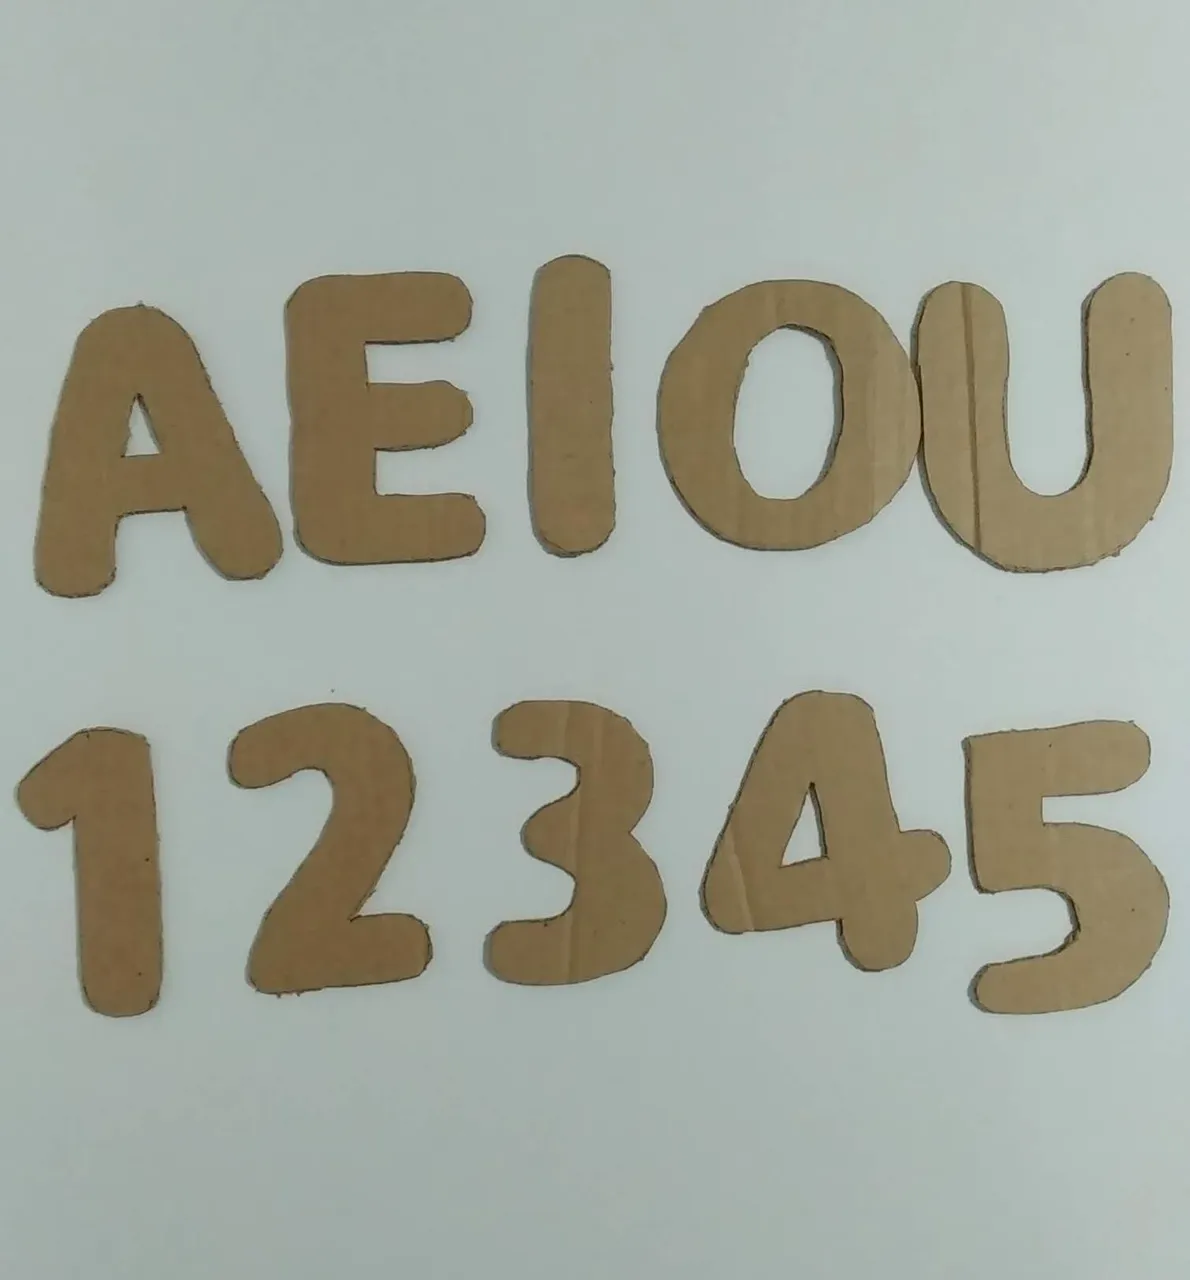
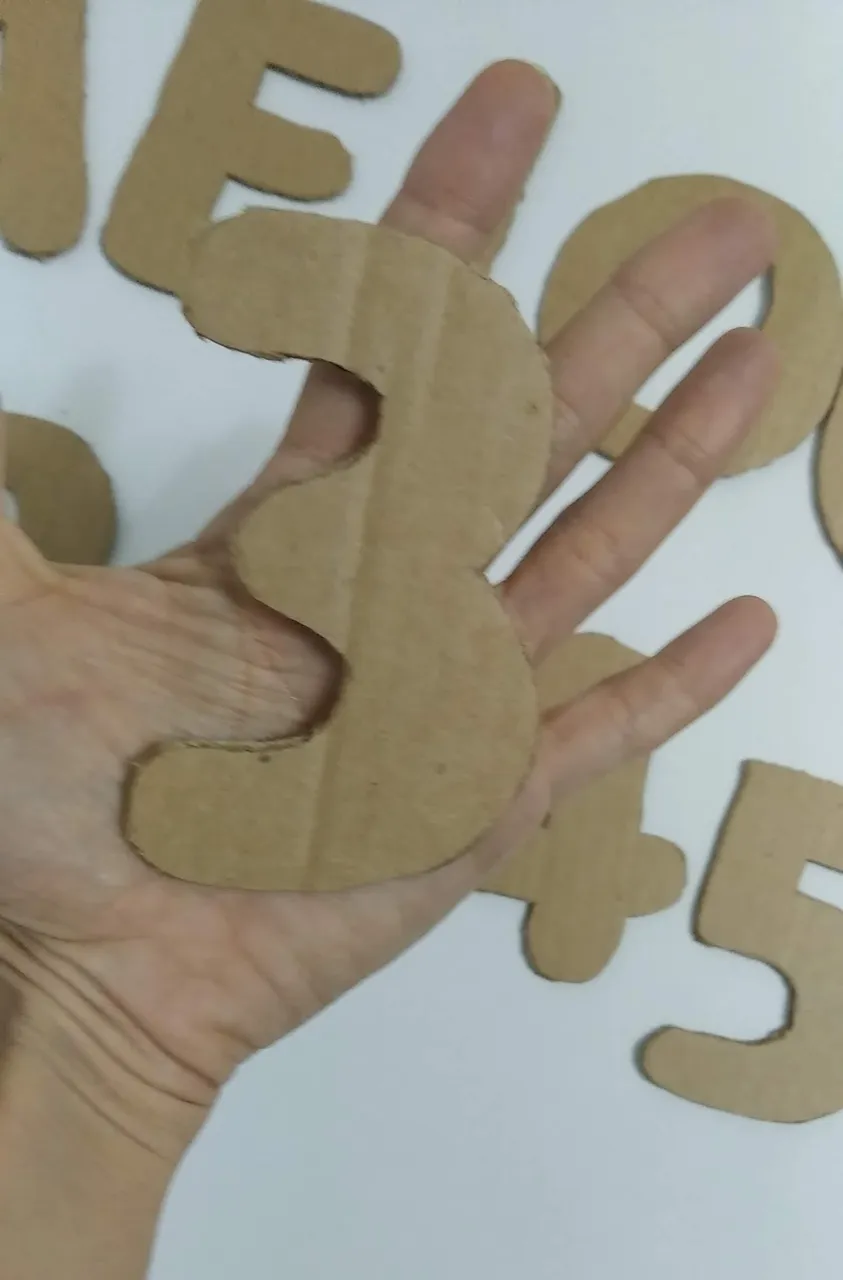
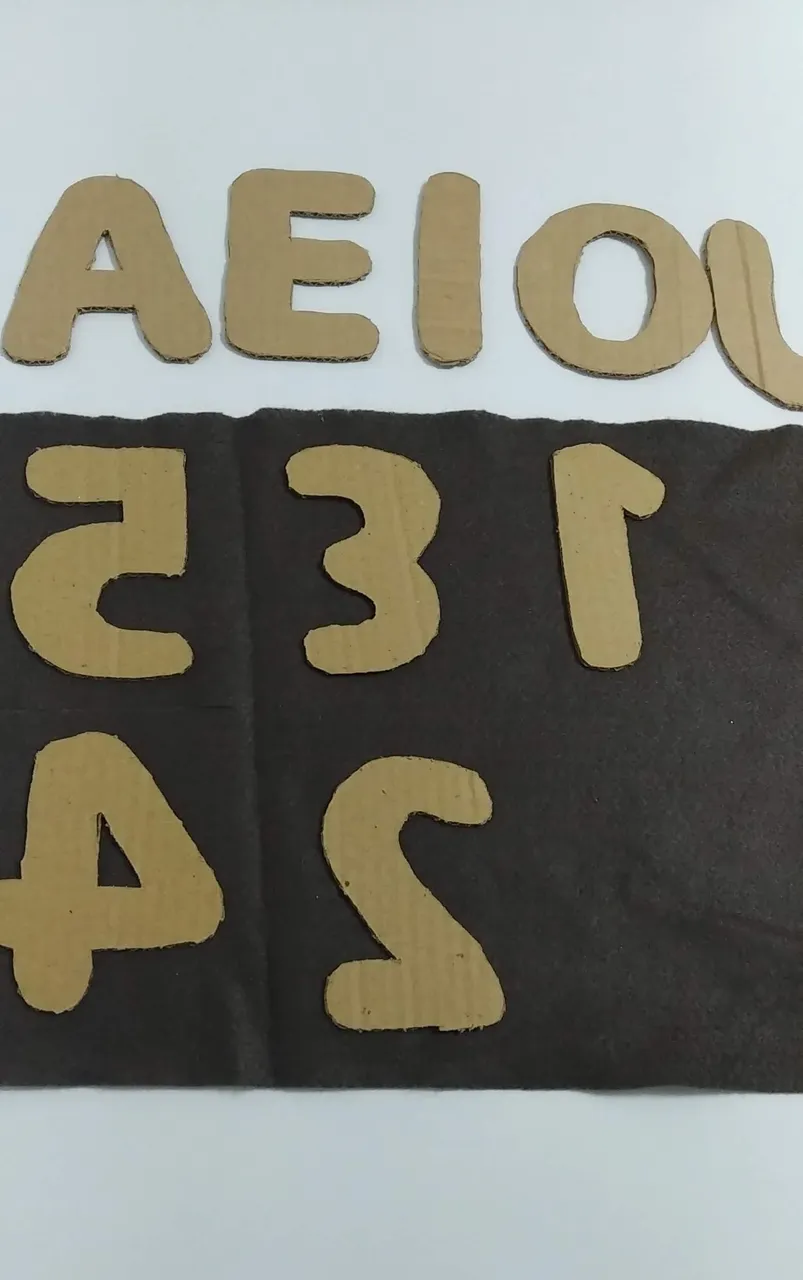
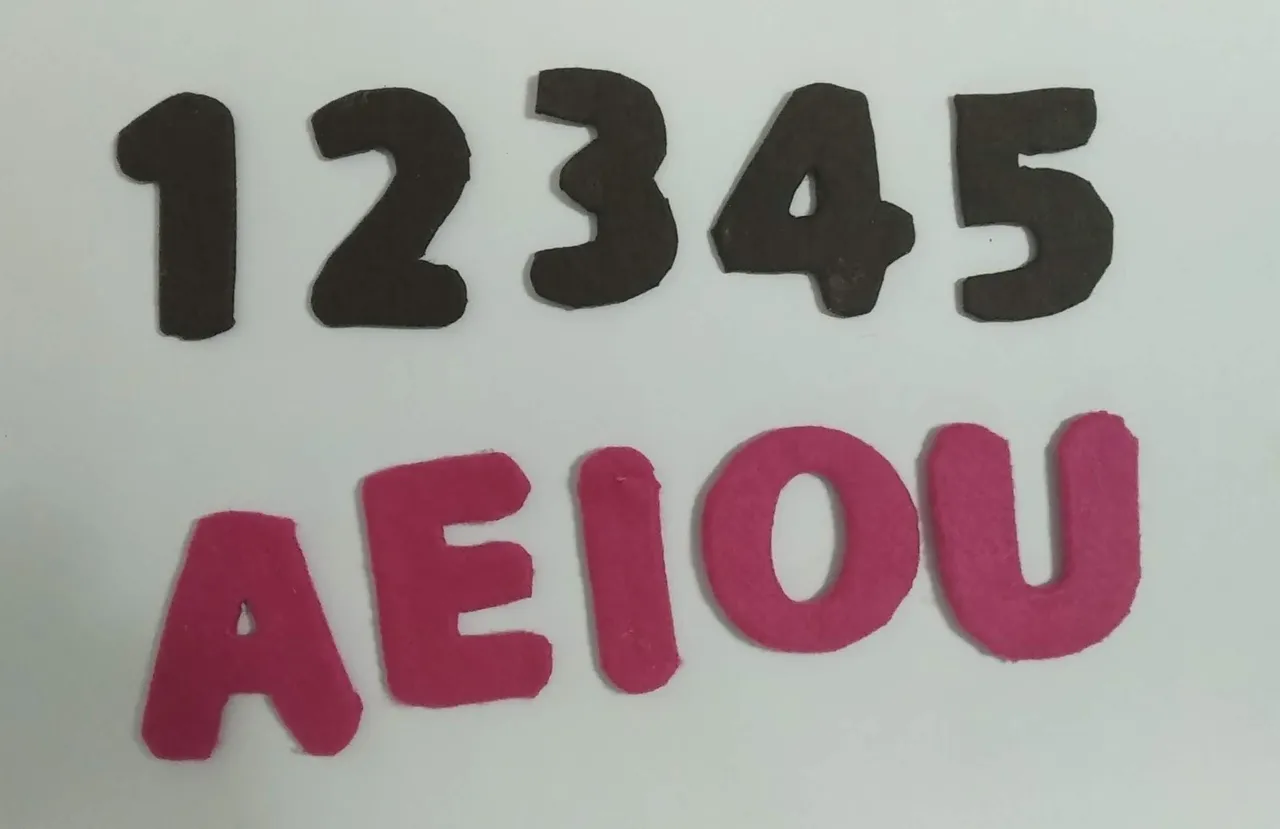
- Marcamos y recortamos en el cartón las letras y números a crear, todas deberán mantener el mismo tamaño.
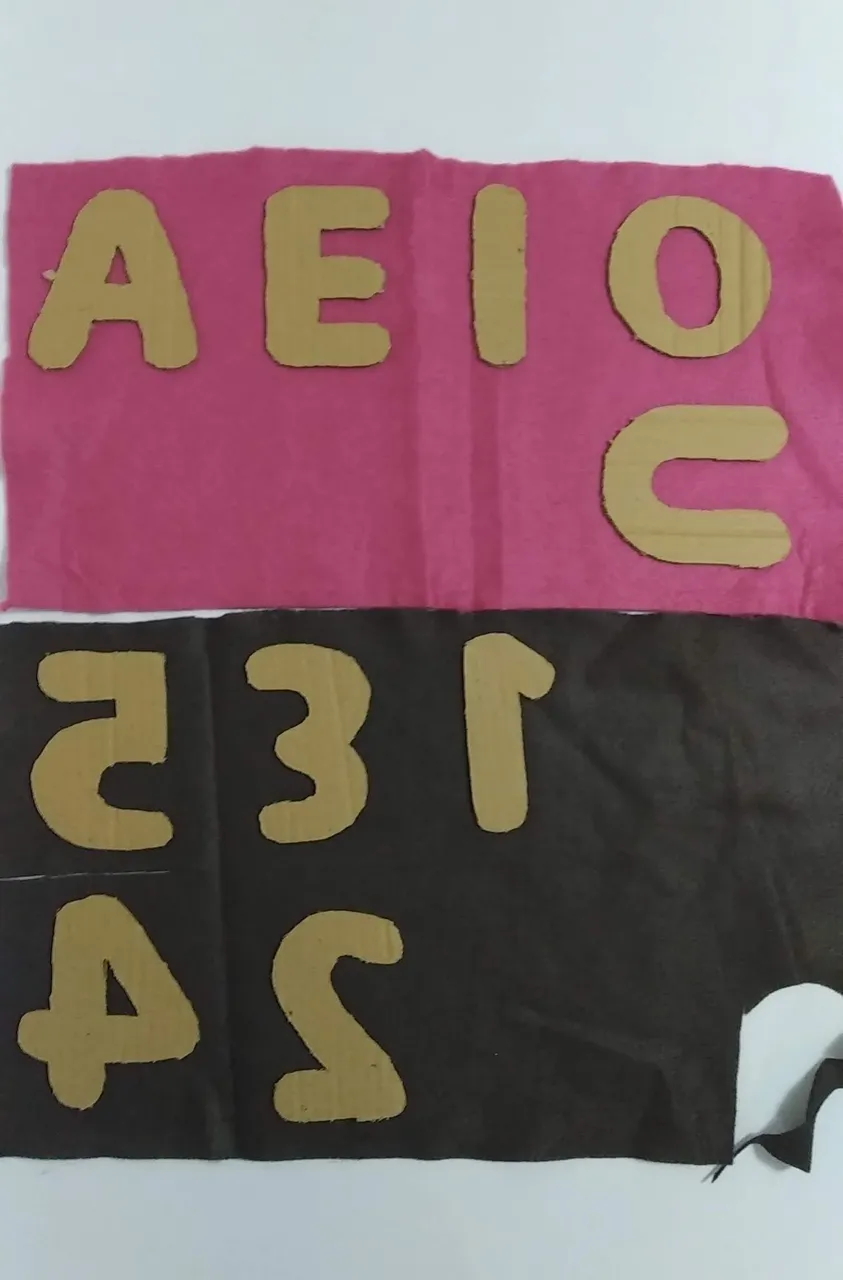
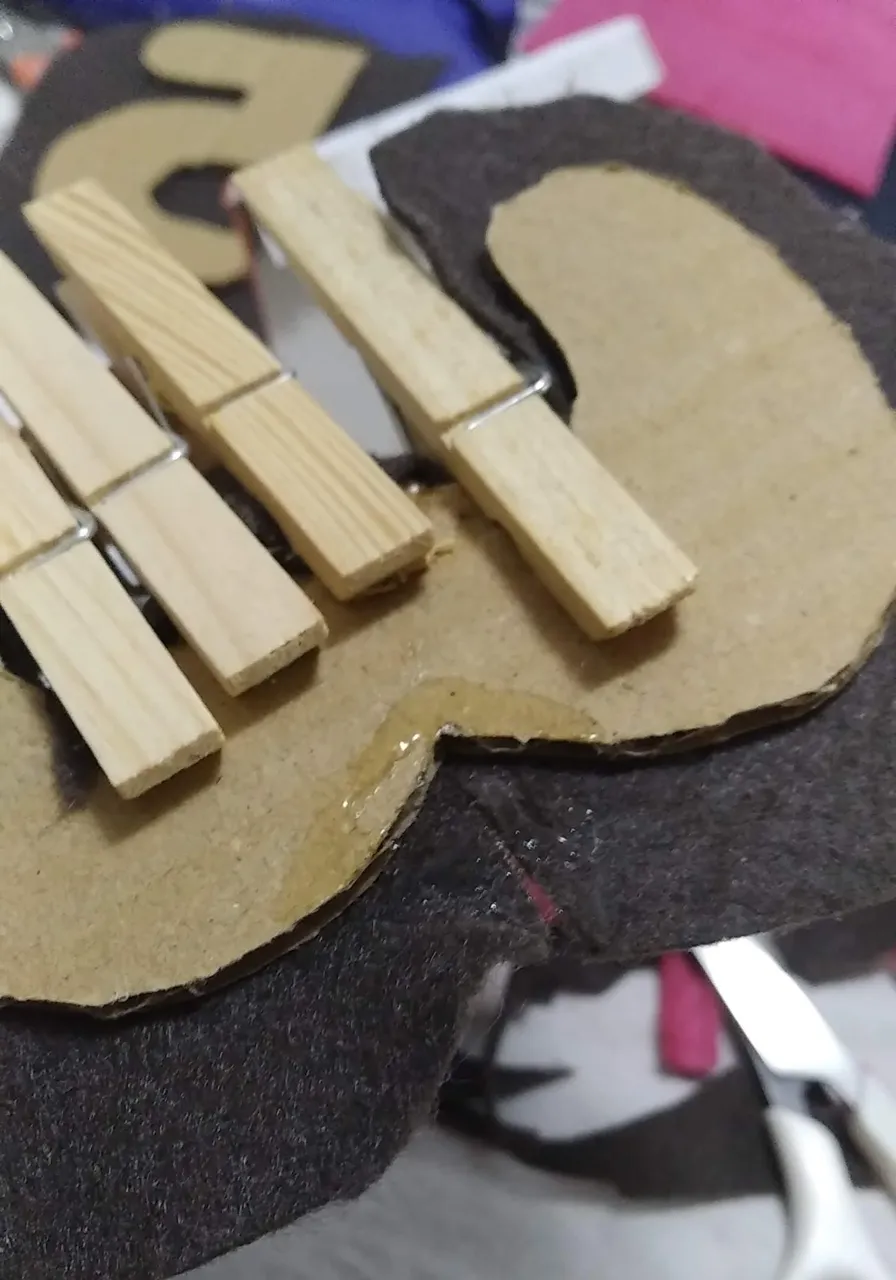
- Los números se forraran con fieltro marrón y las letras con fieltro rosado.
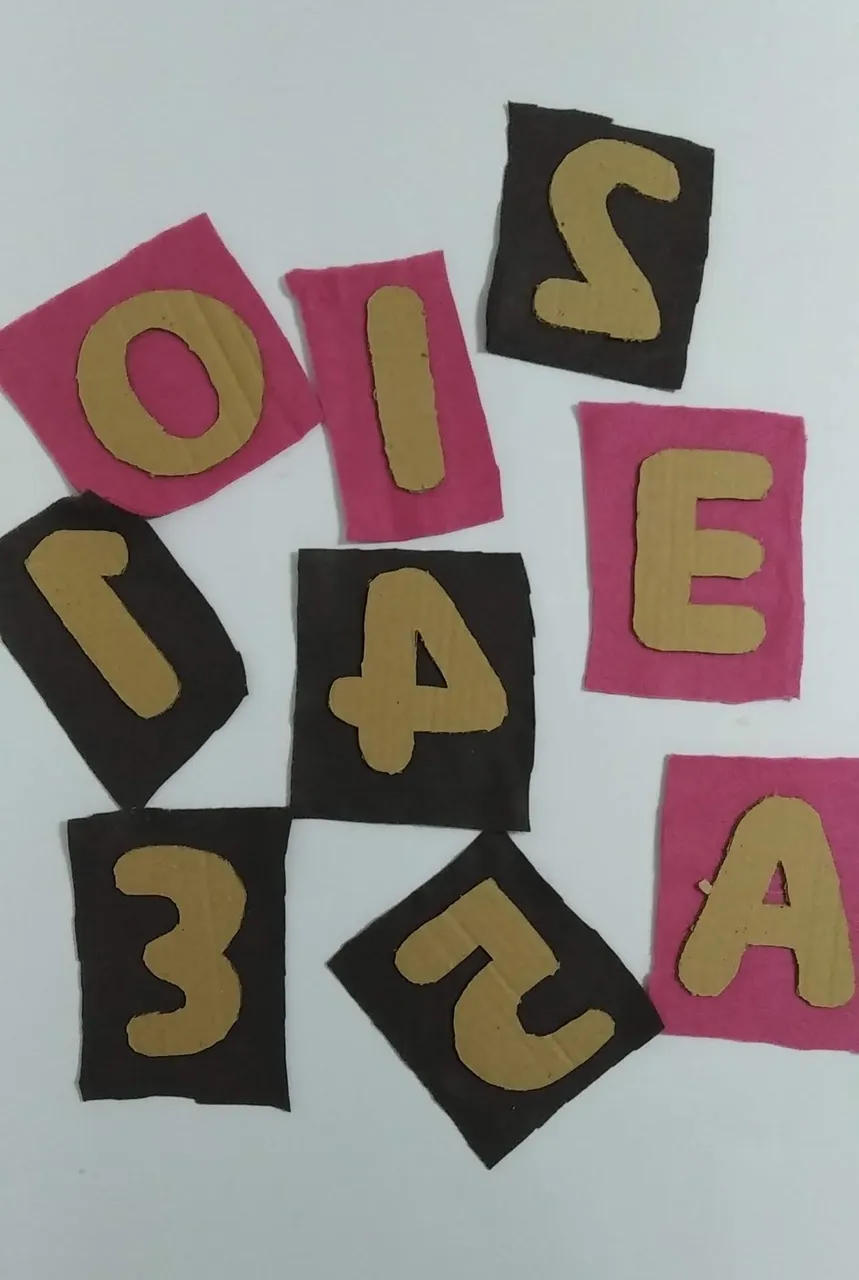
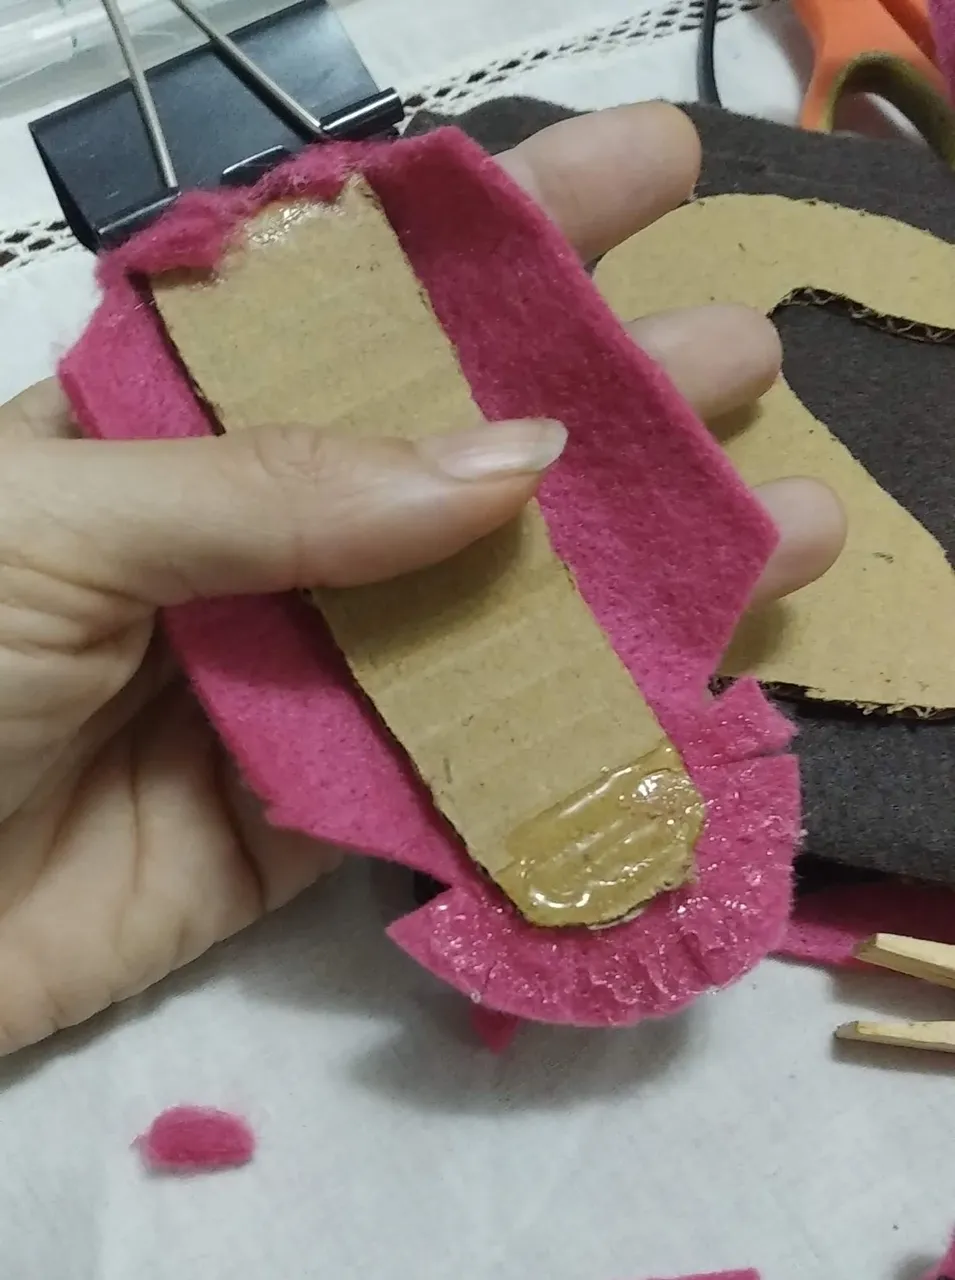
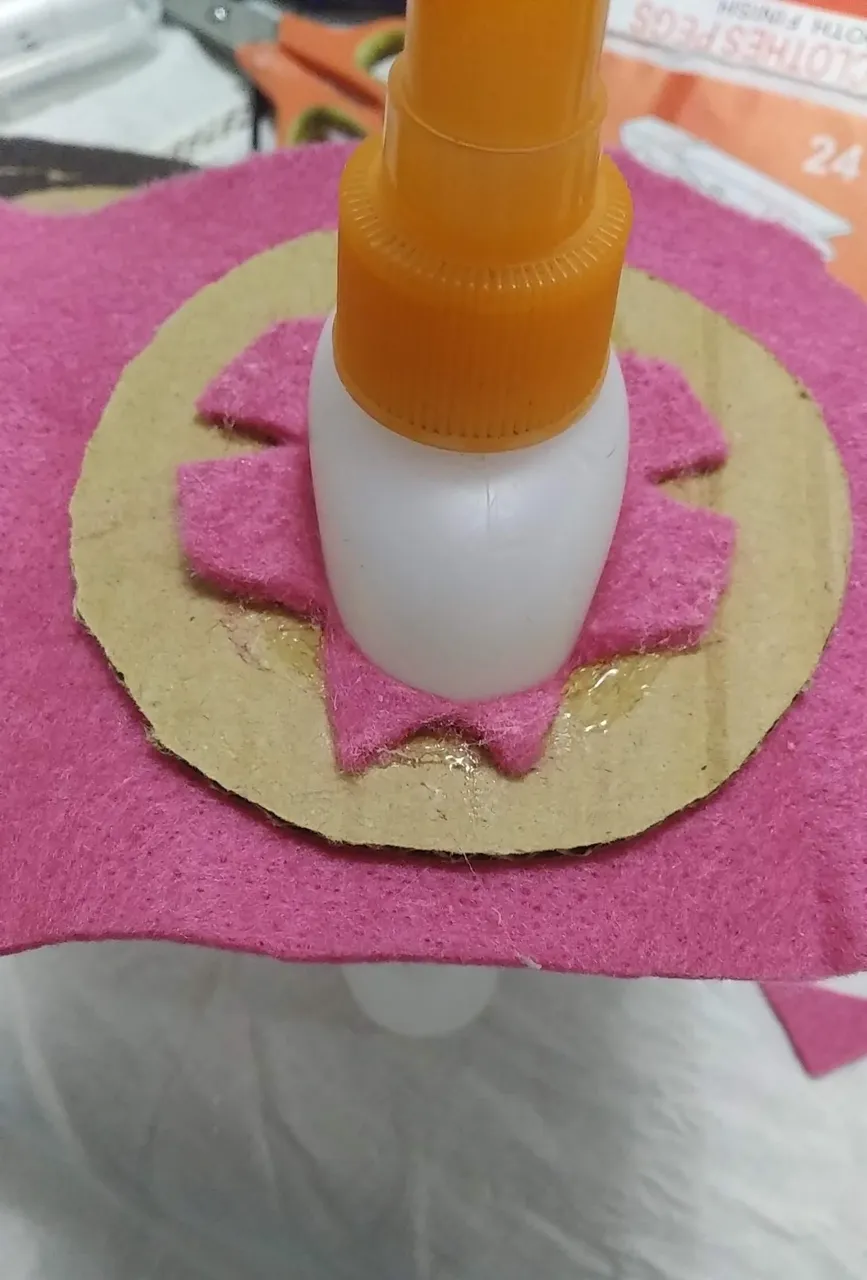
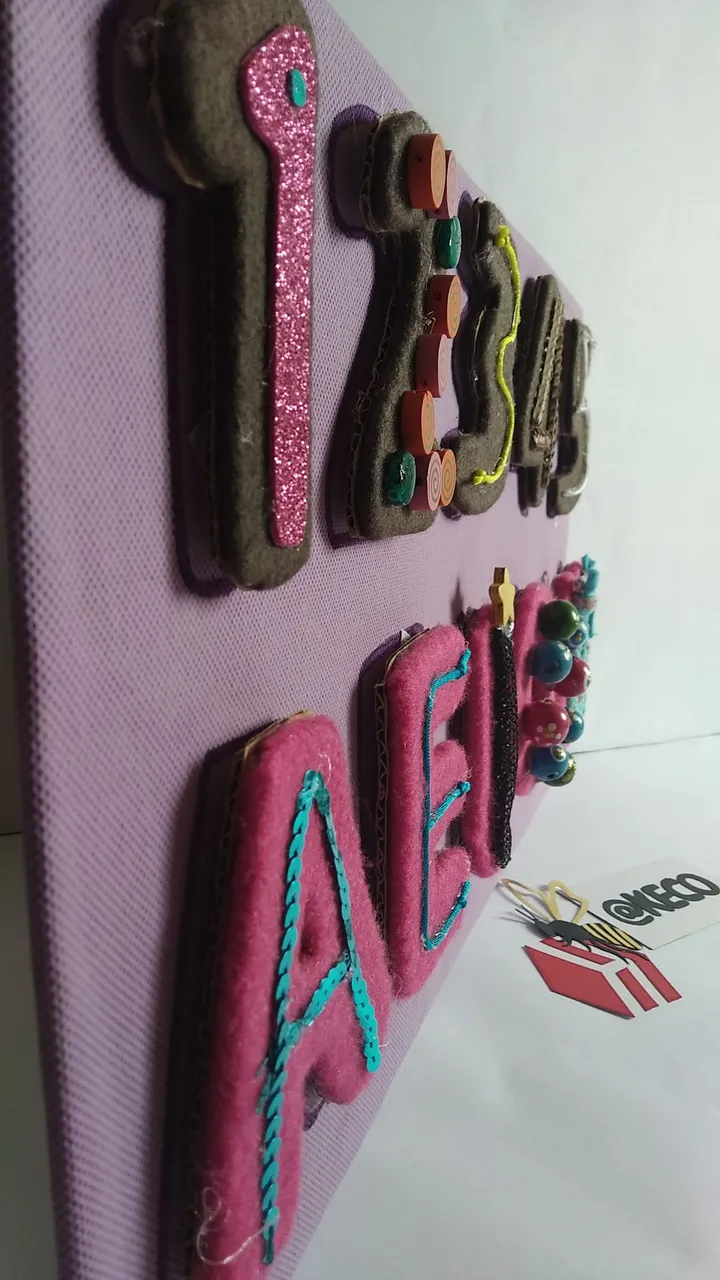
- Cada pieza de cartón se pega al fieltro con silicón caliente, dejando un borde de los lados para luego pegar hacia la parte trasera de cada letra y número. Se deberá hacer pequeños cortes a la parte sobrante para poder pegar mejor.
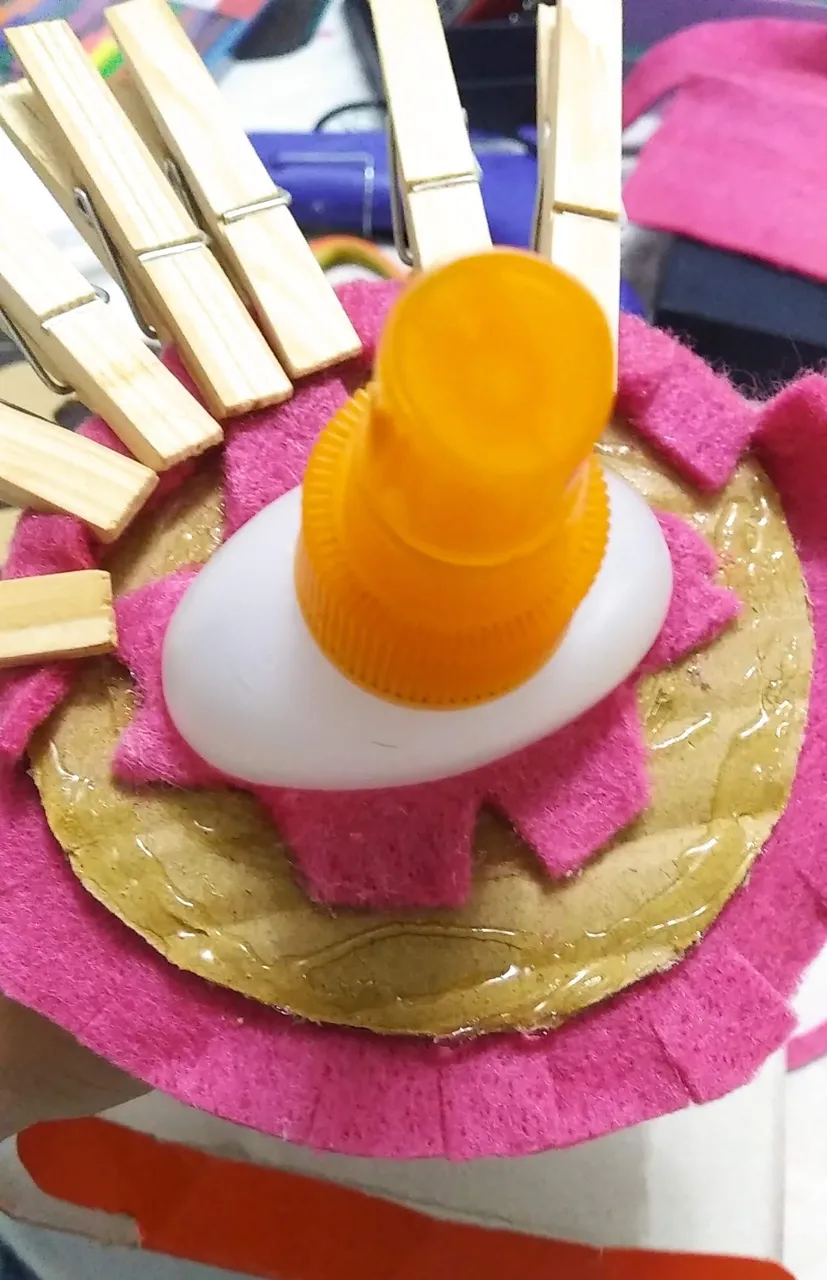
- Para ayudar a fijar mejor mientras seca el silicón, se podrá utilizar ganchos de madera o clips mordaza
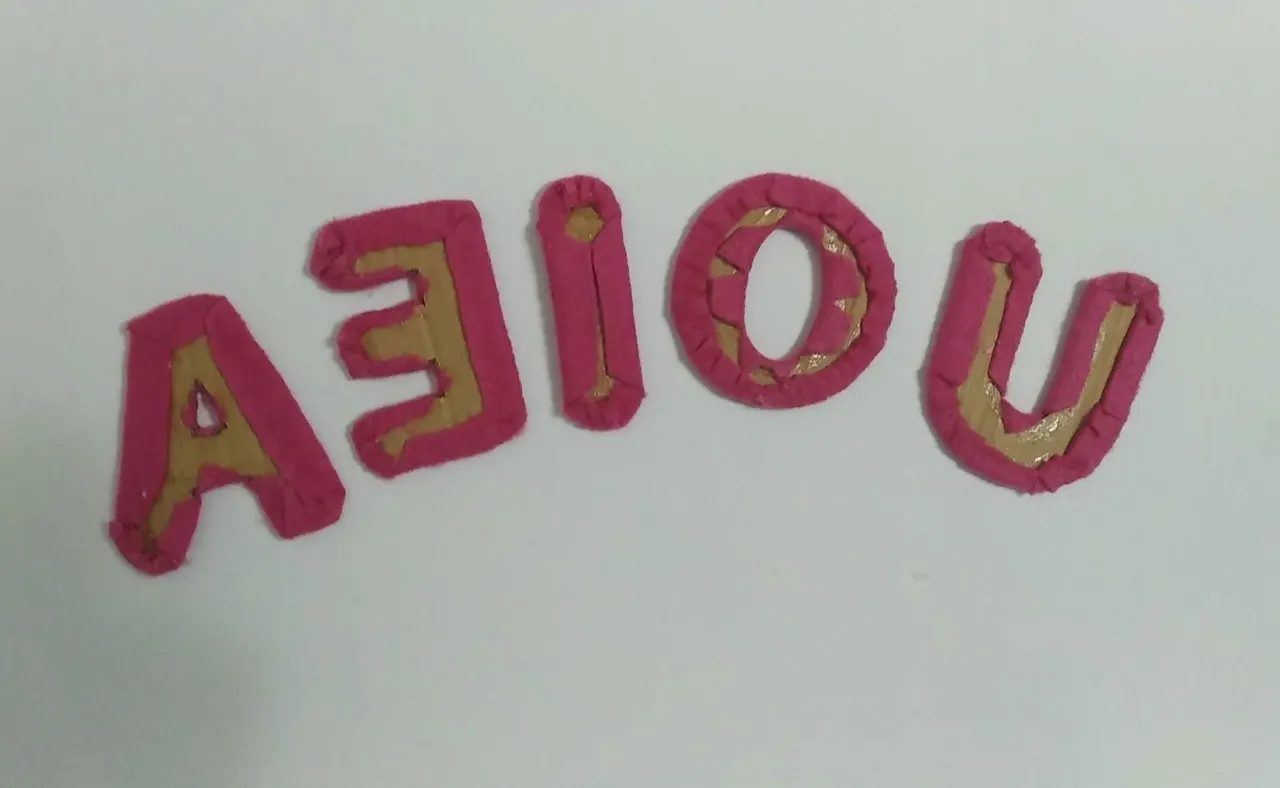
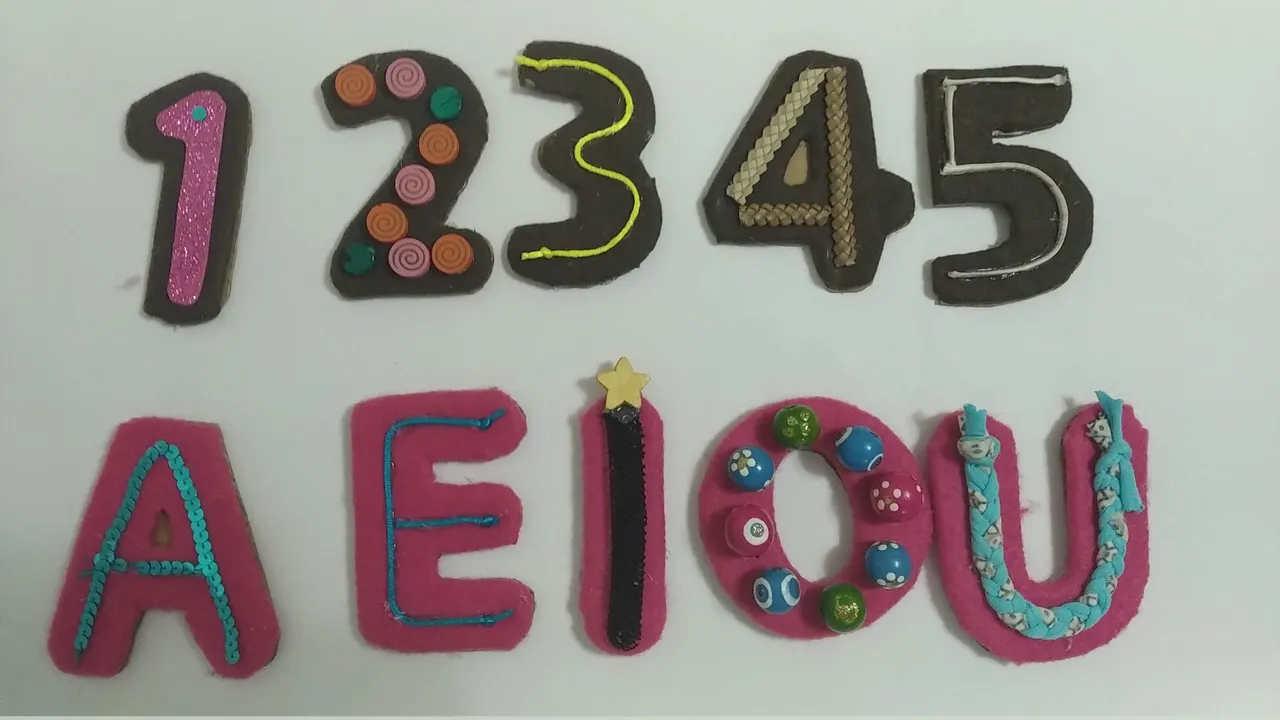
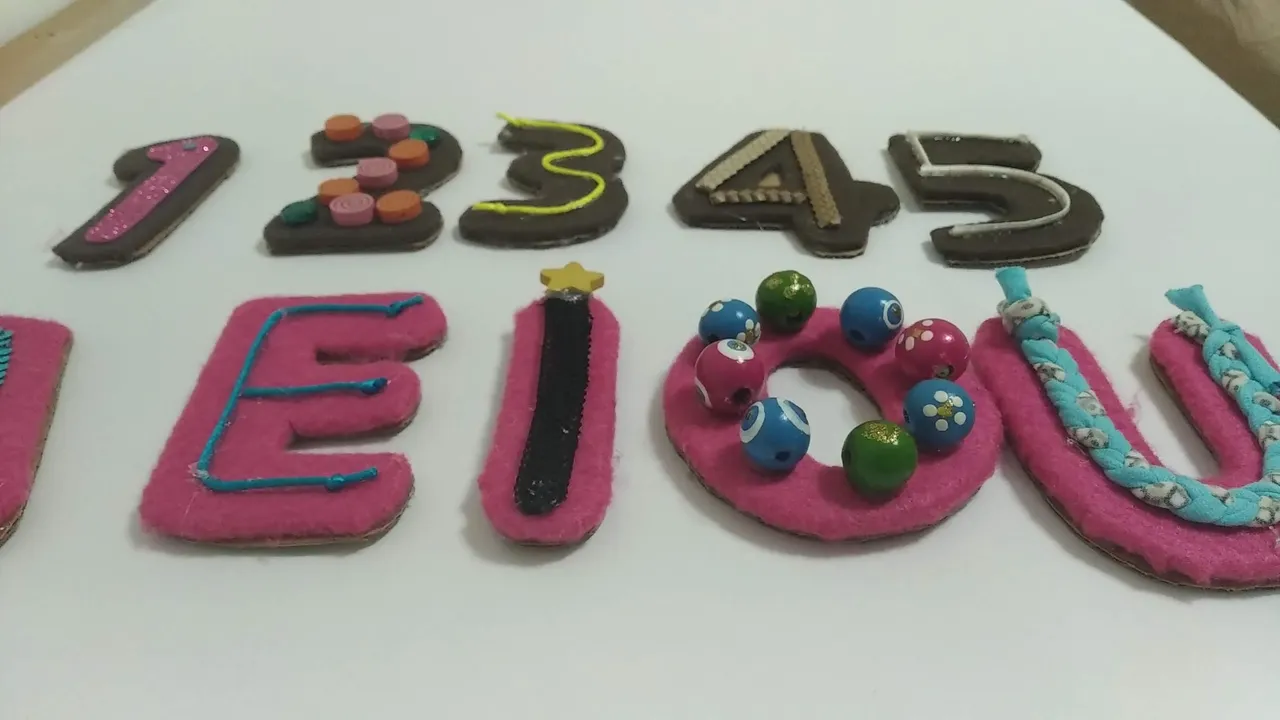
- Una vez se tengan todas las letras y números, seleccionar los elementos con textura y relieve que se le pegaran a cada pieza. Es importante señalar que se deberá seleccionar piezas variadas que permitan al tacto poder seguir la forma de cada letra y numero.
- Pegar los accesorios de textura con bastante silicón caliente para evitar se desprendan con la manipulación.
- Medir las letras y los números en un cartón grueso y resistente y cortar de forma rectangular cuidando de que queden bien centradas.
- Forrar el rectángulo con tela POP morado pegando con silicón caliente.
- Marcar con marcador grueso los bordes de cada letra sobre la tela POP, cuidando queden bien centradas en el rectángulo.
- Cortar la cinta mágica en pequeños cuadros (el tamaño será acorde al tamaño que se corten las piezas)
- Para garantizar las piezas encajen y peguen perfectamente en el rectángulo, se deberá pegar la cinta mágica al rectángulo con el lado duro hacia abajo y el blando hacia arriba. Una vez seca la parte de abajo, aplicar silicón a la parte blanda y pegar la letra/numero en el área demarcada.
- Una vez seca, se podrá separar y pegar cuantas veces sea necesario y y siempre coincidirán las piezas.
- ¡Listo!, a disfrutar de la magia de lo creado en casa para enseñar a los más pequeños de la casa.
English
Hello...
Today I want to show you some sensory letters and numbers that I made for a beautiful 2 year old girl. They say it is the perfect age for initial stimulation in the learning process and her mom wanted to start this process in a fun way in the midst of this global pandemic that keeps us at home, sheltered and active in the teaching process.
These letters, easy and inexpensive to make, allow Tamara to:
- Identify vowels by shape (visual).
- Identify vowels by shape according to texture (following the established texture pattern).
- Identifying numbers by shape (visual)
- Identify numbers by shape according to texture (following the established texture pattern) * Identify numbers by shape according to texture (following the established texture pattern)
- Associate pieces, recognizing the shapes in physical and silhouettes of the cardboard.
- Follow instructions, when the game is played with mom and/or dad and the child is instructed to glue or peel off a specific letter or number.
- Recognize colors, although here only two colors (fuchsia and brown) can be used varied colors.
- Keep the visual and tactile sense stimulated for object recognition.
Without further ado and hoping you enjoy the work done with love, I leave you the materials used, the process and the images of the work.
- Recycled cardboard (resistant)
- Pink Felt
- Brown Felt
- Lilac colored POP fabric
- White magic ribbon or zipper (can be any color) * Texturing stuff (strings)
Things to texturize (strings, strips, buttons, mesh, foami, leather, etc.) * Whatever you have in stock WHATEVER YOU HAVE AT HOME with shape and embossing). - Thick purple marker.
- Hot Silicone
- Scissors.
- Ruler.
- Pencil.
- We mark and cut out the letters and numbers to be created on the cardboard, they should all be the same size.
- The numbers will be lined with brown felt and the letters with pink felt.
- Each piece of cardboard is glued to the felt with hot silicone, leaving a border on the sides and then glued to the back of each letter and number. Small cuts should be made on the excess part to be able to glue it better.
- To help fix better while the silicone dries, you can use wooden hooks or clips.
- Once you have all the letters and numbers, select the textured and embossed elements that will be glued to each piece. It is important to select varied pieces that allow the touch to follow the shape of each letter and number.
- Glue the textured accessories with plenty of hot silicone to prevent them from coming off during manipulation.
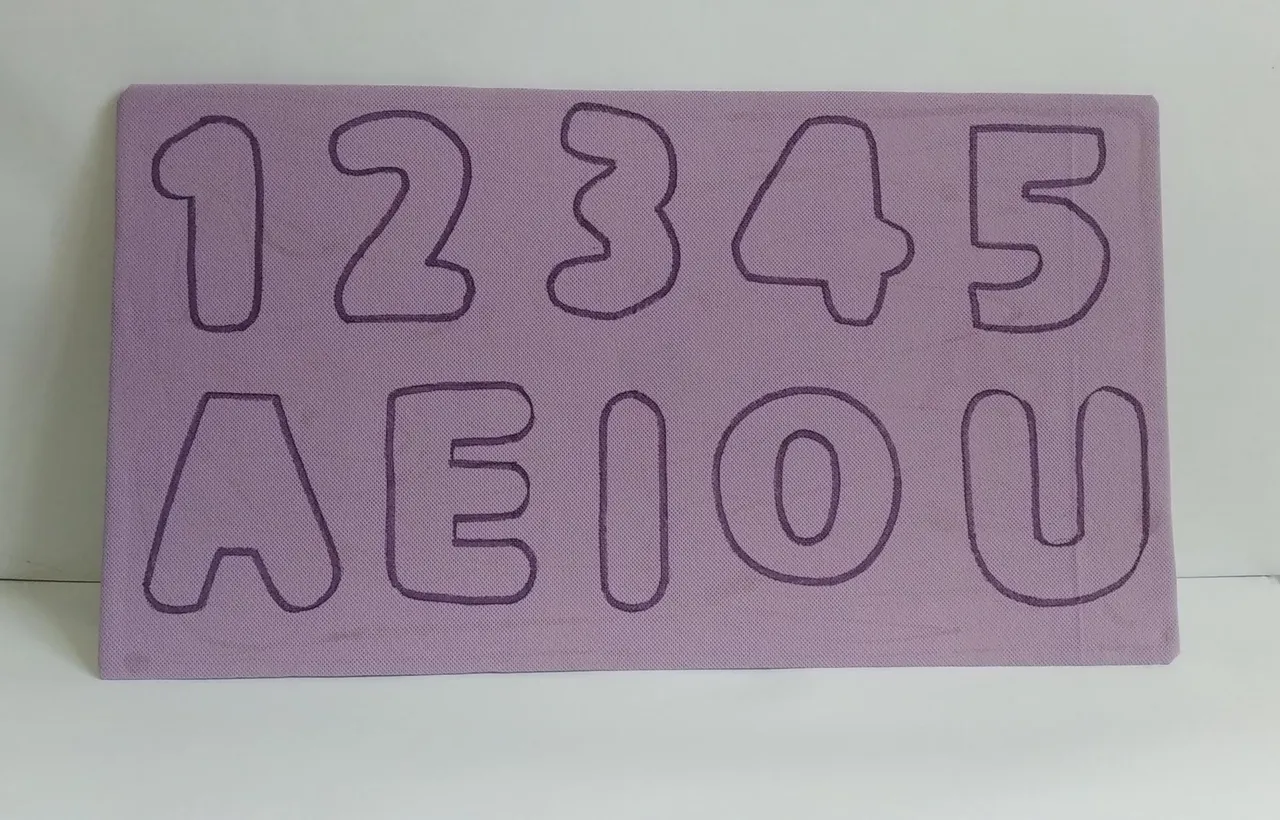
- Measure the letters and numbers on a thick and resistant cardboard and cut them in a rectangular shape, making sure that they are well centered.
- Cover the rectangle with purple POP fabric and glue with hot silicone.
- Mark the edges of each letter on the POP fabric with a thick marker, making sure they are well centered on the rectangle.
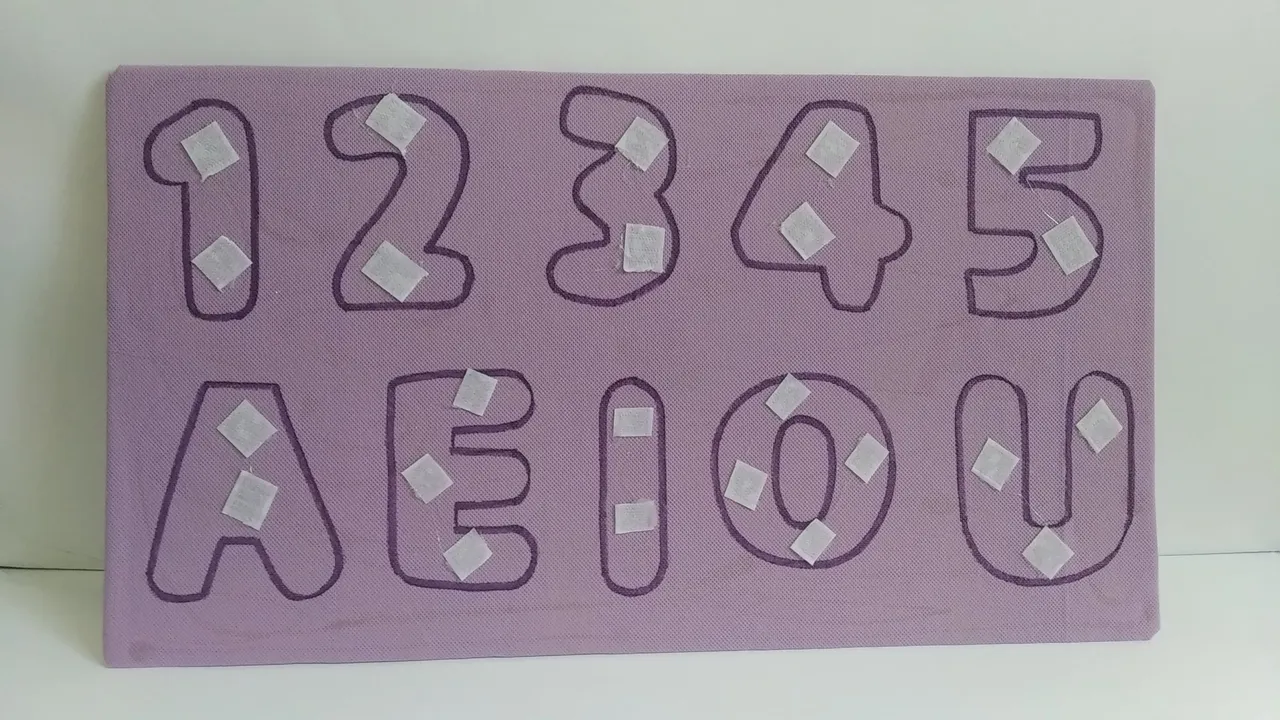
- Cut the magic ribbon into small squares (the size will be according to the size of the pieces cut).
- To ensure the pieces fit and stick perfectly on the rectangle, the magic tape should be glued to the rectangle with the hard side down and the soft side up. Once the bottom side is dry, apply silicone to the soft side and glue the letter/number in the marked area.
- Once dry, you can separate and glue as many times as necessary and the pieces will always match.
- Ready, enjoy the magic of what you have created at home to teach the little ones at home.
Translated with www.DeepL.com/Translator (free version)
IMÁGENES / IMAGES
SALUDOS / REGARDS
Todas las Fotos fueron tomadas con mi teléfono Redmi 7A.
Contenido original de @keco (fotos y texto) - Todos los derechos reservados Publicado en HIVE así como en mi instagram : http://instagram.com/carton_pintura_algo_mas
All Photos were taken with my Redmi 7A phone.
Original content from @keco (photos and text) - All rights reserved Posted on HIVE as well as on my instagram: http://instagram.com/carton_pintura_algo_mas