Español
Hola amigos(as).
Esta publicación es mi participación en el concurso relacionado con la Primavera impulsado por la maravillosa comunidad de @hivediy.
Muchas veces me he entusiasmado con muchos concursos, sin embargo debido a las múltiples ocupaciones del día a día termino dejando de lado muchas de ellas, más que por falta de interés, es por falta de tiempo libre, sin embargo ésta vez, y agradeciendo tenia algo de tiempo disponible este fin de semana decidí crear algo fácil, sencillo pero sobretodo útil que me permitiera tener orden en casa y por supuesto participar por primera vez en la ronda de concursos semanales que siempre organiza el equipo de @hivediy
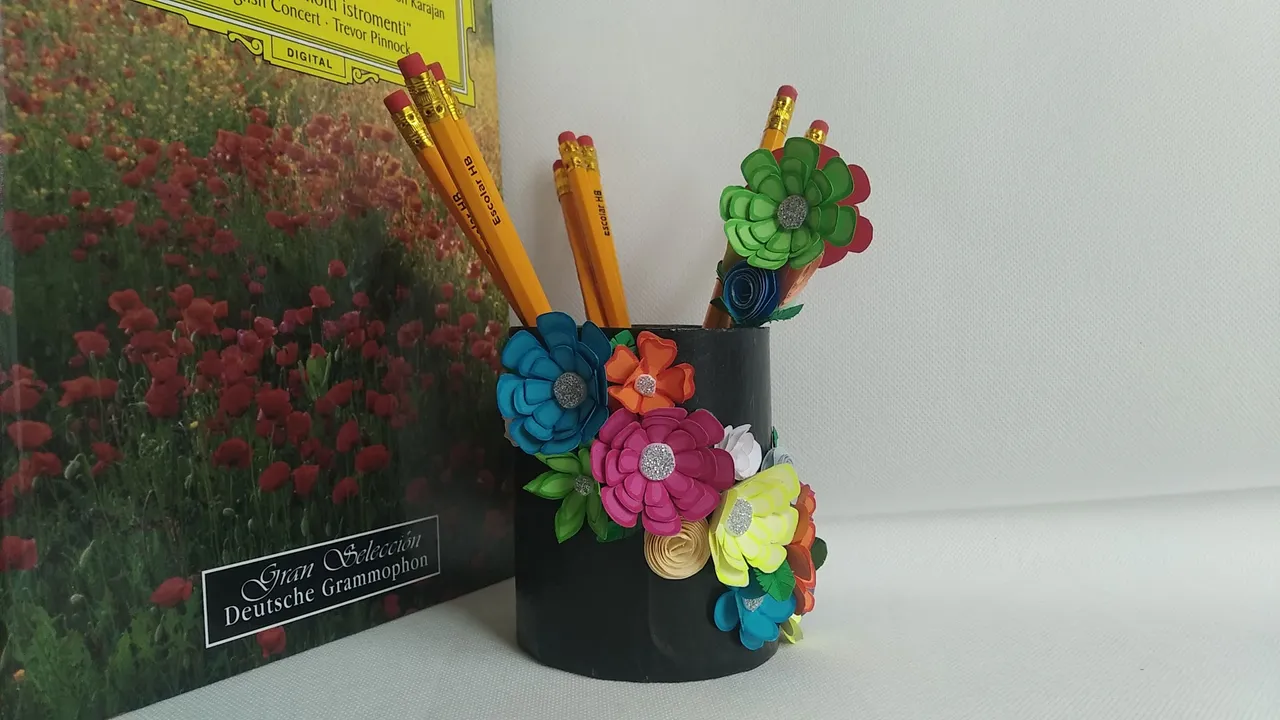
Inspirada en la temática, cree un lindo organizador de lapices y/o lapiceros; utilizando para ello, una base de cartón gruesa (rollo de cartón industrial) y flores de distintas formas y colores para hacerla divertida y colorida tal y como no las ofrece la naturaleza.
Sin más y esperando disfruten del trabajo realizado con amor, les dejo los materiales utilizados, el proceso y las imágenes del trabajo.
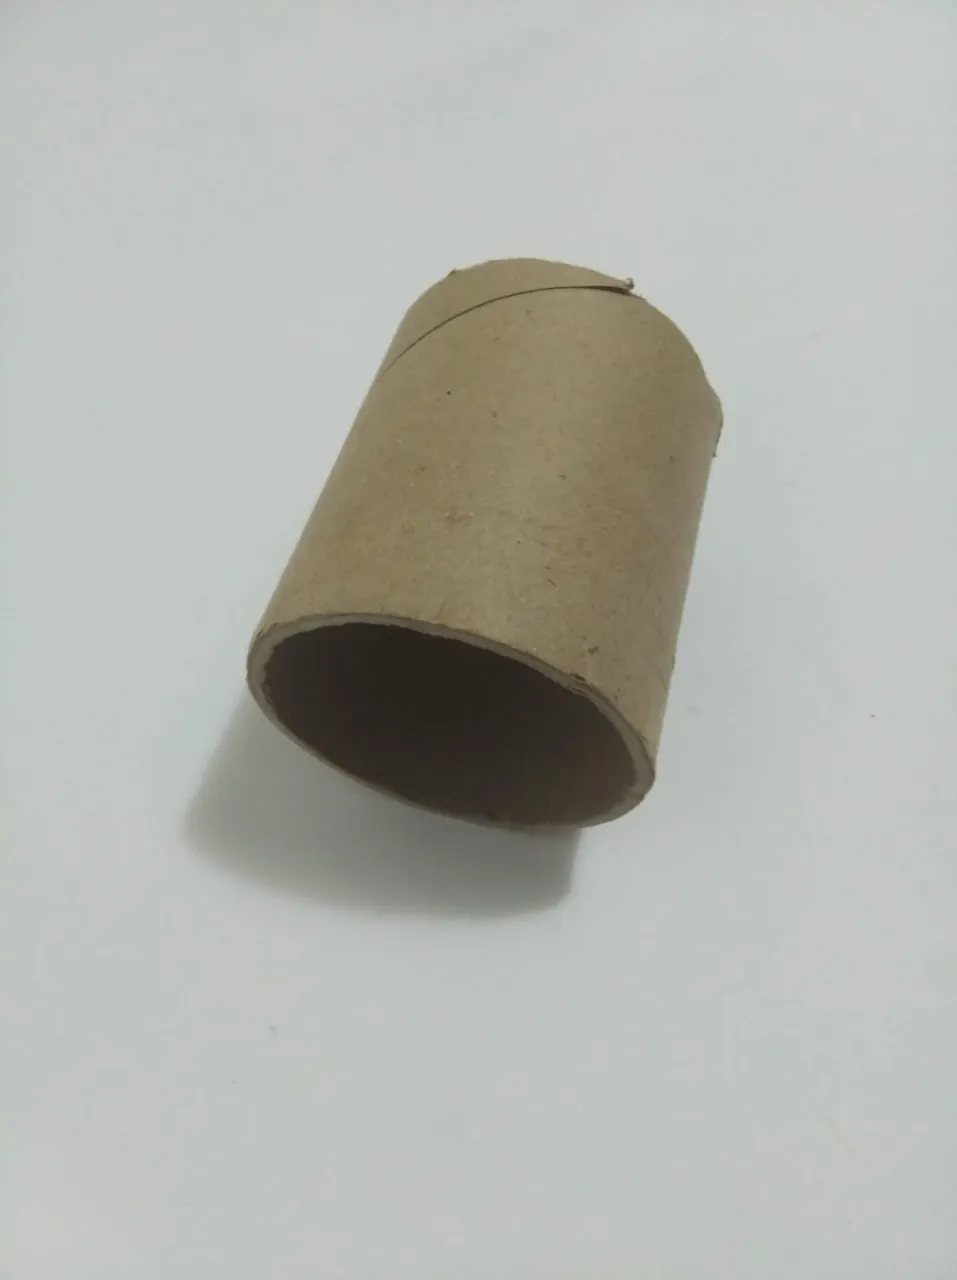
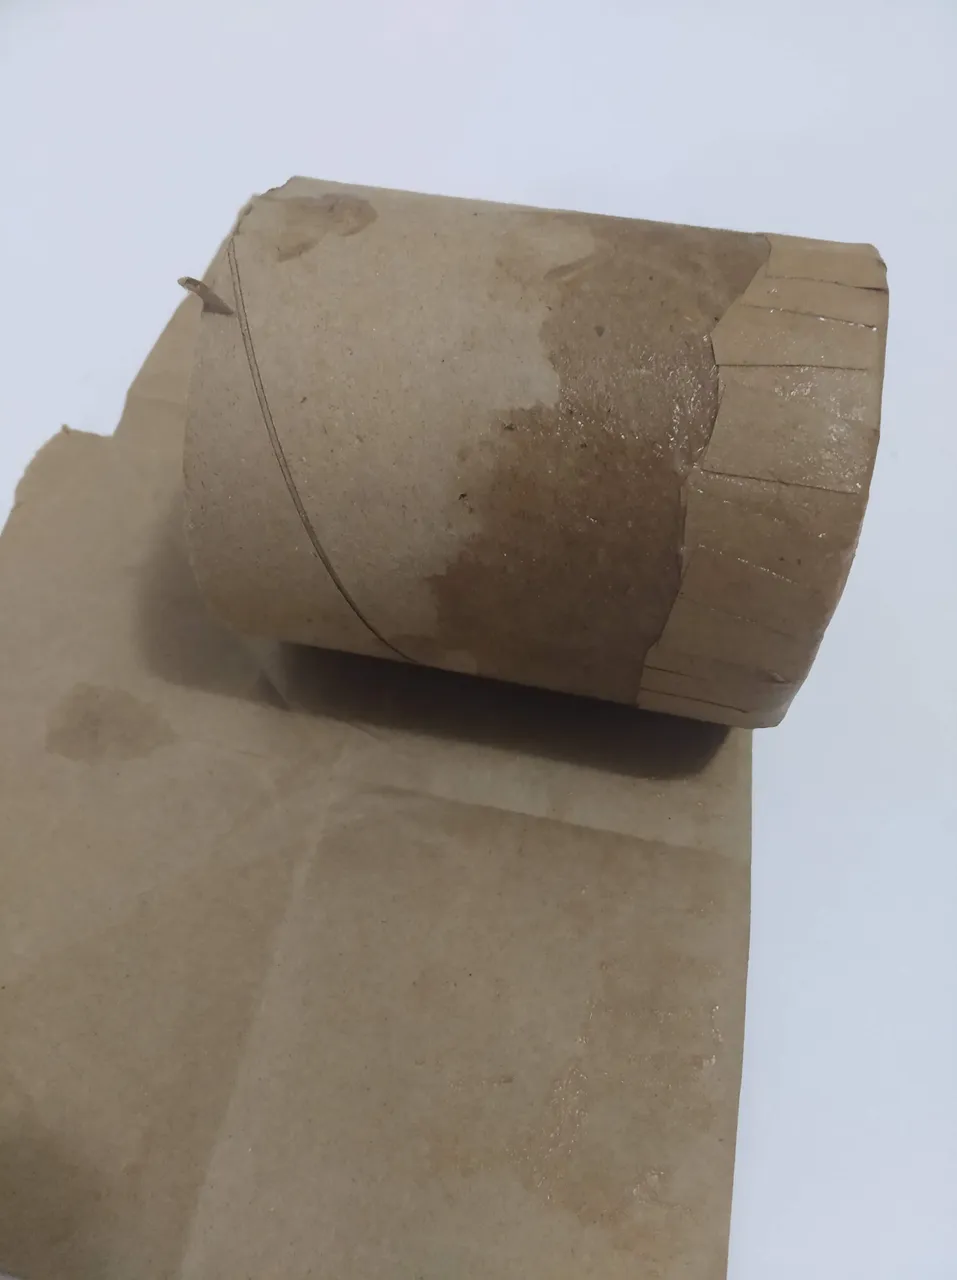
- Rollo de cartón grande (industrial)
- Papel craf reutilizado
- Engrudo (pegamento casero).
- Cartón
- Pintura negra al frio
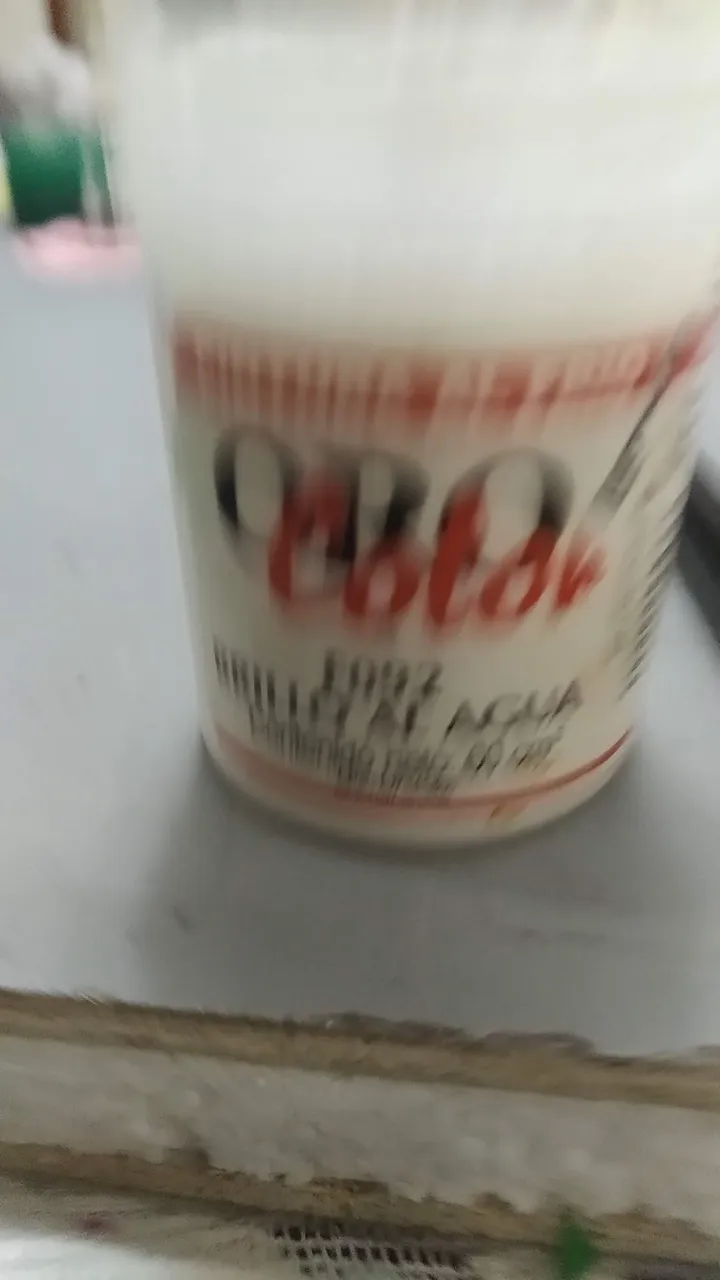
- Brillo al agua (especie de esmalte para manualidades)
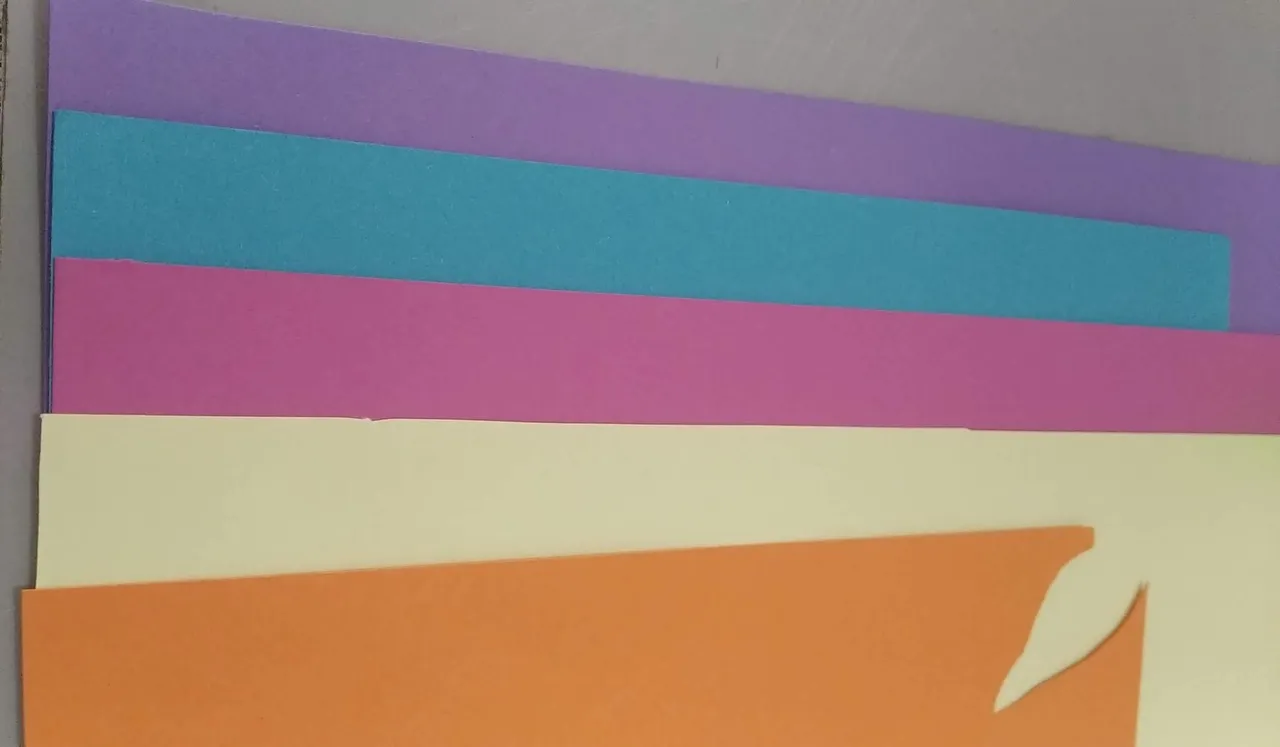
- Cartulina de colores (a gusto de como se deseen las flores)
- Foami escarchado plateado.
- Foami plano color verde grama.
- Silicón caliente.
- Silicón Frio.
- Cutter.
- Tijera.
- Lápiz.
BASE:
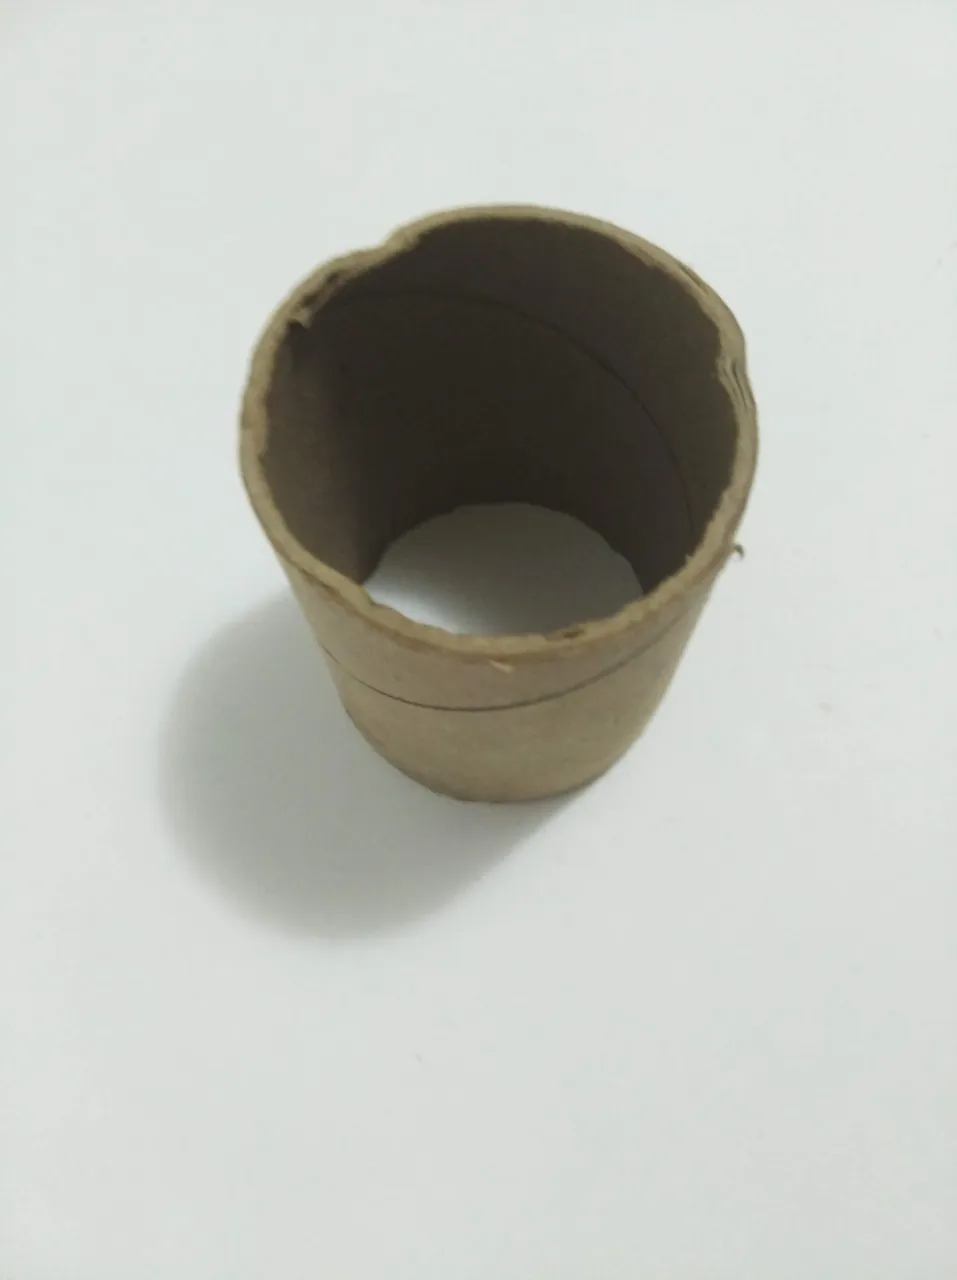
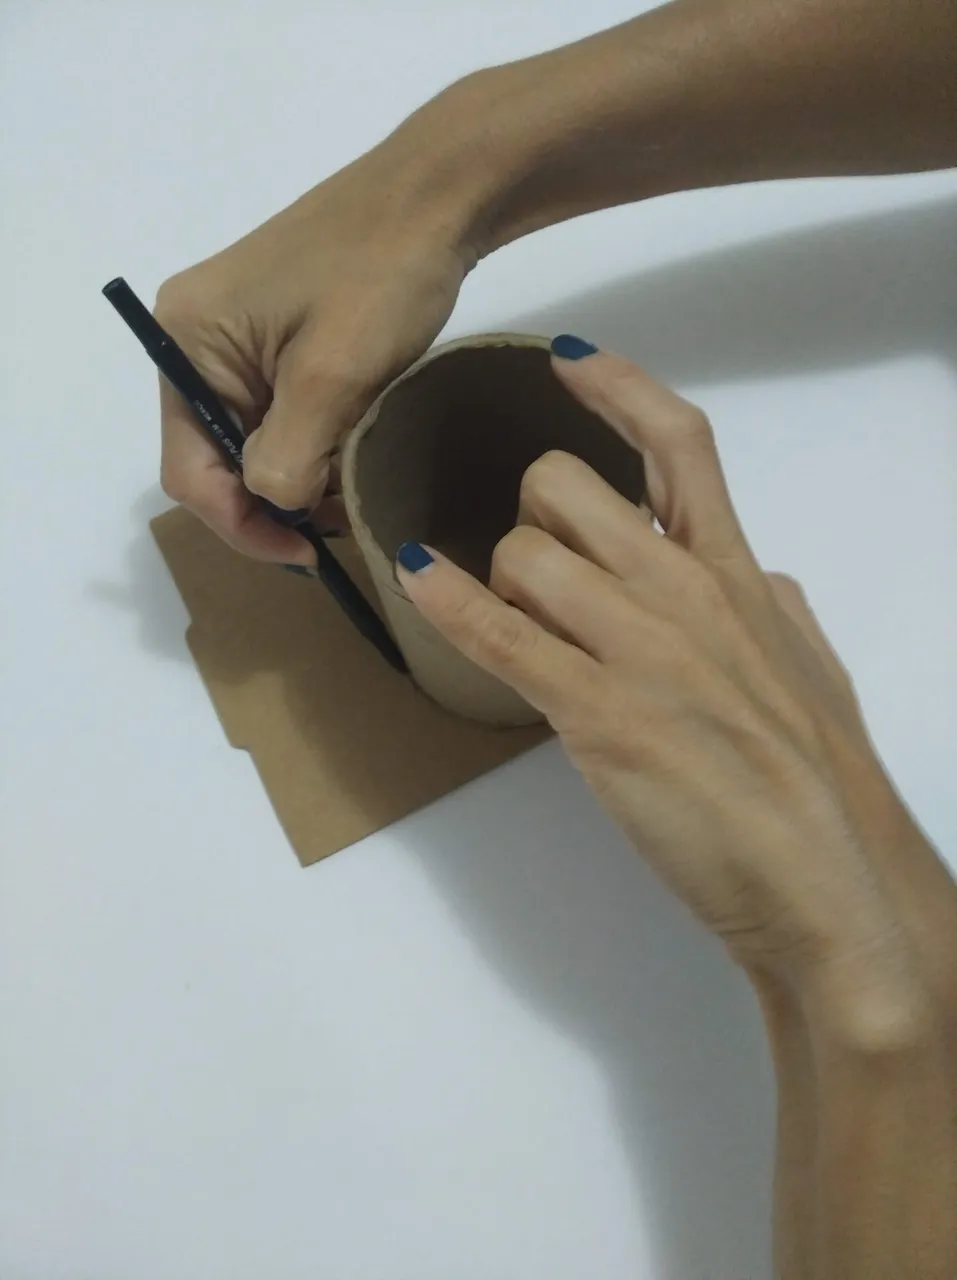
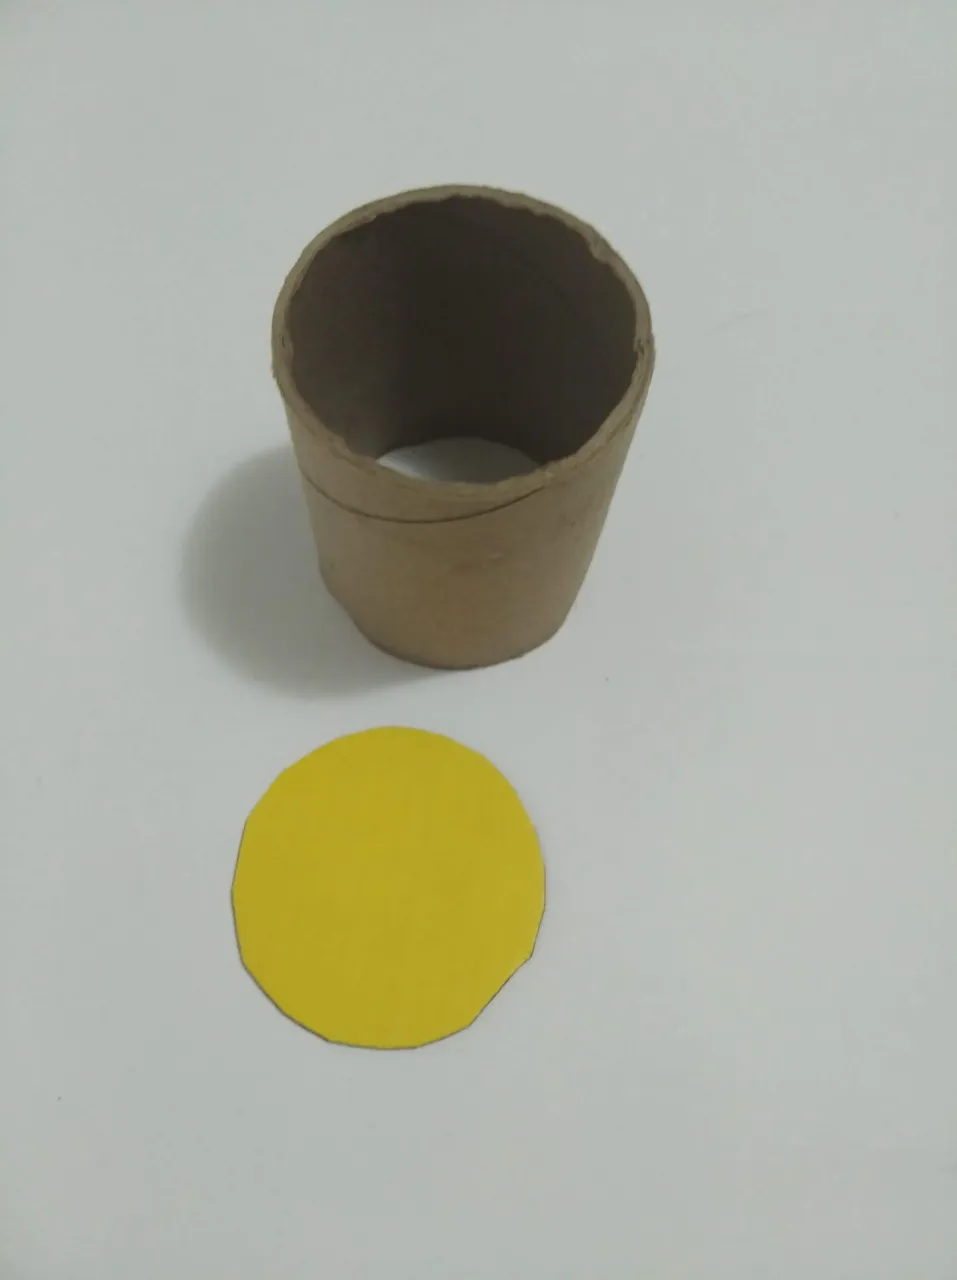
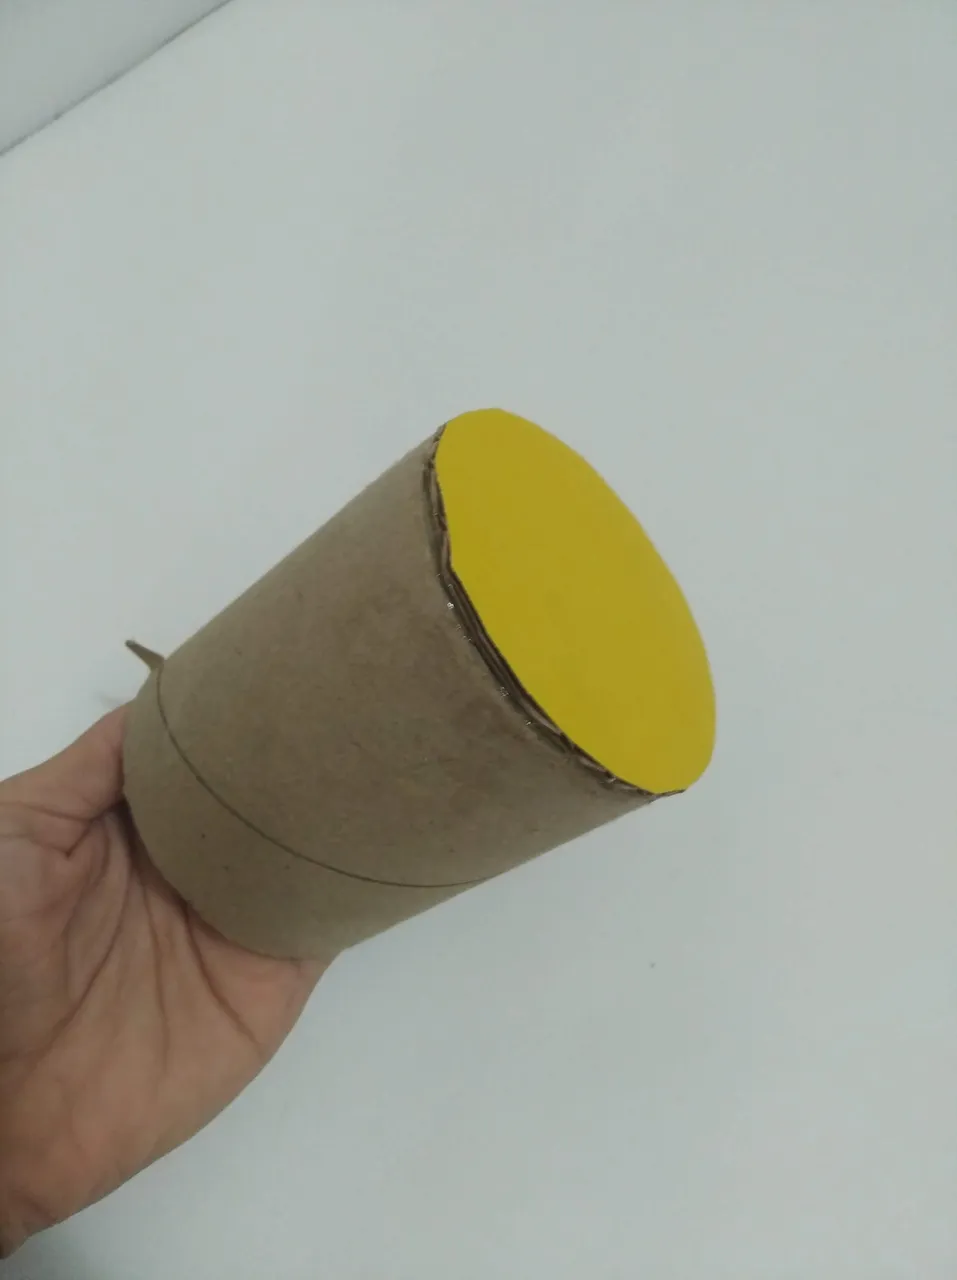
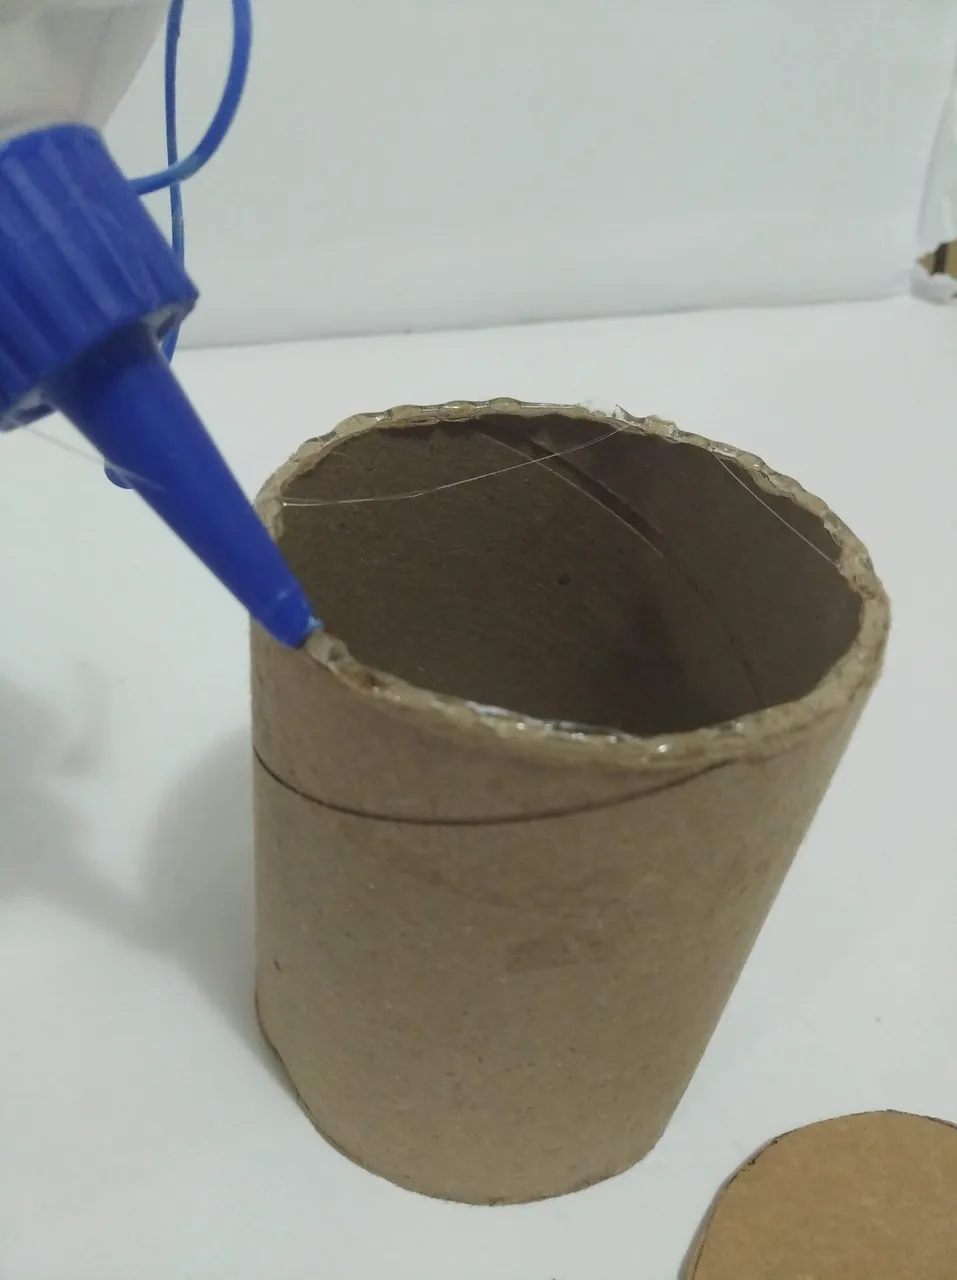
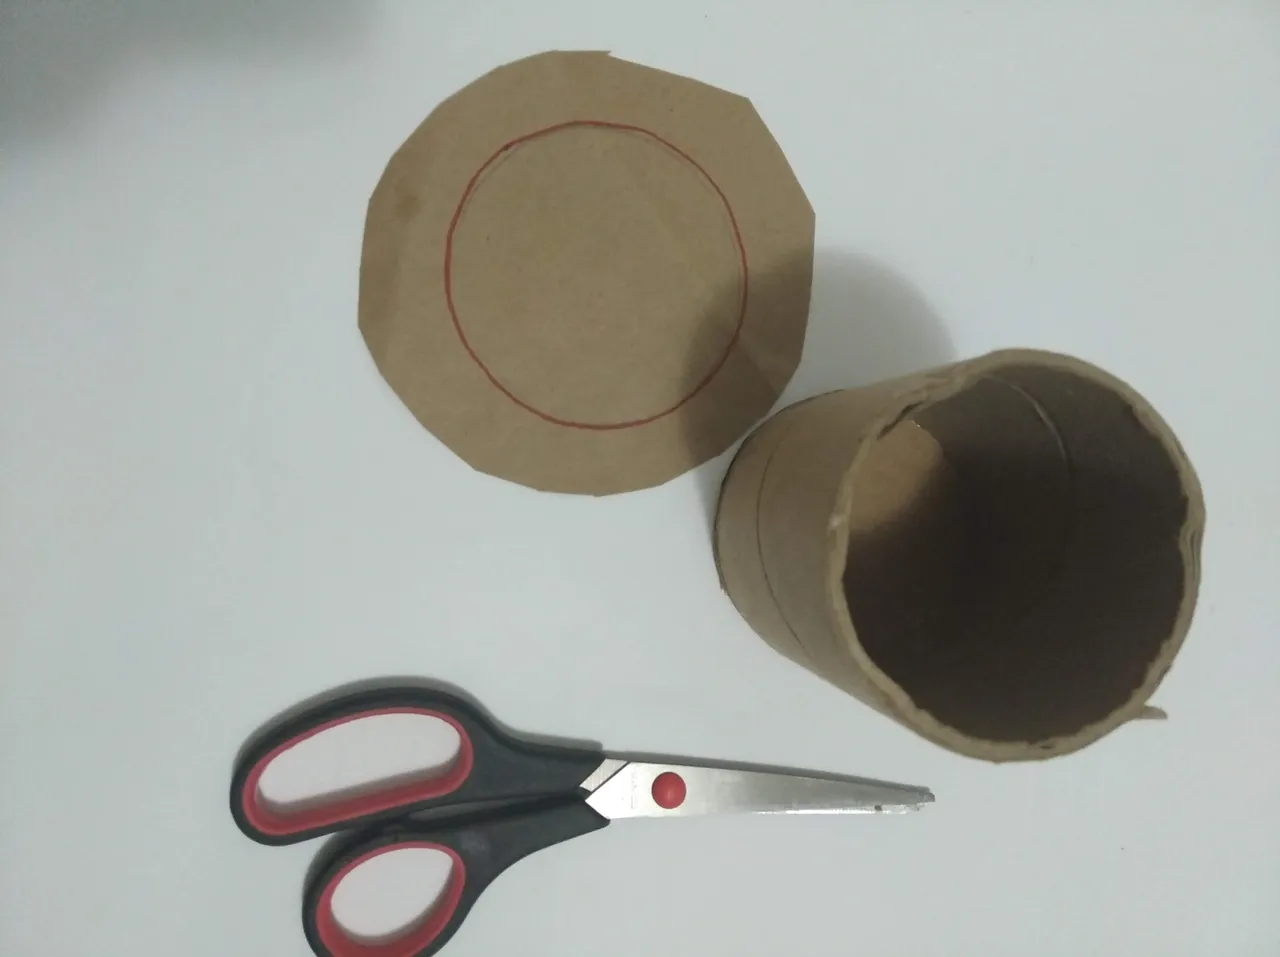
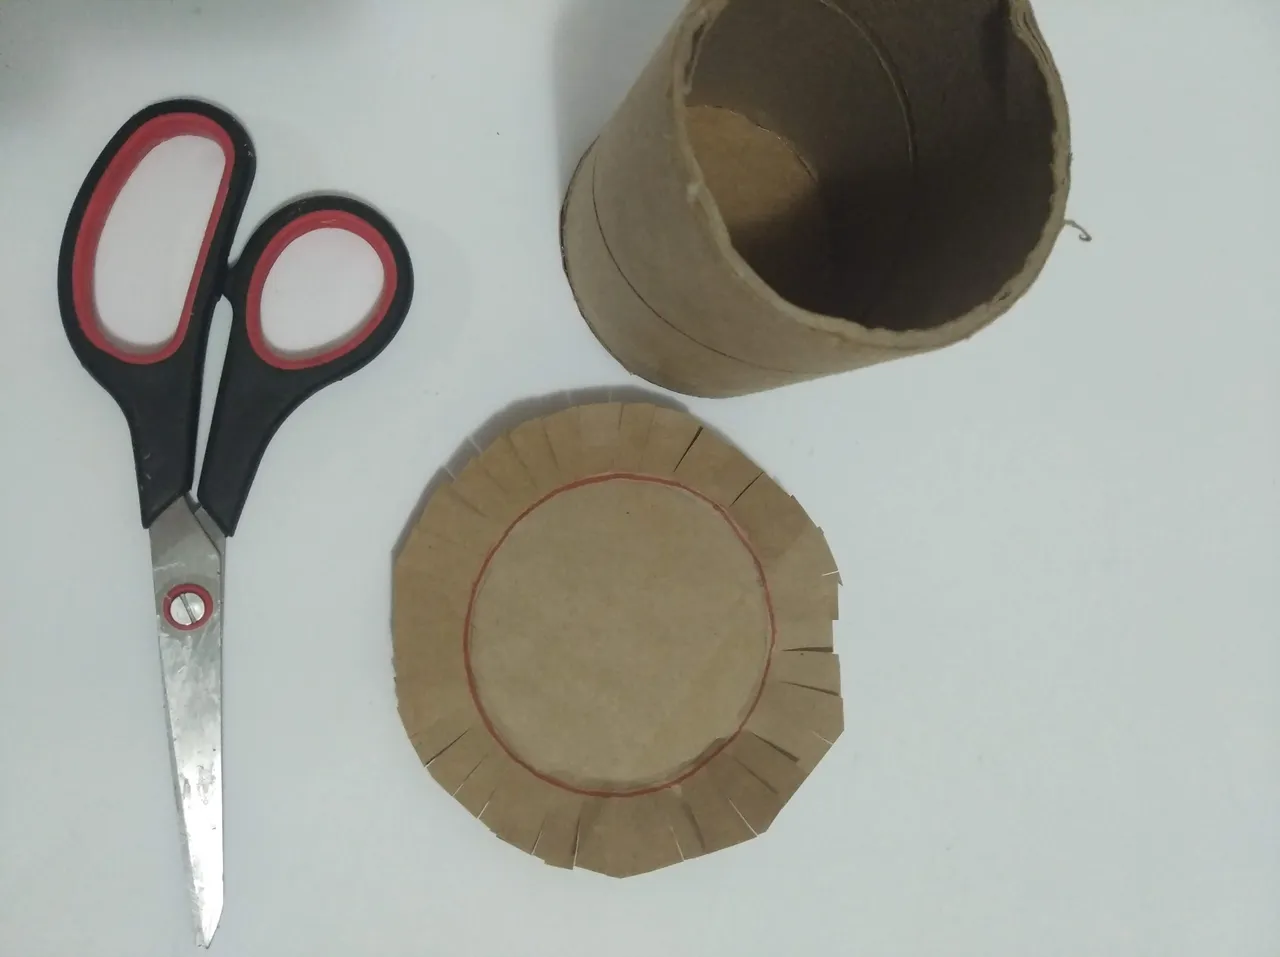
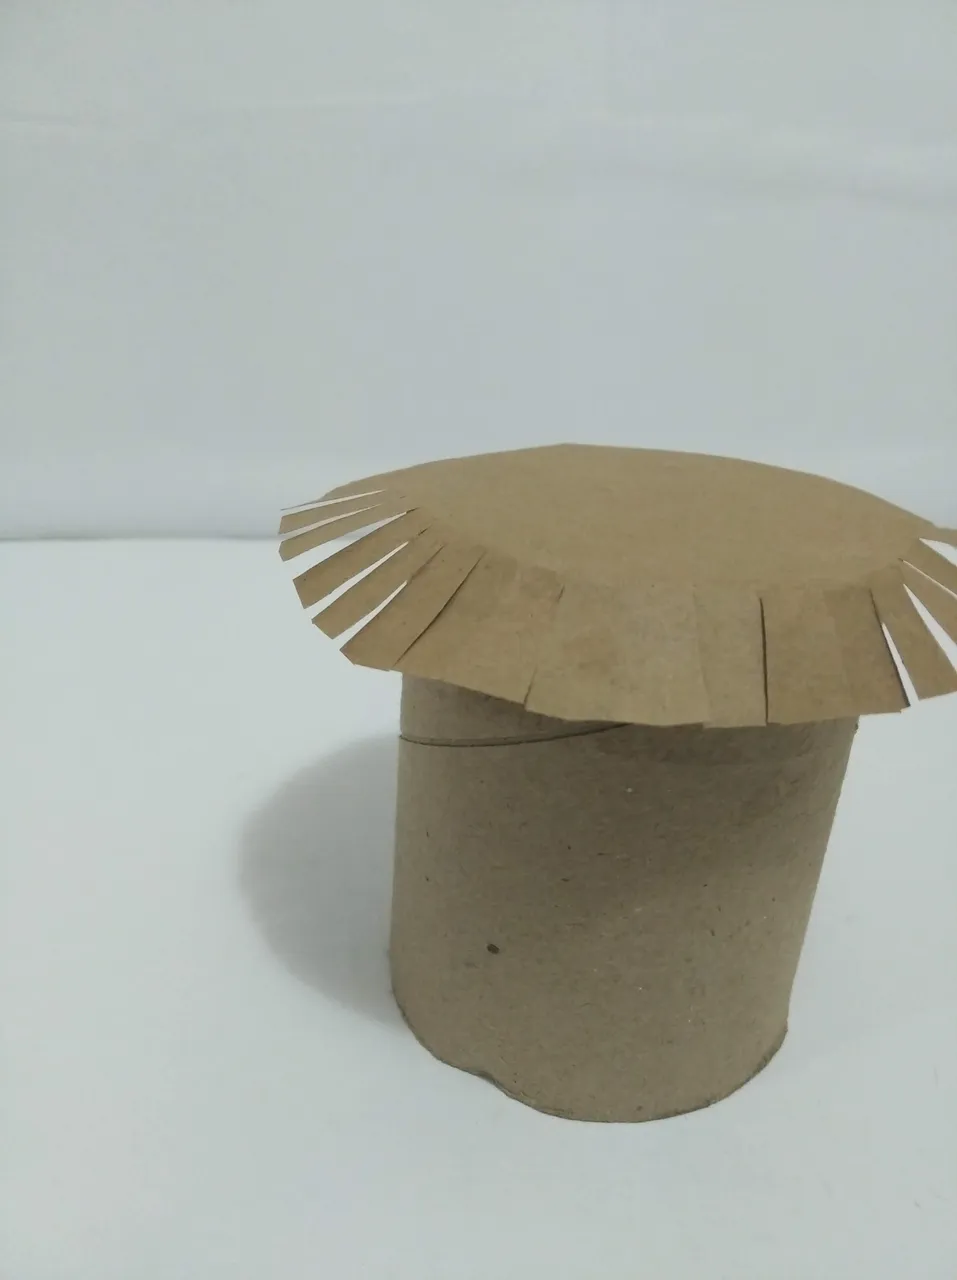
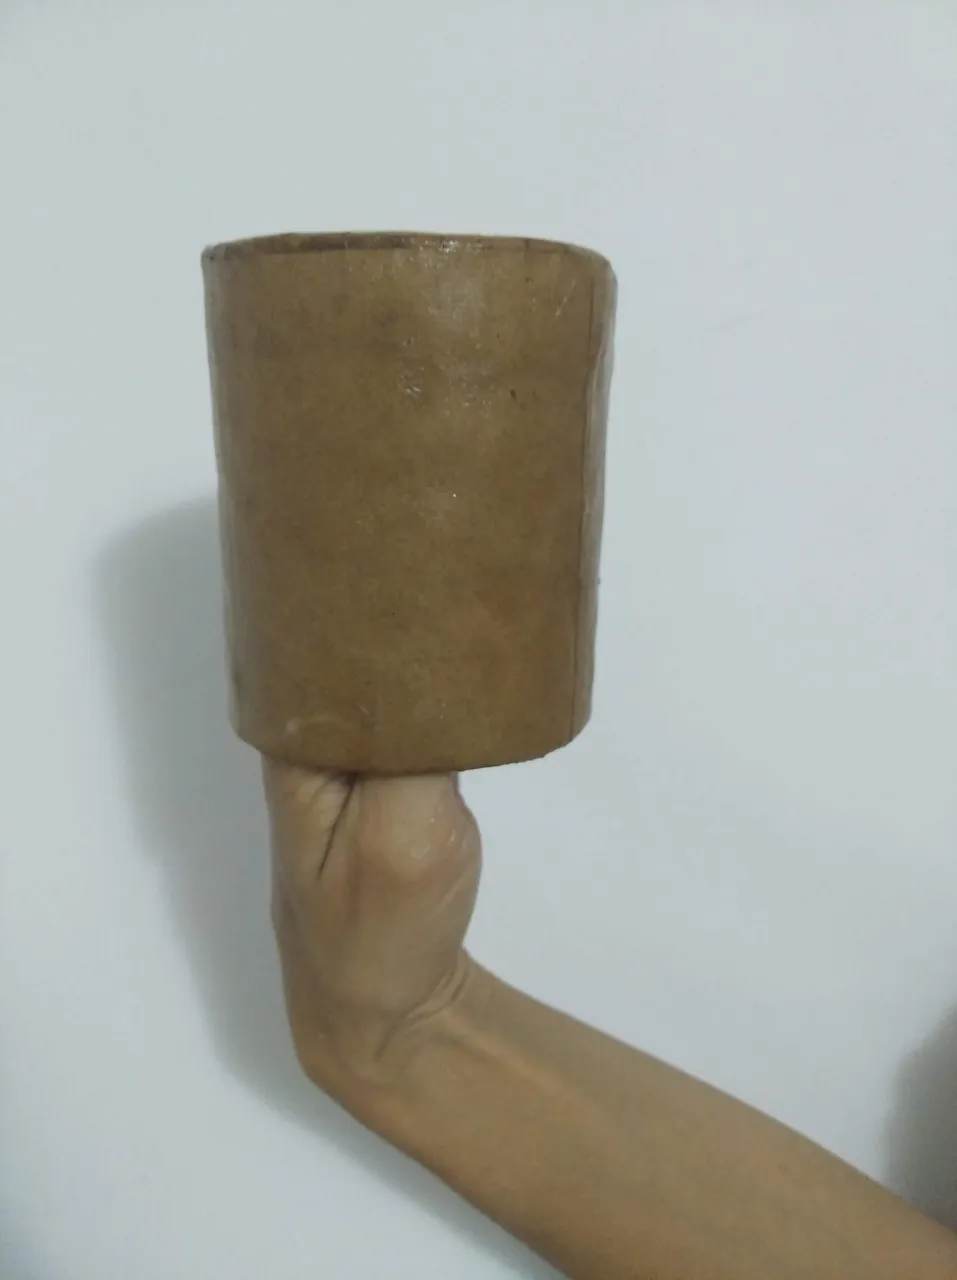
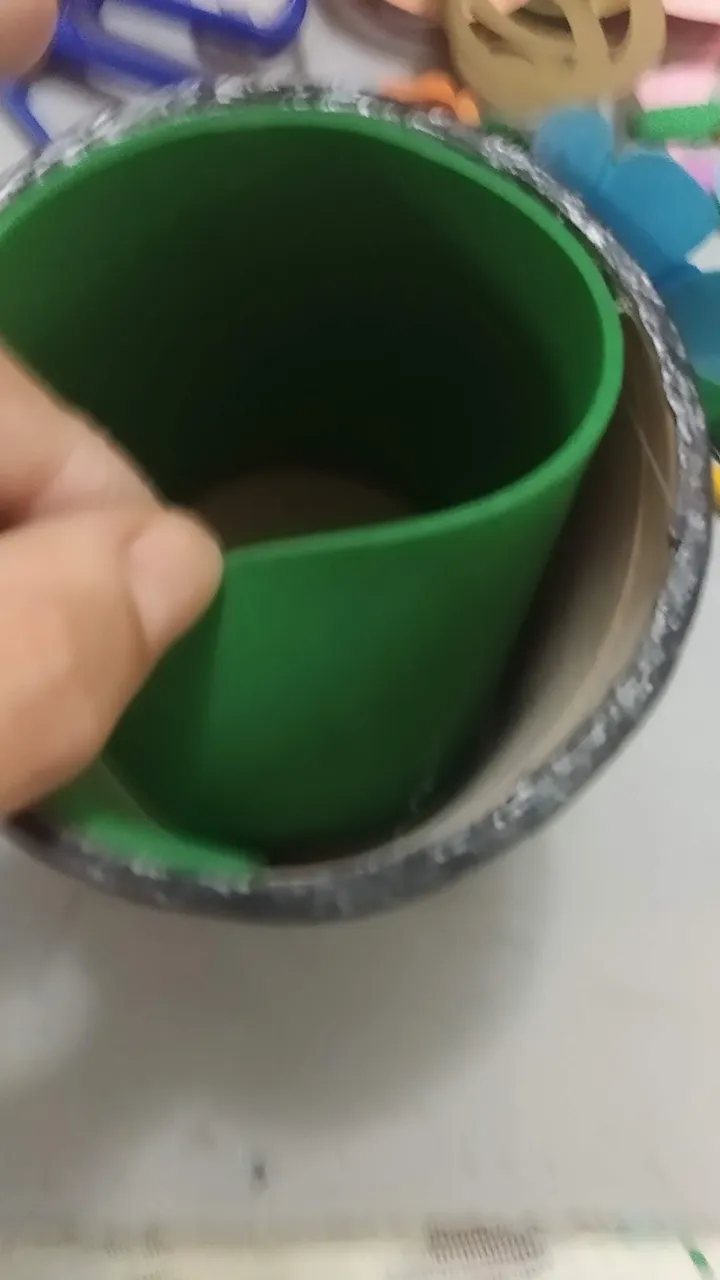
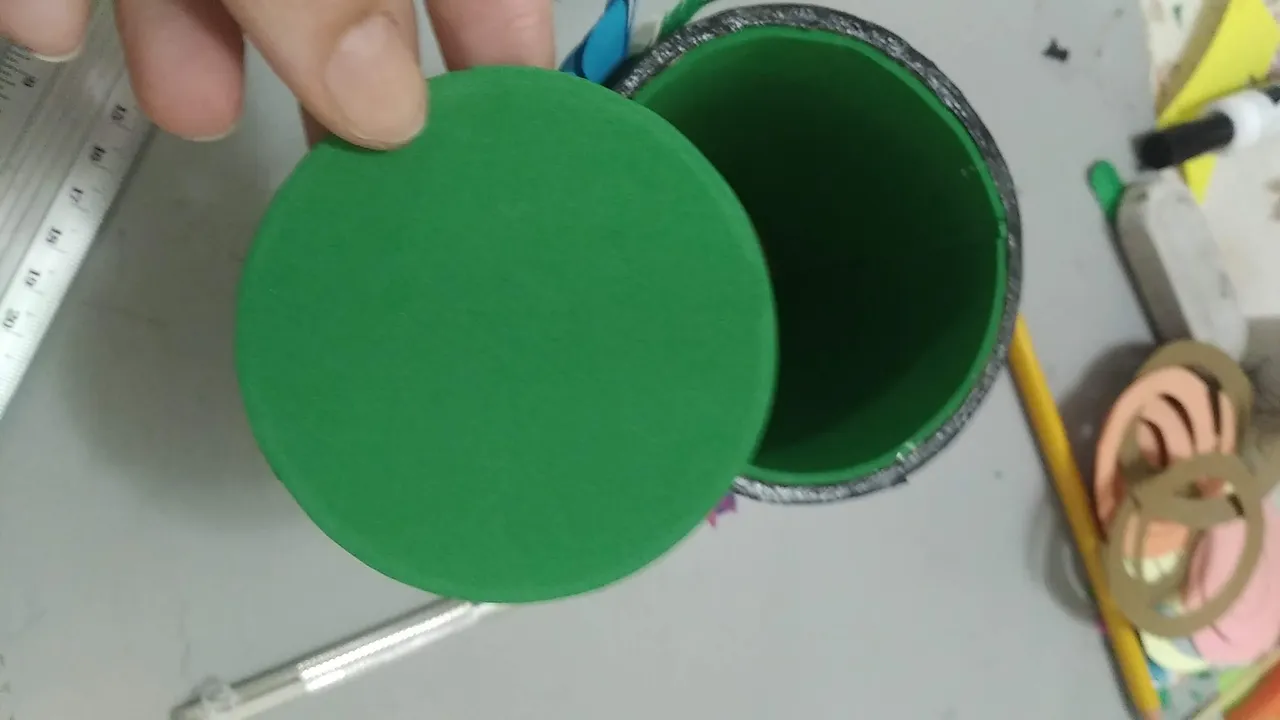
- Tomamos el rollo de cartón industrial (este no necesitó cortarse) y le ponemos en uno de sus lados cartón para hacer la base, cortando el circulo del ancho exacto que ocupe el cilindro y se pega con silicón frio.
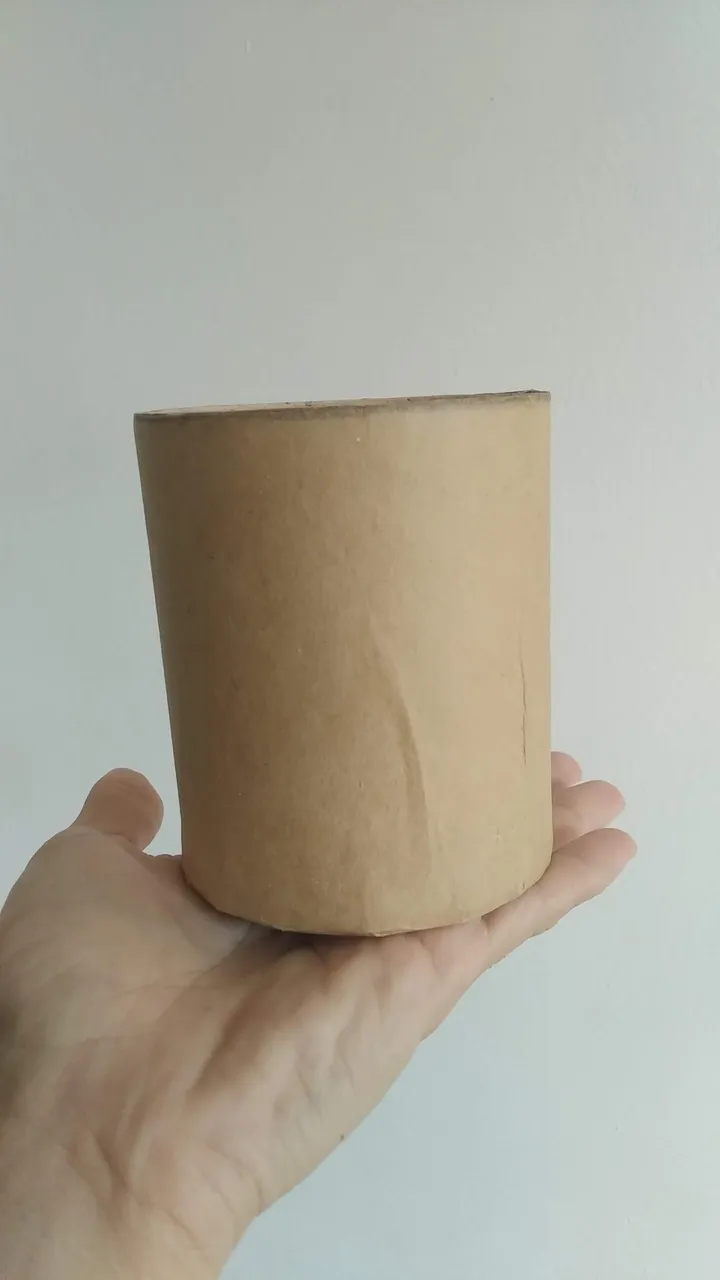
- Se forra el rollo con el papel craf reutilizado de bolsa, y se se pega con engrudo casero. Se debe cuidar de humedecer muy bien el papel por ambos lados para que se fije al cartón sin que se forme burbujas de aire. El papel se puede cortar al ras del cilindro, sin embargo para un mejor acabado yo dejé papel hacia adentro, de igual forma pegado con el engrudo.
- Dejar secar muy bien de preferencia unas 8 horas en corriente de aire fresco.
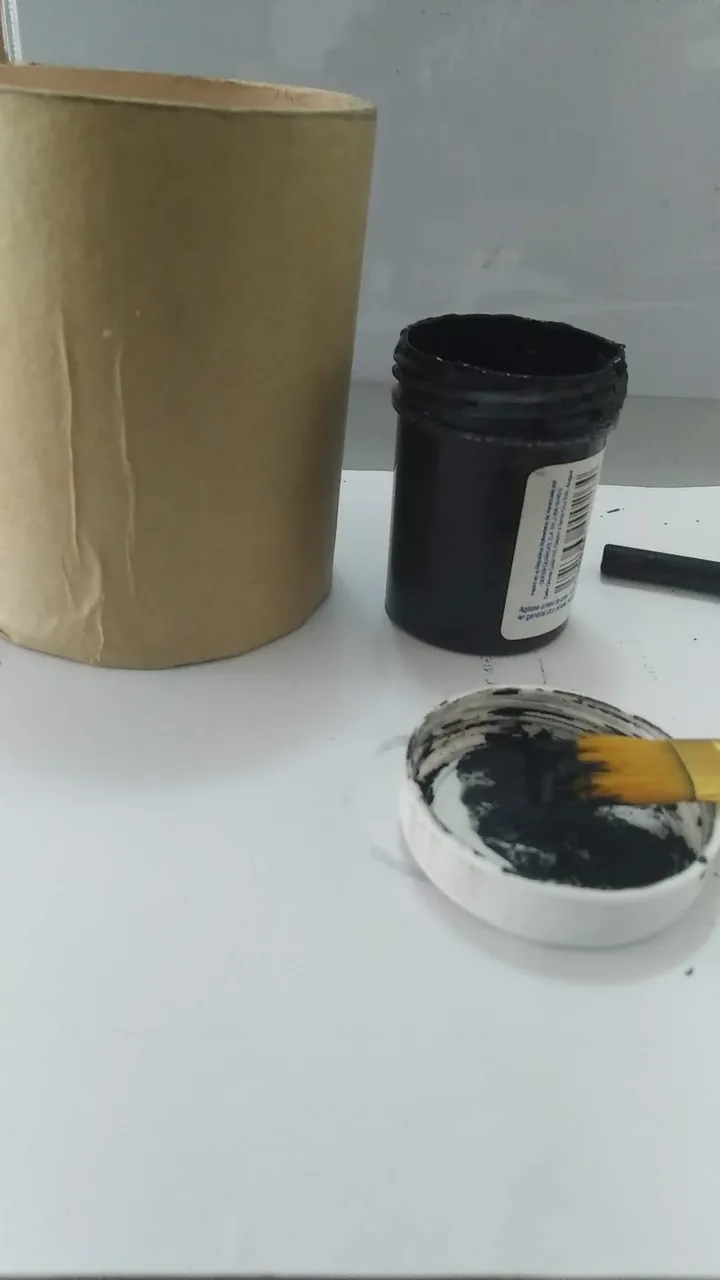
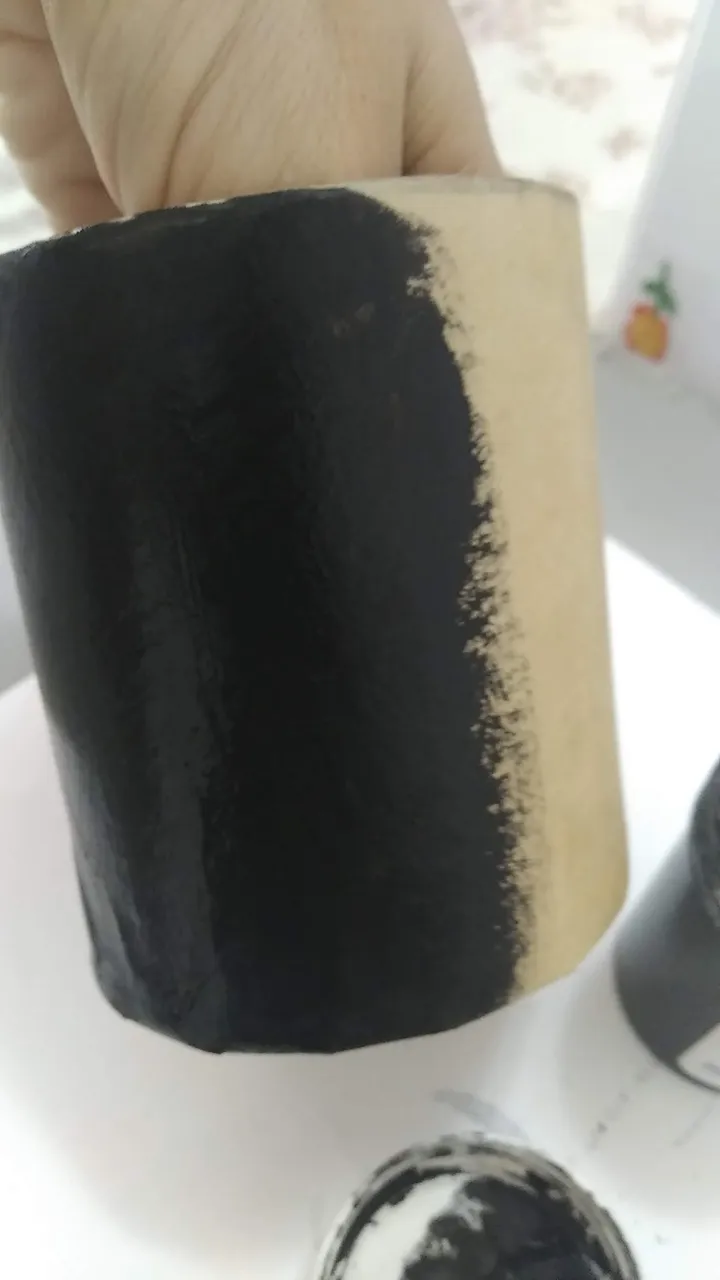
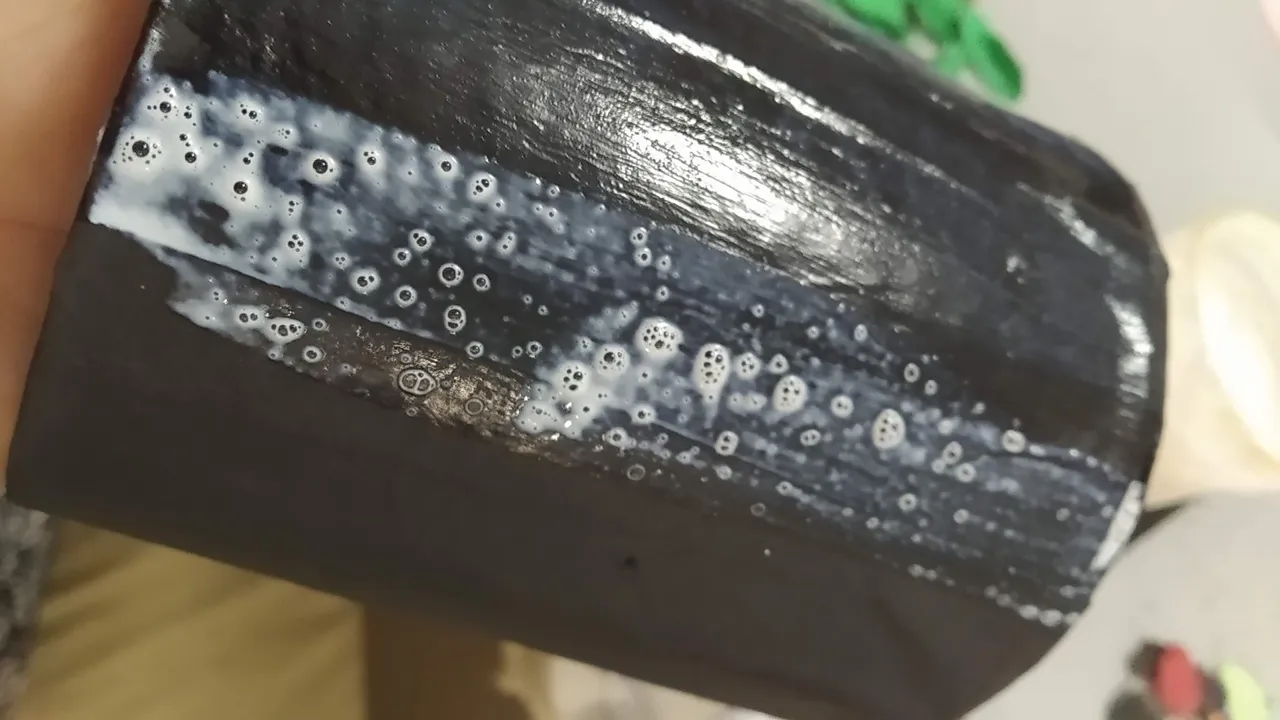
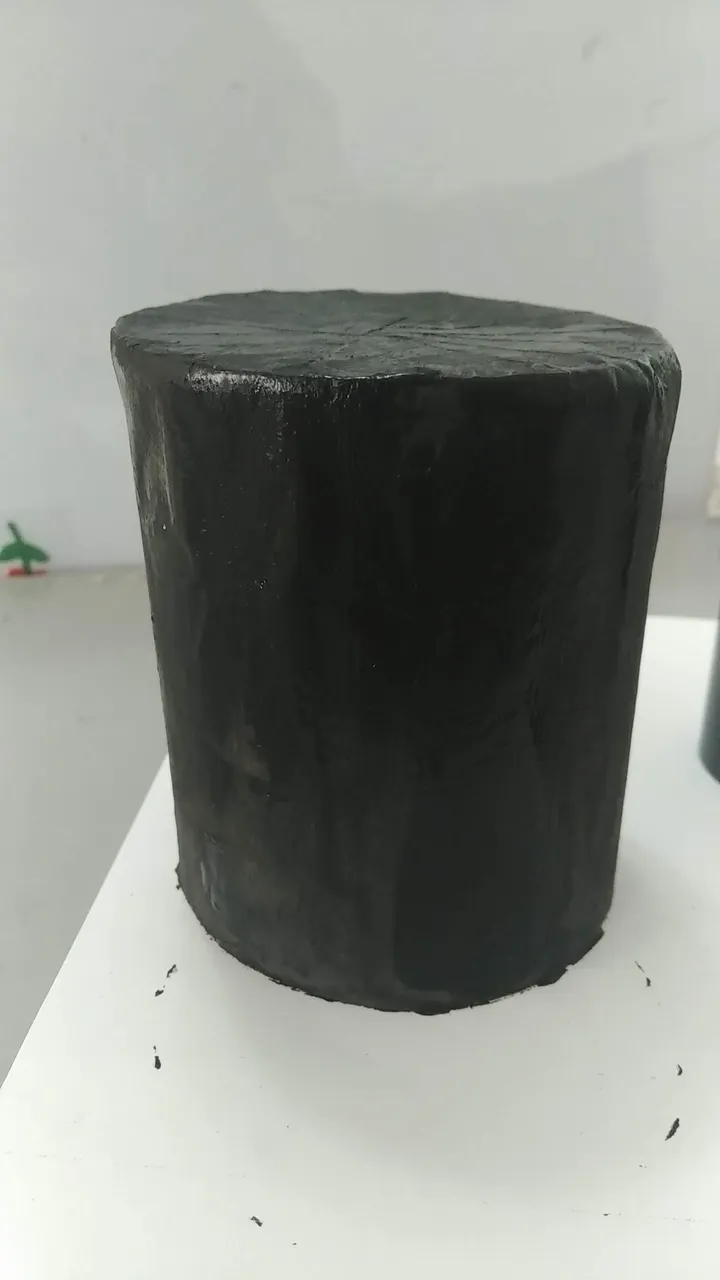
- Pintar la base con pintura al frio y al secar aplicar una base de brillo al agua para darle brillo y durabilidad. Dejar secar nuevamente.
(paso dos y tres puede ser opcional)
FLORES:
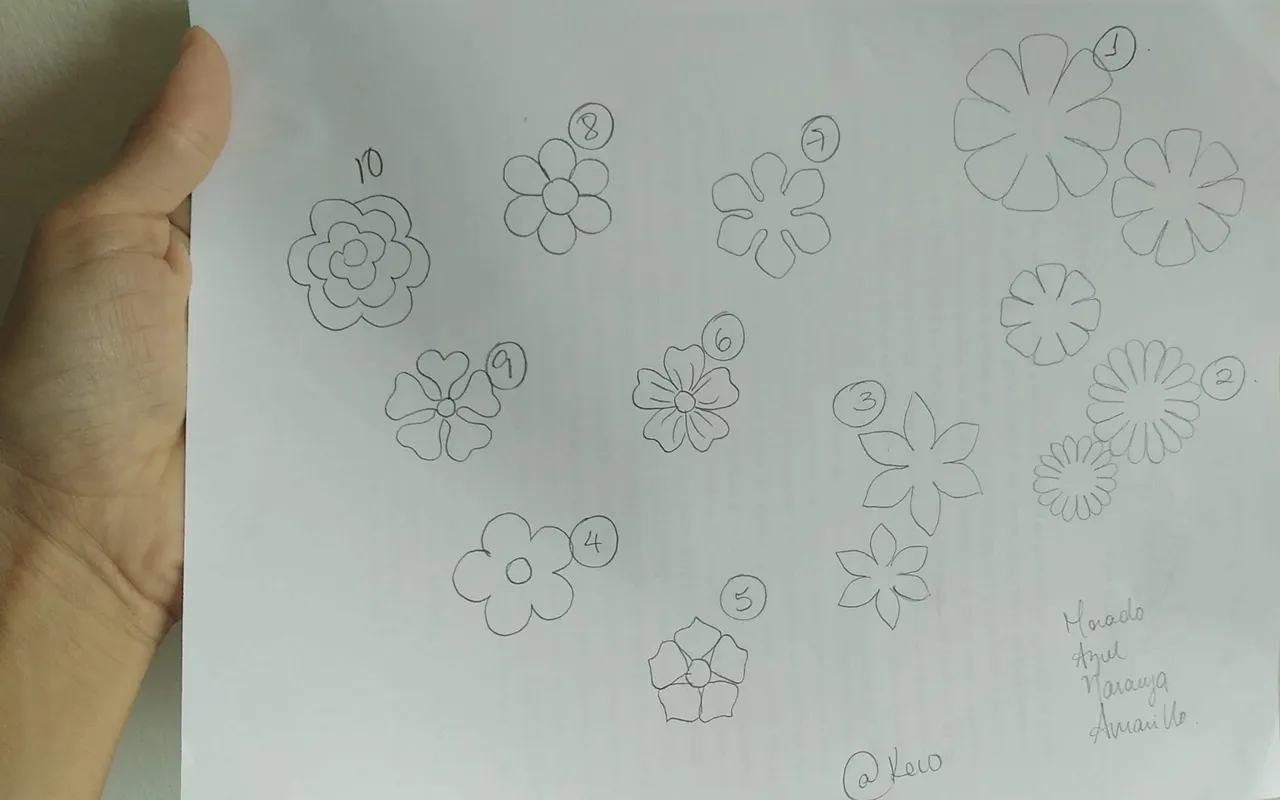
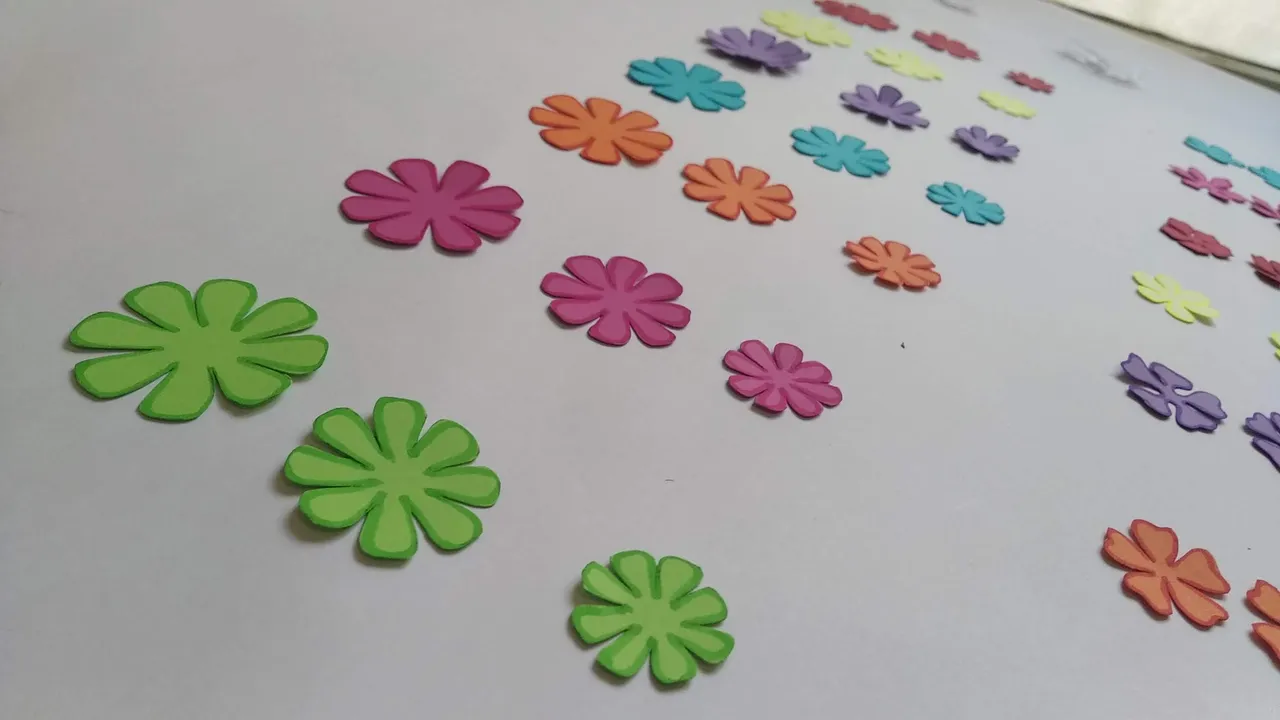
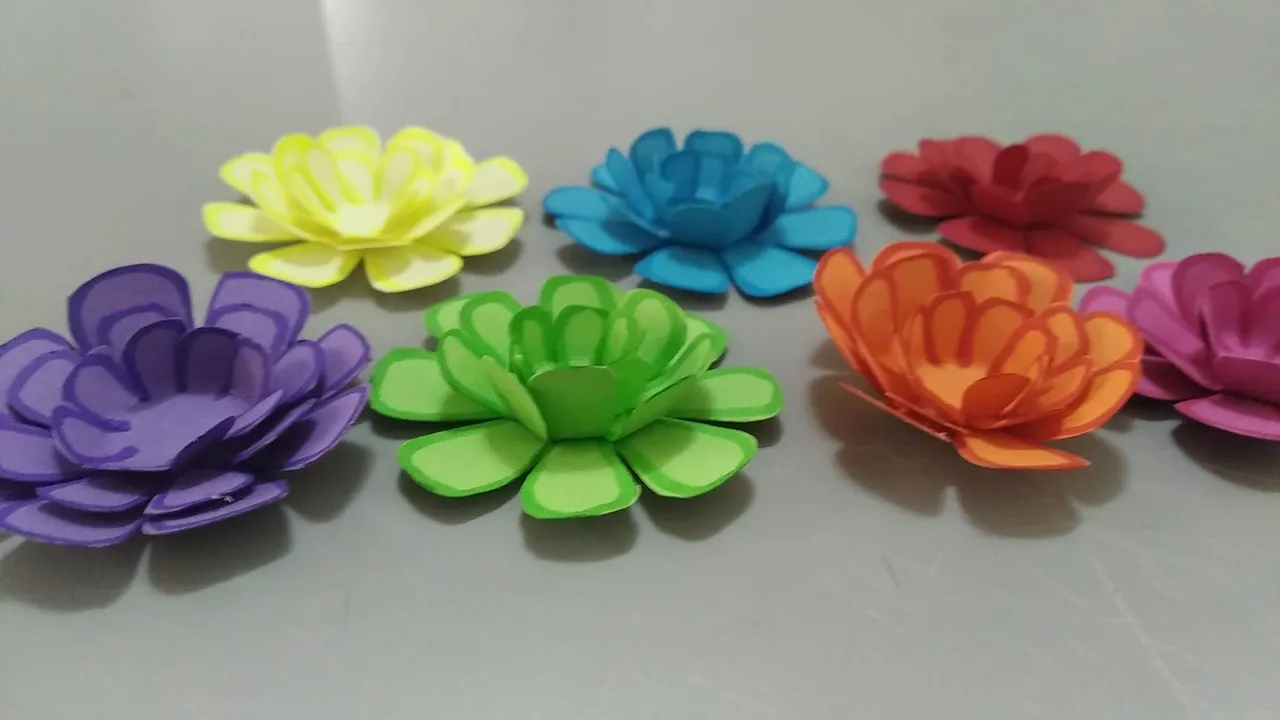
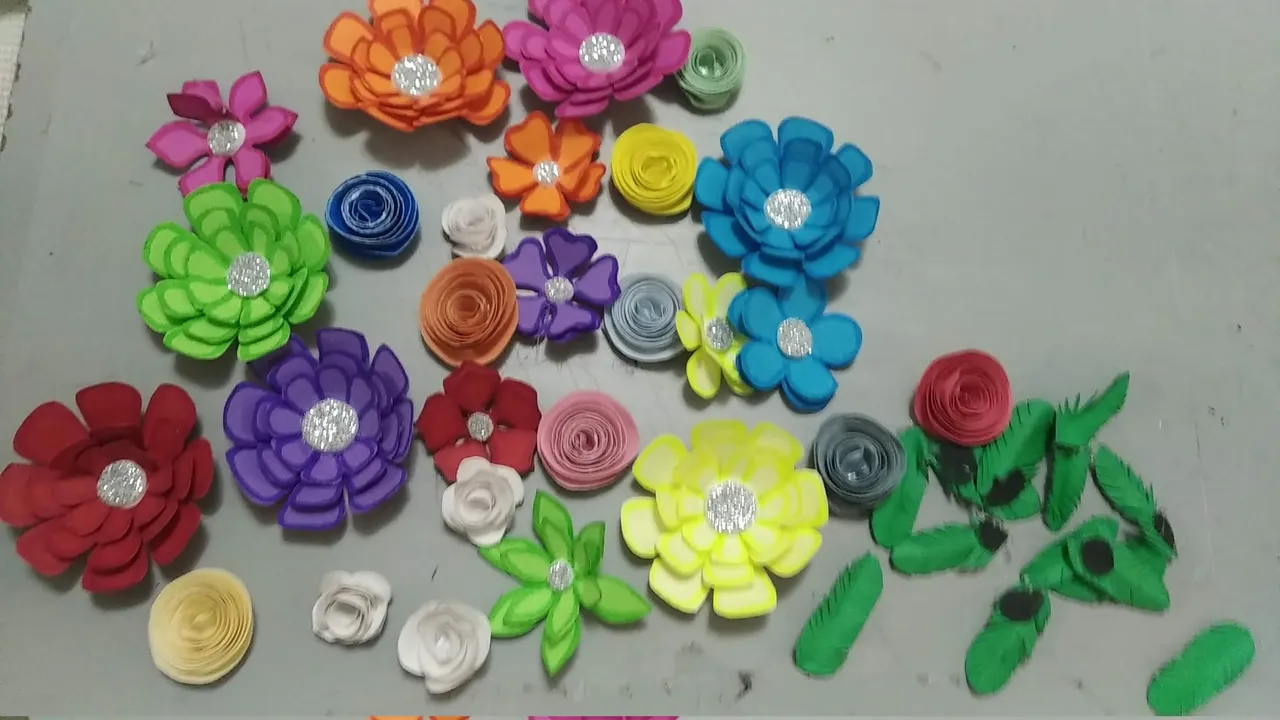
- Diseñar en una hoja los estilos de flores a utilizar respetando la altura del cilindro para que no queden ni muy grandes ni muy pequeñas.
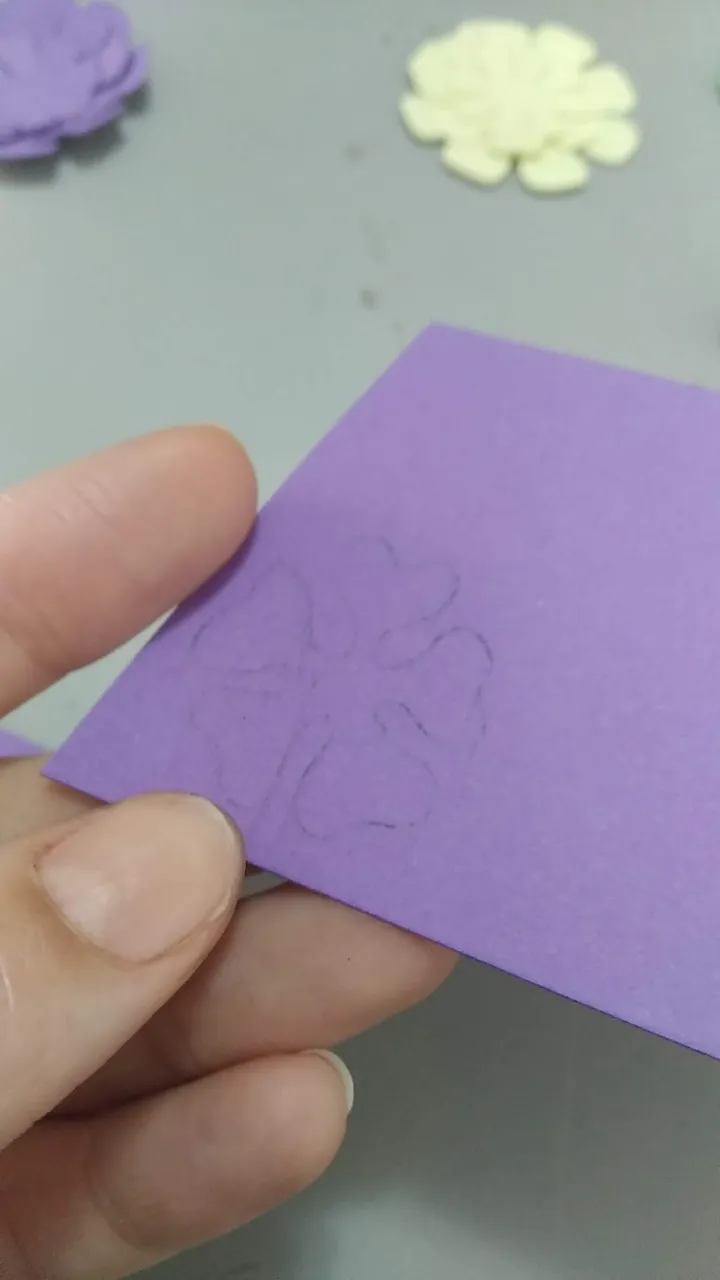
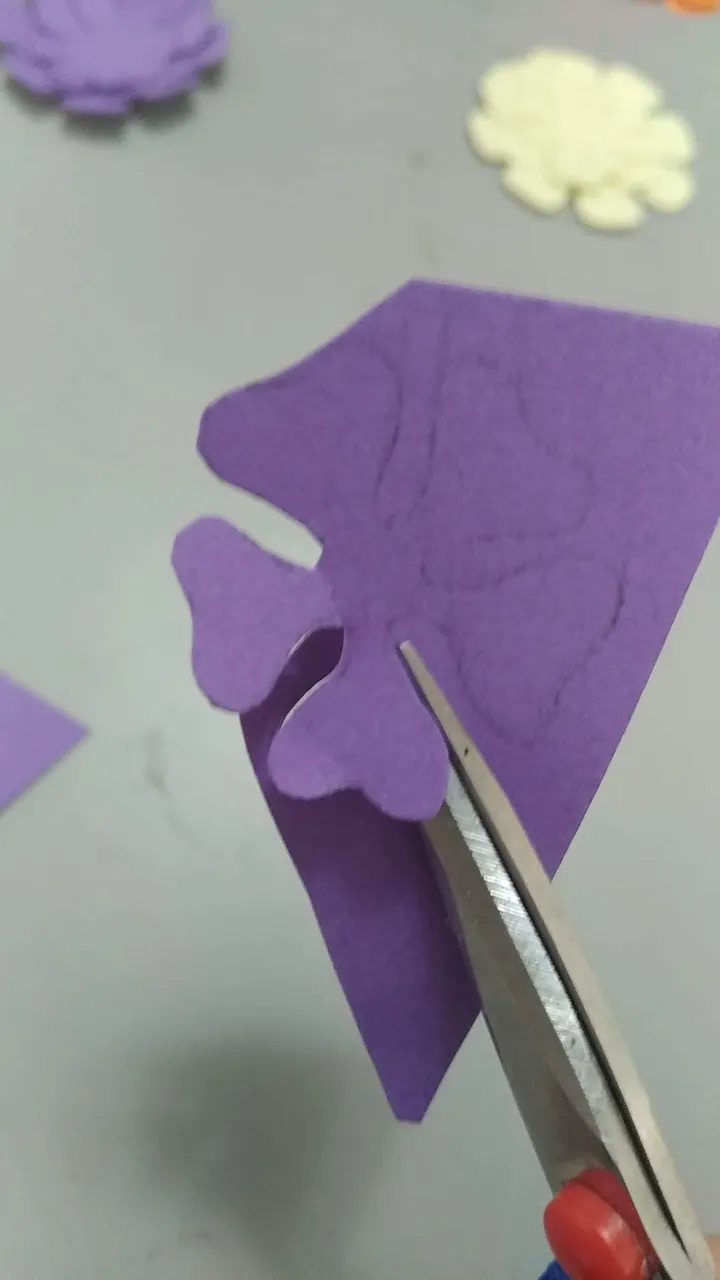
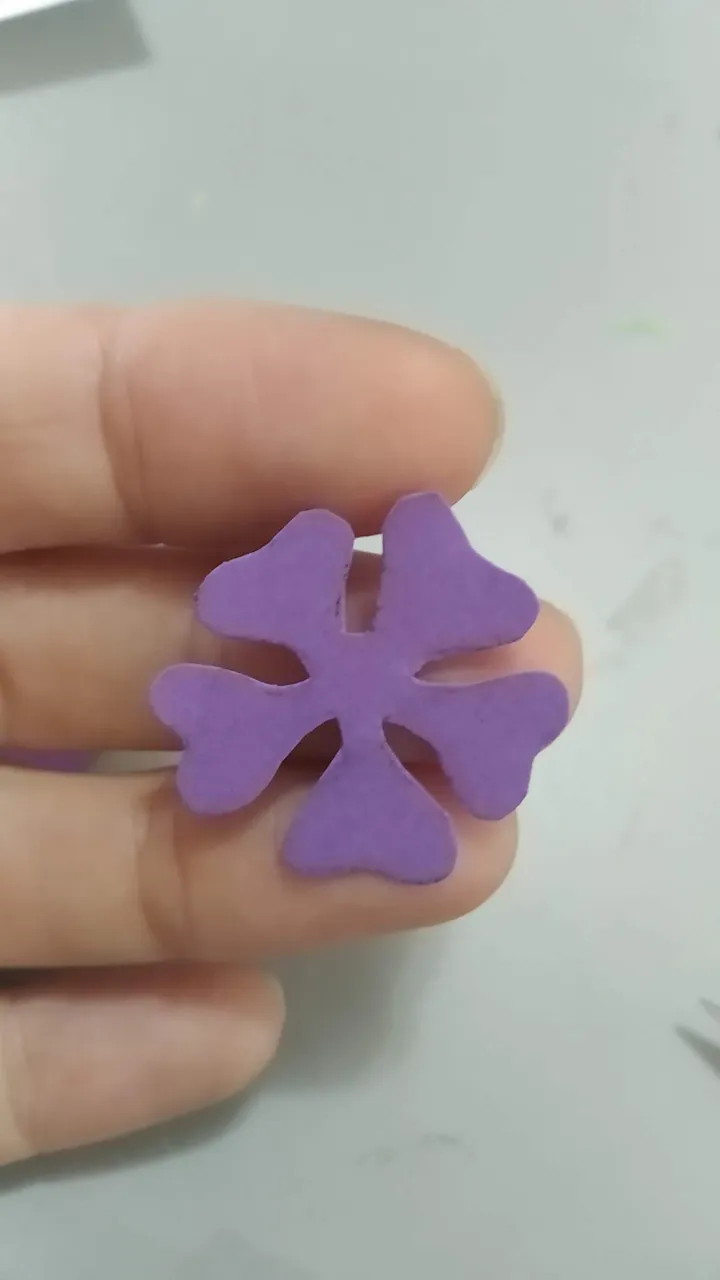
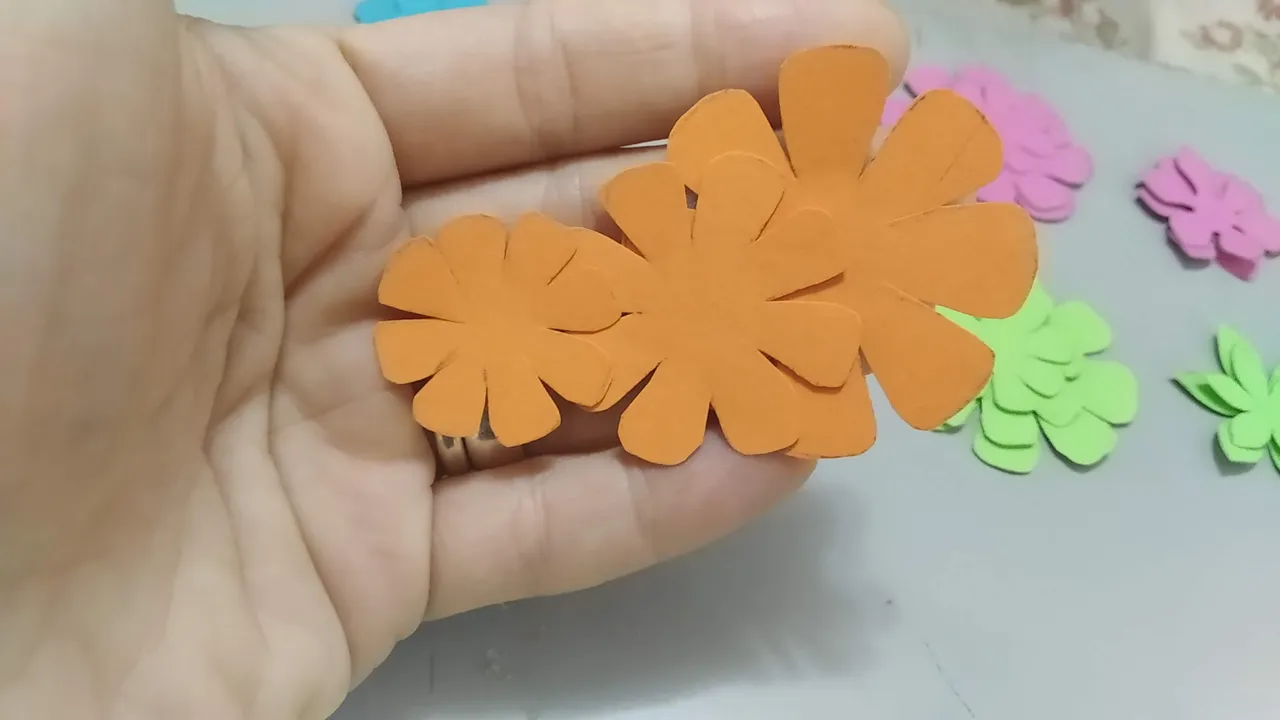
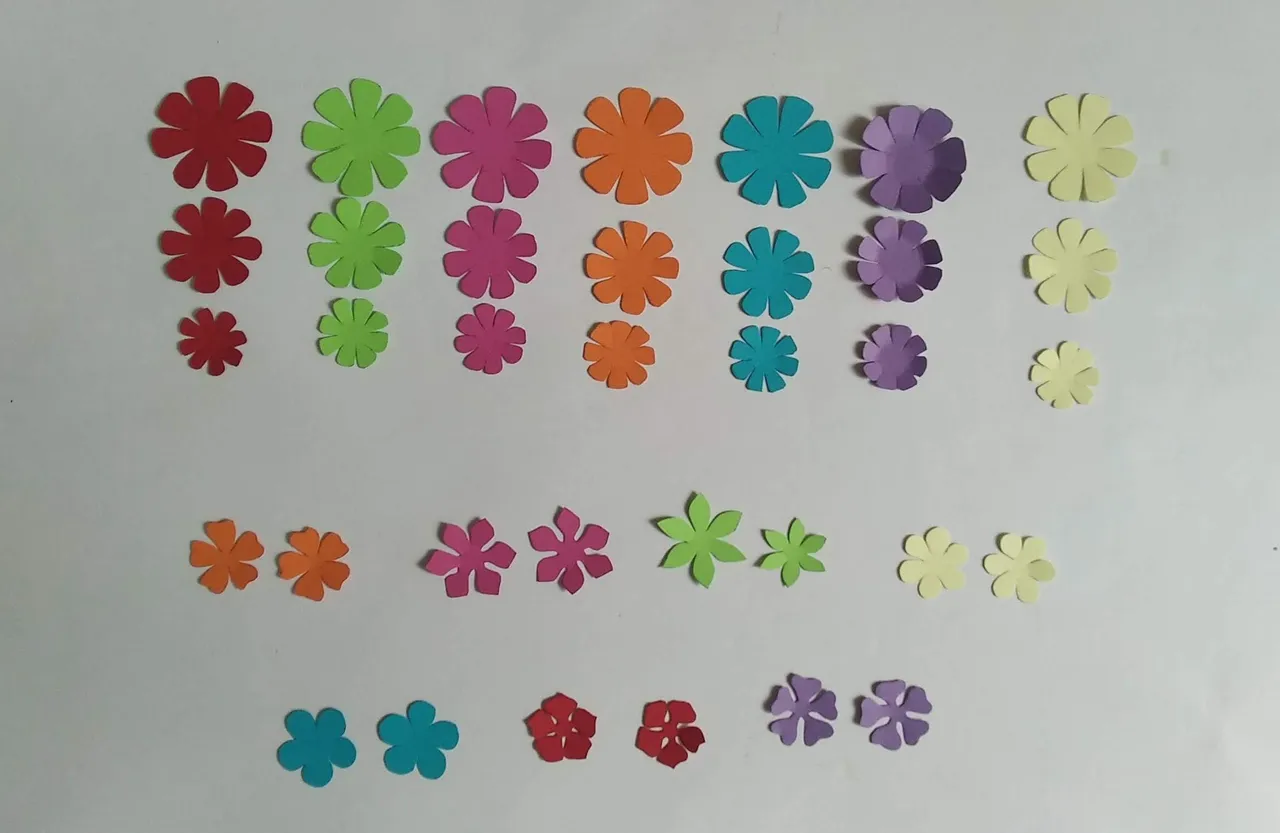
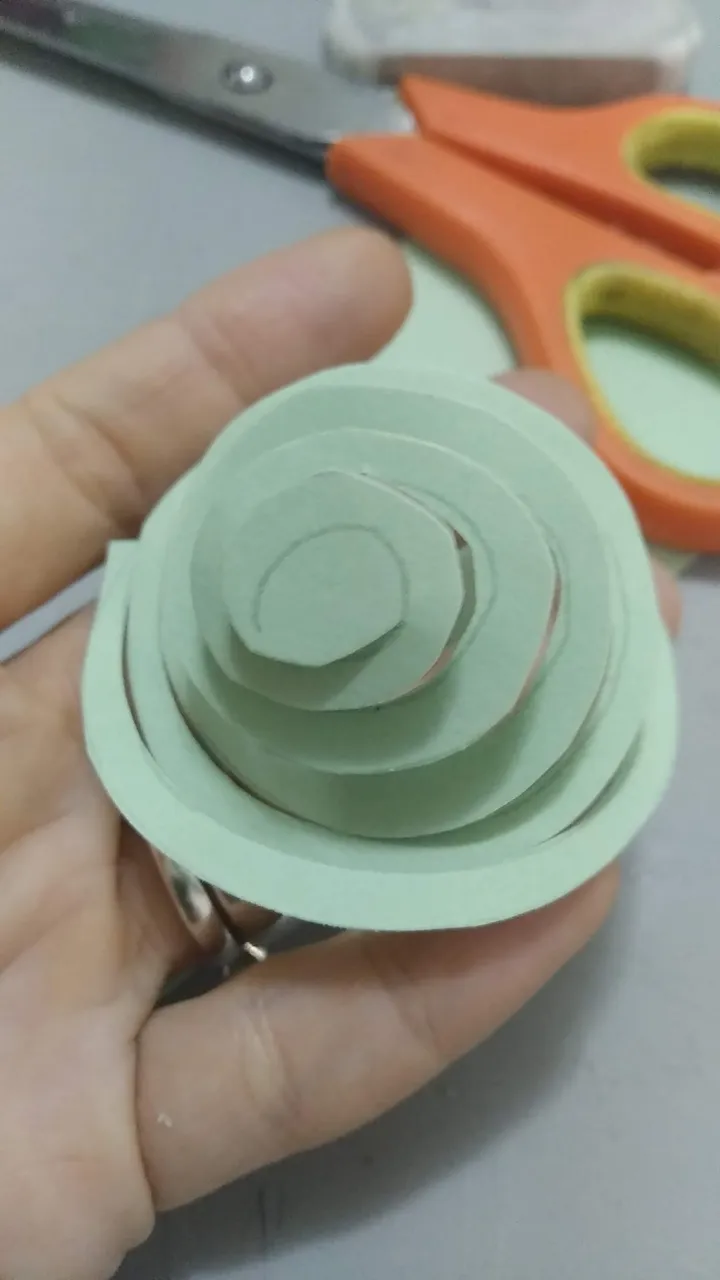
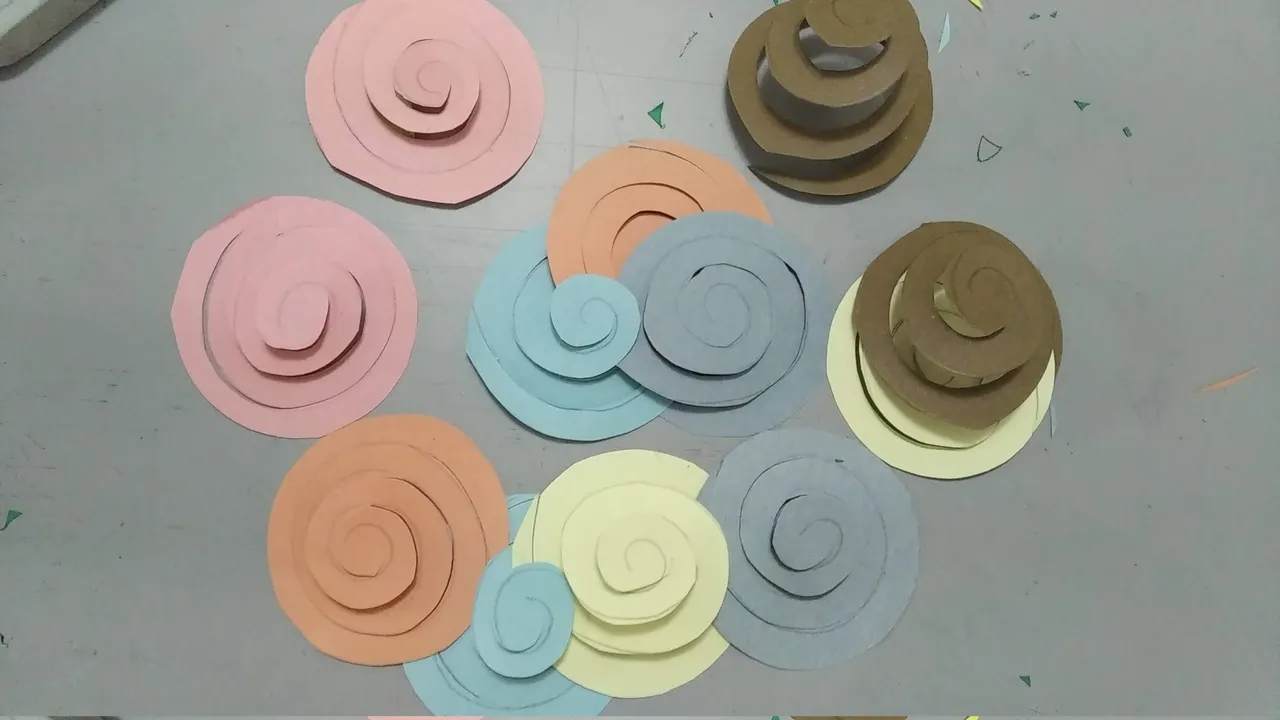
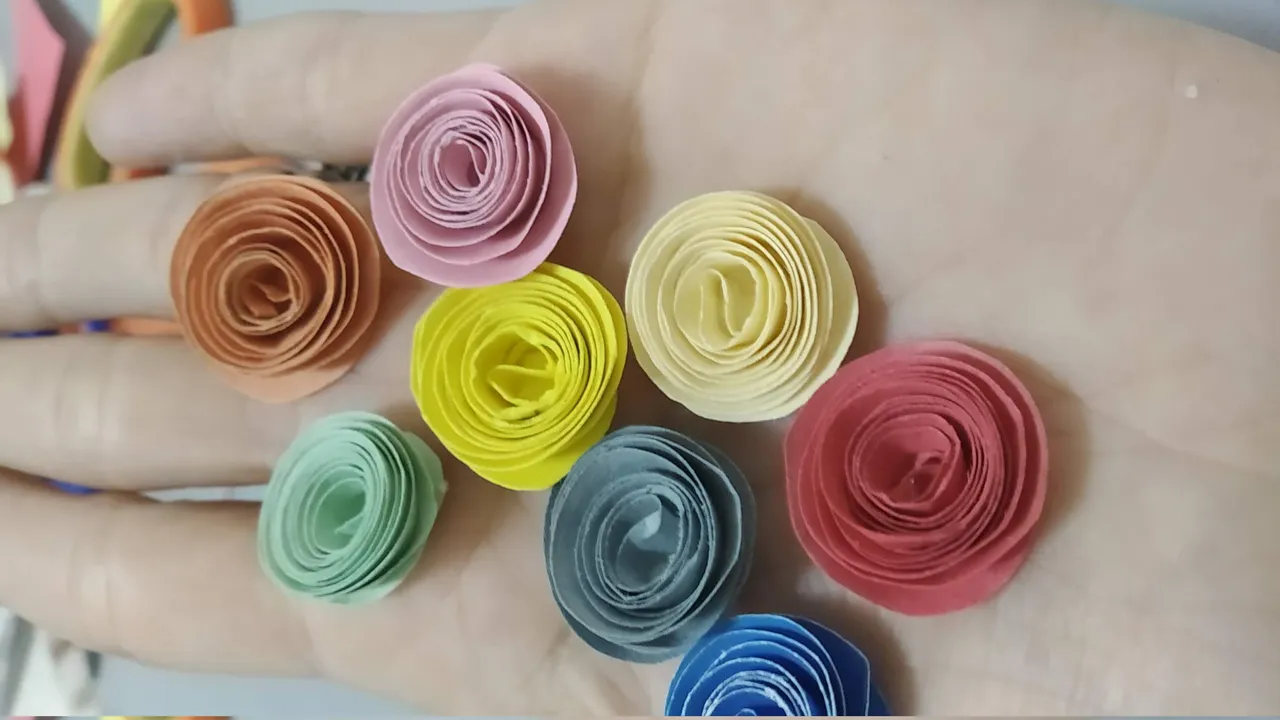
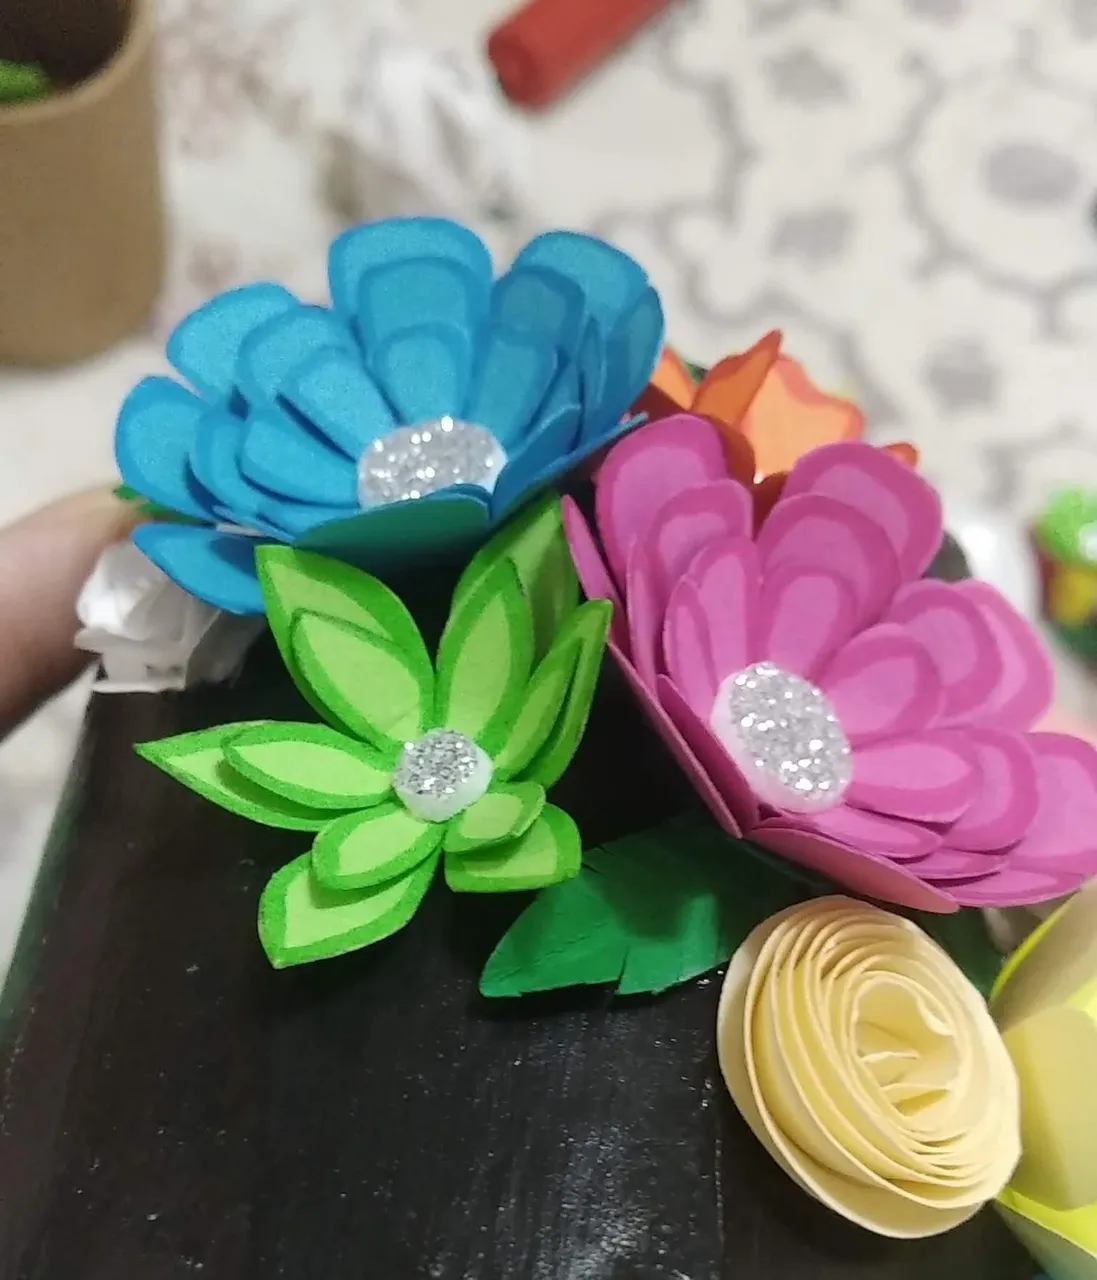
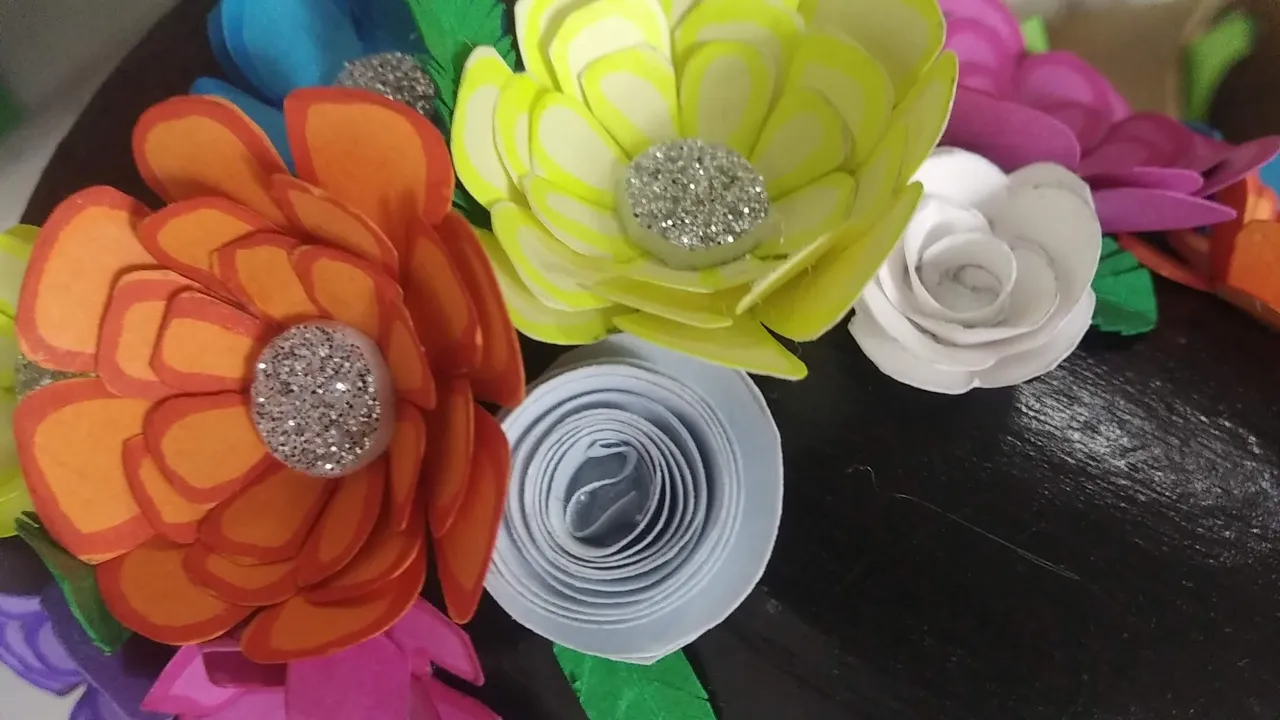
- Marcar y cortar los distintos estilos de flores en las cartulinas de colores seleccionadas. Como a mi me gusta se vean con relieve, decidí cortar tres capas para las flores mas grandes y dos capas para las flores más pequeñas. Las flores en espiral no aplican las capas.
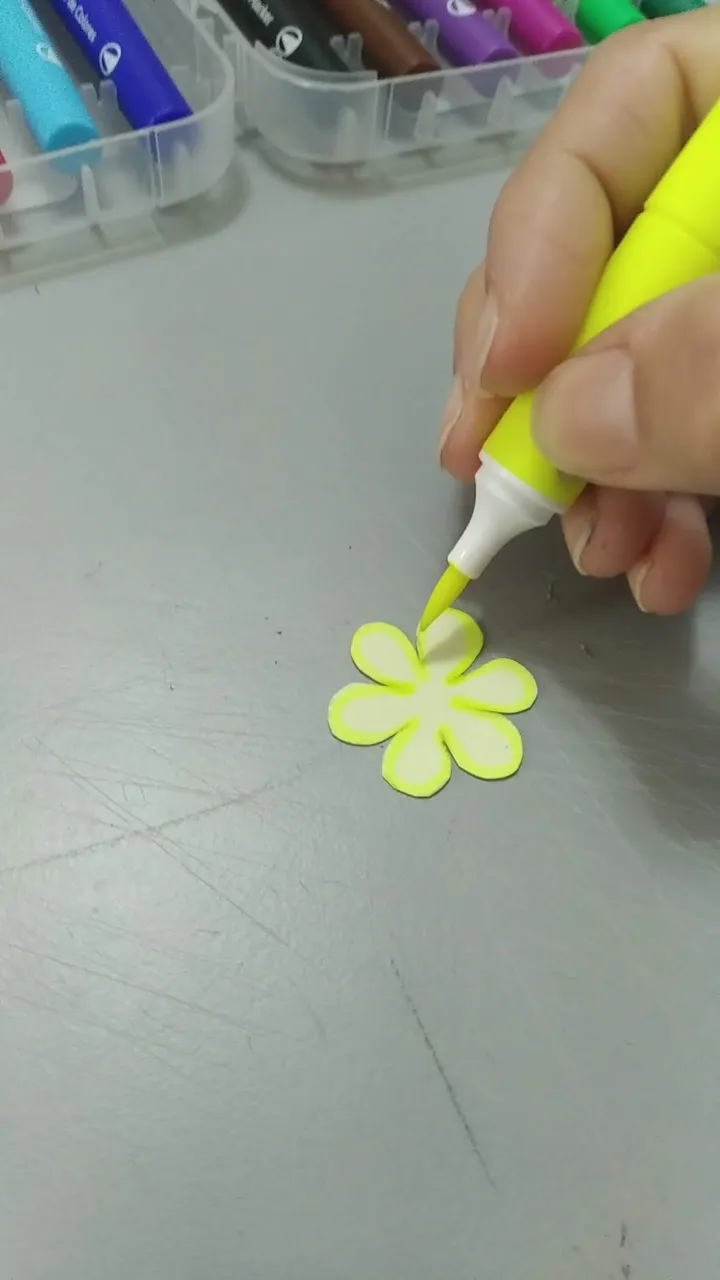
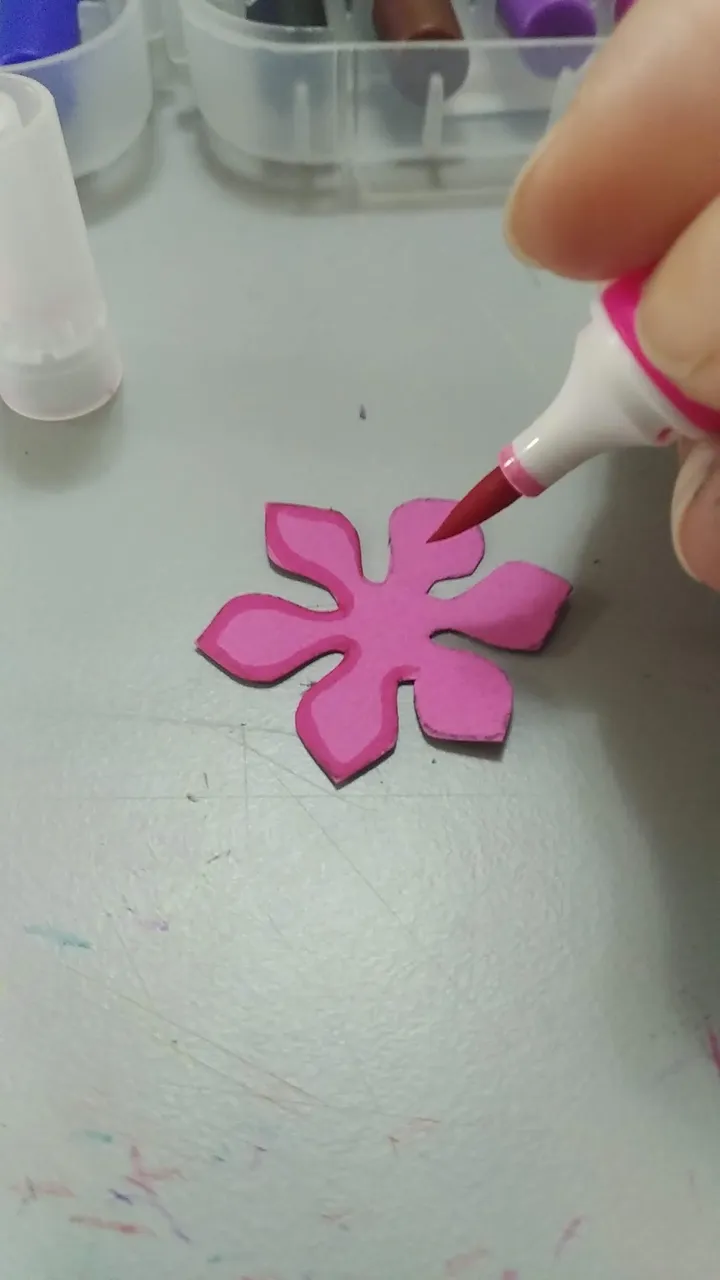
- A todos los cortes, resaltar con marcadores de colores y dejar secar. No aplica para las flores en espiral
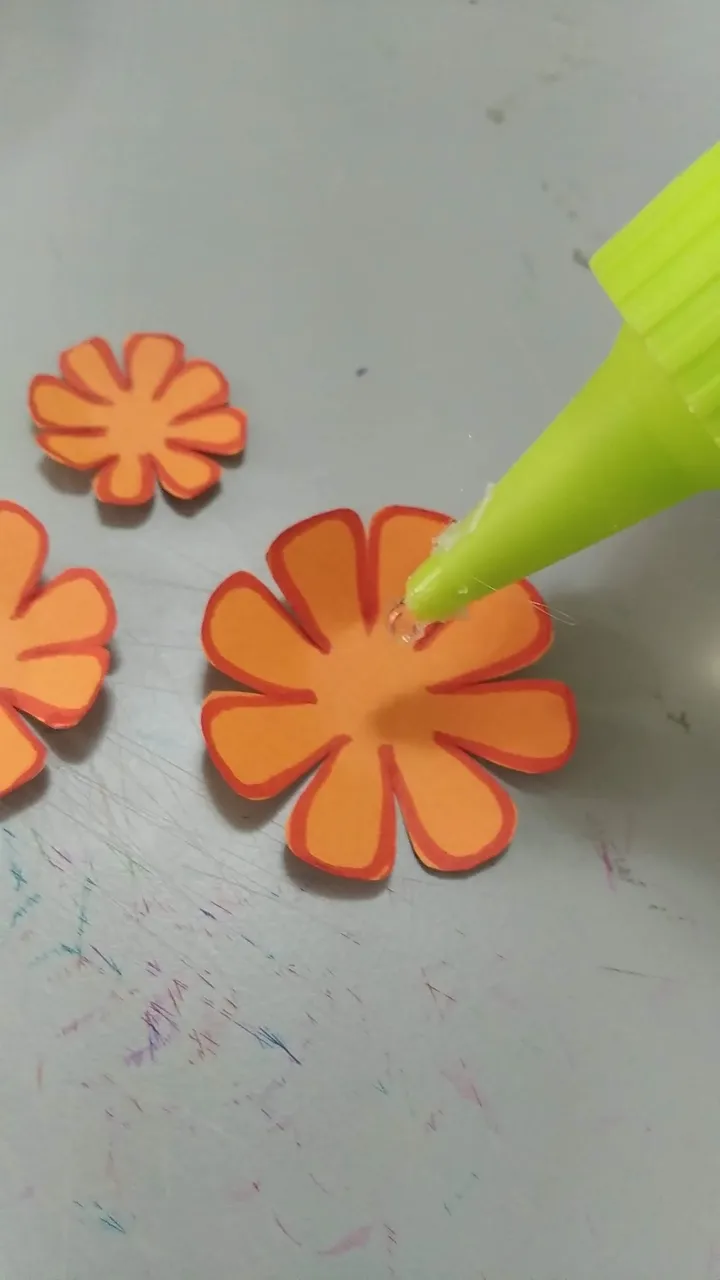
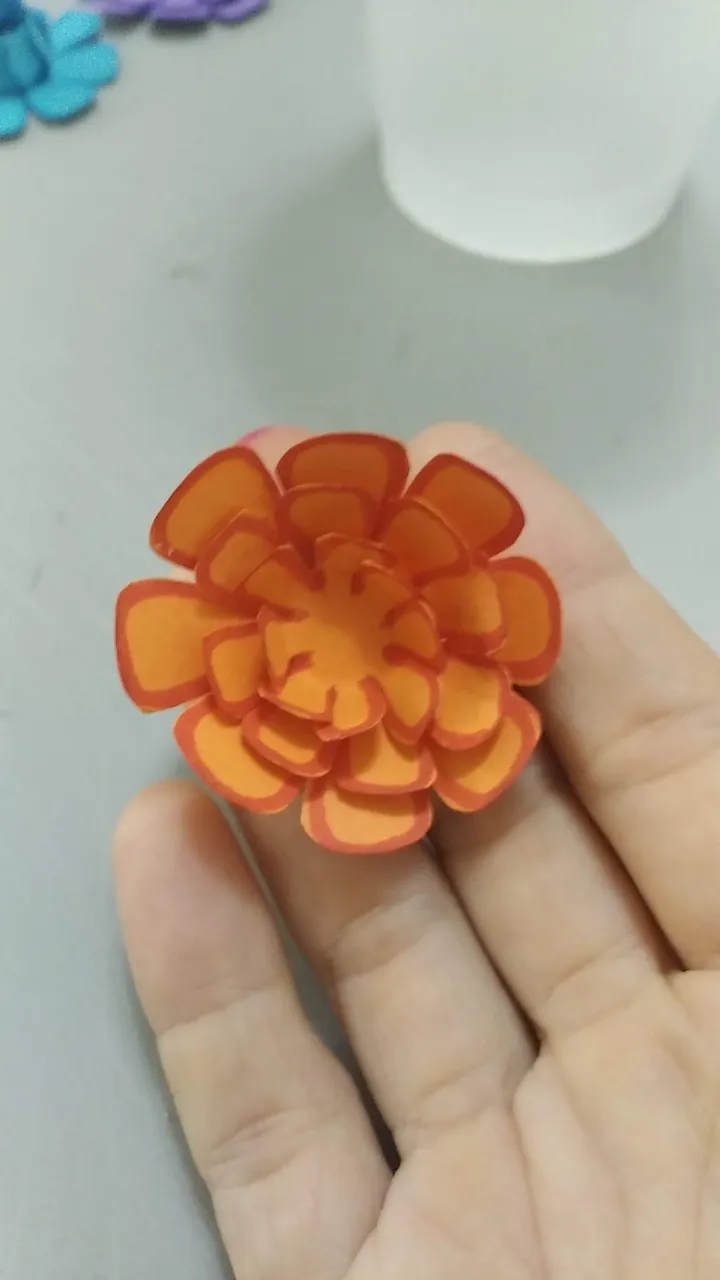
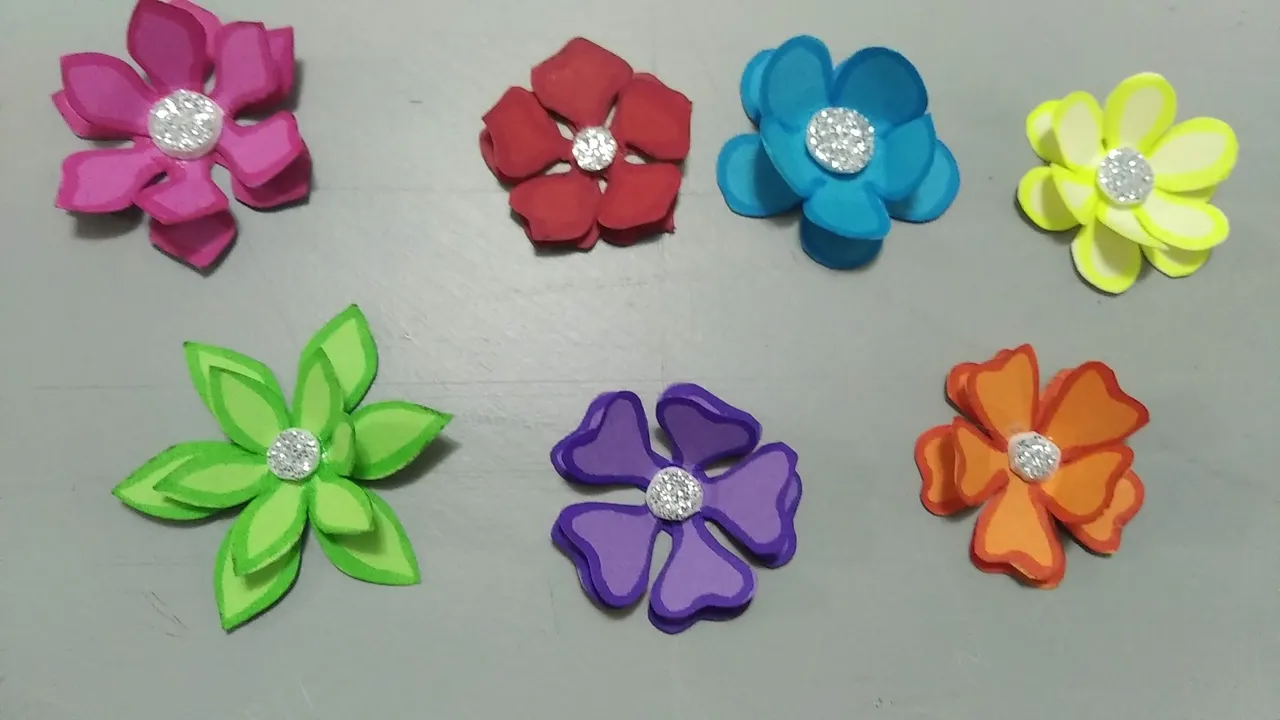
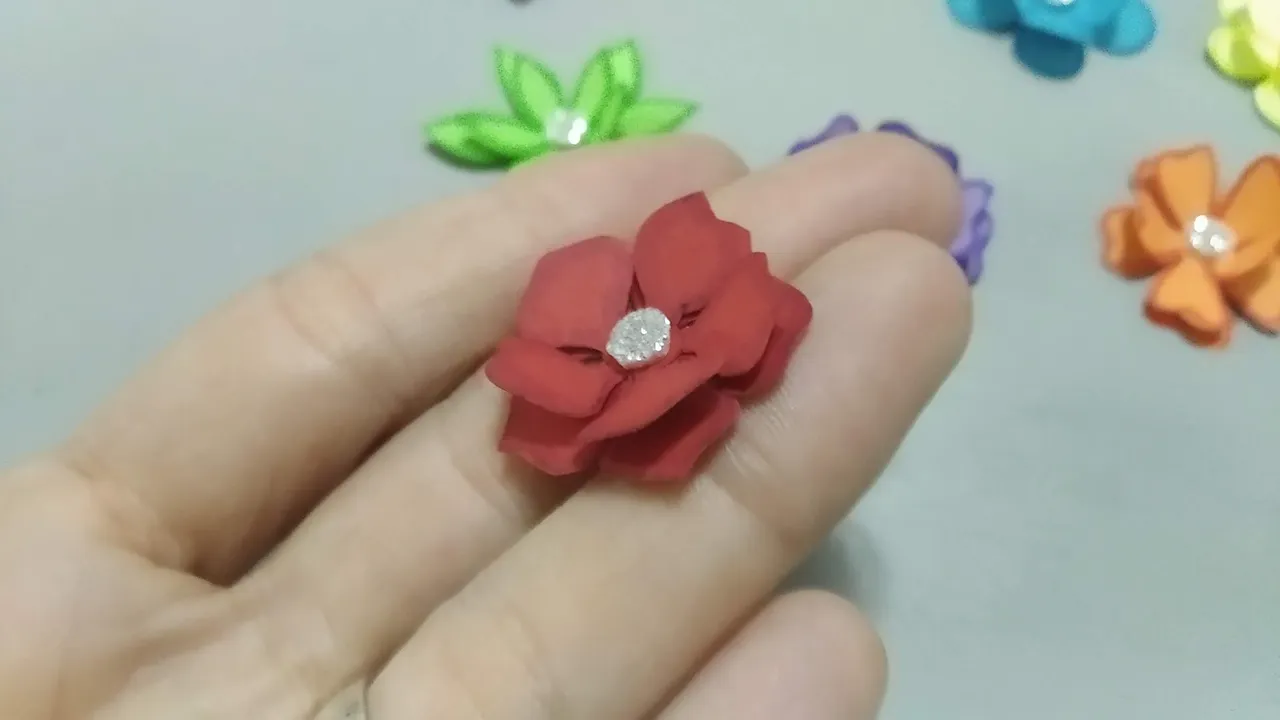
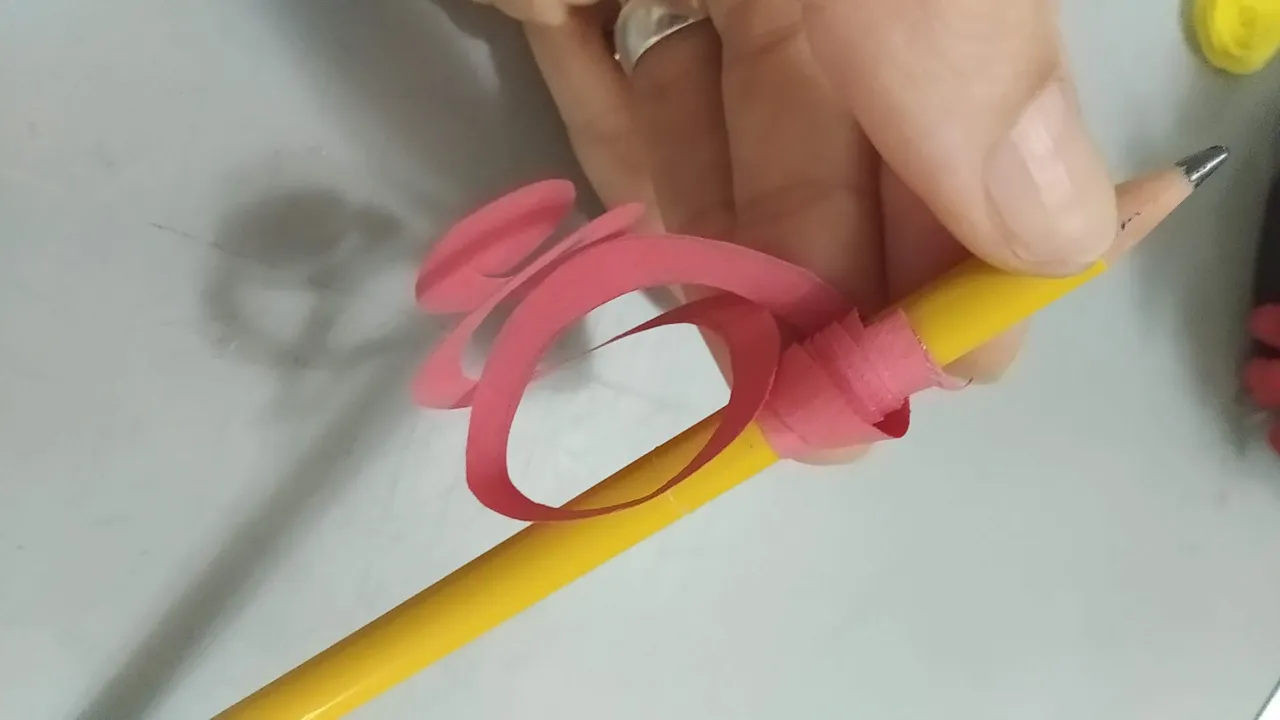
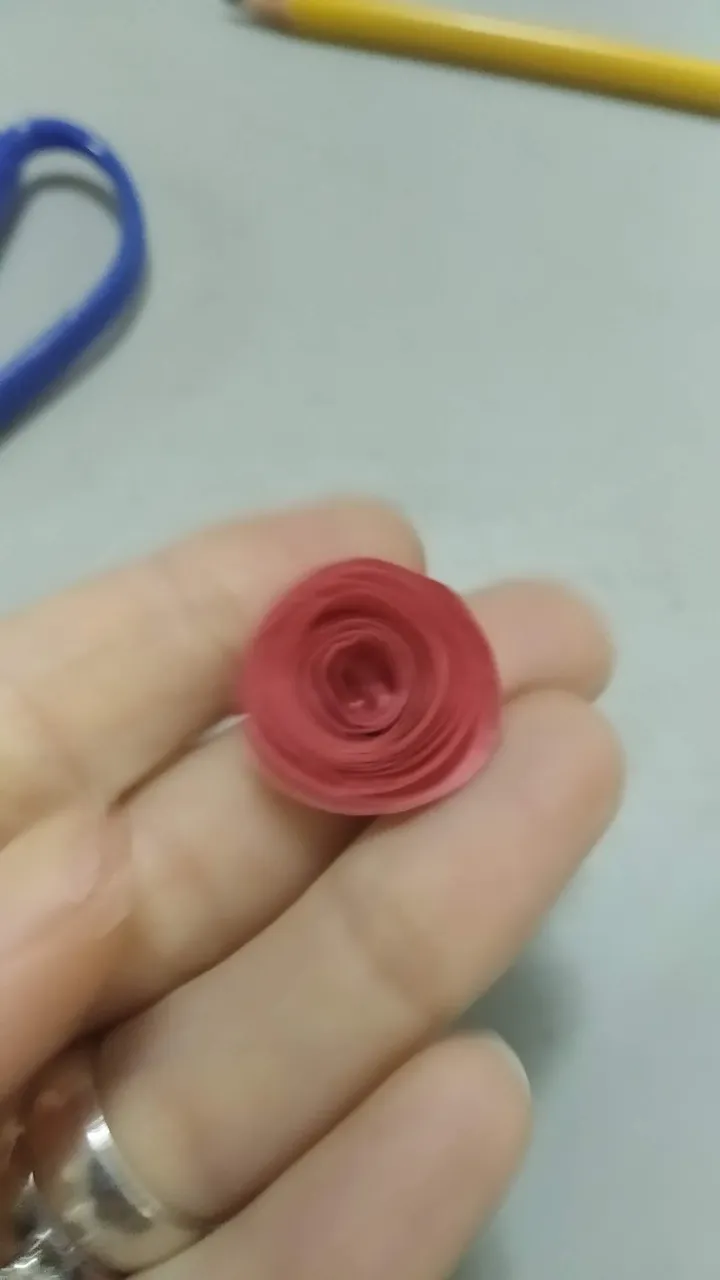
- A cada flor pegar las capas con silicón frio, cuidando de pegar solo el centro y no los pétalos, sino no podrán abrirse después. A las capas en espiral se les pega el silicón al final del entorchado.
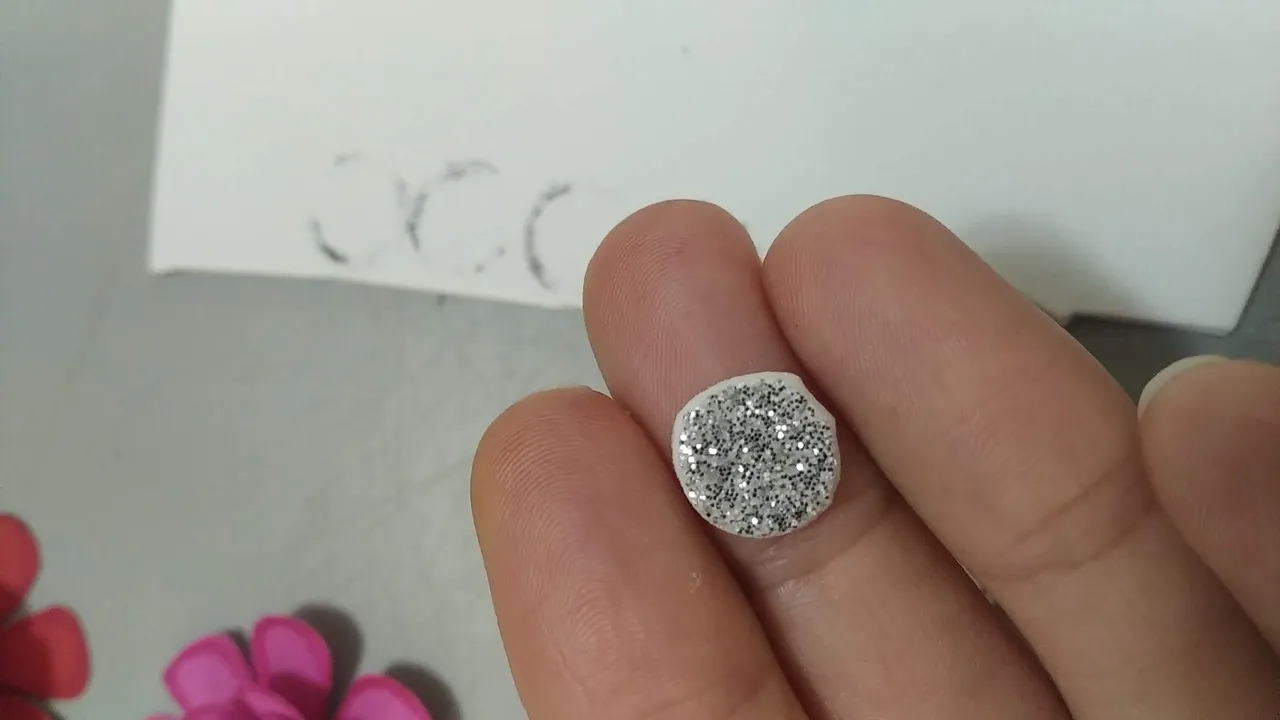
- Cortar el foami escarchado en círculos y pegar en el centro de cada flor, unos círculos serán más grandes que otros dependiendo del diseño y tamaño de la flor. Esto no aplica para las flores en espiral.
- Cortar pequeños rectángulos de cartulina verde grama y formar pequeñas hojas. Para ello se doblan los rectángulos en dos, se curvan las puntas y luego se hacen pequeños cortes en diagonal.
ENSAMBLE:
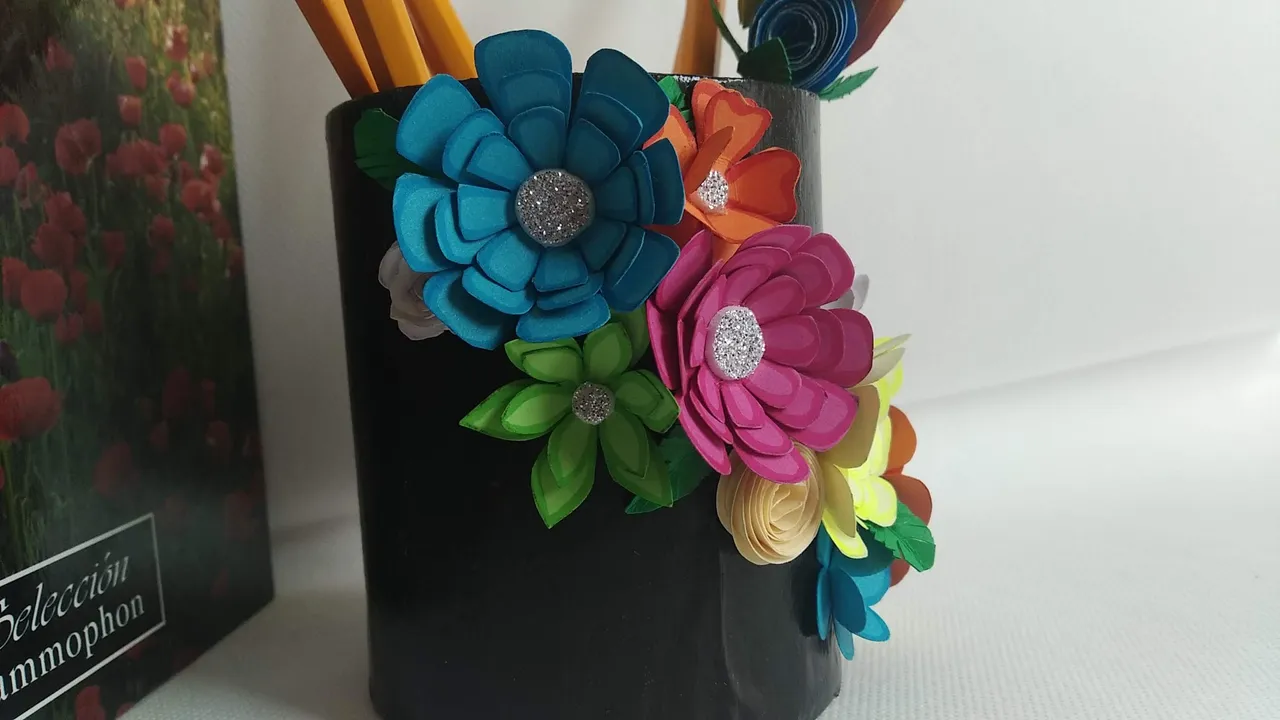
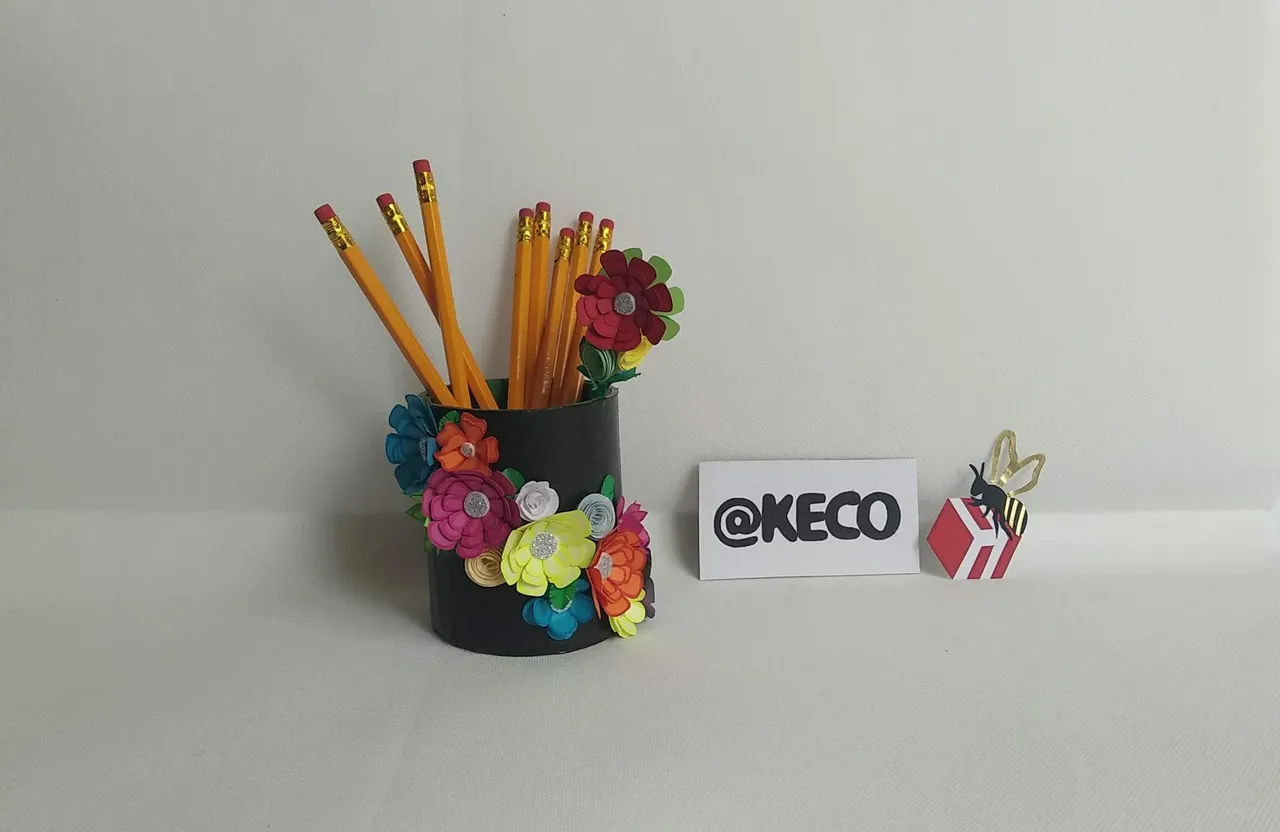
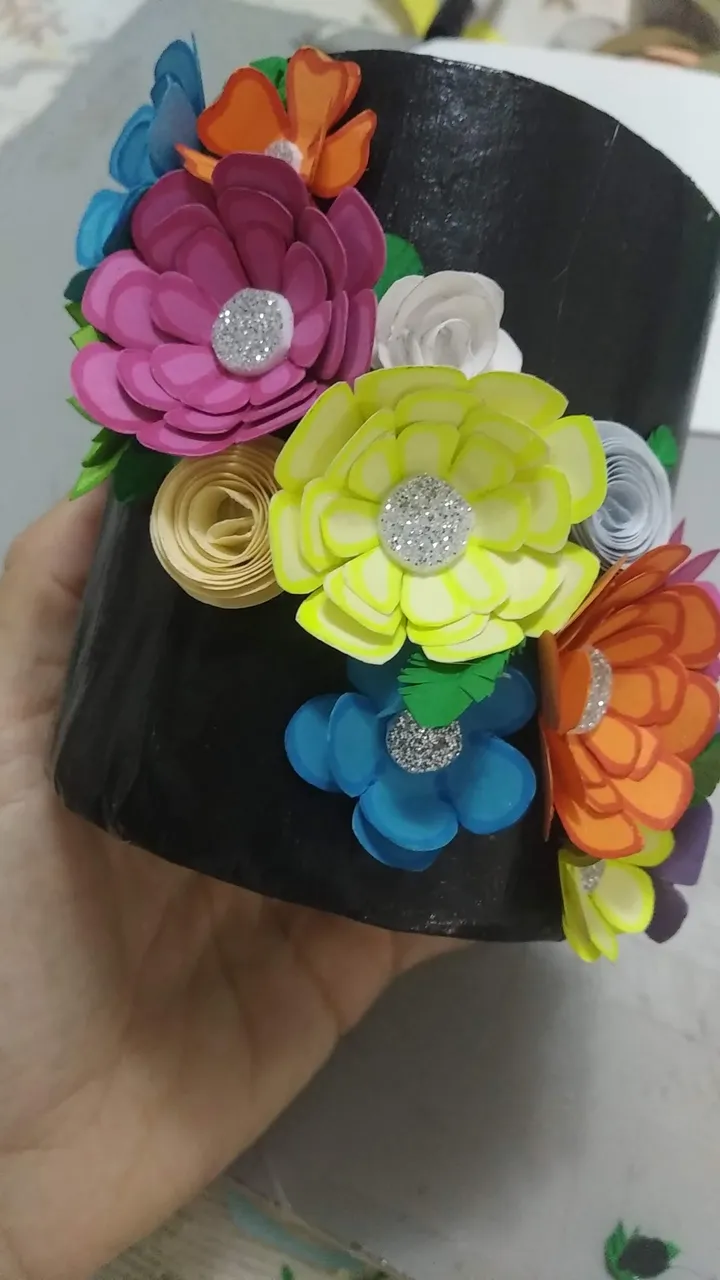
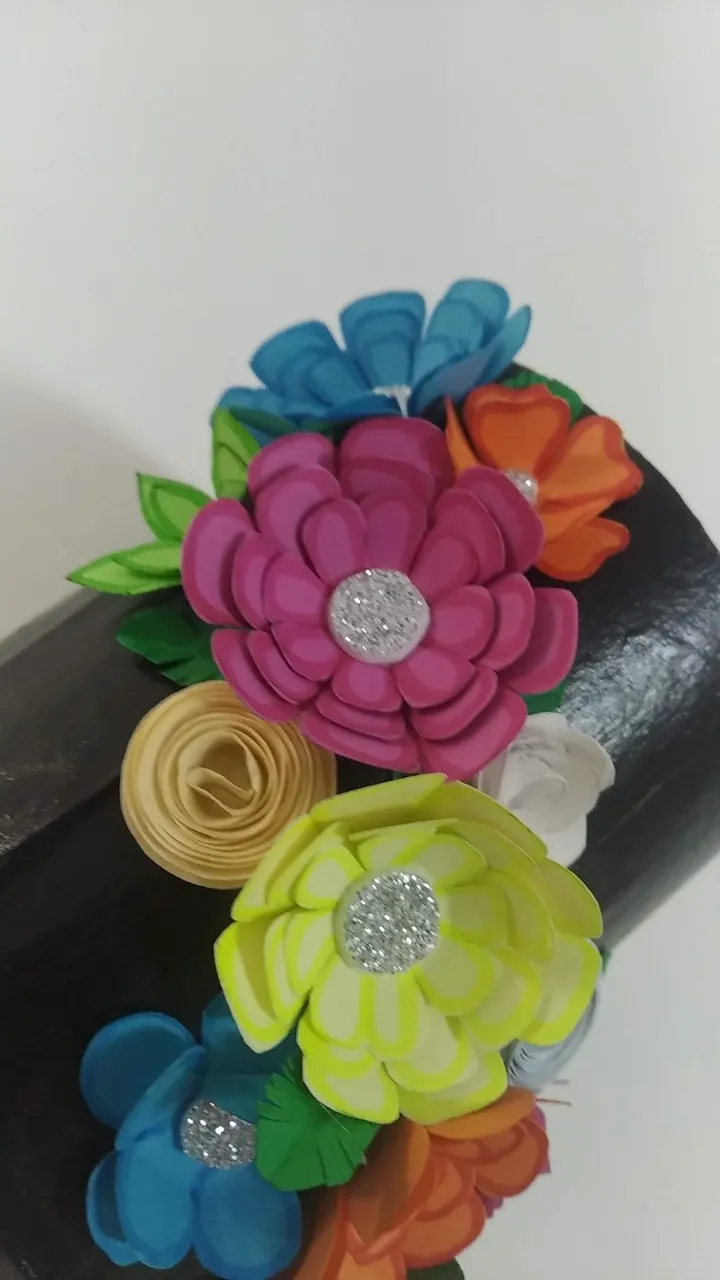
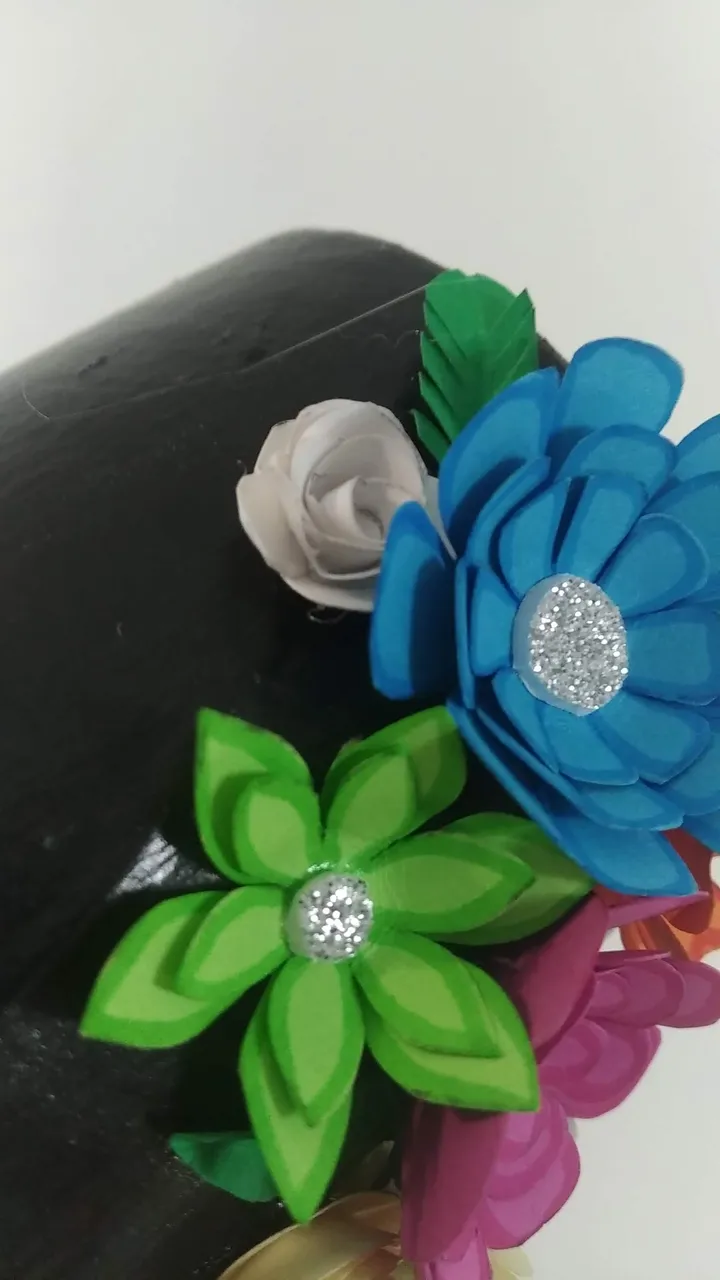
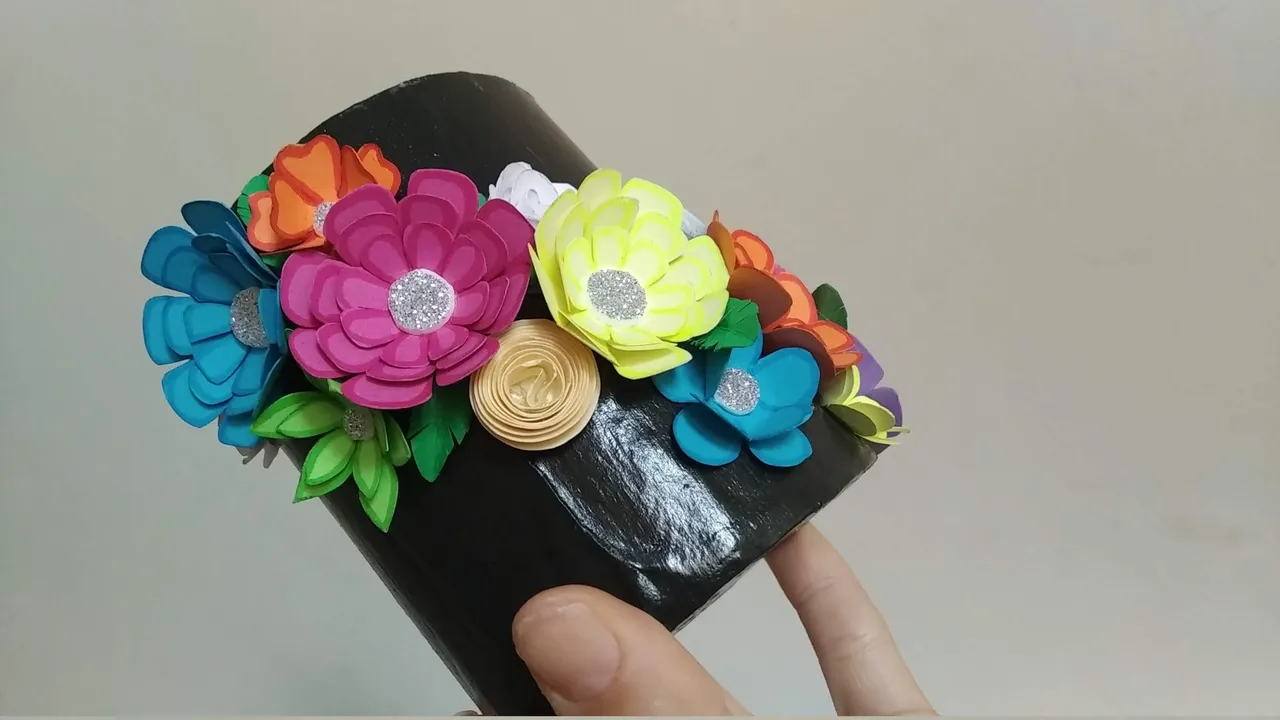
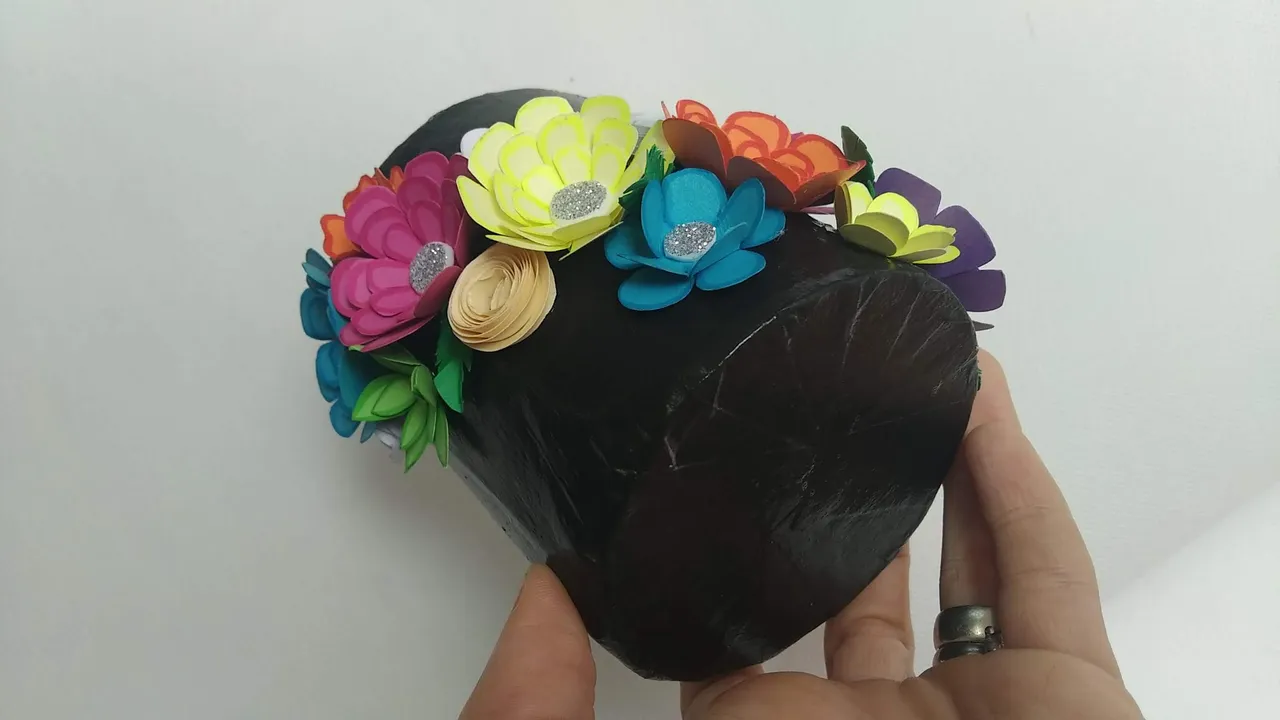
- Tomar la base negra y comenzar a pegar las flores en cascada, comenzando con las flores grandes, seguida de las medianas y de ultimo las espirales y hojas. Se debe cuidar de que los colores contrasten para equilibrar los mismos.
- Tomar el foami verde y cortar al ancho y alto de lo interno de la base y pegar con silicón frio.
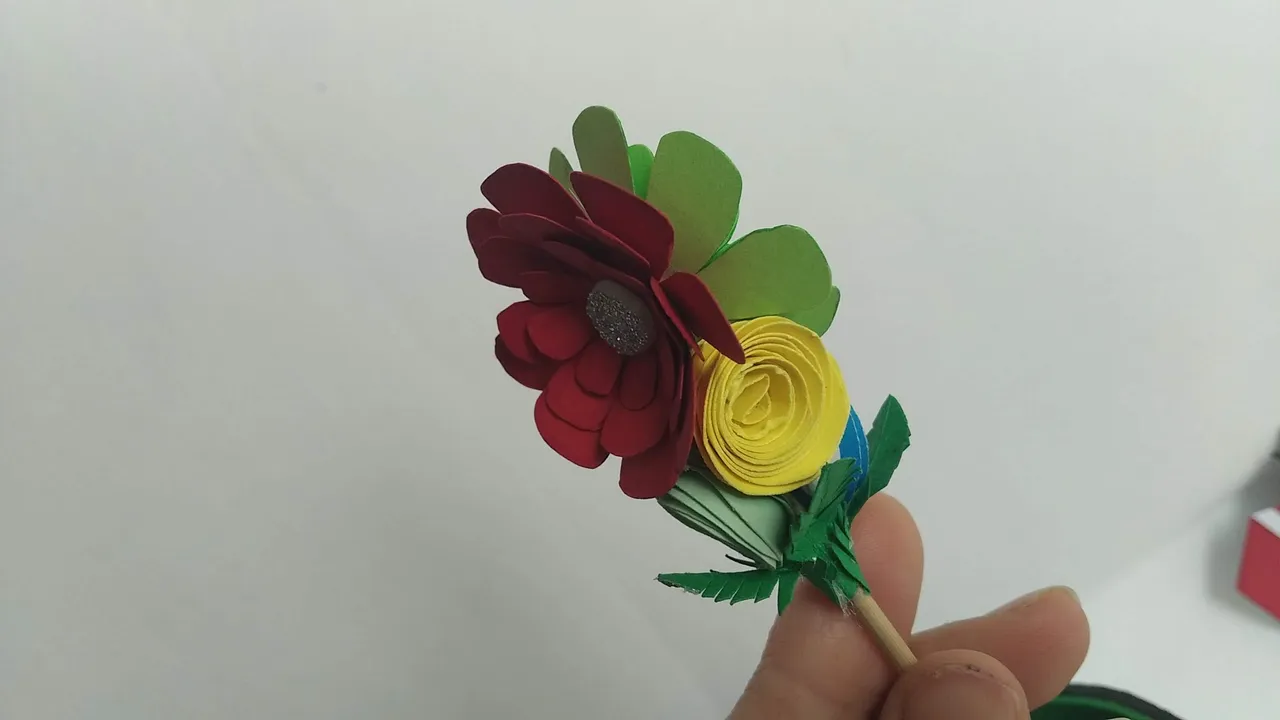
- (opcional) Como me sobraron flores y hojas, las pegue a un palito de madera y cree un pequeño ramillete que complementa la decoración del organizador.
¡Listo!, a disfrutar de la magia de lo creado en casa.
English
Hello friends.
This post is my participation in the contest related to Spring powered by the wonderful community of @hivediy.
Many times I have been enthusiastic about many contests, however due to the multiple occupations of the day to day I end up leaving aside many of them, more than lack of interest, it is for lack of free time, however this time, and being grateful I had some time available this weekend I decided to create something easy, simple but above all useful that would allow me to have order at home and of course participate for the first time in the round of weekly contests that always organizes the @hivediy team.
Inspired by the theme, I created a nice organizer for pens and/or pencils; using a thick cardboard base (industrial cardboard roll) and flowers of different shapes and colors to make it fun and colorful as nature offers them.
Without further ado and hoping you enjoy the work done with love, I leave you the materials used, the process and the images of the work.
- Large cardboard roll (industrial)
- Reused craf paper
- Engrudo (homemade glue).
- Cardboard
- Cold black paint
- Water-based glitter (a kind of enamel for handicrafts)
- Color cardboard (depending on how you want the flowers to look)
- Silver frosted Foami.
- Flat green grass colored Foami.
- Hot Silicone.
- Cold Silicone.
- Cutter.
- Scissors.
- Pencil.
BASE:
- We take the industrial cardboard roll (this did not need to be cut) and put cardboard on one of its sides to make the base, cutting the circle of the exact width that occupies the cylinder and glue it with cold silicone.
- The roll is lined with the reused craf paper from the bag, and glued with homemade paste. Be careful to moisten the paper very well on both sides so that it sticks to the cardboard without forming air bubbles. The paper can be cut flush with the cylinder, but for a better finish, I left the paper facing inwards, and glued it with the paste.
- Let dry very well, preferably about 8 hours in fresh air.
- Paint the base with cold paint and when dry apply a water based gloss to give it shine and durability. Let dry again.
(step two and three can be optional)
FLOWERS:
- Design on a sheet of paper the styles of flowers to be used respecting the height of the cylinder so that they are not too big or too small.
- Mark and cut the different styles of flowers on the selected colored cardboard. As I like them to look embossed, I decided to cut three layers for the larger flowers and two layers for the smaller flowers. The spiral flowers do not apply the layers.
- To all the cuts, highlight with colored markers and let dry. Does not apply to spiral flowers.
- To each flower glue the layers with cold silicone, taking care to glue only the center and not the petals, otherwise they will not be able to open later. The spiral layers are glued with silicone at the end of the twisting.
- Cut the frosted foami in circles and glue in the center of each flower, some circles will be bigger than others depending on the design and size of the flower. This does not apply to spiral flowers.
- Cut small rectangles of grass green cardboard and form small leaves. To do this, fold the rectangles in two, curve the ends and then make small diagonal cuts.
ASSEMBLY:
- Take the black base and start gluing the flowers in cascade, starting with the large flowers, followed by the medium ones and finally the spirals and leaves. Take care that the colors contrast to balance them.
- Take the green foami and cut to the width and height of the inside of the base and glue with cold silicone.
- (optional) As I had some flowers and leaves left over, I glued them to a wooden stick and created a small bouquet that complements the decoration of the organizer.
Ready, enjoy the magic of what you have created at home.
Translated with www.DeepL.com/Translator (free version)
IMÁGENES / IMAGES
BASE / BASE:
FLORES / FLOWERS :


ENSAMBLE / ASSEMBLY:


SALUDOS / REGARDS
Todas las Fotos fueron tomadas con mi teléfono Redmi 7A.
Contenido original de @keco (fotos y texto) - Todos los derechos reservados Publicado en HIVE así como en mi instagram : http://instagram.com/carton_pintura_algo_mas
All Photos were taken with my Redmi 7A phone.
Original content from @keco (photos and text) - All rights reserved Posted on HIVE as well as on my instagram: http://instagram.com/carton_pintura_algo_mas