Español
Hola , feliz y bendecido martes
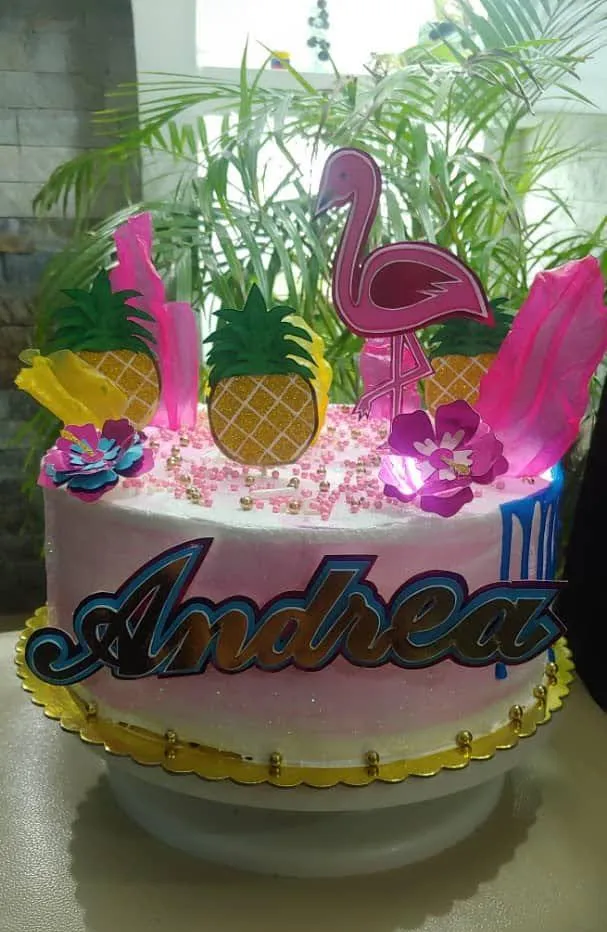
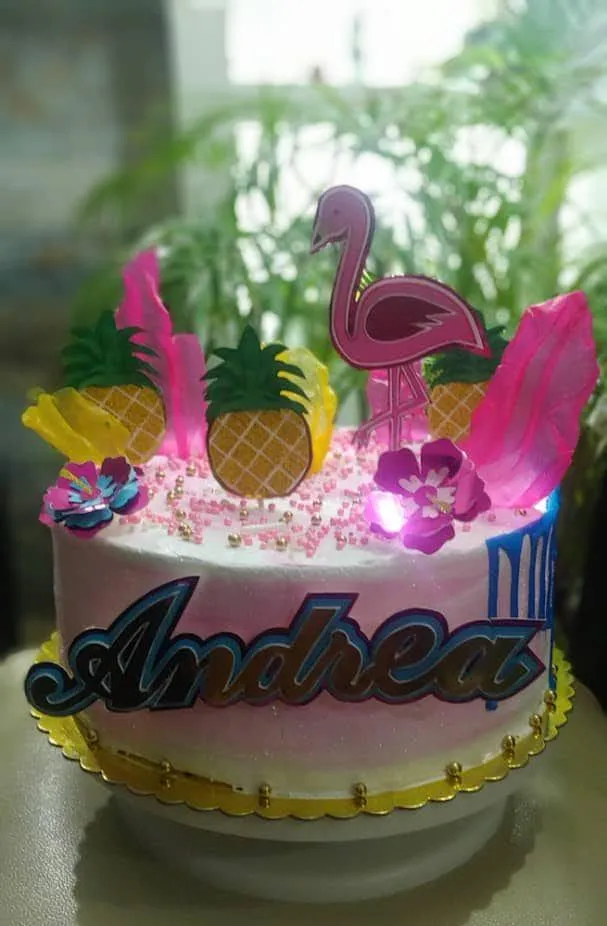
Hoy les mostraré una linda decoración para pastel con motivo tropical realizada en cartulina y palitos de madera.
Es una decoración sencilla pero que realizada con amor, puede hacer que cualquier pastel parezca de lujo, les invito a que revisen el post y se aminen a crear algo parecido para sorprender a familiares y amigos en un día especial .
Sin más y esperando disfruten del trabajo realizado con amor, les dejo los materiales utilizados, el proceso y las imágenes del trabajo.
- Cartulina dorada metalizada tipo espejo.
- Cartulina fucsia metalizada tipo espejo.
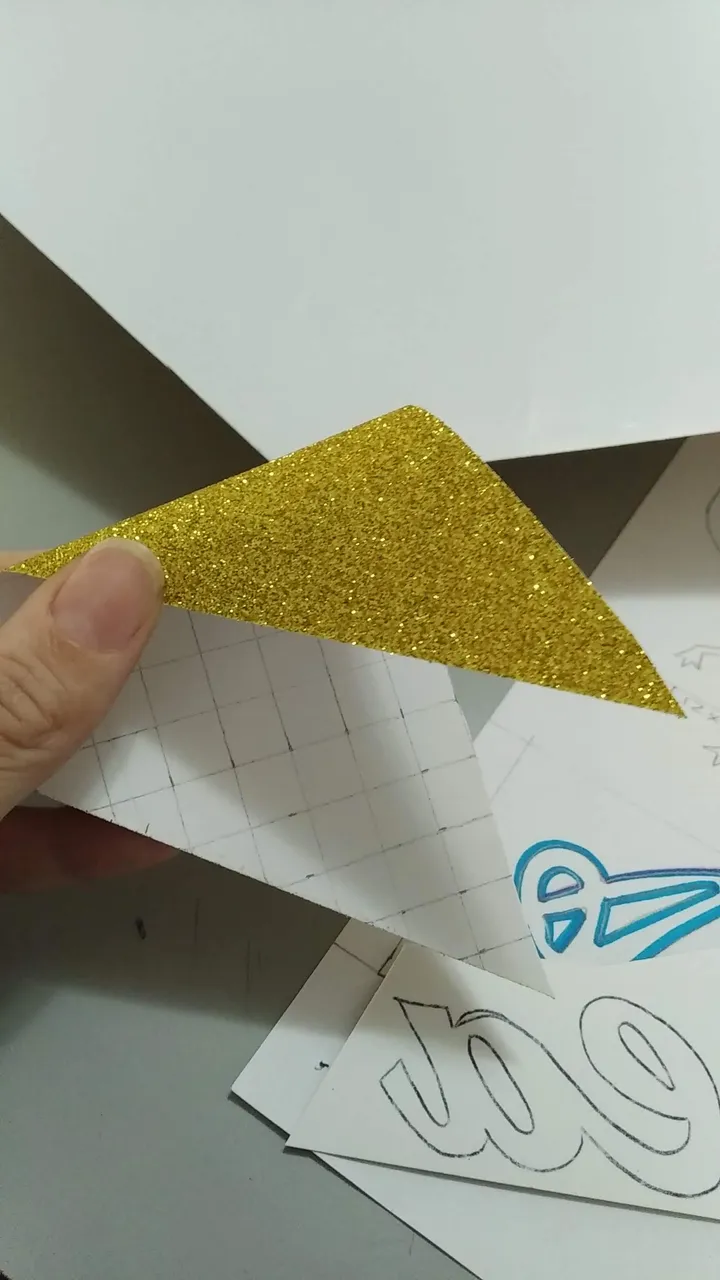
- Cartulina escarchada dorada.
- Cartulina azul.
- Cartulina rosado intenso.
- Cartulina rosado claro.
- Cartulina verde grama.
- Cartulina negra
- Cartulina blanca
- Foami blanco, rosado y azul claro.
- Silicón caliente.
- Palitos de madera.
- Marcador negro punta fina.
- Silicón Frio.
- Cutter.
- Tijera.
- Regla.
- Lápiz.
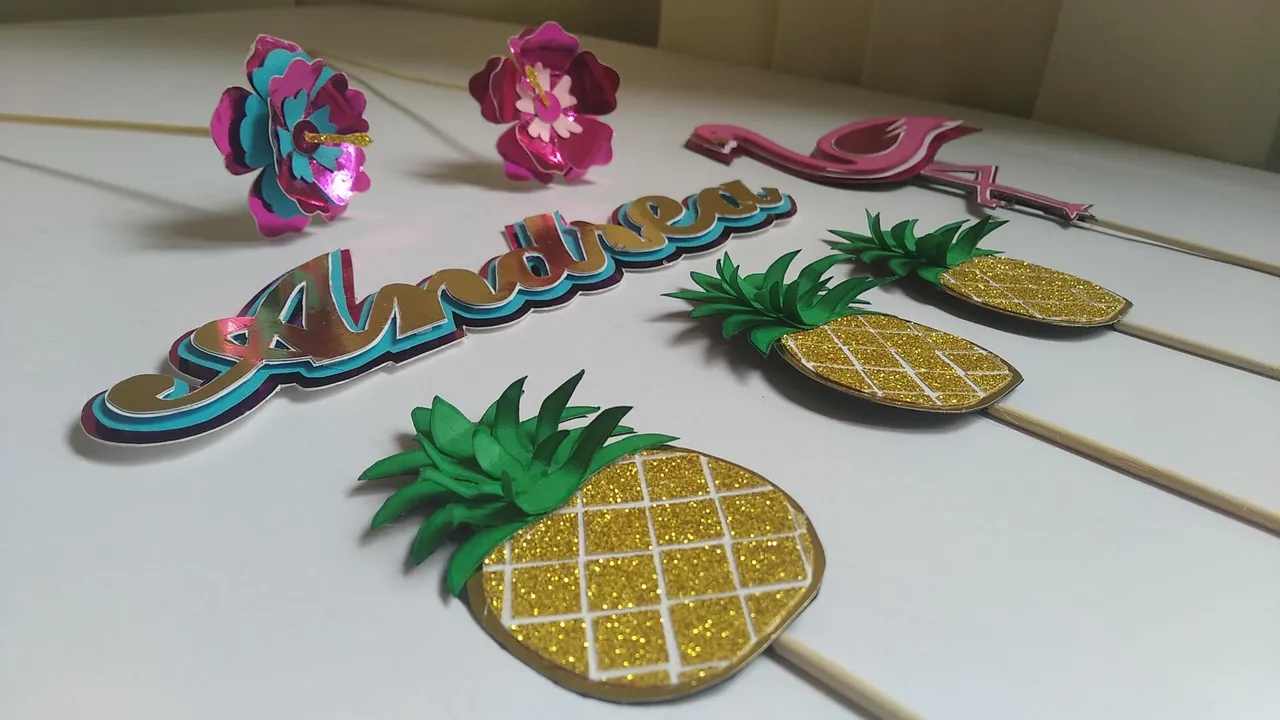
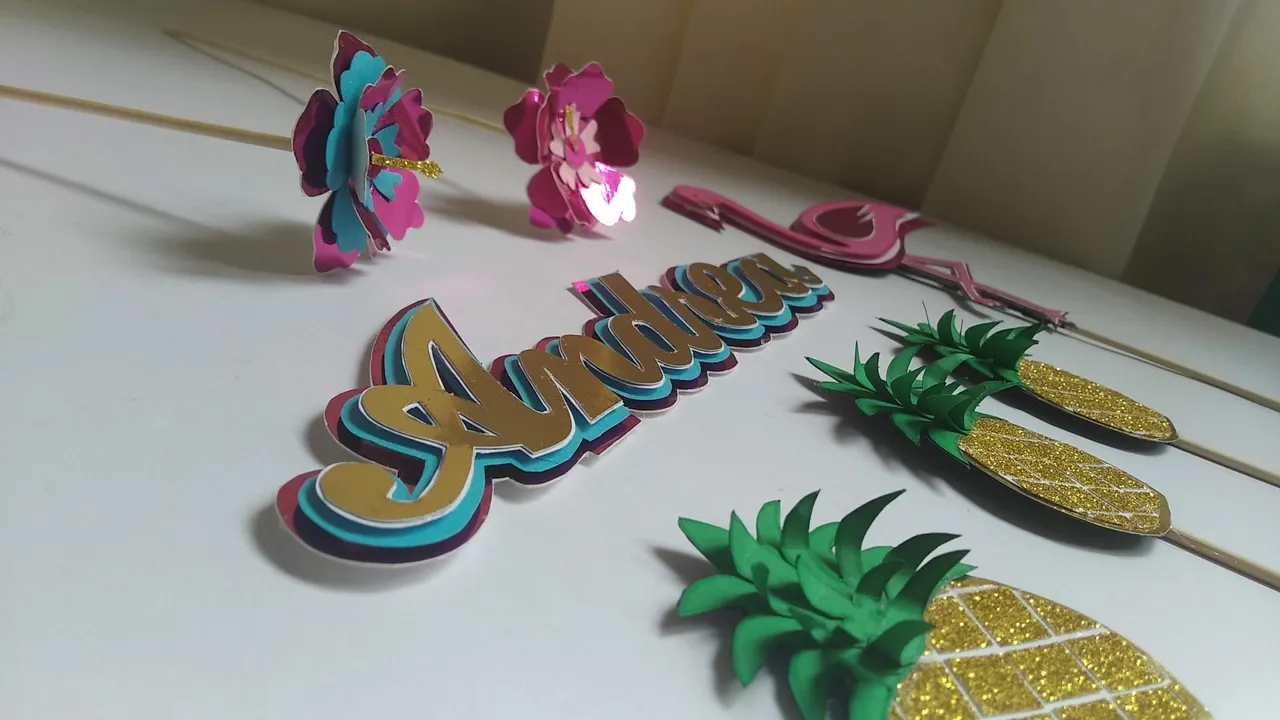
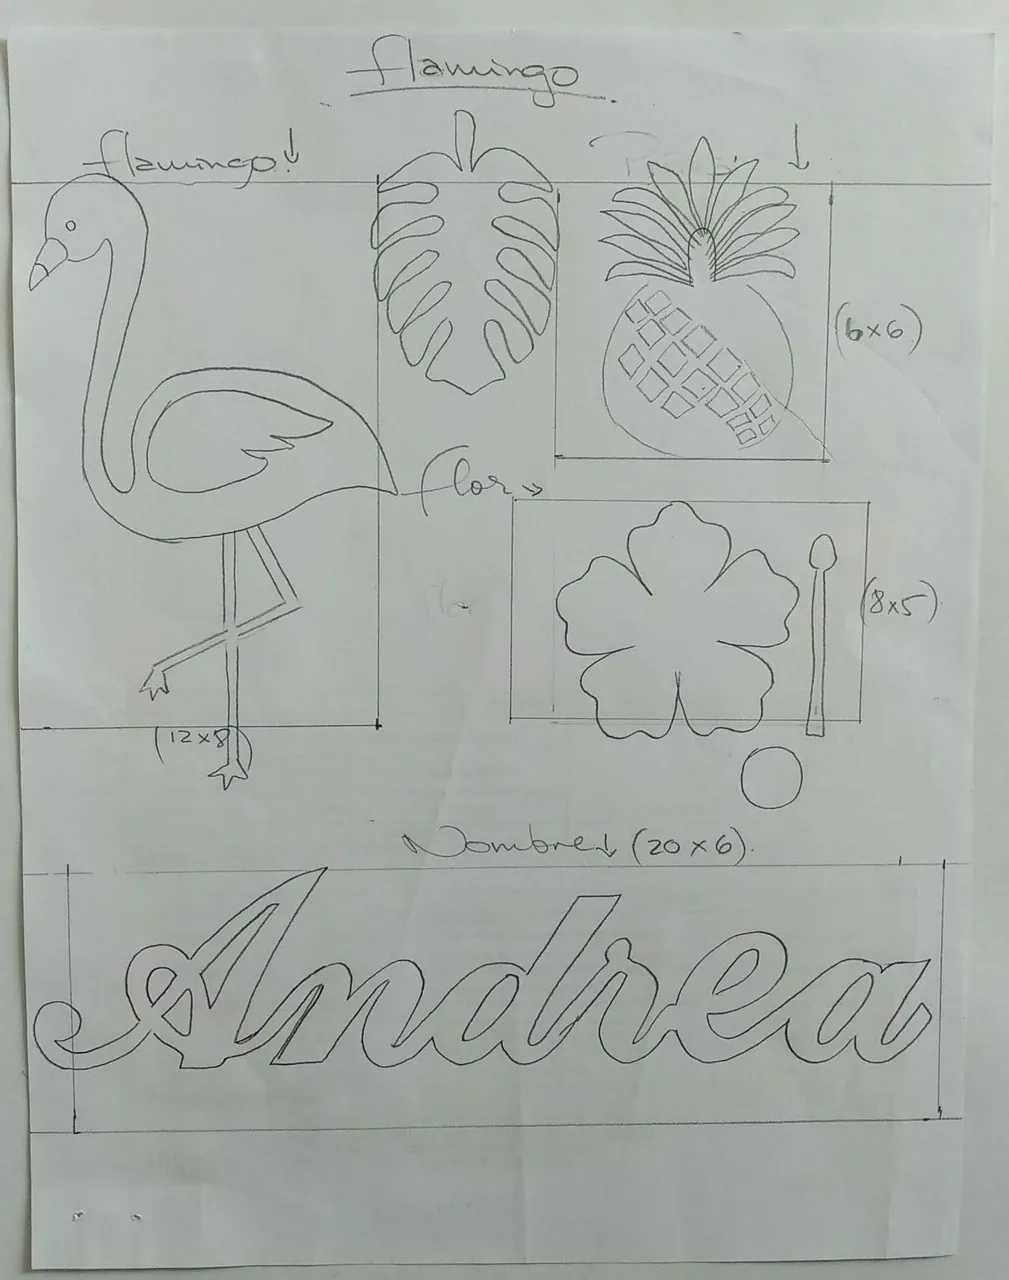
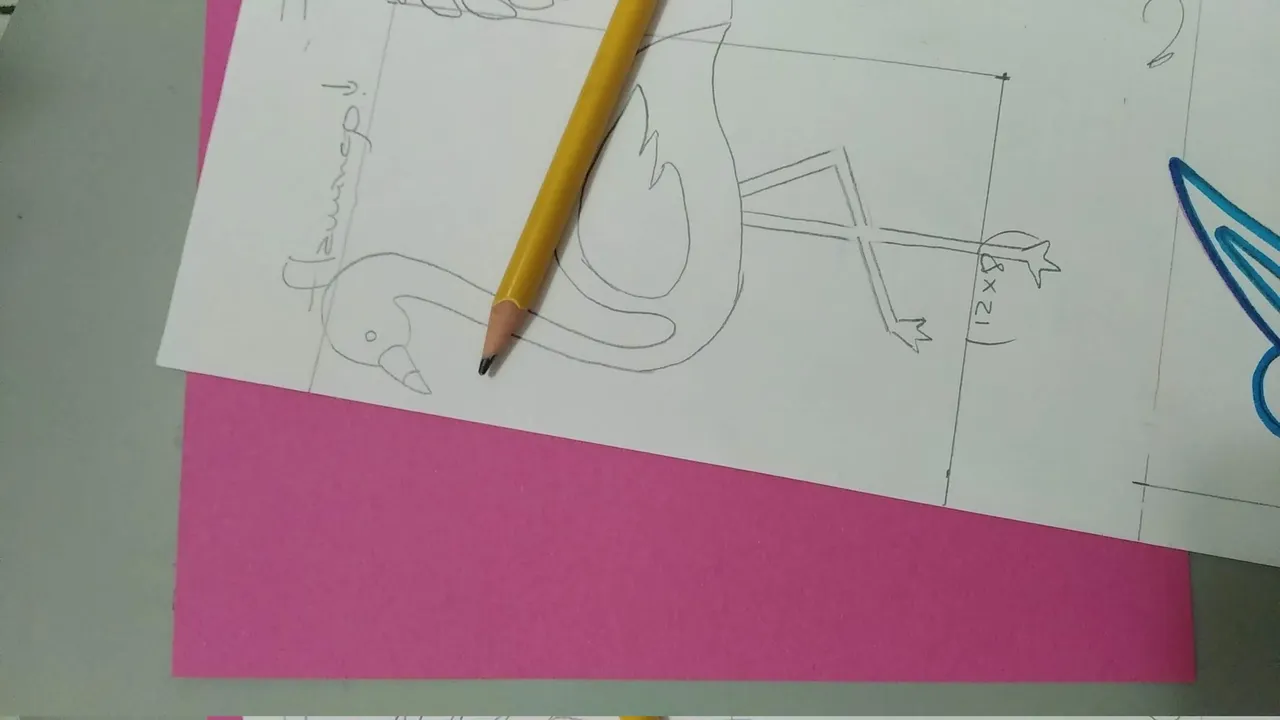
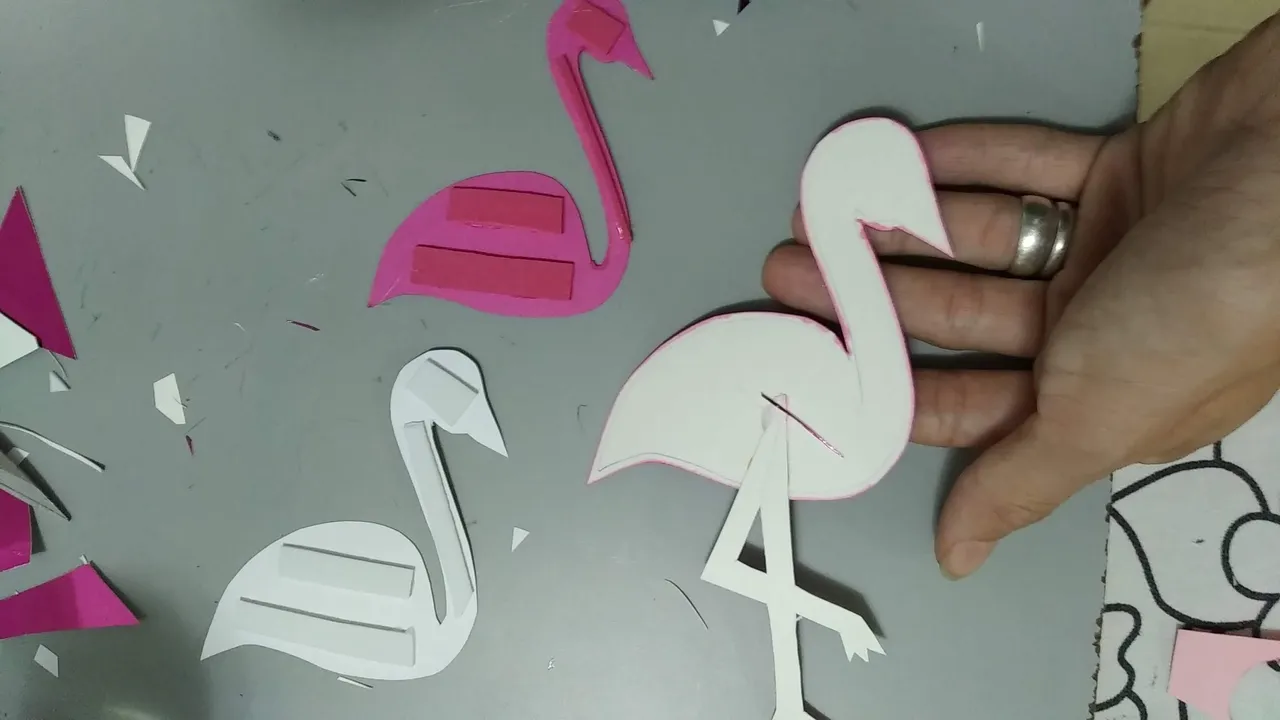
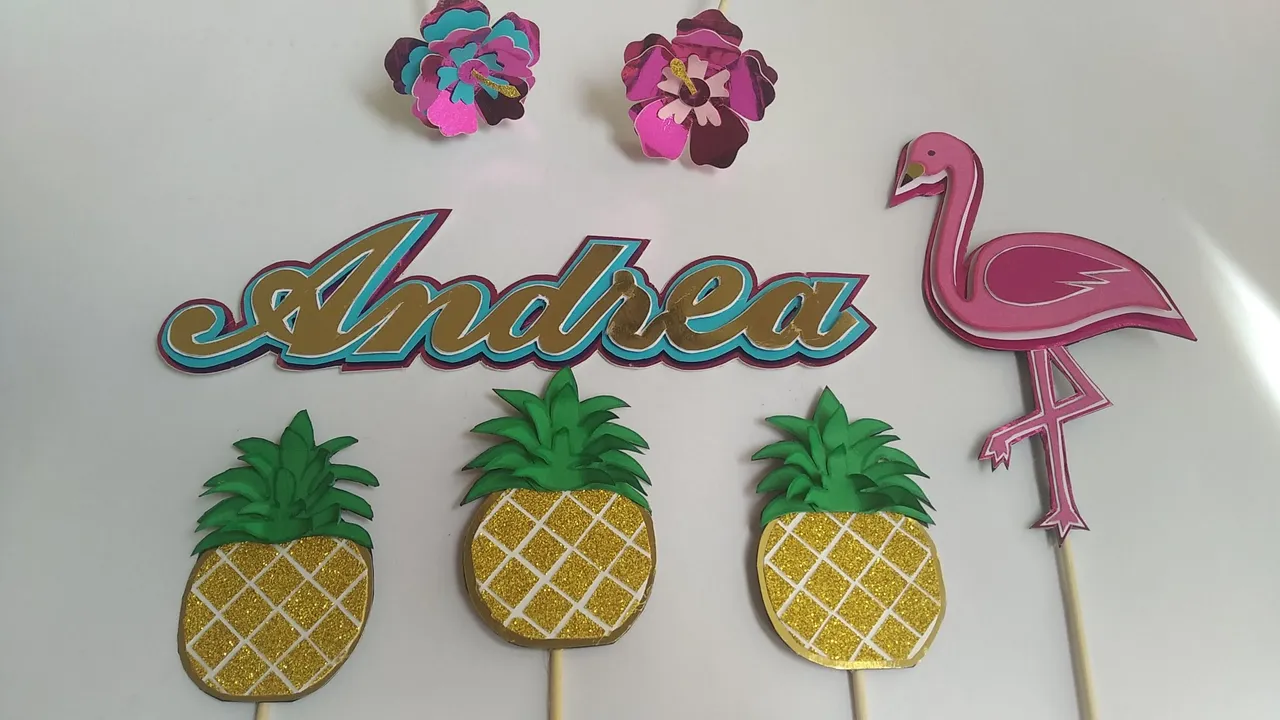
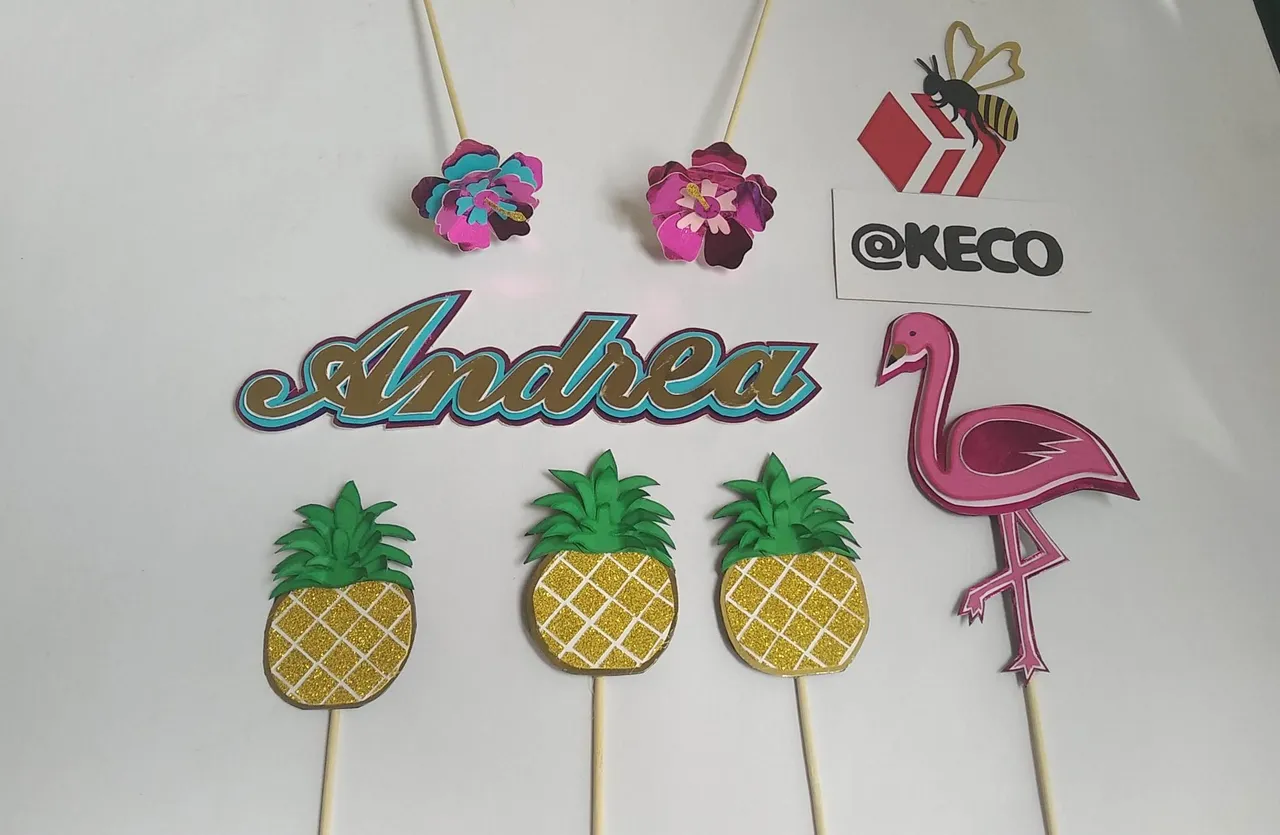
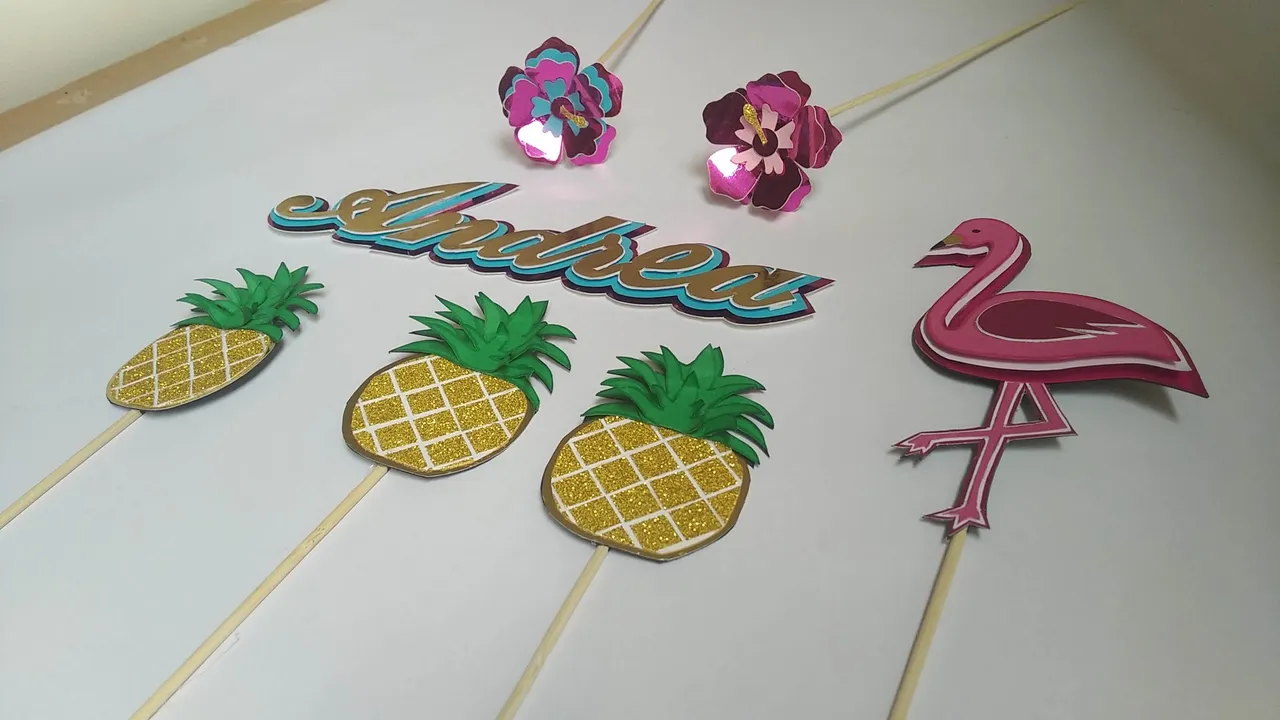
- Sacar el diseño de las piezas a crear, en este caso se creó un flamingo, dos flores, tres piñas y el nombre de la homenajeada.
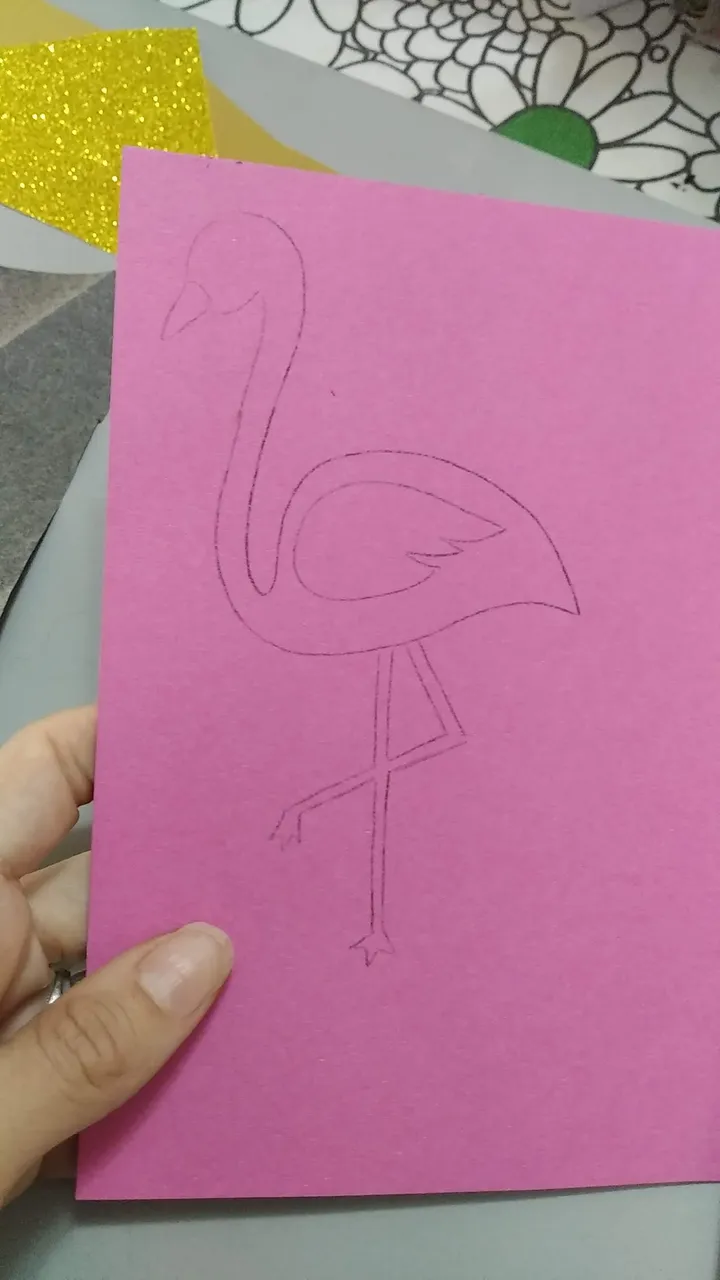
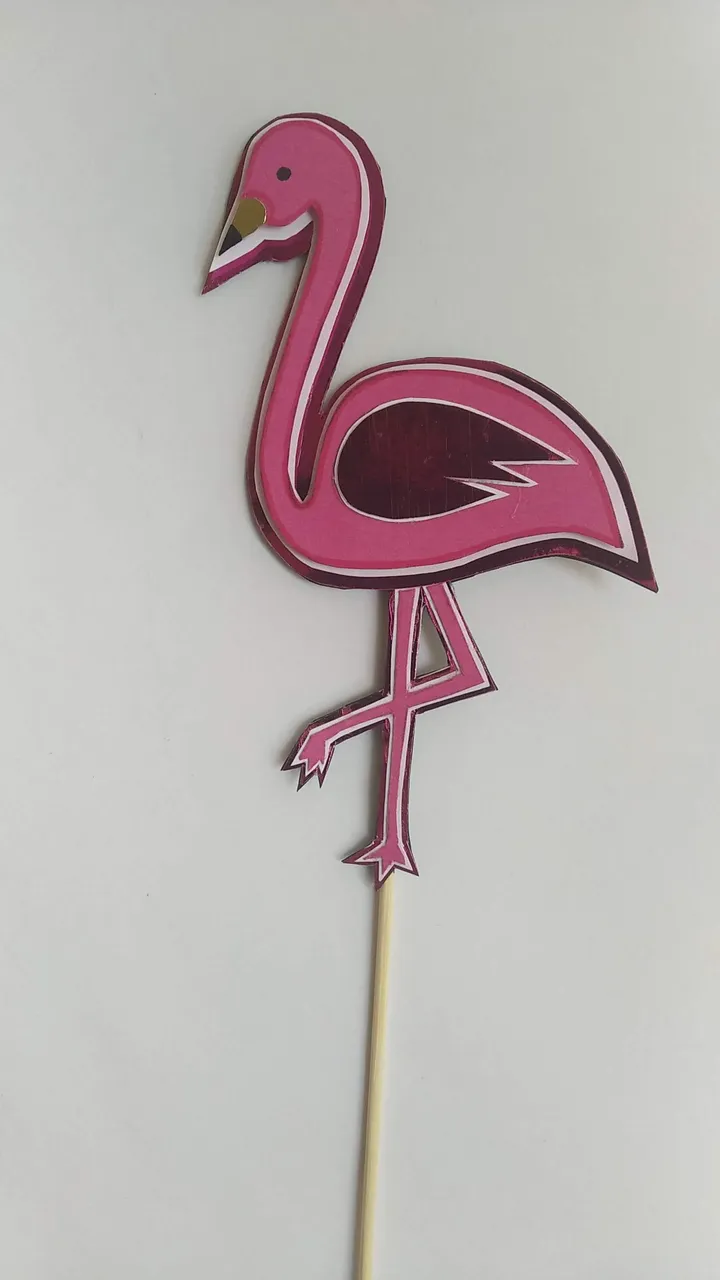
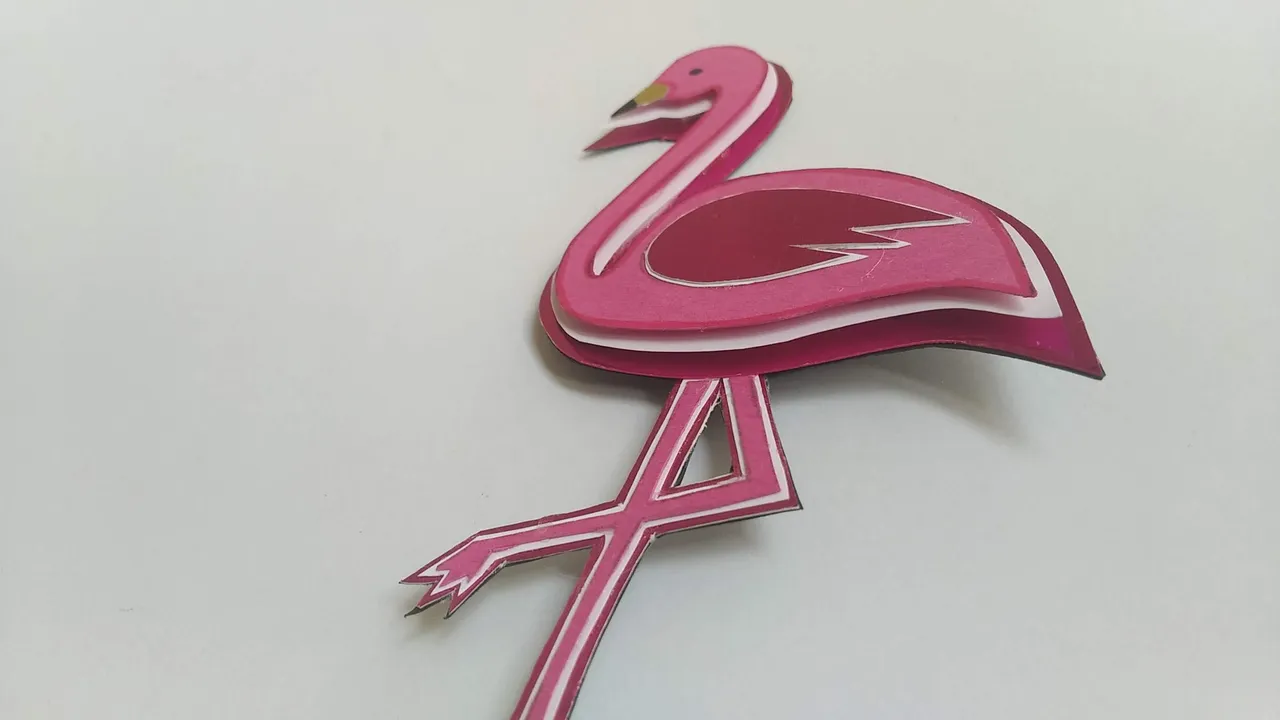
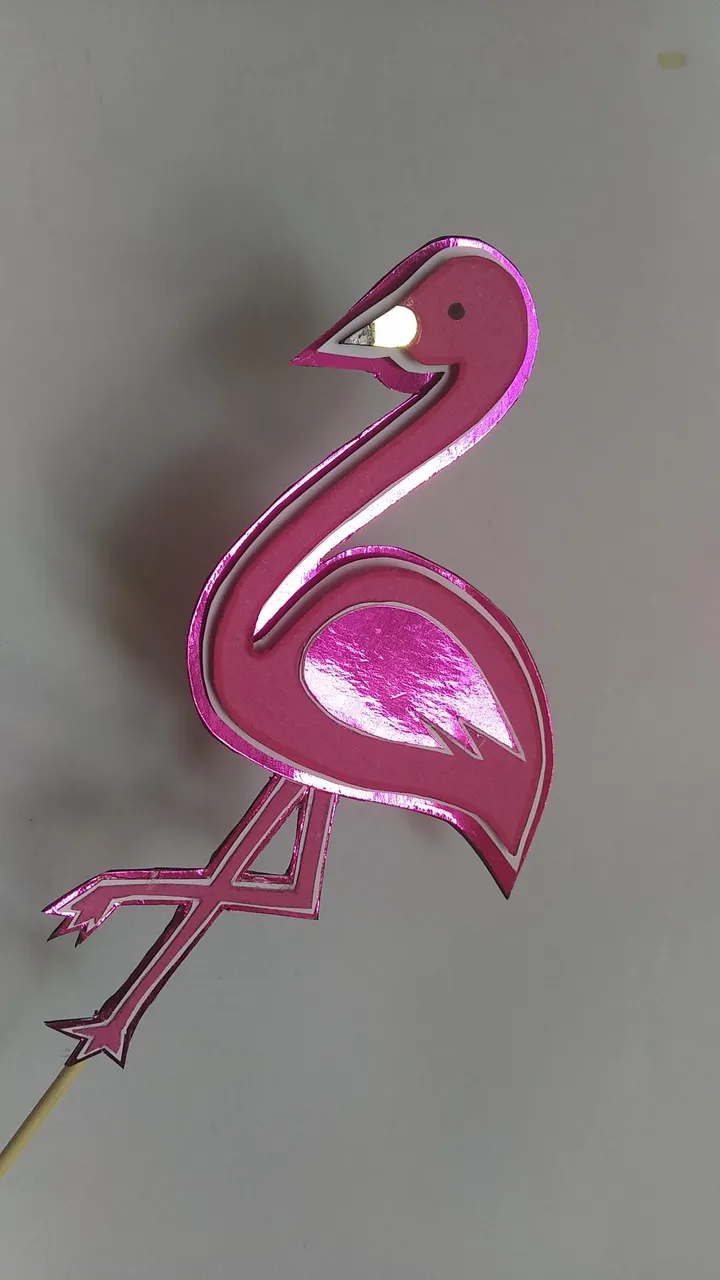
Flamingo (12 x 8 cm):
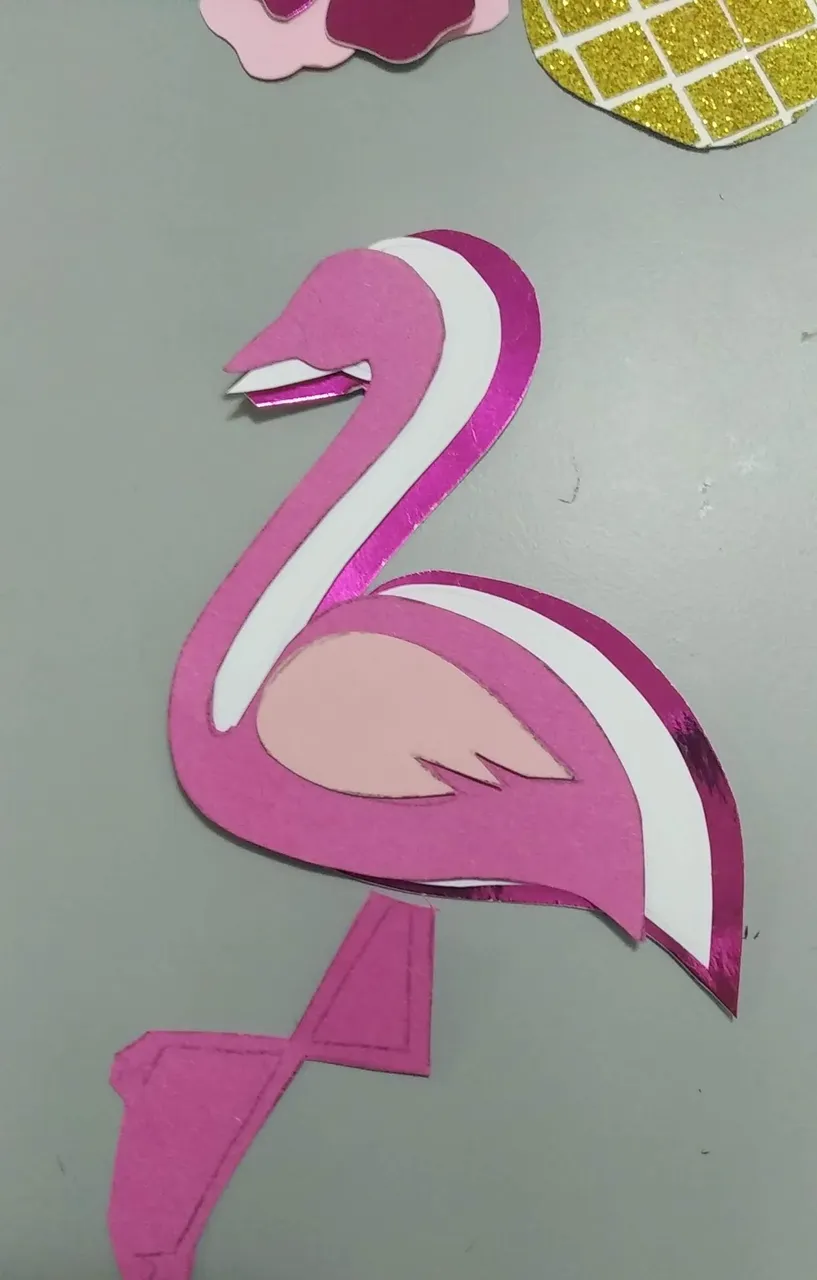
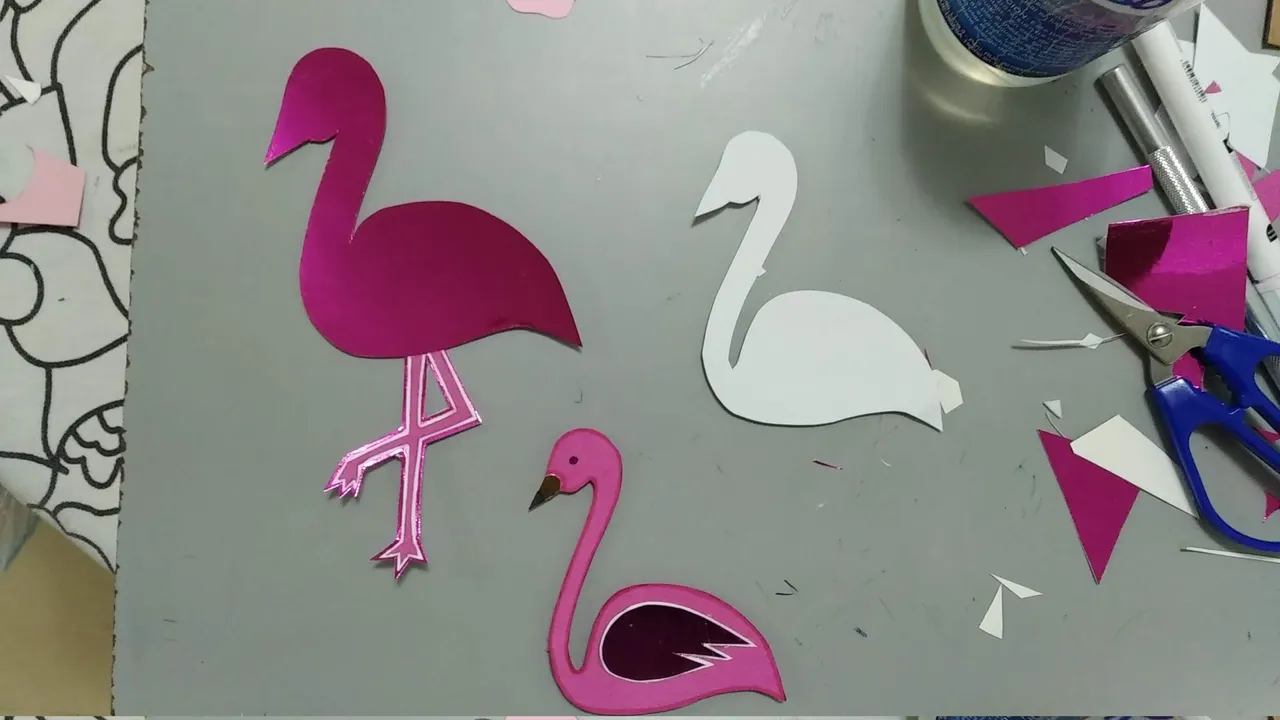
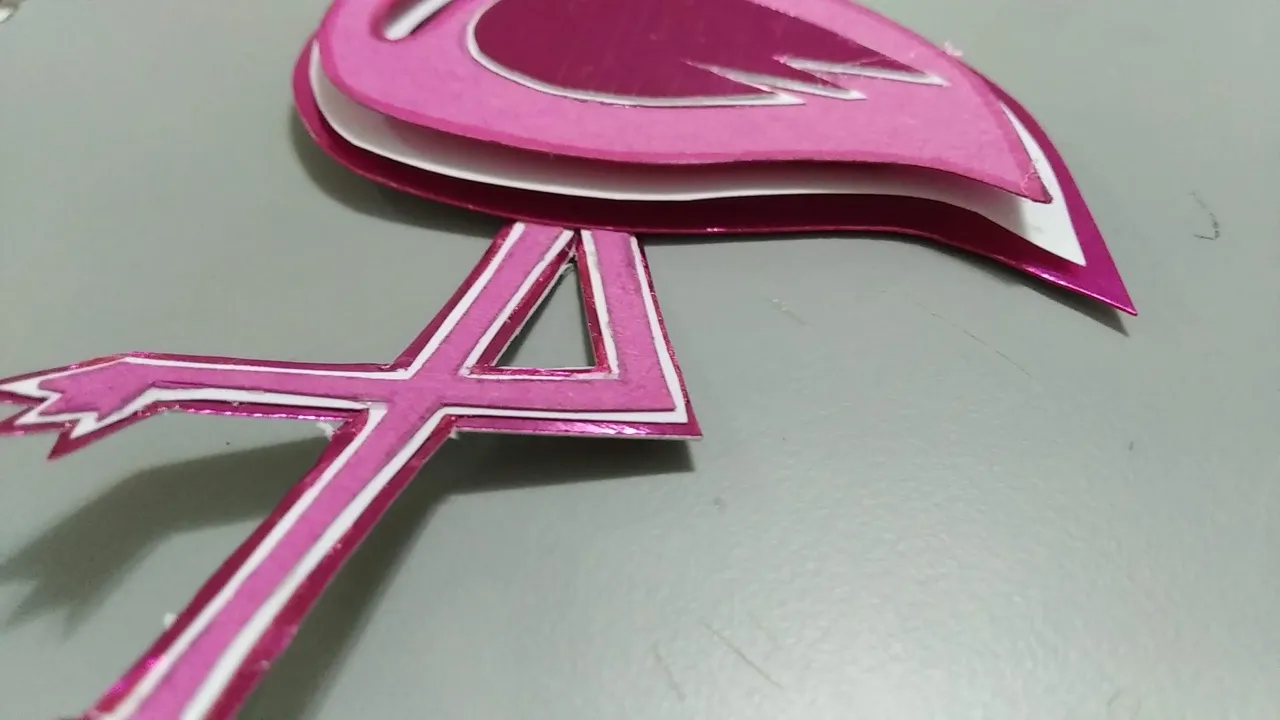
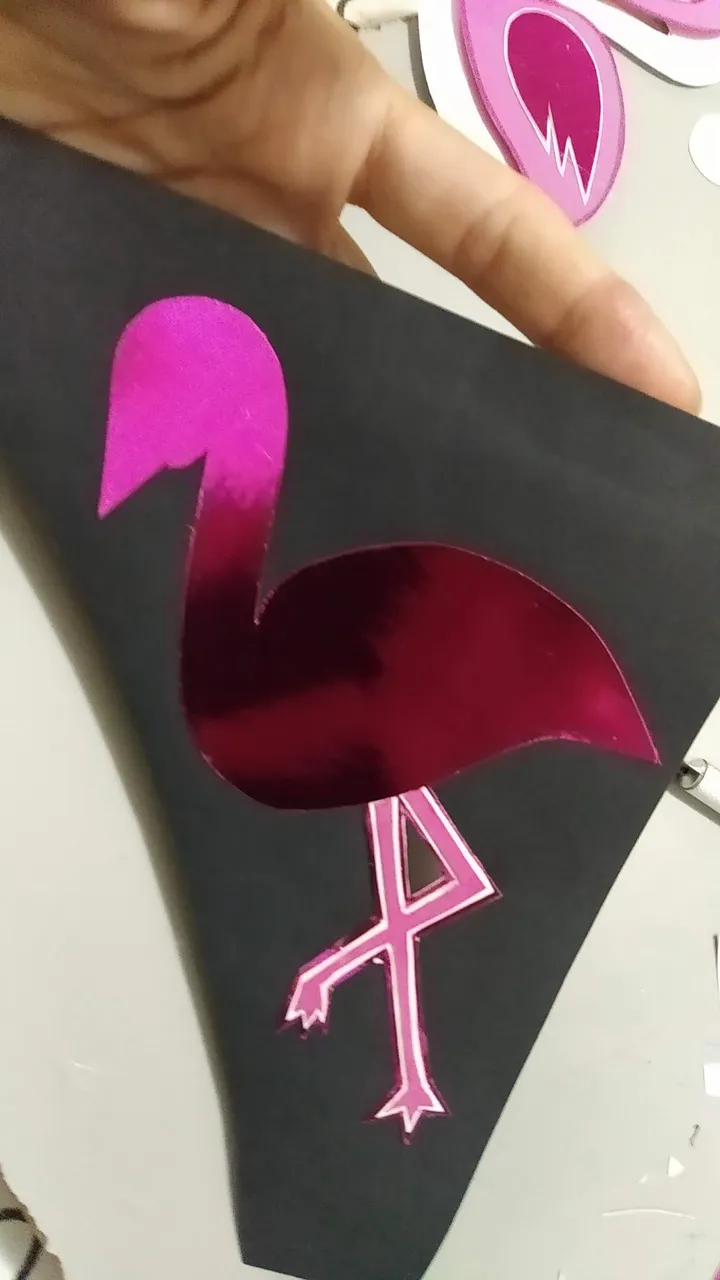
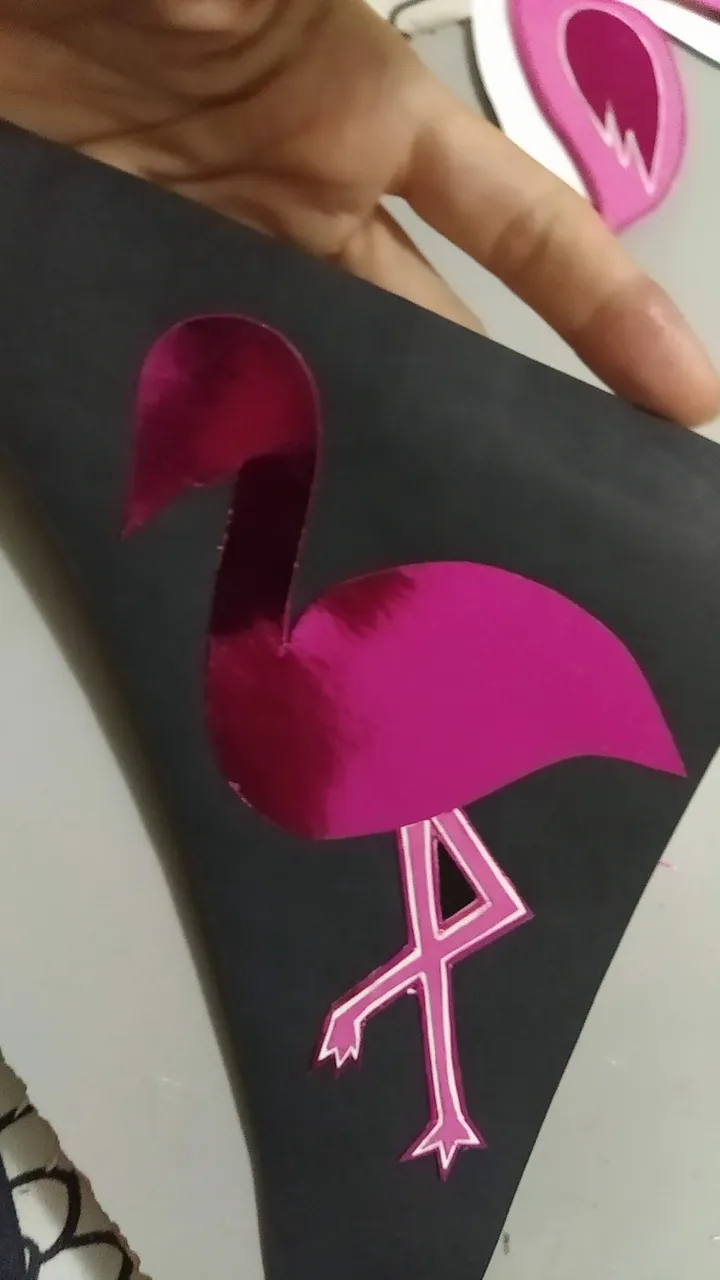
- Marcar y cortar la silueta del flamingo en la cartulina rosada (cuerpo, patas y alas)
- Tomando la silueta rosada como patrón, cortar otra silueta en cartulina blanco dejando un pequeño borde que sobresalga de la rosa, es decir la blanca deberá ser un poco más grande.
- Utilizando la silueta blanca, marcar y cortar la silueta en cartulina fucsia tipo espejo, dejando un pequeño borde que sobresalga de la blanca, es decir la fucsia tipo espejo deberá ser un poco más grande.
- Para crear el efecto en capas, entre silueta y silueta pegar pequeños trozos de foami con silicón frio y dejar secar.
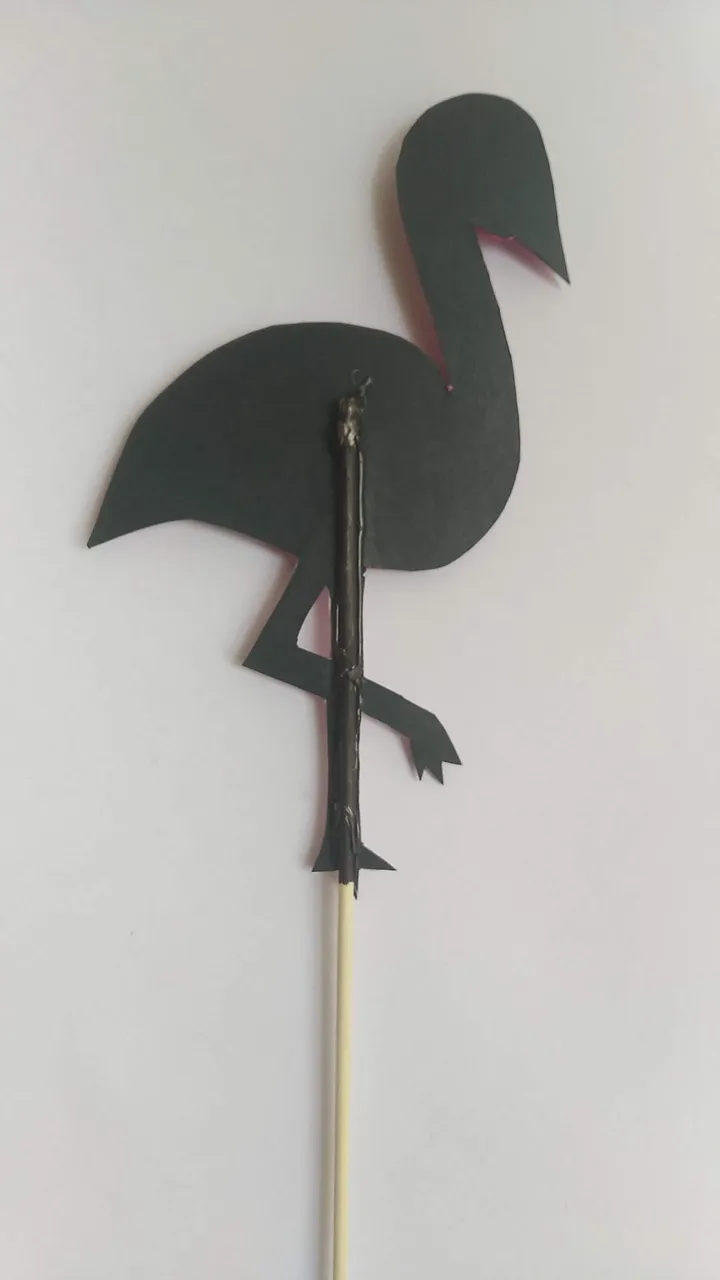
- La ultima silueta fucsia pegarla a cartulina negra para darle un mejor acabado. Se deerá pegar cuerpo y patas.
- Con todas las piezas ya ensambladas, pegar el palito de madera, cuidando el palito quede justo detrás de la pata del flamingo.
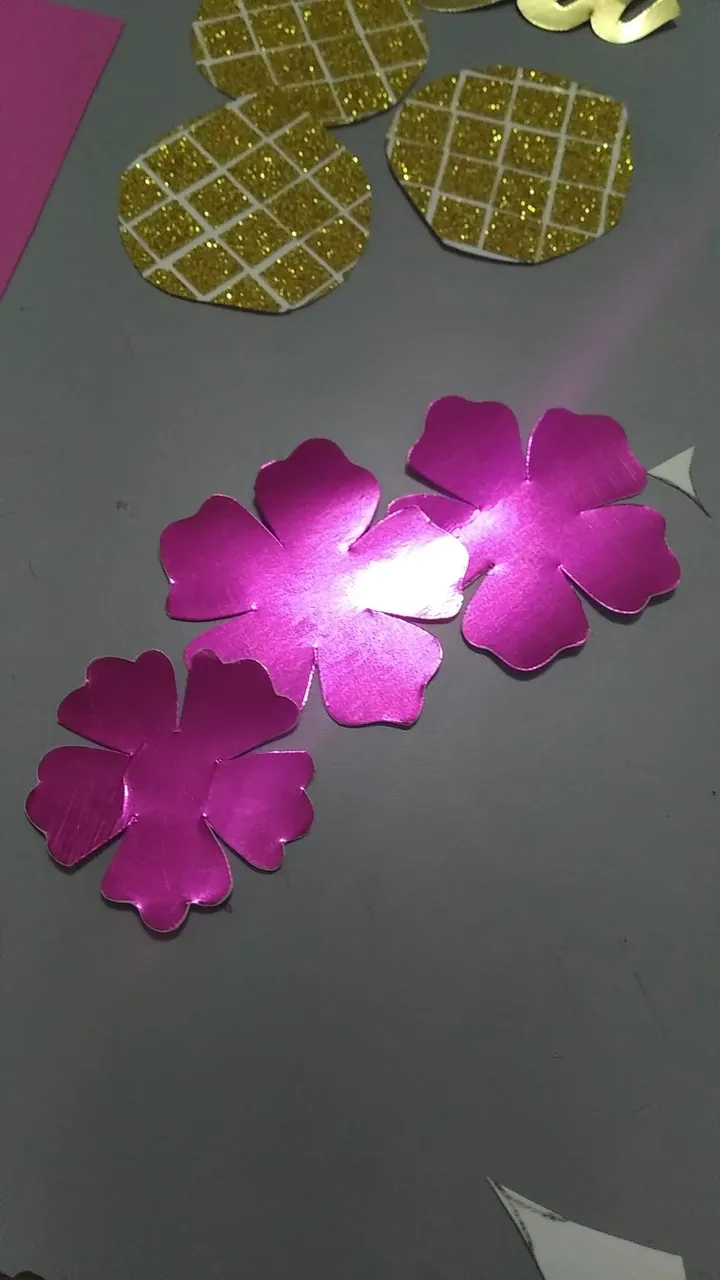
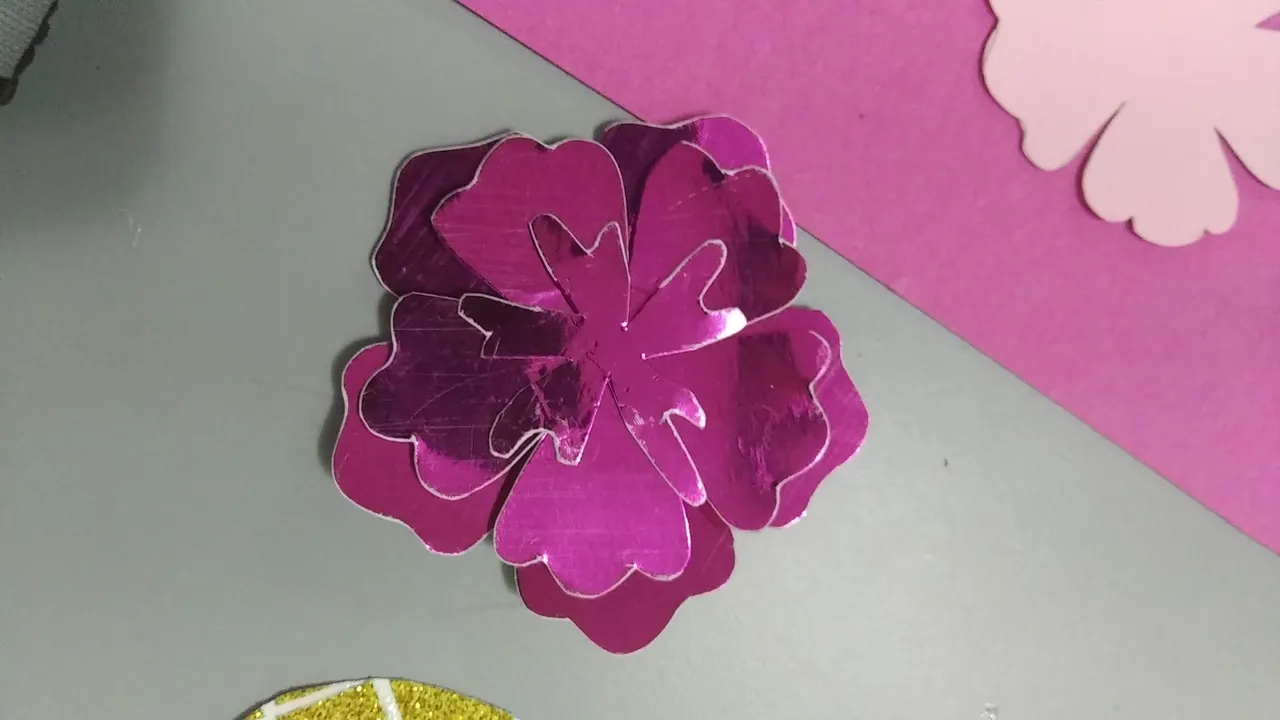
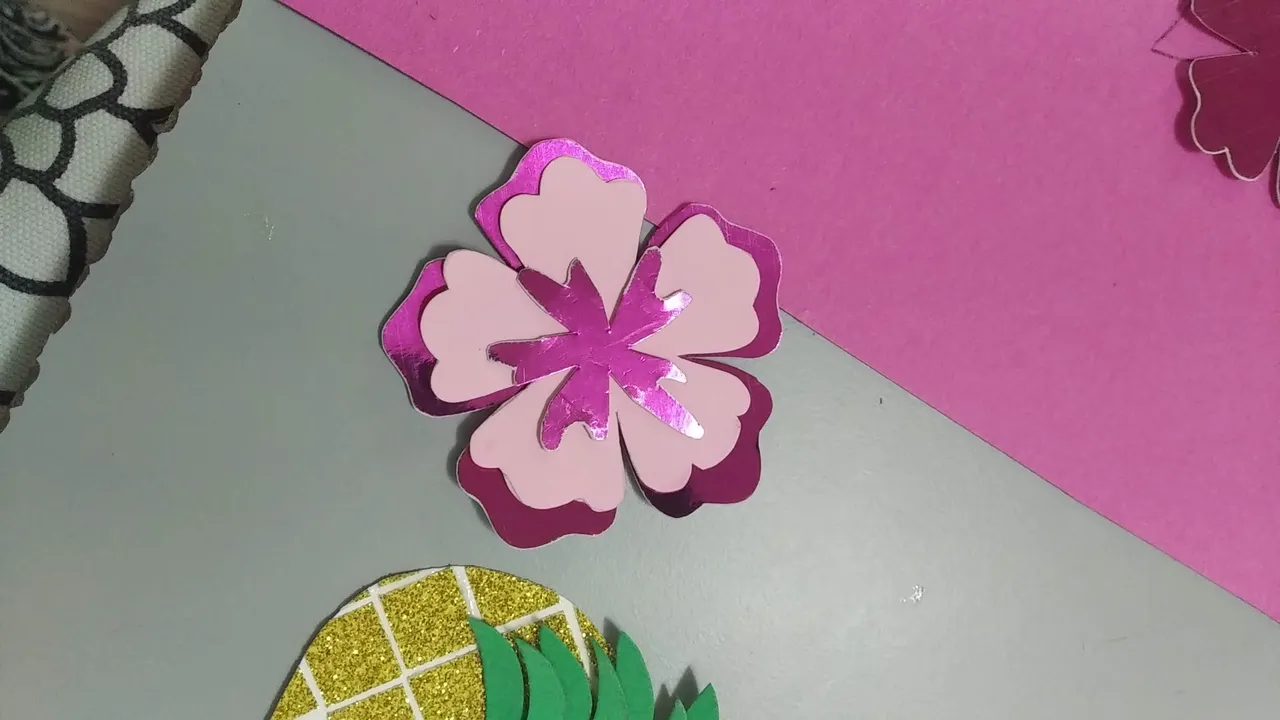
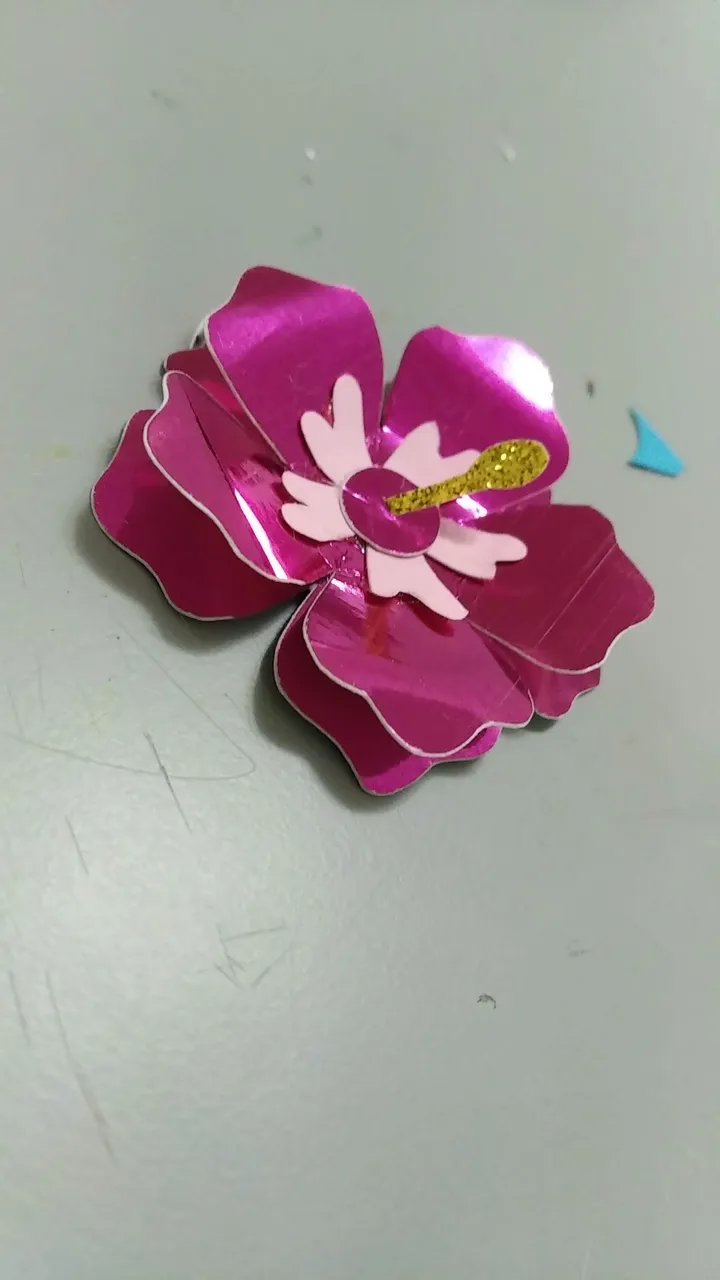
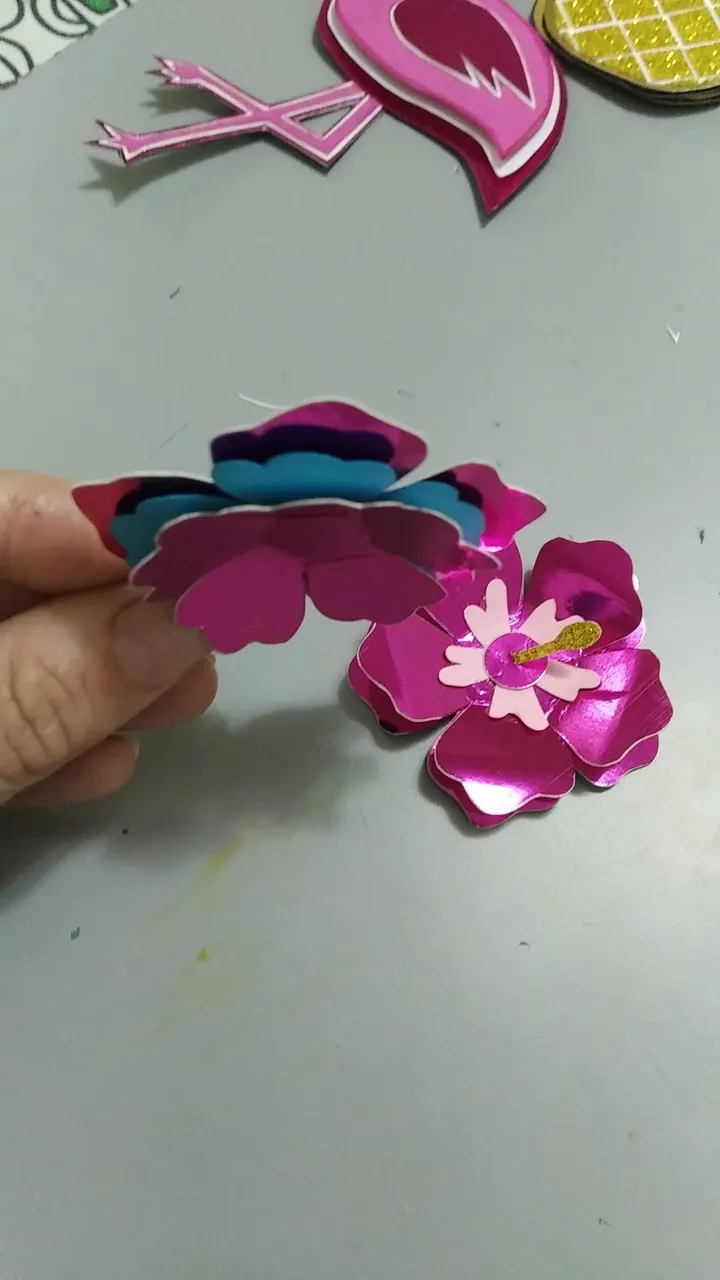
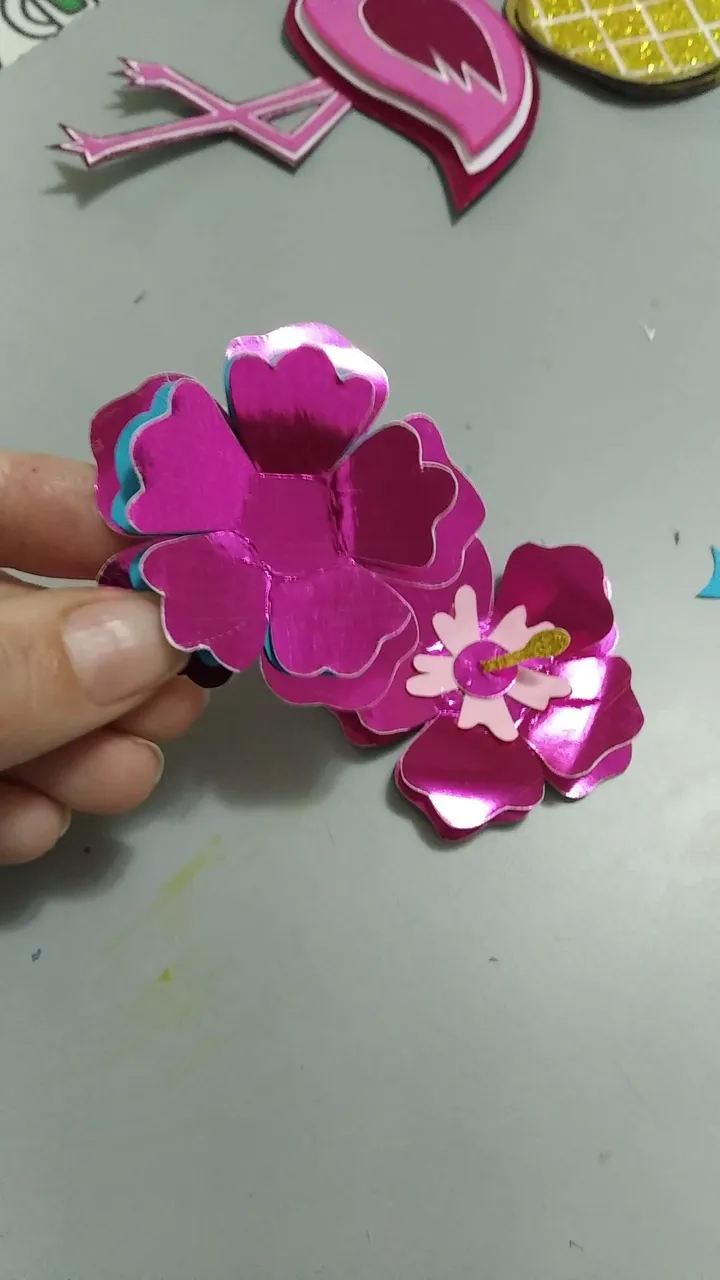
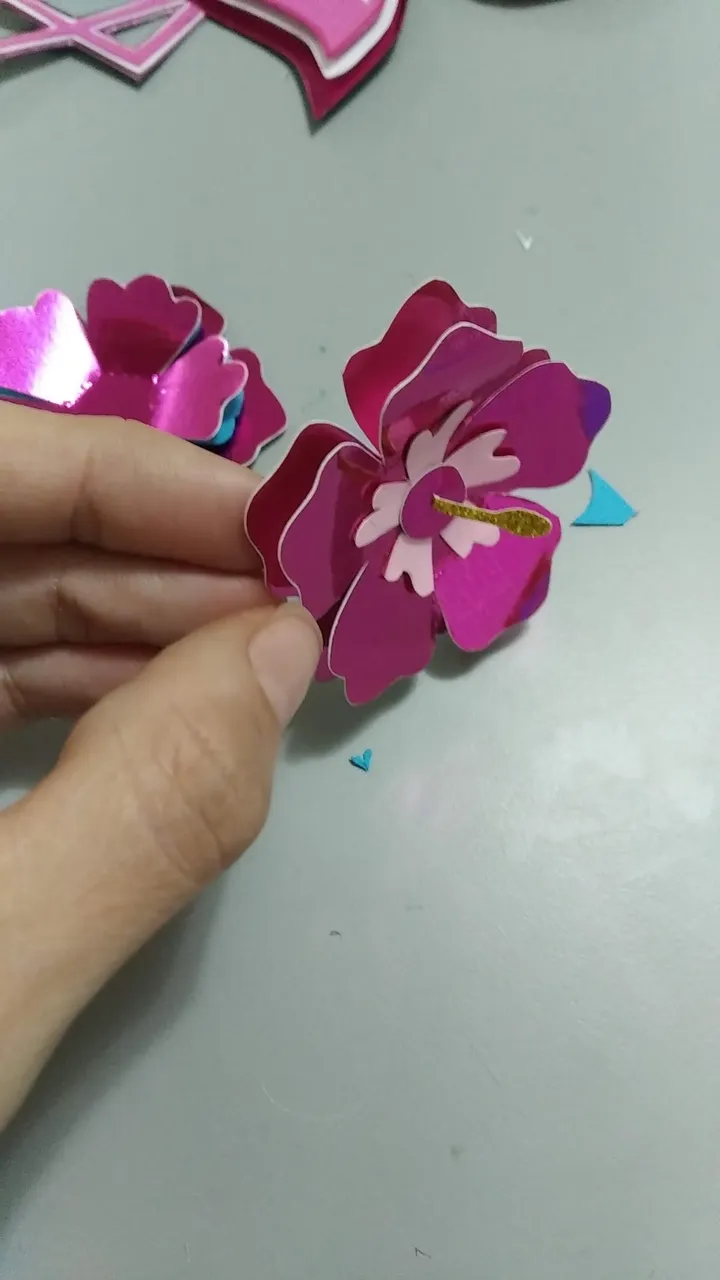
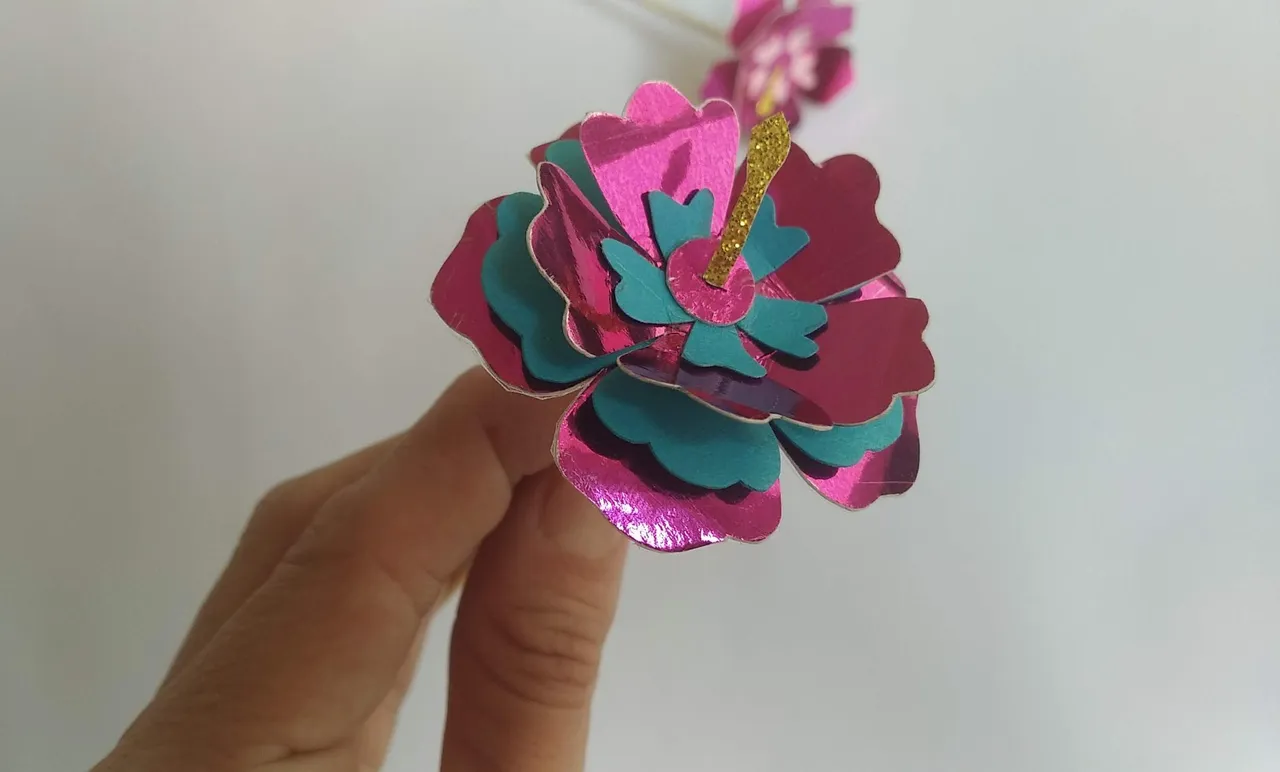
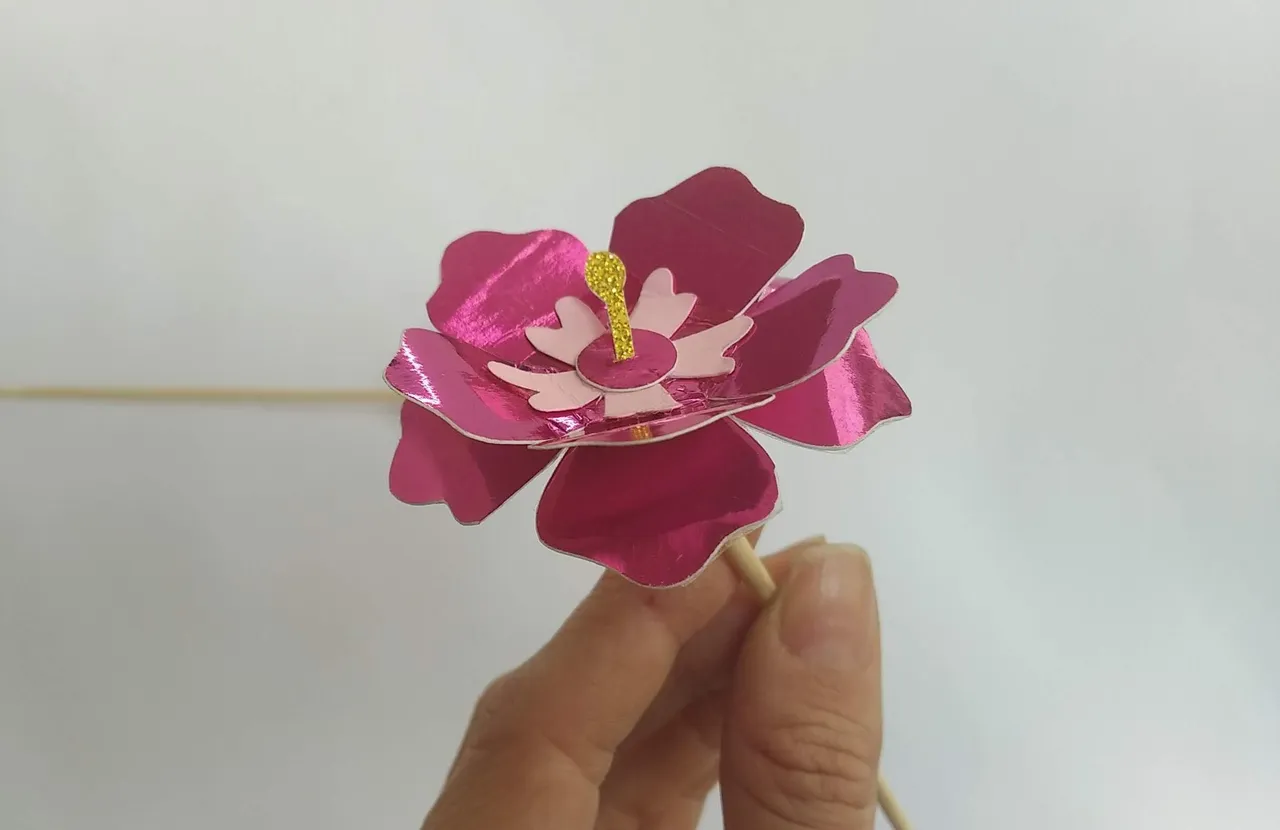
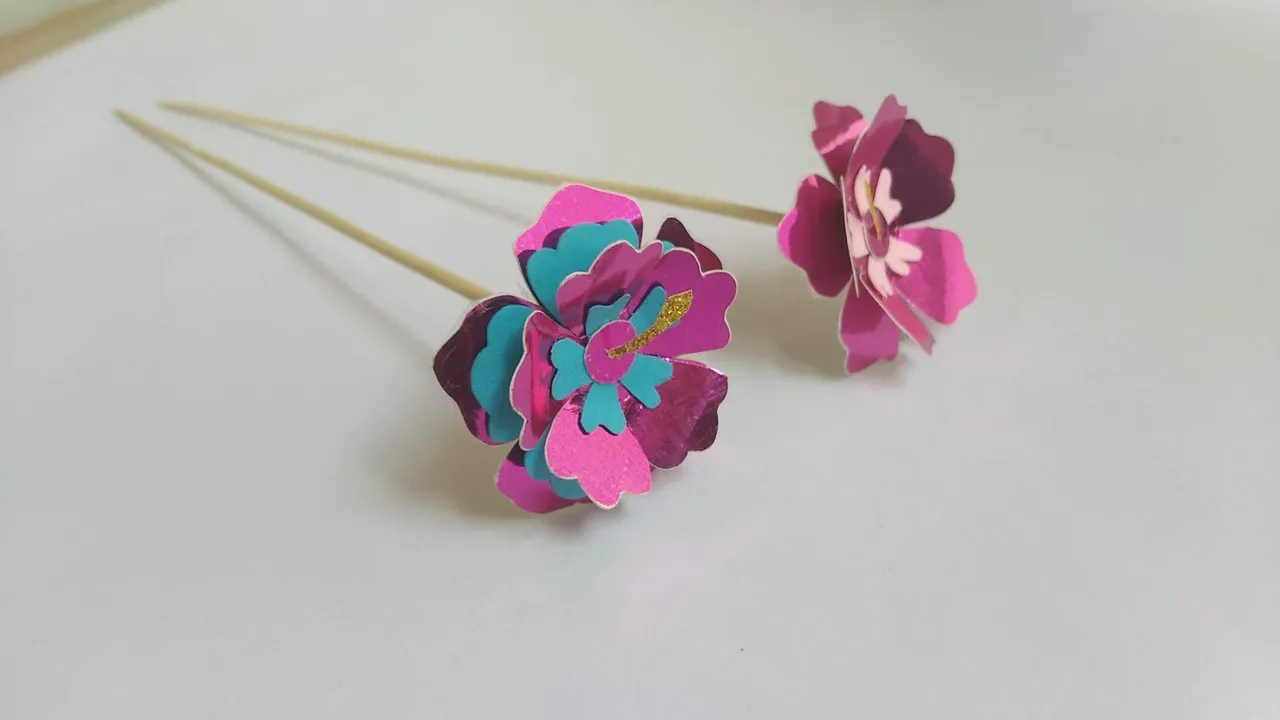
Flores (8 x 5 cm):
- Marcar y cortar la forma de la flor sobre la cartulina fucsia tipo espejo. Cortar en varios tamaños para el efecto.
- Para hacer contraste a las flores, cortar siluetas en cartulina color rosado claro y azul claro.
- Cortar el resto de los elementos de la flor en cartulina de color y escarchada.
- Pegar las piezas de pequeño a grande, utilizando silicón frio, se debe cuidar de solo pegar el centro y no los pétalos para que puedan separarse mejor.
- Una vez las piezas estén secas, pegar el palito de madera con silicón caliente y dejar secar bien.
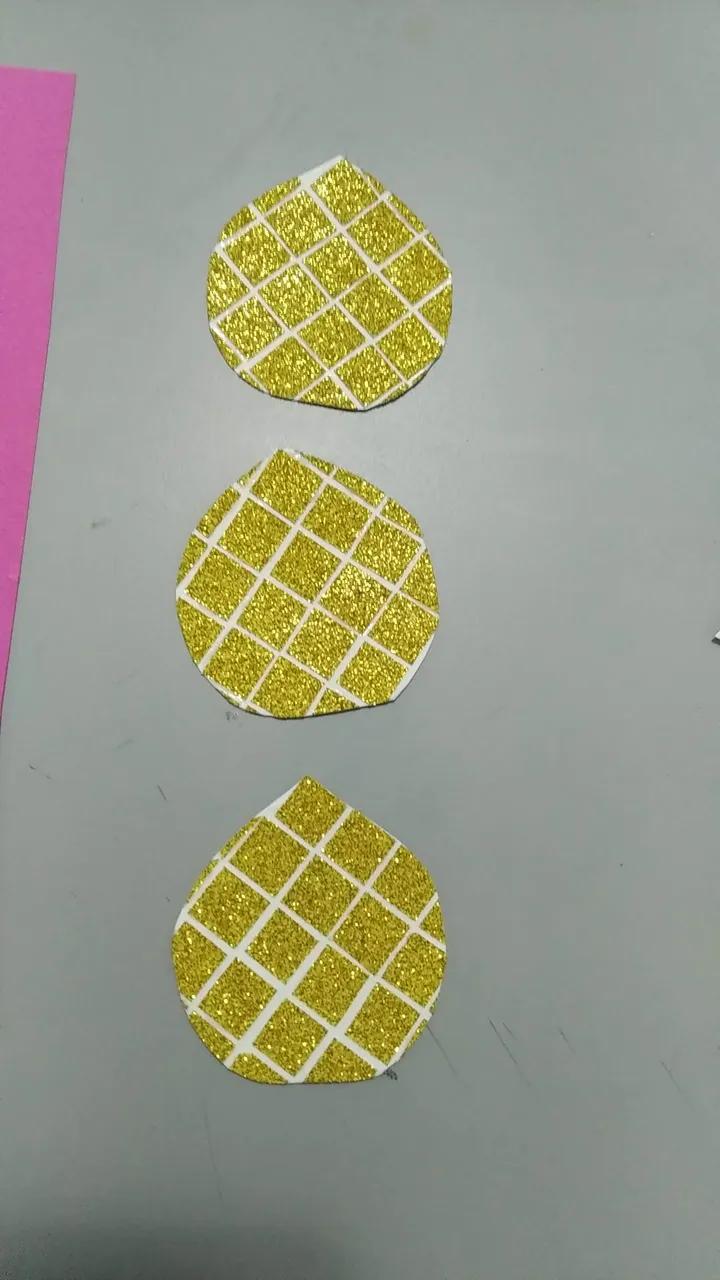
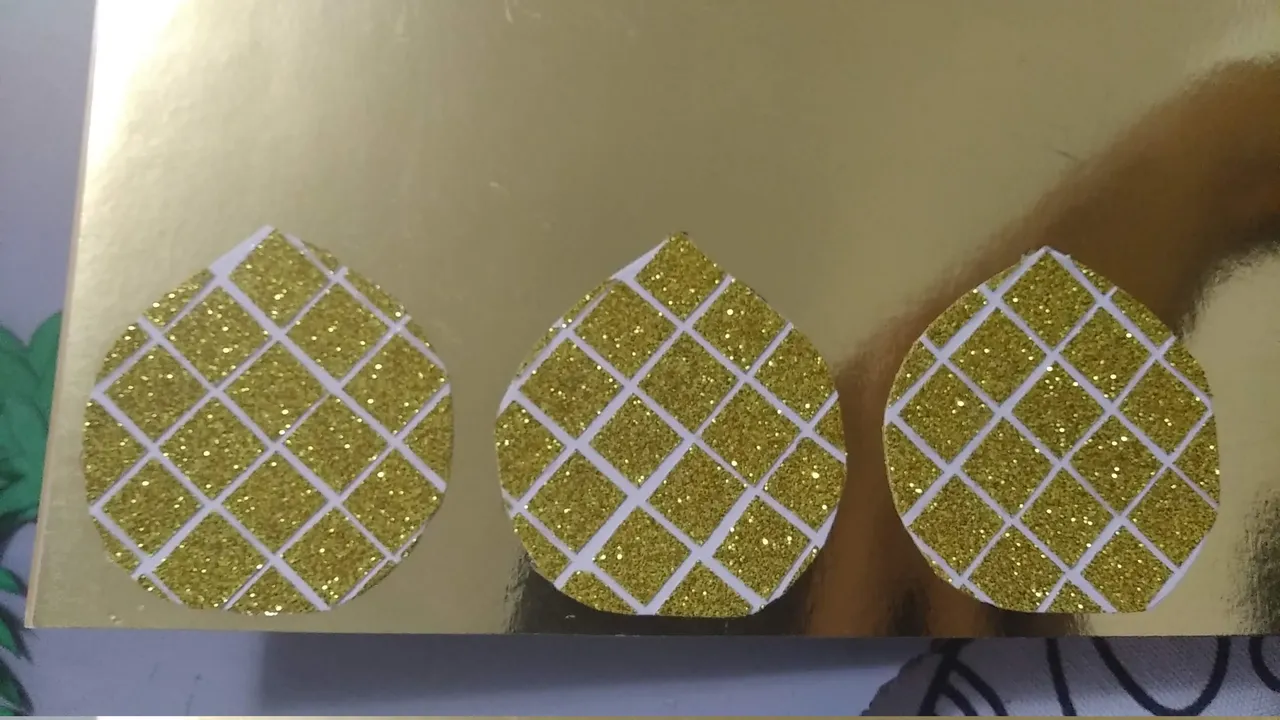
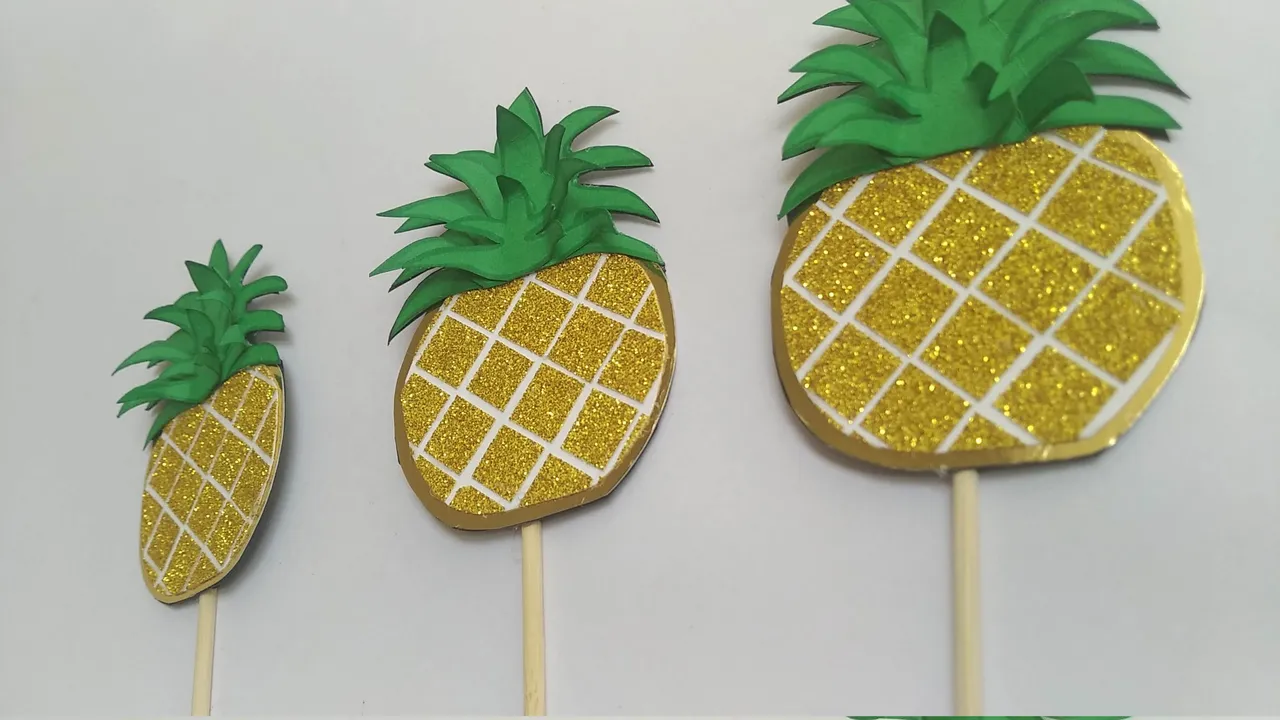
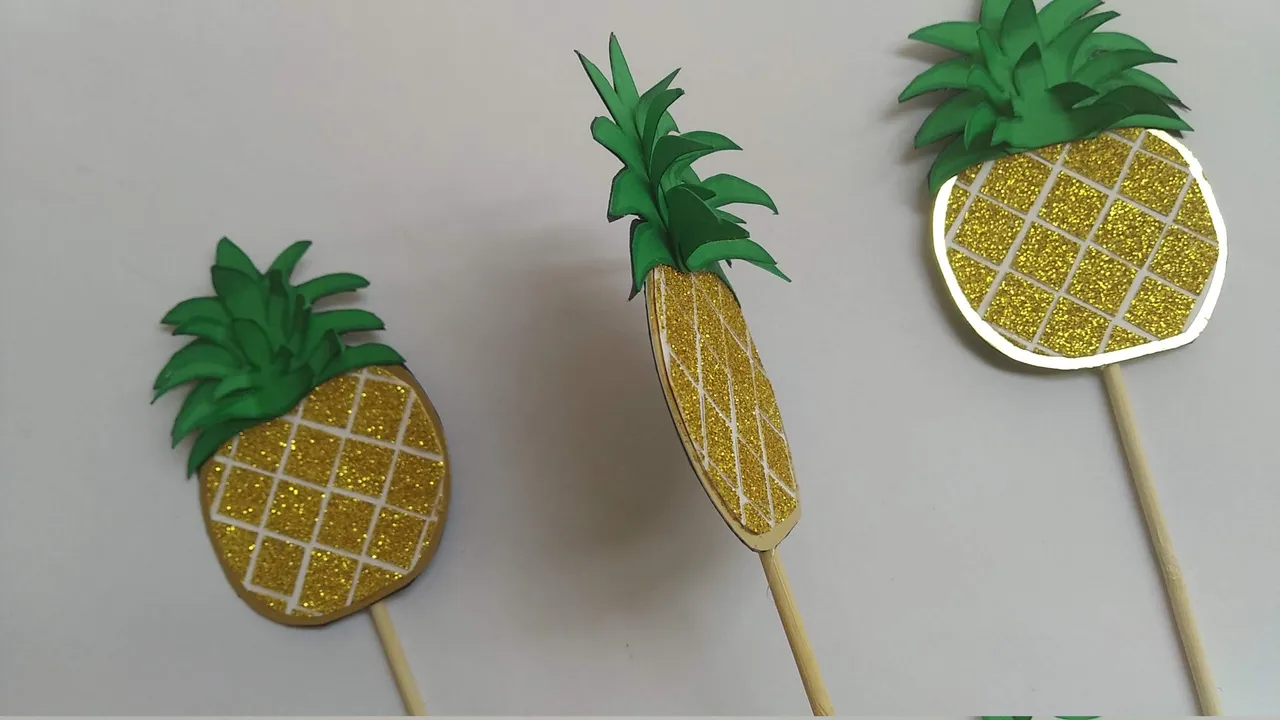
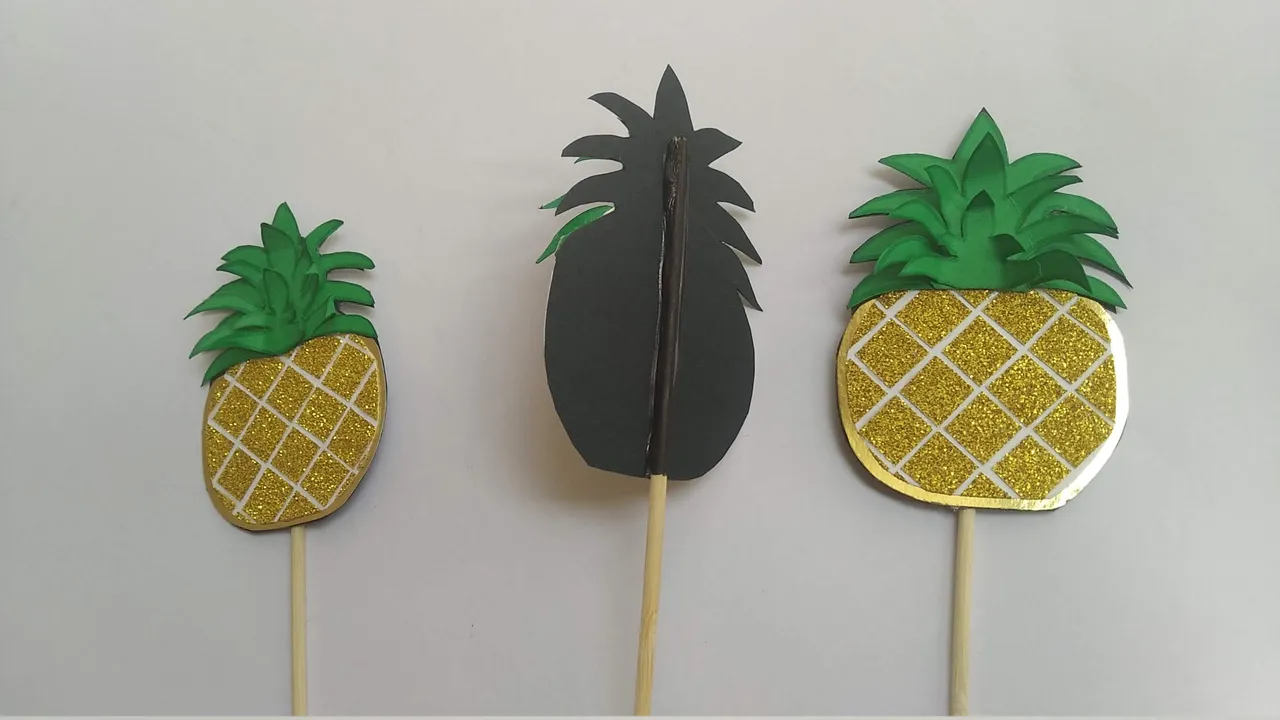
Piñas ( 6 x 6 cm):
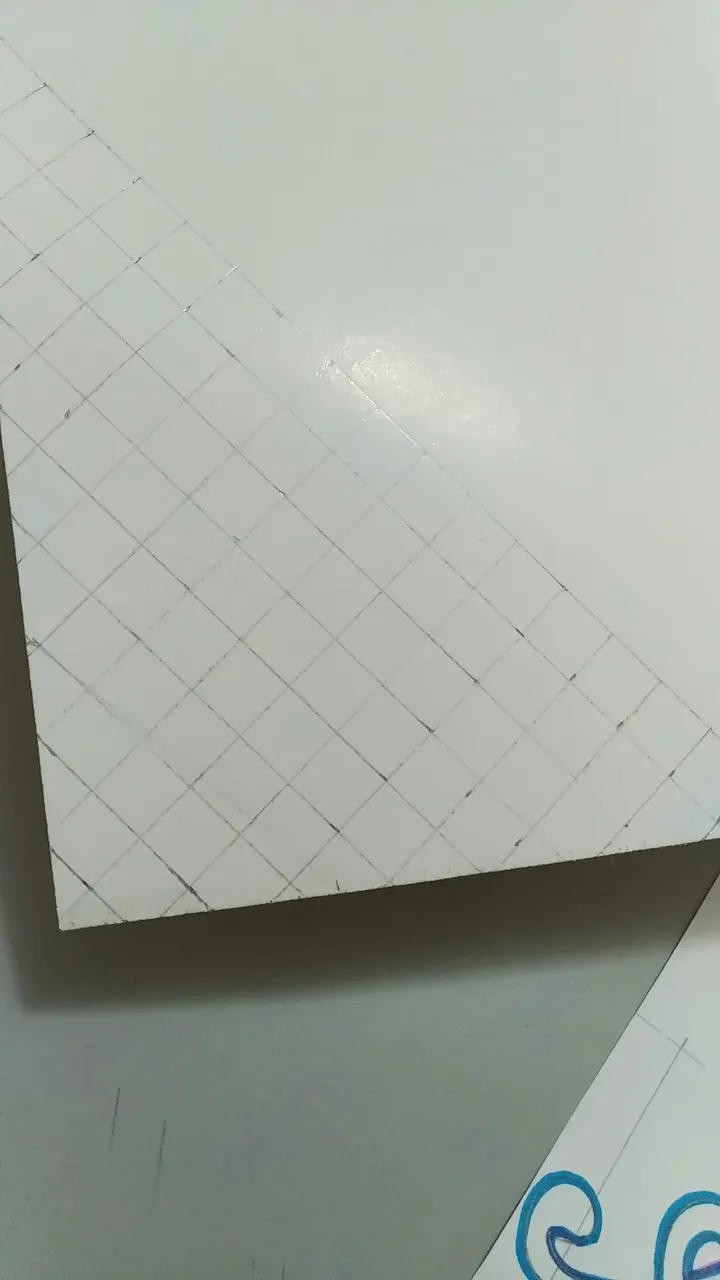
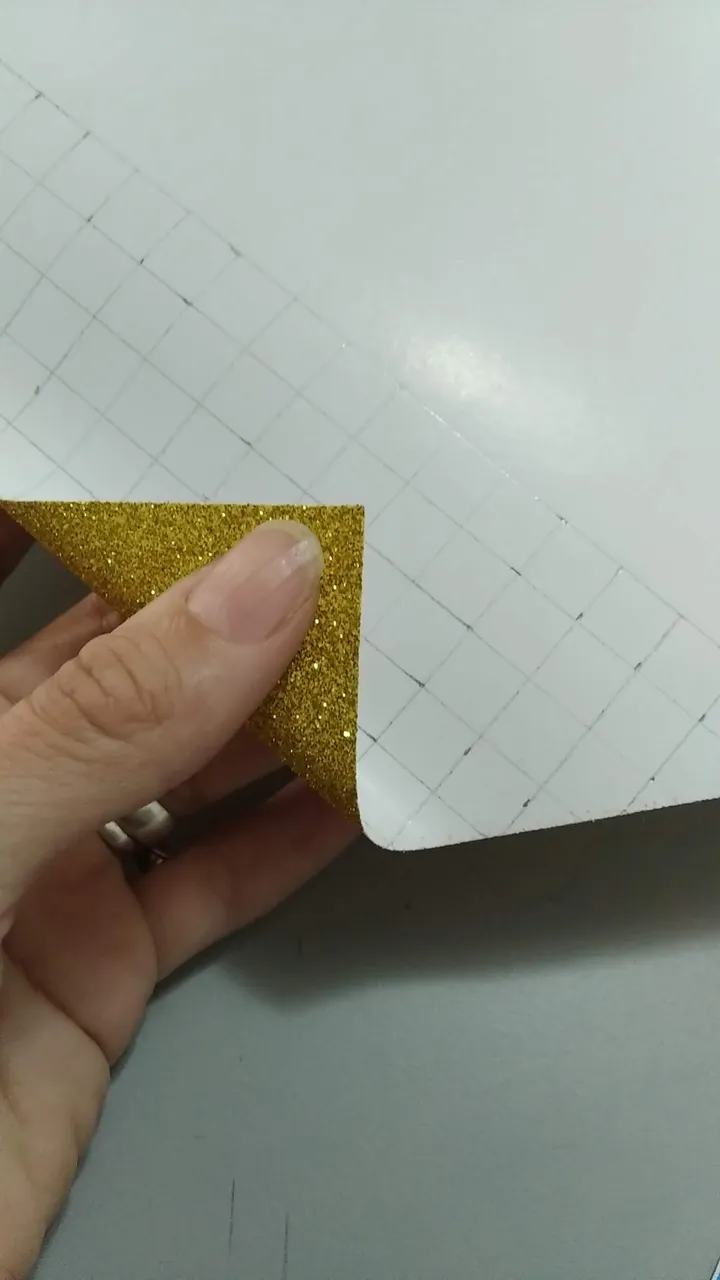
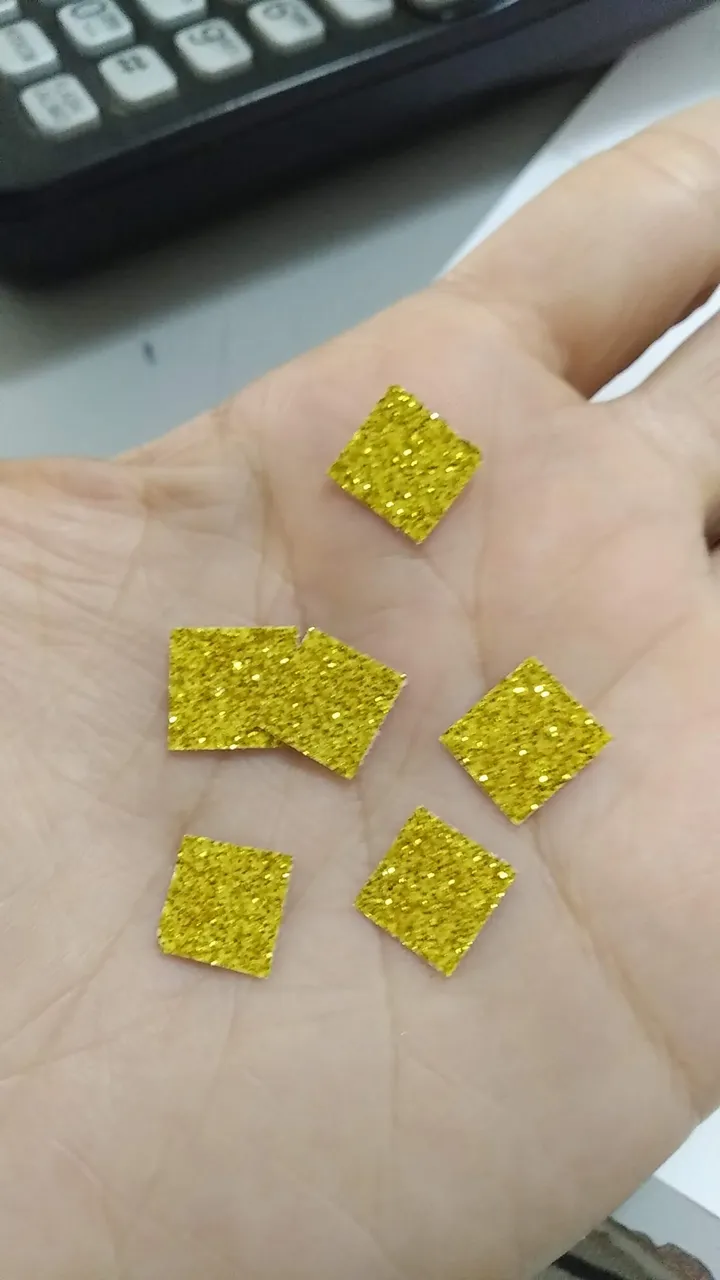
- Marcar y cortar en la cartulina dorada escarchada cuadros de 0.5 centímetros de alto y ancho.
- En cartulina blanca marcar la forma de la piña a crear.
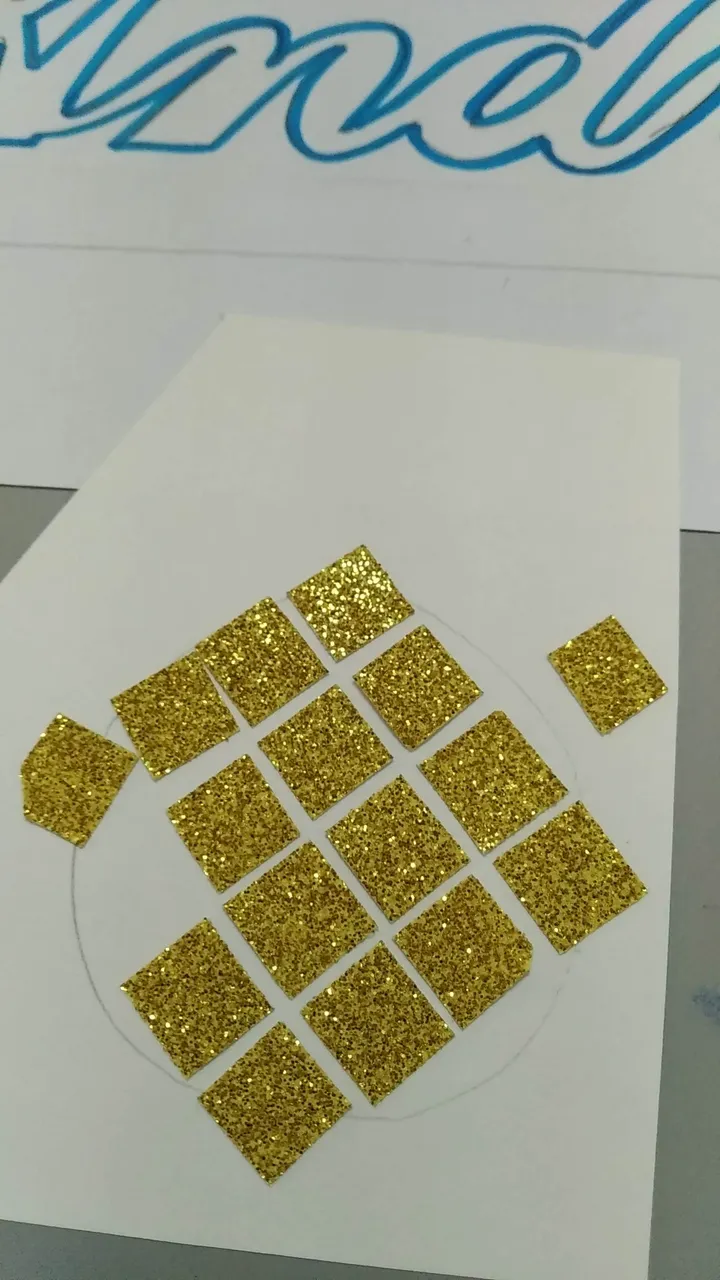
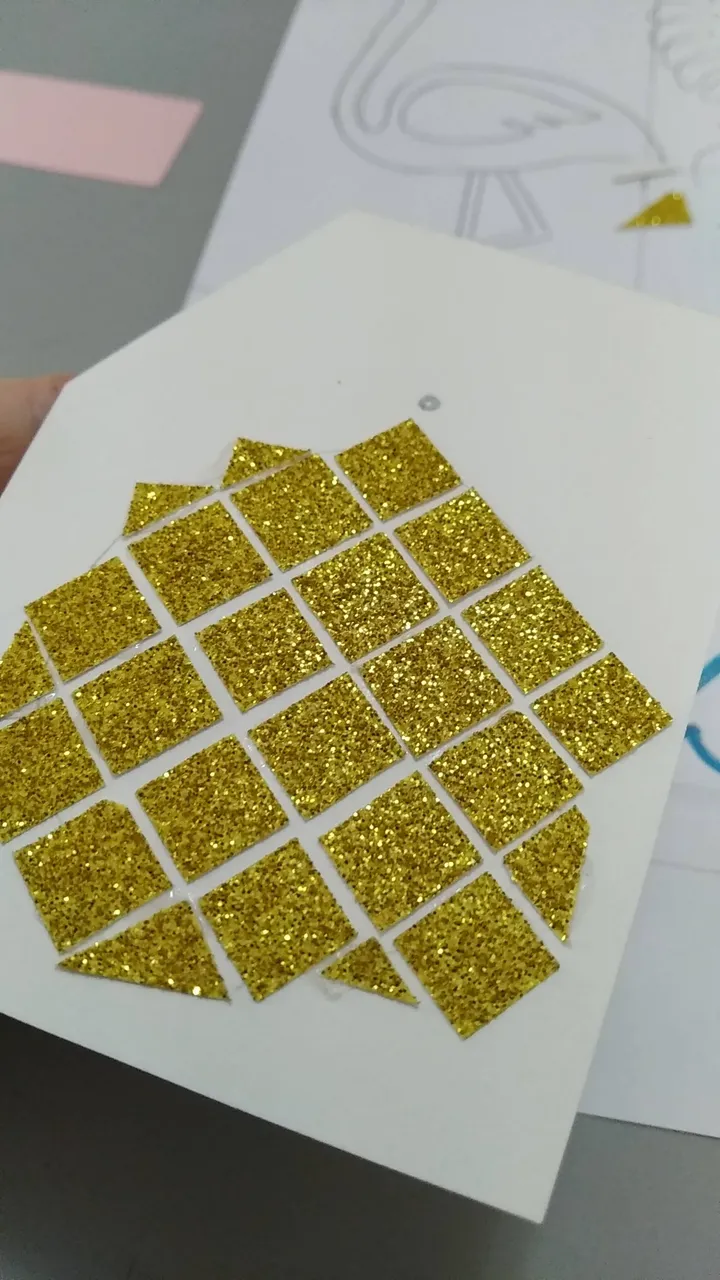
- Pegar en forma de rombo los cuadros dorados al diseño marcado, no importa si los cuadros sobresalen ya que luego se recortaran según el diseño hecho.
- Pegar las piezas a la cartulina dorada tipo espejo y recortar dejando un pequeño borde dorado.
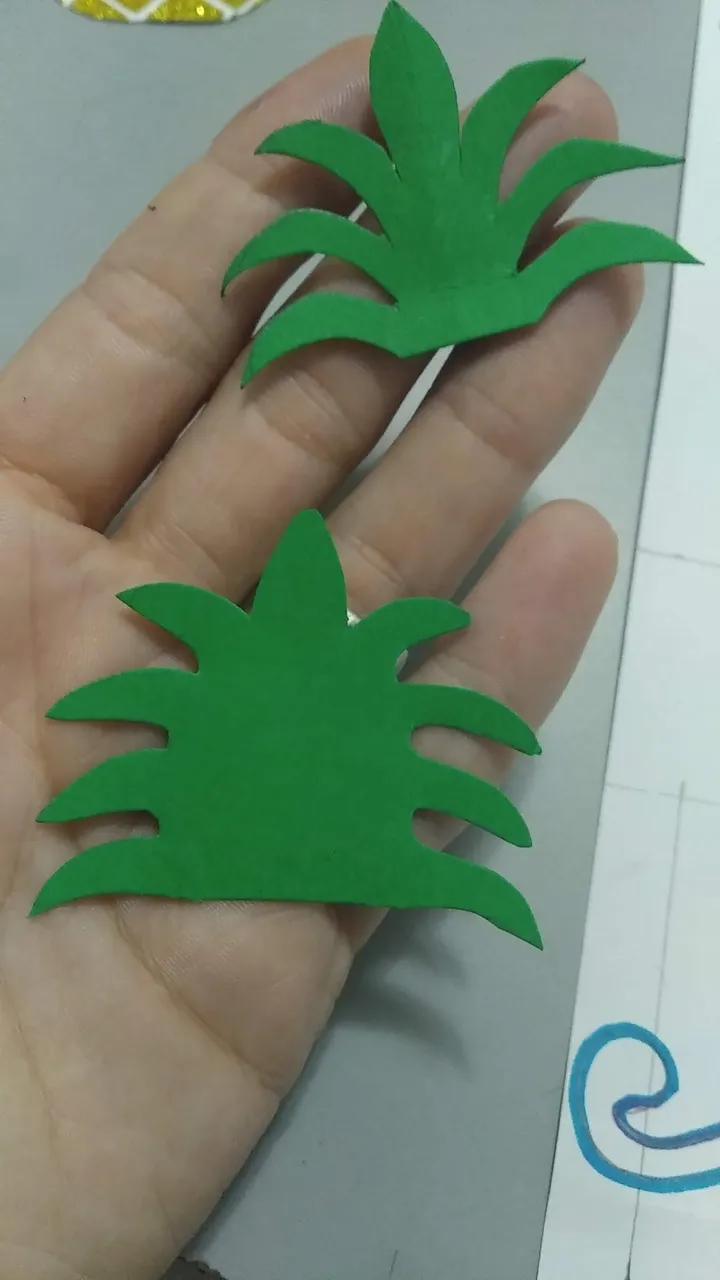
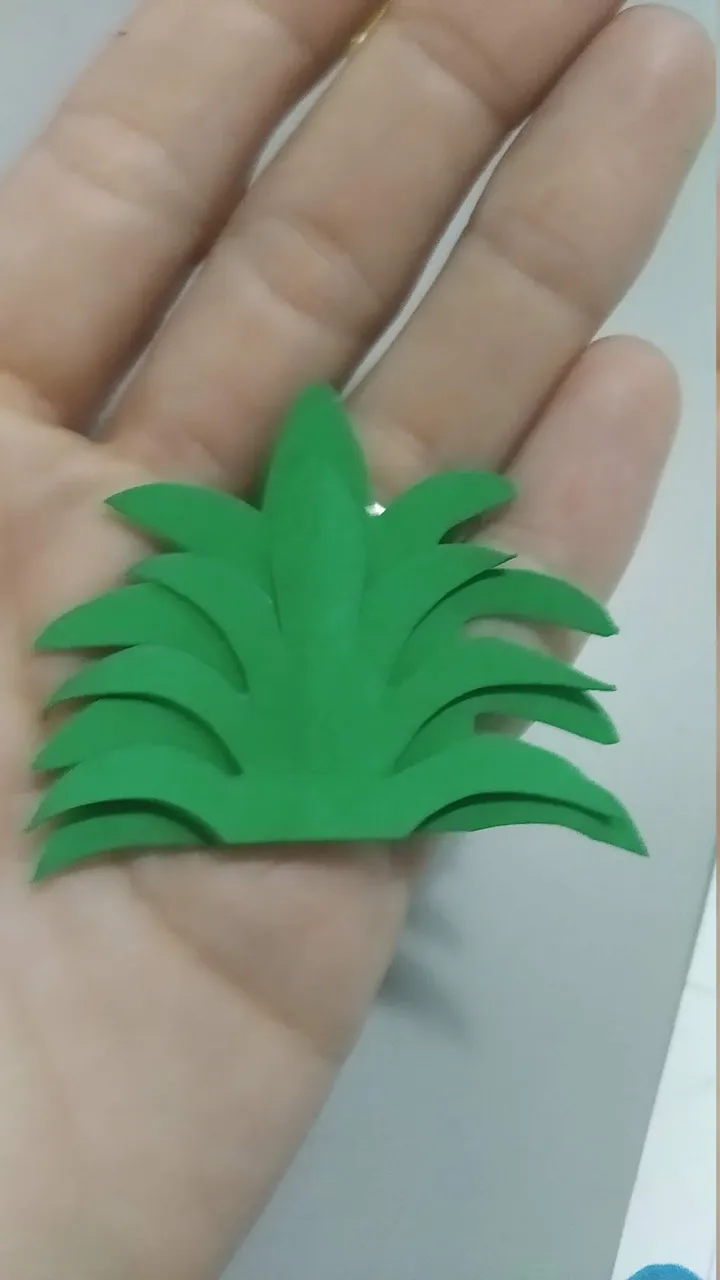
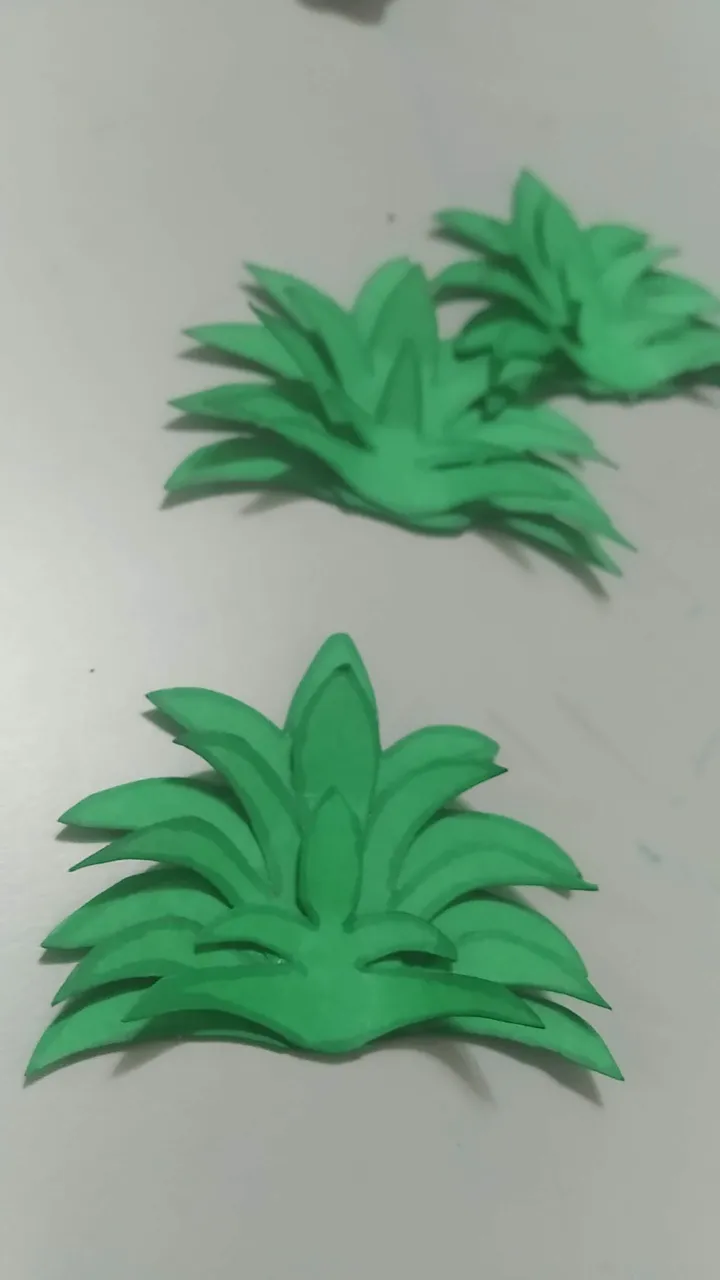
- Marcar y cortar en cartulina verde las coronas de las piñas. Para crear el efecto de corona se deberá cortar tres piezas para cada piña, las tres de tamos distintos.
- Pegar las coronas a las piñas , cuidando de no aplicar mucho silicón frio.
- Una vez las piezas estén secas, pegar el palito de madera con silicón caliente y dejar secar bien.
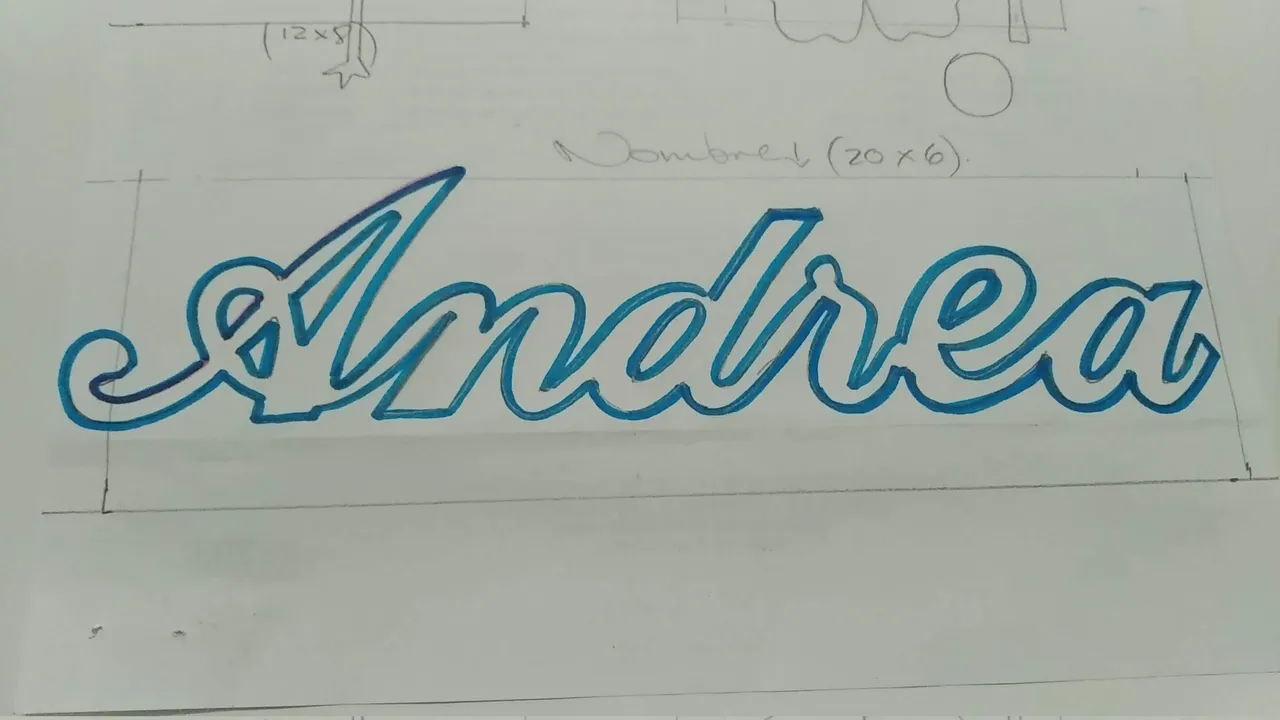
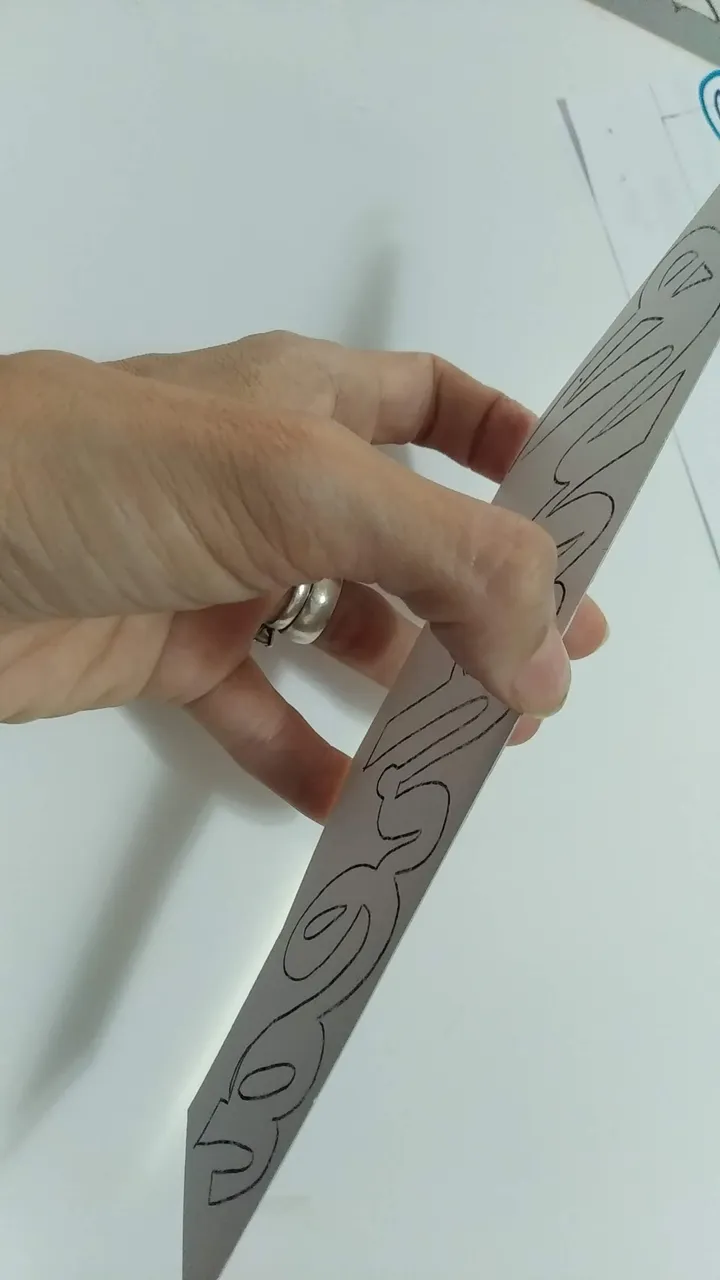
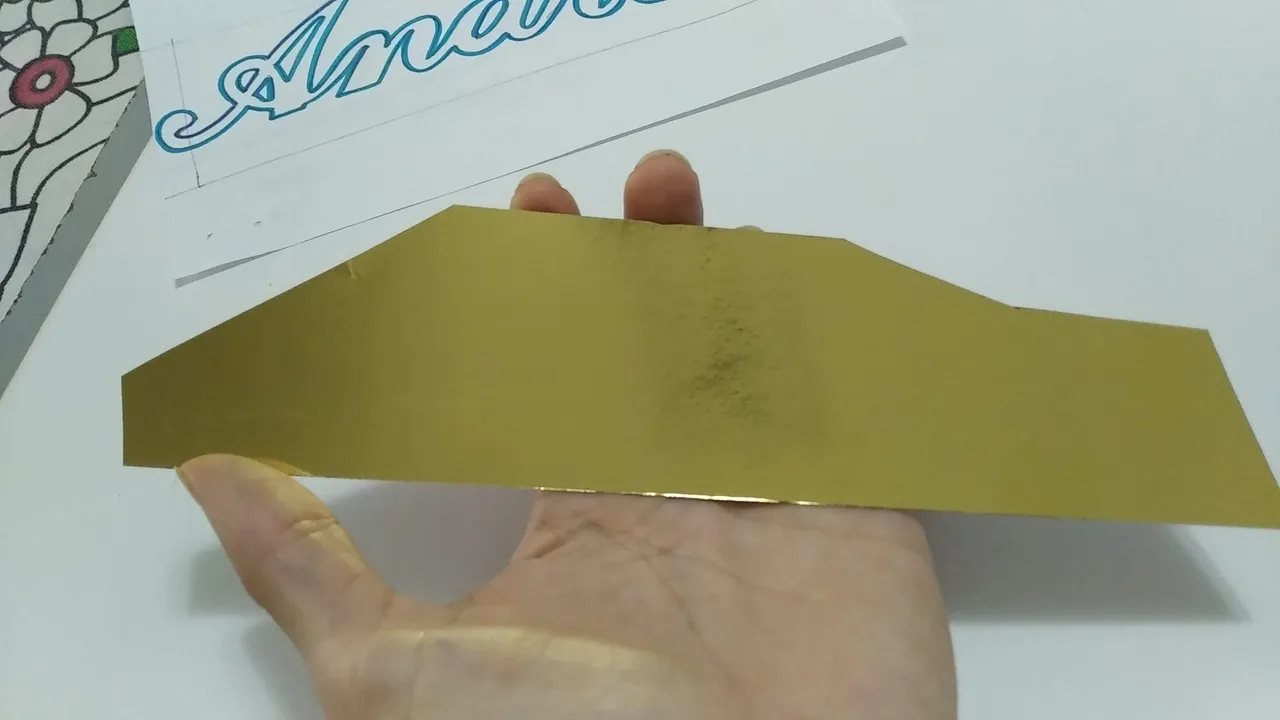
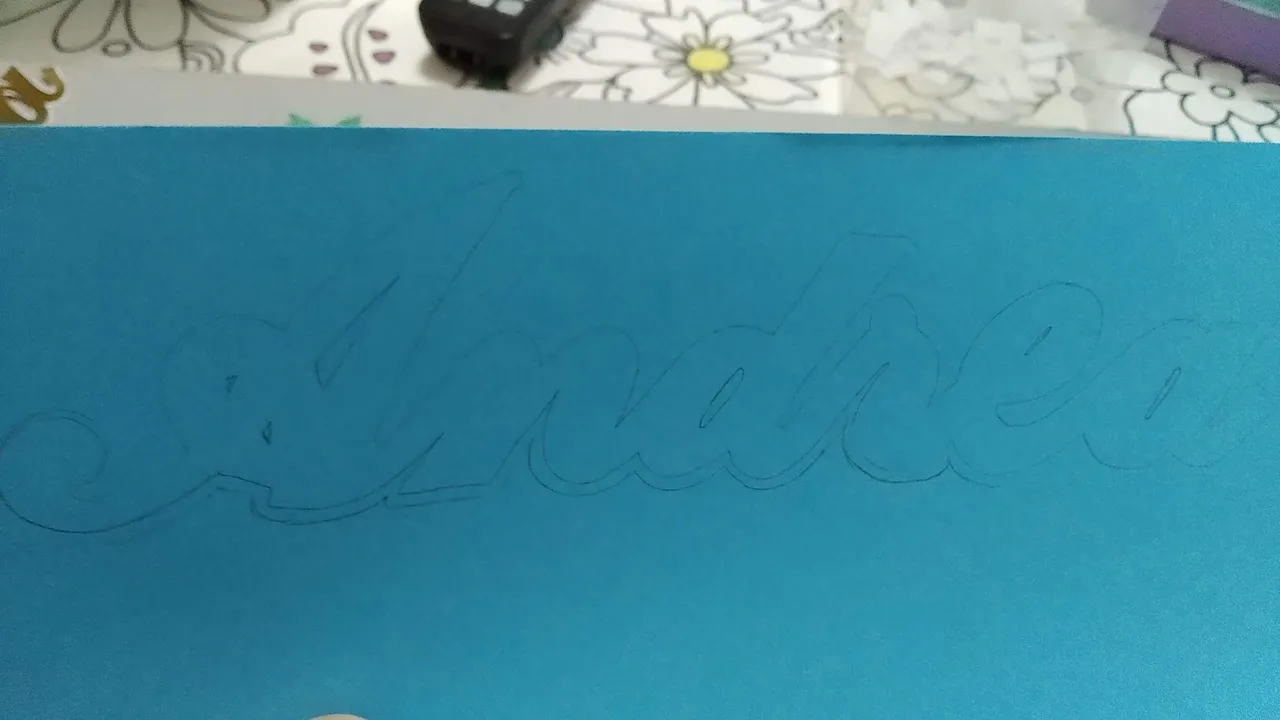
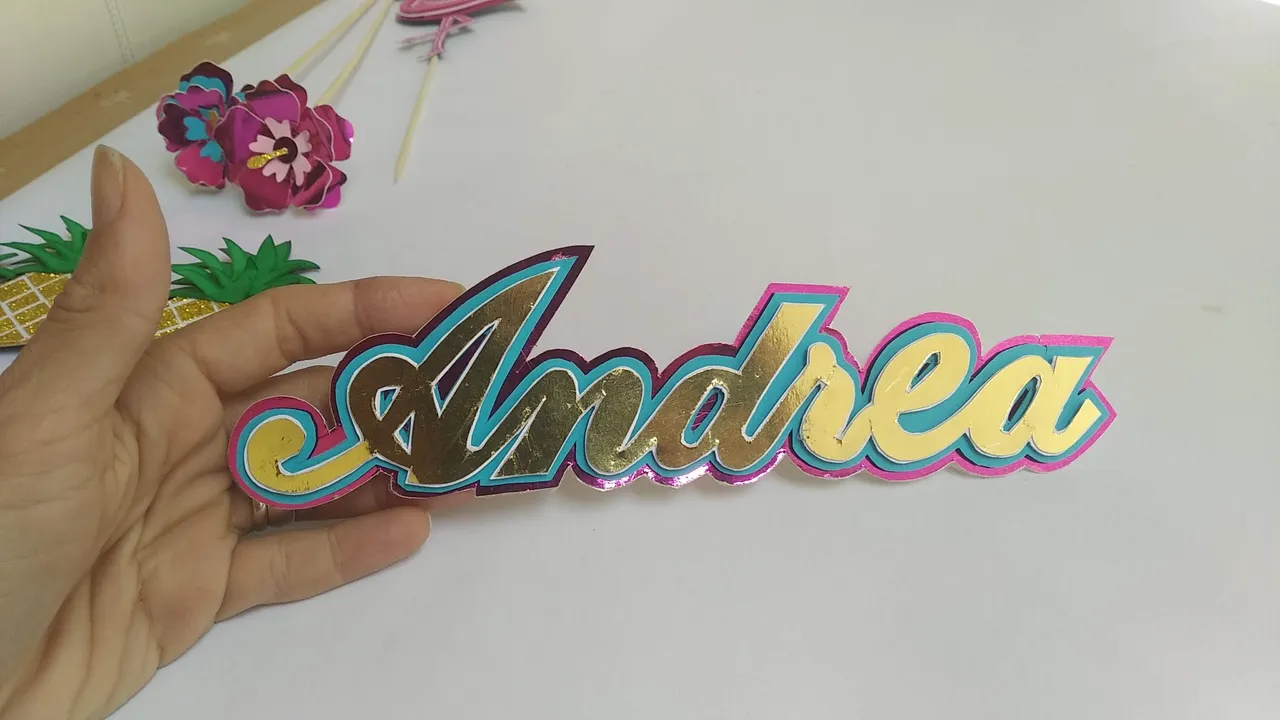
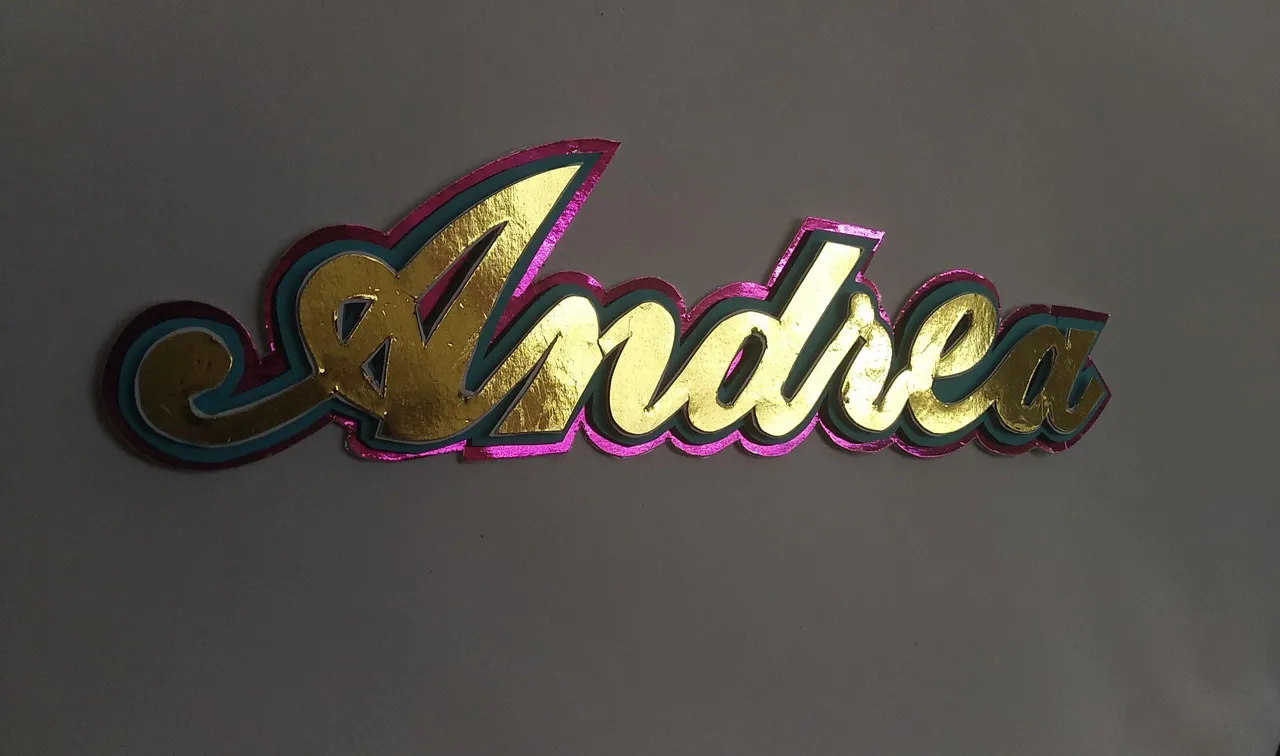
Nombre (20 x 6 cm):
- En nombre se marca y se recorta en la cartulina dorada.
- Usando como guía el nombre en dorado se marca y recorta en cartulina blanca .
- Usando como guía el nombre en blanco se marca y recorta en cartulina azul .
- Usando como guía el nombre en azul se marca y recorta en cartulina fucsia metalizada
- Entre capa y capa pegar pedacitos de foami para darle el relieve necesario y crear en efecto en capas.
¡Listo!, a disfrutar de la magia de lo creado en casa.
English
Hello, happy and blessed Tuesday
Today I will show you a nice cake decoration with tropical motif made with cardboard and wooden sticks.
It is a simple decoration but done with love, can make any cake look luxurious, I invite you to review the post and aminen to create something similar to surprise family and friends on a special day.
Without further ado and hoping you enjoy the work done with love, I leave you the materials used, the process and images of the work.
- Gold metallic mirror cardboard.
- Fuchsia metallic fuchsia mirror cardboard.
- Gold frosted cardboard.
- Blue cardboard.
- Deep pink cardboard.
- Light pink cardboard.
- Grass green cardboard.
- Black cardboard
- White cardboard
- White, pink and light blue Foami.
- Hot glue.
- Wooden sticks.
- Black fine tip marker.
- Cold Silicone.
- Cutter.
- Scissors.
- Ruler.
- Pencil.
- Draw the design of the pieces to be created, in this case a flamingo, two flowers, three pine cones and the name of the honoree were created.
Flamingo (12 x 8 cm):
- Mark and cut the flamingo silhouette on the pink cardboard (body, legs and wings) 3.
- Taking the pink silhouette as a pattern, cut another silhouette in white cardboard leaving a small border that protrudes from the pink one, i.e. the white one should be a little bigger.
- Using the white silhouette, mark and cut the silhouette in fuchsia mirror cardboard, leaving a small border that protrudes from the white one, i.e. the fuchsia mirror cardboard should be a little bigger.
- To create the layered effect, glue small pieces of foami between the silhouette and the silhouette with cold silicone and let dry.
- The last fuchsia silhouette should be glued to black cardboard to give it a better finish. The body and legs should be glued.
- With all the pieces already assembled, glue the wooden stick, taking care that the stick is just behind the flamingo's leg.
Flowers (8 x 5 cm):
- Mark and cut out the shape of the flower on the fuchsia mirror cardboard. Cut in various sizes for effect.
- To contrast the flowers, cut out silhouettes on light pink and light blue cardstock.
- Cut the rest of the flower elements out of colored and frosted cardstock.
- Glue the pieces from small to large, using cold silicone, taking care to only glue the center and not the petals so that they can separate better.
- Once the pieces are dry, glue the wooden stick with hot silicone and let dry well.
Pineapples (6 x 6 cm):
- Mark and cut out squares of 0.5 centimeters high and wide on the gold frosted cardboard.
- On white cardboard mark the shape of the pineapple to be created.
- Glue the golden squares in a rhombus shape to the marked design, it doesn't matter if the squares protrude as they will be cut out according to the design.
- Glue the pieces to the golden mirror cardboard and cut out leaving a small golden border.
- Mark and cut out the crowns of the pine cones on green cardboard. To create the wreath effect, cut three pieces for each pine cone, all three in different sizes.
- Glue the crowns to the pinecones, taking care not to apply too much cold silicone.
- Once the pieces are dry, glue the wooden stick with hot silicone and let dry well.
Name (20 x 6 cm):
- The name is marked and cut out on the gold cardboard.
- Using the name in gold as a guide, mark and cut it out on white cardboard.
- Using as a guide the name in white is marked and cut out on blue card stock .
- Using the blue name as a guide, mark it and cut it out on fuchsia metallic card.
- Between layers glue pieces of foami to give it the necessary relief and create a layered effect.
Ready, enjoy the magic of what you have created at home.
Translated with www.DeepL.com/Translator (free version)
IMÁGENES / IMAGES
FLAMINGO:
FLORES:
PIÑAS:
NOMBRE:
SALUDOS / REGARDS
Todas las Fotos fueron tomadas con mi teléfono Redmi 7A.
Contenido original de @keco (fotos y texto) - Todos los derechos reservados Publicado en HIVE así como en mi instagram : http://instagram.com/carton_pintura_algo_mas
All Photos were taken with my Redmi 7A phone.
Original content from @keco (photos and text) - All rights reserved Posted on HIVE as well as on my instagram: http://instagram.com/carton_pintura_algo_mas