
Español
Hola Amigos en Hive, gusto en saludarles nuevamente; en especial a la comunidad creadora de @hivediy.
Si eres latino, segura estoy te identificas con la palabra PIÑATA. ¿a cuantas celebraciones han asistido y ha estado presente este elemento?, quizás muchas, porque las piñatas o caja de sorpresas son un componete clave en las celebraciones infantiles ya que ofrecen emoción a los niños y adultos al pensar en la cantidad de golosinas y juguetes que puede contener.
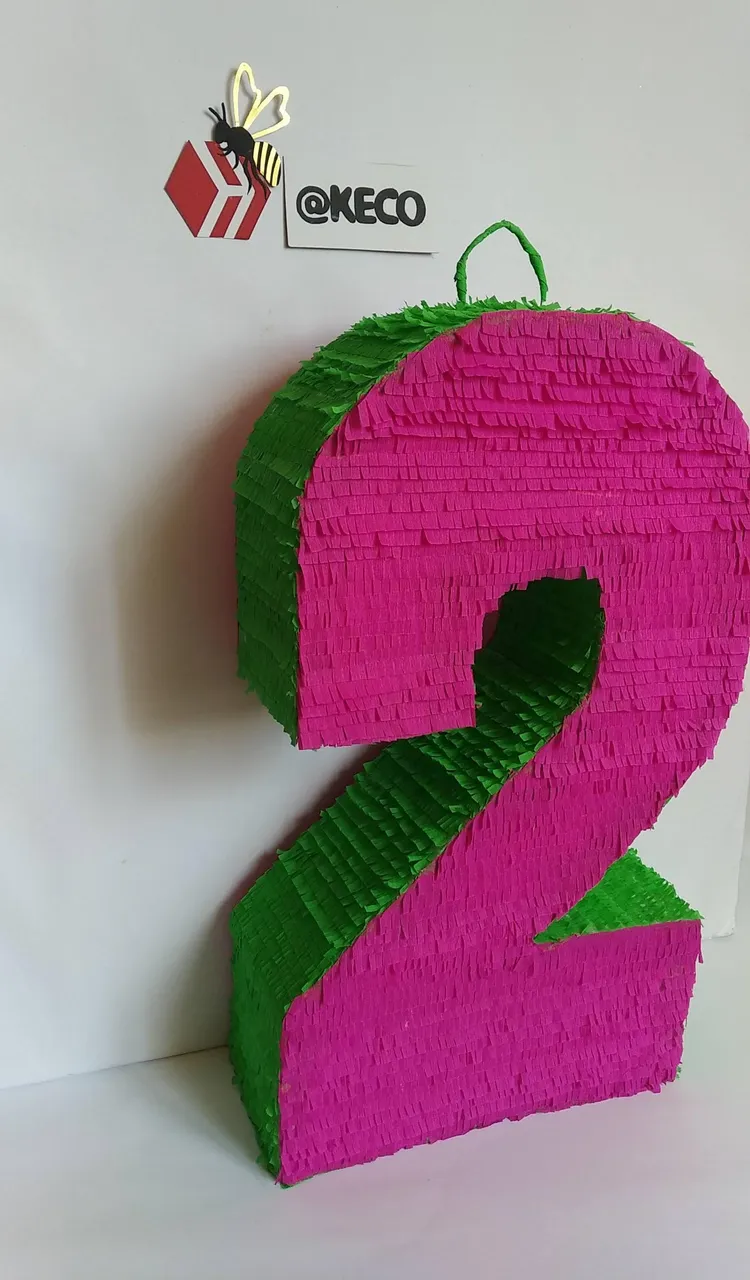
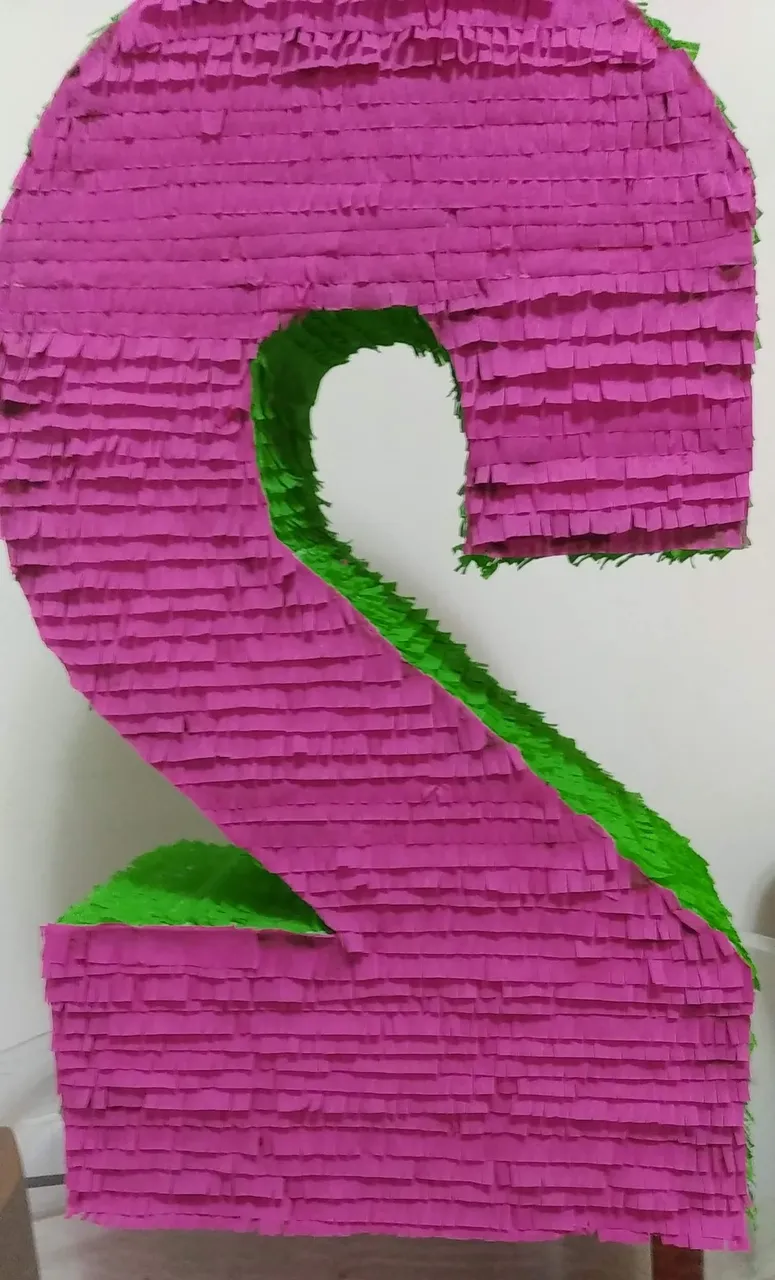
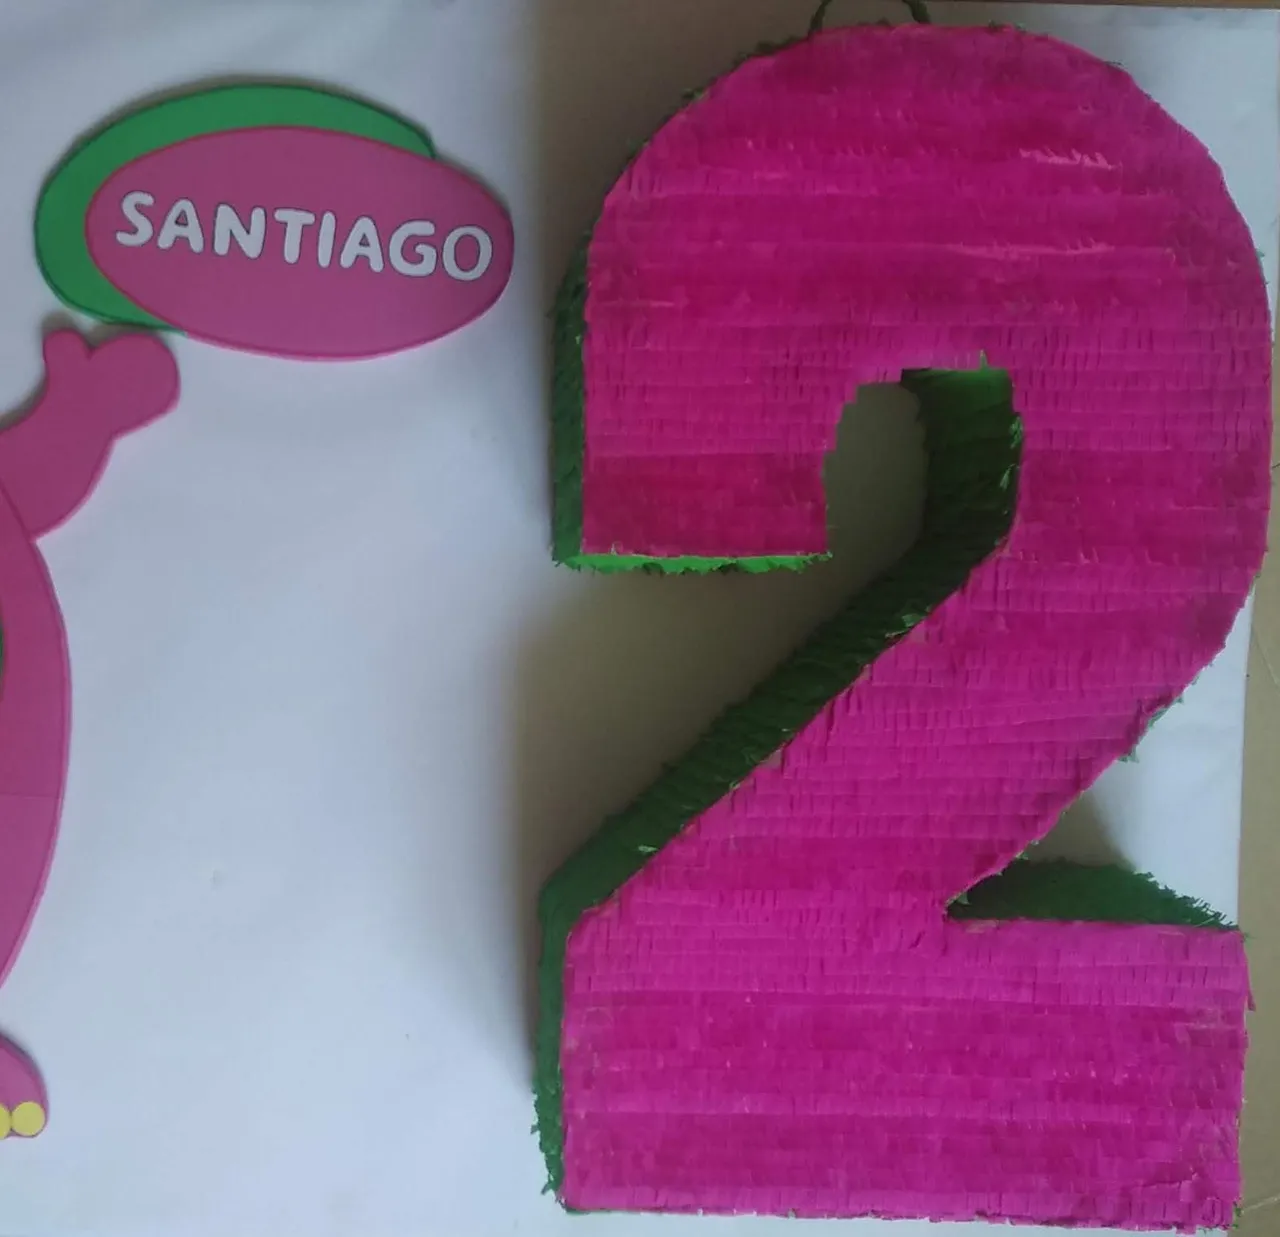
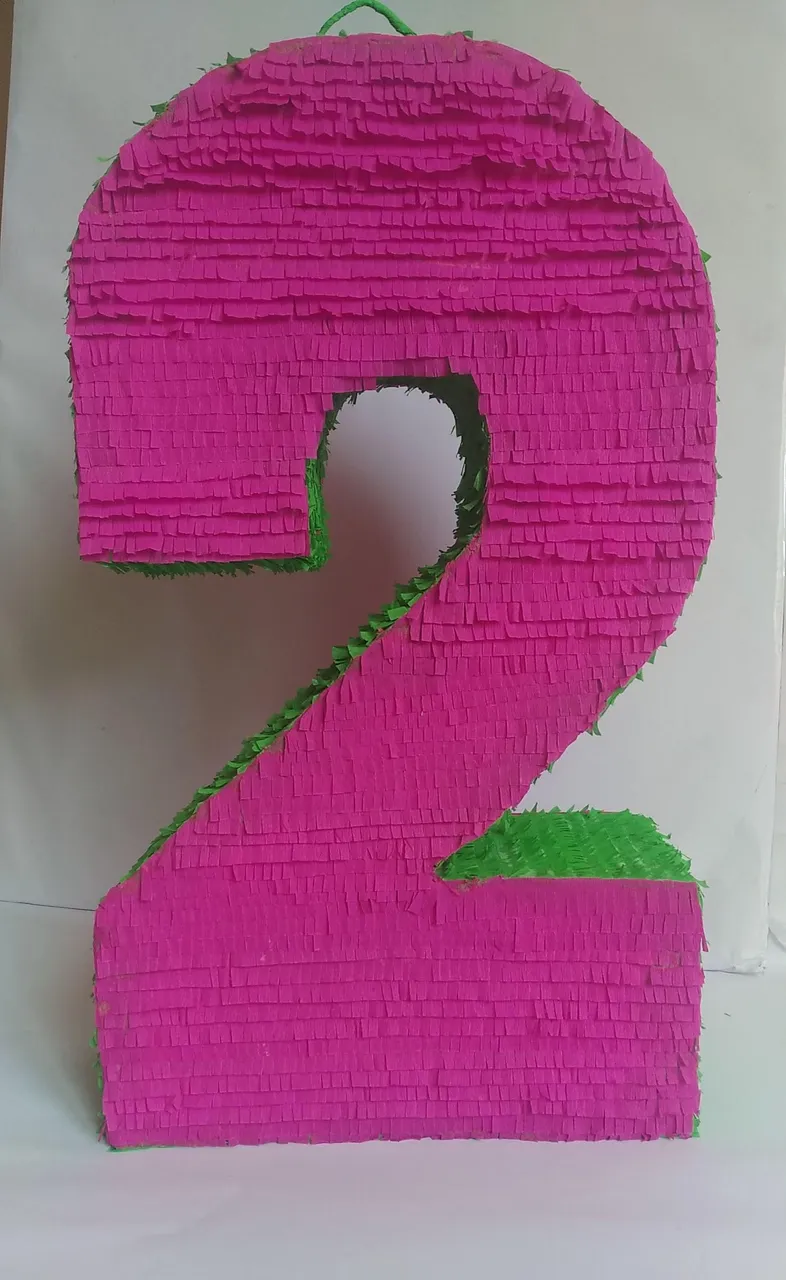
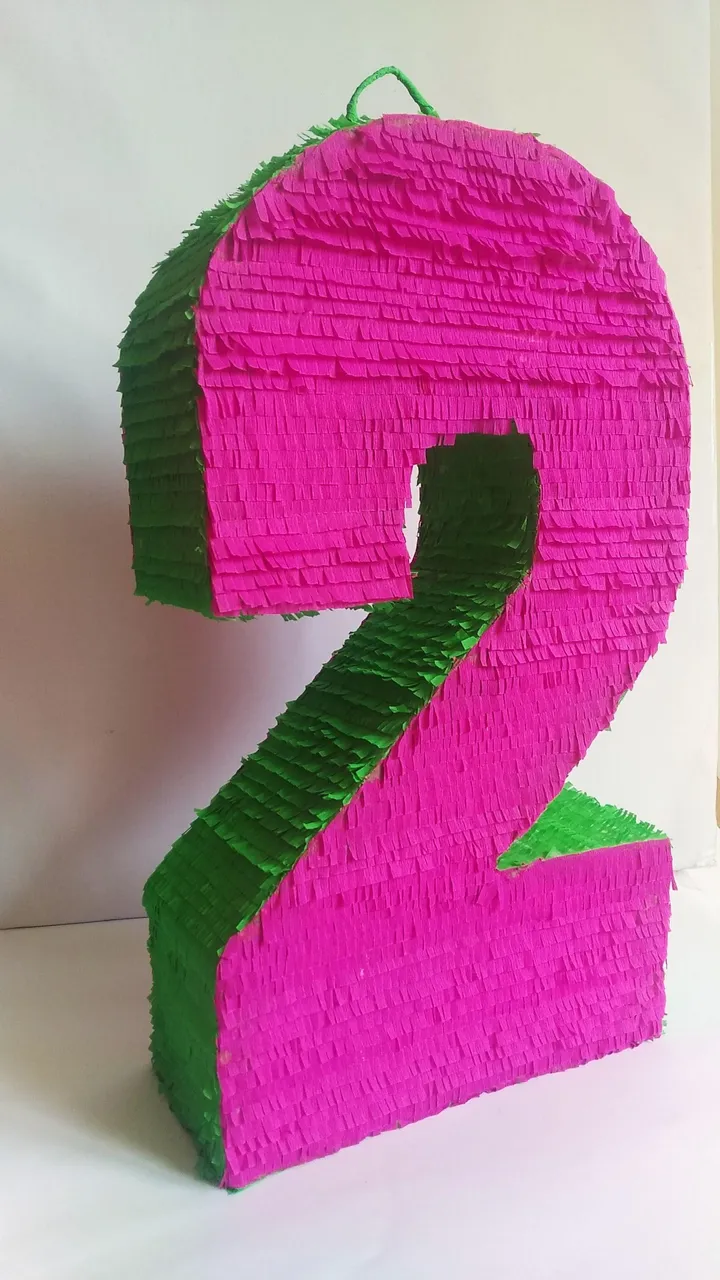
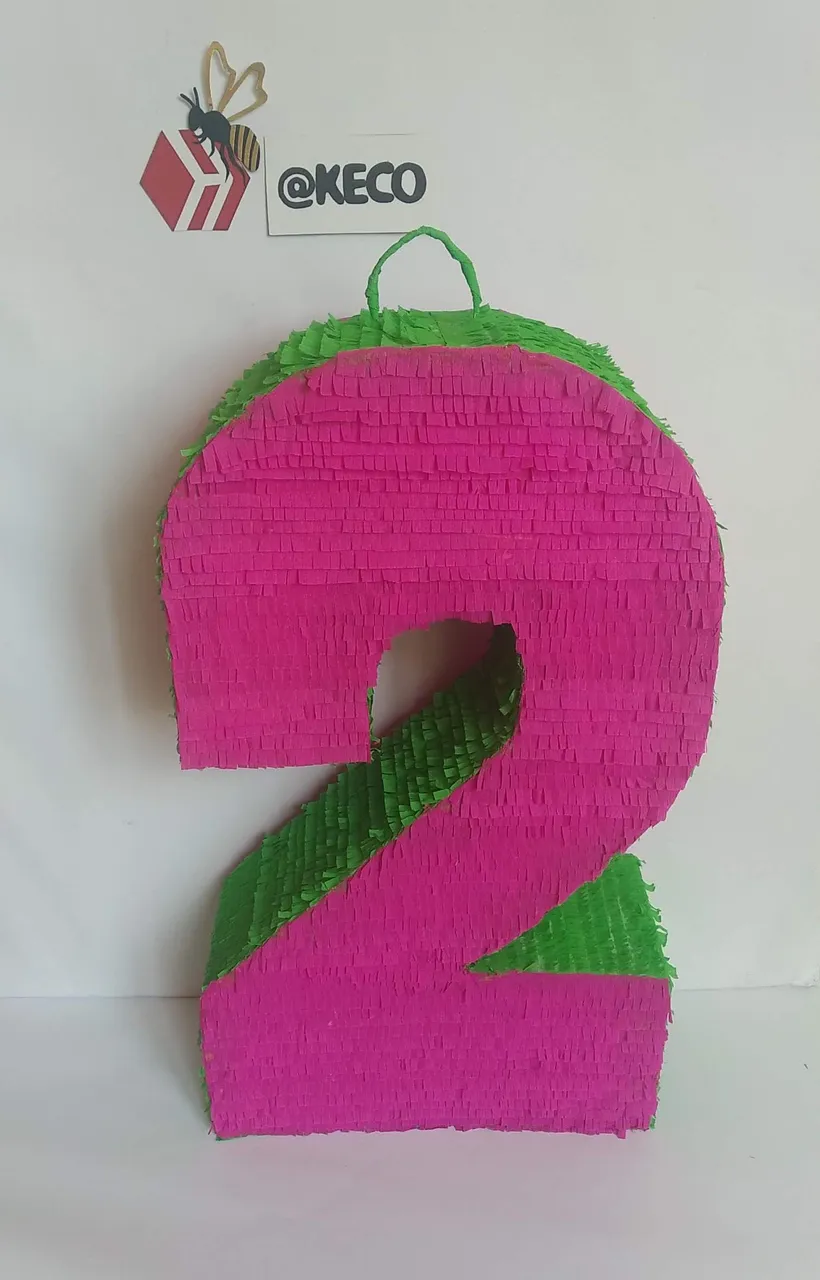
La publicación de hoy tiene que ver con una piñata en forma de numero para celebrar la vida un adorable niño llamado Santiago, él ama al personaje Infantil llamado “BARNEY” y su mamá, que es mi amiga Betsy, quiso decorar su fiesta con éste motivo.
Ésta es una piñata sencilla y fácil de realizar (realmente cualquier numero lo es) porque se lleva muy poco material y tiempo de realización. Hacer números como piñatas, ofrece la posibilidad de decorar de muchas formas lo que permite a la imaginación dar rienda suelta. En este caso, solo se usaron los colores propios del personaje y listo, se disfrutó de una linda creación.
Sin más y esperando disfruten del trabajo realizado, les dejo los materiales utilizados, el proceso y las imágenes del trabajo.
- Dos pedazos de Cartón liviano, puede ser cartón de un canal (reciclados).
- Cartones varios súper livianos, tipo cartulinas escolares (reciclados).
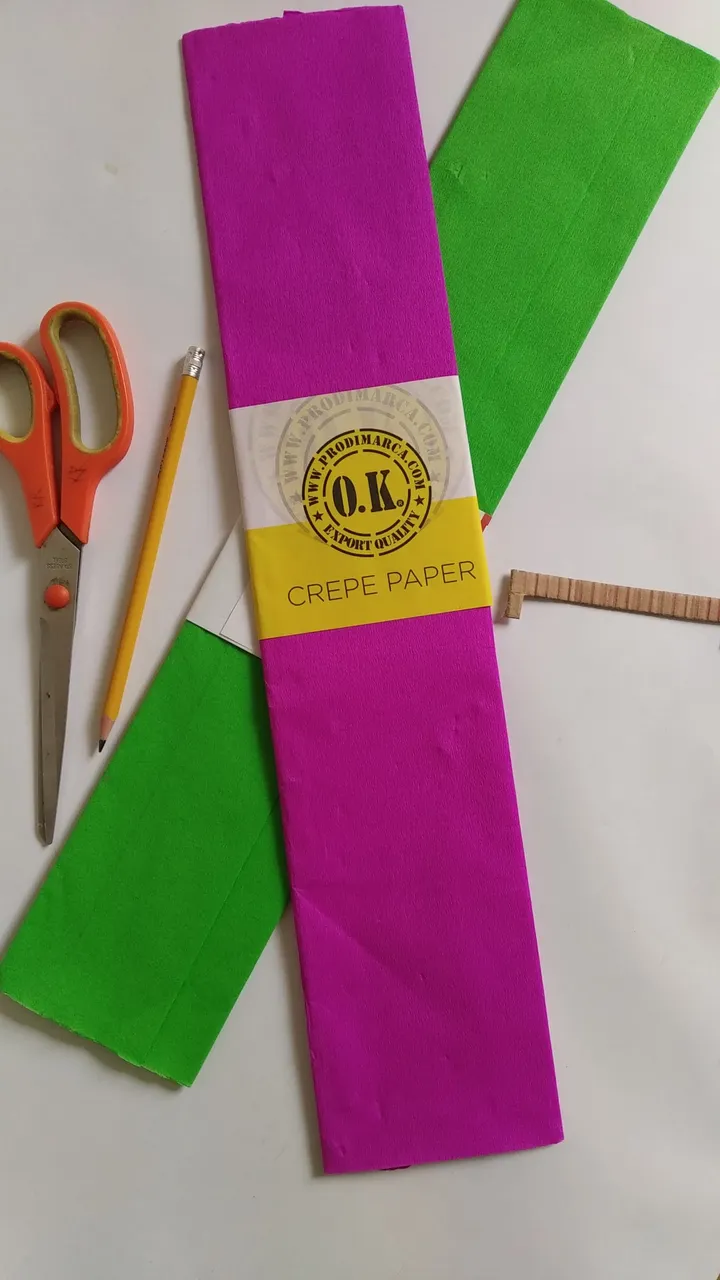
- Papel Crepé morado-fuscia (se tendrá que elegir el color que mas se asemeje al personaje)
- Papel Crepé Verde grama
- Pedacito de alambre para el agarre (reciclado)
- Silicón Caliente
- Engrudo casero
- Pincel medio (para aplicar el engrudo)
- Grapadora
- Tijera
- Regla
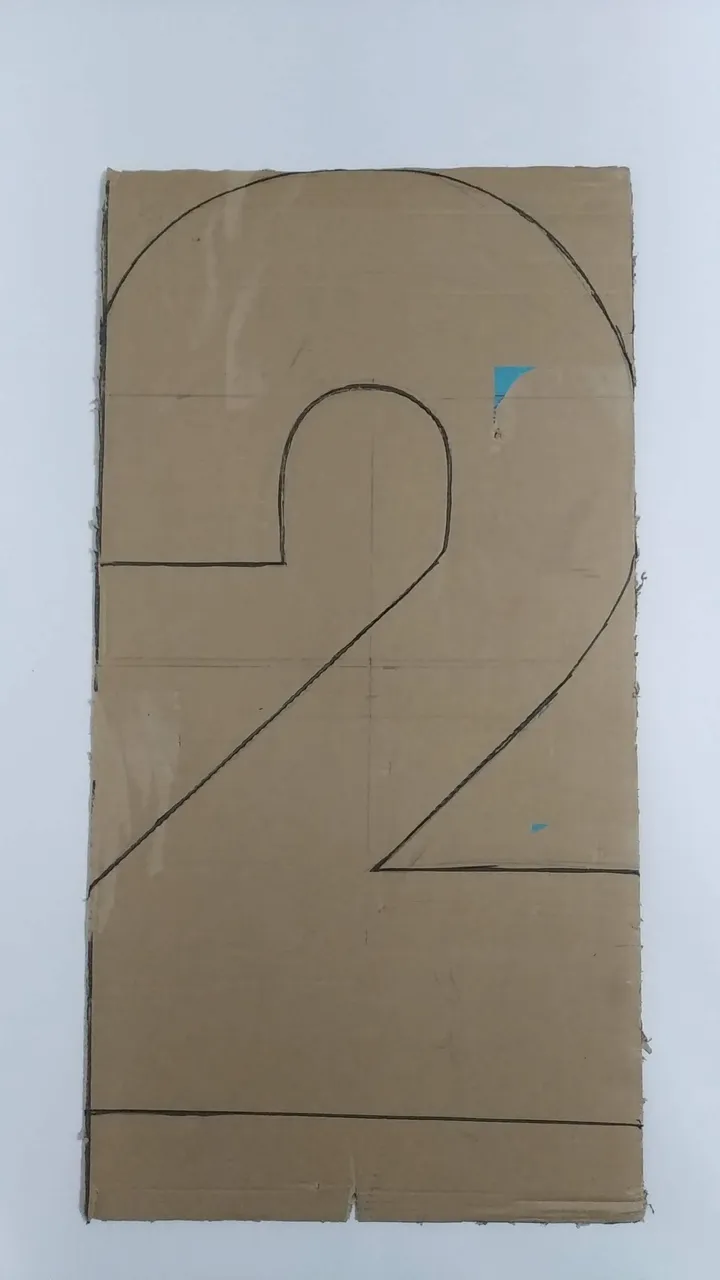
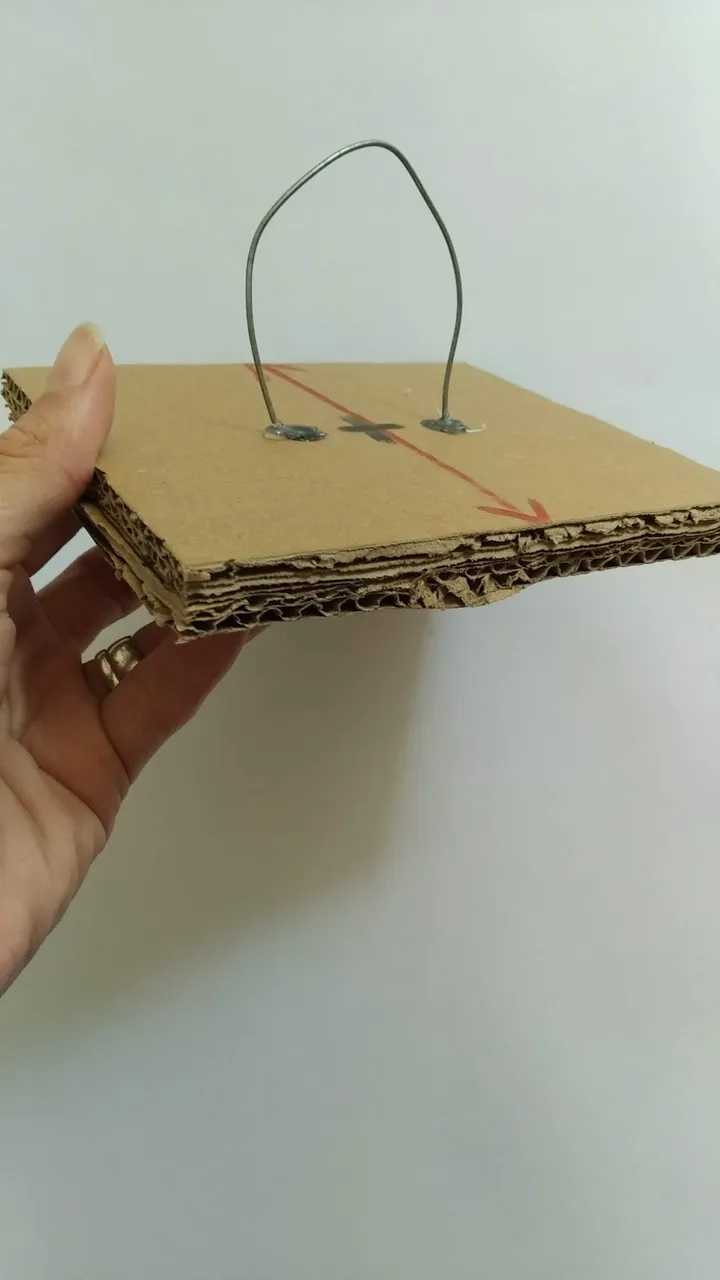
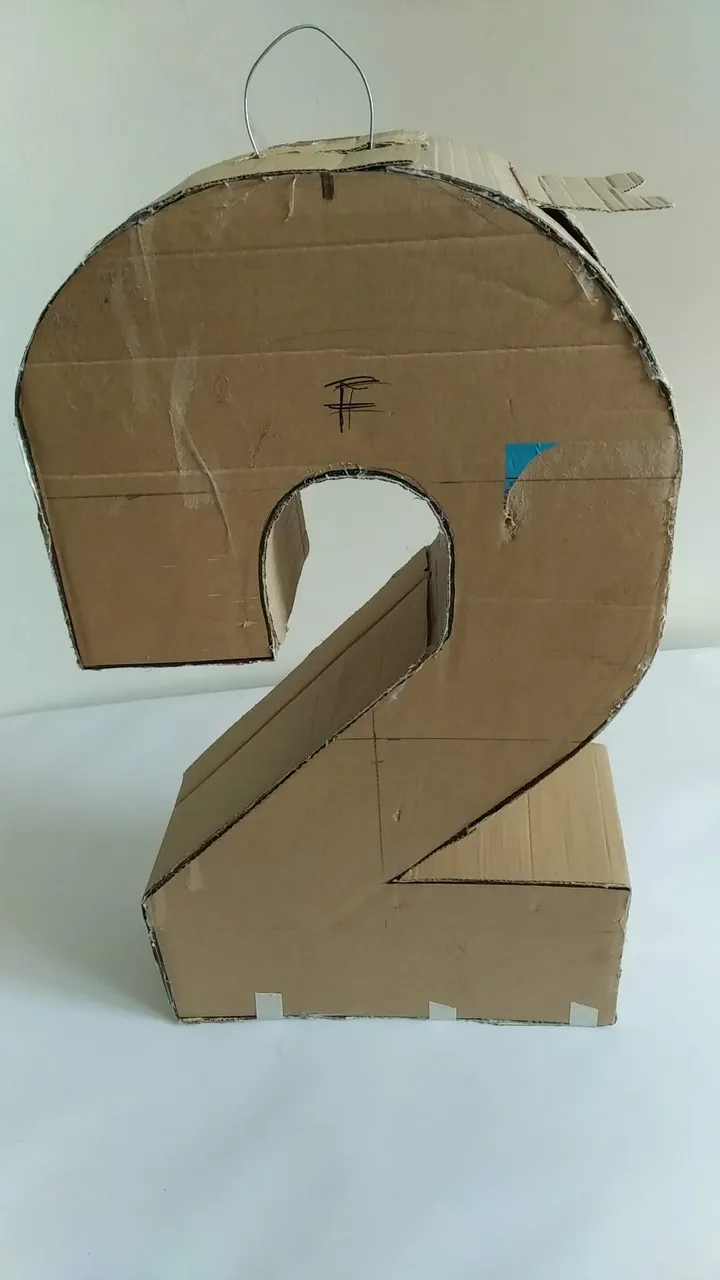
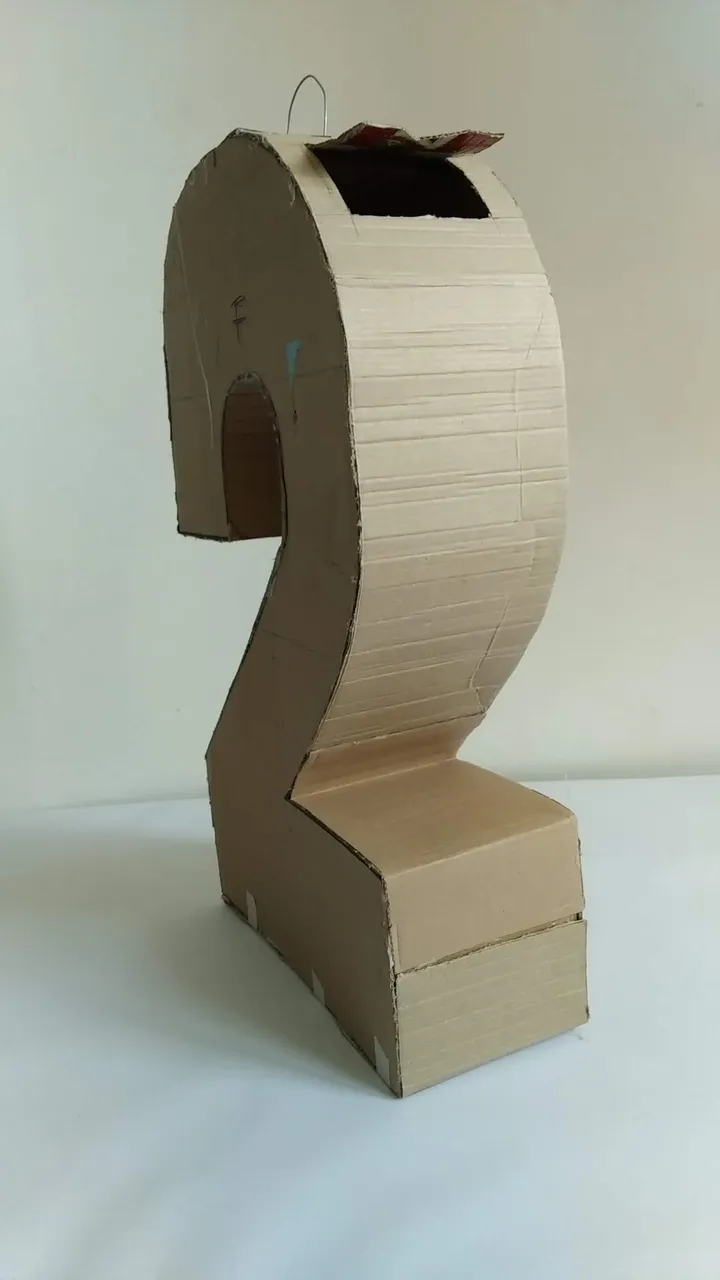
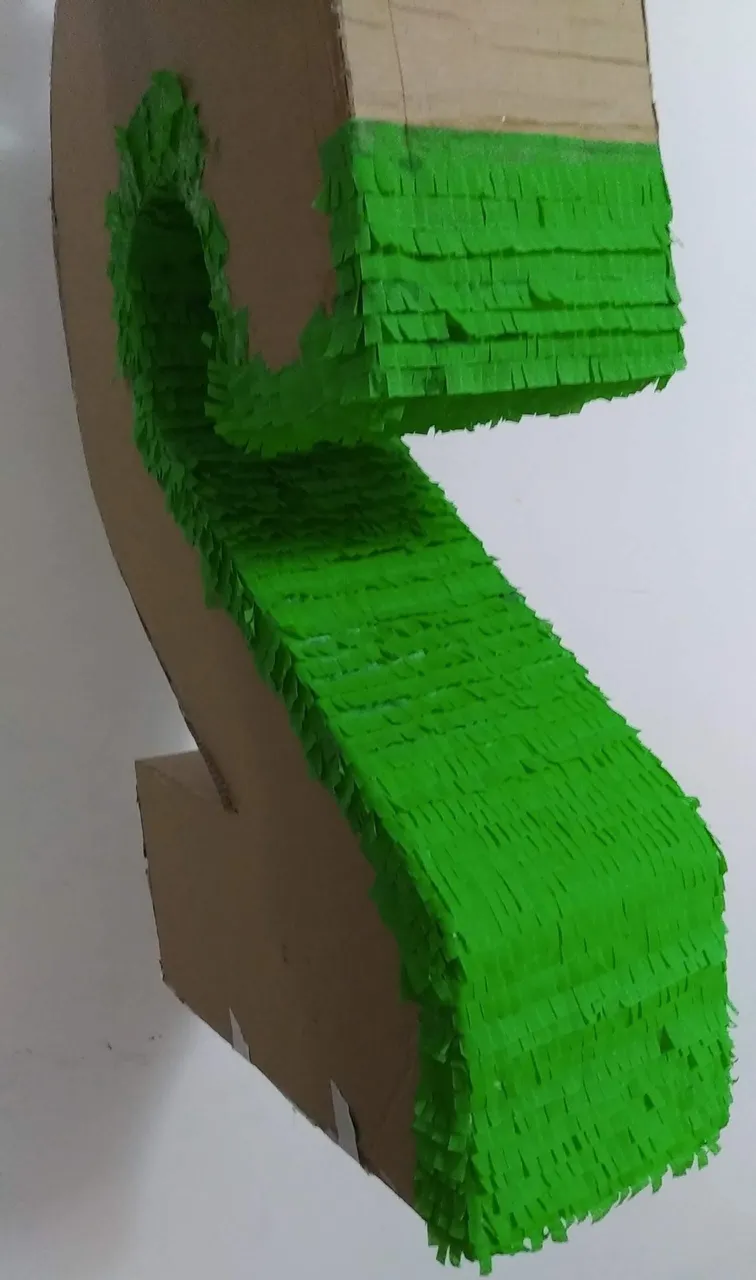
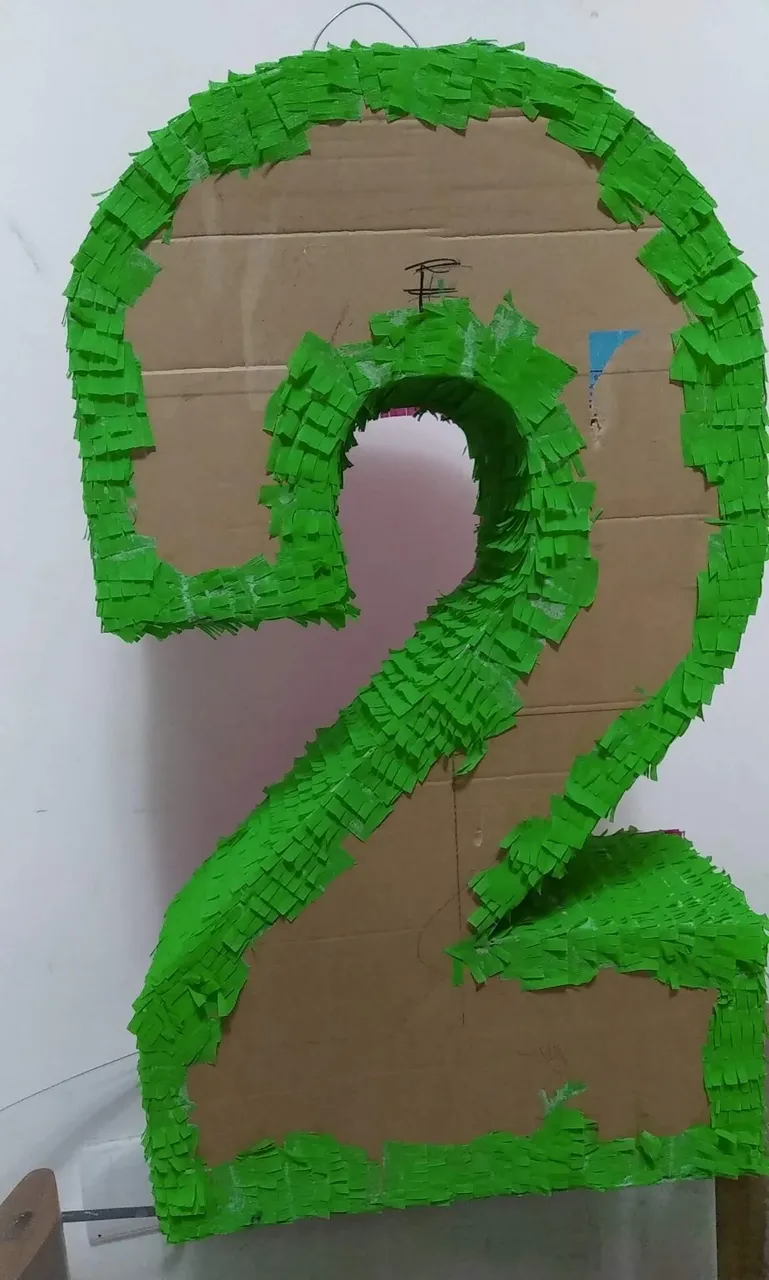
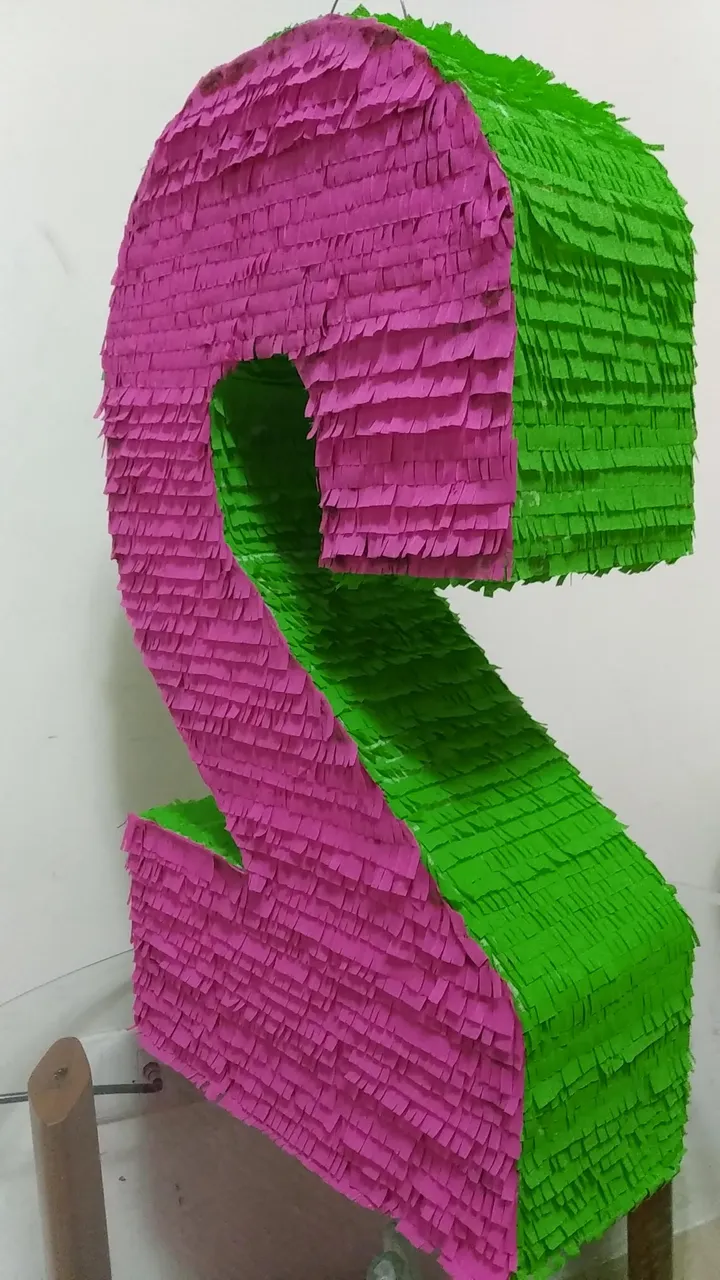
- En uno de los pedazos de cartón liviano, diseñar el número en el tamaño deseado (ancho y alto) y recortarlo. Ésta piñata midió 60 cm de alto, 40 cm de ancho y 15 cm de profundidad.
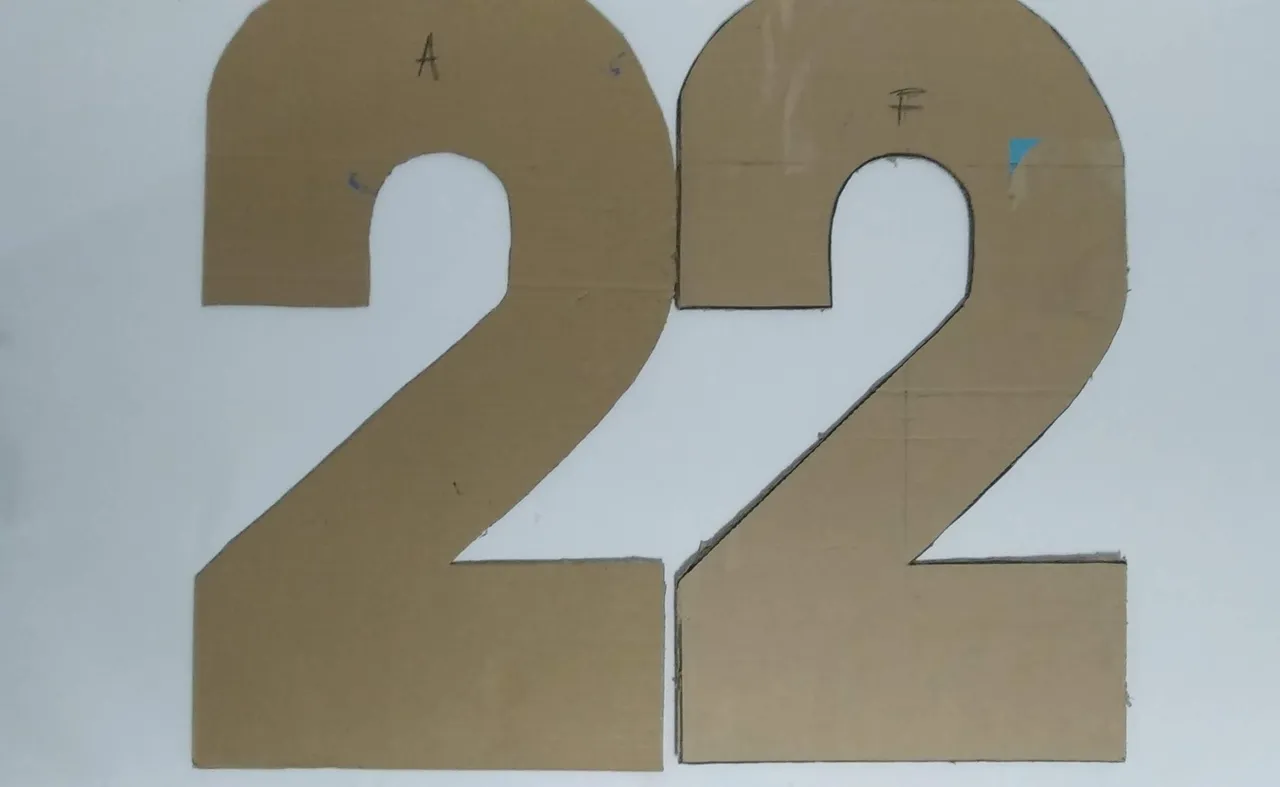
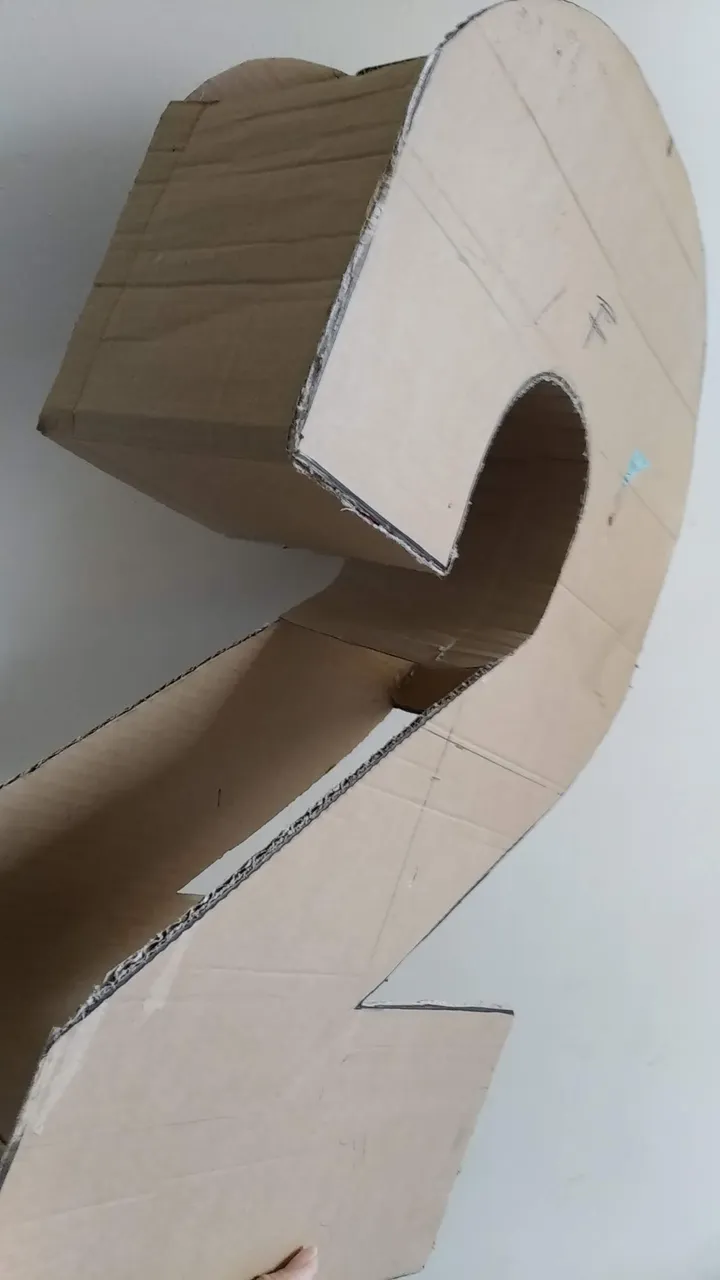
- Usando el primero como plantilla, recortar otro de mismo tamaño y forma.
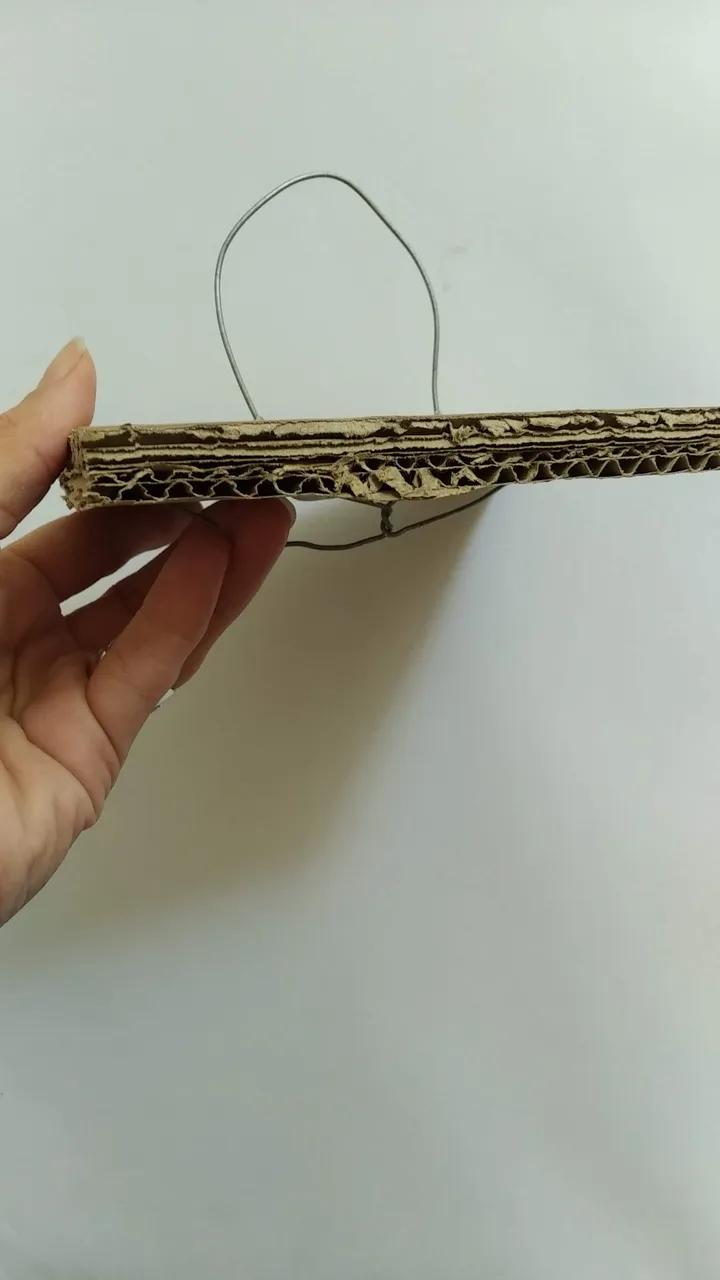
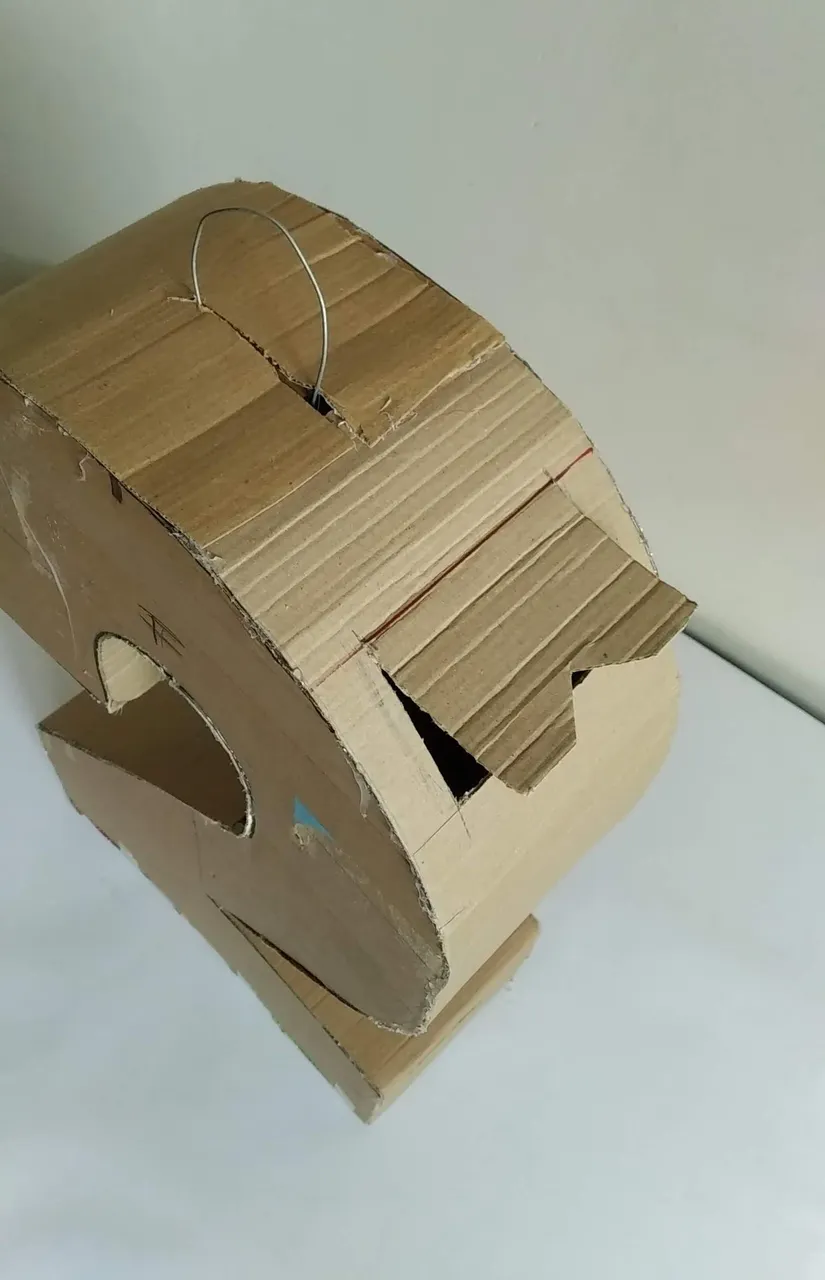
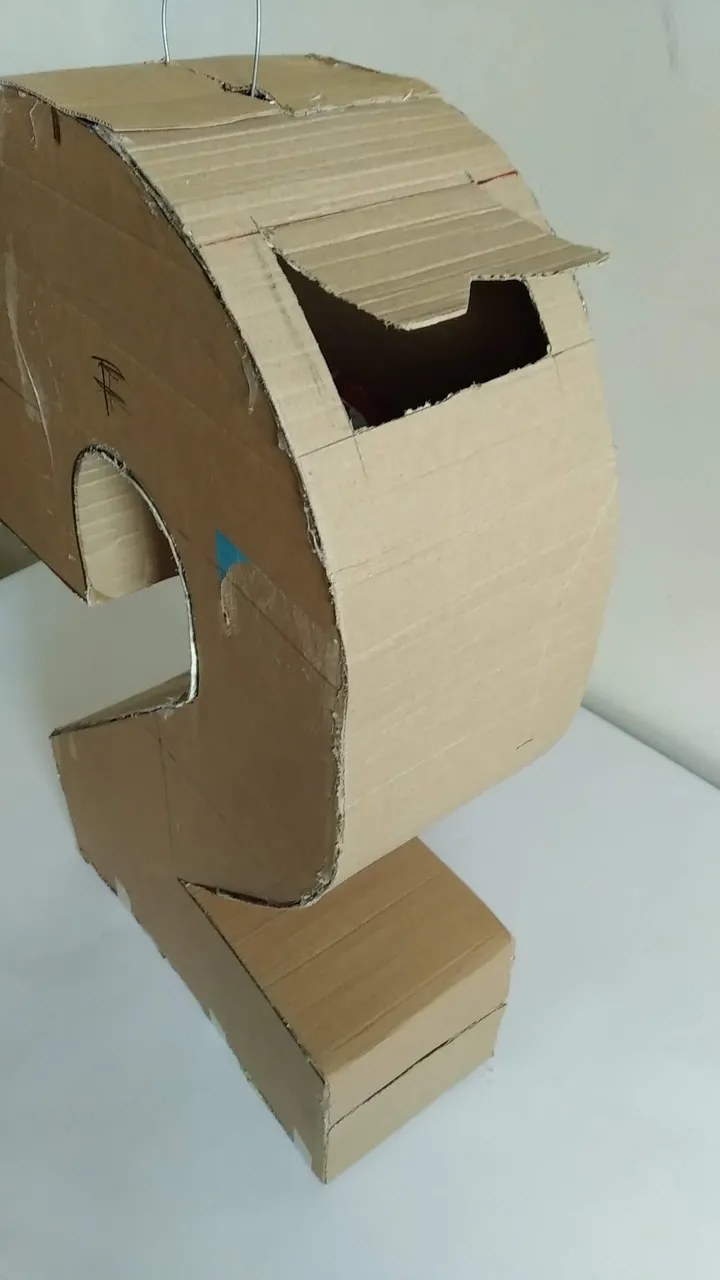
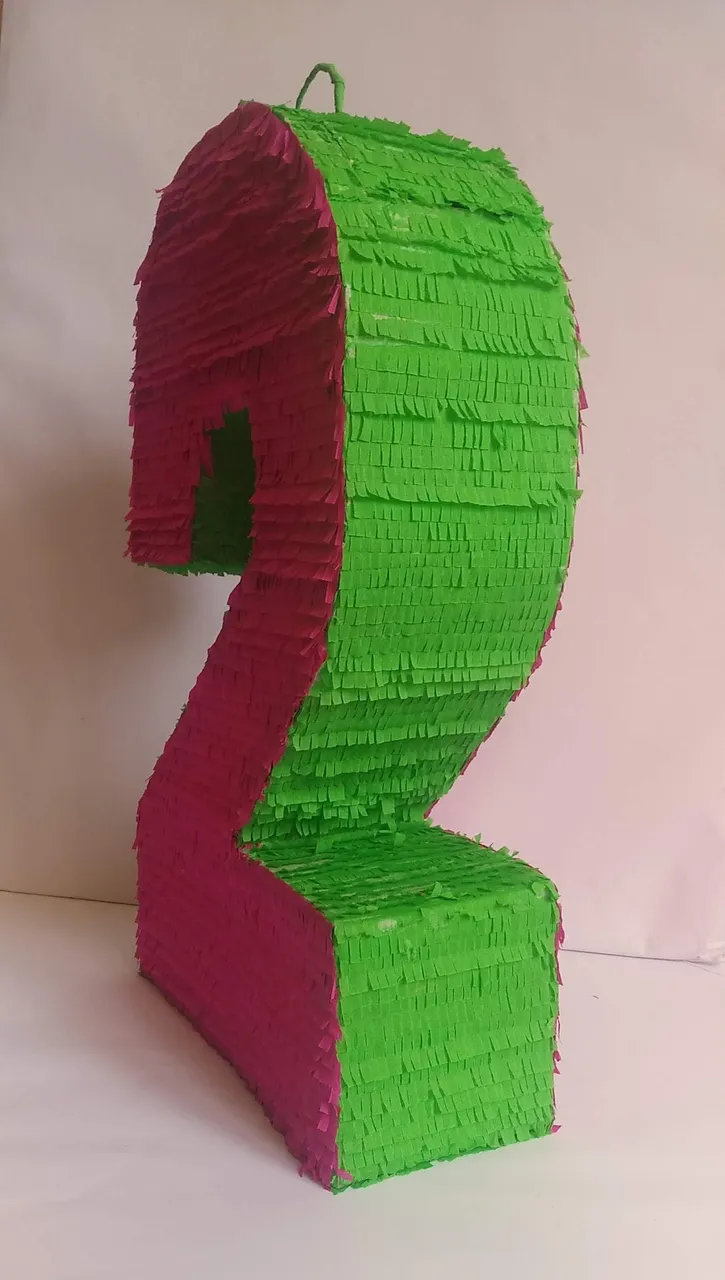
- Tomar un pedazo grueso de cartón de caja reciclada con la medida de la profundidad (15 cm) , reforzarlo y colocar alambre grueso creando especie de una argolla.
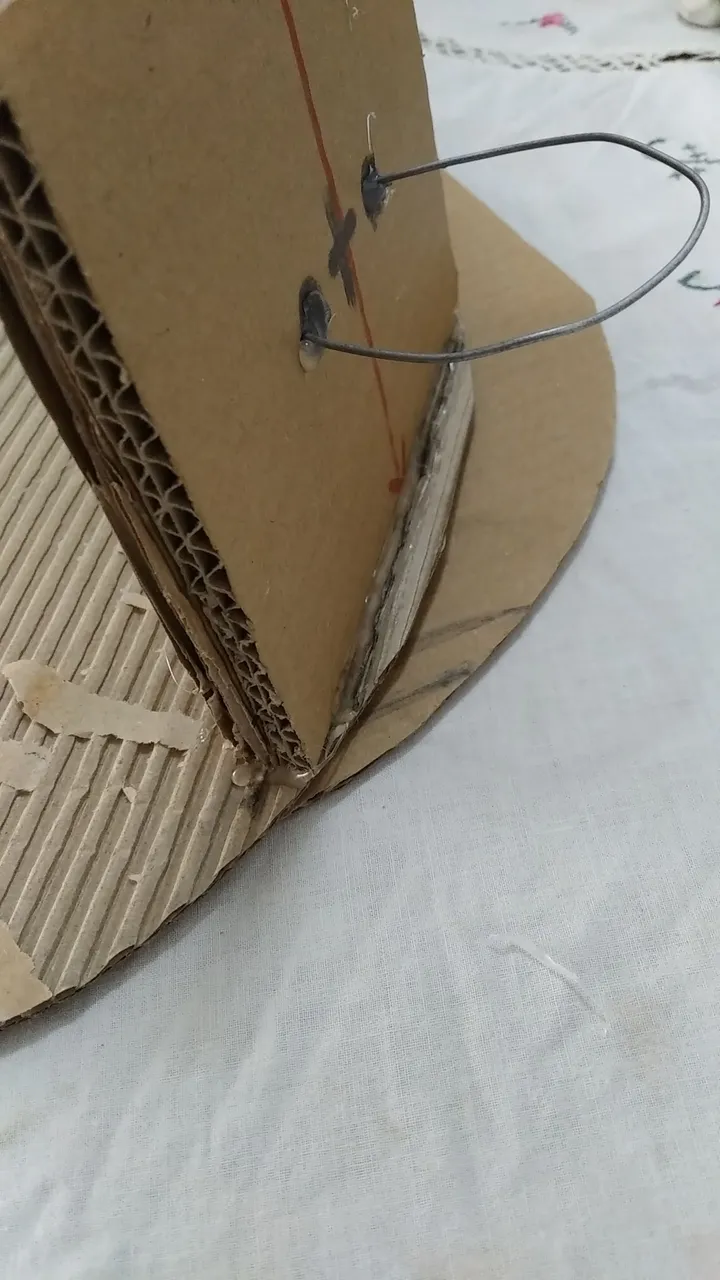
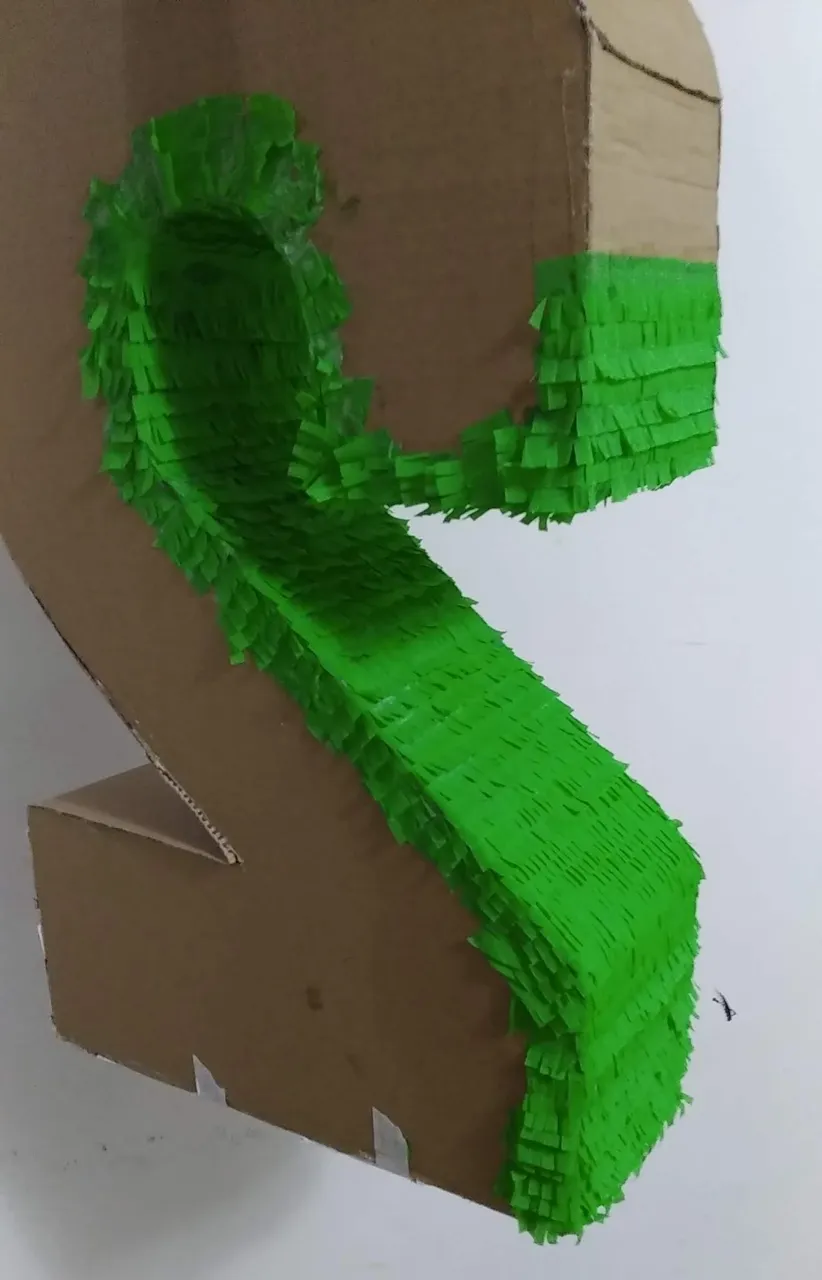
- Con la ayuda del cartón sobrante del recorte; colocar pedazos en forma de pestaña que sujeten ambas caras para darle la profundidad a la piñata. Estas pestañas deberán fijarse bien, por lo que se recomienda pegar y grapar para evitar se suelten. Colocar arriba, abajo y a los lados.
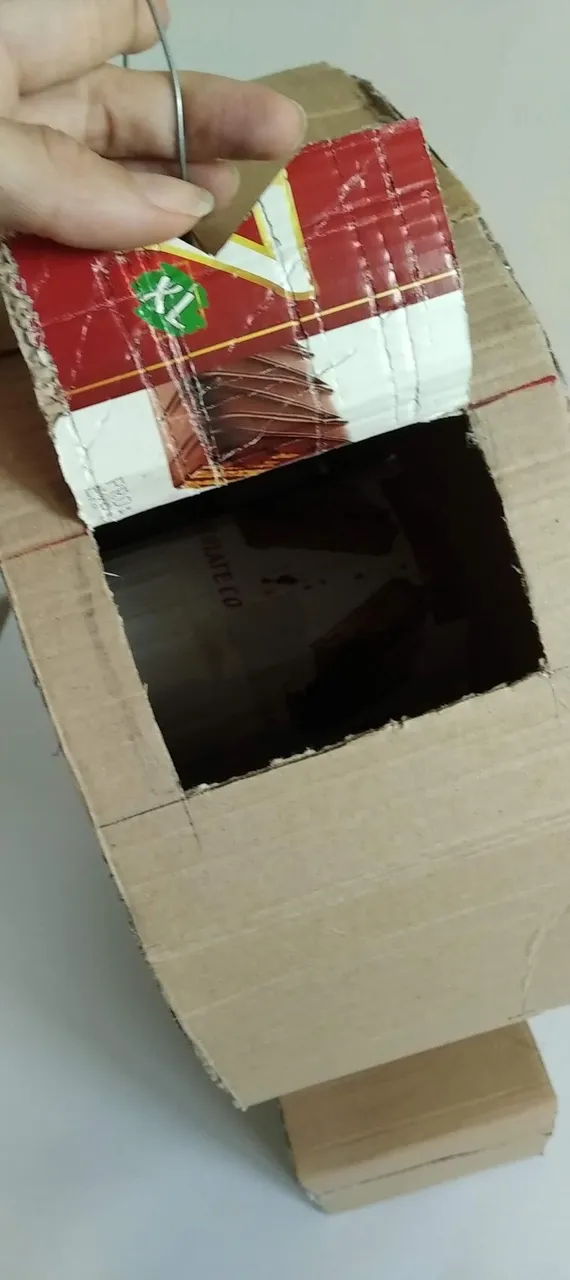
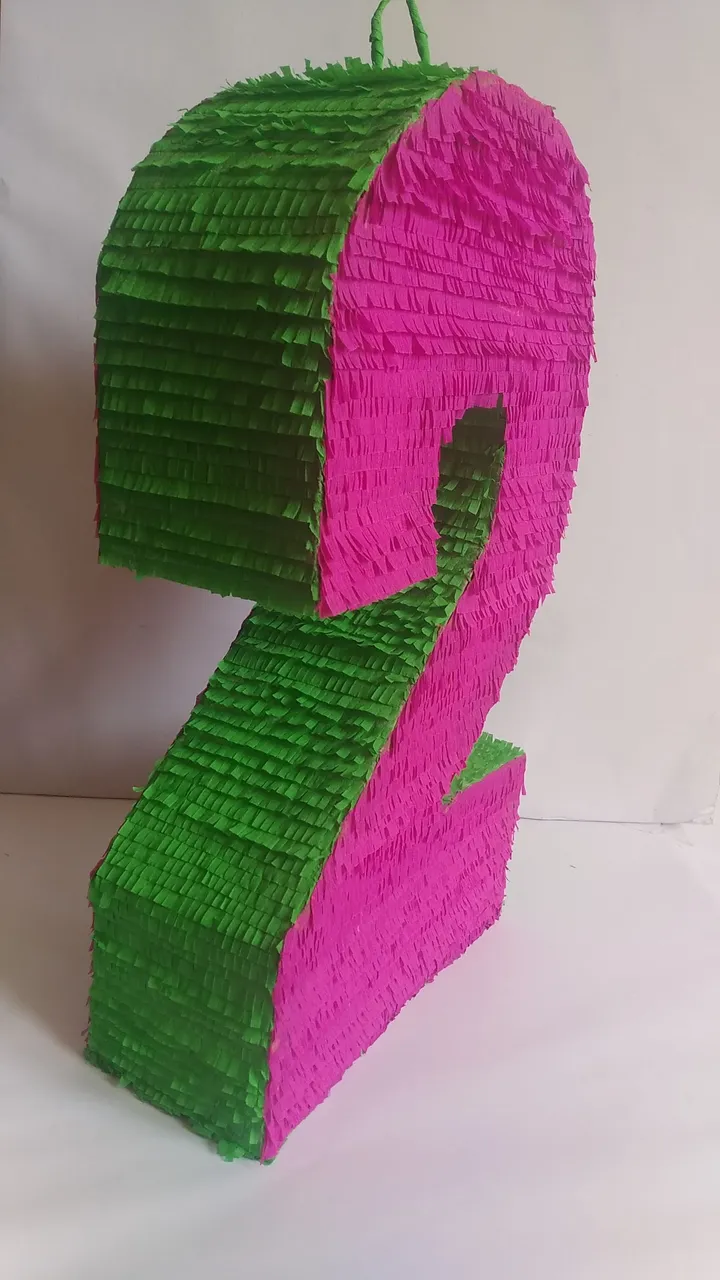
- El contorno del numero, forrarlo con cartón ultra liviano. Se deberá recortar a la medida del ancho dado a la piñata (15 centímetros) y pegar todos los bordes con silicón caliente, cuidando todos los lados queden bien pegados.
- Al terminar de cubrir los bordes del número con el cartón ultra liviano, hacer un corte al cartón en forma de pestaña para luego poder rellenar con caramelos y sorpresas.
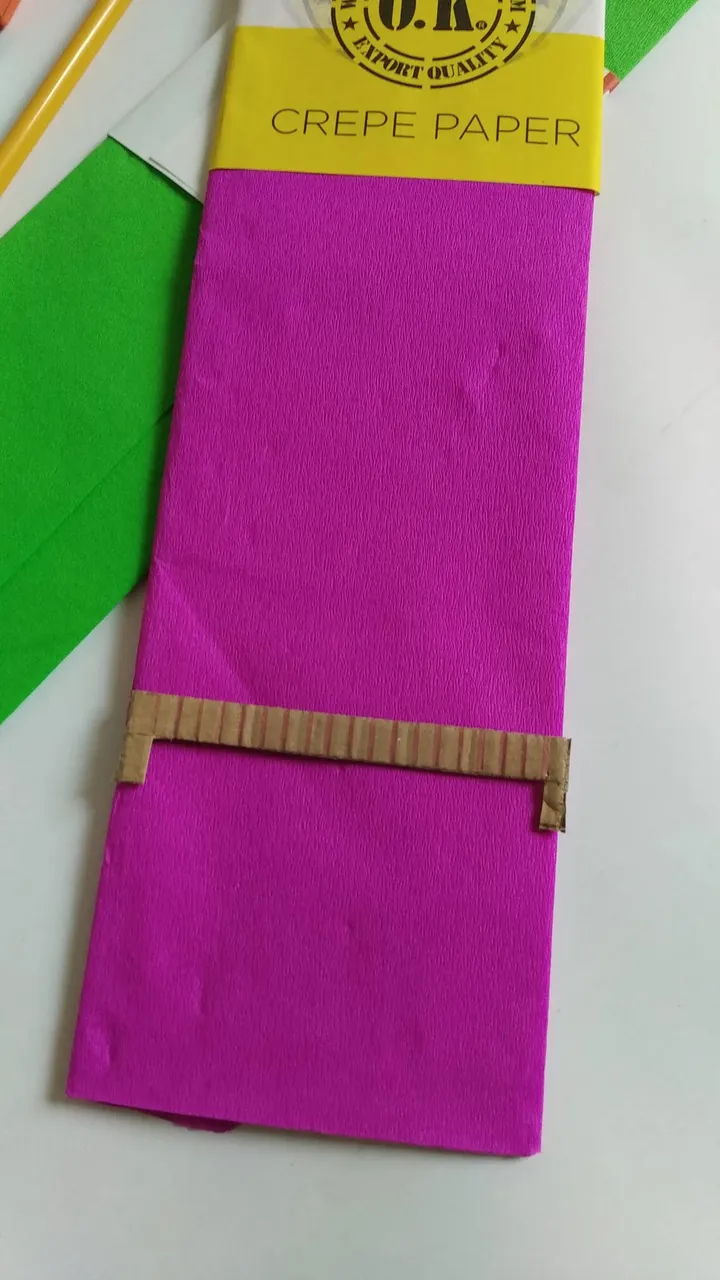
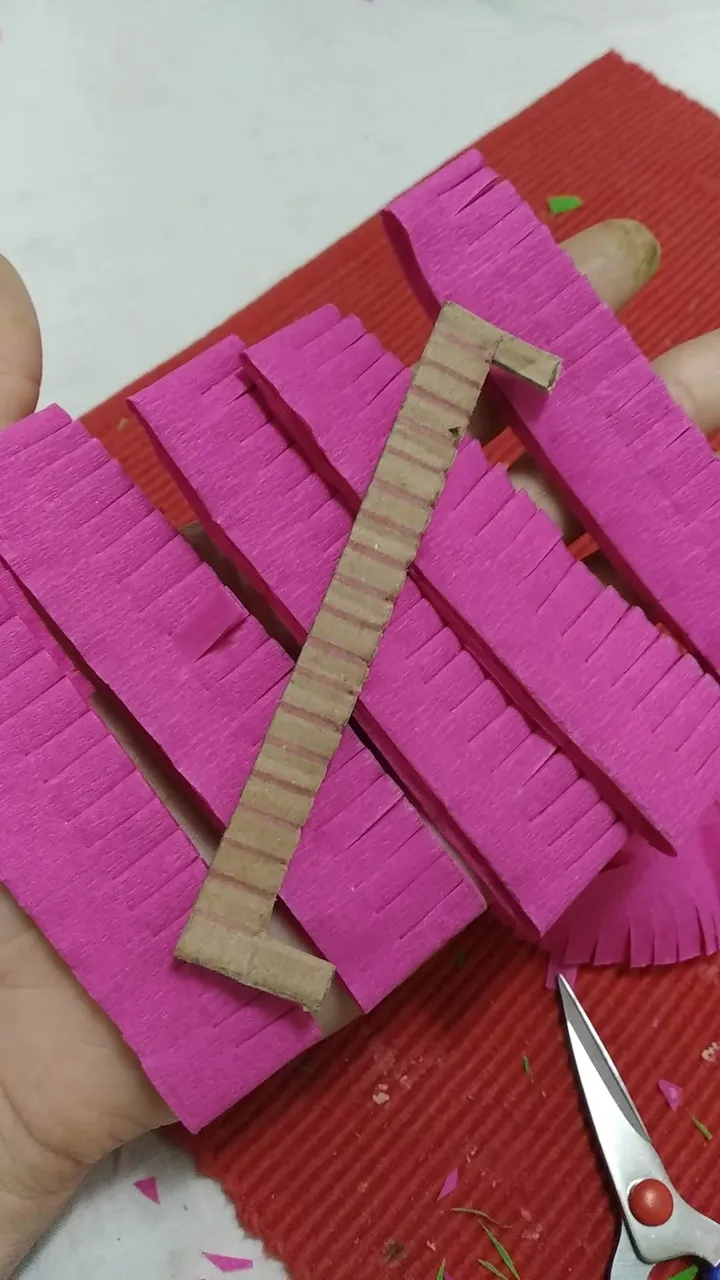
- Crear una plantilla para cortar de forma simétrica el papel crepé. Para ésto, se deberá tomar un pedacito de cartón del ancho del papel crepé y hacer las marcas correspondientes al ancho que serán los flecos del papel crepé
- Recortar varios pedazos antes de comenzar a pegar y reservar, cuidando no se dañen los Flecos.
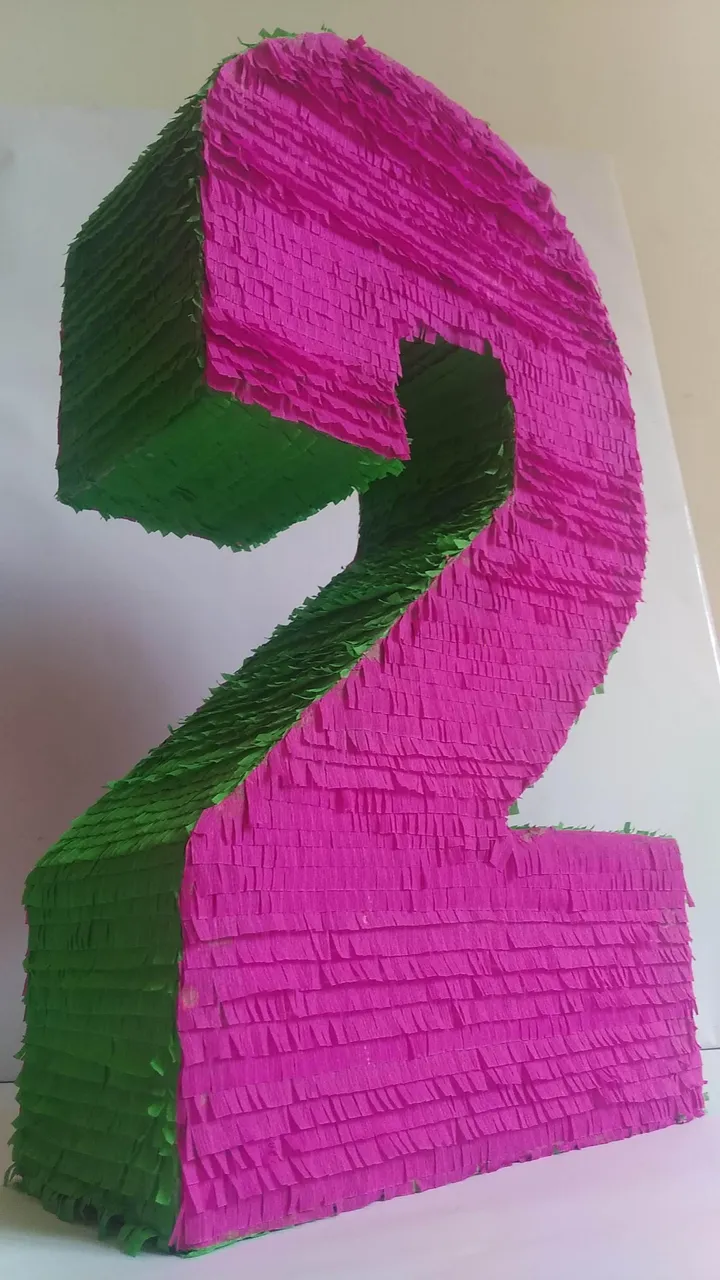
- Comenzado por el área de la profundidad de la piñata, pegar de abajo hacia arriba, el papel verde, aplicando una capa de engrudo casero y pegar la parte lisa del papel crepé (la parte que no tiene flecos).
- Luego pegar el papel morado por el frente y por detrás; pegando igual de abajo hacia arriba, aplicando una capa de engrudo casero y pegar la parte lisa del papel crepé (la parte que no tiene flecos).
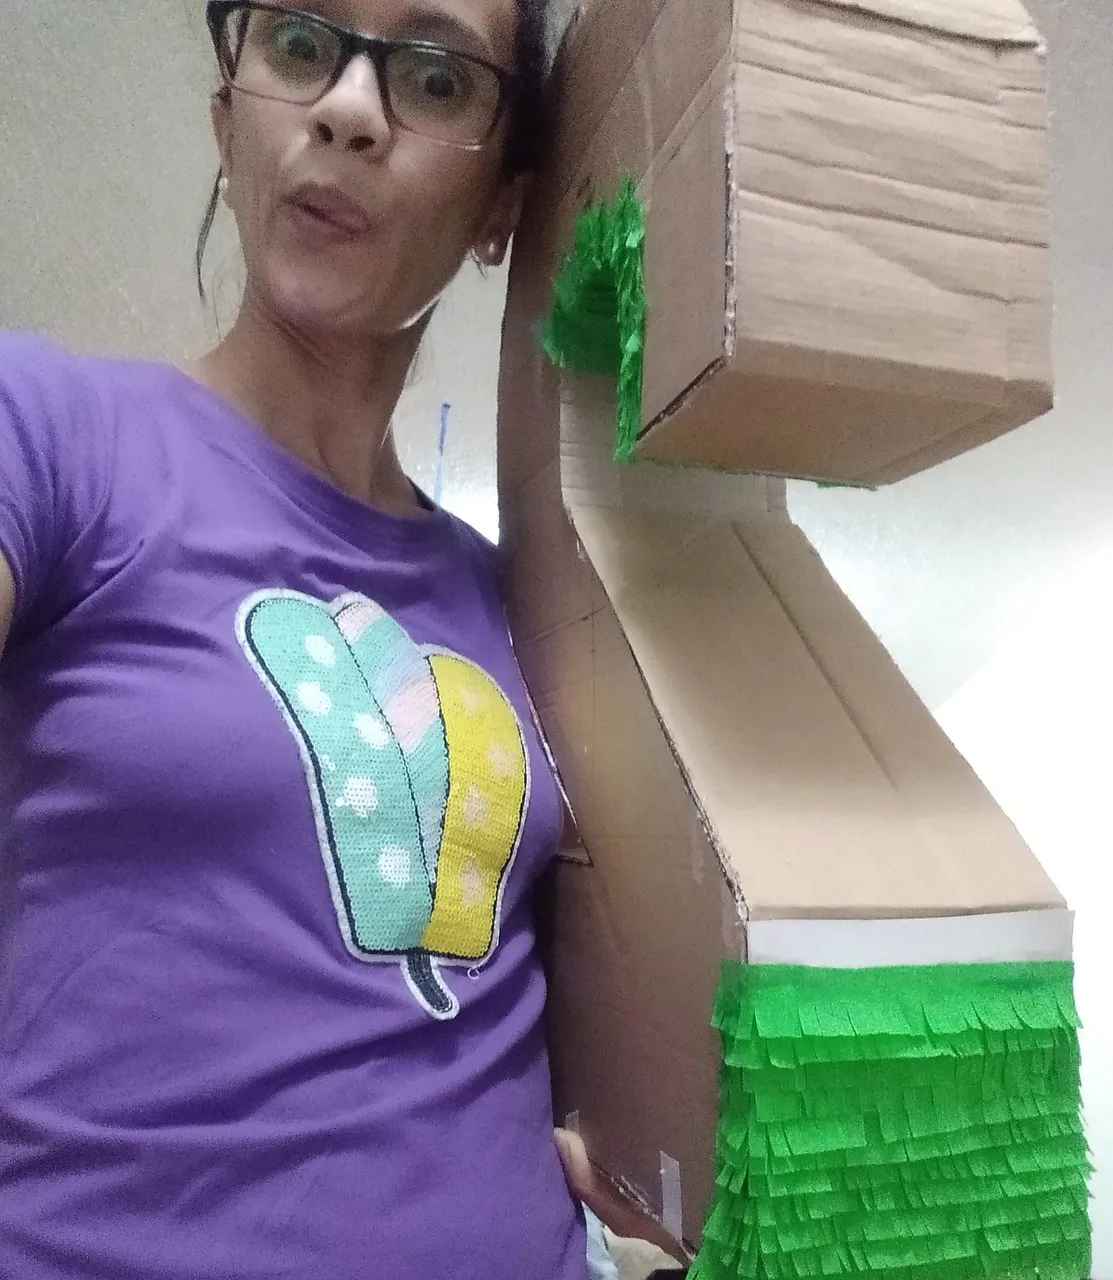
- Al terminar todos los lados, forrar el alambre con papel crepé verde para mejorar la estética.
- ¡Listo!, a disfrutar de la magia de lo creado.
English
Hola Amigos at Hive, nice to greet you again; especially to the creative community of @hivediy.
If you are Latino, I'm sure you identify with the word PIÑATA. How many celebrations have you attended and this element has been present, perhaps many, because the piñatas or box of surprises are a key component in children's celebrations as they offer excitement to children and adults to think of the amount of candy and toys that can contain.
Today's post has to do with a piñata in the shape of a number to celebrate the life of an adorable little boy named Santiago, he loves the children's character called "BARNEY" and his mom, who is my friend Betsy, wanted to decorate his party with this motif.
This is a simple and easy piñata to make (really any number is) because it takes very little material and time to make. Making numbers as piñatas, offers the possibility to decorate in many ways which allows the imagination to run wild. In this case, we only used the colors of the character and that's it, we enjoyed a nice creation.
Without further ado and hoping you enjoy the work done, I leave you the materials used, the process and the images of the work.
- Two pieces of light cardboard, it can be cardboard from a channel (recycled).
- Super light cardboard, such as school cardboard (recycled).
- Purple-fuscia crepe paper (choose the color that most closely resembles the character).
- Crepe paper green grass
- Piece of wire for the grip (recycled)
- Hot Silicone
- Homemade glue
Medium brush (to apply the paste) * Stapler - Stapler
- Scissors
- Ruler
- On one of the pieces of lightweight cardboard, design the number in the desired size (width and height) and cut it out. This piñata measured 60 cm high, 40 cm wide and 15 cm deep.
- Using the first one as a template, cut out another one of the same size and shape.
- Take a thick piece of cardboard from a recycled box with the measure of the depth (15 cm), reinforce it and place thick wire creating a sort of a ring.
- With the help of the cardboard left over from the cutting, place pieces in the shape of tabs that hold both sides to give depth to the piñata. These tabs should be well fixed, so it is recommended to glue and staple to prevent them from coming loose. Place at the top, bottom and sides.
- The outline of the number, line it with ultra light cardboard. It should be cut to the width given to the piñata (15 centimeters) and glue all the edges with hot silicone, taking care that all sides are well glued.
- When you finish covering the edges of the number with the ultra light cardboard, make a cut in the cardboard in the shape of a tab so that you can fill it with candies and surprises.
- Create a template to cut the crepe paper symmetrically. To do this, take a piece of cardboard the width of the crepe paper and make the marks corresponding to the width that will be the bangs of the crepe paper.
- Cut out several pieces before gluing and set aside, taking care not to damage the bangs.
- Starting with the area of the depth of the piñata, glue the green paper from the bottom to the top, applying a layer of homemade paste and glue the smooth part of the crepe paper (the part that does not have bangs).
- Then glue the purple paper on the front and back; gluing the same from bottom to top, applying a layer of homemade paste and glue the smooth part of the crepe paper (the part that does not have bangs).
- When all the sides are finished, cover the wire with green crepe paper to improve the esthetics.
- Ready, enjoy the magic of what you have created.
Translated with www.DeepL.com/Translator (free version)
IMÁGENES / IMAGES


SALUDOS / REGARDS
Todas las Fotos fueron tomadas con mi teléfono Redmi 7A.
Contenido original de @keco (fotos y texto) - Todos los derechos reservados Publicado en HIVE así como en mi instagram : http://instagram.com/carton_pintura_algo_mas
All Photos were taken with my Redmi 7A phone.
Original content from @keco (photos and text) - All rights reserved Posted on HIVE as well as on my instagram: http://instagram.com/carton_pintura_algo_mas