Español
Hola a todos, espero ésta sea una maravillosa y bendecida semana.
¿Recuerdas que edad tenias cuando aprendiste identificar la hora en los relojes de aguja, los relojes analógicos?.
A mi me constó mucho, muchísimo, de hecho recuerdo que desarrollar esa comprensión de los valores que asumen los números me fue muy complejo. Con la intención de apoyar a Camilo en este proceso de aprender las horas, apoyé a su mamá para que el proceso de enseñanza le fuera mas divertida, por tanto le realice a Camilo un reloj analógico que podrá usar hasta consolidar la lectura correcta del tiempo a través de las horas.
Para las personas que tenemos hijos pequeños sabemos lo complejo que puede resultar aprender sobre el tiempo, por eso creo es elemental hacer de éste tipo de actividades algo muy divertido y colorido para permitirle así a los más pequeños aprender divirtiéndose.
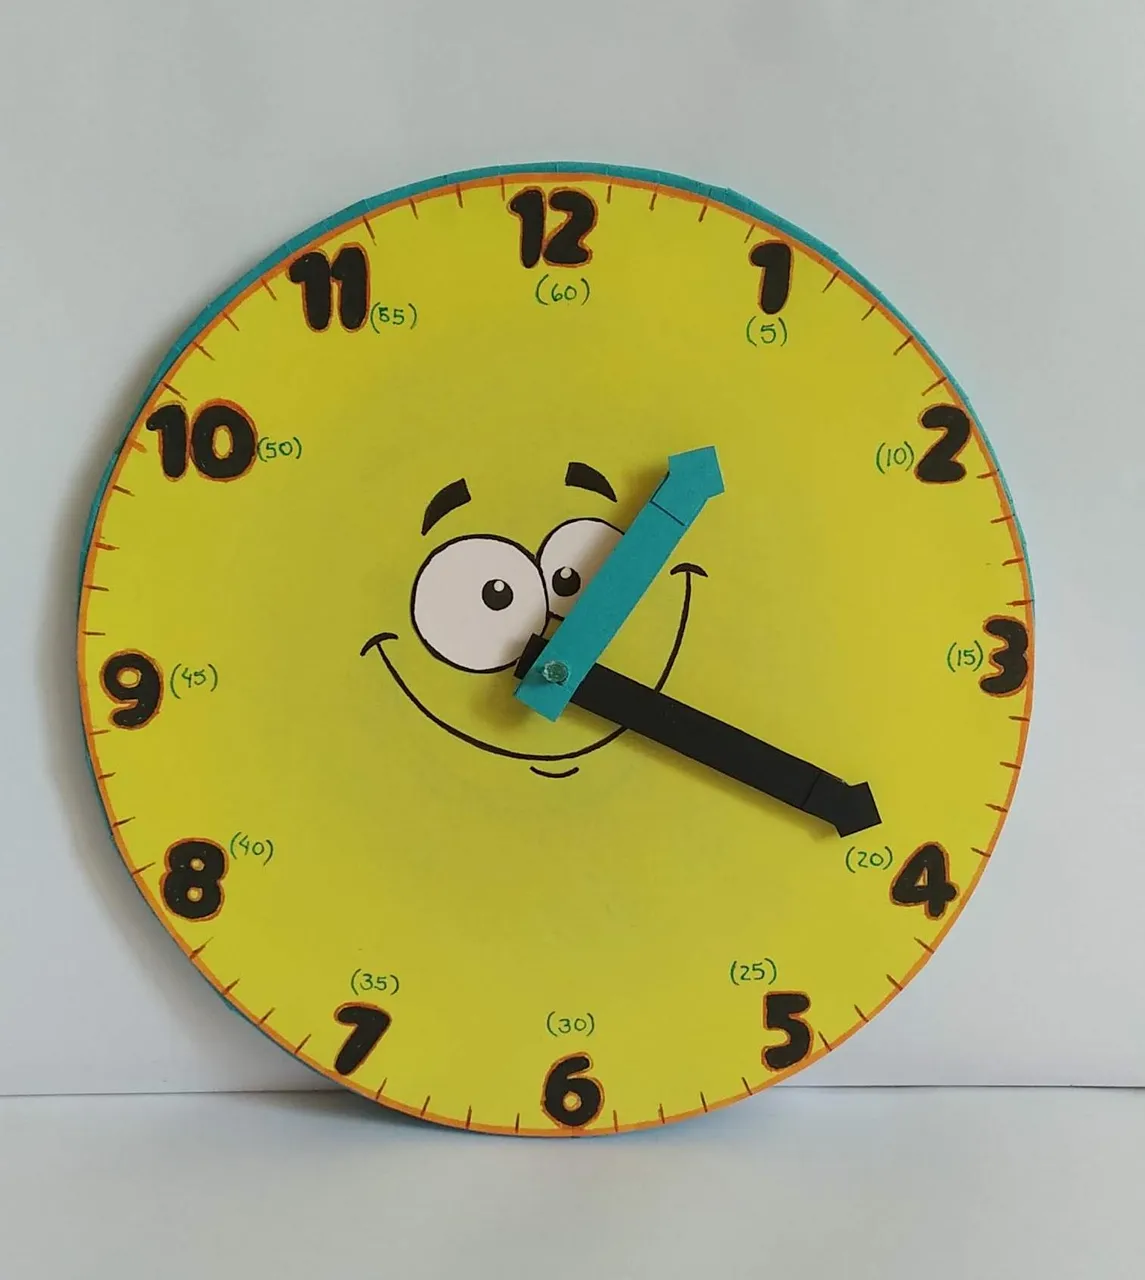
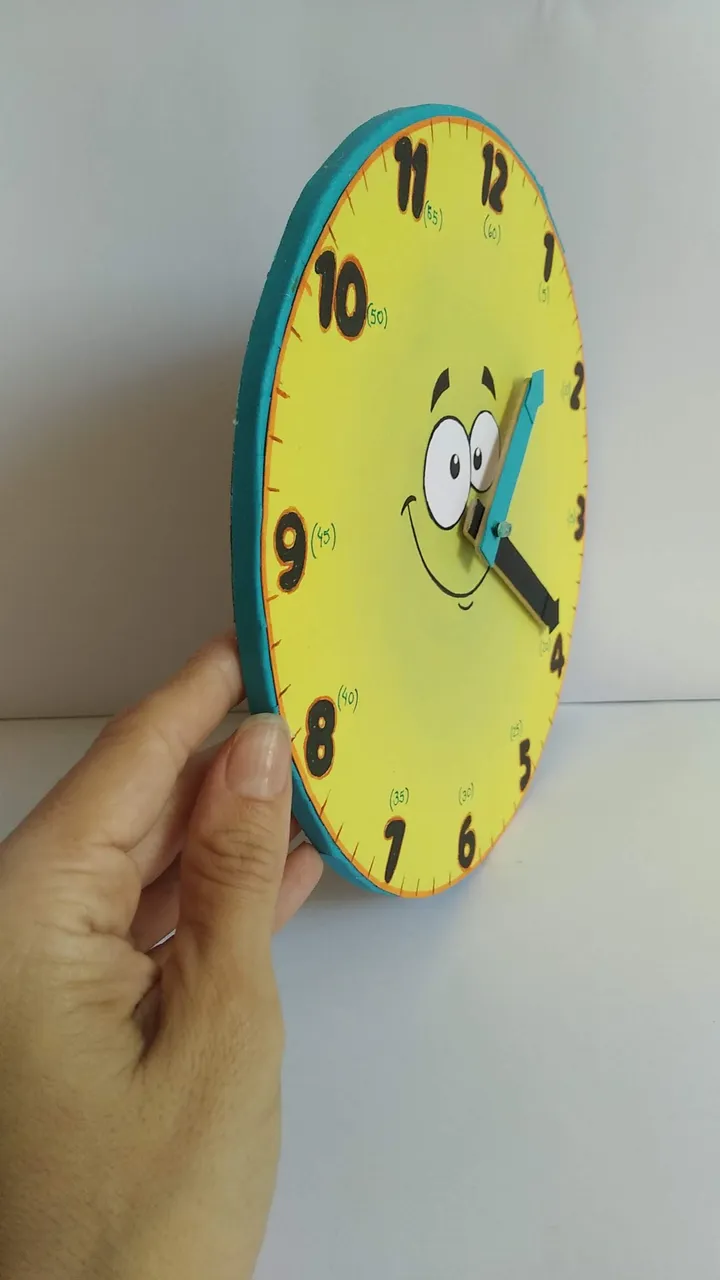
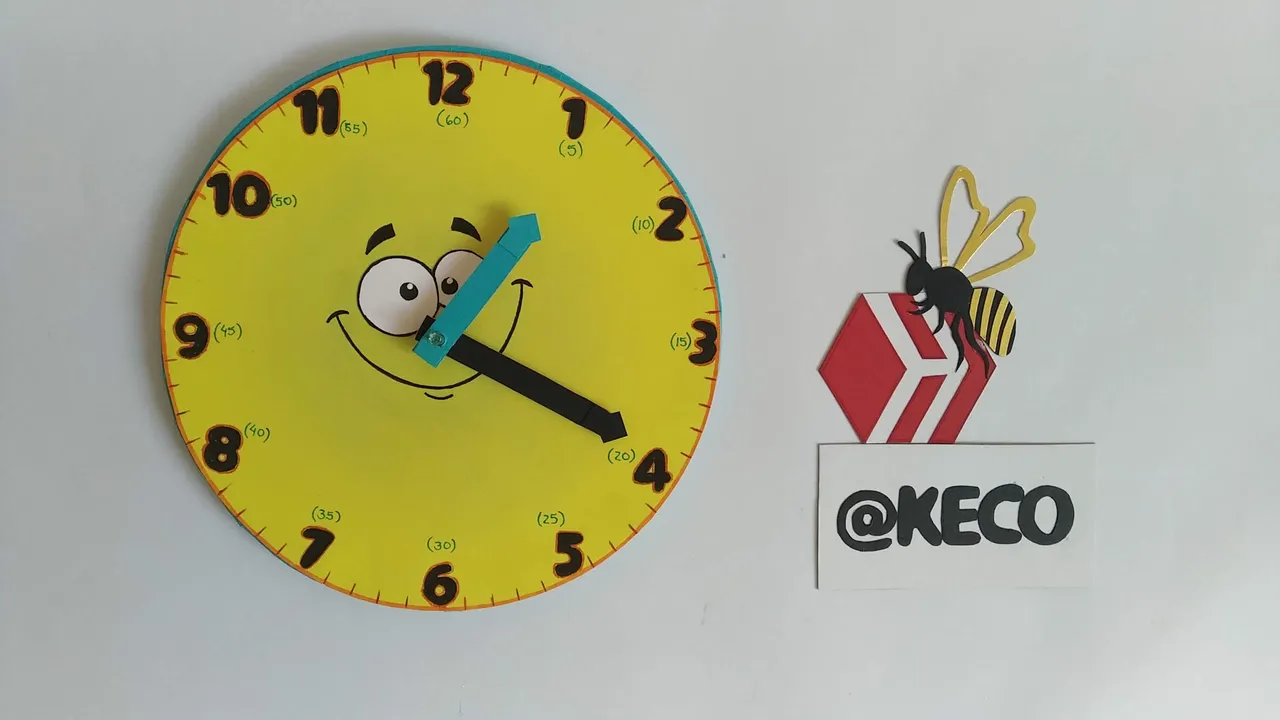
Éste reloj ésta pensado y diseñado para aprender la hora en formato de doce (12) horas, identificando visualmente el valor que asume el número para los minutos, ésta realizado con material reciclado y otros elementos fáciles de conseguir y/o tener en casa. Sin más y esperando disfruten del trabajo realizado con amor, les dejo los materiales utilizados, el proceso y las imágenes del trabajo.
- Cartón reciclado (resistente).
- Cartulina de color Amarilla.
- Cartulina de color negra.
- Cartulina de color Azul.
- Un palito de madera grueso.
- Una paleta de madera.
- Marcadores de Colores.
- Silicón Caliente.
- Silicón Frio.
- Cutter.
- Tijera.
- Regla.
- Lápiz.
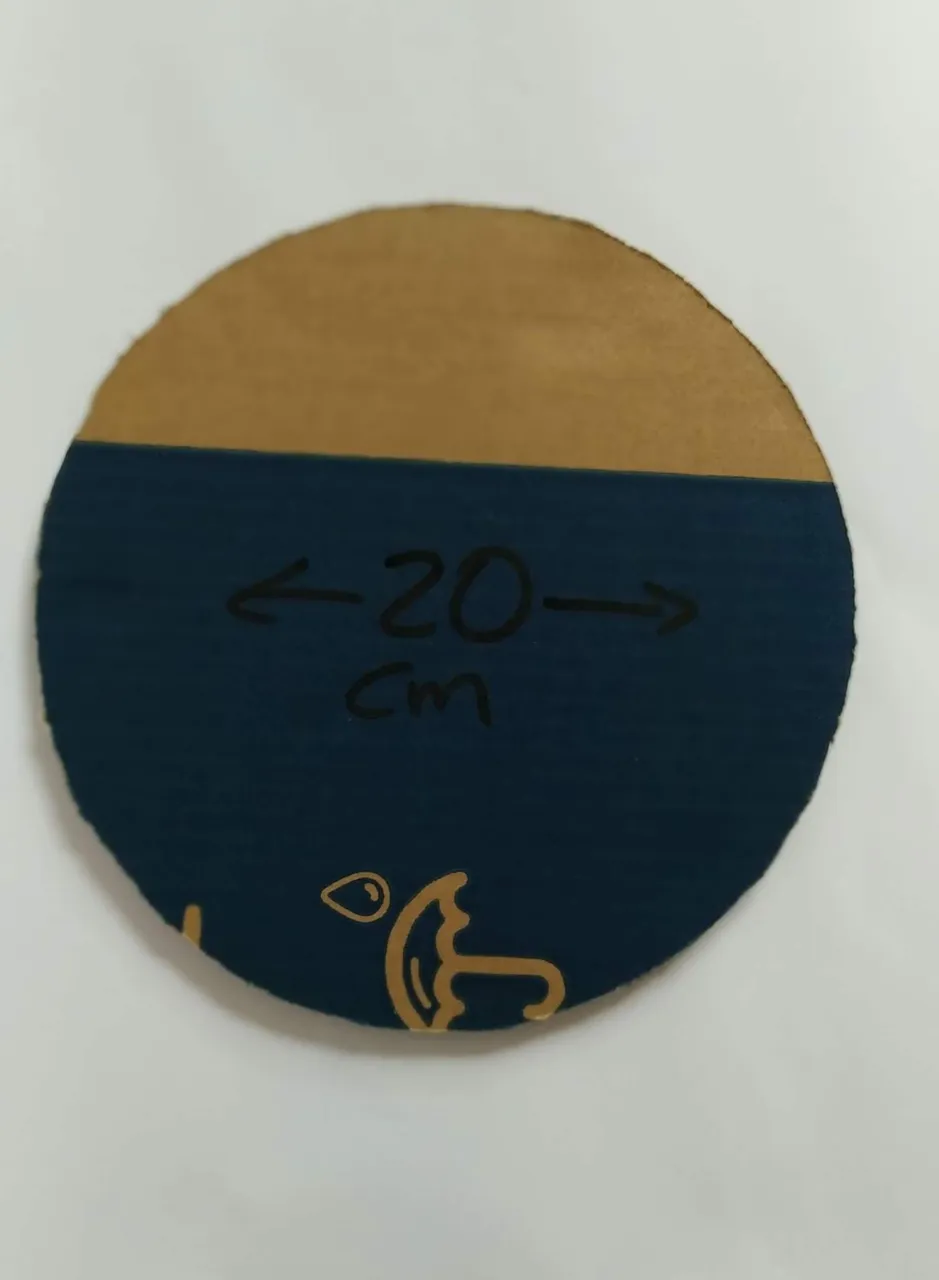
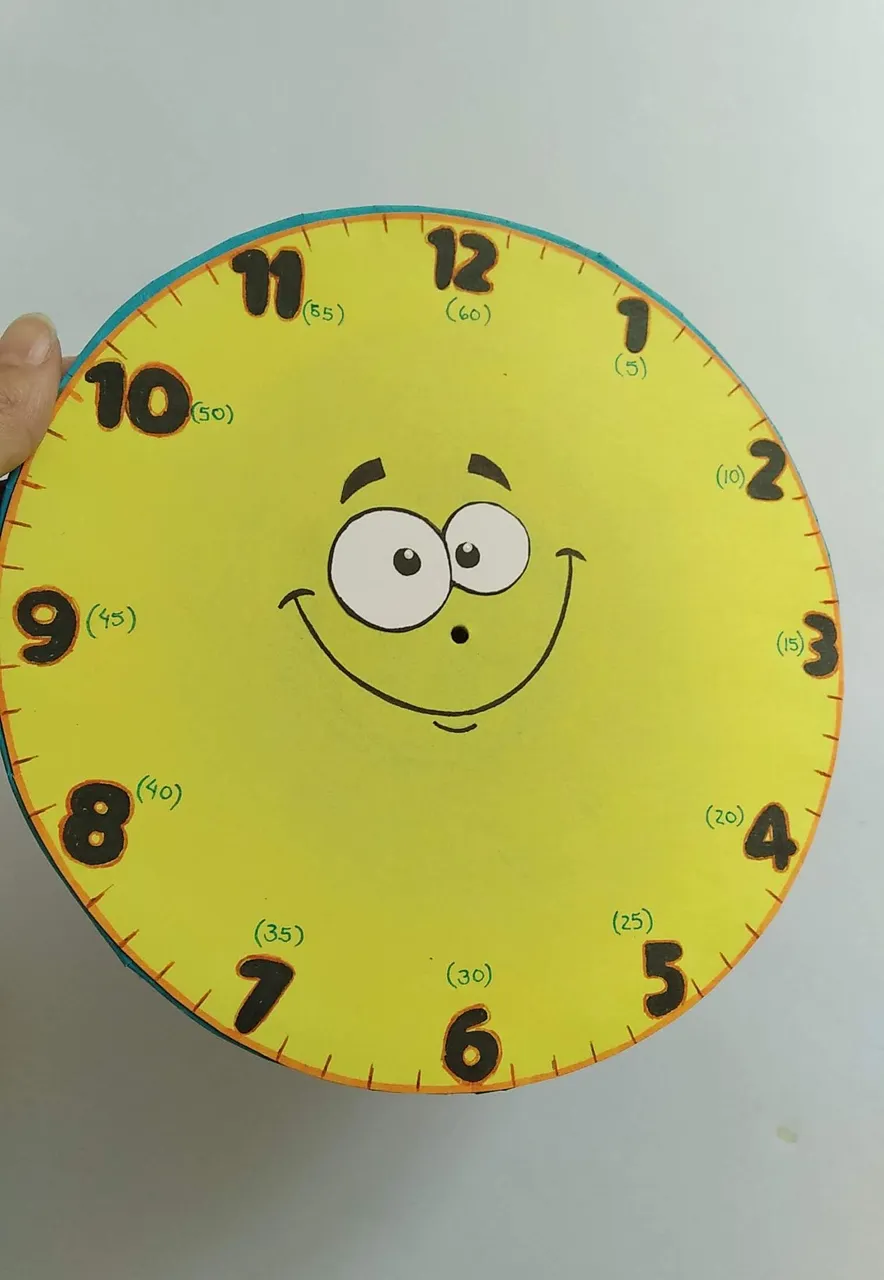
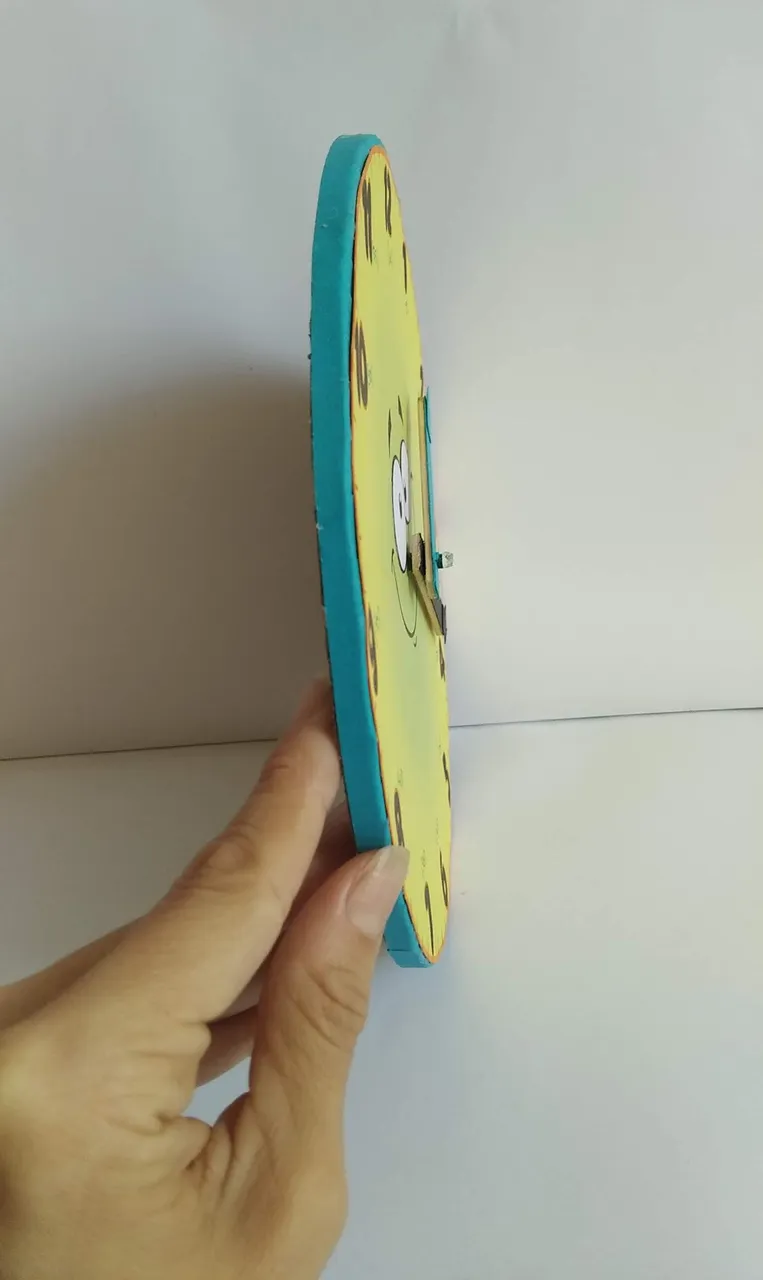
- Marcamos y cortamos en el cartón en un circulo. Las medidas serán a gusto de cada persona, éste en particular mide 20 centímetros de diámetro.
- En la mitad del circulo perforar un pequeño hoyo donde se pegará luego el palito de madera que sostendrá las agujas.
- Se corta una tira larga de cartulina azul, de aproximadamente 1,5 centímetros de ancho y se pega con silicón frio por el borde del cartón para una mejor estética del trabajo. Como la cinta será mas gruesa del cartón, hacer pequeños cortes a la cartulina y pegar hacia el lado donde irá la cartulina amarilla.
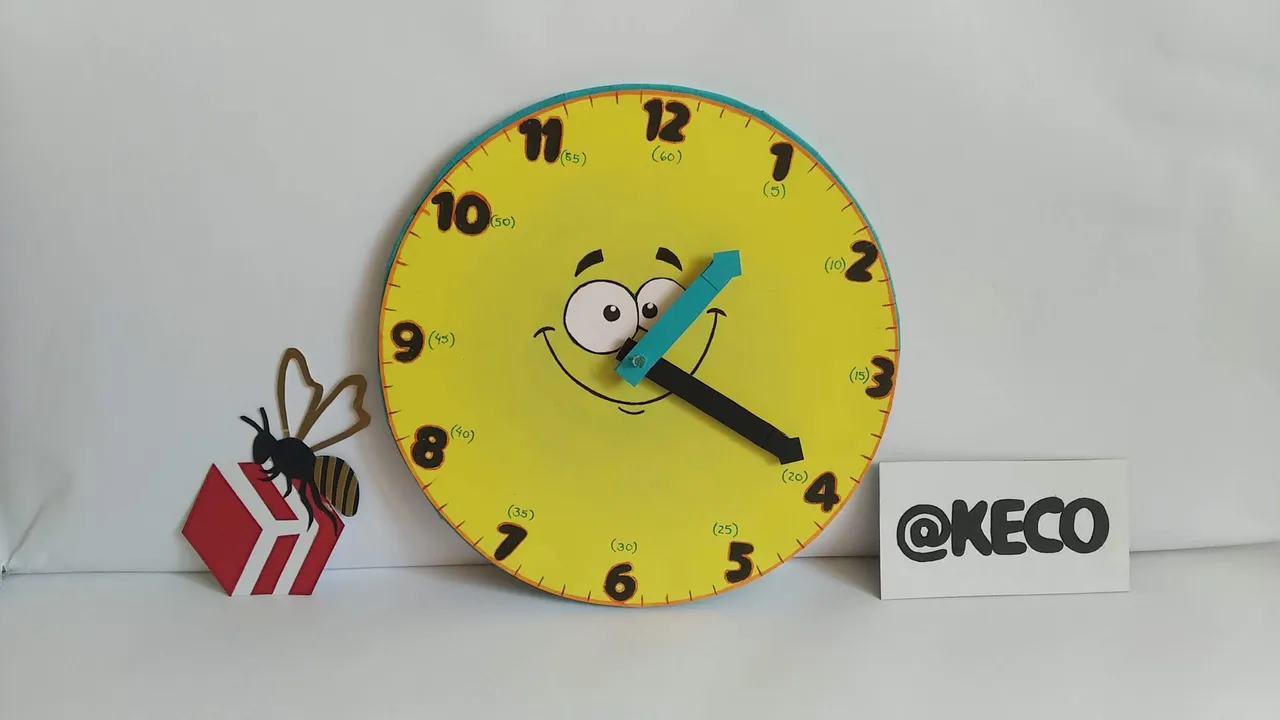
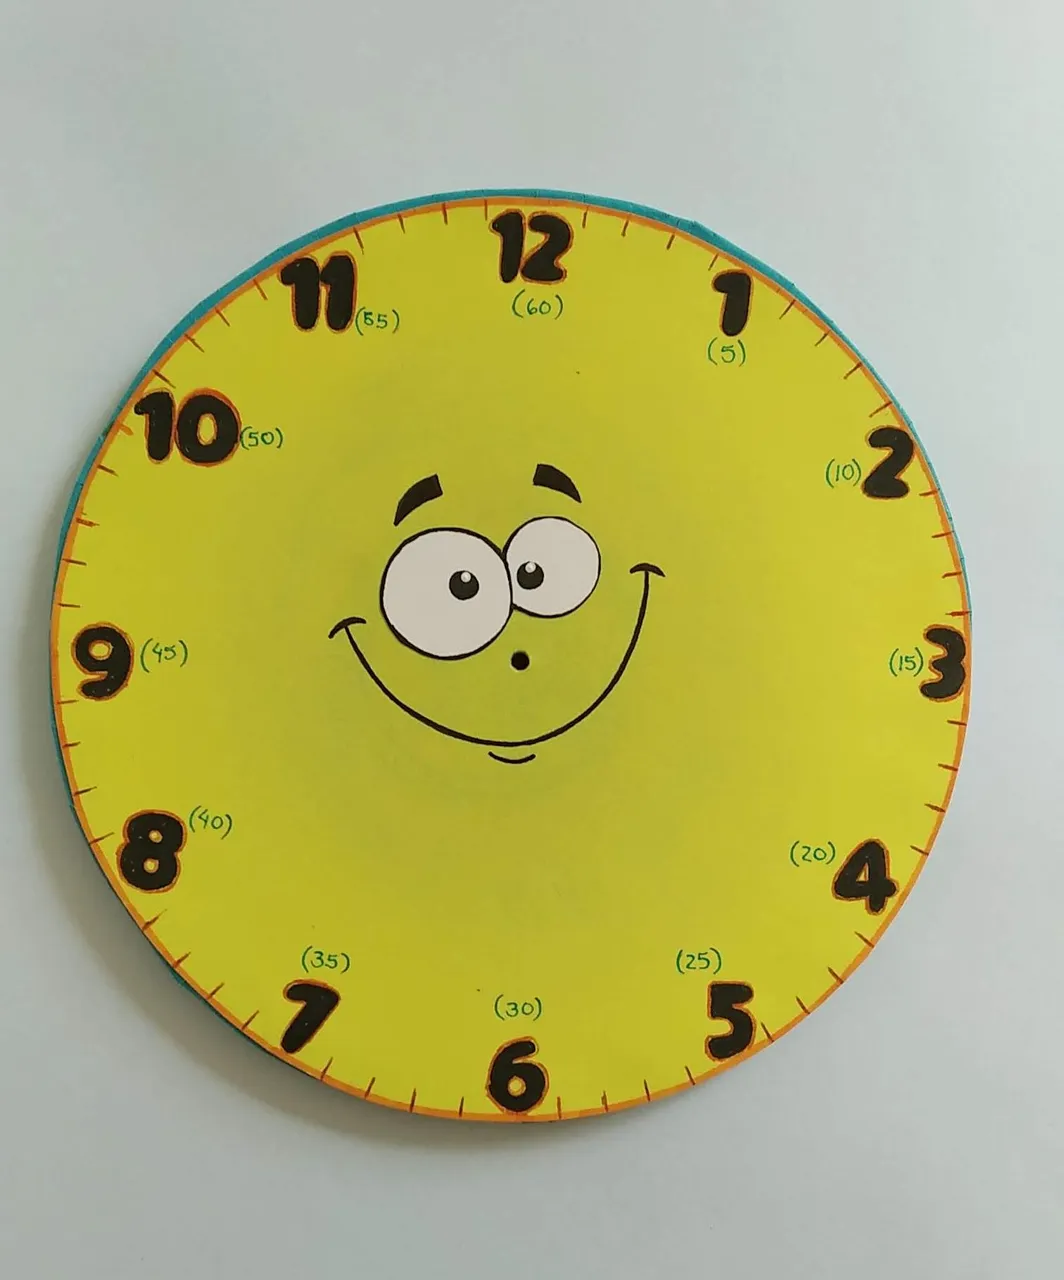
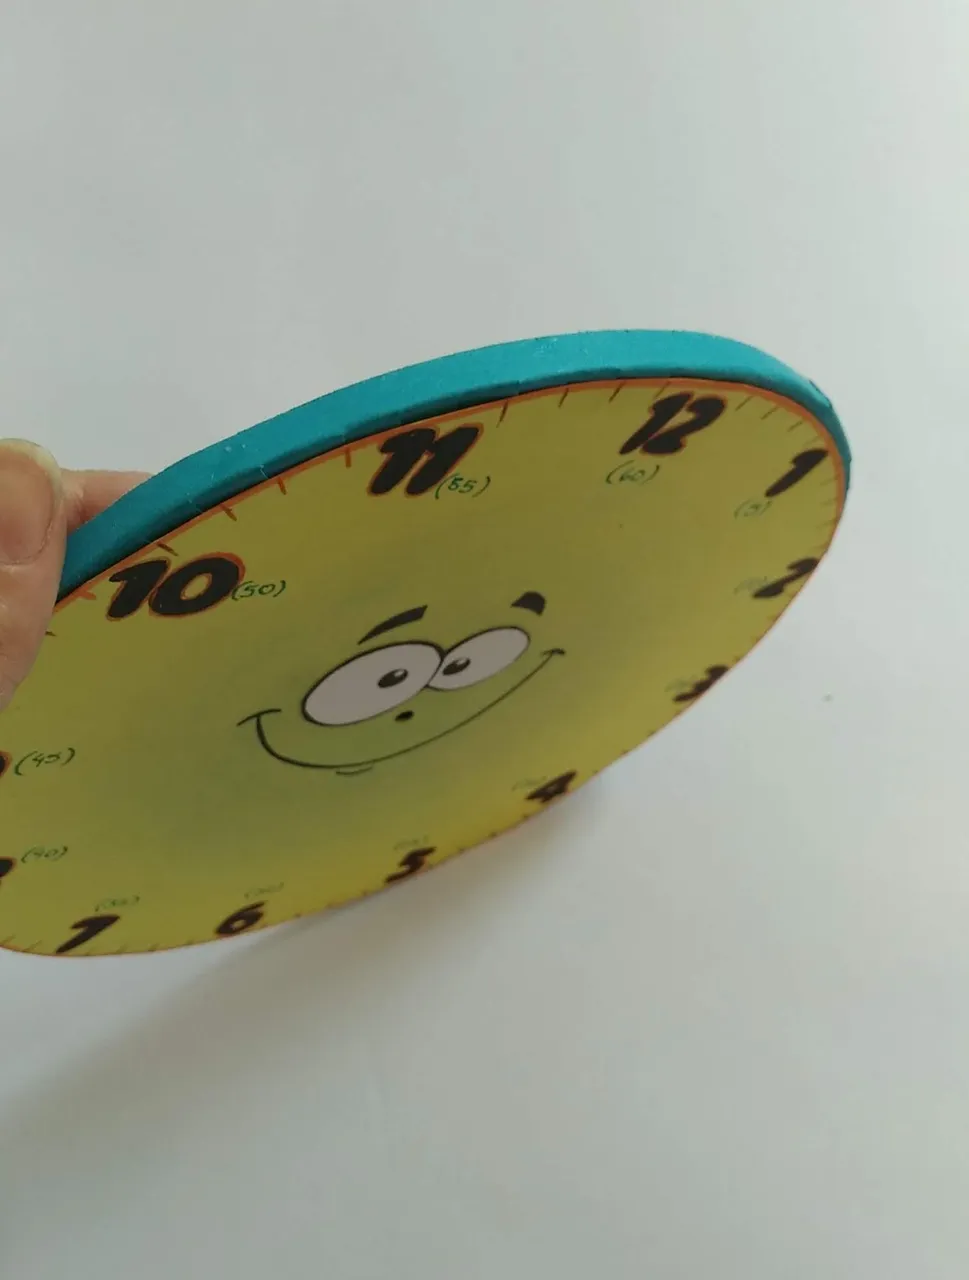
- Marcar y recortar en la cartulina amarilla un circulo de 20 centímetros de diámetro al que se le pintará con marcador de color (o pegar si se imprimen) los números del 1 al 12 y el diseño divertido para pegar al centro, en ésta creación se utilizó una cara divertida.
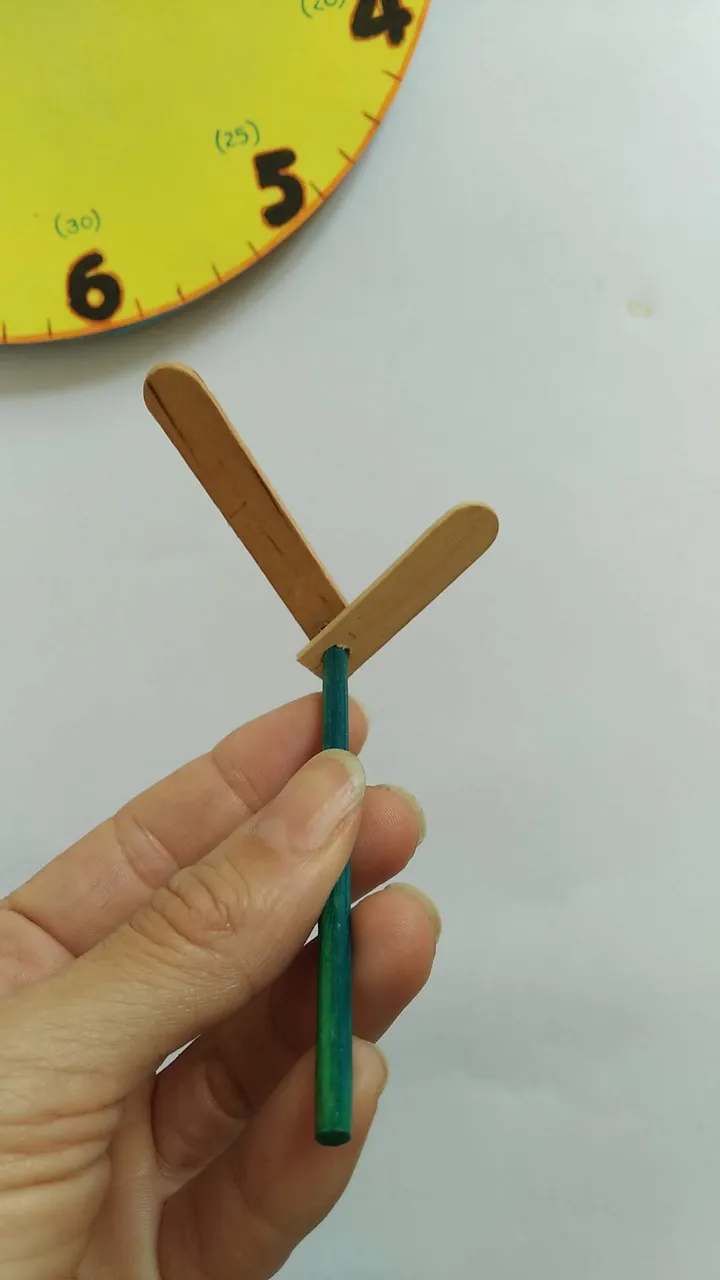
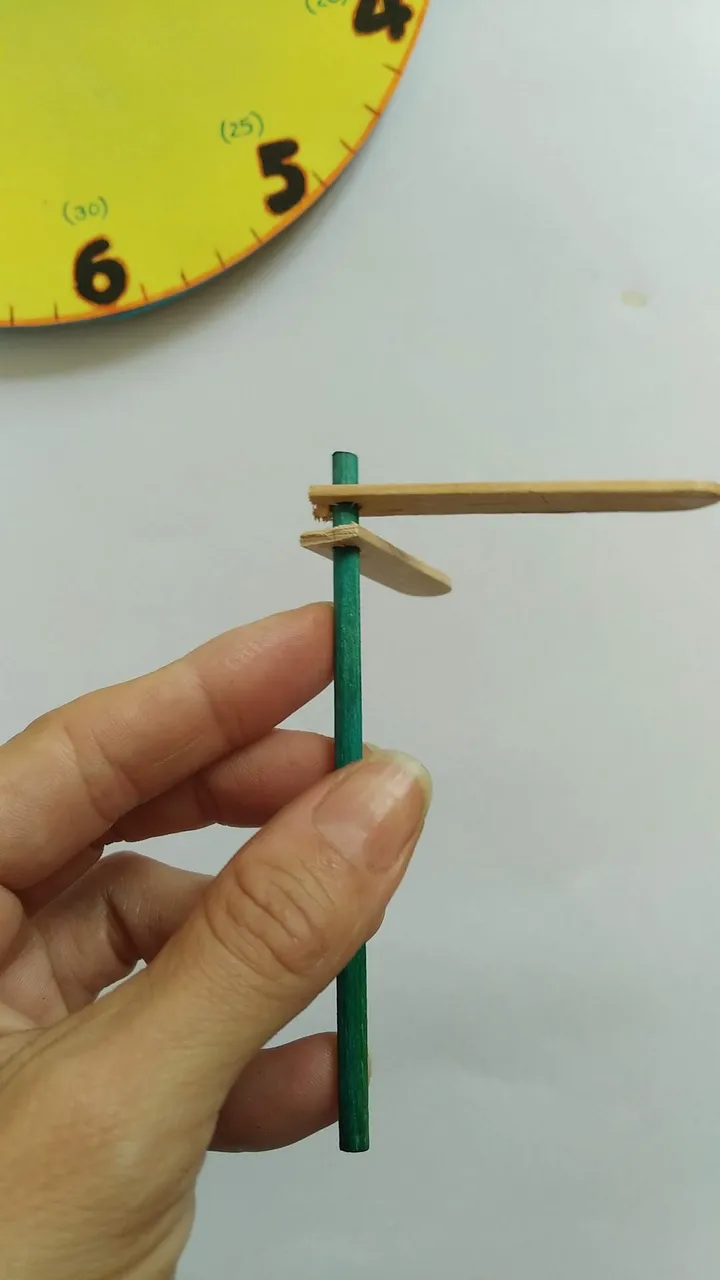
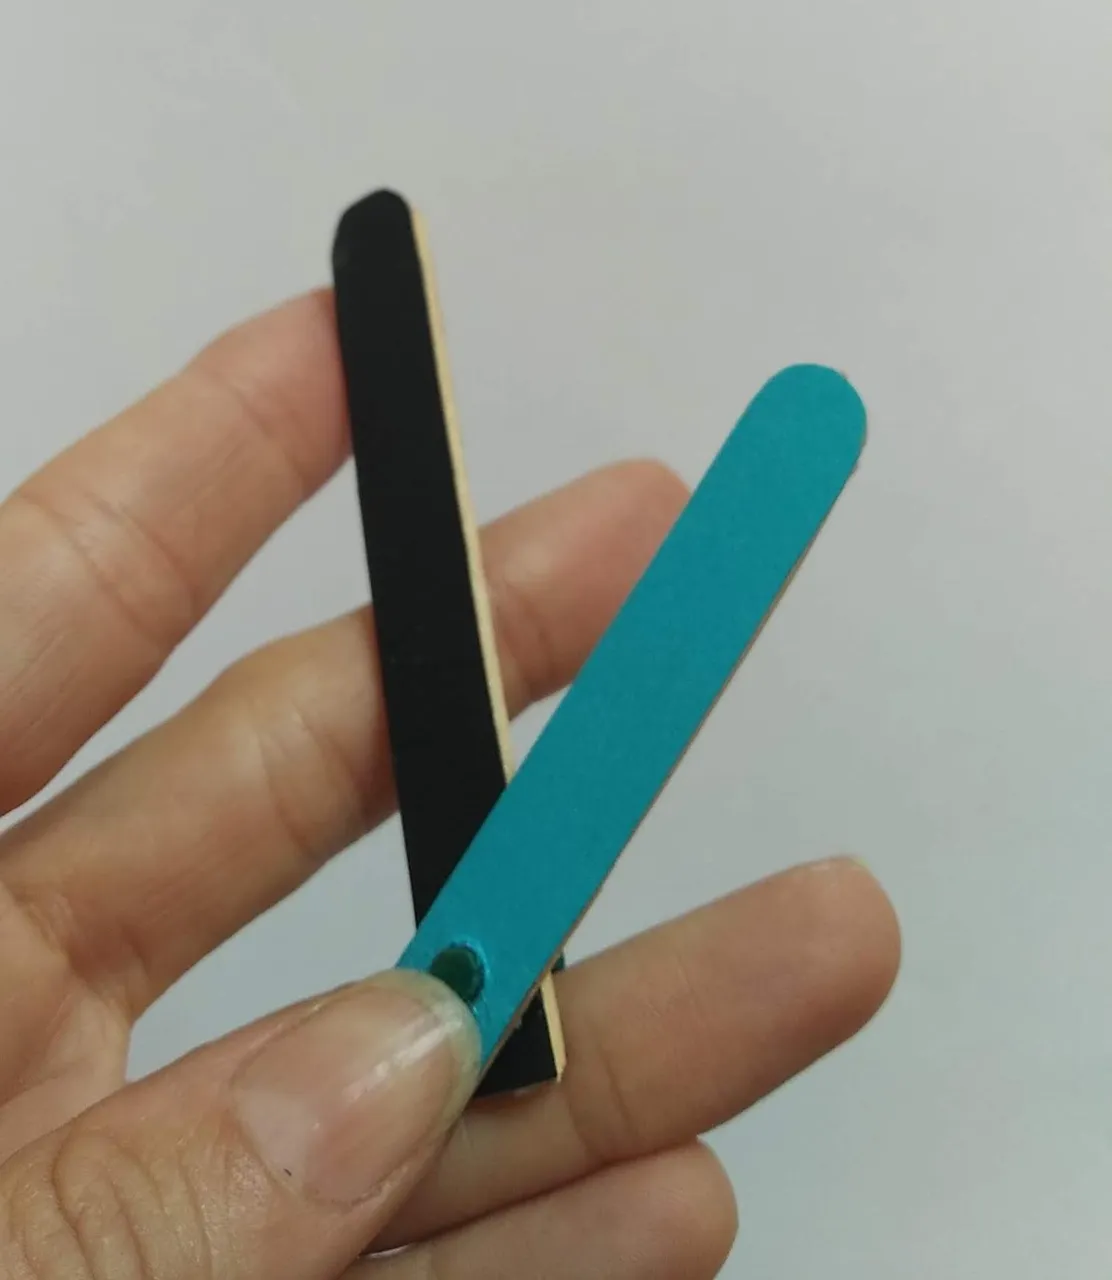
- Marcar y cortar la paleta de madera en dos, siendo un pedazo más grande que el otro. Una indicará la hora, otra los minutos.
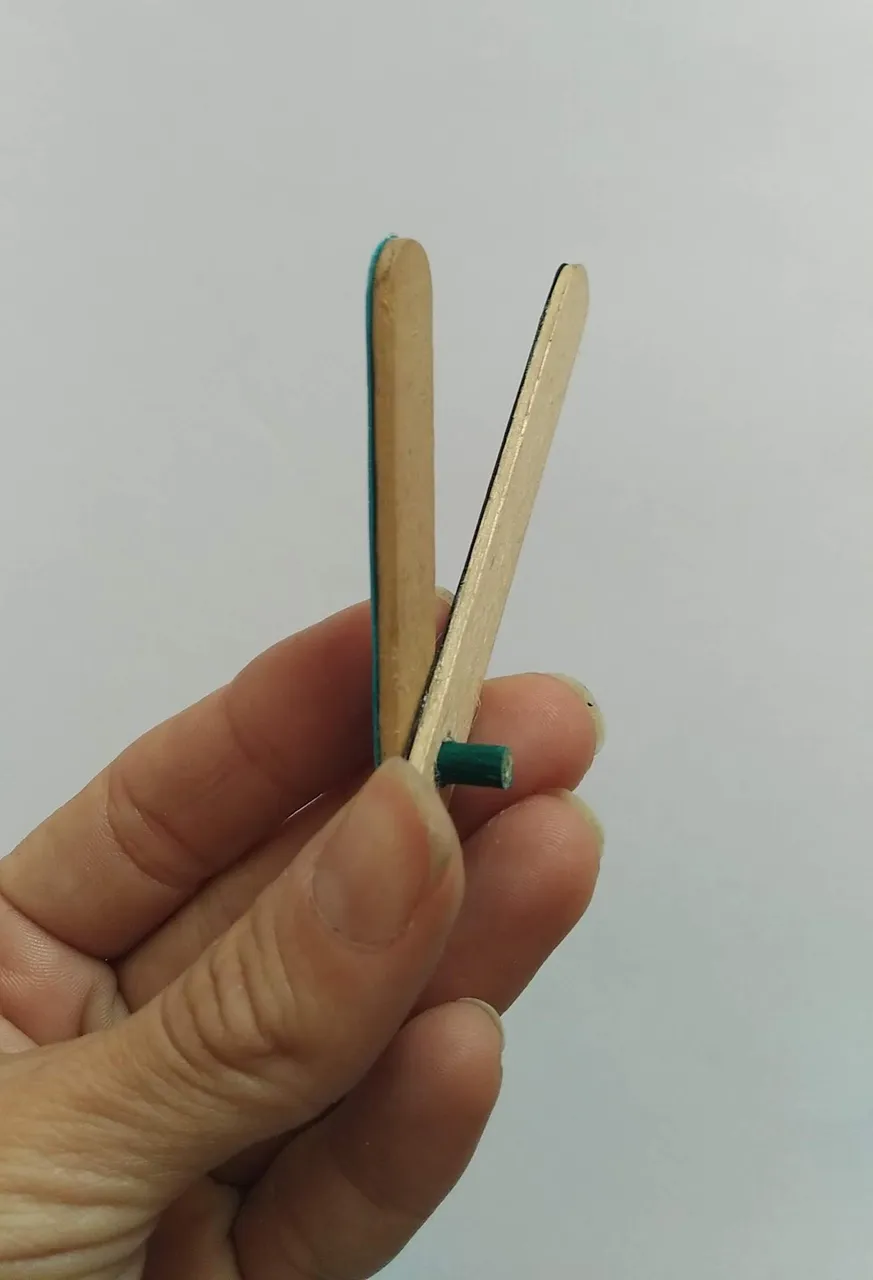
- A ambos pedazos de paleta, se deberá perforar un hueco del ancho del palito de madera. La intención es que los palitos puedan girar sobre su eje fijo.
- Con las paletas en su lugar, cortar el palito de madera de acuerdo al grueso del cartón dejando solo una pequeña área que sobresalga.
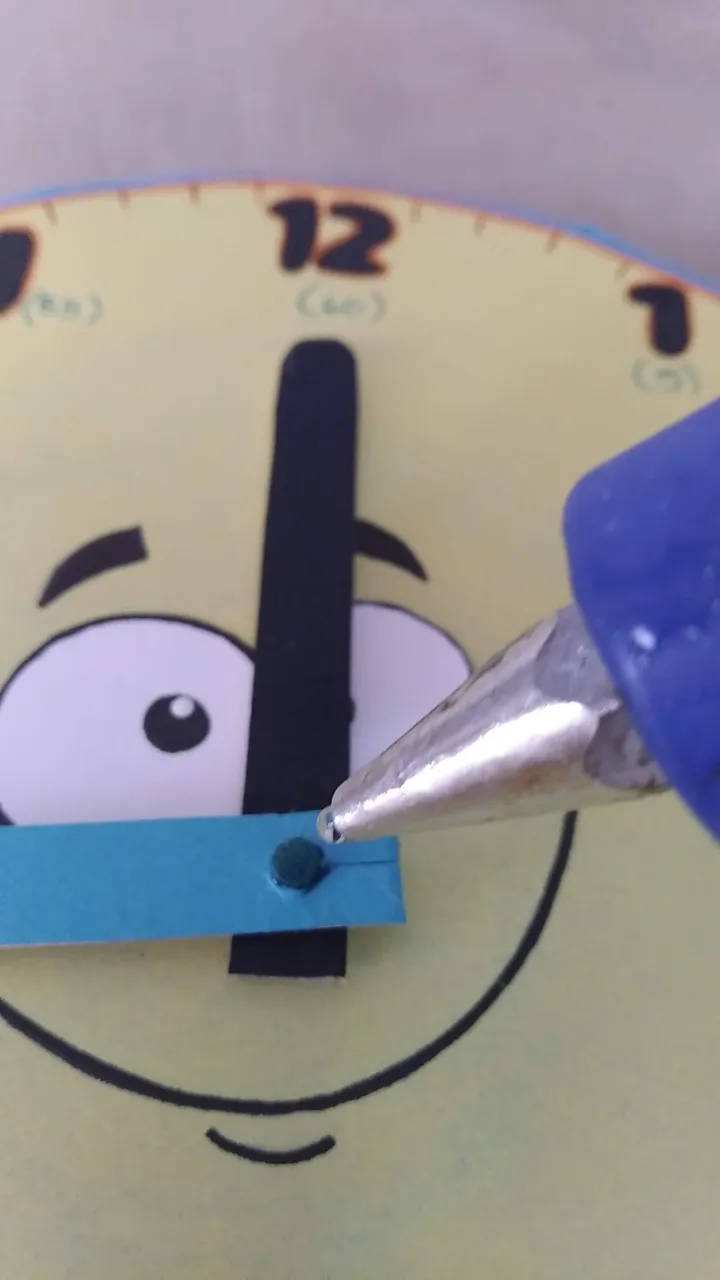
- Para una mejor estética pero sobretodo orientar mejor al niño, la paleta correspondiente a la hora tendrá el mismo color de las horas (NEGRO) y la paleta correspondiente a los minutos será azul, esto ayudará a orientar mejor la lectura de los minutos. A las puntas colocar una especie de flecha que indique mejor cual es el numero que se indica.
- Fijar con silicón caliente el palito de madera en la perforación realizada en el paso 1.
- para evitar las agujas se salgan en la manipulación de las mismas, aplicar una gota de silicón caliente sin que llegue a las agujas sino no podrán girar.
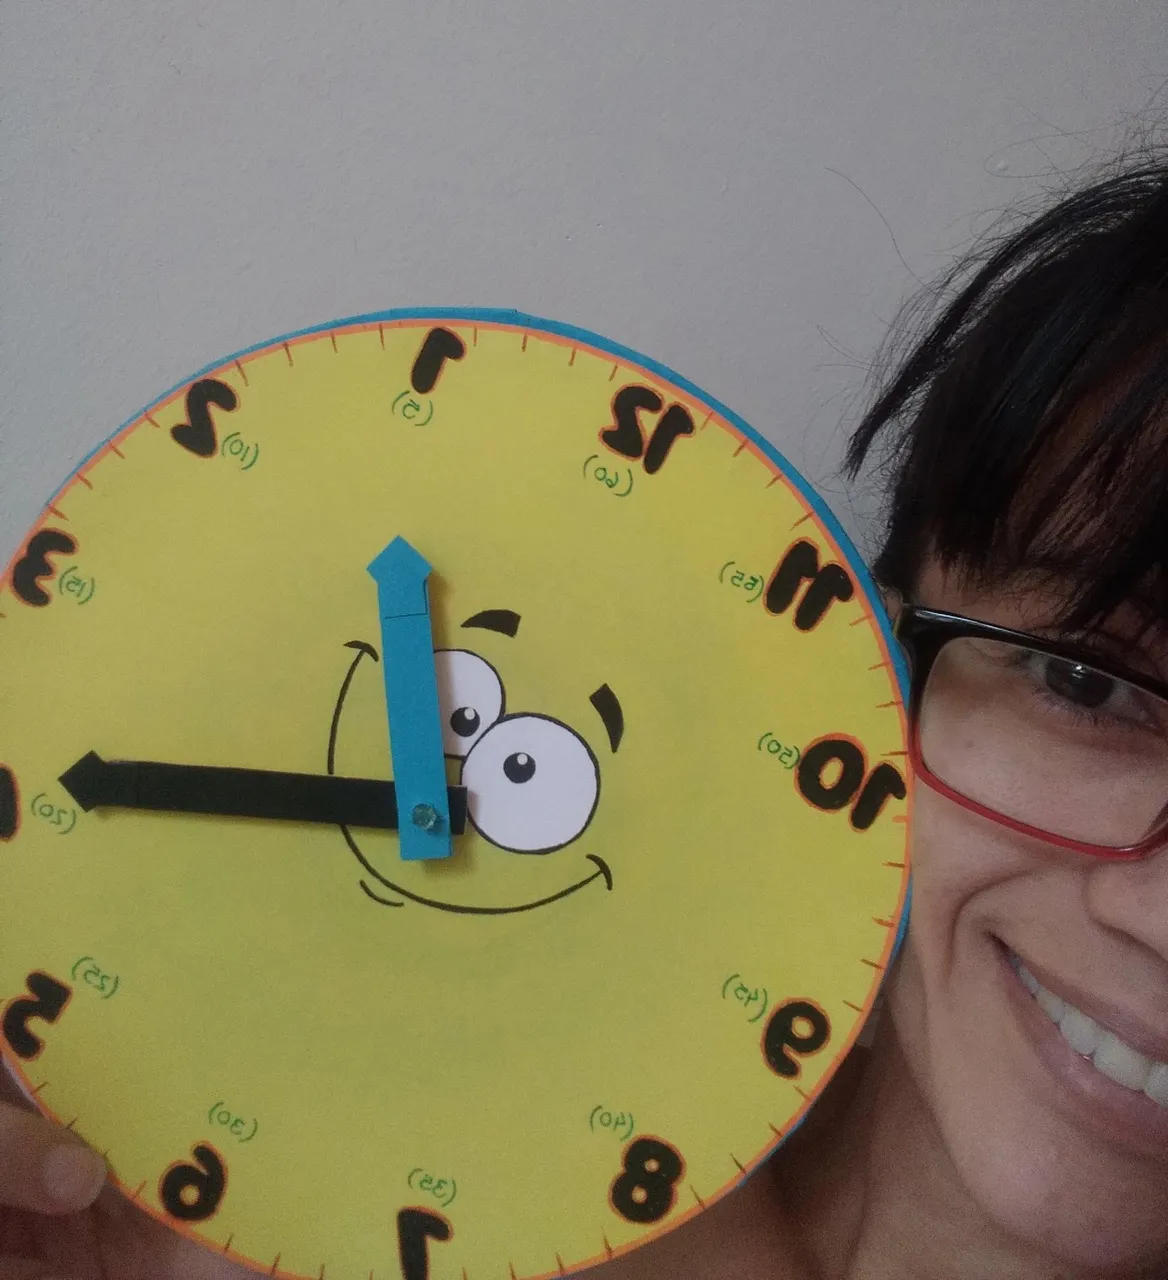
- ¡Listo!, a disfrutar de la magia de lo creado en casa para enseñar a los más pequeños de la casa.
English
Hello everyone, I hope this is a wonderful and blessed week.
Do you remember how old you were when you learned to identify the time on the needle clocks, the analog clocks?
For me it was very, very hard, in fact I remember that developing that understanding of the values assumed by the numbers was very complex. With the intention of supporting Camilo in this process of learning the hours, I supported his mother so that the teaching process would be more fun, so I made Camilo an analog clock that he can use until he consolidates the correct reading of time through the hours.
For those of us who have young children we know how complex it can be to learn about time, so I think it is essential to make this type of activities something fun and colorful to allow the little ones to learn while having fun.
This clock is intended and designed to learn the time in twelve (12) hour format, visually identifying the value that assumes the number for the minutes, it is made with recycled material and other elements easy to get and / or have at home. Without further ado and hoping you enjoy the work done with love, I leave you the materials used, the process and the images of the work.
- Recycled cardboard (resistant).
- Yellow cardboard.
- Black color cardboard.
- Blue cardboard.
- A thick wooden stick.
- A wooden palette.
- Color markers.
- Hot Silicone.
- Cold Silicone.
- Cutter.
- Scissors.
- Ruler.
- Pencil.
- We mark and cut in the cardboard in a circle. The measures will be to taste of each person, this one in particular measures 20 centimeters in diameter.
- In the middle of the circle punch a small hole where the wooden stick that will hold the needles will be glued.
- Cut a long strip of blue cardboard, approximately 1.5 centimeters wide and glue it with cold silicone on the edge of the cardboard for a better aesthetic of the work. As the ribbon will be thicker than the cardboard, make small cuts in the cardboard and glue to the side where the yellow cardboard will go.
- Mark and cut out a circle of 20 centimeters in diameter on the yellow cardboard, which will be painted with color marker (or glued if printed) the numbers from 1 to 12 and the funny design to glue in the center, in this creation a funny face was used.
- Mark and cut the wooden paddle in two, one piece being larger than the other. One will indicate the hour, the other the minutes.
- To both pieces of popsicle, a hole should be drilled the width of the wooden stick. The intention is that the sticks can rotate on their fixed axis.
- With the paddles in place, cut the wooden stick according to the thickness of the cardboard leaving only a small area protruding.
- For better aesthetics but above all to better orient the child, the palette corresponding to the hour will have the same color of the hours (BLACK) and the palette corresponding to the minutes will be blue, this will help to better orient the reading of the minutes. At the tips place a kind of arrow to better indicate which number is indicated.
- Fix with hot silicone the wooden stick in the perforation made in step 1.
- To prevent the needles from coming out when handling them, apply a drop of hot silicone without letting it reach the needles, otherwise they will not be able to turn.
- ready, enjoy the magic of what you have created at home to teach the little ones at home.
Translated with www.DeepL.com/Translator (free version)
IMÁGENES / IMAGES


SALUDOS / REGARDS
Todas las Fotos fueron tomadas con mi teléfono Redmi 7A.
Contenido original de @keco (fotos y texto) - Todos los derechos reservados Publicado en HIVE así como en mi instagram : http://instagram.com/carton_pintura_algo_mas
All Photos were taken with my Redmi 7A phone.
Original content from @keco (photos and text) - All rights reserved Posted on HIVE as well as on my instagram: http://instagram.com/carton_pintura_algo_mas